When I first saw 21st Century Toys kits at my local Wal-Mart, I did a double take. The megastore has for years carried the same 4 or 5 tired old Revell kits- I've built them, you've built them. Not bad kits, but way old. So when I saw a 1/32 scale Zero and Macchi 202, I had to pick the box up and check them out.
I resisted picking those up, as I saw on the box that two of my favorite WWII planes, the F4U Corsair and the Messerschmitt Bf-109 were available. So I figured I'd wait.
And wait I did. About 6 weeks later, the Bf-109 showed up. I picked it up, but I really wanted the Corsair. After several weeks, it never showed up. The shelves became void of 21st Century kits. I started seeing them on Ebay for $75..... I figured I missed my chance.
Fast forward several months. I'm standing in my local hobby shop, Hayes Hobby House, talking to Mike, my friend who works there. Suddenly I gasped- the Corsair, sitting right there on the shelf! I grab it- "Mike, I gotta have it!" It was marked at $13.98, but I don't mind supporting the local hobby shop one bit, so I paid my money and headed home.
21st Century Toys packages their kits differently than other manufacturers. All of the parts are off the sprues, packed in sealed plastic bags. Some of the smaller parts are packaged in a small plastic tray. A small bag of screws is supplied, as the fuselage and wings have joins that the screws hold together. You can build the kit with or without the screws, and fill in the holes with supplied caps. A bit of filler should take care of covering it up.
I always wash kit parts thoroughly before starting, and this one was no different. I'd thought the idea of no sprues was pretty cool- until I got to the washing. There was no problem with the large parts, but the smaller ones worried me. I had to be careful and make sure nothing washed away.
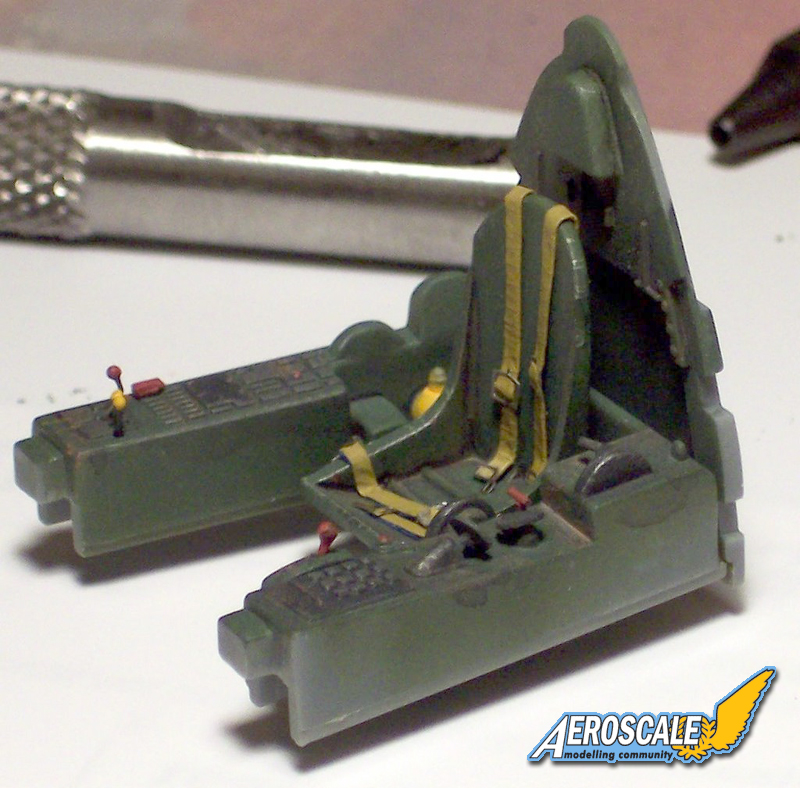
After washing and drying the parts thoroughly, I started on the cockpit. (Perhaps one day I'll start at another point in a kit... just to be different.) I'd been researching Corsair cockpits, and quite a few of the period color pictures I'd seen, as well as some unrestored birds from more recent times, showed the cockpit to be a darker green than the standard zinc chromate. I used PollyScale Medium Green, and if it's not correct, at least it's a nice variation on the usual.
As is, the kit cockpit is not too bad for what is really supposed to be a toy. I normally don't build in 1/32 scale, so I thought it might not be a bad idea to add a few scratch-built details. I had some excellent reference pics of a Corsair cockpit, and added a few knobs, levers and switches to bring the cockpit to life. Later, I also added a very prominent feature of the Corsairs cockpit- the "foot trays" beneath the rudder pedals. I didn't make them exactly like the Corsairs, but I did them close enough that only someone who really know Corsairs would realize they're not right on.
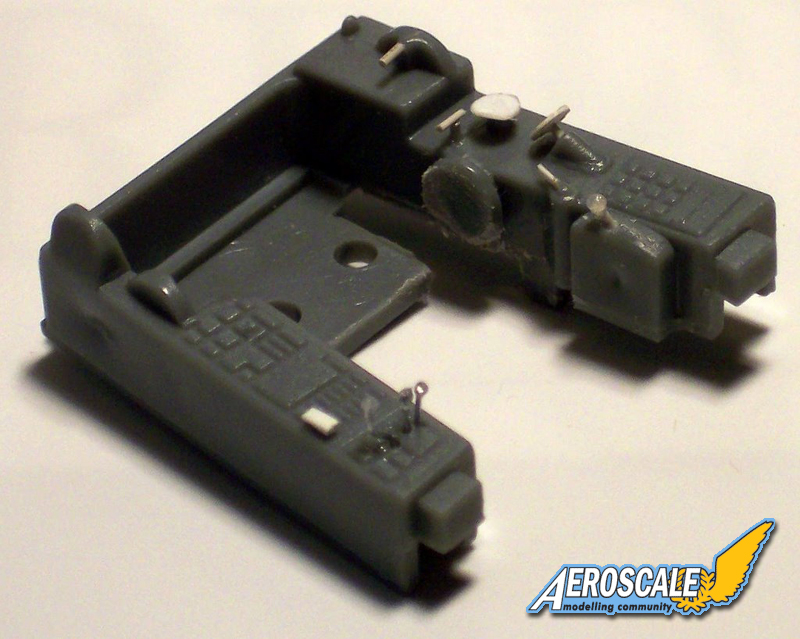
Here are some before and after shots of the side control panels.
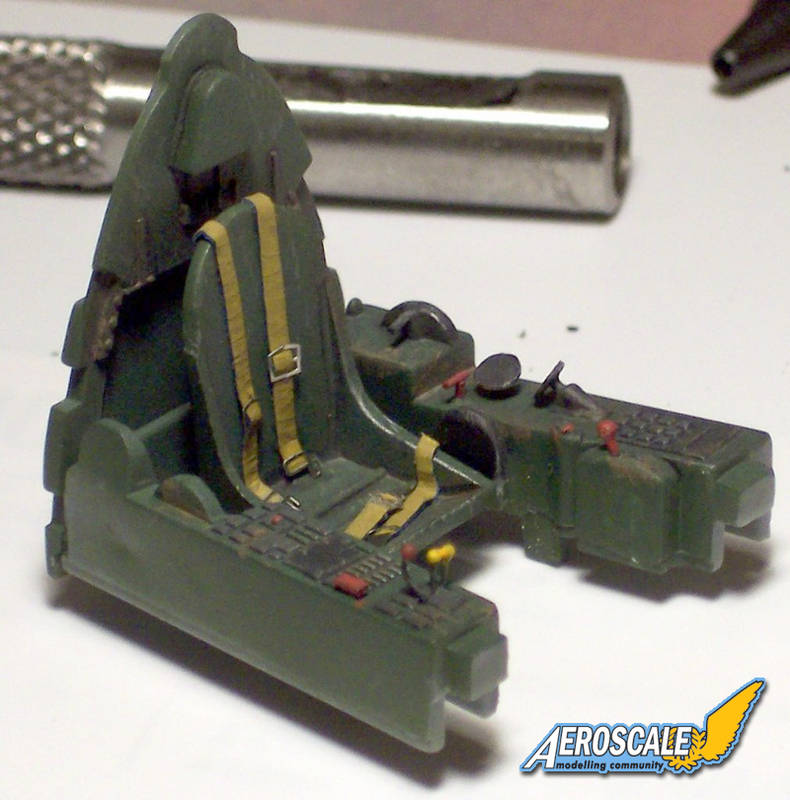
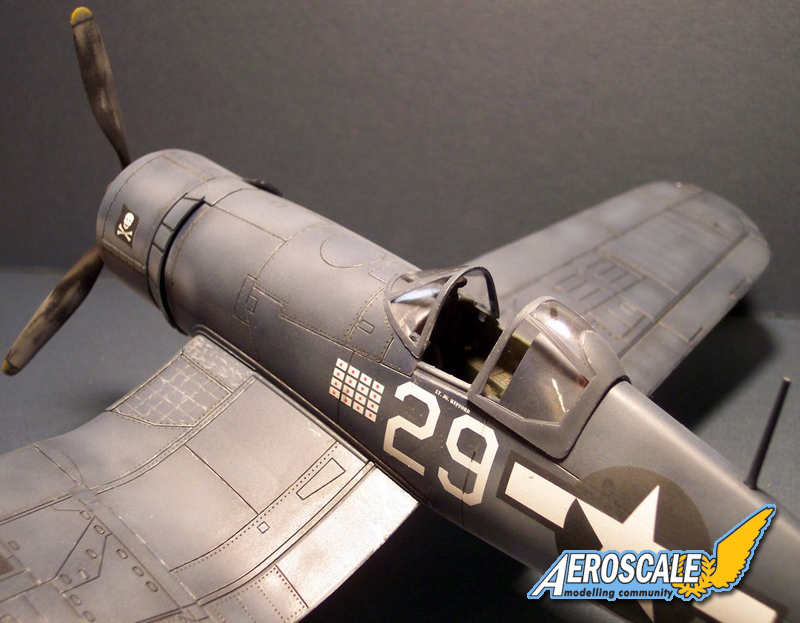
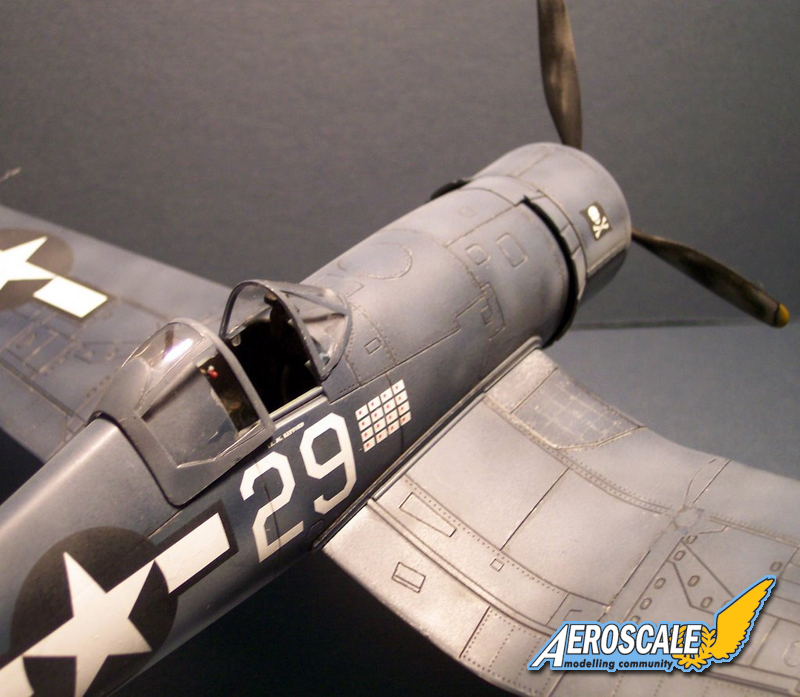
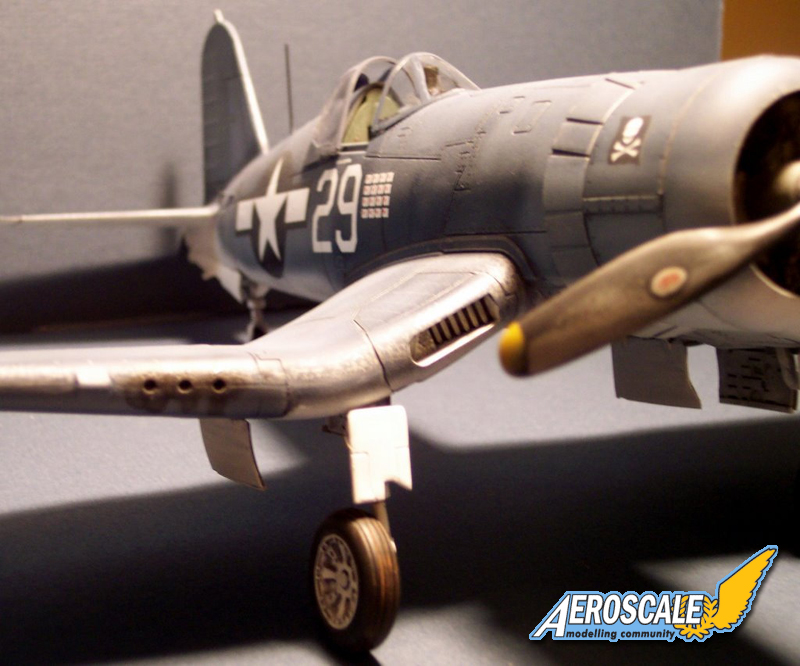
Continuing on to the painting, I picked out details using my reference pics to be as close to accurate as I could (without going overboard.) Having not built in this scale before, I really enjoyed how much simpler painting was because of the larger size of the parts. The instrument panel was void of detail, so if you want to make it stand out, printing up your own decals, or using some aftermarket decals, will give it some added life. A set of photo etched seat buckles and some masking tape belts added realism to the seat. Everything goes together into a nice solid unit. I finished things off with a scratch-built throttle to mount to the fuselage sidewall. For a kit of this size and price, I thought I ended up with a pretty decent cockpit.
The cockpit turned out rather well, and the additional detail and seat-belts really made a difference.
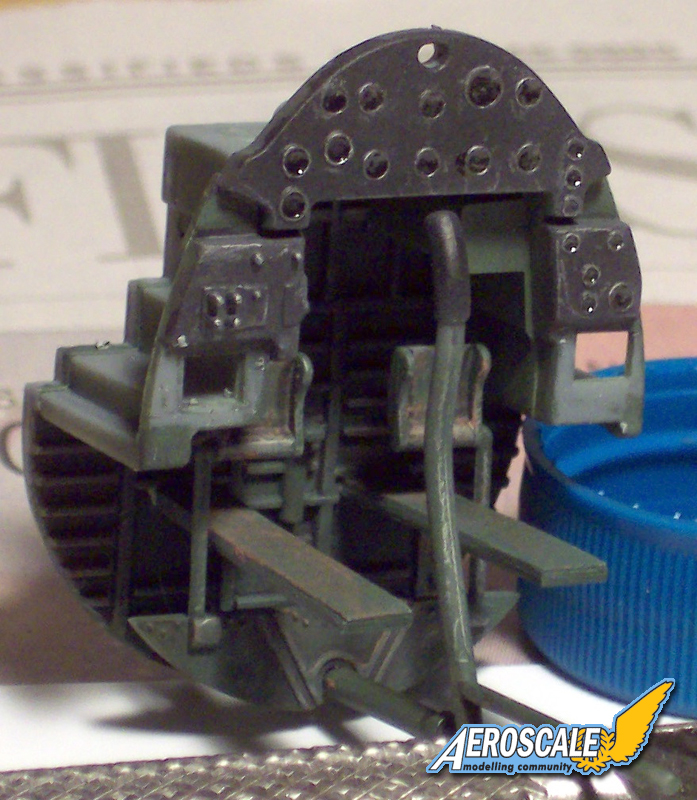
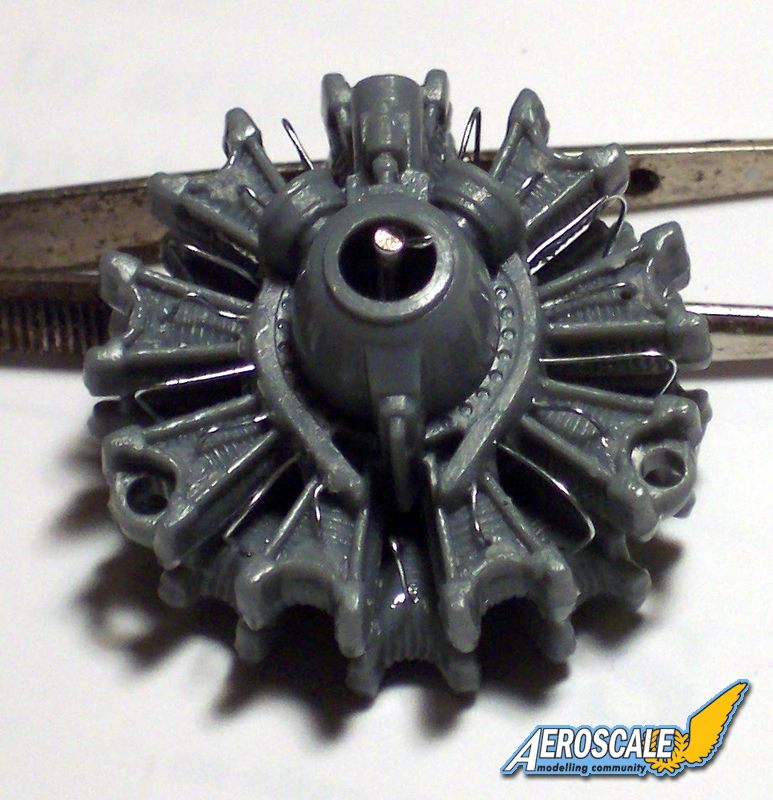
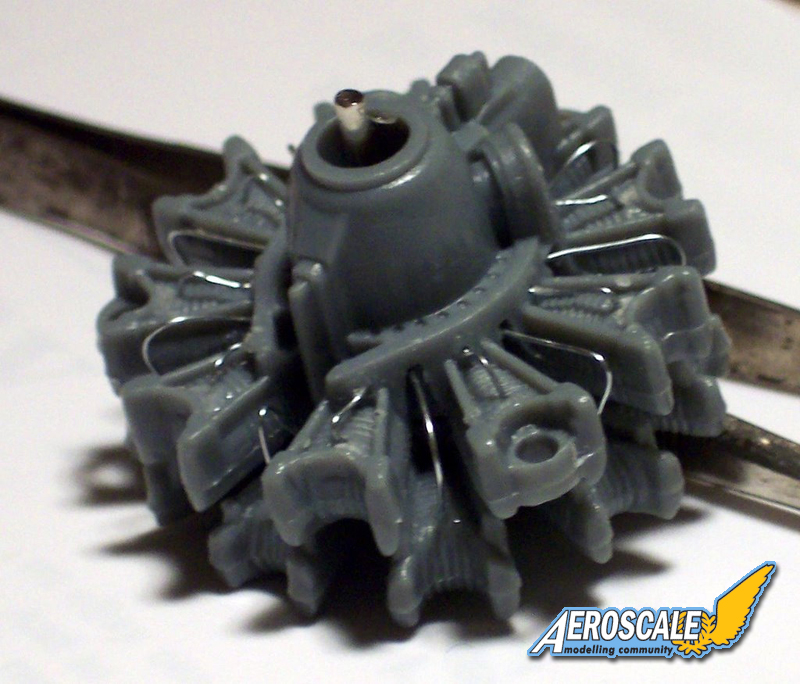
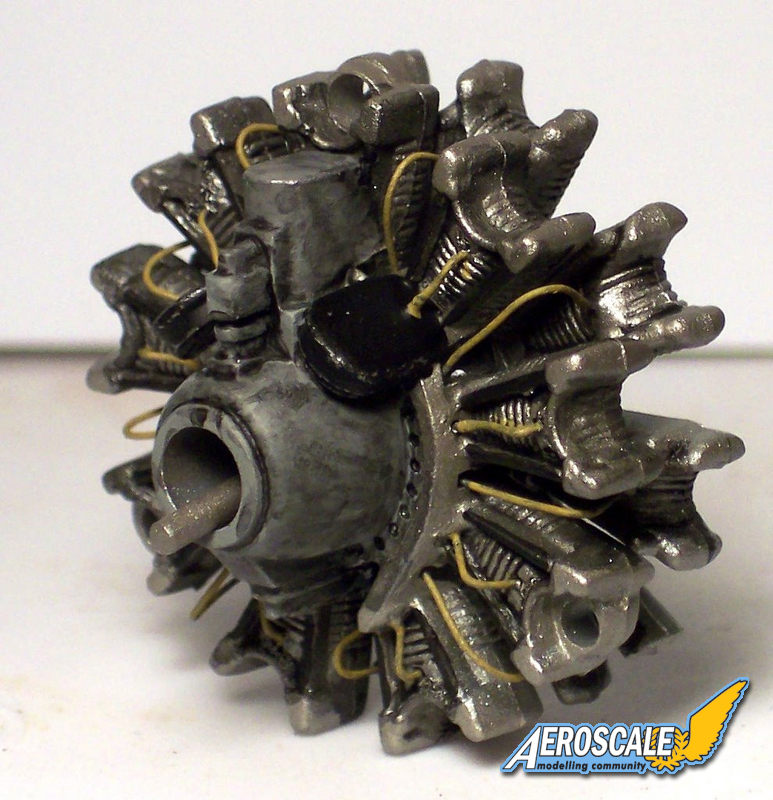
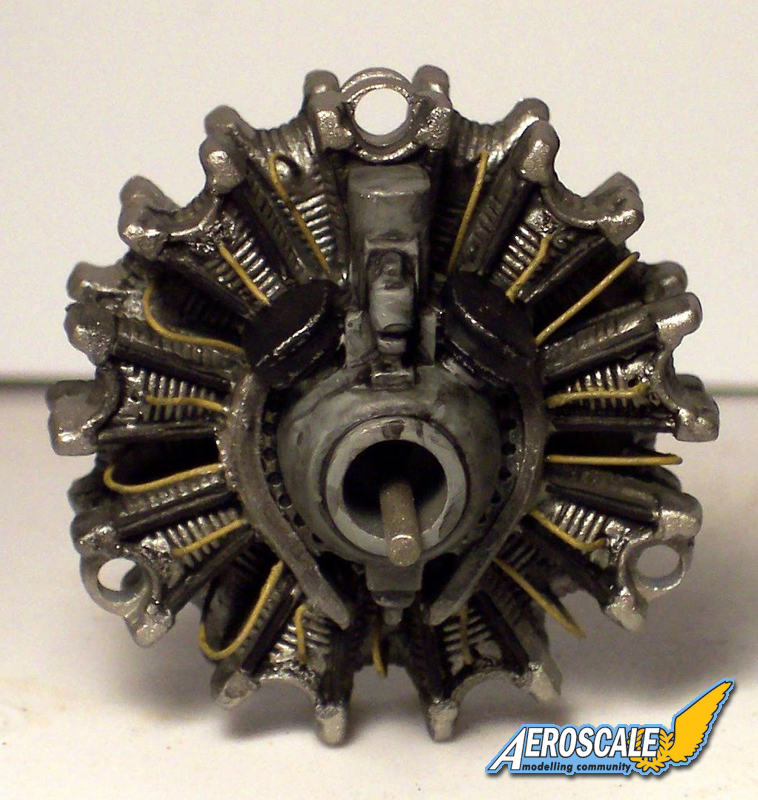
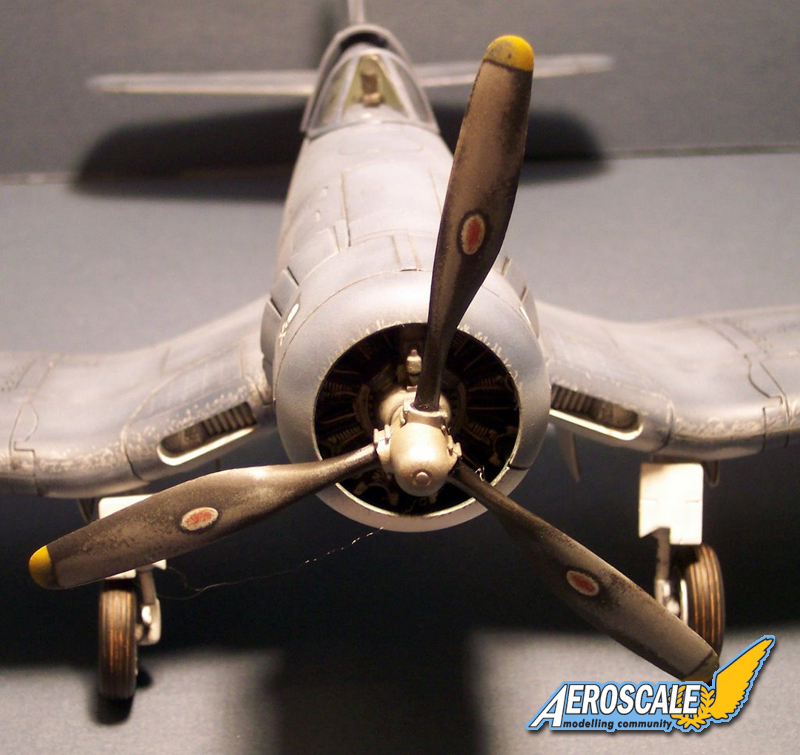
Next up was the engine. Since returning to modeling, most of the kits I've built have been aircraft with in-line engines, mostly Spitfires and P-40s (both of which you can never have enough if...). The Corsair's engine was such a prominent feature though, and at 1/32 scale it was so visible, I decided to put a little extra effort into the engine. I added some simple jewelers wire here and there to give it a little life, then painted the engine with PollyScale Aluminum. I added some black and gray to the various parts based on reference pics, and painted the wiring a tan color (PollyScale Middlestone to be precise). The whole unit was finished up with a "dirtying" wash of PollyScale Grimy Black. For just a little added work, I thought it turned out nice.
The addition of a few pieces of wire really make the engine come alive.
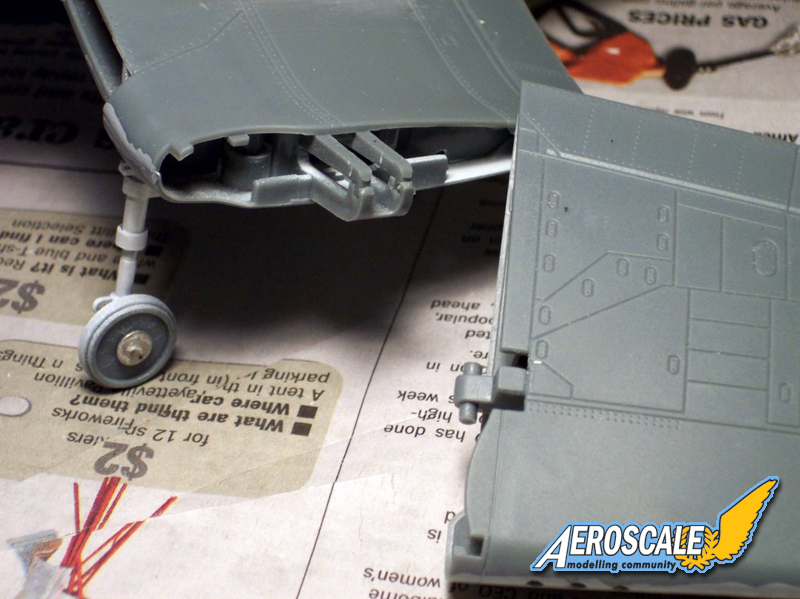
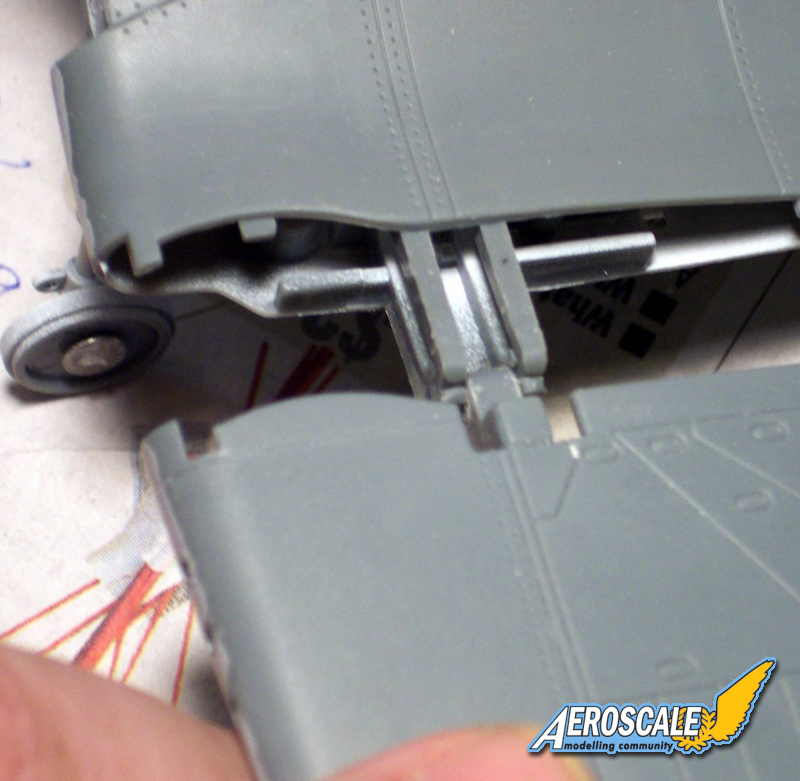
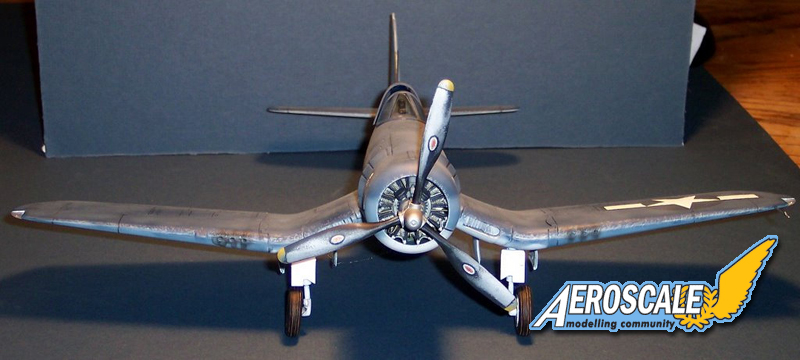
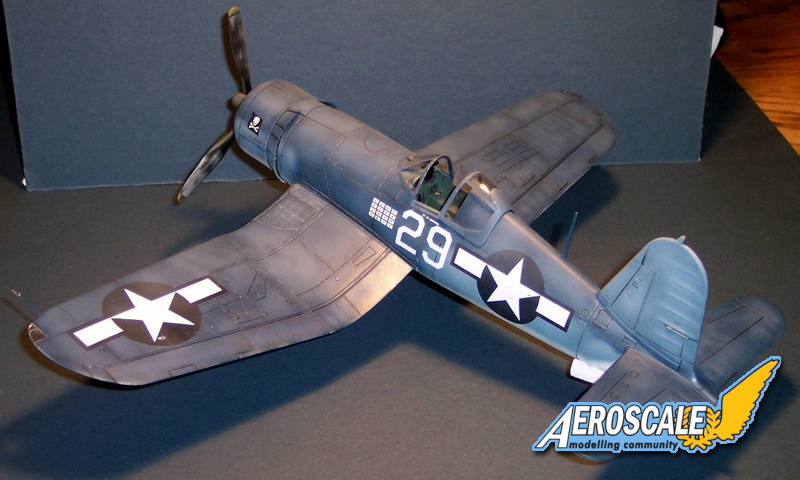
The wings comprise 7 pieces- two for each outer wing section, and three for the inner wings- one lower and two upper. Following the instructions will have you assembling this all at one time, leaving you with folding wings. While the folding mechanism works very well, I decided I wanted them fixed in the down position. I assembled the inner and outer sections separately, then filled in the holes where the screws were used to hold them together (although I did not use the screws). Once the holes were taken care of, I glued the inner wing portion to the fuselage. The fit was stellar- other model companies should take note of how 21st Century does this. The wing panels actually extend under the fuselage "lip", leaving no chance of the dreaded wing root gap.
If you follow the instructions construction sequence, you'll attach the outer wing panels to the inner early in the construction, leaving the outer wings able to fold up. As there is no folding mechanism detail, I decided to wait on attaching the outer wings. Once I had the inner wing portions attached to the fuselage, and all gaps and holes sanded smooth, I was ready to attach the out panels. There are two small round tabs on the outer wing that would be trapped in the inner wings mechanism if you followed the instructions (first photo). Using my handy-dandy sprue snippers, I clipped off the tabs, then sanded them smooth (second photo). Once the tabs are removed, the outer wing slides right on. You'll want to apply glue to both inner and outer wing sections and let the plastic soften for a bit, then slide them firmly together. One of the wings fit so well for me, I could've left it as is and it likely would have been find. However, just to be sure, I used a piece of masking tape stretched from the outer to the inner wing to hold things in place. Once dry, you might want to use some filler for two small indents on the upper wing that facilitated the wing folding.
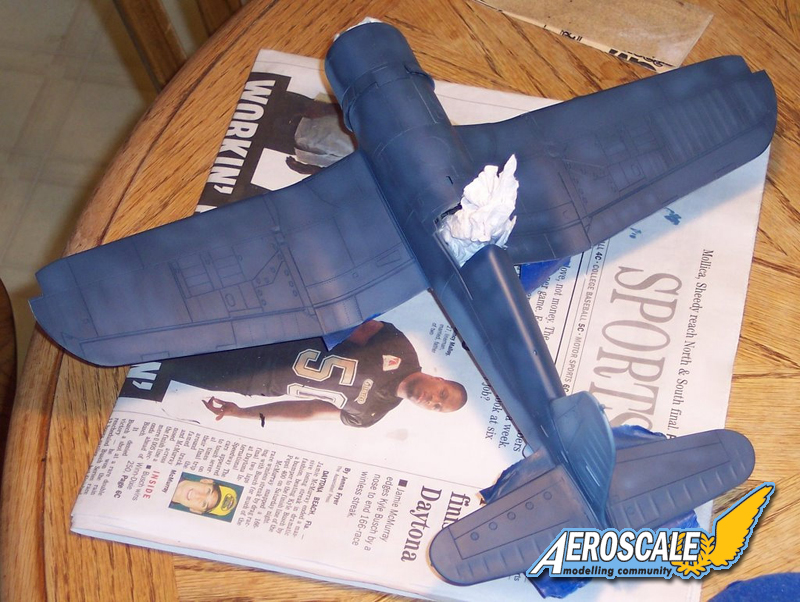
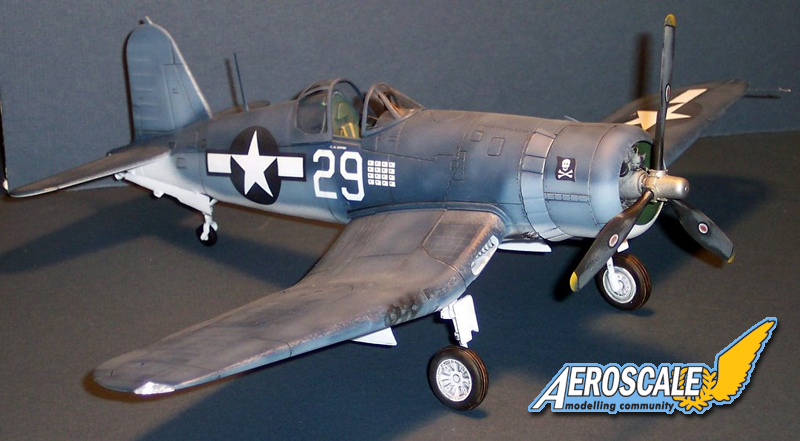
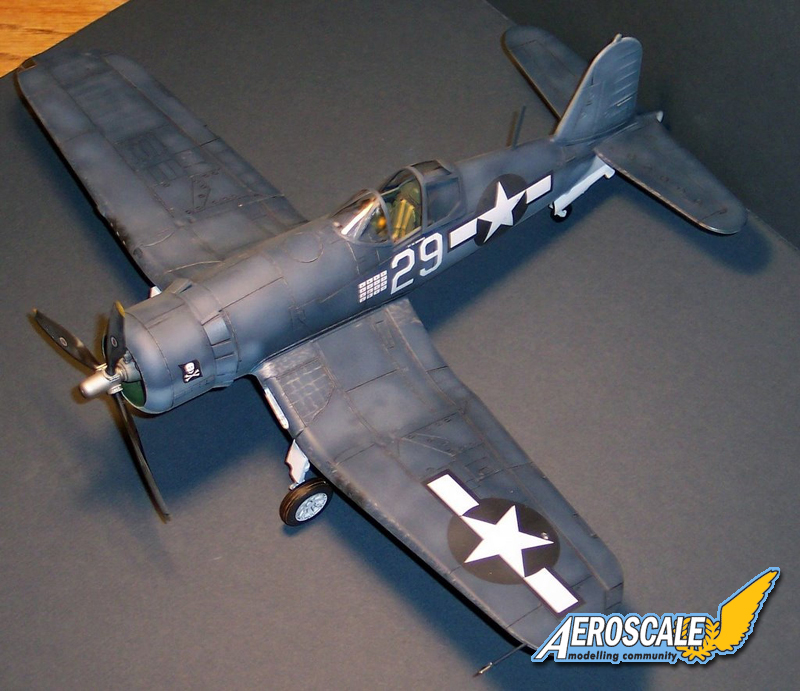
Once I'd let the wings dry for a few days, it was time to begin painting. This paint job would be a challenge for me. I'd not done a USN tri-color scheme, and had not done free-hand camo, either. And the Corsairs that flew in the Solomon's in the South Pacific had very faded, mottled paint. So various shading and fading methods would be required to get a good looking finish.
I started with the undersides, most of which was white, though the undersides of folding wing portions was intermediate blue. I started by pre-shading the various panel lines with black on the underside, then begin to fill in gaps with white, allowing some of the black to shine through to give some depth and variation to the undersides.
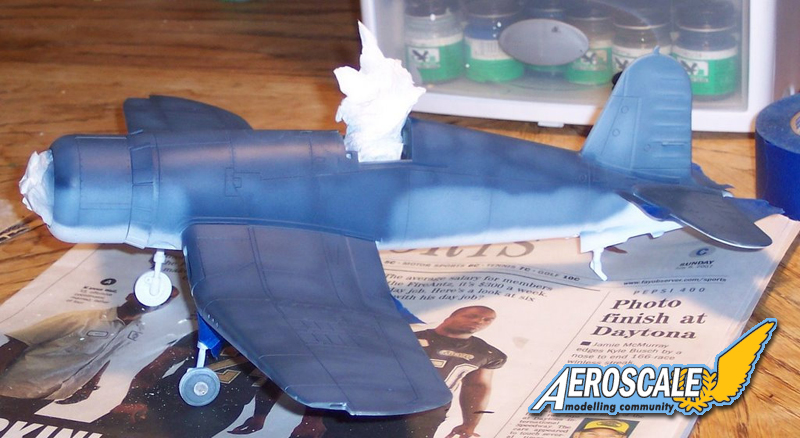
Once the white was dry, I decided on a strategy to tackle the intermediate and dark blue for the uppersides. I decided to forego pre-shading for those portions, opting instead to lay down a solid coat of the primary color, then following up with succeeding lighter shades to not only get the panel lines to stand out, but also to provide a patchy, faded appearance.
Loading my Aztek 470 up with intermediate blue, I began on the outer wing portions on the undersides, then moving on to the fuselage areas which had the same color. If you do this color scheme, be sure and go far enough beyond the intermediate and dark demarcations with your intermediate blue color, so when you follow up with the dark, you won't have any gaps.
After laying down a coat of intermediate blue, I added a few drops of white to the color cup, then began filling in panel areas, much like is done in pre-shading. I did two more lightening passes, each time adding a little more white. I tried to make each pass a little more subtle and a little more random. I didn't even wait for the coats to dry, figuring that if they mixed a bit, it would actually improve the effect.
I was very happy with the final effect. It's not perfect, but I think it looks pretty good. And I'm really sold on the technique.... with some work I think it can produce a really fine finish.... or should that be "messed-up finish"? Hmmm...
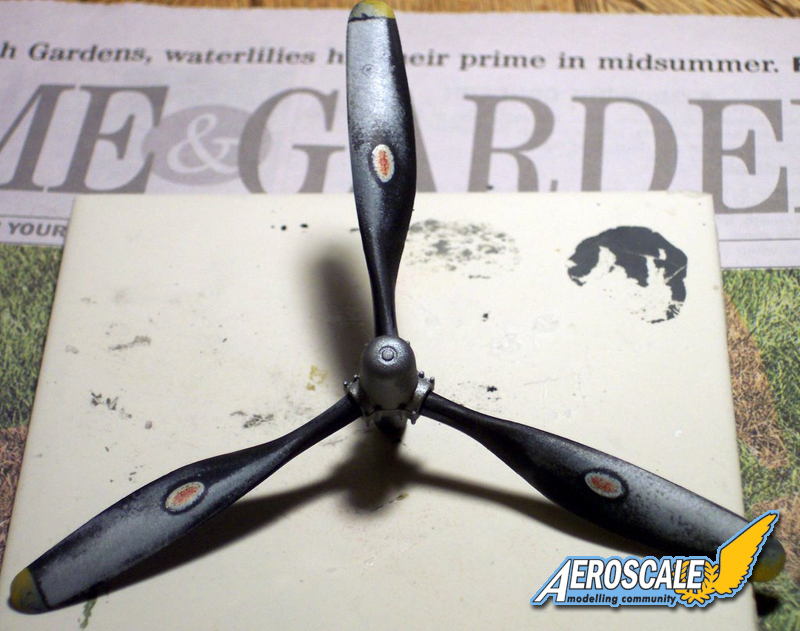
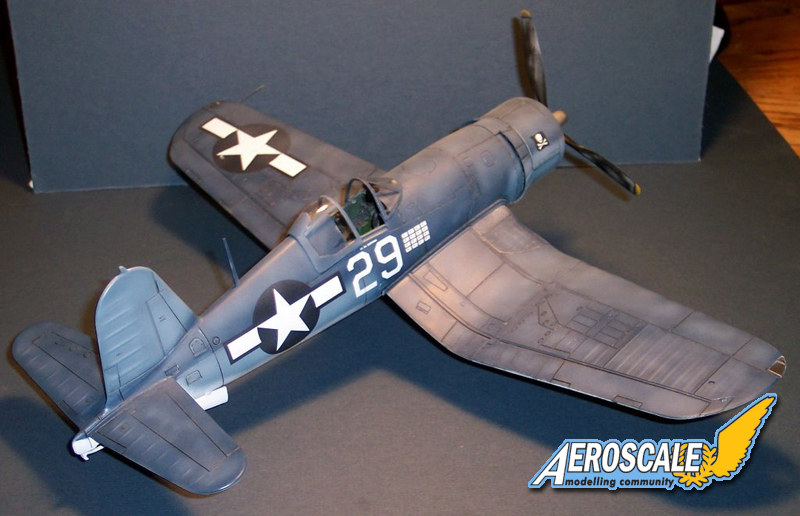
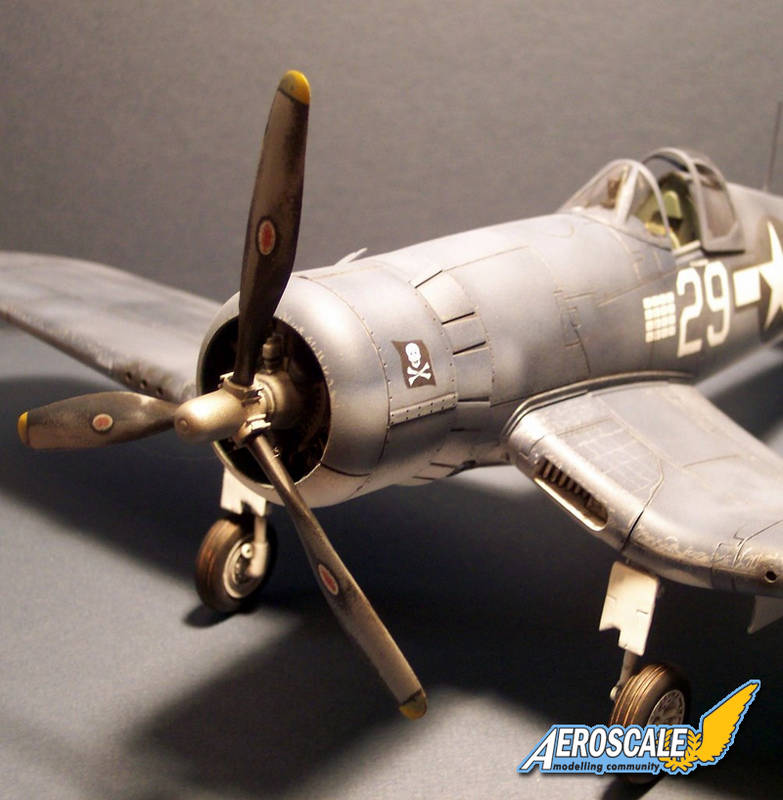
Another detail I wanted to achieve was weathering of the propeller. I noticed in a photo of the actual aircraft that the prop was heavily weathered.... I mean the paint was almost completely worn off. Normally I'd use a Prismacolor silver pencil to weather it, but because of the size of the prop and the amount of weathering, I needed another approach. I started by airbrushing the prop with PS Steel, then applying the appropriate black and yellow colors. I finished off the prop with the appropriate decals. Once it was dried, I began removing paint with a sanding stick, using a photo as a reference. I made sure to wear down the decals, too. Once complete, I thought it gave a nice weathered effect.
(Note to self: When you weather the propeller to excess, be sure the rest of the palne is equally weathered. Live and learn. ;-))
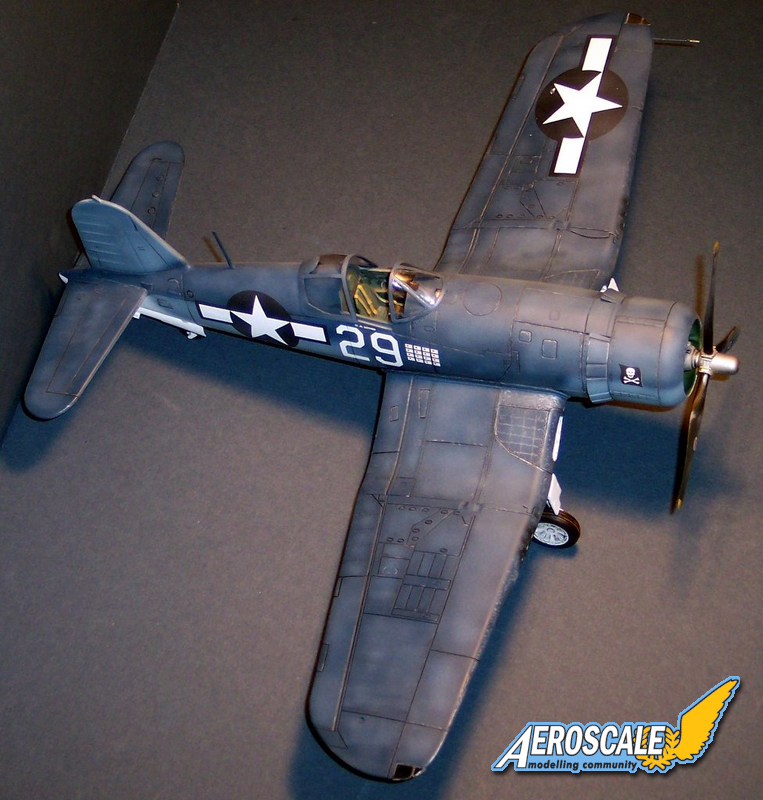
Next up came the weathering and finishing. I pulled out my trusty Prismacolor silver pencil and begin the process of simulating paint chipping. This took a while- the Corsair in 1/32 scale is a big plane. When I was happy with that, I airbrushed on several coats of Future to prepare the surface for decals and washes.
I've always heard people say that the decals in 21st Century Toys kits were worth the price alone, but they were a bit testy for me. They are very thin, with great color, but it took a lot of patience to get them in place. Once in place, they reacted a bit "bubbly" to PS Decal Softener, but nothing too severe. They did settle down into the panel lines nicely. (The kit comes with markings for 3 aircraft.)
I applied one more coat of Future to seal the decals, and then applied my panel wash. I use a mixture of water/dish soap/PS Night black in a 3/2/2 ratio. The panel lines are probably grossly out of scale, but I like them that way- makes putting down the panel wash very easy. I slopped on the wash (literally), and then used a moist paper towel to remove the excess.
The canopy that comes with the kit is a "D" model canopy- without the braces running from the front to rear. The kit I chose to do was an "A" model, and it had the braces. I experimented with a few different methods, and finally ditched them all- settling on simply cutting away the mask where the braces should be and airbrushing them on. They don't have any depth, but it doesn't appear to bad.
I finished off the build by adding the last few parts- gear doors, antennas, etc. I hit the whole plane with a coat of PS Flat Finish.... a long process, it turned out. (This is a big airplane....) Adding the canopy on with some white glue, I called it done.
This was a fun build- I really enjoyed it. It's one of those that you wouldn't mind doing a second time. I did discover that I do prefer 1/48 scale. Though 1/32 scale is easier for me to see and paint, it's size makes it a bit unwieldy in my kitchen table work space. Aside from that, this was a very enjoyable build.
One thing I would've done differently- the landing gear. They are composed of quite a few parts, and I glued the gear legs in place early in the build, including the inner rims. When it came time to put on the tires and outer rims, I realized I had failed to test fit the parts. It took quite a bit of scraping with my x-acto knife to make it all go together. It did go together just fine eventually, but I think next time I'll do the wheels as a separate unit and simply add them to the gear legs at the end.
Pick yourself up the 21st Century Toys F4U-1A- you'll enjoy it!
Please remember, when contacting retailers or manufacturers, to mention that you saw their products highlighted here - on AEROSCALE.
SUMMARY
Highs: Can't beat the price, excellent decals, good fit, adequate detailLows: Plugs that must be filled, toy heritage makes landing gear a bit fiddly to deal withVerdict: A great kit for any skill level.
About Jon Bius (jwb) FROM: NORTH CAROLINA, UNITED STATES
My name is Jon Bius, and I'm Editor and Publisher of AgapeModels.com, a Christian-based modeling outreach ministry that features build reports, kit reviews, industry interviews, forums and inspirational devotionals. I am a former US Army paratroooper, having ...


Comments