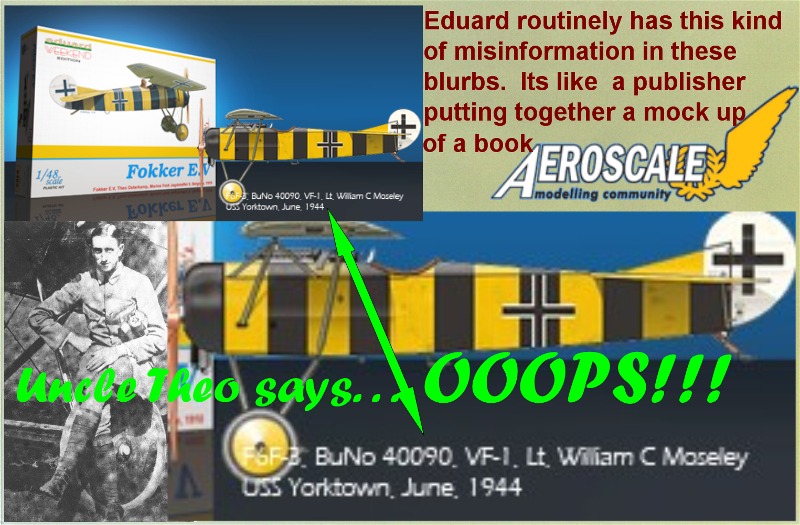
Stropping a cutting edge Razor
The Fokker E.V was the last production fighter of the German Air Service in 1918. It had a troubled start with the problem being traced to poor workmanship in the wing manufacturing shops of the Fokker subsidiary. When gussets and webs were installed correctly, the plywood covered wing of the E.V met and exceeded required specifications. Redesignated as the D.VIII, ( some examples still labeled as E.V) the type soldiered on even after the end of World War One. It was fleshing out infant air forces in other countries, outwardly they were indistinguishable except by their stenciled serial numbers. The aircraft was nicknamed the Razor, due to its head-on profile, but in 1918 it was the cutting edge. It just came too late to be useful in combat.
Overview
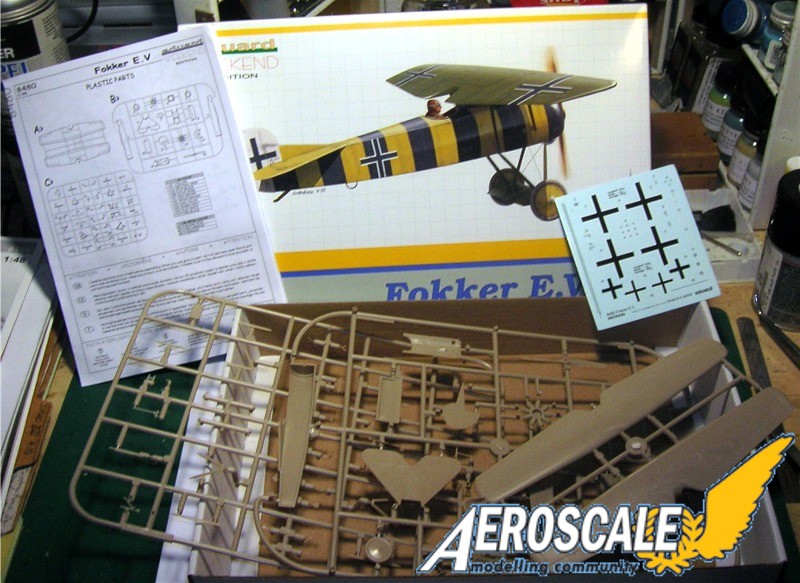
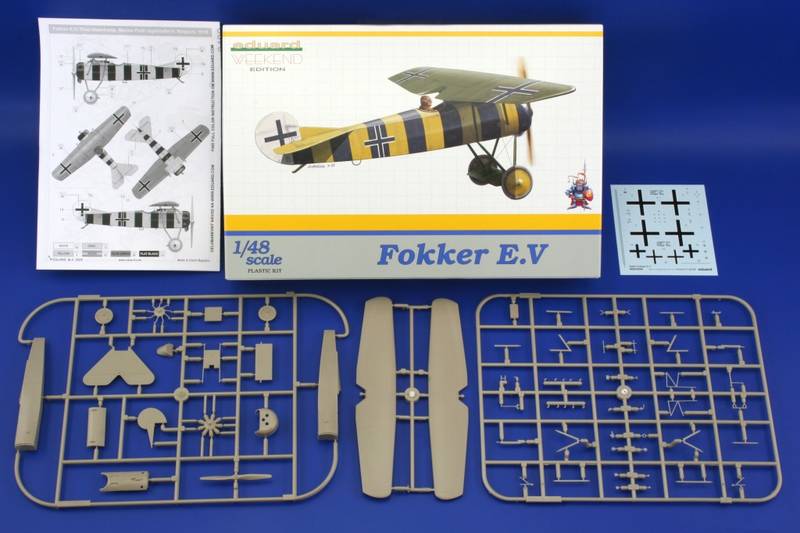
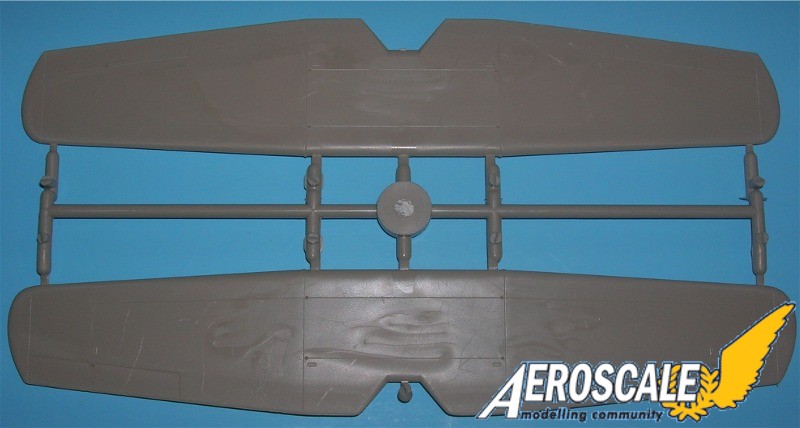
The popularity of the E.V / D.VIII as a model subject can be traced directly to the fact that it has so little rigging. The plastic in the early Eduard kit (#8003) is a little thick and the sockets for the struts must be enlarged. But the photoetched brass and decals are killer! The Flashback kit has the Eduard plastic, but the locations of the cockpit instrumentations (in the resin tub) are laid out in reverse. There are fewer brass items as the resin is meant to combine some of these. The DML / Dragon kit has great plastic and metal parts. Use gel type super glue to give the struts a better airfoil cross-section. Also, the precut flourescent kit decals should only be used in making patterns from better grade aftermarket Lozenge decals. I recommend the Eagle Strike examples. Yet here in 2009, Eduard gives us the newest in their jewel collection. The Fokker E.V / D. VIII kit # 8480 has very few build concerns.
Building the reissued kit
This piece is about
Stropping a cutting edge Razor or putting a fine edge on the Eduard kit. Pre-drill all rigging holes. The exploded view instructions are great. The rest of the kit appears to be very well tooled. The average modeler can pick this kit up and get very decent results. It fills the void in the Fokker D.VIII line up left by DML / Dragon's neglect. as Eduard has proven they can exceed our expectations with a kit that has almost everything the modeler could want in one box. That is great plastic with two options for wing variants, optional photoetch and precut decal lozenge and a comprehensive slick paper magazine for instructions. I will refer to plastic parts as PP and photoetch as PE.
Page 1. Text and history. The history is reasonably accurate, except that Eduard has noted that about 200 E.V airframes were ordered with 289 being delivered, when actually it was closer to 335 being ordered and 289 being delivered by 8 Oct. 1918, for both the E.V & D. V.III. (See the break down-below). Also there are the legend, parts map and colour references. Before beginning, wash your kit plastic in mild dish soap & water, dry completely, then pre-drill and clean up all rigging and strut locator holes.
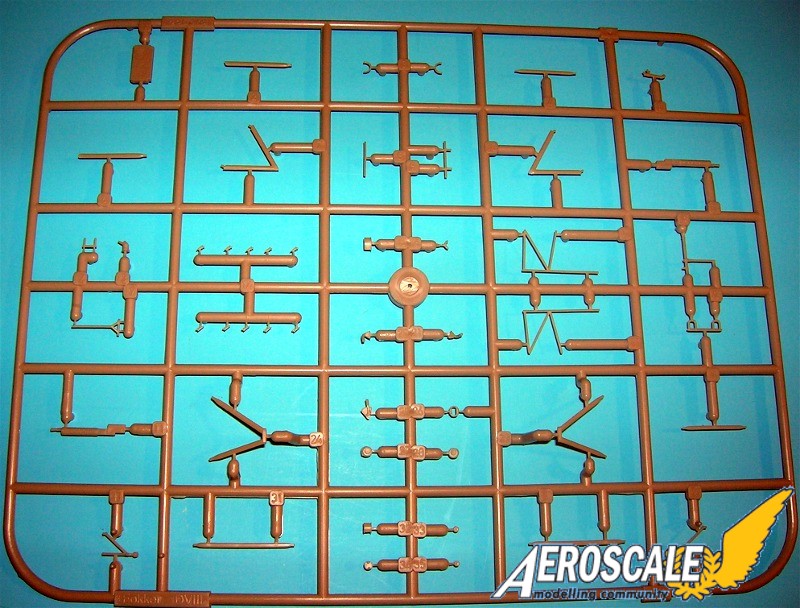
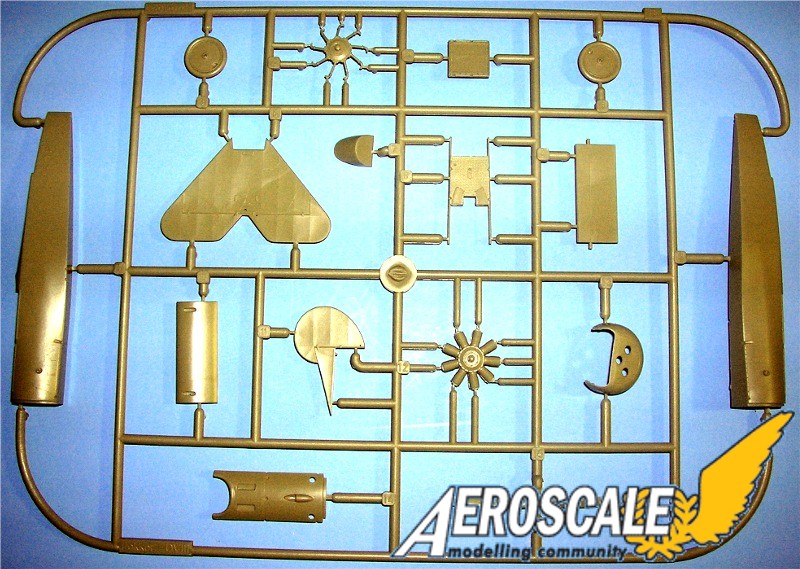
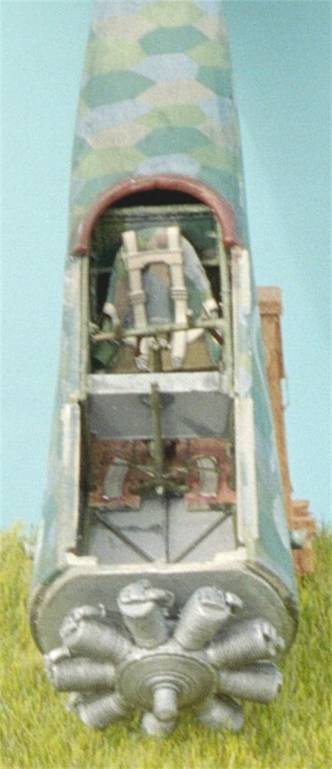
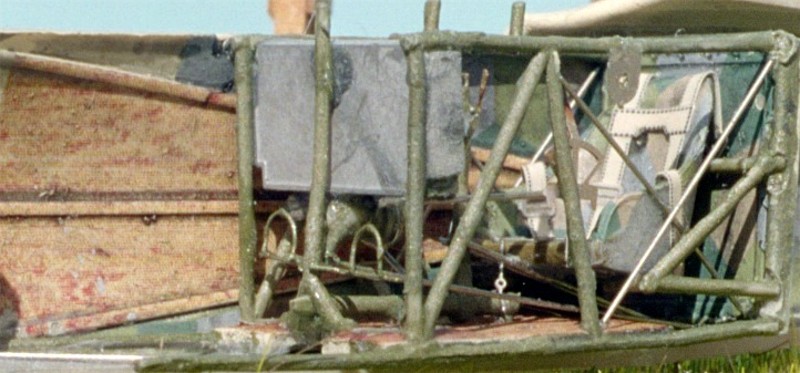
Page 2. Begins with the seat (PP B 7), the harness assembly (PE 6 & 7 x 2) and its support assemblies (PP C 8, 30, 36). Whatever the fuselage covering use the same covering on the bulkhead/screen (PP B 5). Also the seat was known to be covered in the same lozenge fabric and was held in place by attaching it to eyelets in the seat backs outer rim.). Then the flooring (PP B 8) and side tubing (PP C 17 & 22), column support (PP C 18 & 26), compass( PP C 16, 34 & PE 9), ammo box (PP C 1) and rear gun mounts (PP C 9 ). Aileron control horns need to be scratchbuilt - I used two of the plastic control horns (PP C 14 x 2). These are added to the lower leg of the control column (PP C 18), fine fuel adjustment and air mixture control (PE 8 or PP C 25). Also I replaced the kit control yoke (PP C 26) with a Toms Modelworks item for Fokker types, as the kit item looks too much like one for an Albatros fighter for my tastes. Also the fuel tank-pressure hand pump needs to be scratchbuilt. This was little more than an air pressure hand pump just to keep the fuel tank under pressure as it lost fuel to normal use.You my want to add a half loop of painted brass wire to simulate the air hose leading toward the front of the cockpit strapped to the framework.
The rudder bar assembly (PP C 19 & 23) and tachometer (PP C 13) are applied here. I replaced the thick plastic rudder bar with a nice Copper State Models PE version. It appears that on most of Fokkers rotary equipped aircraft that the instruments (tachometer, oil pulsator and in some cases an altimeter) were attached directly to the airframe, in the same manner as the Fokker Dr.I. If the instrument panels were installed, it may have been due to the post war sales requirements of purchasing countries. To finish, you will need to install the starter magneto (PE 2 & 16) at the pilots left on the upper longeron inside the cockpit of the left fuselage half (PP B 1). Installing the resulting cockpit tub into the fuselage is a snap.
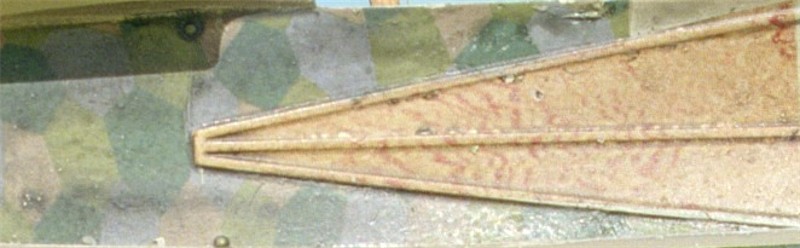
The inner surfaces of the fuselage halves (PP B 1 & 2) should have the reverse pattern of the lozenge camouflage you have chosen. The triangle shaped cheek/ fuselage formers seen on the inner surfaces as well will be a clear varnished plywood with wood or metal edge and centerline rods, that were apart of the original aircrafts framework, paint these first. Next lay down your lozenge decal and when dry use a sharp razor knife to cut along the border of the triangle shaped formers. The result is very pleasing. Since the cockpit frame needs to fit against the inner surfaces, try a dry run first and see if you need to do any shimming between the framework and the fuselage inner surfaces. Carefully note any areas that need more work. Evergreen plastic strips can help if there are any concerns. My effort fit very well. I attached the framework to the kit fuselage sides in the upper areas where the longeron would be on the real aircraft.
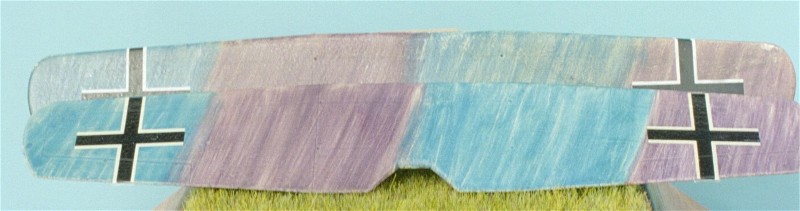
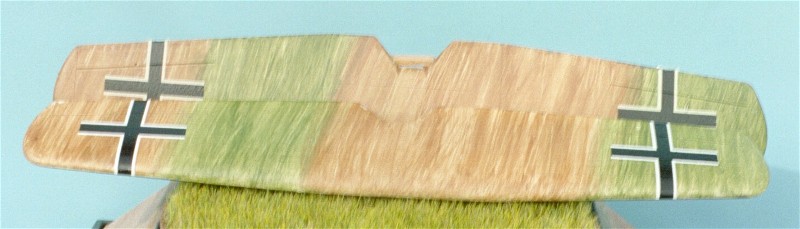
Page 3. The upper forward deck (PP B 14) is finely detailed. I also added the metal filler caps (PE 14 x 2). The fuel gauge (PE 13) fits well but there should be a slight over hang on the shroud (like on their Fokker D.VII kit). I scribed and reset the elevators on both of the horizontal flying surfaces (PP B 6), the Rudder and fin (PP B 11). The optional photoetch reinforcement rings (PE 24 X 12) are to be applied after you cut or scrape off the ones from the plastic surfaces. These are supposed to be fabric. The chin pan facade (PE 3) works well especially if you anneal it. For the exterior, the kit supplied four and five colour lozenge colours are way too light, but in an attempt to help the modeler work with what comes out of the box I will offer a fix. A wash coating of translucent dark blue and / or black tends to help greatly. I have to admit that this is one of their better efforts to provide the lozenge camouflage compared to what they have offered in the past. I prefer the Eagle Strike lozenge decals instead of the kit provided items. Their clear carrier film on the lozenge decals allows them to be easily reversed. Just apply a little decal Sol & Set.
Next add the cowling and engine (PP B 4,12 &13, PE 1). Add a small piece of plastic rod vertically to the apex of the lower longerons at the stern post. It is meant to appear like the lower end of the tube/post on which the rudder swivels. If you're going to use the rest of the photoetch pieces add only the parts that are wholly attached to the model. Wait until the last step to add any small parts that extend away from the model surface. For example lower end of the control column (PE 20) or the tail skid (PP C 5), foot step (PP C 12 ) or grab handles (PP C 3 x 2). Note the "do not glue" comment is meant for the engine stub only. The cowling is meant to be glued in place.
Next we see the Spandau machine gun assemblies (PP C 11 & 33 x 2, PE 4, 19 & 22 x 2). If you want to have the flip up rear sights find a set of 1/72 items, they are closer to scale than any of the 1/48 sets I have seen. Then continue with the ammunition feeds (PP C 15 & 32) and the empty belt eject tubes (PP C 20 & 21). I would continue to use the control horns (PE 26 x 6). After cleaning up their sprue attachment points and painting, add the cabane struts ( PP C 2, 6, 7, 10 & 31 x 2). The photoetch retainer band (PE 23) is meant to represent the assembly that holds the cowling to the fuselage.
Page 4.In reference to the second wing, I was ready toexplain the manner to describe the "Cupped Surface Option". But Eduard has done away with it in this issue and both wings are exactly the same. In the first issue of thie mold, you could see that one has smooth surfaces and the other has criss-cross ribs and spars with valleys or slight depressions between. This dished or "cupped" detail is so subtle you just don't see it in the upper or lower plan views. Not so much a starved cow but the kind of surface one would expect to see when rigid sheets or plates are tacked to a skeletal surface. Note this is not the experimental wing structure that has been suggested on another website. All substructures were at right angles. The cupped wing use to be PP A 2. Resembling the dished plywood surface. The ailerons are molded to the wing entirely, so if you're going to reset them do it before mounting on the fuselage.
Add the footstep or hand grab bars (PP C 12 & 3 x 2). Now, to bring it all together... I use a temporary jig made from childrens Lego blocks. When completely dry, I replaced the stabilizer struts ( PP C 4 x 2). Also add the small parts that were previously discussed. Ensure that the landing gear legs (PP C 24 & 29) seat fully in the Axle Wing ( PP B 10). I replaced the plastic axle ends with brass rod of appropriate diameter. The rigging is very straight-forward. You can use the fine wire or monofilament / invisible sewing thread. I prefer smoke grey coloured monofilament.
Page 5. Adds the final bits and pieces as the control horns.
Decals & Camouflage
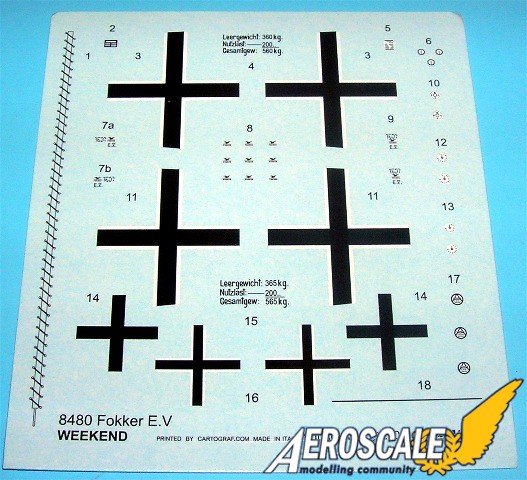
Eduard continue to struggle with their lozenge decals colours and the four colour lozenge here is comparable with their Fokker D.VII kit decals without the speckles. It provides markings for four colour schemes, three of which have been available in either kit or aftermarket forms previously. Note also the Fokker company stencils / Logos (decals 38 - 40) were applied to the pilots right side only, not on both sides.
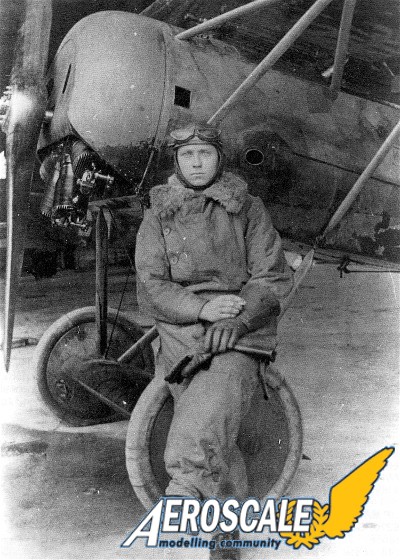
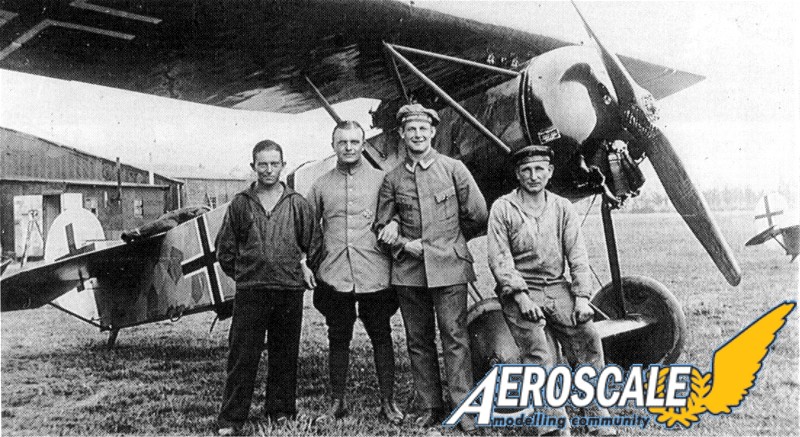
A. Fok. E.V , E.V 156/18. This scheme is supposed to represent the Fokker E.V flown by Theo Osterkamp, Marine Feld Jagdstaffel II, Belgium, 1918. One fellow has said, ". . .All in all: The scheme seems to be highly improbable, being based on Osterkamp's verbal description of the marking of his *D VII*, then adapted for the E V replica. For the D VII, the markings makes a lot of sense: Sachsenberg, the Geschwaderkommandeur, was VERY systematic in the concept of Geschwader markings (more so than Richthofen or Berthold, for example), and he used the alternating squares/diamonds for his own aircraft (he commanded MFJ 1 as well as the Geschwader), whereas there are at least two combat reports for MFJ 3´s commander Brockhoff describing *horizontal* yellow and black stripes for his D VII - so the *vertical* stripes for Osterkamps MFJ 2 machine would give three clearly noticable markings for the three Staffelfuehrer. . . "As for the markings . . . the only "confirmation" for Osterkamps markings seems to come from a much later replica E V flown in England in the eighties.
It is however possible that the aircraft (in the image where Osterkamp is sitting on the tire) was remarked - definitely probable if Osterkamp REALLY was shot down in that aircraft (E.V 156/18) on September 28, (1918) six weeks after the delivery. However, if shot down during a familiarsation flight, September 28, (1918) seems rather late. . ."
Dan San Abbott weighed in with, ". . .I had read that Ltn.z.S.Theo Osterkamp did not like the Fok.E.V and only flew it a few times. see "FOKKER D.VIII" by P.M. Grosz, WINDSOCK DATAFILE 25, foot note (2), page 5."
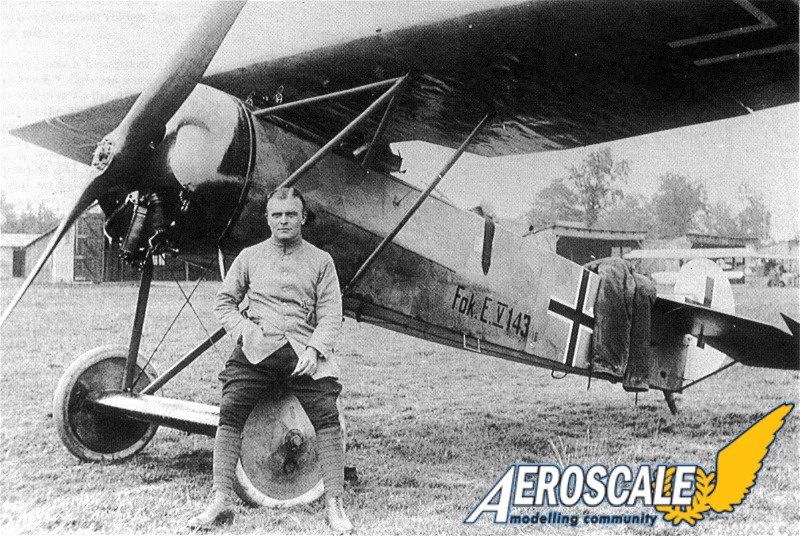
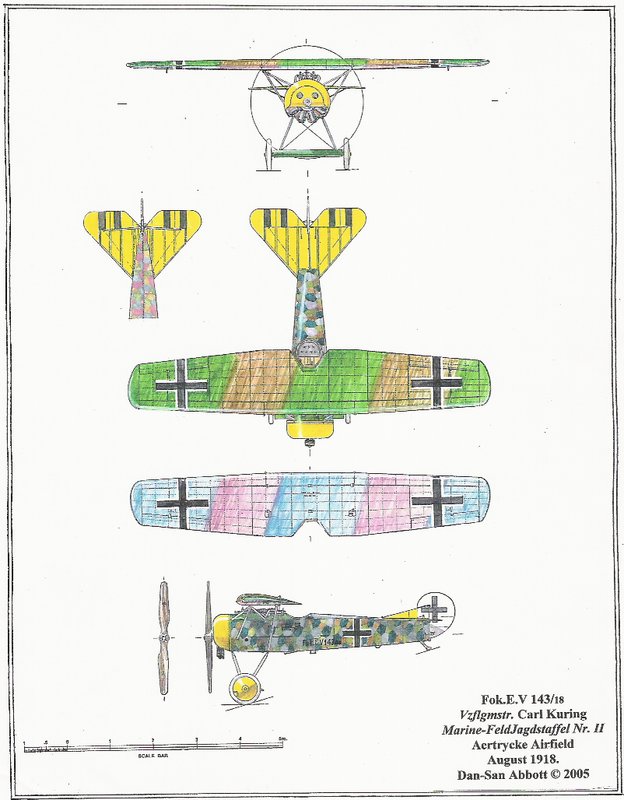
In recent years there has been a good deal of focus placed on the photographic evidence concerning markings and the camouflage of these Fokker E.V / D.VIII types. We know that mostly, four colour Lozenge was used and that in a few cases five colour type camouflage was used. The only existing portion of a production Fokker E.V is the vertical tail unit of 149/18 ( it is in 5 colour Lozenge). The top wing was thought to be a solid dark green, but is now known to also have been streaked like the Fokker Dr.I or had patterns of the camouflage pattern streaked on at the factory levels.
Conclusion
In my opinion, Eduards new Laser Technology Mold is a welcome addition. A vast improvement from their first attempt (slush mold) of this subject in 1992-3. The new generation exploded view instructions are great. The average modeler can pick this kit up and get very decent results. Eduard tries to offer us everything the modeler wants in one box. That is great plastic with four options for colour schemes, optional photoetch and precut decal lozenge and a comprehensive slick paper magazine for instructions. Eduard is making high marks with their orange label kits. I note that I only replaced three kit items with what I consider better detailed or stronger pieces - these are the axle, rudder bar and control yoke.
Thank you to Eduard for kindly supplying the review sample.
Fokkers Exodus
The myth that Fokker smuggled train-loads of aircraft out of Germany, has reached epic proportions. While we know that this was true to some extent, we must try to understand what was happening. First, we know that Germany was out of the aircraft purchasing market after November 11, 1918. It is known that of 335 that were ordered, 289 Fokker E.V/D.VIII had been delivered by 8 Oct.1918. Pending contracts could not be paid for, so the post war German government was more than willing to let Fokker leave with his rolling stock of D.VII, D.VIII and C.I types (some of these having been accepted by the German government were among those spirited away). Herr Anthony Fokker was not a war criminal, so why would the allies pursue him? The allied commission was busy destroying aircraft in the field. New aircraft at air parks ready for disbursement went to the allied countries as war reparations (mostly Fokker D.VII and Roland D.VIb types). At least twenty incomplete Fokker D.VIII type airframes were destroyed at the Fokker factory in Schwerin. At the exodus a further twenty ( 29?) complete Fokker E.V/ D.VIII types went to Holland and were sold off by the Fokker company there. Recipients were the Dutch Luchtvaart Afdeling , Polish Air Service and The United States of America (purchased P165 and P169. "P" stands for "Project".).
Fokker E.V / D.VIII, known serial numbers (/18) and the possible (?) works numbers (w/n) allocations:
100/18 - 226/18 w/n 2741 - 2867
227/18 ------------ (w/n 2868 ?)
228/18 - 231/18 w/n 2869 - 2872
232/18 ------------ (w/n 2873 ?)
233/18 - 236/18 w/n 2874 - 2877
237/18 ------------ (w/n 2878 ?)
238/18 - 241/18 w/n 2879 - 2882
242/18 ------------ (w/n 2883 ?)
243/18 ------------ (w/n 2884 ?)
244/18 --------------w/n 2885
245/18 ------------ (w/n 2886 ?)
246/18 --------------w/n 2887
247/18 ------------ (w/n 2888 ?)
248/18 --------------w/n 2889
249/18 - 251/18 --(w/n 2890 - 2892 ?)
252/18 --------------w/n 2893
253/18 - 307/18 --(w/n 2894 - 2948 ?)
308/18 - 309/18 ---w/n 2949 - 2950
500/18 - 564/18 ---w/n 3255 - 3319
670/18 - 729/18 w/n 2672 - 2731 *
Total = 335 aircraft ordered
* The reason last series of work numbers is out of sequence is that they were originally assigned to the Fokker D.VI contract orders. When the balance of the D.VI types were canceled, the remaining work numbers were transferred to the E.V / D.VIII production series.
References
Aerodrome Modeller, Vol.3, #3, P.125.
Eindeckers of World War I by D. Pardee, Cross & Cockade USA Vol.22, #4, Pp.331-343,1981.
Fokker D.VIII by J.M.Bruce, Profile Pub. #67, 1966.
Fokker D.VIII by P.M.Grosz, Windsock Datafile #25, Albatros Pub. Ltd. 1991.
Fokker D.VIII by P.M.Grosz, World War One Aero #86, September 1980.
Fokker E.V./ D.VIII by R. Rimell, Warpaint #5 Scale Models May 1979.
Fokker Fighters of WWI by A. Imrie, Osprey, Vintage Warbirds #6, Pp.53-55, 58-59, 1986.
Fokkers D.VIII ...Reluctant Razor by P. Grosz, Air Enthusiast 17 Pp.61-73, 1980.
Fokker D.VIII Wing and Airfoils by C. Cash et al, World War One Aero #79, May 1980.
German Army Air Service in WWI, Osprey, Vintage Warbirds #2,Pp.26-27, 1985.
Info from Dan-San Abbott, unpublished.
Pictorial History of the German Army Air Service by A. Imrie, Ian Allen Pub. 1971.
Report on the Fokker Monoplane Type E.V, Report I.M.1015 Air Ministry June, 1920.
Royal Prussian Jagdstaffel Nr.36 by S.T.Lawson, Cross & Cockade Int. Vol.20, #1, Pp. 1989.
Scale Model Aircraft in Plastic Card by H.Woodman, Model & Allied Pub., 1975.
Serendipity at Aerdrome 92' by P.M.Grosz, World War One Aero, Pp.64-66, 1993.
U.S. Air Services Fokker D.VIII Monoplanes by B.Flanagan, Cross & Cockade USA, Vol.16, #1, Pp.83-92, 1975. (Fokker E.V P165 and P169 were tested at McCook Field 1920-22.)
World War One in Plastic by Brad Hansen, Great Auk Pub. Pp.25,52 1979 & update 3/79.
World War One in the Air by R. Rimell, Osprey Pub. Vintage Warbirds #9, p.35,1988.


Comments