The art of dogfighting, based on experience of the first world war, was viewed by many pilots as a matter of skill, much like fencing. Maneuverability was prized above all other factors and was held to with tenacity by pilots and aircraft designers alike. In 1936, new designs were on the table worldwide, and increases in armament and armor plating, improved, more powerful engines and greater speed were in conflict with the ability to twist and turn in battle. While the rest of the world opted to go with change, and new aircraft designs were faster, heavier and more powerfully armed, Japan, whose pilots were among the most conservative, chose to go with an airplane design that would prove to be the most maneuverable in the world, the Nakajima Ki-27.
The Nakajima Ki-27 was one of three entrants in a competition for a new Japanese Army Air Force fighter plane, the other two being the Mitsubishi Ki-33 (a modified A5M) and the Kawasaki Ki-28. JAAF command wanted to maintain the maneuverability of the existing Ki-10 biplane fighter.
The Ki-27 was designed with a straight leading edge, tapered trailing edge, fixed landing gear and was powered by the HA-1 Otsu air cooled radial engine rated at 650 hp (485kW). The design was extremely limited in an effort to keep weight at a bare minimum. Self sealing tanks and armor plate were considered unnecessary. Armament was limited to two 7.7mm machine guns firing through the engine cowling. Total weight was 3,523 lbs (1,547 kg) fully loaded. In the competition, the Ki-27 had the slowest speed and rate of climb, but demonstrated astonishing maneuverability. So impressed was the JAAF that they chose the Ki-27 as the new Army type fighter. Adopted officially in 1937, it was named the type 97 fighter.
The decision to adopt this aircraft was fateful for Japan. In it's first combat over China, the Ki-27 was very successful against Chinese aircraft. Later, in the Nomonhan "incident" (a 3 month long mini-war between Japan and the Soviet Union) the Ki-27 was initially very successful against Soviet I-15 (biplane) and I-16 (monoplane) fighters. However, towards the end of the conflict, improved models of the I-16 began to appear that could outdive the Ki-27, and adopted the technique of zooming through Ki-27 formations in hit and run tactics that would also be used with great success later on by pilots of the AVG with their P-40s. The unarmored Ki-27 was easily destroyed if hit, and lacked the speed to pursue. It was soon fighting on uneven terms and was pulled from combat service by 1942. It continued as a training fighter and late in the war was used as a kamikaze.
A total of 3,368 aircraft were built. The "A" variant featured a canopy that was partially covered. The "B" variant featured a full visibility canopy and the ability to carry four 50lb bombs on the center line.
The kit
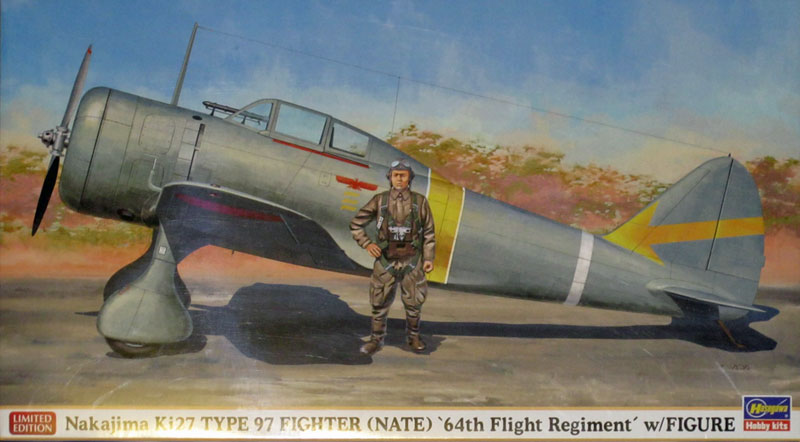
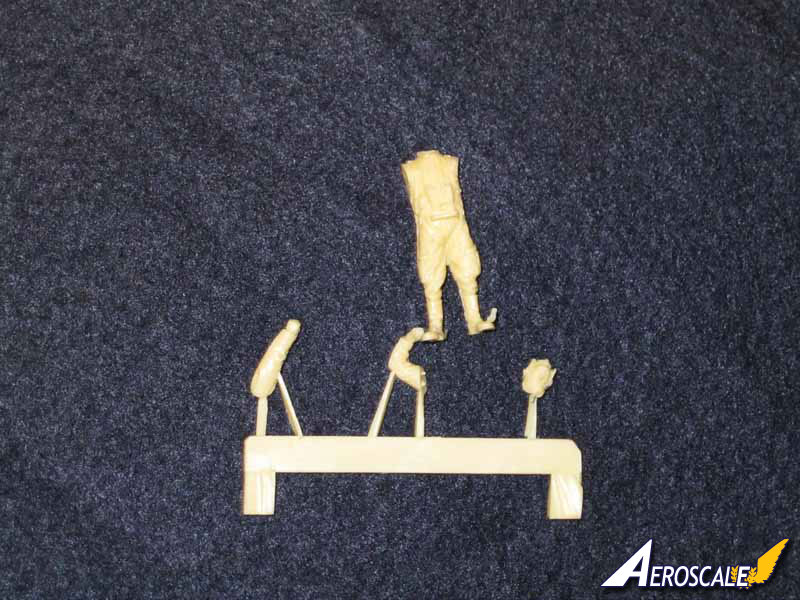
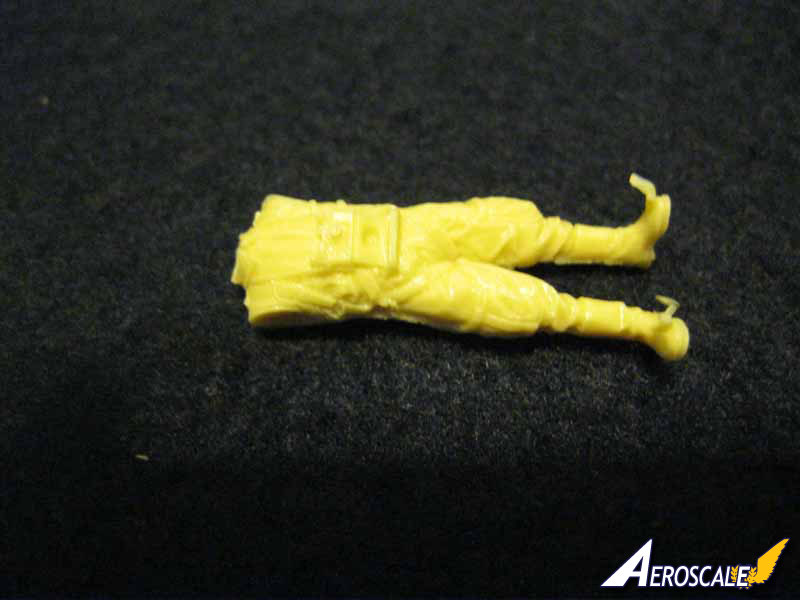
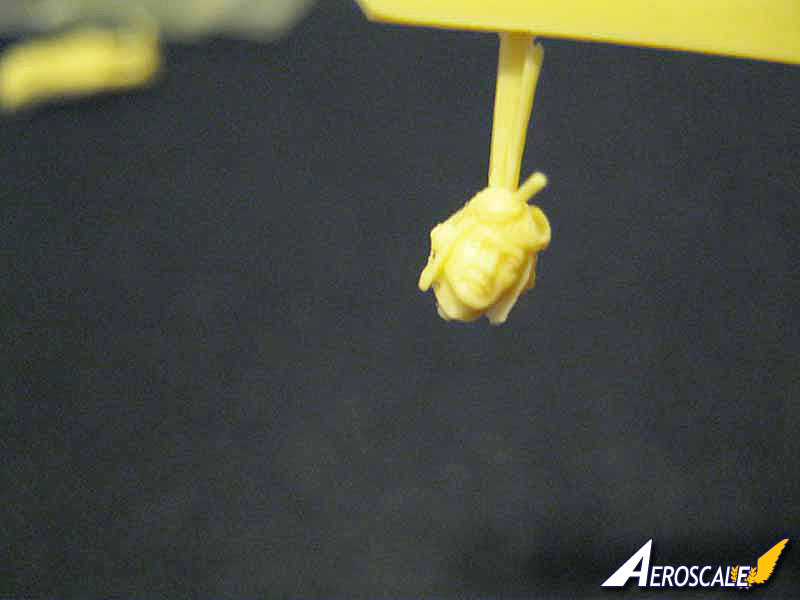
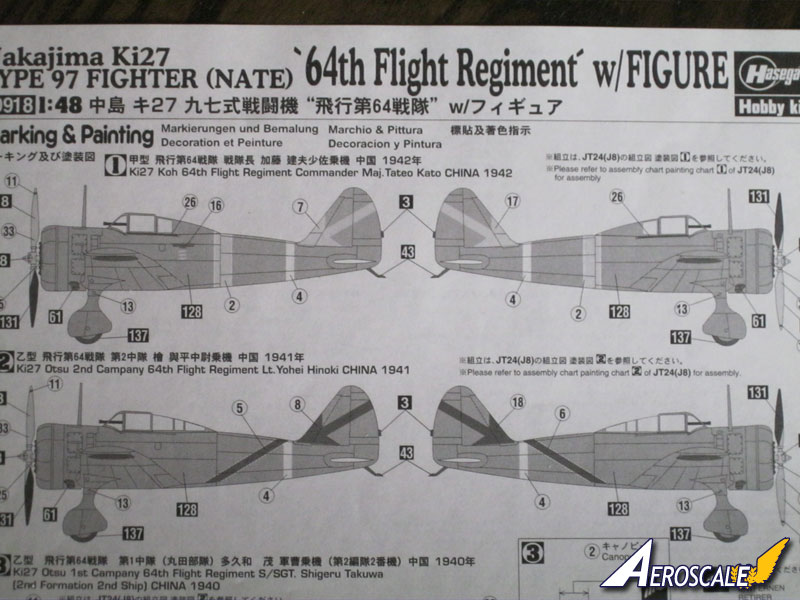
The Hasegawa kit first appeared in the early 1970s, manufactured by Mania, a Japanese model company. It was unique at the time for having very fine rivet and engraved panel line detail as well as a fairly extensive (for the time) cockpit. When Mania went out of business in 1975, Hasegawa purchased the molds. The kit has been produced off an on over the past 35 years and recently has been released in several limited production runs with different marking options. This kit represents three aircraft with the 64th flight regiment and offers a bonus resin pilot figure.
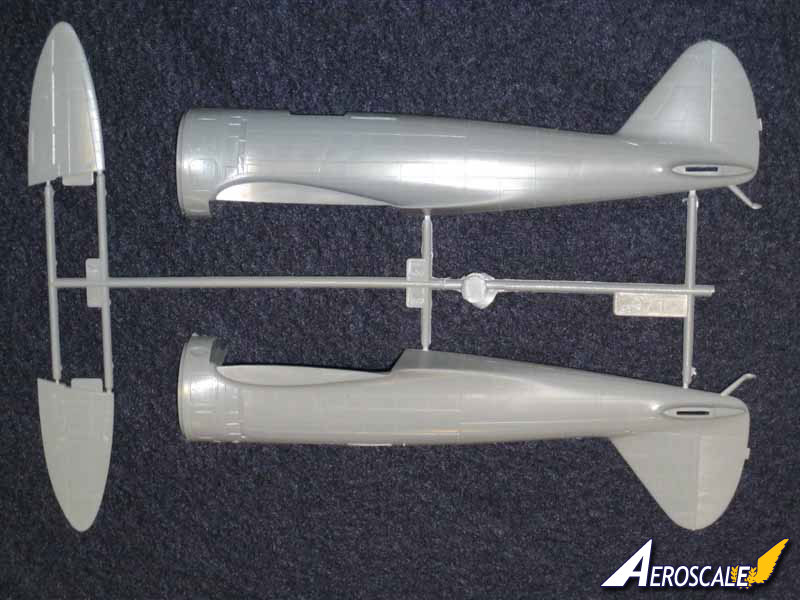
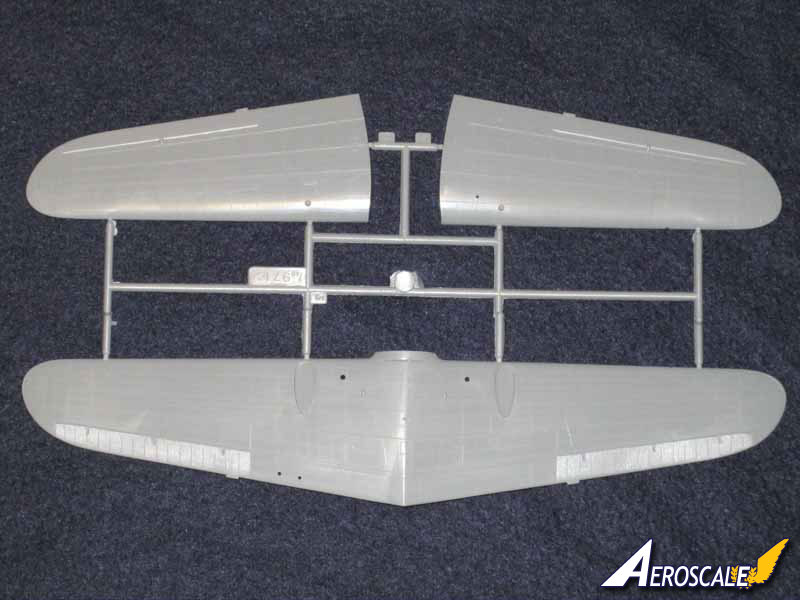
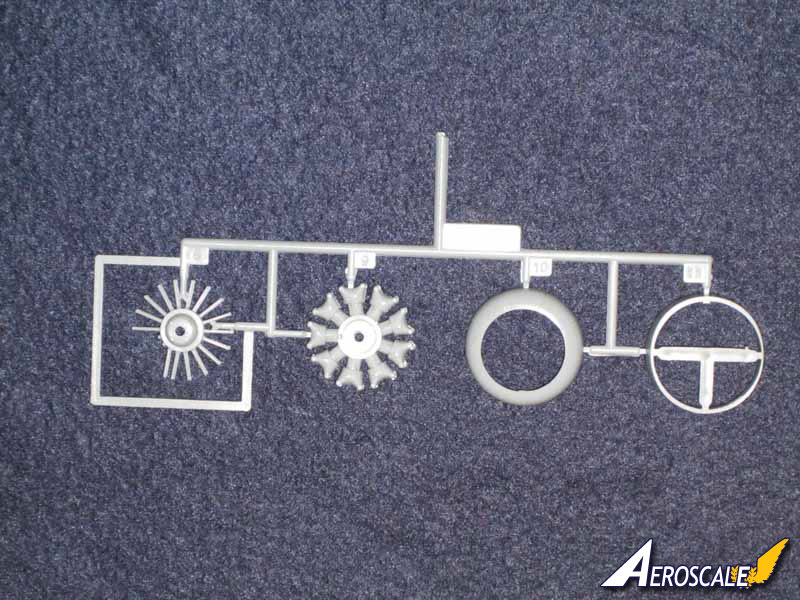
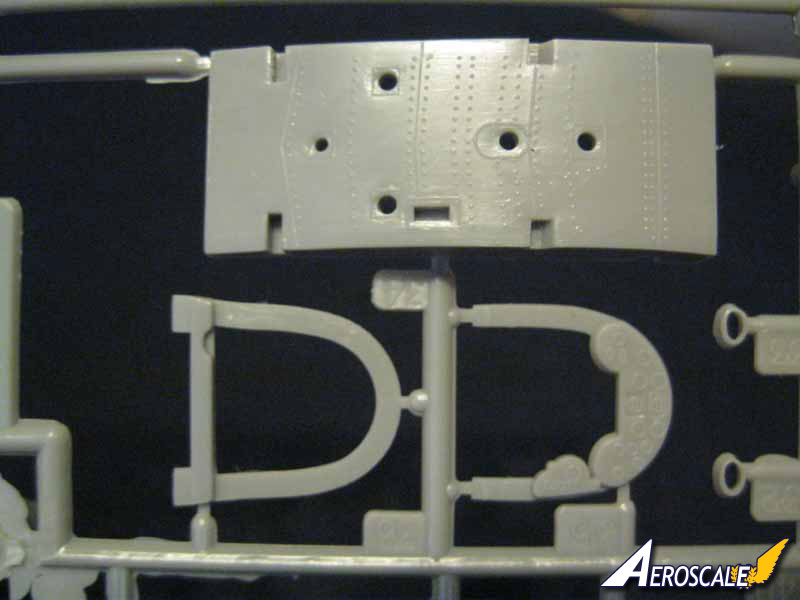
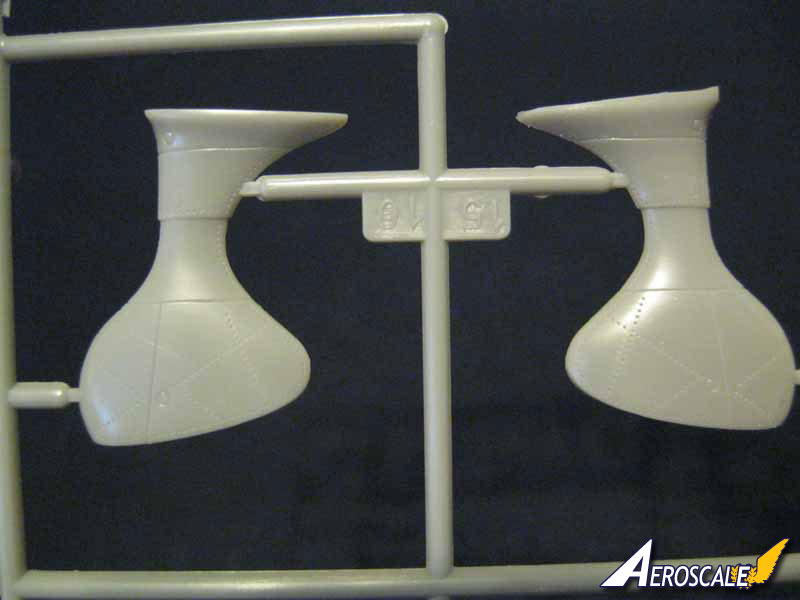
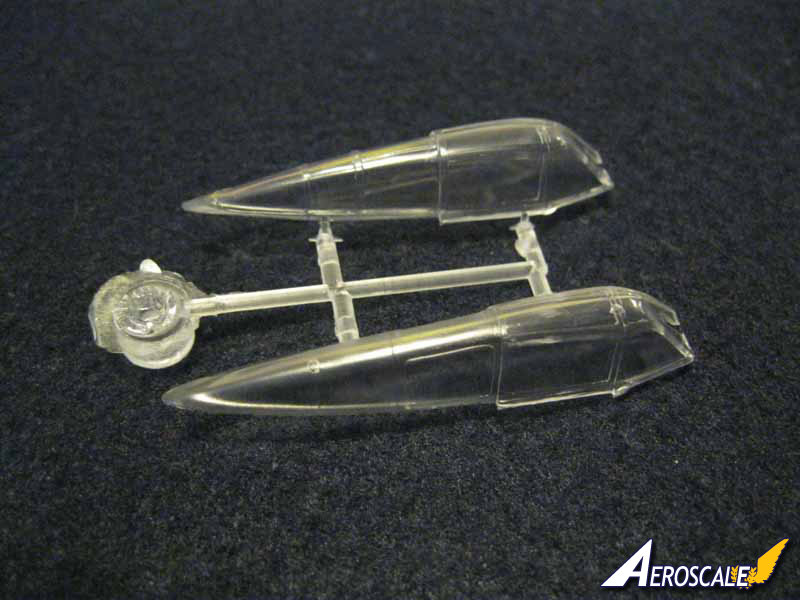
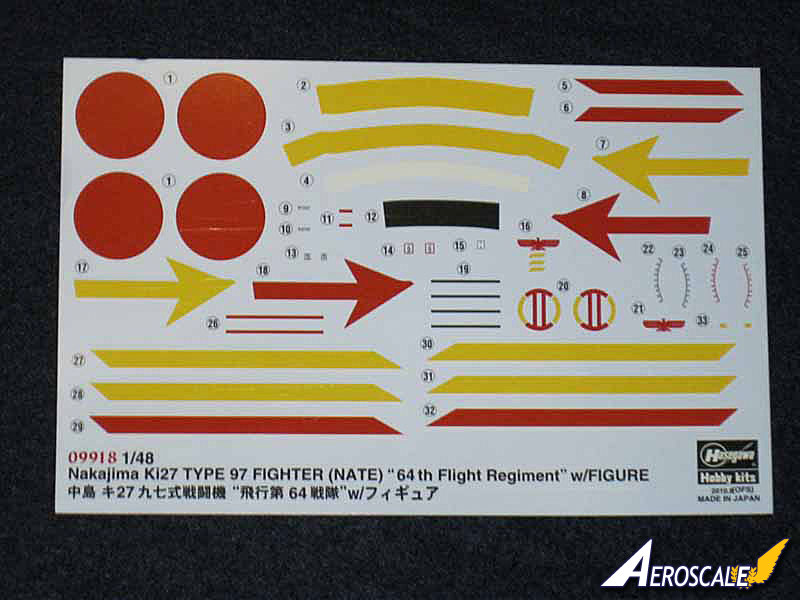
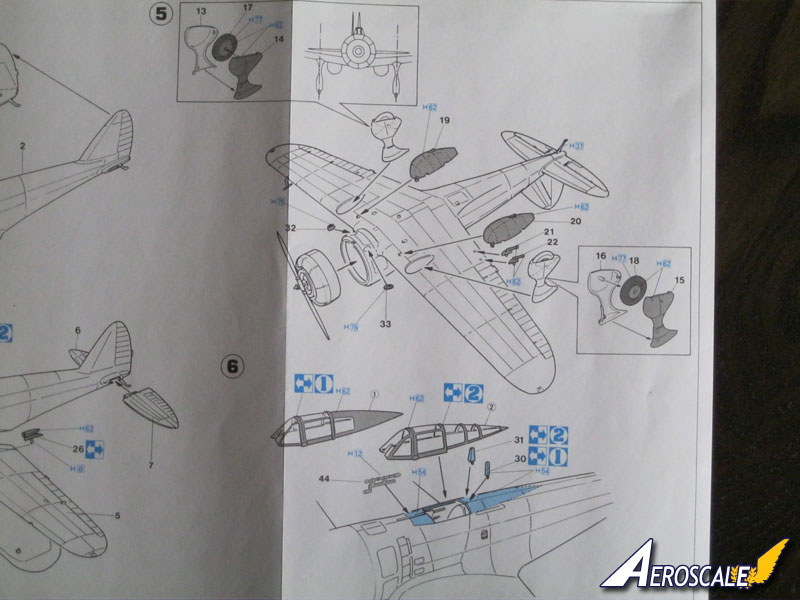
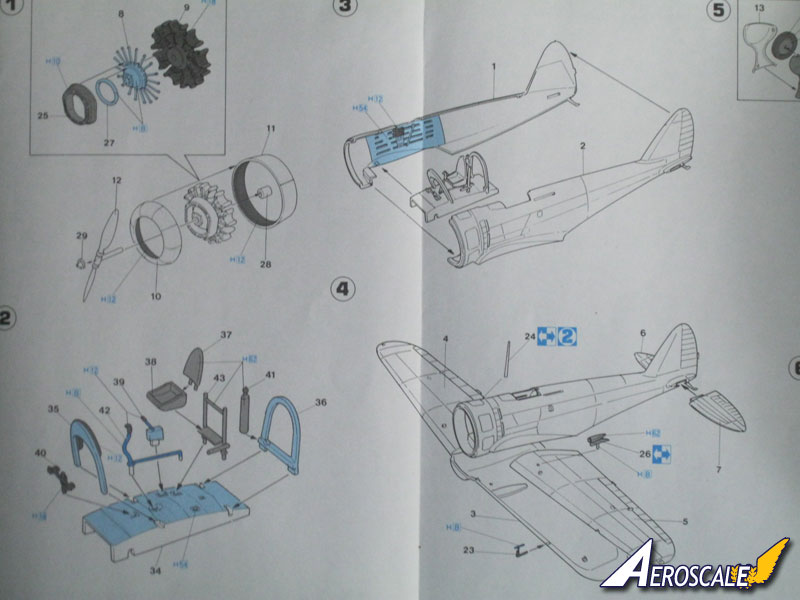
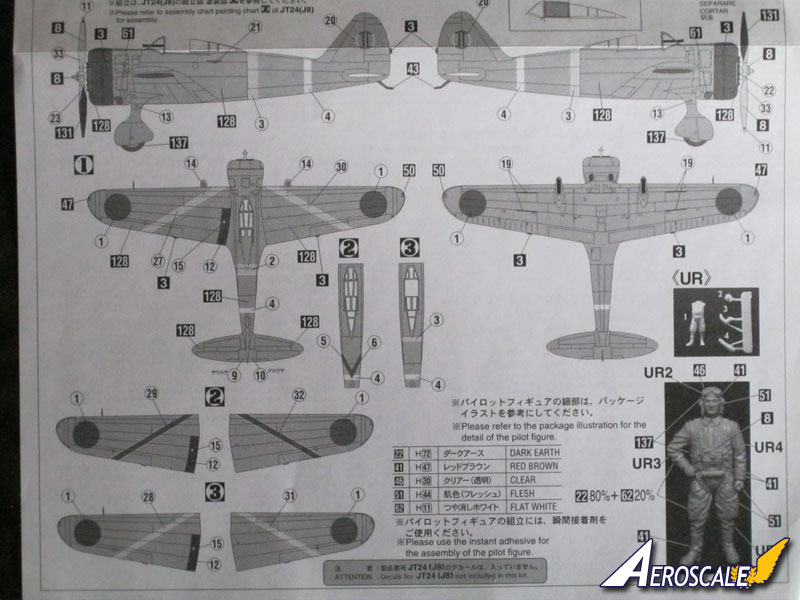
The kit itself is quite basic, comprising 44 gray styrene and two clear plastic parts. The included resin figure is in four parts. Instructions are on one folding page and are broken down into 6 primary steps. A separate sheet is included for decal and painting schemes for the three aircraft options in this kit.
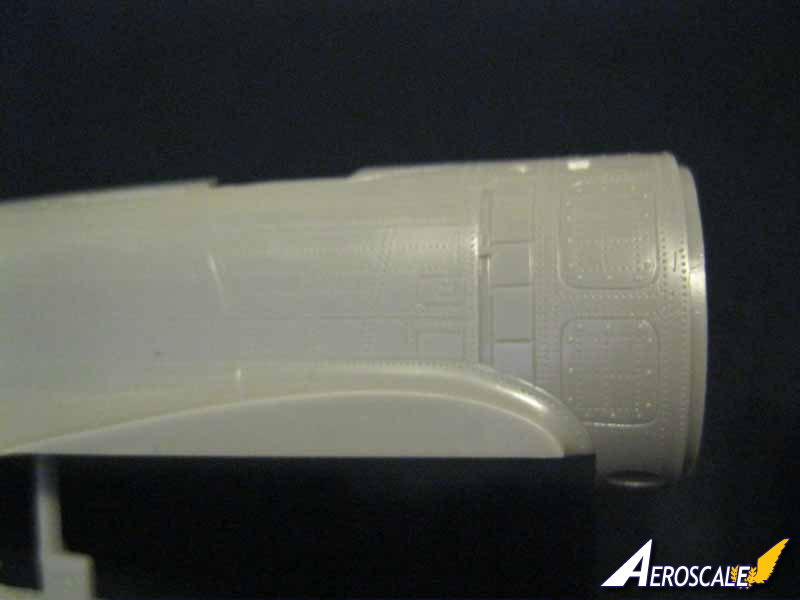
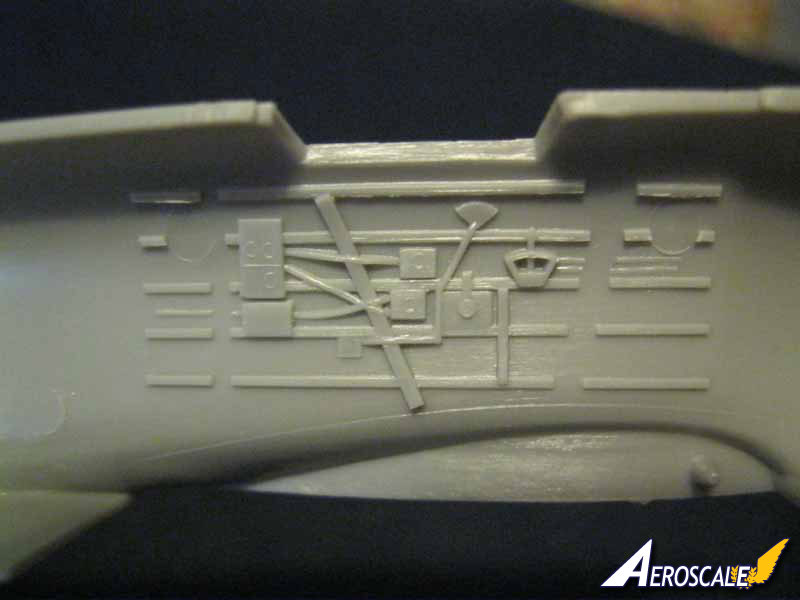
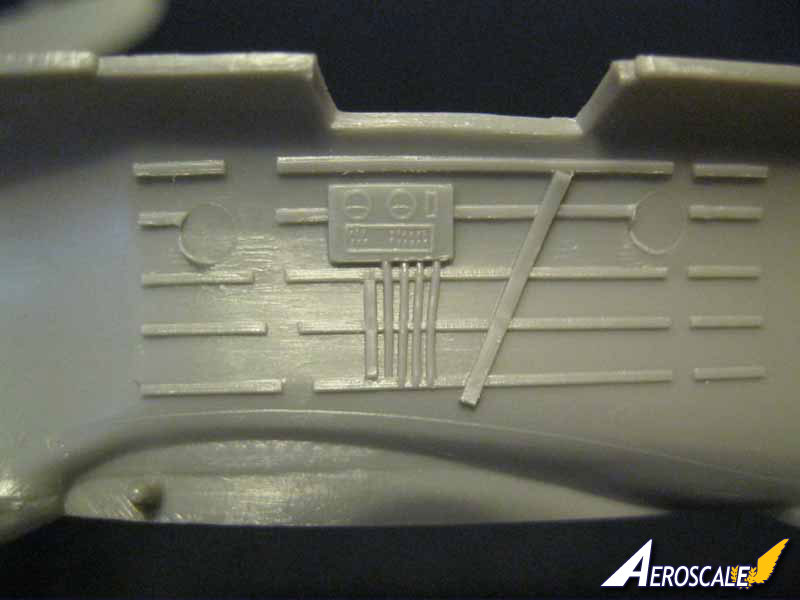
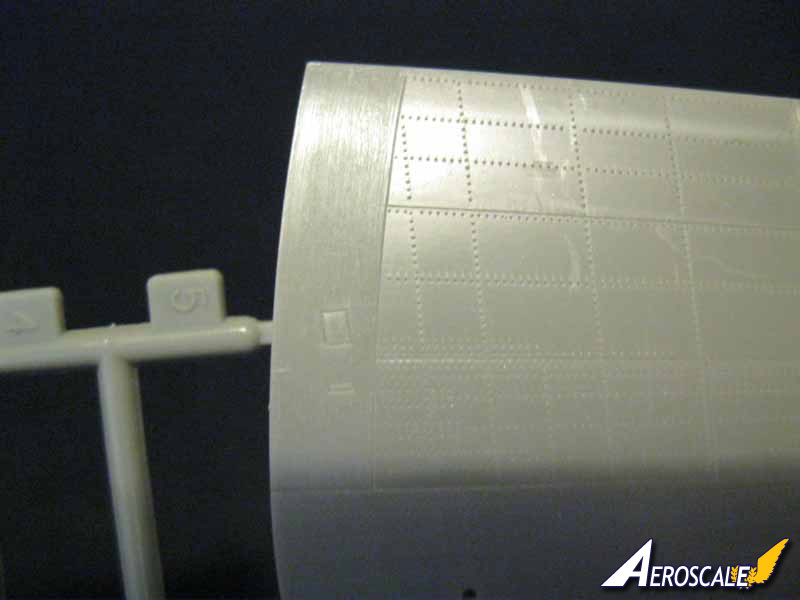
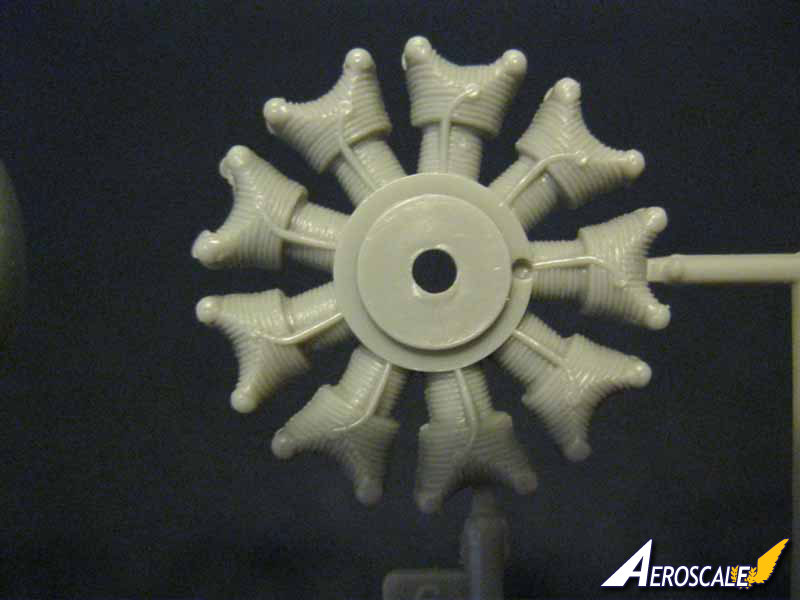
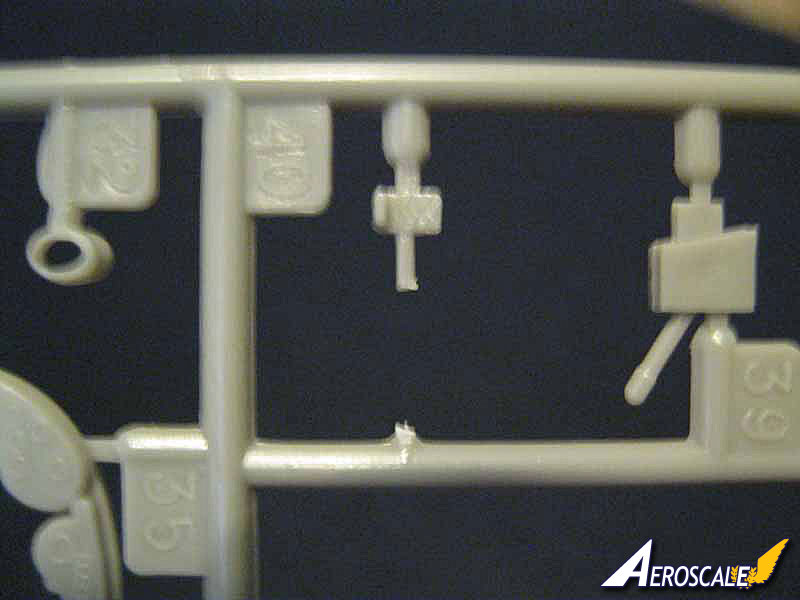
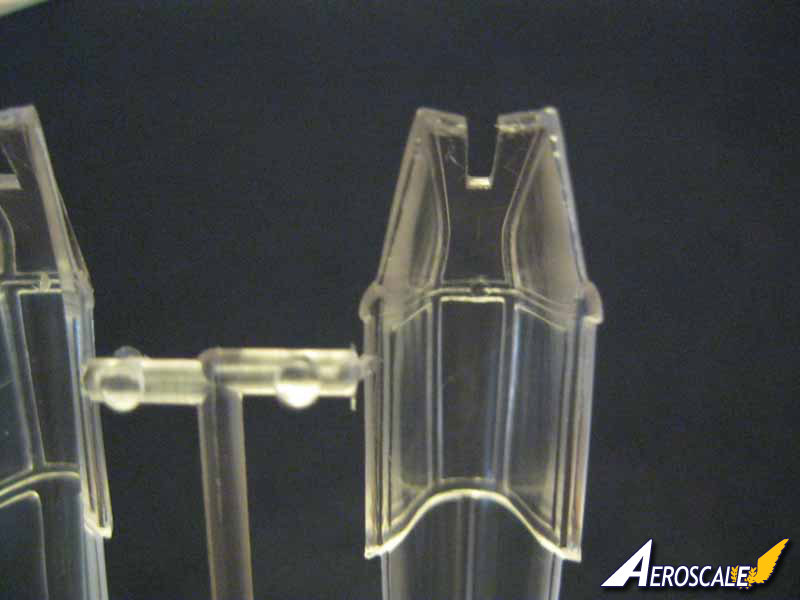
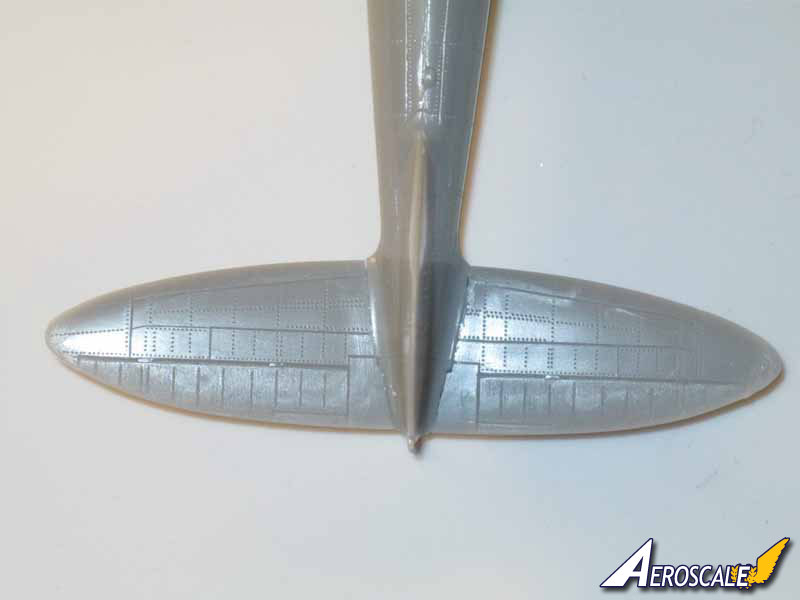
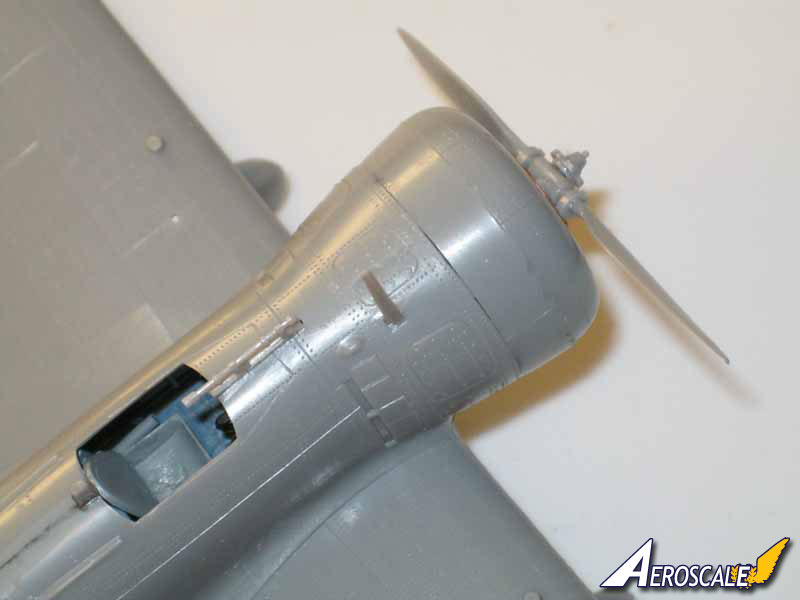
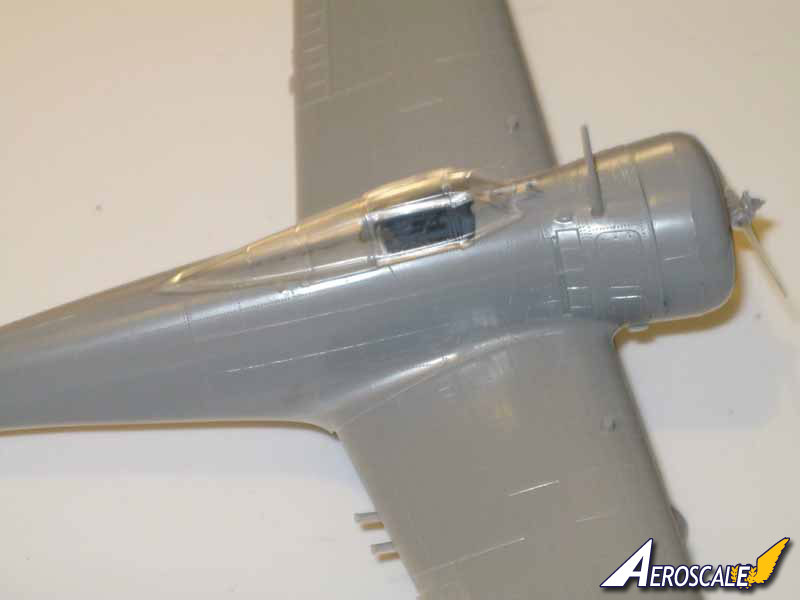
My sample arrived with two parts broken-push rods on the engine and the control pedals for the pilot. Details overall are quite good for the exterior. The cockpit interior is by current standards very basic. There are update sets available from True Details, Eduard, and possibly others, but the cockpit is so small almost none of the detail will be visible. All control surfaces are molded in place but have texture detail to show they are cloth. There was some significant flash present on some parts and some of the mold attachment points are very heavy. Ejector pin marks are mostly hidden although both canopies have one in the top center.
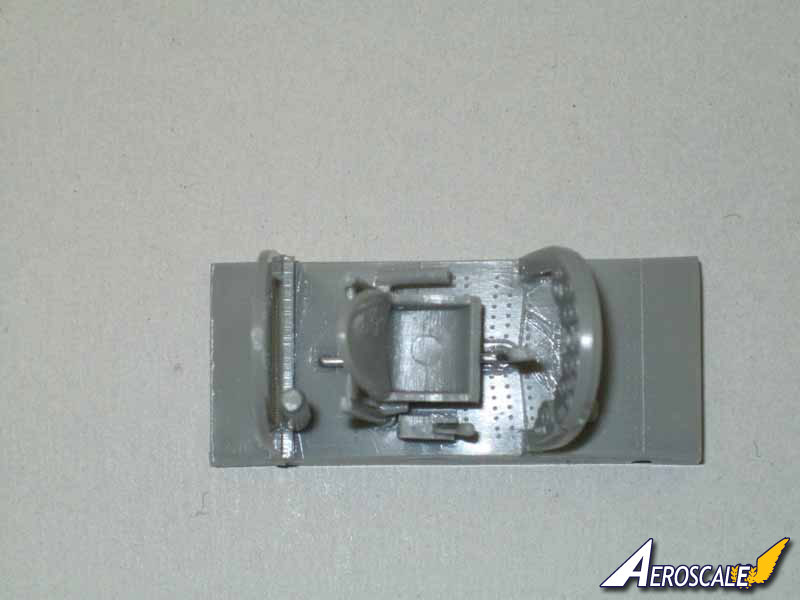
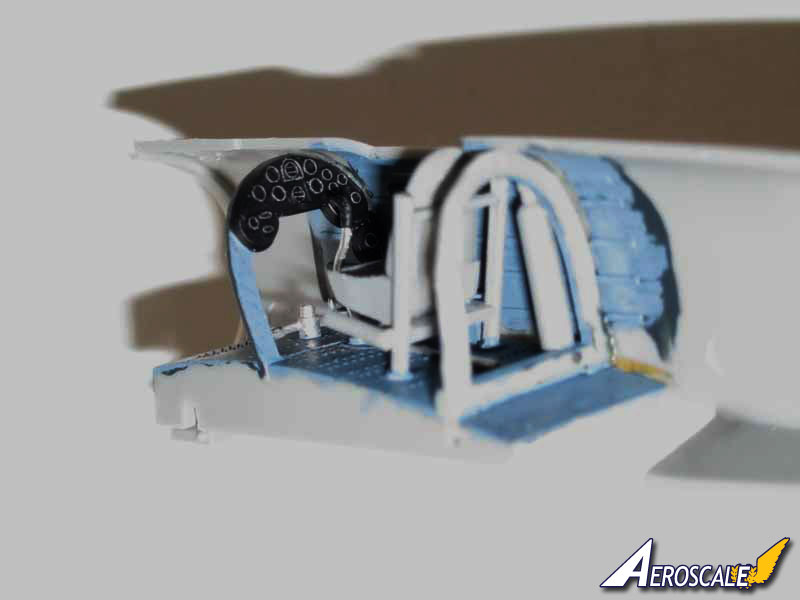
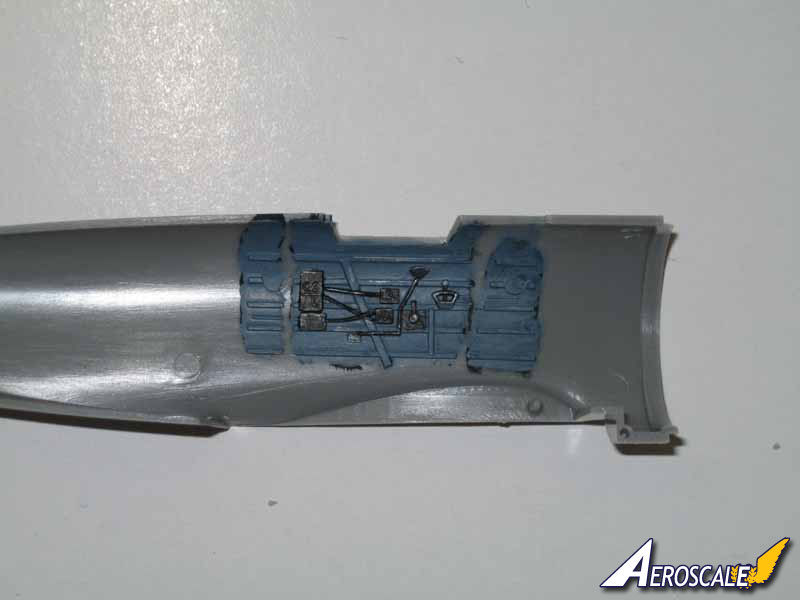
I began construction by repairing the broken parts. I painted the engine parts and then assembled the cockpit. I removed the ejector pin mark on the pilot's seat and thinned the sides down. Then I began studying how to paint the cockpit. There is a lot of discussion on the issue. The instructions say navy blue overall, but most sources I located online said a dark gray or blue gray, similar to intermediate blue, so I overpainted the navy blue with the intermediate blue. Instruments were painted black and detailed with a silver pencil.
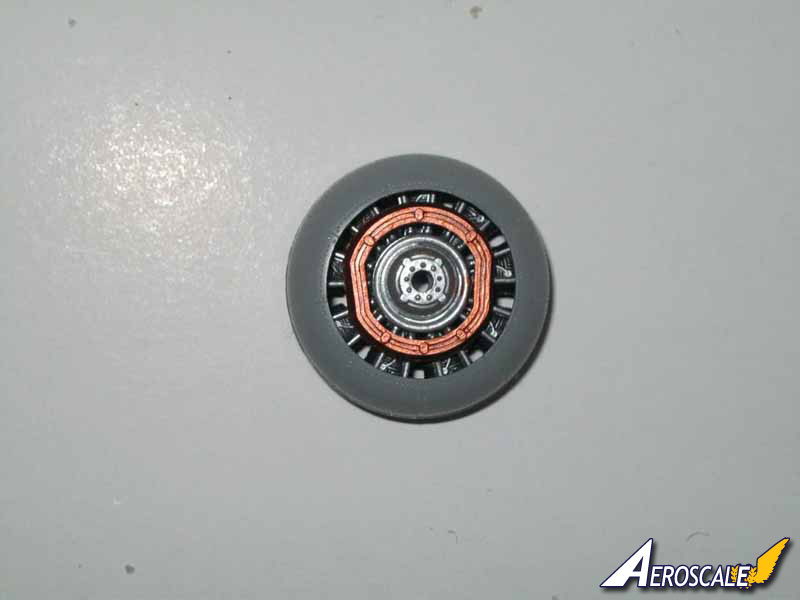
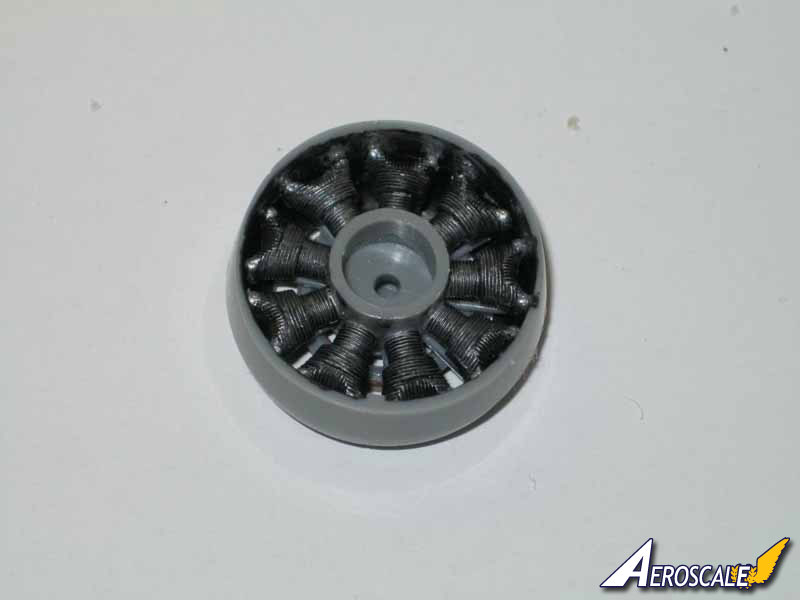
The engine cylinders were painted in MM non buffing steel and overpainted with MM burnt iron as a sort of wash. Push rods were painted MM chrome and the oil cooler was painted copper. The instructions are not too specific on assembly of these parts. It worked best to assemble the outer cowling and then push the assembled engine in to place. The oil cooler should protrude just slightly out of the cowling front.
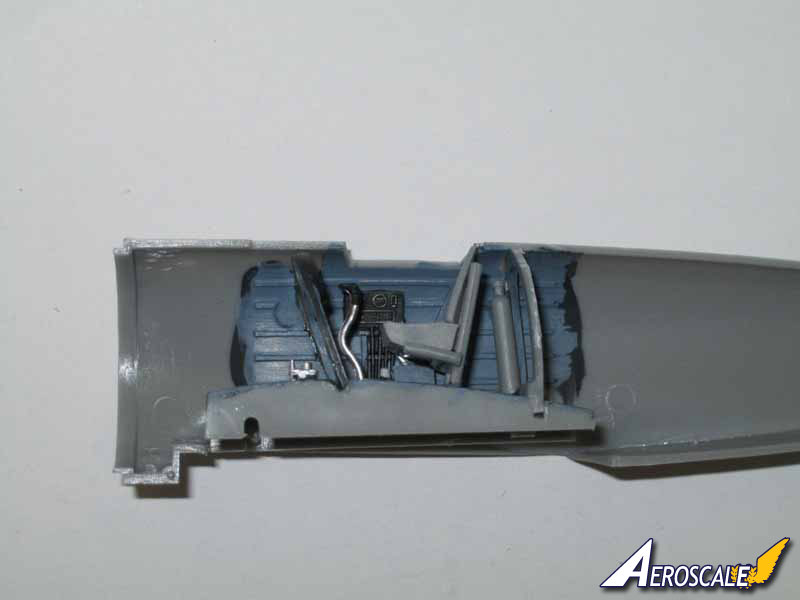
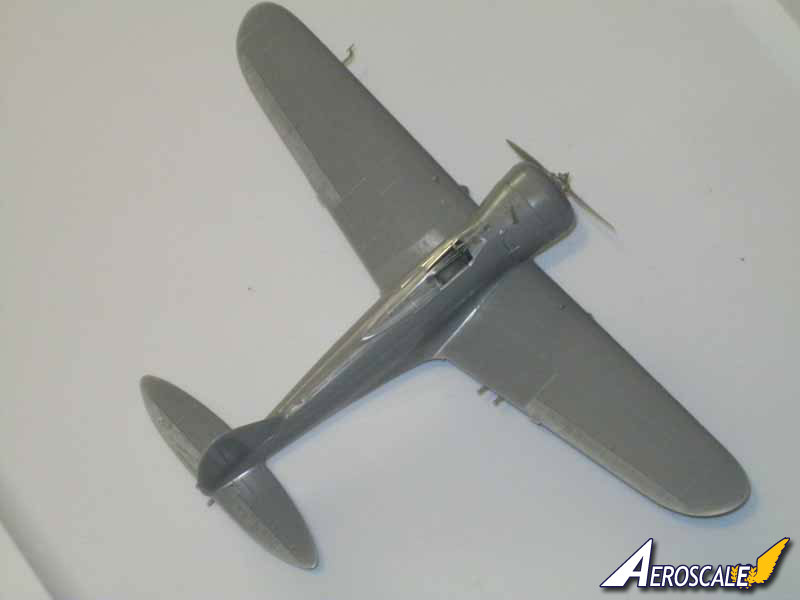
The fuselage halves lined up fairly well, as good as or slightly better than the other airplane kits I have built. However, I mounted the cockpit to one side first and left it to set. As a result it sits uneven. Better to leave it a little loose inside and then glue it together with the fuselage halves. The lower wing portion was then added. I had to file the fuselage a bit to get things to fit straight, and there are some gaps to fill. Again, not worse than other kits. Then the upper wing surfaces were added. Before I placed them I blocked the holes for mounting the external auxiliary fuel tanks and the gun camera as the former were used only for transport and the latter only in training.
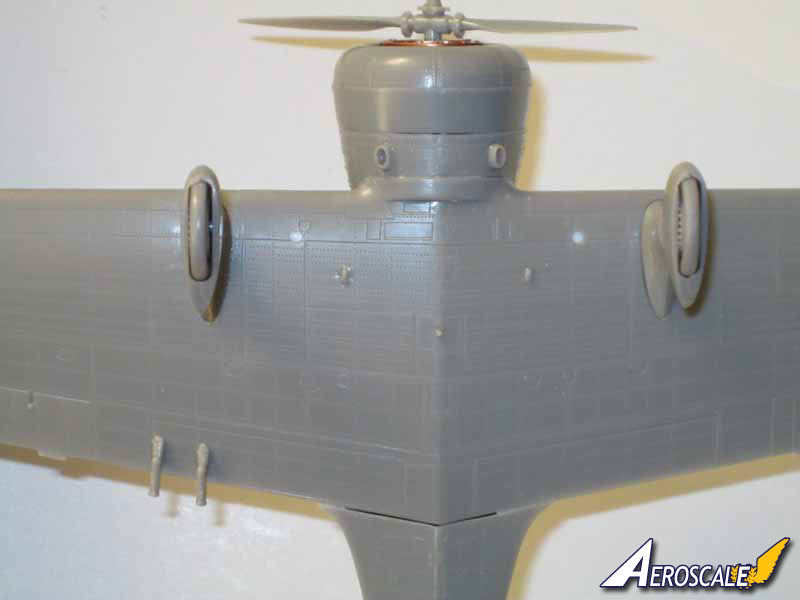
There is no firewall between the engine and cockpit, so if you shine a light through the canopy and look in the engine you can see all the way through. I won't be doing this so I didn't worry too much about it. I added the propeller and placed the engine assembly. It will also need some work to clean up around the edges. The landing gear was assembled, with the wheels facing bolt side out. Their fit to the wings was a little sloppy with the placement holes being slightly oversized. There are two parts that go on the lower edge of the right wing. I don't know what they are, and no one else who has built the kit seems to know either. I added them. Others have deleted them and filled those holes as well. Then the exhausts, gun sight, headrest and antenna were added. The pitot tube is somewhat oversized, but I wanted to keep the kit out of box. I haven't assembled the pilot figure yet, but the detail is very crisp, with some clean up needed for the seams and pour nubs.
I am going to go with marking option one, Maj Tateo Kato, China 1942, which uses the "A" model canopy with solid rear portion. The other two markings are for Lt Yohei Hinoki of 2nd company, China 1941 and S/Sgt Shigeru Tukawa, 1st company, China 1940, both of which use the "B" style canopy. Tukawa's aircraft shows the center portion of the canopy removed, which was common for pilots to do.
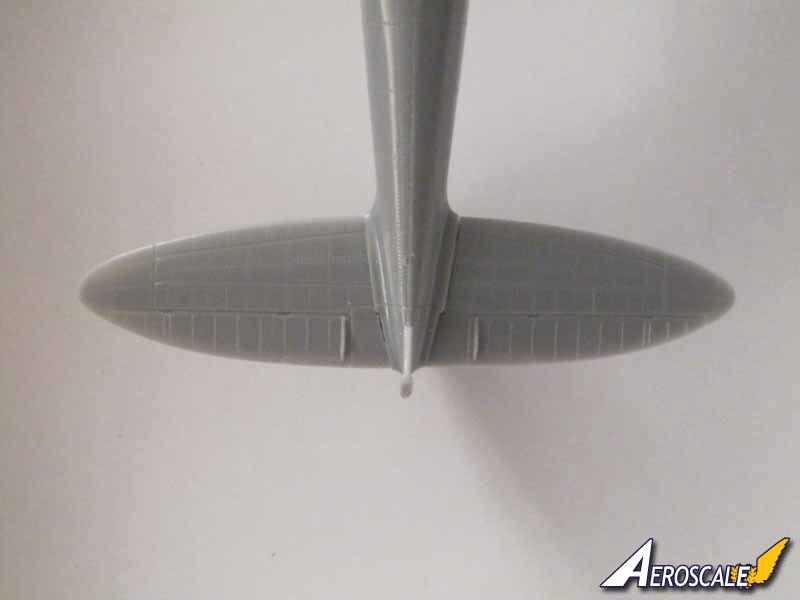
There are two nubs over the landing gear. Don't cut them off. It was a protrusion of the gear that extended when the aircraft was on the ground. This aircraft used a wooden skid on the rear in place of a landing wheel. When completed I compared it to a 1/72nd scale P-40 and a 1/48 scale P-47. It is almost the same length as the P-40 and is dwarfed by the P-47. This is a tiny aircraft. Paint scheme called out for the body is IJA Gray, but again there is significant discussion on just what that color can mean.
Conclusion
Overall, construction of the kit was simple. It would benefit from a clean up of the molds, or better, a re-tooling to address some issues, such as better fit to the wings of the landing gear, improved detail of the engine and cockpit and separate control surfaces. The instructions would benefit from some clarification as to what the optional parts are used for, such as the camera and fuel tanks. The decals are clear and bright, which is good as they are the newest feature in the kit, being released just this year. It was top of the line 35 years ago, but it needs some modernized attention. If you are looking for a quick build of an interesting subject, this would be a good model to go with.
Please remember, when contacting retailers or manufacturers, to mention that you saw their products highlighted here - on AEROSCALE.
SUMMARY
Highs: Easy assembly and good external surface detail.Lows: Poor fit of some parts, somewhat clunky details for engine and cockpit. Verdict: This is a highly buildable kit for all skill levels. Easy enough to be simple, but available aftermarket for the super detailer.
Our Thanks to Hobbico! This item was provided by them for the purpose of having it reviewed on this KitMaker Network site. If you would like your kit, book, or product reviewed, please contact us.
About Russ Amott (russamotto) FROM: UTAH, UNITED STATES
I got back into the hobby a few years back, and wanted to find ways to improve, which is how I found this site. Since joining Armorama I have improved tremendously by learning from others here, and have actually finished a couple of kits. I model to relax and have fun, but always look to improve. ...
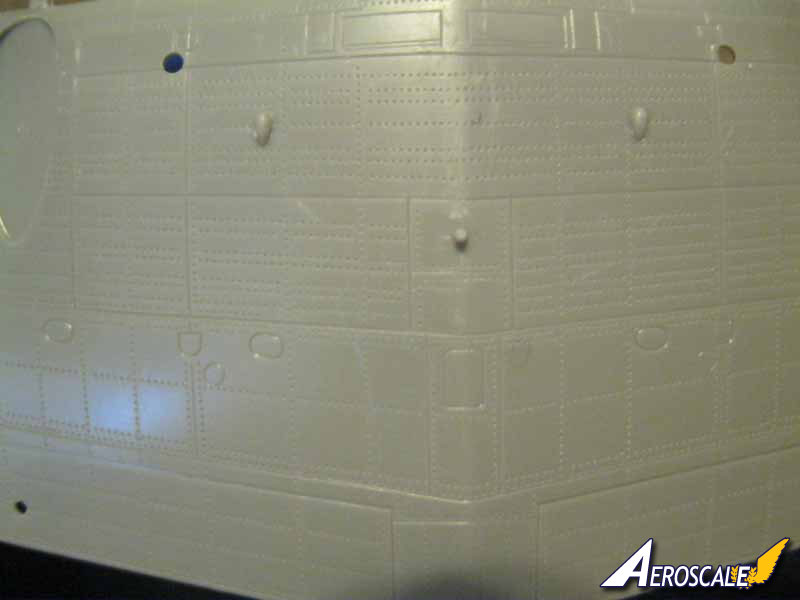
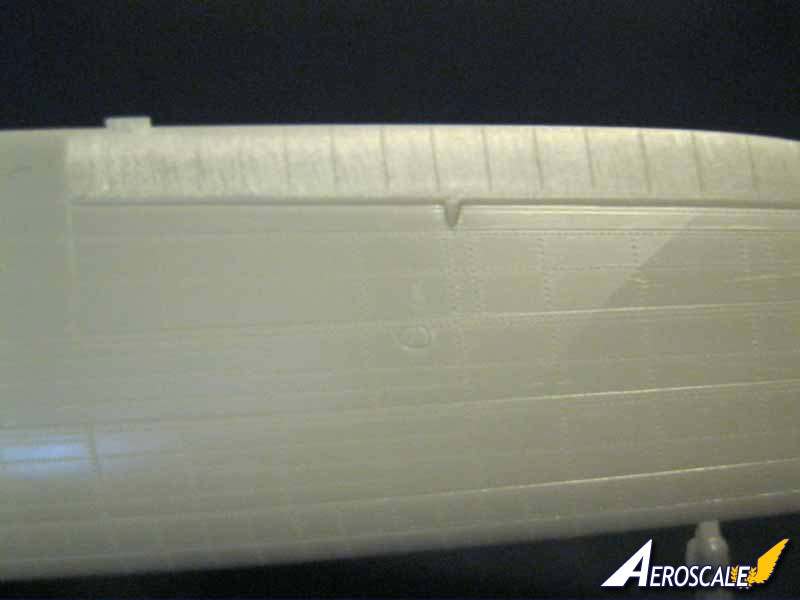
This is an incredibly well-made and well detailed kit. The engraved and rivet detail is superior to anything that has been done since in 1:48th scale, and rivals some current 1:32 scale riveting in subtlety.
This kit would greatly benefit from the canopy set from Falcon/Squadron, because althought the kit canopy is accurate and clear, the telescopic sight in the windshield makes the plastic's excessive thickness obvious, and this is compounded by an incorrect "slot" opening under the telescope to allow easy assembly, the scope being something which should be instead be fitted directly into a simple hole...
The extreme smallness of the canopy also makes any thickness issue stand out...
Note the only real outline problem of this kit is the angle of the leading edge of the fin which is a bit too sloped. A small amount of trimming should be very easy to do without major damage..
Gaston
Rowan, thanks for getting this up. Hey, 10200 more posts and I'll catch up to you.
Marty, thanks for the info. I agree on the rivet detail. Very fine. The kit deserves some modern TLC from Hasegawa to fix up the sprues a little.
Arseny, sorry about the lack of detail on the decals and paint schemes. Overall color is IJA Gray. The online debates about the color are extensive and the exact color is a little confusing. Some say close to Tamiya IJA Gray, and others say it should be more of a sage green.
Marking schemes for the first aircraft are yellow bands on the fuselage and wings and a yellow arrow on the tail. The second option has a red arrow on the tail and a red band diagonally on the fuselage and wings. The third option has yellow bands on the fuselage, but more narrow than on the first, and yellow bands on the wings. The decals appear cleanly printed, but built kits refer to them being a little thick.
I haven't yet painted and applied the decals as the weather has been too cold and windy.
Nick, I'm glad you like the subject.
Russ, thanx for update. I've also read about the thick decals, that's I was looking for the colour schemes - hoping they can be easily painted with masks.
Thanks anyway for your efforts!
Hi Russ,
I appreciate the review--even more so as you built the model! Looking forward to her painted and decaled.
I built this little model long ago, and have another in the works. True as you reported, the detail is a little basic compared to today's latest-greatest, but still competitive. Here she is:


Comments