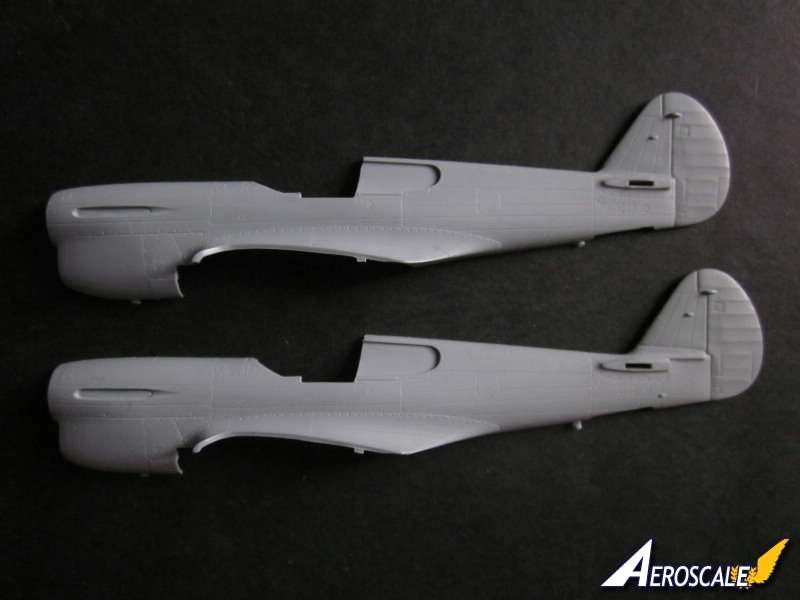
Due to it's powerplant, the Alison V-1710-39 engine, the P-40 E Warhawk and the Kittyhawk Mk IA had a low performance at high altitudes. Curtiss tried to resolve the poor performance at altitude by installing licence built Rolls Royce Merlin 28 engines into the P-40. The P-40 F/MkIIA powered by a Packard Merlin engine, featured different air ducts, nose panel covers and enlarged wing fuel tanks. The rest of the airframe was the same as the P-40E. The first prototype of the new P-40F took of on the 30th June, 1941. After successful trials 669 P-40F-1 were ordered. Subsequently stability problem arose and the aircraft was redesigned and built with a longer fuselage of 48cm. This lengthened fuselage became a standard feature of all P-40 versions from the F model.
The P-40F were used by the US Army [designated the Warhawk] and other Allied Forces. Serving with British and Commonwealth Forces the P-40 was known as the Kittyhawk. Between 1941 and 1944, however, the P-40 played a critical role with Allied Air Forces in three major theatres: North Africa, the Southwest Pacific and China. It also had a significant role in the Middle East, Southeast Asia, Eastern Europe, Alaska and Italy. The P-40's high altitude performance was not as critical in those theatres, where it served as an air supremacy fighter, bomber escort and fighter bomber.
In theatres where high altitude performance was less important, the P-40 proved an effective fighter. Although it gained a post-war reputation as a mediocre design, suitable only for close air support, more recent research including scrutiny of the records of individual Allied squadrons indicates that the P-40 performed surprisingly well as an air superiority fighter, at times suffering severe losses, but also taking a very heavy toll on enemy aircraft. The P-40 offered the additional advantage of low cost, which kept it in production as a ground attack fighter long after it was obsolete in air superiority.
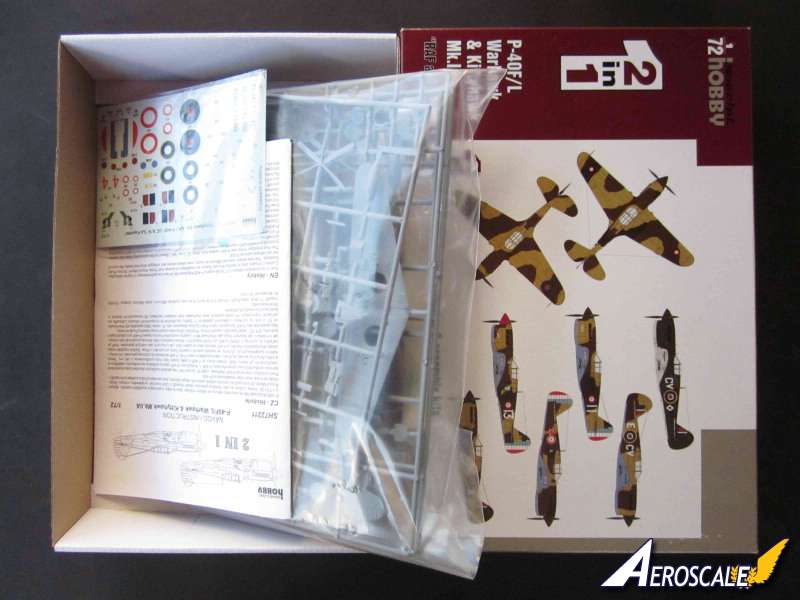
First thing to check on opening the box is to see which version is supplied, the long or the short fuselage P-40F. Well the good news is that both are supplied. Strange it does not mention this fact on the box cover. Contents come in a sturdy top opening box. All items are bagged, the kits glazing and decals are wrapped separately. The photo etched [PE] and the film of instruments are bagged with the decals.
Contents.
Included are:
8 x light grey plastic sprues.
2 x transparent plastic sprues.
1 x small sheet of decals.
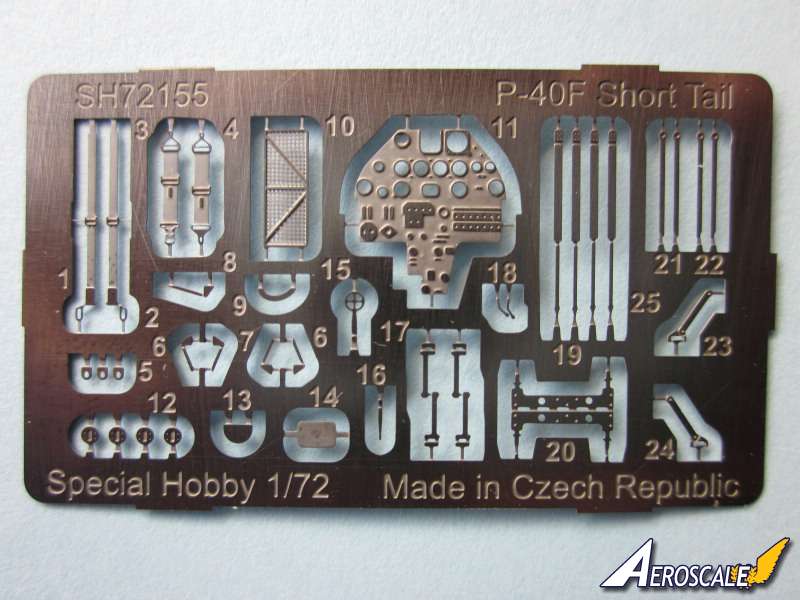
2 x fret of PE parts.
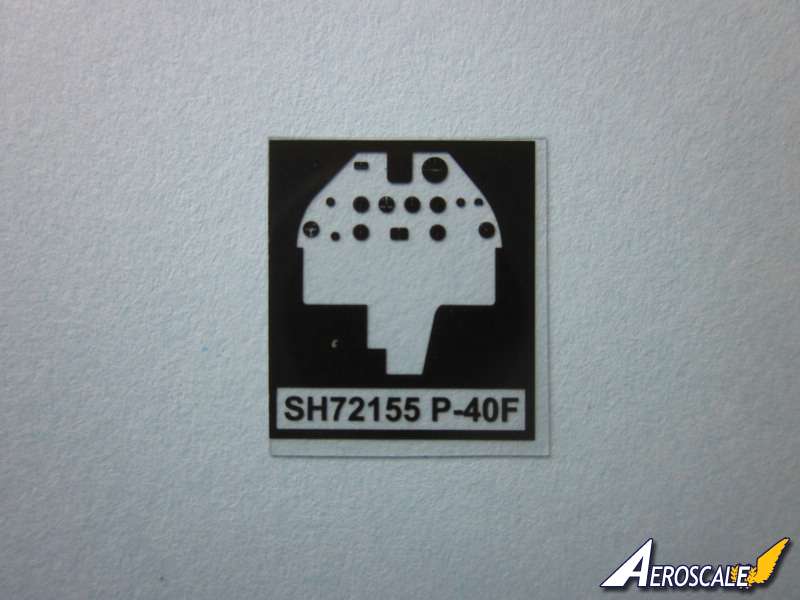
2 x photo instrument faces.
1 x instruction manual.
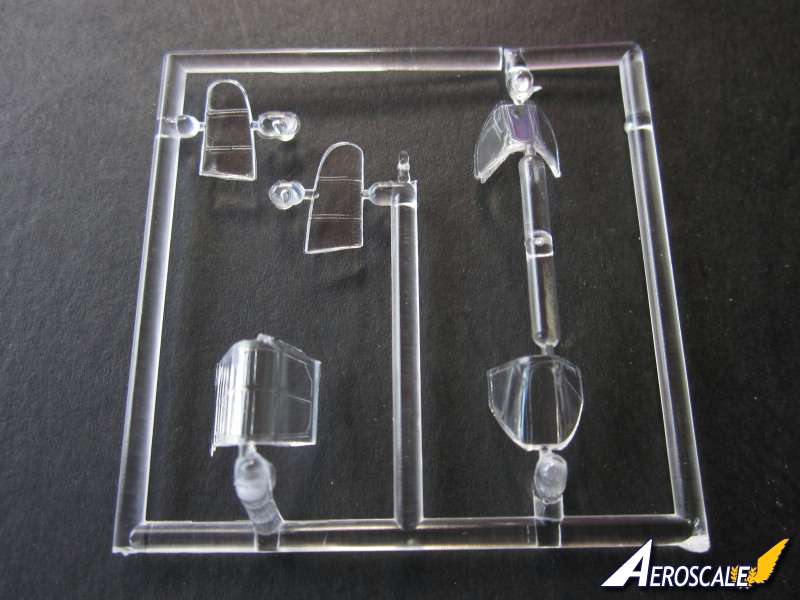
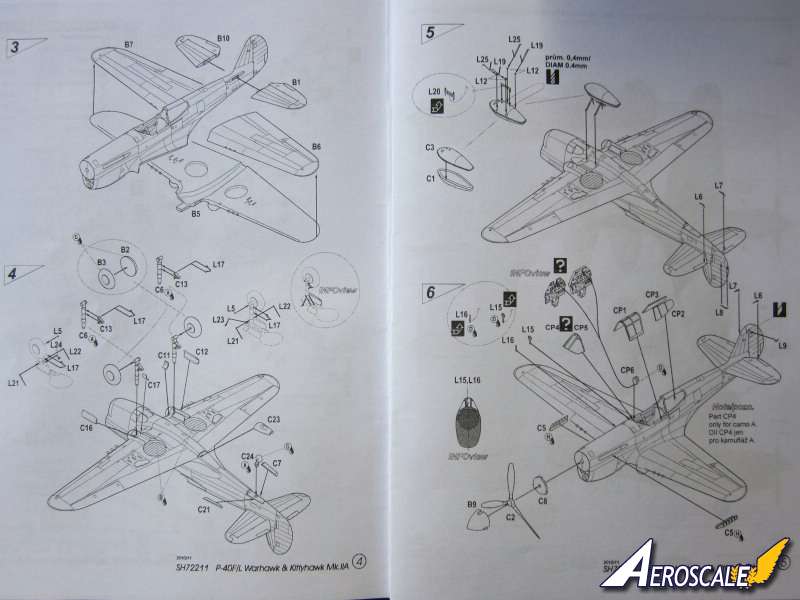
I compared the fuselage and wings to references that I have and everything seems to be in the correct place. The cockpit is made up from 10 plastic parts. The components for the cockpit include separate floor, front and rear bulkhead, pilots seat, sidewalls, instrument panel, control stick, rudder pedals and a head rest. There is a nicely detailed instrument panel with low relief details for those who hate PE parts. For those that love their PE parts there is a lovely PE instrument panel and a tiny slither of film with instrument faces printed on them. If you look closely at the film there is some exquisite detail on there. Whether you will see it once it is in place is doubtful, but it's there for anyone wanting to examine the cockpit with a magnifying glass. It is a superb bit of work particularly for this scale. Seat harnesses are provided as PE parts. Another PE addition to the cockpit is the minute ring and bead sight. There is a scrap drawing in the instructions that illustrates the fact that the sight is not placed on the centre line of the aircraft, but slightly of to the starboard. A pity there are no PE rudder pedals to replace the rather slab like plastic ones, but that is being downright picky. The sidewalls come as separate injected plastic parts and are well detailed. Be aware that there is a transparent plastic part [CP6] that makes up the gun sight that could be easily overlooked. So an excellent cockpit is provided straight out of the box.
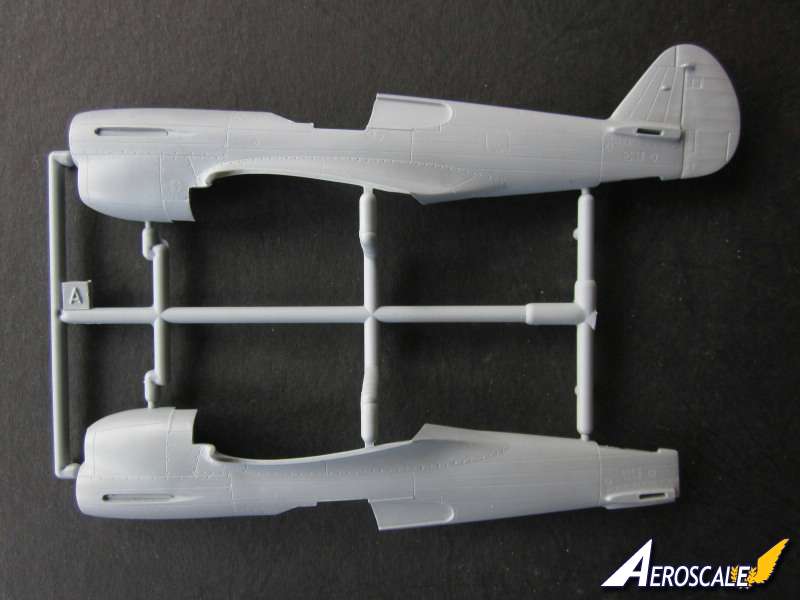
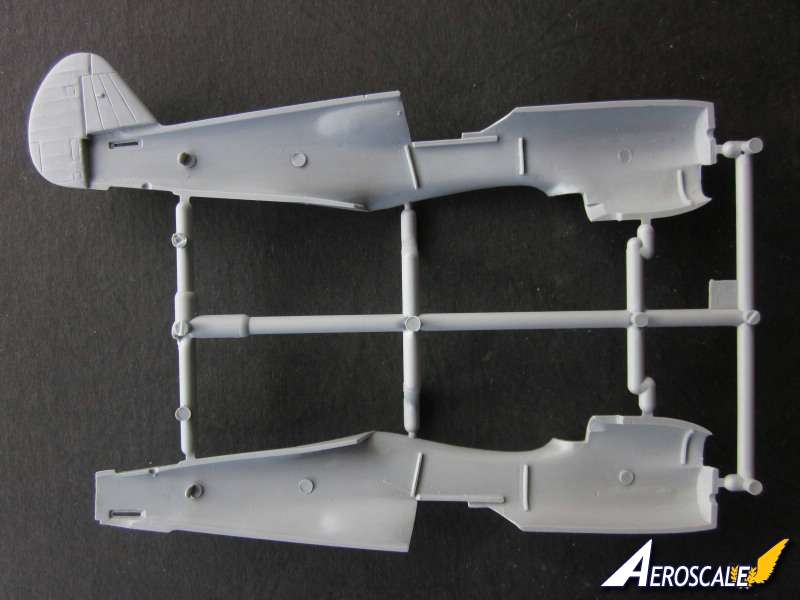
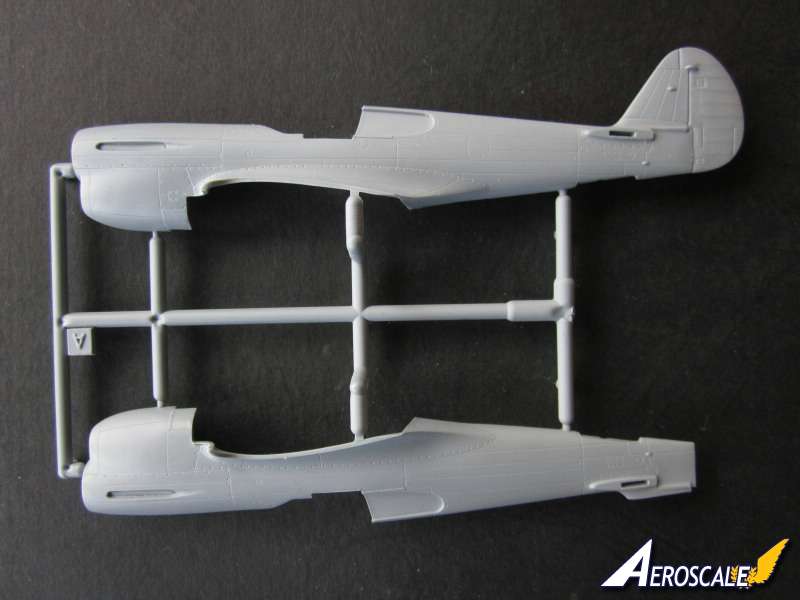
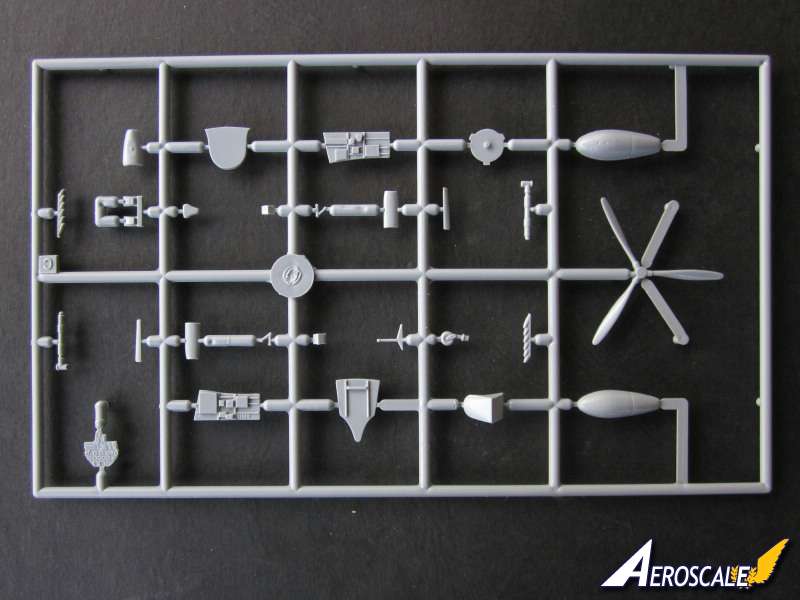
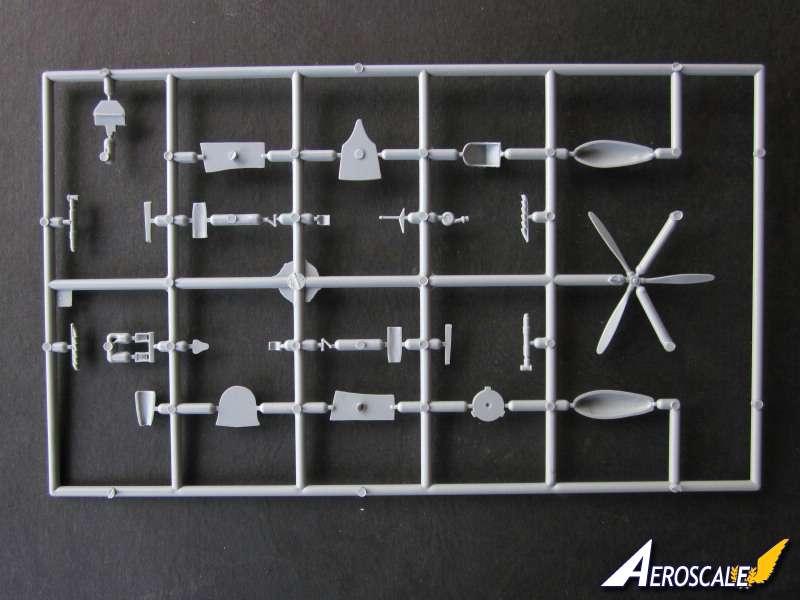
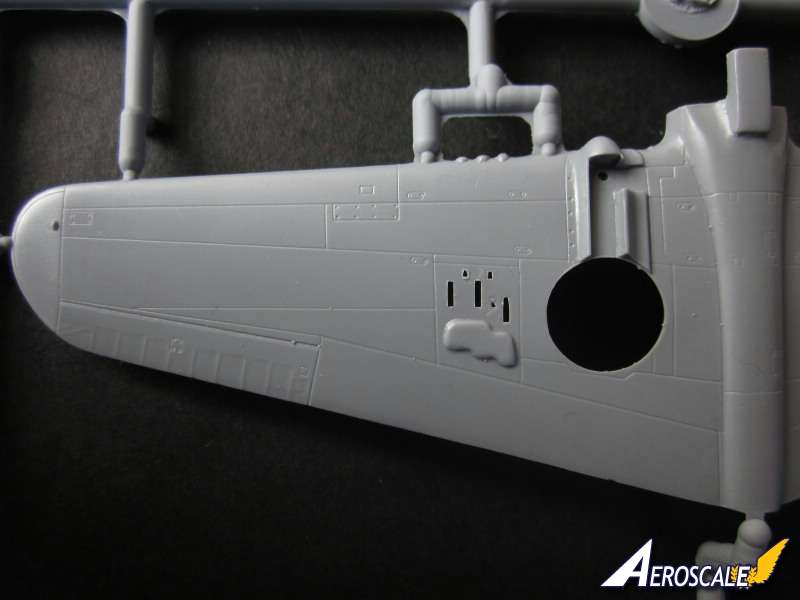
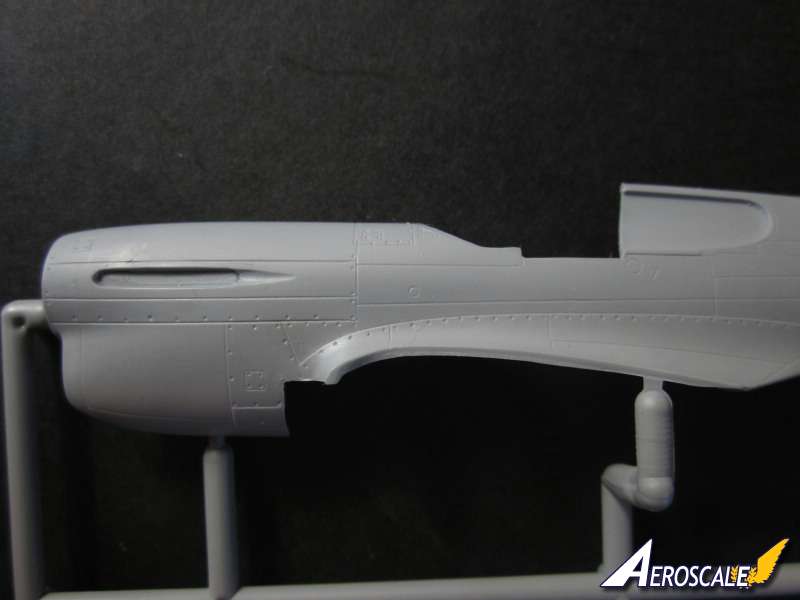
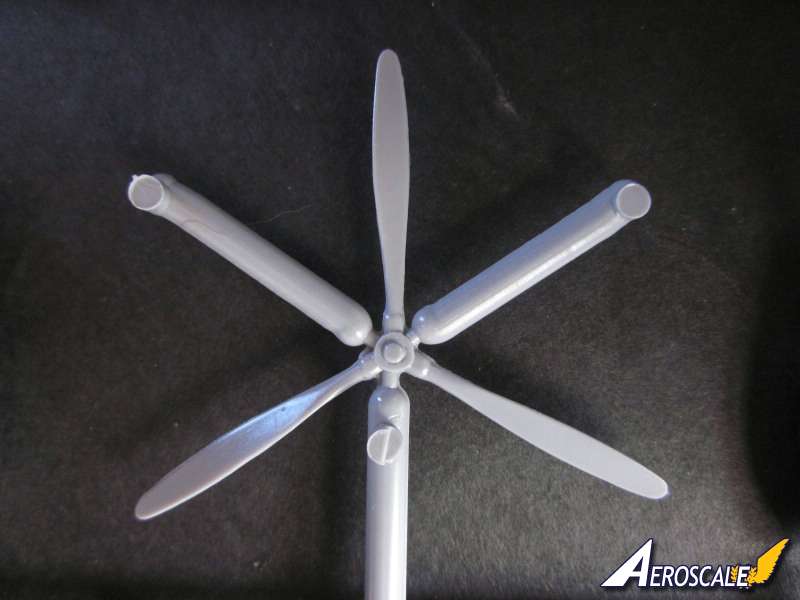
The two different fuselages are split vertically. There are no locating pins or holes to aid the joining of the two halves. The radiator is the correct type that kept the Packard Merlin engine cool. A very good PE coolant radiator grill is provided. This replaces the very acceptable plastic injected radiator. A tiny PE flap is provide for the oil cooler vent to the radiator, presumably this controlled the airflow through the oil radiator. A nice touch. The radiator needs to be assembled before the fuselage halves are joined. The fishtail exhaust look fine, although there are no representation of the exhaust slots. First glance at the prop had me thinking there was something amiss as it looks as if it is has five blades. The three bladed prop looks excellent and comes in one piece. The shape is very good with thin and slightly twisted blades, as it should look. Some care will be needed to release the unit from the sprue. The spinner also looks accurate and comes in two pieces, the spinner itself and the back plate.
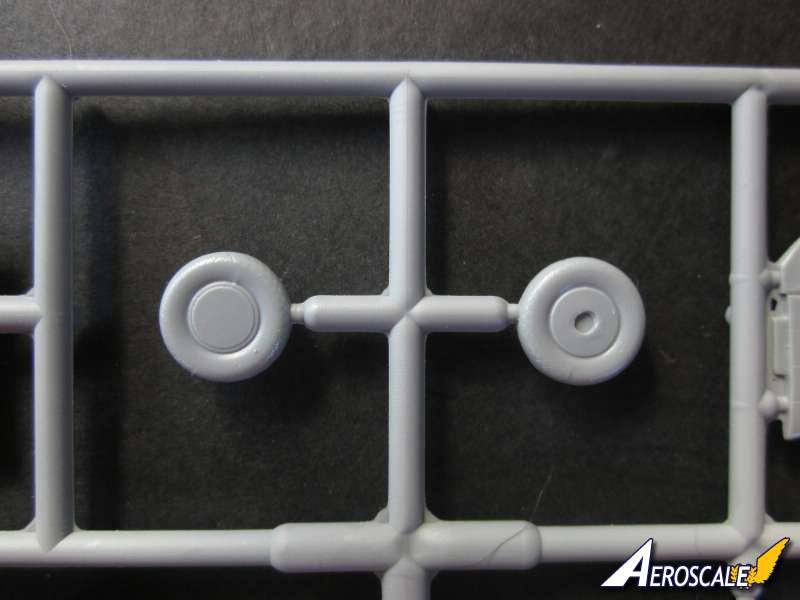
The undercarriage is good. Undercarriage doors are thin at the edges. Torque links are supplied as plastic parts, although there are some PE details to be added. Each main wheel is split vertically. Presumably this is to make it easier to attach the wheels to the ceiling of the wheel bay if you want to finish your model wheels up. Not much detail on the wheels, just a hint of a cross tread on the tyres. The locating hole on the wheel hubs for the axle look a little clumsily done. Rear wheel and oleo are one piece and looks fine.
One drop tank is supplied and comes in two parts split horizontally. The filler cap is finely moulded. Sway straps are supplied as PE parts, drilling two 0.4mm holes is required to fit them. There are no guide marks to assist in locating the points where to drill.
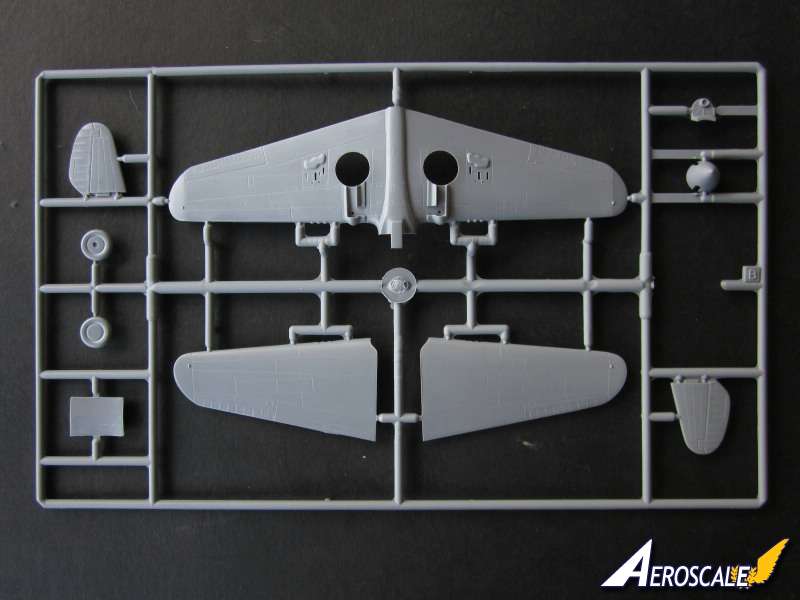
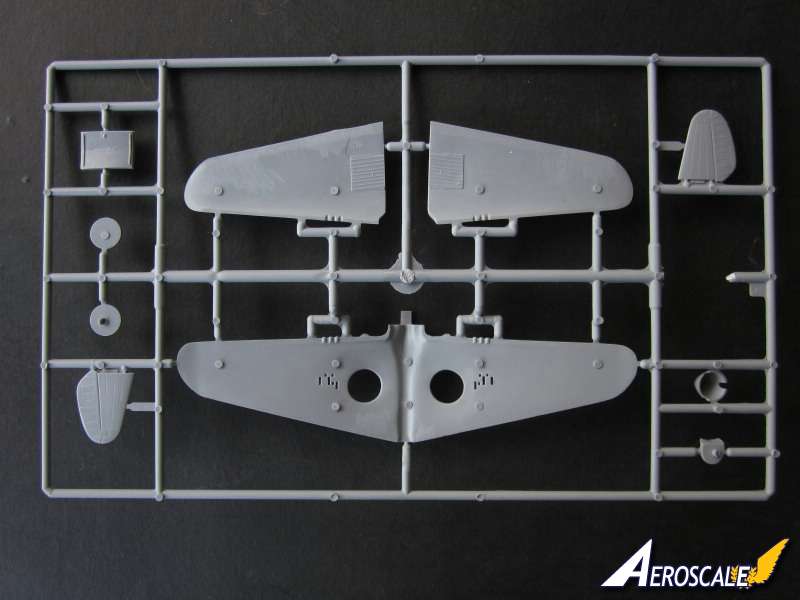
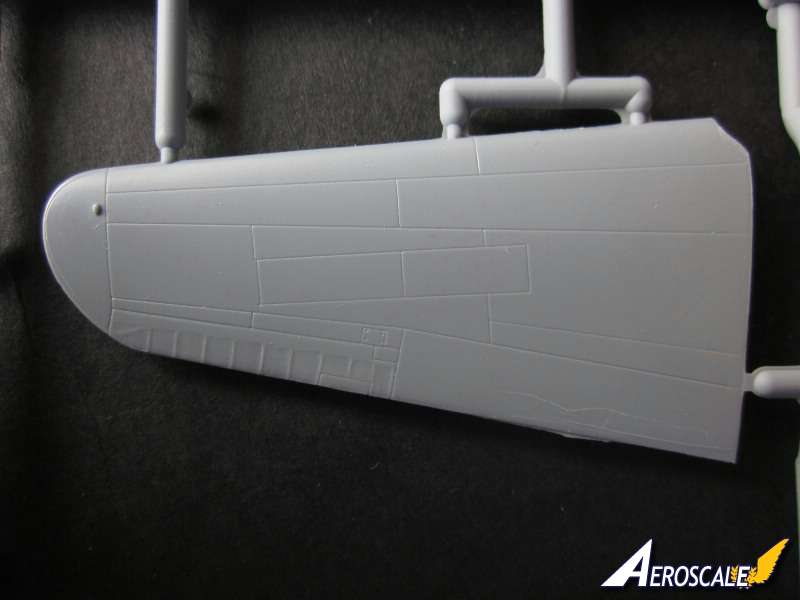
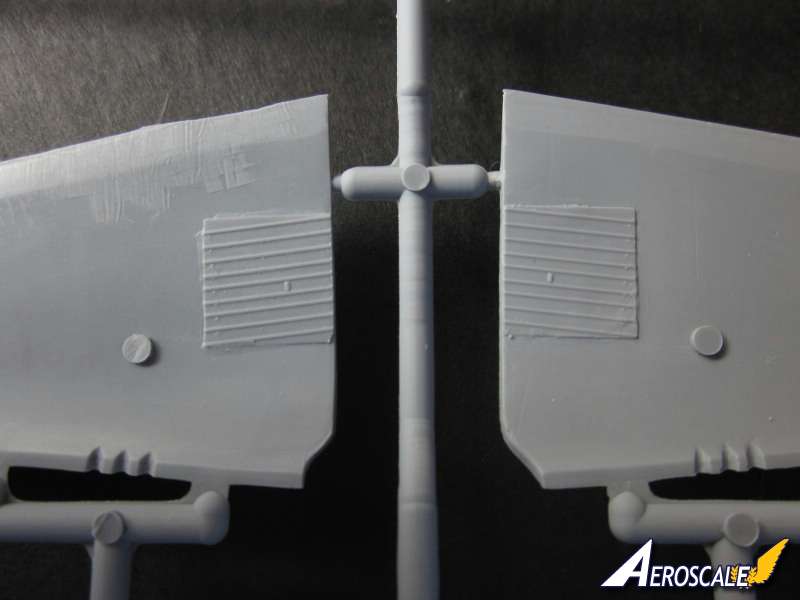
The wings come in three parts, the one piece lower wing and the two part upper wing. The sprue attachment will need to be carefully removed to avoid damaging the leading edges of the wing. There are some very fine recessed panel lines. All control surfaces on the wing, tail and rudder are moulded integrally. So if you feel the urge to drop the elevators or flaps, then some very careful surgery will be required. The representation of the fabric control surfaces is very well done. The lower wing has six little nondescript bumps that represent the machine guns. You will probably want to remove these and replace them with thin tubing. The six cartridge ejector holes are cut out. The upper wings have very fine detail where the ceiling of the undercarriage bay is located. The inside surfaces of all three parts that make up the wings have some long ejector stubs that may need reducing in height before cementing the wings together. The fairing around the retracted under carriage oleo is very well done. This is where the plastic is at it's thickest and one would normally expect to see sink marks here. Not here, superb.
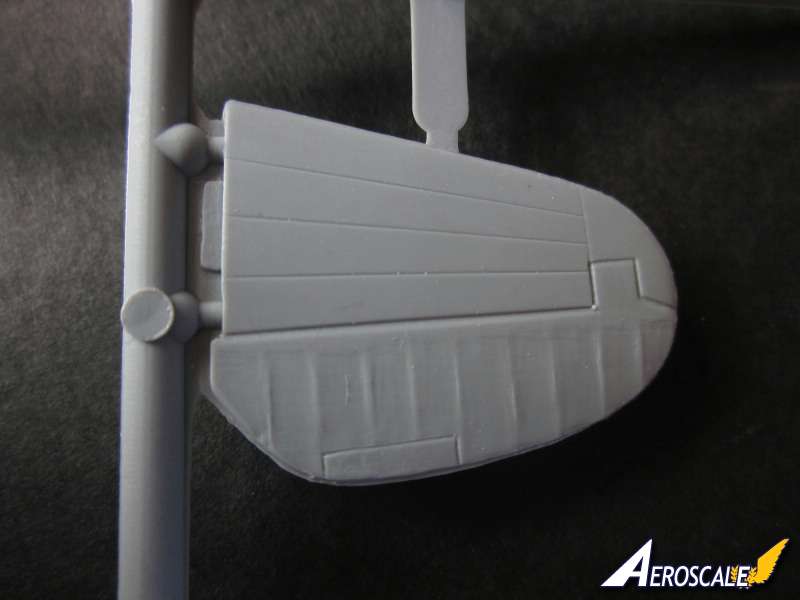
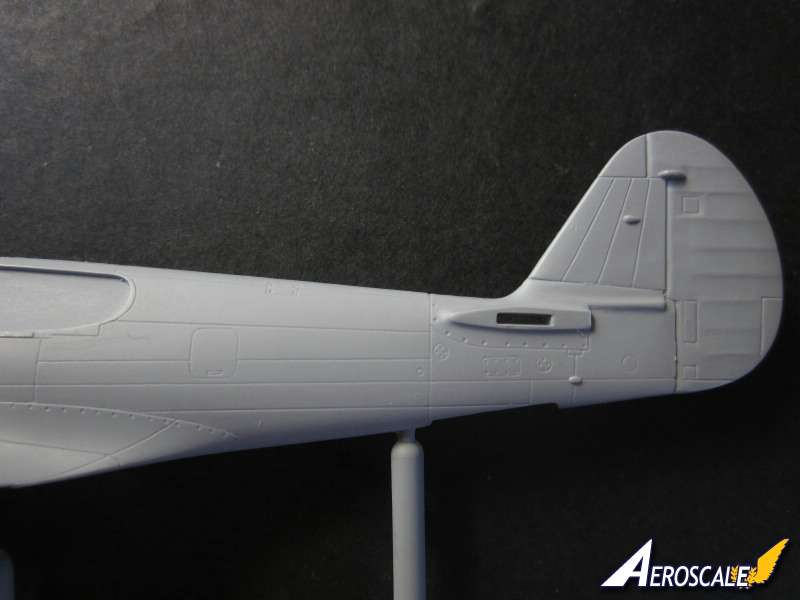
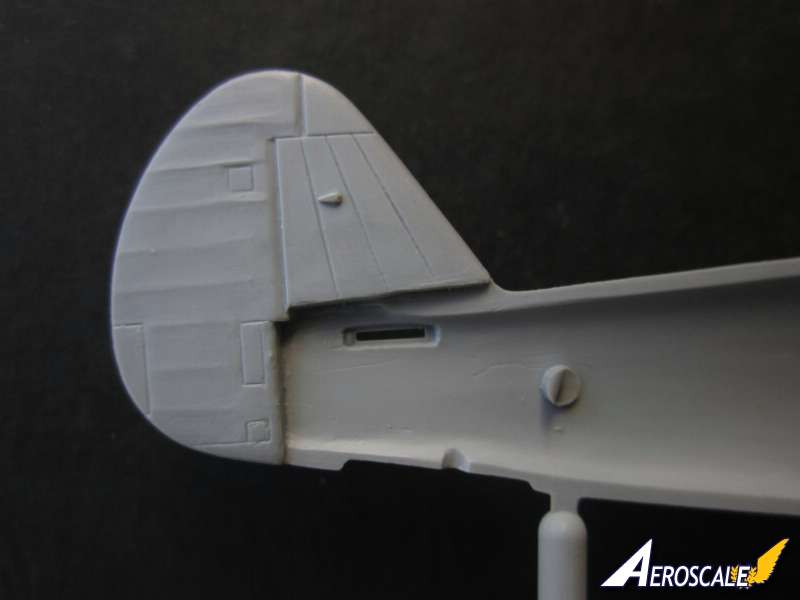
Each tail plane is one piece and trailing edges are thin and there is no sign at all of ejector marks. The tail planes have locating stubs to provide a positive attachment point when joined to the fuselage.
Special Hobby supply a separate windscreen, canopy and rear glazing, so the canopy can be displayed open to show off all that lovely detail. Two different windscreens are provided, one of them has the additional frame on the left hand side. This windscreen is fitted to option A. The edges of the canopy will need some cleaning up as there is a hint of flash.
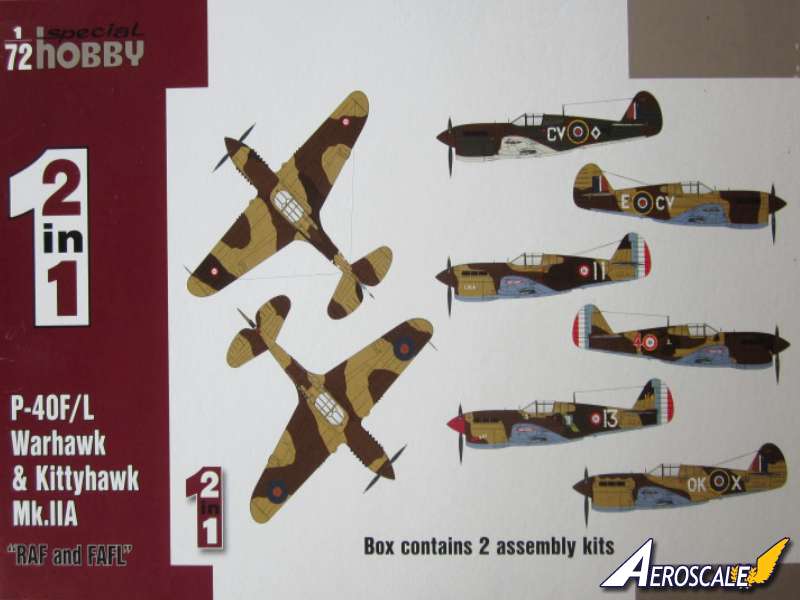
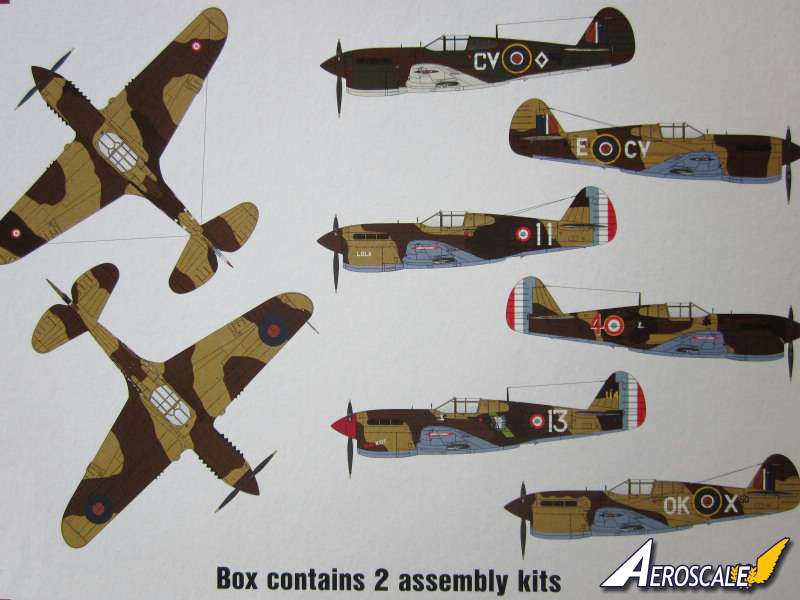
Markings.
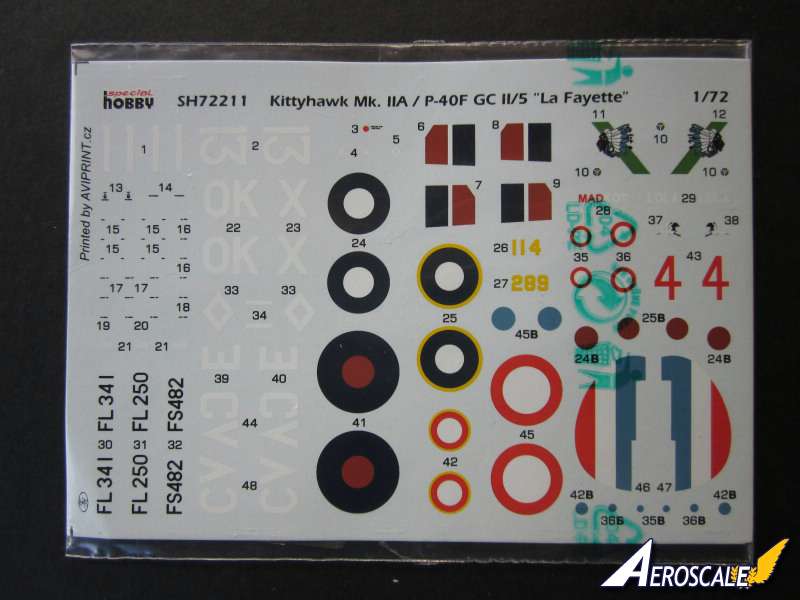
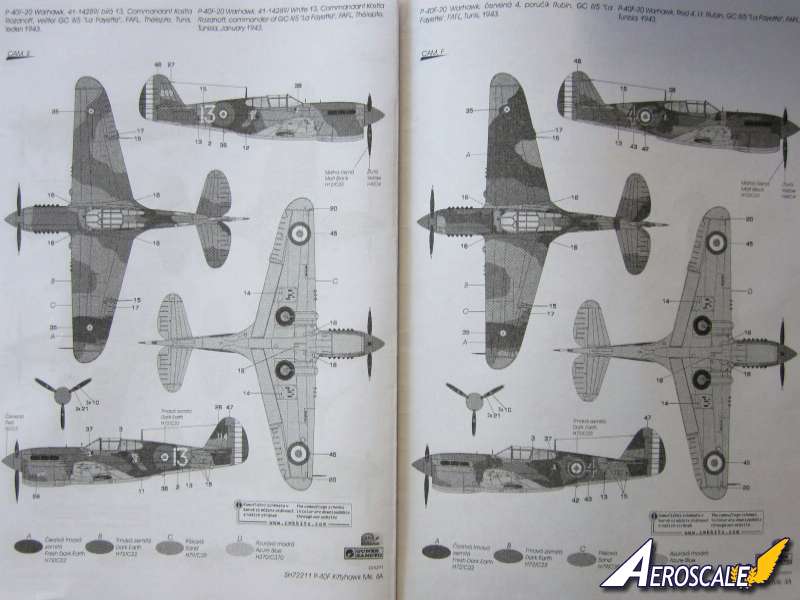
Decals are very well printed with good colour density and registration. Carrier film is negligible. The centres for both British and French cockades are printed separately. There are some tiny stencils included on this sheet, mostly No Step and Hand Off. Some interesting markings for the three French aircraft all with the La Fayette Escadrille. Aircraft 11 has Lola painted on both sides of the radiator housing. Aircraft 13 has the famous artwork of the Indian wearing a head dress painted on both sides of the fuselage just aft of the canopy. Also on the nose of 13 is the name Madkot. Mad is in red and kot is in white. Aircraft no 4 features another symbol of the La Fayette Escadrille, a flying stork, painted just aft of the canopy on both sides of the fuselage. Decals are printed by Aviprint.
Six marking options are included, I have noted which aircraft is the short fuselage [SF] and long fuselage [LF]. A. Kittyhawk MkIIA [LF] FS482, CV-<>, RAAF 3 Squadron, Foggia, Italy, October 1943. B. Kittyhawk MkIIA [SF] FL341, CV-E, RAAF 3 Squadron, Malta, June 1943. C. Kittyhawk MkIIA [SH] FL250 OK-X, RAF [RAAF] 450 Squadron, Kairouan, Tunisia. D. Warhawk P-40F-1 [SF] White 11 Lola, GC11/5 la Fayette, FAFL, Tunisia, 1943. E. Warhawk P-40F-20 [LF] White 13, Commandant Kostia Rozanoff, Commander of GC 11/5 la Fayette, FAFL, Thélepte, Tunisia, January 1943. F. Warhawk P-40F-20 [LF] Red 4, Lt Rubin, 11/5 la Fayette, FAFL, Tunisia, 1943.
The RAF and RAAF aircraft have dark earth and sand disruptive camouflage on the upper surfaces and azure blue on the under surfaces. The French aircraft have dark earth, fresh dark earth and sand
disruptive camouflage on the upper surfaces and azure blue on the under surfaces.
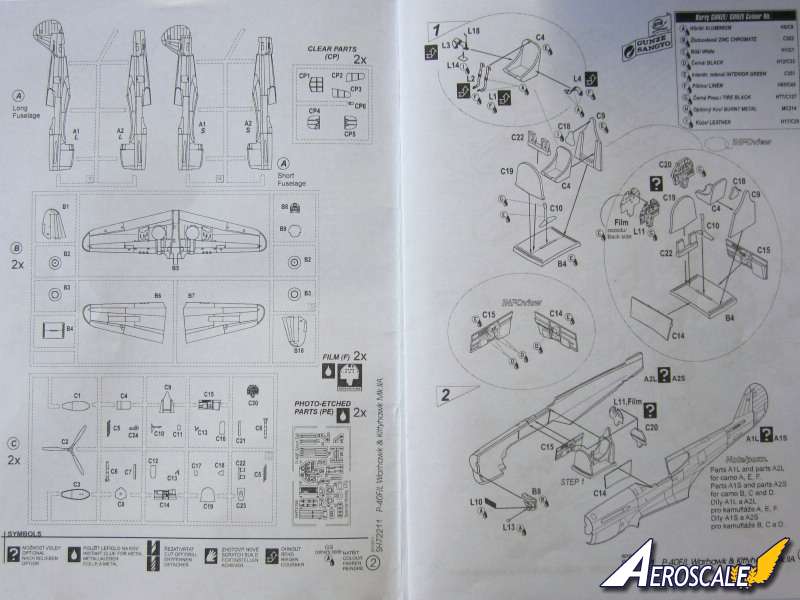
The instructions are in the form of a 12 page folded A4 manual. Exploded diagrams are all black line drawings and very understandable. The paint guides are in black and white, the colour is indicated by dot matrix shading. I did have a bit of a problem trying to differentiate between the three different colours of the upper surface of three la Fayette aircraft in the painting instructions. It would be worth breaking out the colour pencils and colouring the areas in the paint guides to avoid confusion before painting.
Conclusions.
I have built the old Airfix, Matchbox [in two shades of blue] and the Academy 1/72 scale P-40's and this is undoubtedly the best one by some distance. The excellent shape, subtle panel lines and rivets, the representation of the fabric surfaces and the fit of the components and the choice of markings make this an excellent kit and probably the best P-40F/L in 1/72 scale. The detail is right up there amongst some of the best kits I have seen. There is also the bonus of two kits with this release, both short and long bodied P-40F fuselages are provided. Interestingly this kit cost around £22 in the UK. For the forthcoming Special Hobby release of the P-40F Warhawk Guadacanal the price for that kit with one aircraft will be around £17. So this 2 in 1 release is a real winner.
Many thanks to Jean-Luc for this sample.
SUMMARY
Highs: The excellent shape, subtle panel lines and rivets, the representation of the fabric surfaces and the fit of the components and the choice of markings make this an excellent kit and probably the best P-40F/L in 1/72 scale. Lows: I did have a bit of a problem trying to differentiate between the three different colours of the upper surface of three la Fayette aircraft in the painting instructions.Verdict: Excellent. This "2 in 1" is good value for money when taken against the price of a single P-40 kit from Special Hobby. Highly recommended.
Our Thanks to Special Hobby! This item was provided by them for the purpose of having it reviewed on this KitMaker Network site. If you would like your kit, book, or product reviewed, please contact us.


Comments