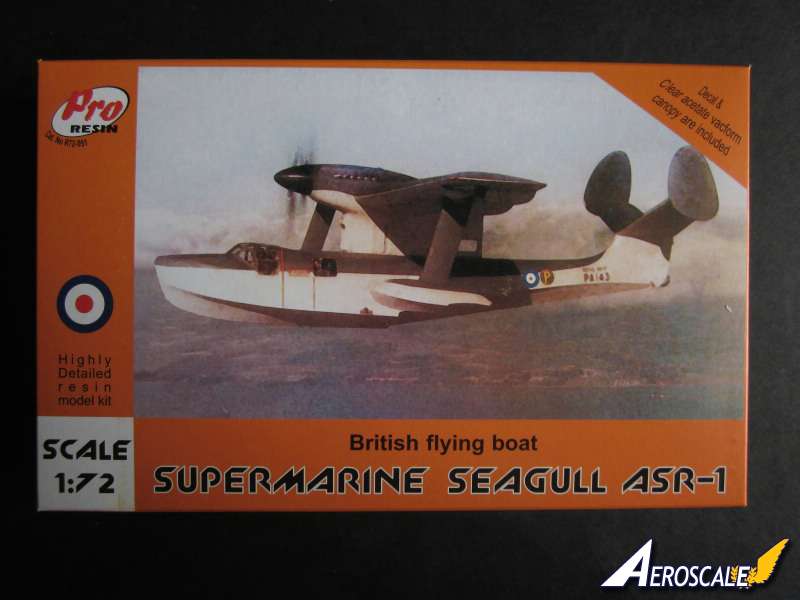
Olimp Models latest resin release is the Supermarine Seagull ASR-1. Olimp is well known for producing many British prototypes in resin over the years. So how does Olimps model of Supermarines last flying boat look?
History.
In October 1940, the British Air Ministry issued Specification S12/40 to Supermarine and Fairey for a catapult-launched, amphibian, reconnaissance and spotter aircraft to replace the Supermarine Walrus and Supermarine Sea Otter. An order for three prototypes of Supermarine's aircraft was issued in April 1943. There was an interruption in design due to the necessity of moving the Supermarine design office, after the bombing of the facility at Woolston. Further delays were caused by the extensive wind tunnel testing that was needed and the change from a Rolls Royce Merlin to the more powerful Rolls Royce Griffon. Also, the design specification was changed in 1944 to a new requirement, S.14/44 (later S.14/44/2), the role of the aircraft being changed from reconnaissance and gunnery spotting to Air Sea Rescue. This change removed the four-gun turret the design had featured.
The first prototype Seagull, serial no PA143, subject of this kit, first took off on 14 July, 1948 from Southampton Water, flown by test pilot Mike Lithgow. The second aircraft - PA147 - flew in September 1949, and was used for carrier trials on HMS Ark Royal later in that year, during which it demonstrated the capability to carry five passengers. Experiments were also carried out with rocket assisted take-offs. The prototypes could be seen with variuos tail combinations to try and cure the problems of instability in the yaw axis. By the early 1950s, helicopters were taking over the air-sea rescue role. In 1952, the two completed prototypes and the partially-built third aircraft, PA152, were scrapped.
Olimp have chosen to reproduce the first prototype, which had just the two vertical tail surfaces.
The Kit.
The top opening box is 210 x 130 x 035 mm in size. The tray is very sturdy, made up of two ply card offering a good level of protection for the contents if you are having it delivered via the post. The image on the box cover is a photograph of the prototype contained in the box. All the resin components and the vac formed canopies are contained in a resealable plastic bag. The canopies were not packed separately, but seemed absolutely fine. The instructions and decals were not in the bag.
Contents.
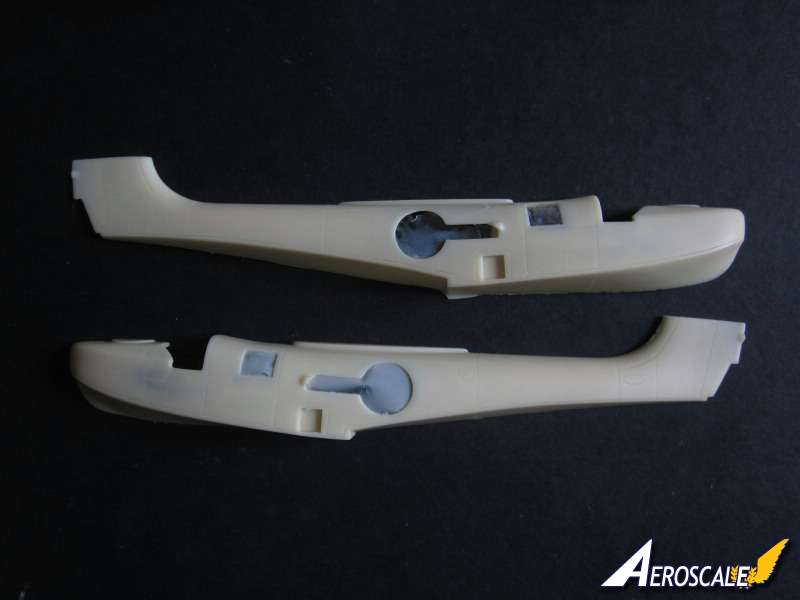
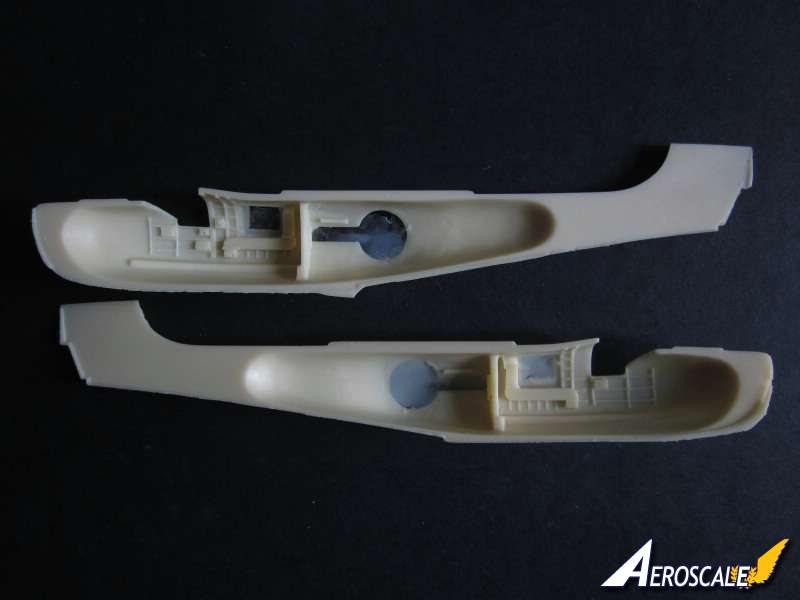
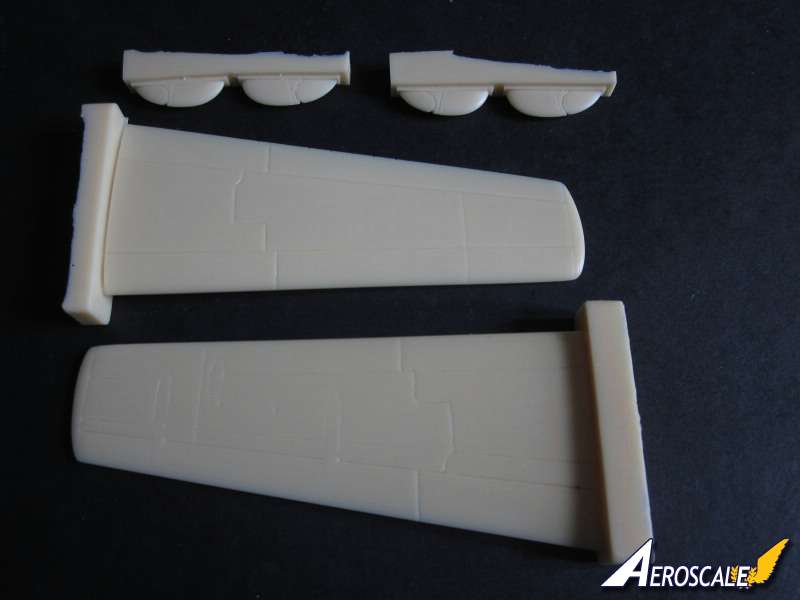
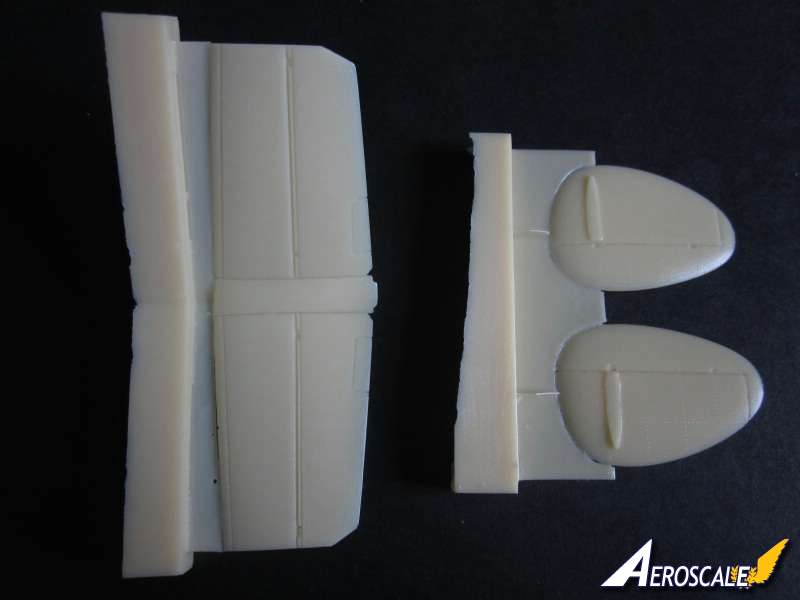
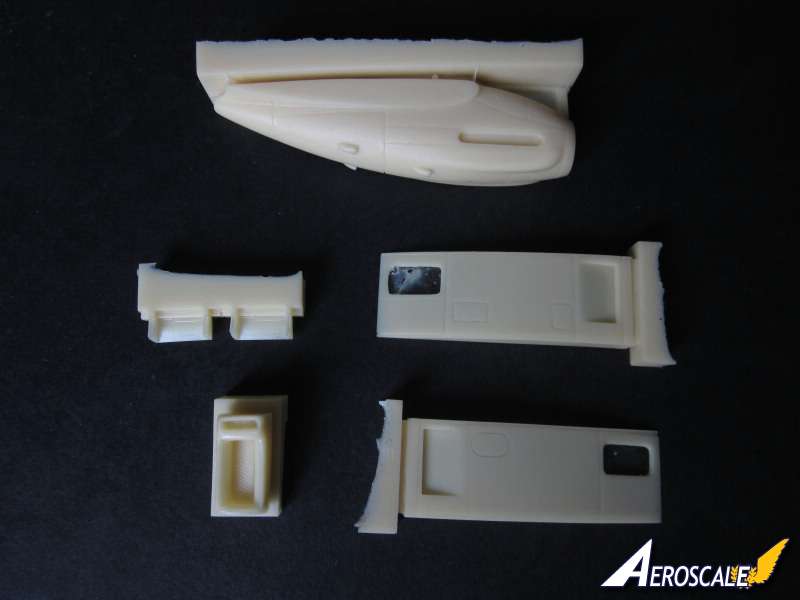
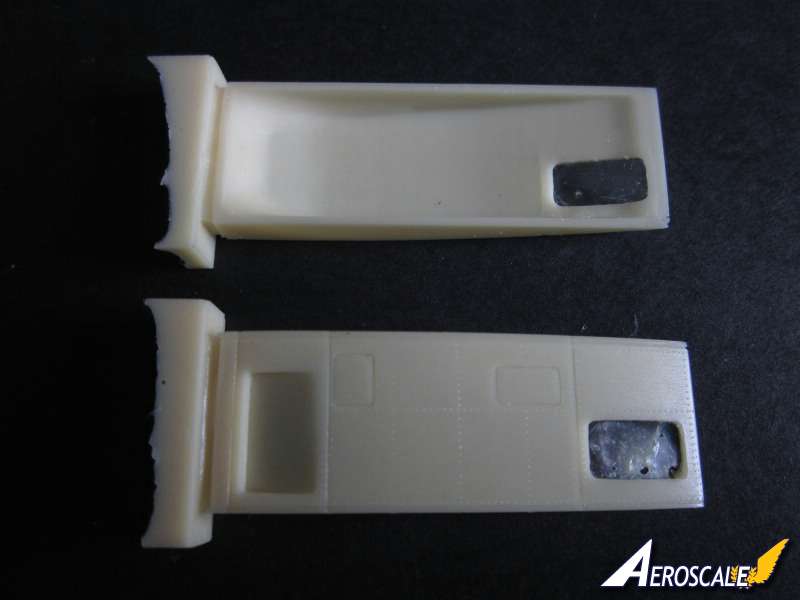
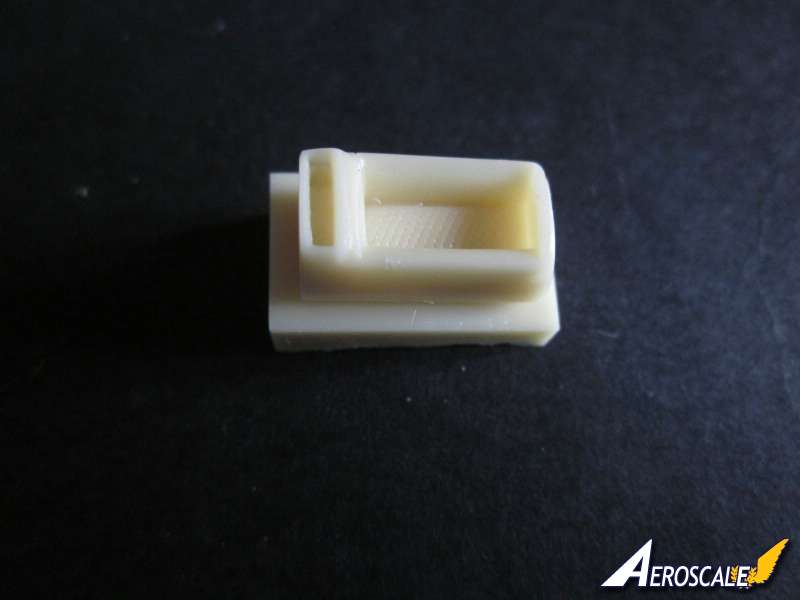
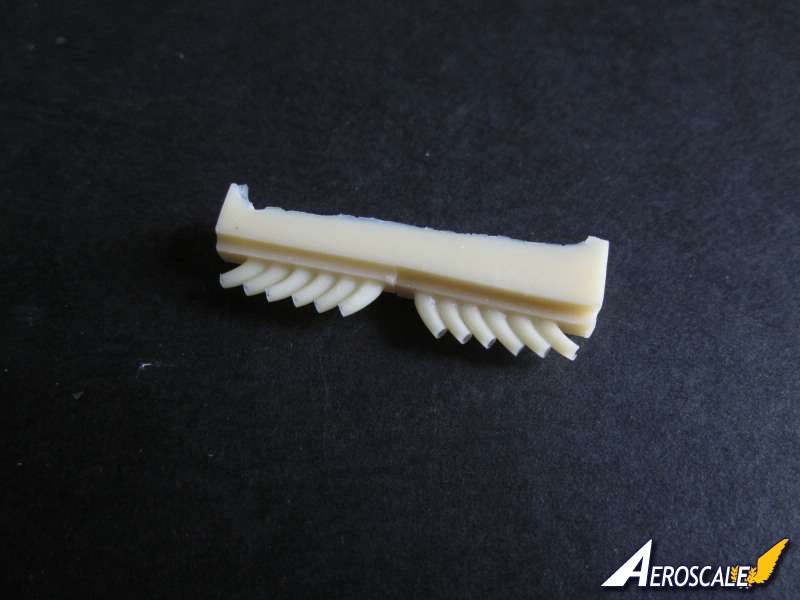
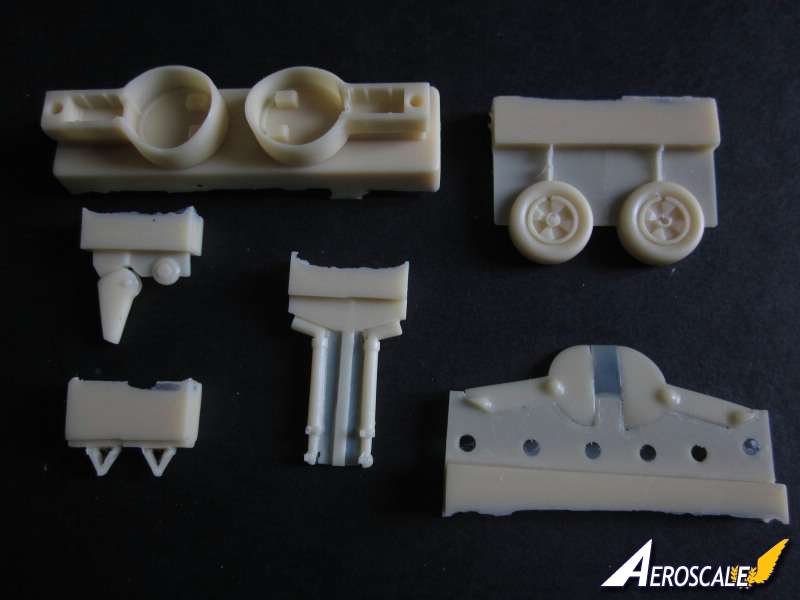
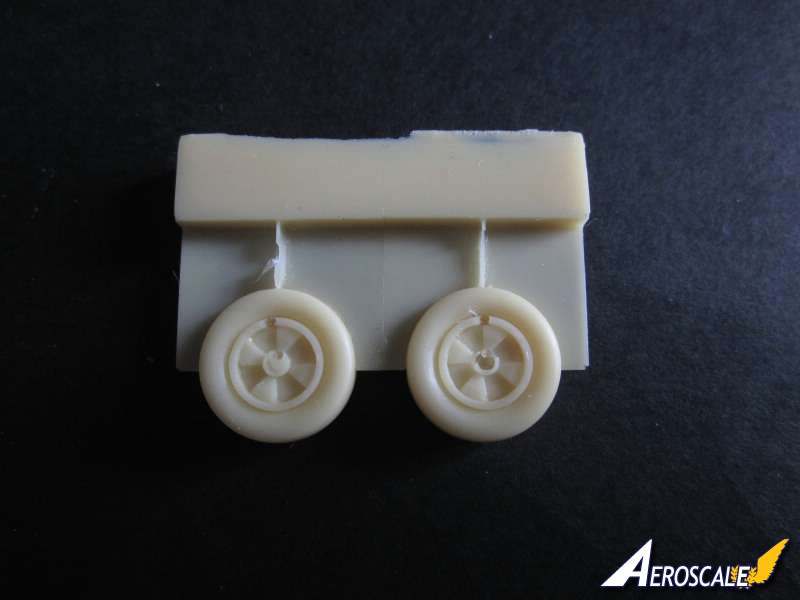
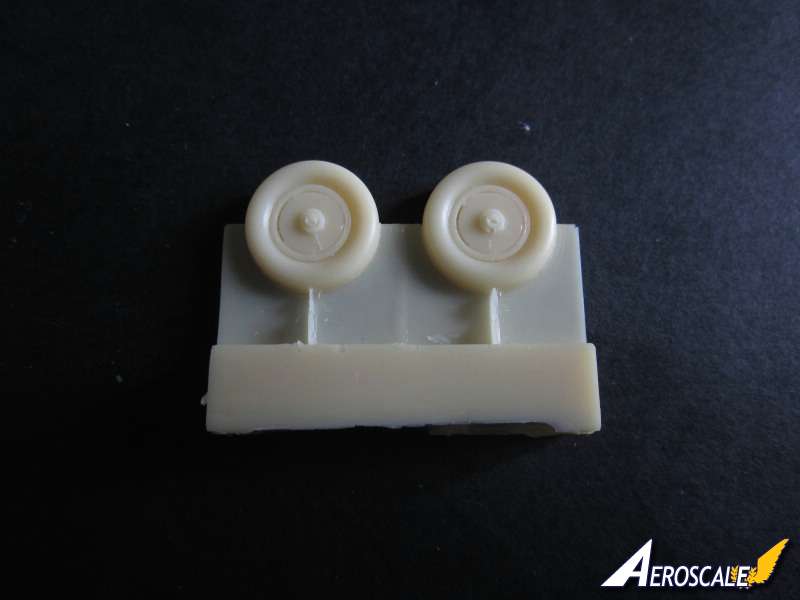
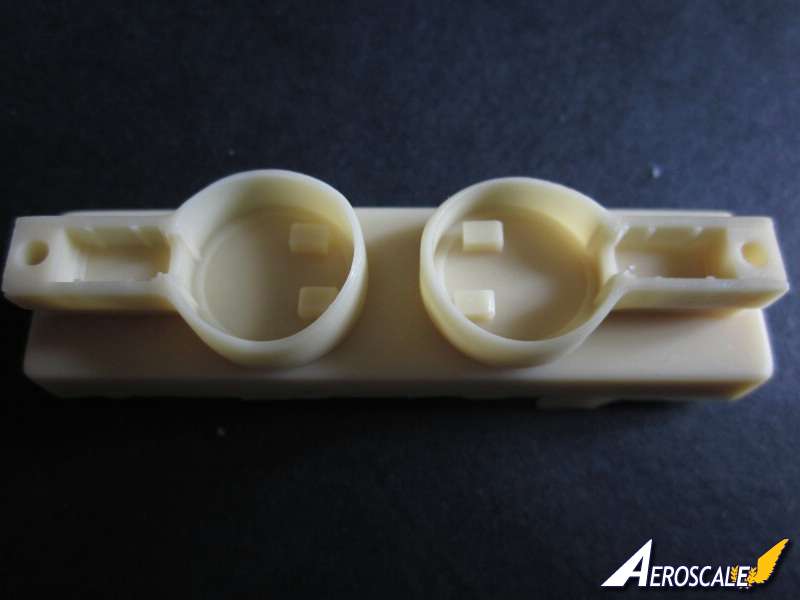
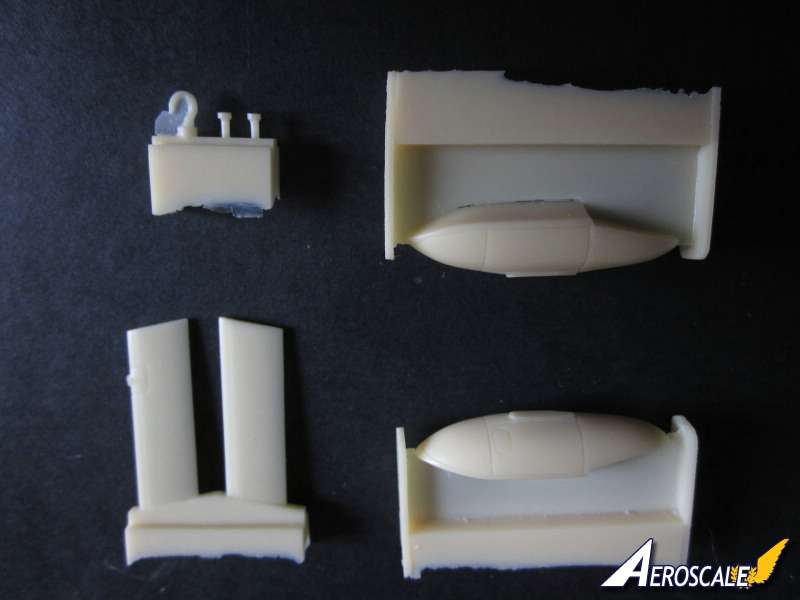
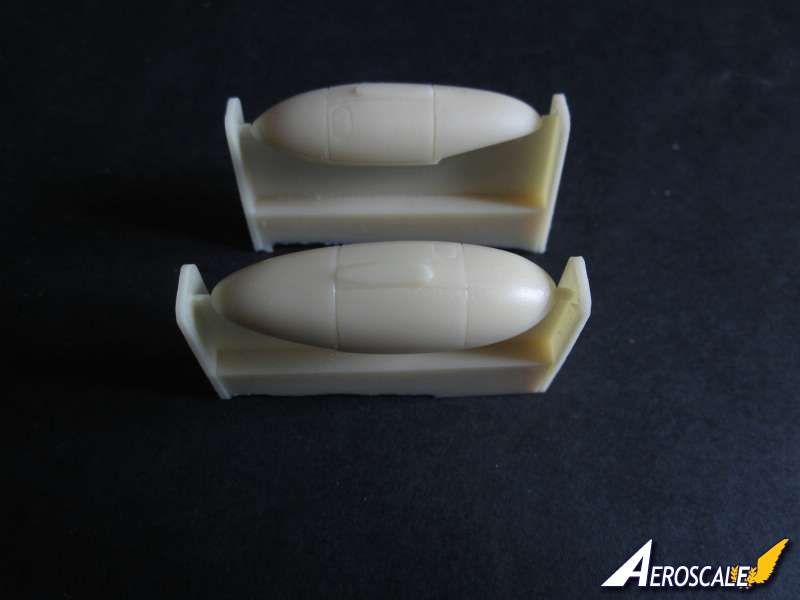
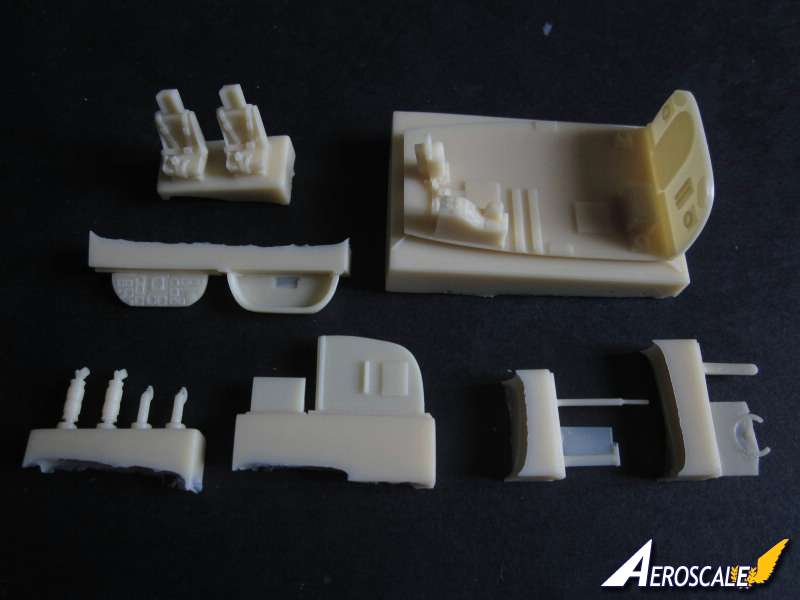
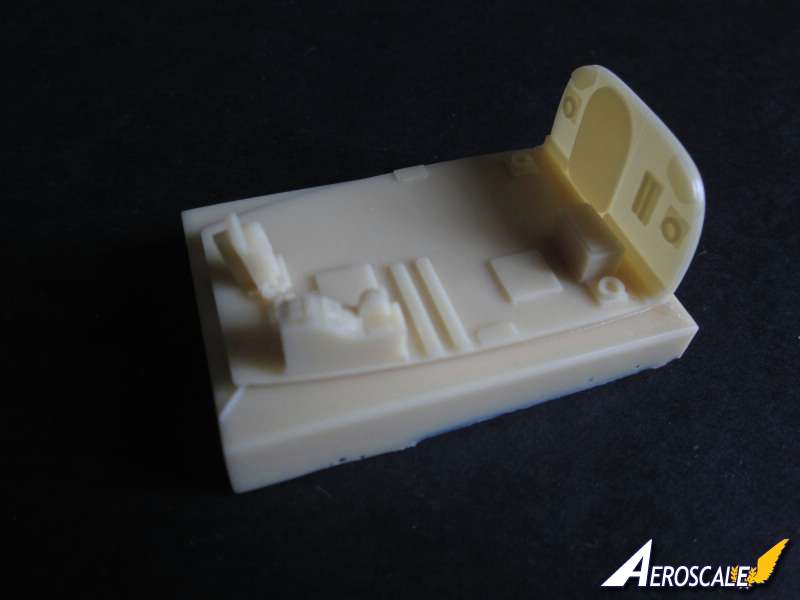
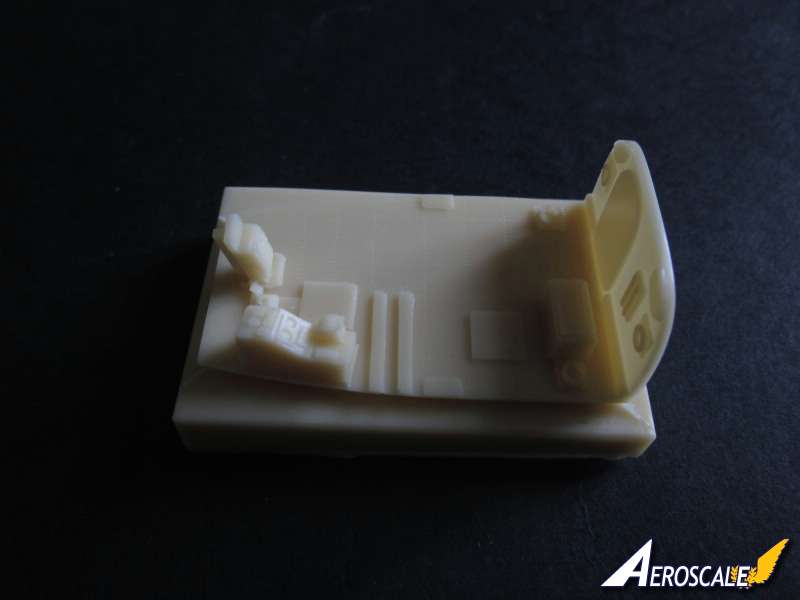
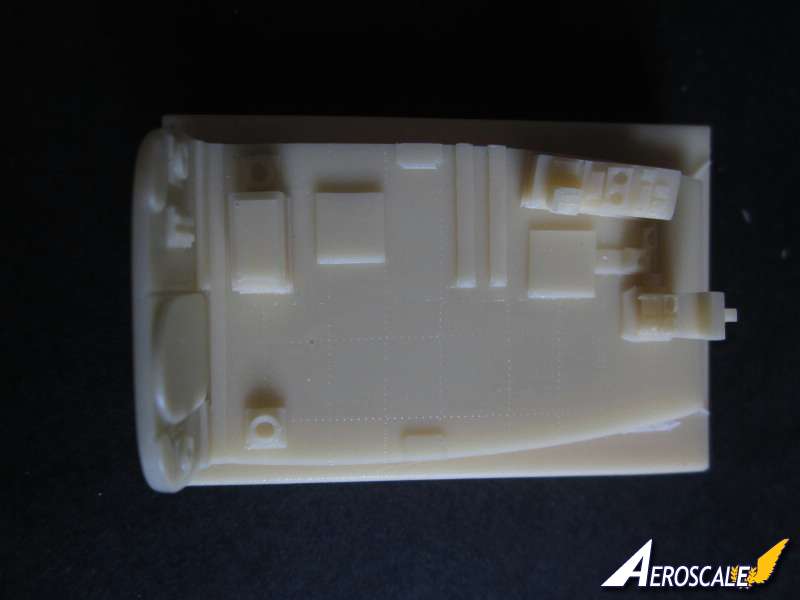
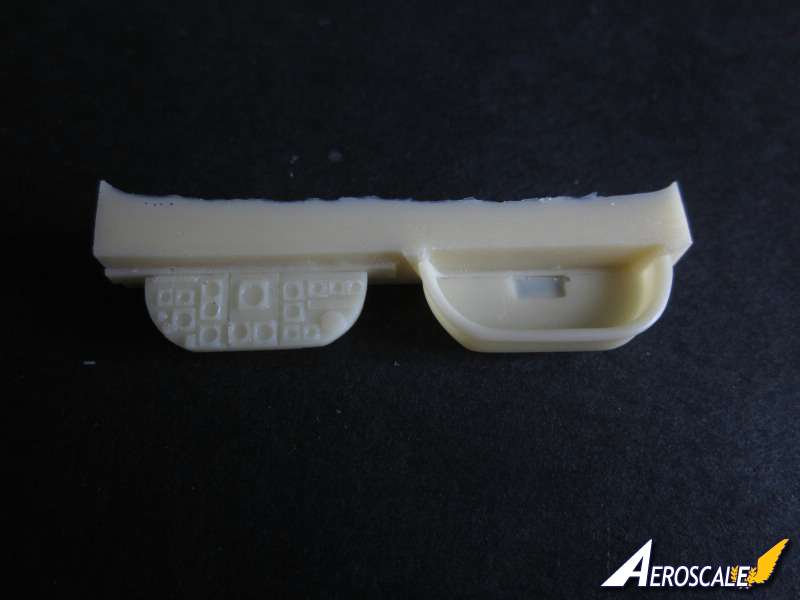
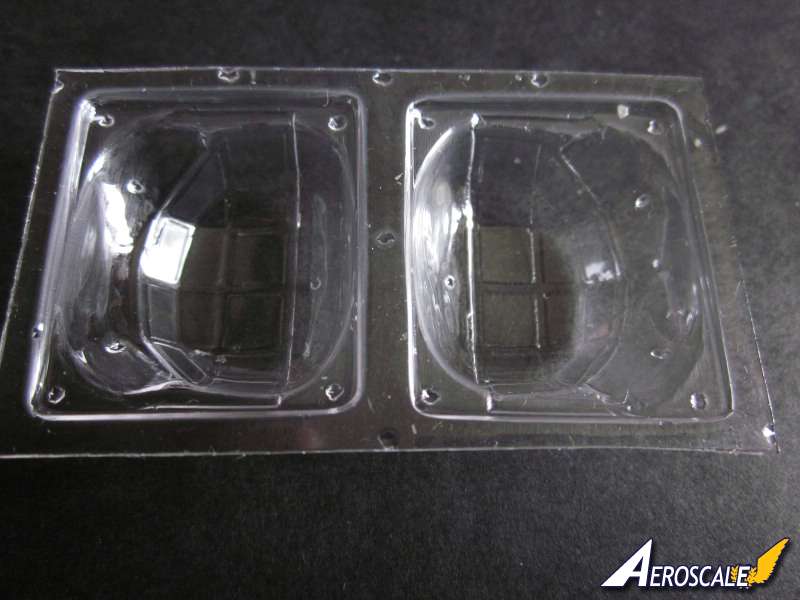
Inspection of the creme coloured resin parts revealed no obvious pin holes, flow marks or flaws whatsoever. The surfaces are very smooth and it's evident that there is some very high quality casting here. Fuselage: Olimp have captured the beautiful shape of the hull. The fuselage is split vertically. The forward hatch is cast closed. Inside the cockpit and crew area are some nice detailing of the ribs, fuse boxes and ducting. In the cockpit there is a sill for the separate cockpit floor to sit on. There is a very thin film of resin covering the two small side windows and the main wheel wells, which should be very easy to remove using a sharp knife. There is a little excess resin around gluing area where the fuselage halves join, which needs a little sanding to achieve a good fit. The components for the cockpit includes a floor with rear bulkhead, two seats with cast harnesses, a partition wall for the navigators position, navigators table, instrument panel and coaming, control wheel and separate column, two rear bulkhead supports and two fire extinguishers. The floor needs to be removed from a fairly hefty resin block so some care will be needed. The floor has some excellent details cast onto it, including a side console to the left of the pilots seat, with a throttle and low relief instruments. There is an instrument stack just forward and to the right of the pilots position again with some very good looking low relief instruments. Olimp provide two options to depict the instrument panel. The resin instrument panel has low relief instruments cast onto it, so some careful painting will bring out the detail. If you don't fancy that then you can apply the one piece water slide decal to the smooth reverse side of the instrument panel. There is a colour guide for all the components of the cockpit, the dominating colour is dark grey. A film of transparent plastic is provided for the side windows. The one piece film has all four window [there are two in the engine pylon], each individual window need to be cut out. Olimp kindly provide black printed lines as an aid to cutting. Canopy: There are two vac formed canopies supplied, always a comfort when cutting knowing you have a backup. Quality of the plastic is very good and feels robust. Lovely clear canopies. Engine nacelle: Cast as one piece with two separate sets of exhaust pipes for the Griffon engine. On the nacelle there are three air intakes all are hollowed out at the mouth to give the impression of depth. The exhaust are hollow at the ends and the walls of the pipes are extremely thin. The engine pylon comes in two parts, the two windows are covered with a very thin film of resin. Apparently this was the observers position, if so it must must have been a pretty warm and noisy place to sit! There are a couple of vents from the radiator to fix in position. The radiator housing on the leading edge of the engine pylon is separate, the honeycomb detailing of the radiator is delicately done. The distinctive contra rotating props comprise a one piece spinner and six separate propeller blades. The blades are beautifully thin with a twist, just as they should be. The blades are well protected on the block, as there are a couple of cast sprues either side of the blades. Wings: The two wings are cast in one piece. the panel lines are very nicely executed as is the wing fold joint. There is no provision included to depict the wings folded. It is possible to separate the wings along the joint if you wanted to depict the wings folded, but it is quite a complex line to cut. The rivet detail is exquisitely done and puts many of the mainstream manufacturers to shame. The trailing edges are very sharp. There are no locating stubs to join the wing to the engine nacelle, it is intended to be butt joined. This is probably fine as the wings are not large and heavy. You may want to reinforce the joint to be on the safe side. There are some very useful marks on the underside of the wings to assist the placing of the float pylons and the flap and aileron actuator housings. The two stabiliser floats are cast in one piece with some very fine panel and rivet detail. The starboard float pylon has a small recess in the leading edge to attach a resin probe. Tail: the angled tail plane comes in one piece. The two separate one piece fins have a cast guidance mark to aid the fitting of the components, but similar to the wing they are butt joined. There is no indication in the instructions at what angle to set the tail fins, but I think after looking at my copy of Putnams 'Supermarine Aircraft since 1914' they are set almost perpendicular to the tail planes. As with the wings the tail planes and fins have very sharp trailing edges. Undercarriage: As this is an amphibious aircraft it comes with a undercarriage. The separate wheel bays for the main undercarriage are attached to the inside of the fuselage before joining the fuselage halves. The undercarriage legs are resin and there is a separate scissor link to attach to each leg.. The beautifully cast main gear doors come in one piece, which if you don't want to spoil the pleasing lines of this flying boat by having the gear down, makes the fitting of the doors much simpler. If you want to display gear down then you need to cut the doors into three pieces. Unfortunately the instructions omit what to do with the centre doors. The doors have attachment points for the undercarriage legs so there is no vagueness about locating them. There is a very generous hole to fit the undercarriage legs into the wheel bays, which should create a strong joint. The four spoke main wheels [are they from a Spitfire?] are nicely cast although there is a little missing detail in the centre. A little filler should sort this out. The rear wheel is cast separately and is added to a fairing, which is attached to the rearmost end of the fuselage. Just above the rear wheel is a rather chunky looking retracted arrestor hook Finishing off. There are some small parts that need adding towards the end of the build such as the two bollards that are placed either side of the bow hatch. There is also a pitot tube under the starboard wing as well as a probe that fits into the starboard float pylon.
Markings.
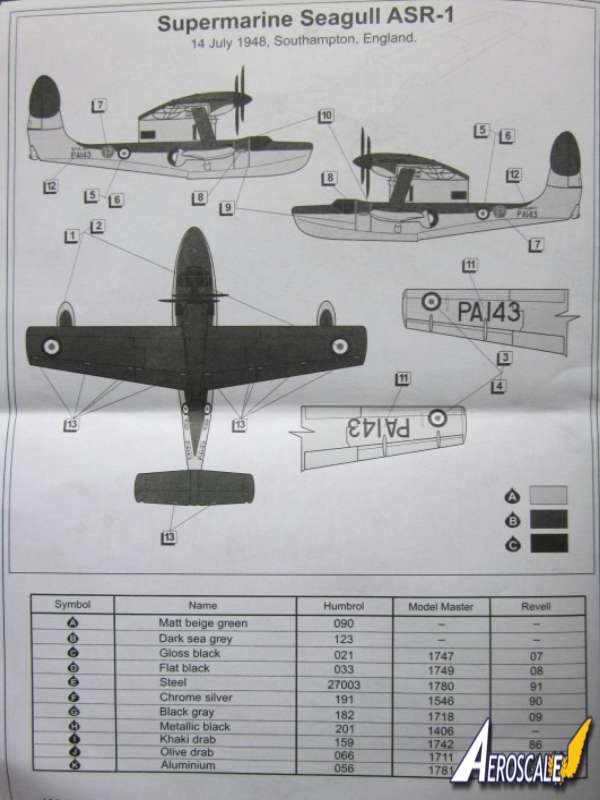
Just the one option, PA 143. The upper colours according to the instructions are dark sea grey and the lower colours are matt beige green [sky]. Olimp provide three paint manufactures for references to paints: Humbrol, model Master and Revell.
Decals are printed by Begemot and are well printed with good colour density. The red centres to the roundels are printed separately. There are a few stencils such as 'no walk' and 'danger propeller'. I am not 100% convinced that the red background on the prototype decal is correct, I have a feeling it should be dark sea grey
Instructions.
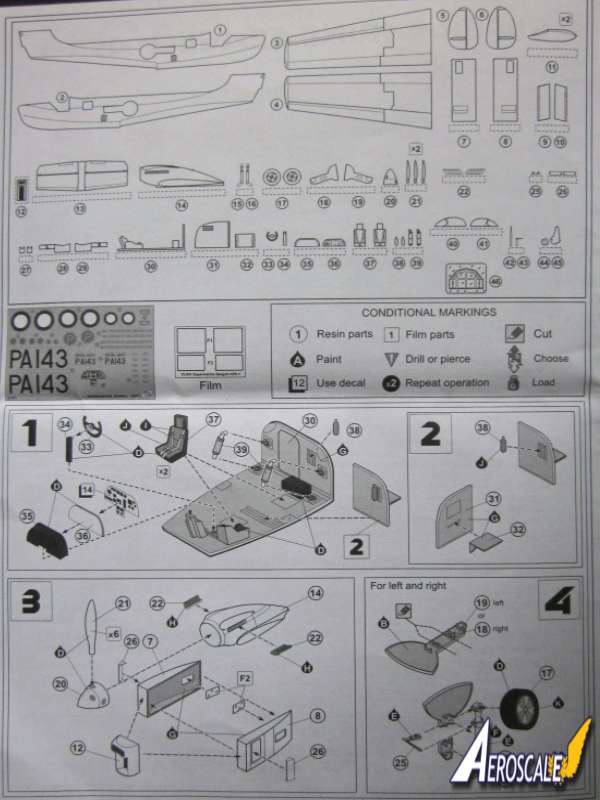
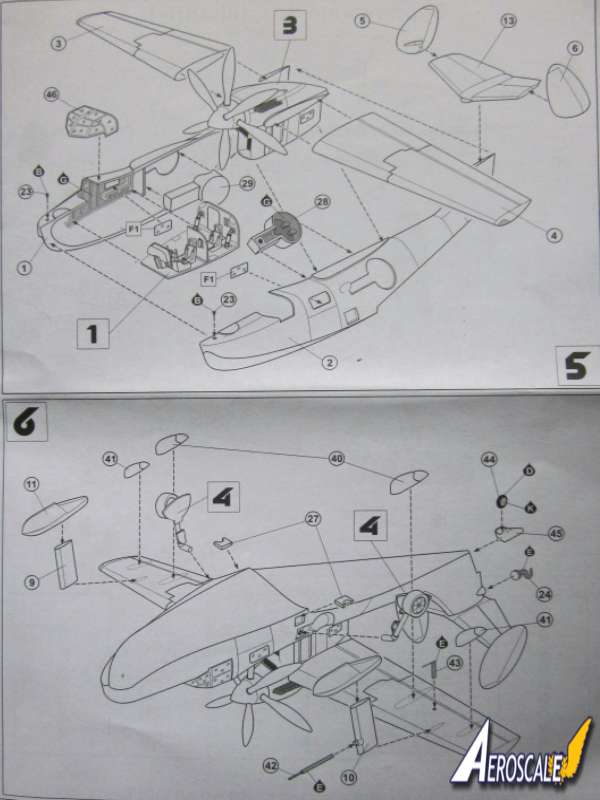
Folded over A4 sheet with excellent exploded black line drawings. There is a parts map providing numbers to identify the components, but there are no numbers on the casting blocks. There is also an explanation of the meaning of the symbols. All text is in English.
Conclusions.
The Seagull has always been a favorite of mine and I am very, very happy to see this superb resin model of it. Olimp have done a superb job creating this aircraft and they have also done really well with the level of detail as well as the subtle treatment of the panel lines and rivet detail. It is well engineered and I don't anticipate any problems assembling this kit. Really looking forward to building this one. Nice one Olimp.
Manythanks to Oleg from Olimp Models for supplying this review sample.
SUMMARY
Highs: Too many to mention.
Lows: None.
Verdict: Well to answer my own question at the start of this review, I think this will make a stunning build and a very different looking aircraft amongst your 1/72 model aircraft flightline. Highly recommended.
Our Thanks to Olimp Models! This item was provided by them for the purpose of having it reviewed on this KitMaker Network site. If you would like your kit, book, or product reviewed, please contact us.
Never thought I would see the day the Supermarine Seagull would be released as a resin kit. I remember starting the Whirlykits 1/72 Seagull a few years ago, but never finished it.
H


Comments