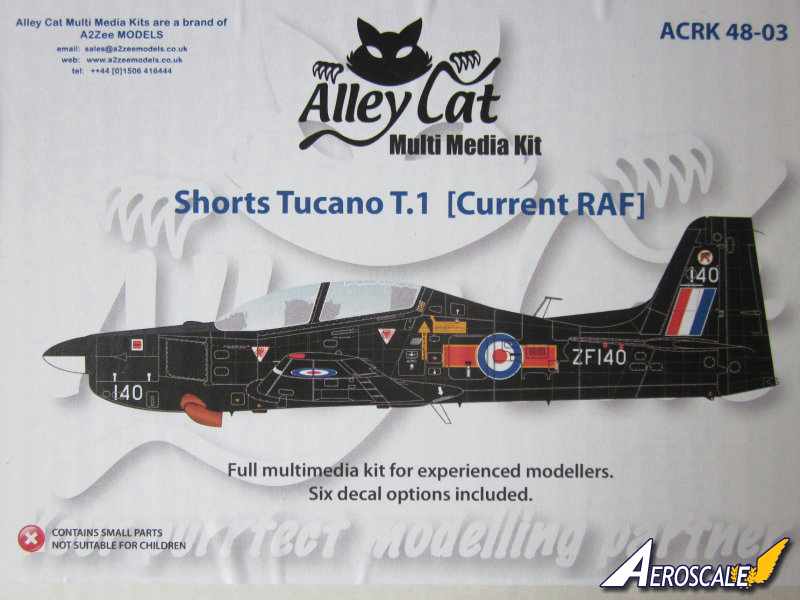
The Short Tucano was developed by the British company Short Brothers in order to meet a requirement to replace the Jet provost as the basic trainer for the RAF, as laid down in Air Staff Target 412. It is an adaptation of the Embraer EMB-312 Tucano fitted with the more powerful 1,100shp [820kW] Garret turbo prop engine in place of the EMB-312's 750 hp [560 kW] Pratt & Whitney Canada PT6 engine, to give higher climb performance.
Aside from a different powerplant, the other differences between the Short Tucano and the EMBRAER Tucano are:
-A strengthened airframe
-A new cockpit layout similar to the BAe Hawk advanced trainer
-A four-bladed propeller, as opposed to three-bladed
-Ventral airbrake and restyled wingtips
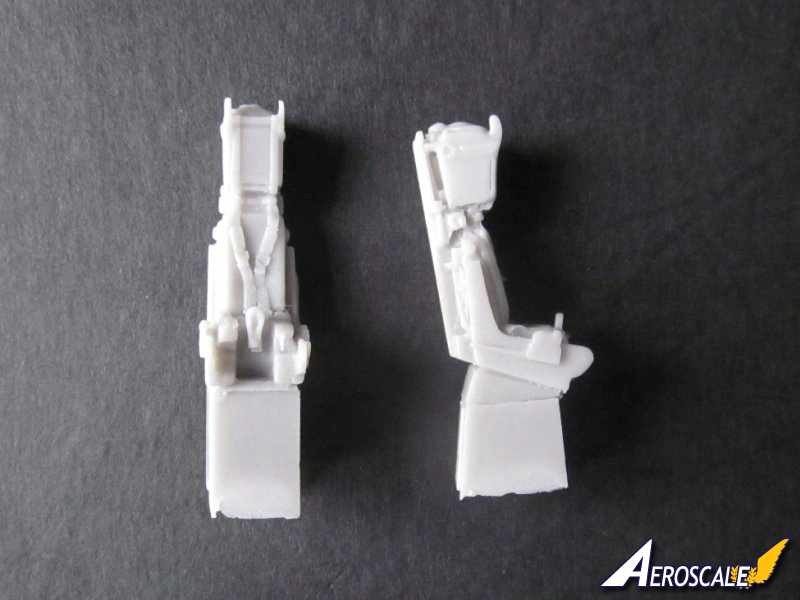
-The fitting of Martin Baker MB 8LC ejection seats for both crew
-A new oxygen system
-A new flight data recorder
-A modified canopy
The Tucano was selected in 1985 in preference to the Swiss Pilatus PC-9and the British Hunting Firecracker. The first Garrett-engined Tucano flew in Brazil on 14 February 1986, with the first Shorts built production aircraft flying on 30 December 1986. The decision to replace the 750 PT-6 engine used in the standard EMBRAER model with the 1,100 shp [820 kW] Garrett TPE331-12B engine and "bird-strike" proofing of the cockpit canopy to UK standards (combined with the fitting of Martin Baker ejection seats) caused a number of problems which delayed the introduction of the aircraft into service until.
Since first deliveries to the RAF in 1989, the Tucano has been operated primarily from No 1 Flying Training School at RAF Linton-on-Ouse to provide basic fast-jet lead-in flying training to RAF and RN student pilots. The deployment is officially to 72 [Reserve] Squadron, 207 [Reserve] Squadron, and 76 [Tucano Air Navigation] Squadron. Student pilots fly around 130 hours during their training course on the Tucano before progressing to the BAe Hawk aircraft at RAF Valley.
In service the Tucano has proven to be 70% cheaper to operate than its predecessor the Jet Provost. With a greater range and endurance than the Jet Provost, it can fly two consecutive sorties before being refueled. One of the key performance requirements was that it can climb to 15,000 ft [4,600 m] in six minutes, in comparison to the Jet Provost's 15 minutes; this gave considerably more training value for each one-hour sortie.
Source: Wikipedia.
Contents
All the content are placed in a rather sturdy top opening box. I was very surprised at the weight when Madame Poste handed me the parcel. The resin contents are protected in a bubble wrap envelope and there are smaller bags containing the components. Extra padding in the way of a piece of bubble wrap was also included. The canopy and the photo etched parts are packed separately. Contents includes:
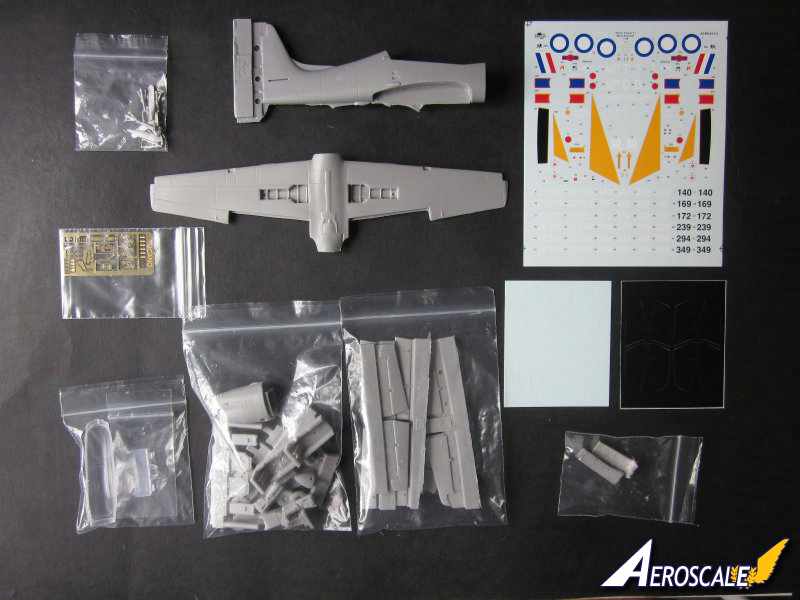
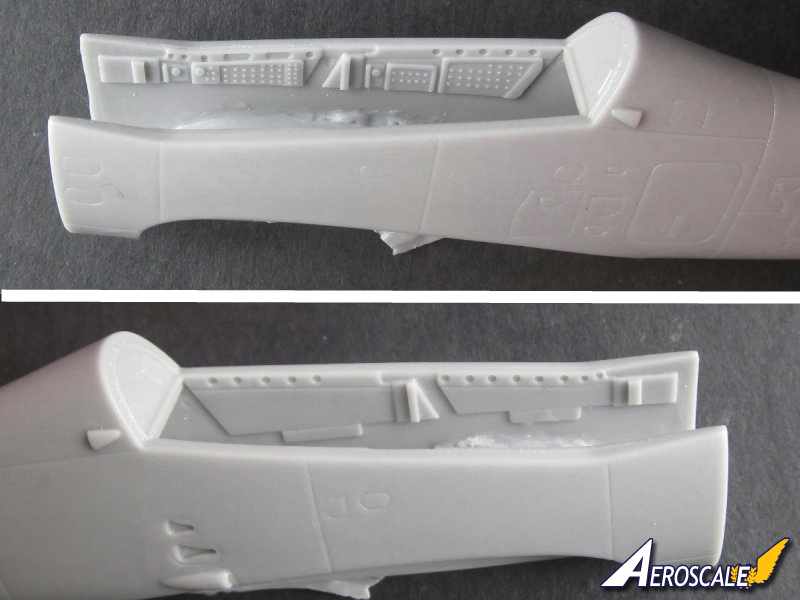
-One piece fuselage.
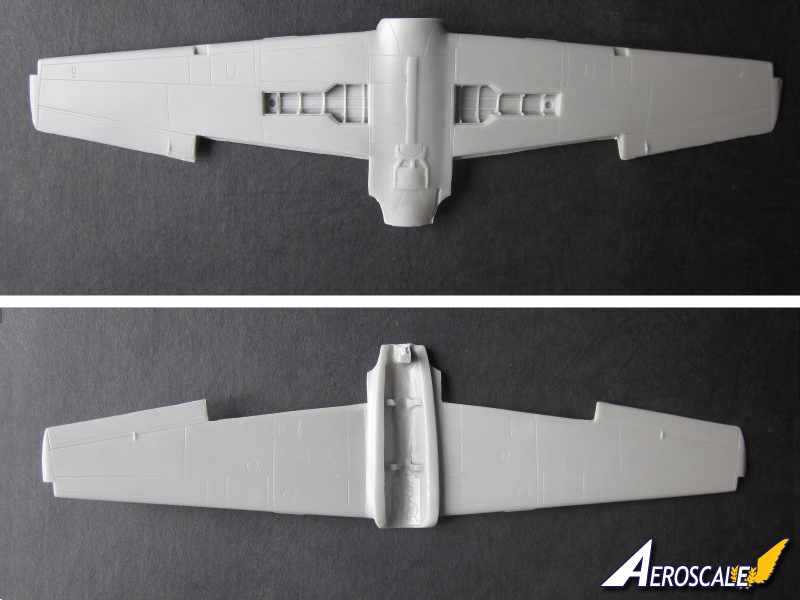
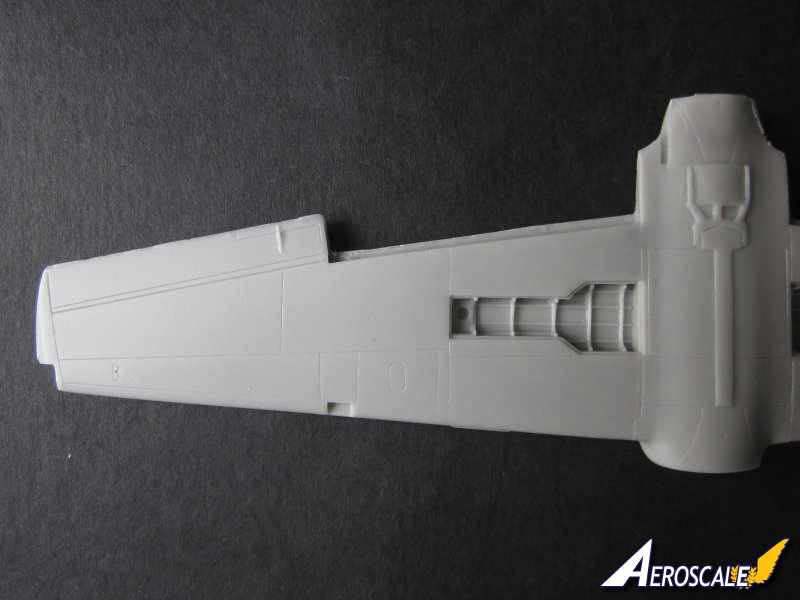
-One piece wing.
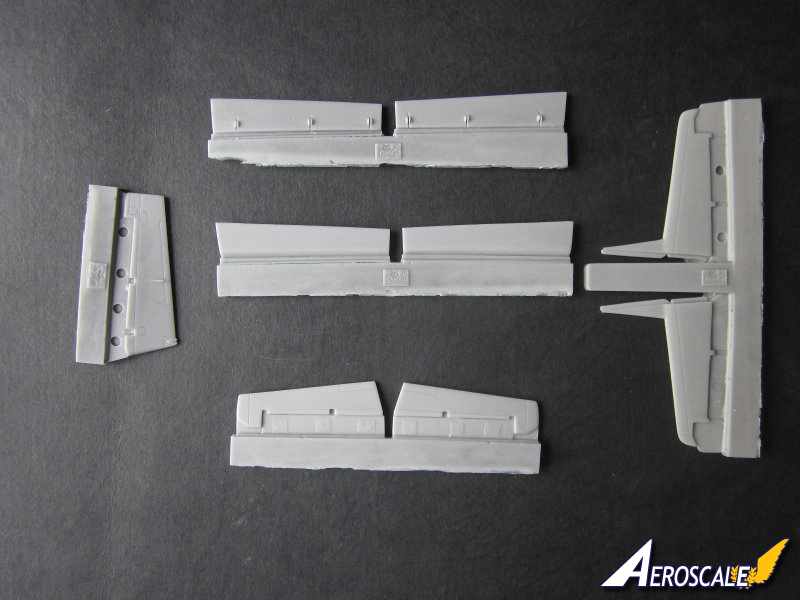
-Bag containing tail planes, elevators, flaps and rudder.
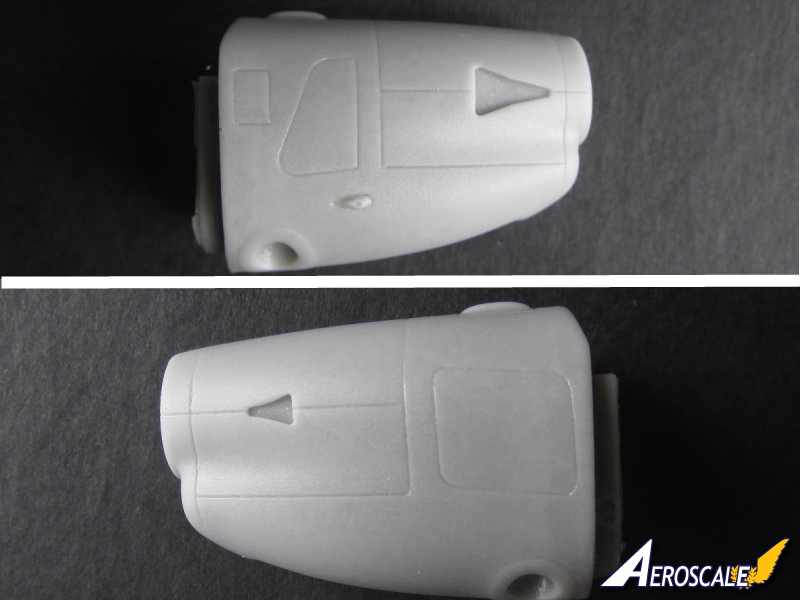
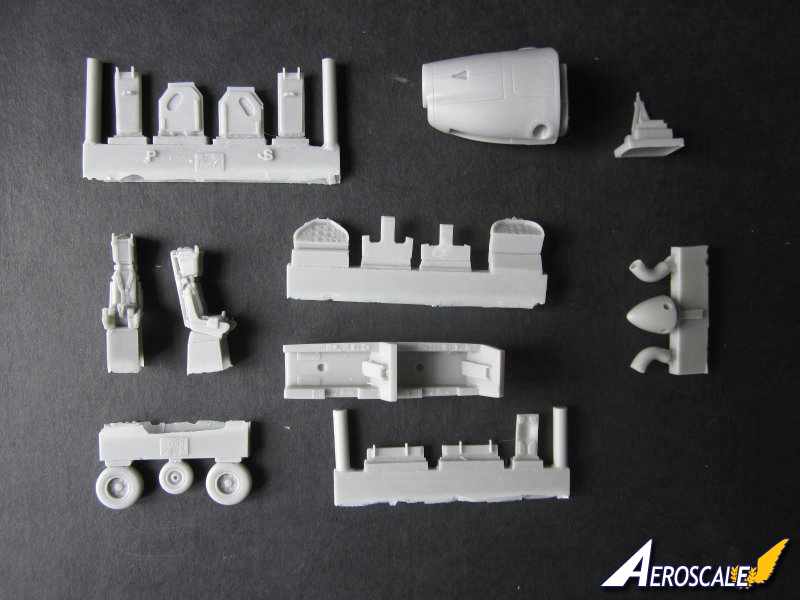
-Bag containing cockpit and undercarriage parts, nose, exhaust pipes and spinner.
-Small bag of white metal parts including undercarriage legs and four propeller blades.
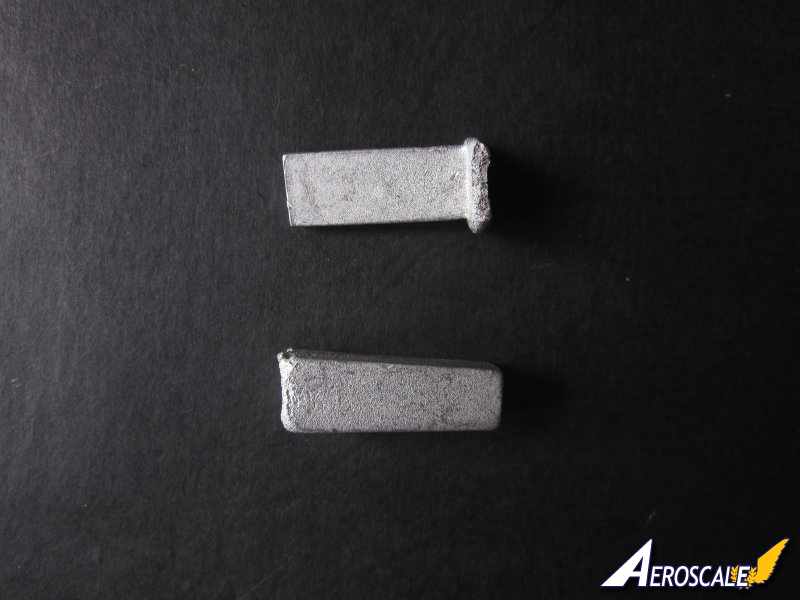
-Small bag containing two white metal weights for the nose.
-Small bag containing the canopy, wing lights lenses.
-Small bag containing the photo etched fret.
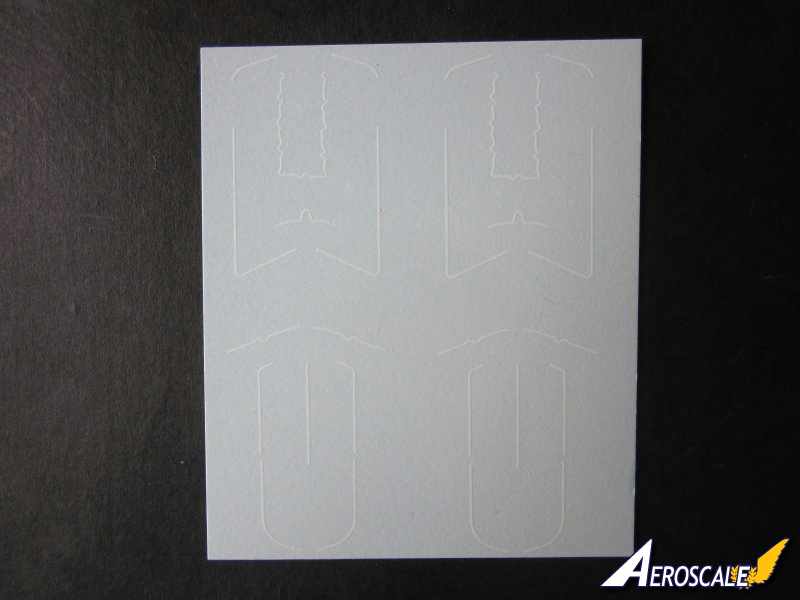
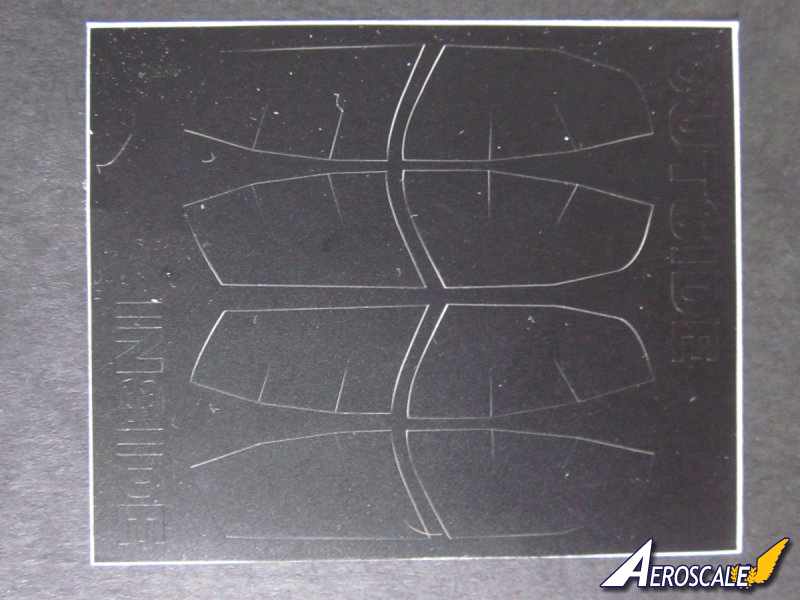
-Paint masks for the canopy.
-2 x decal sheets.
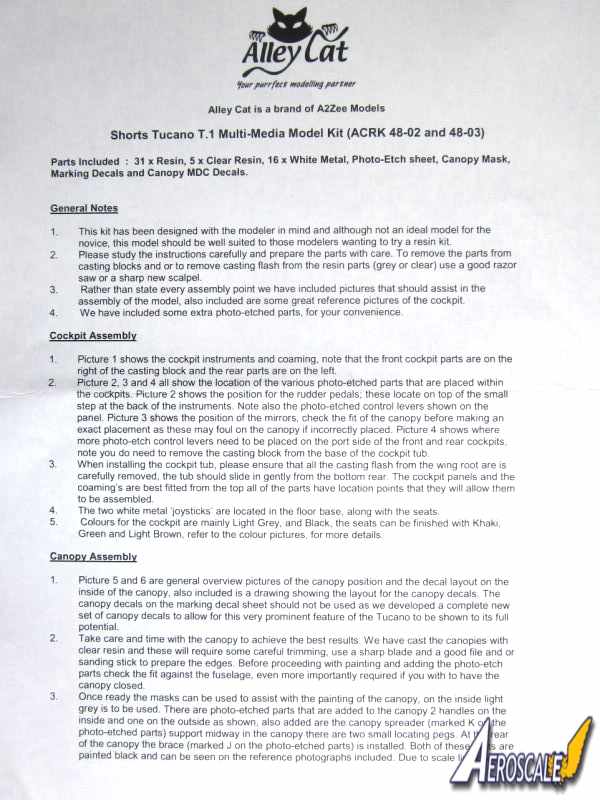
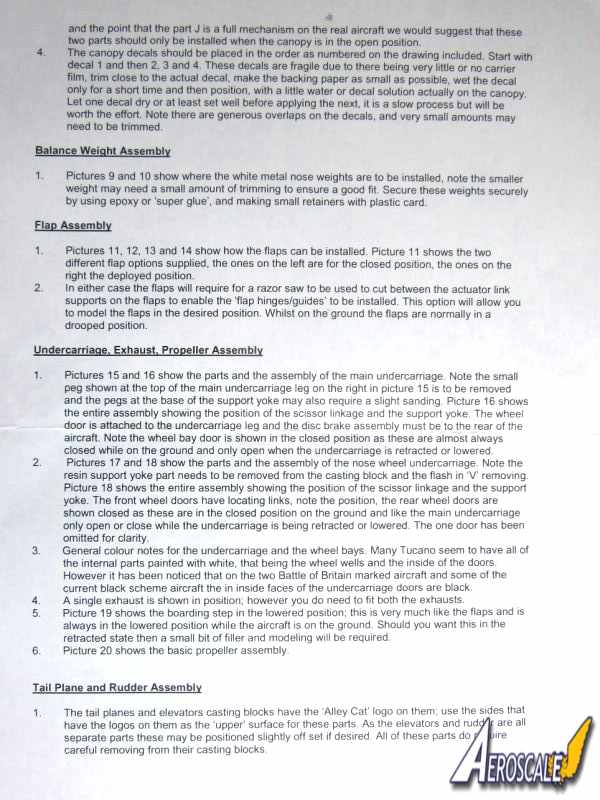
-7 x A4 pages of instructions.
-6 x A4 pages of markings and colour schemes.
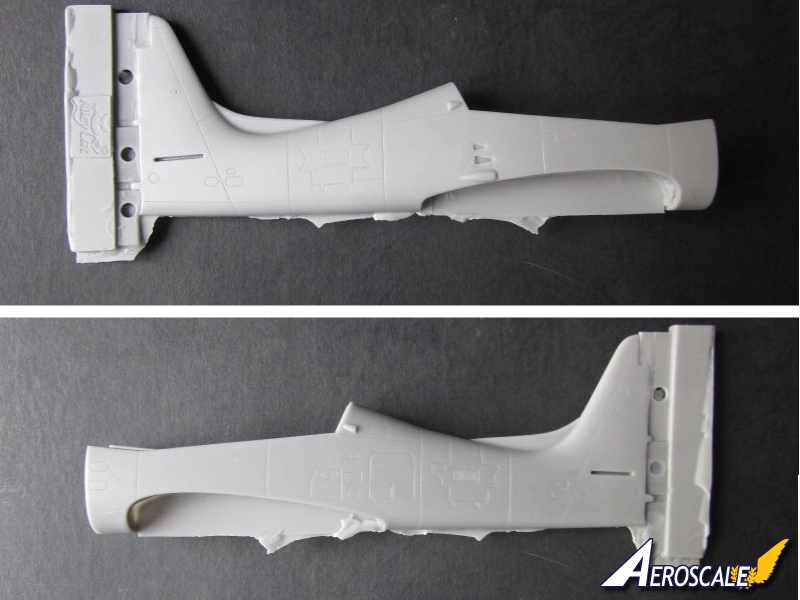
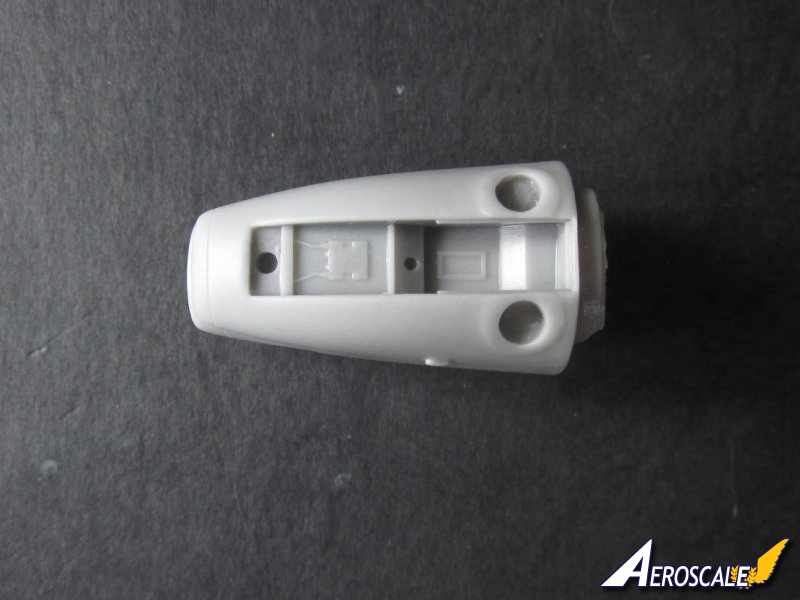
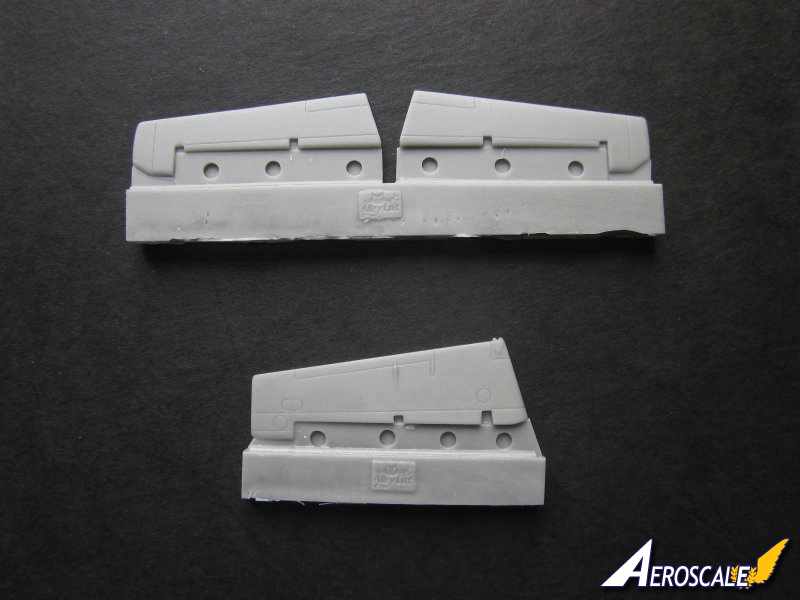
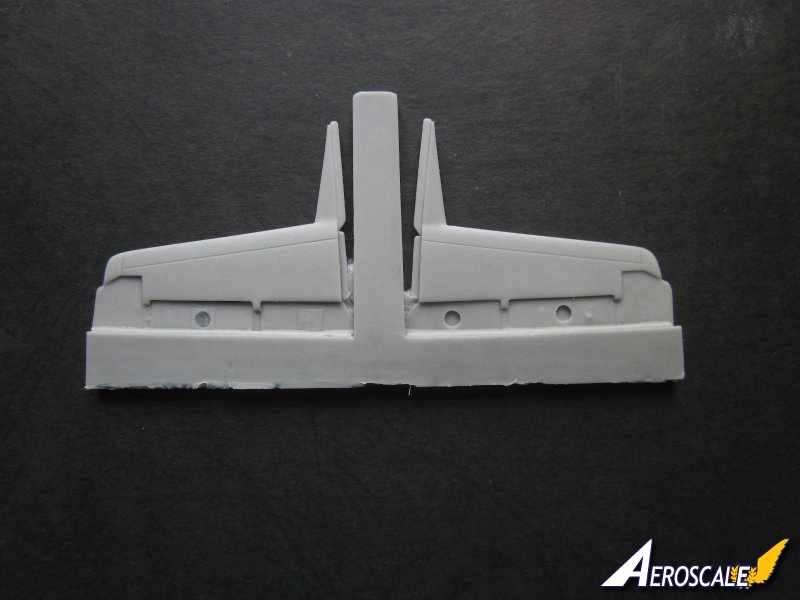
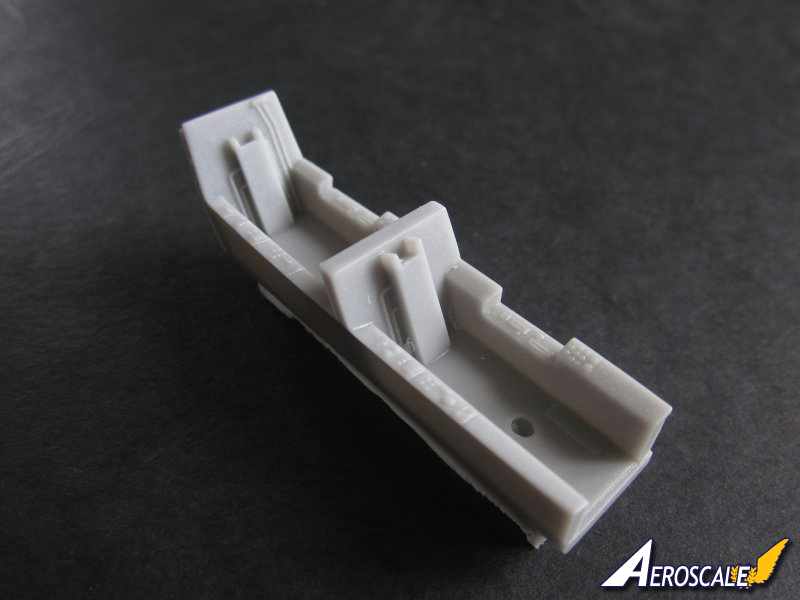
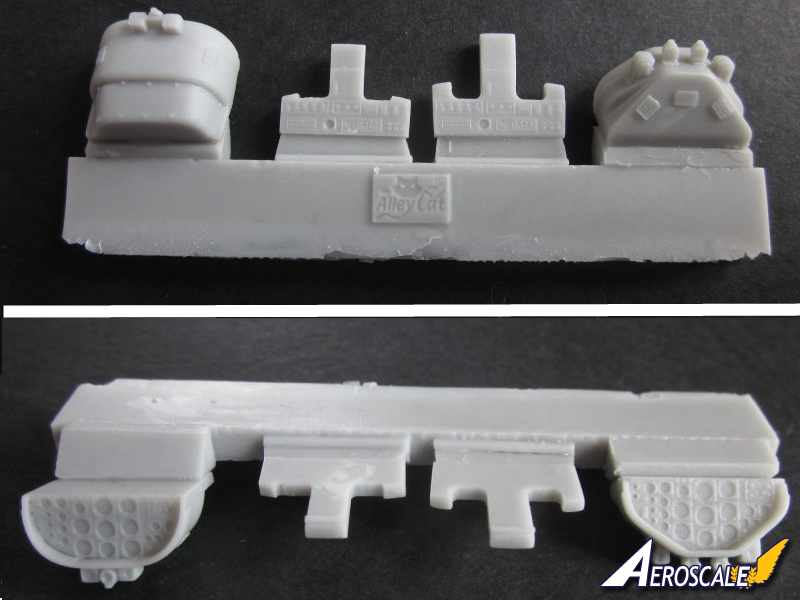
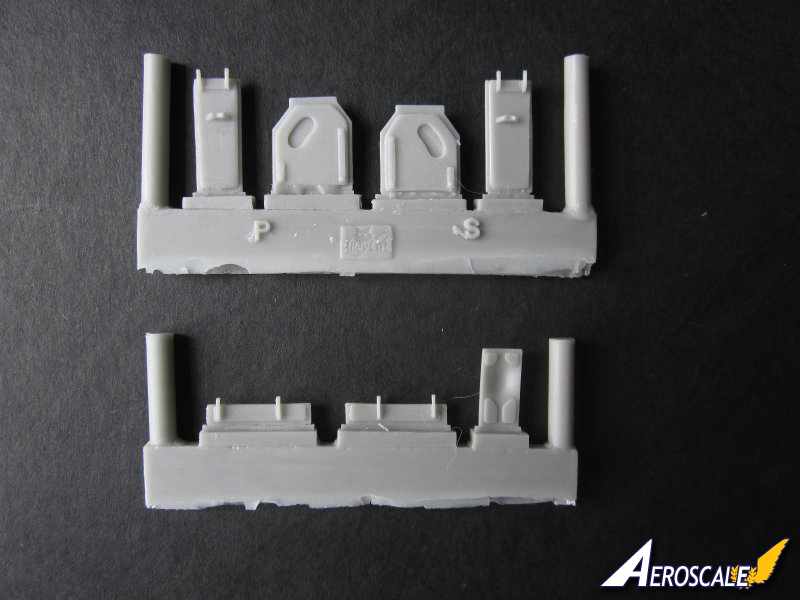
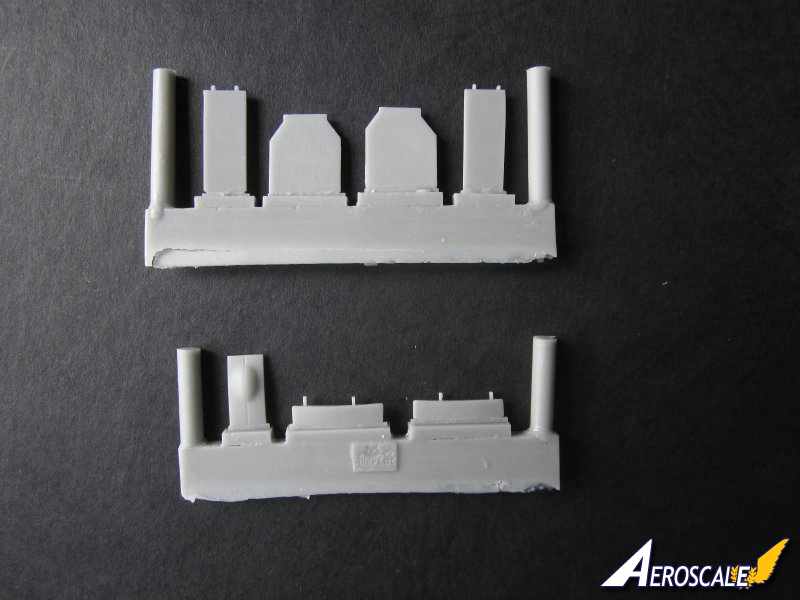
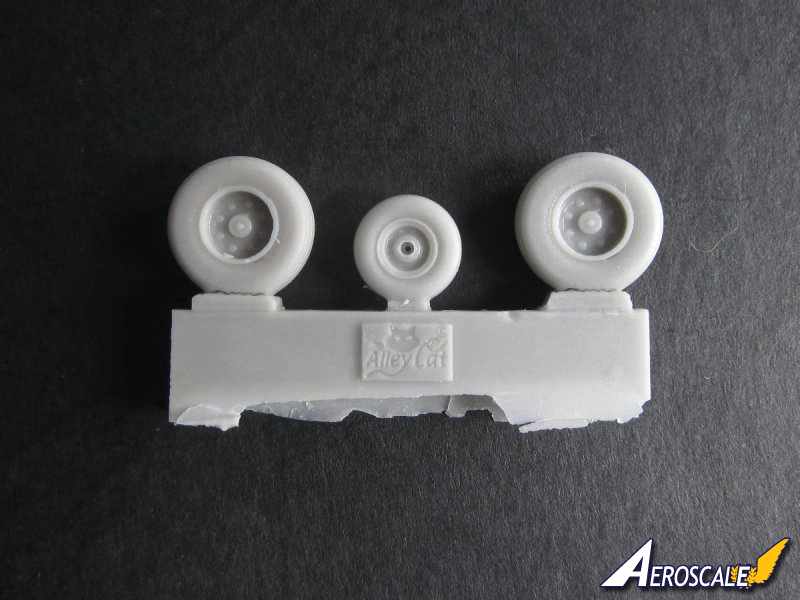
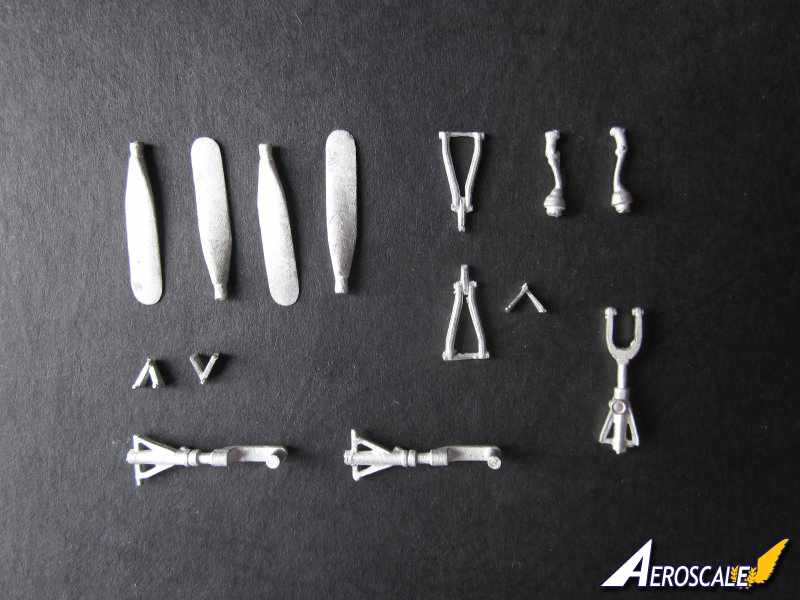
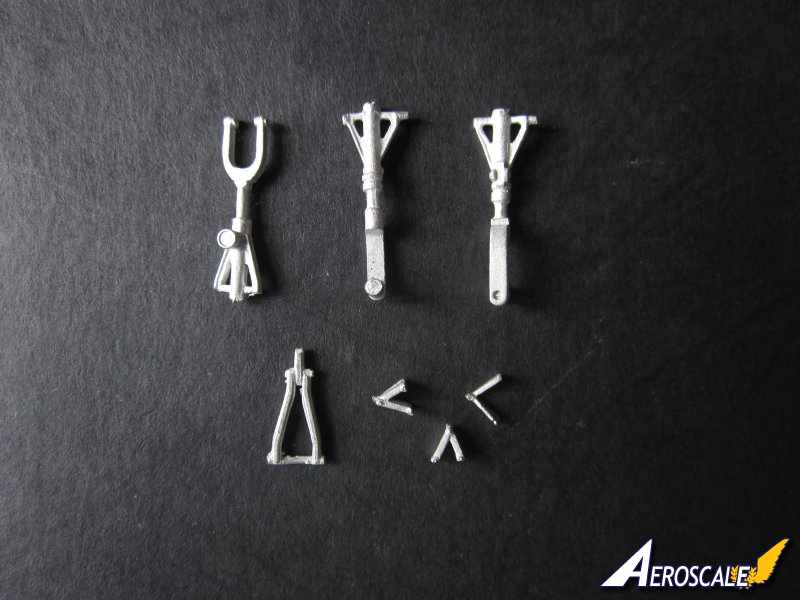
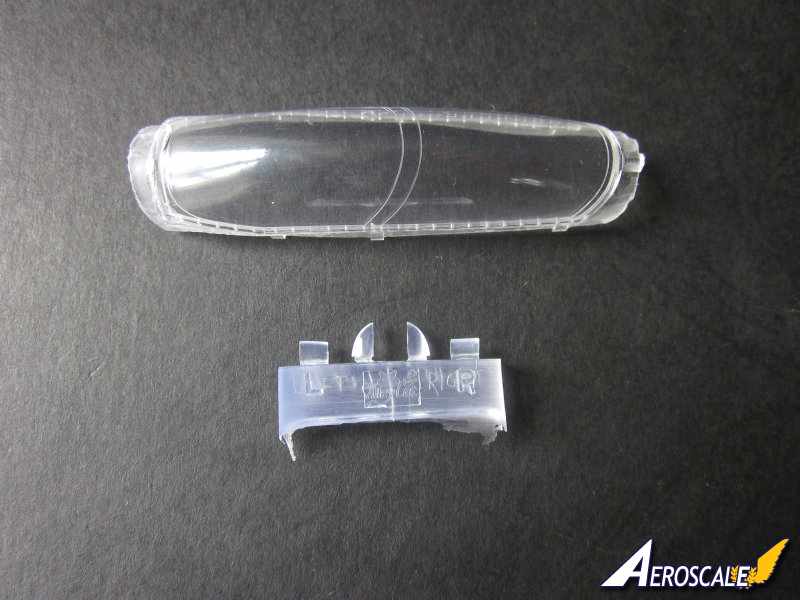
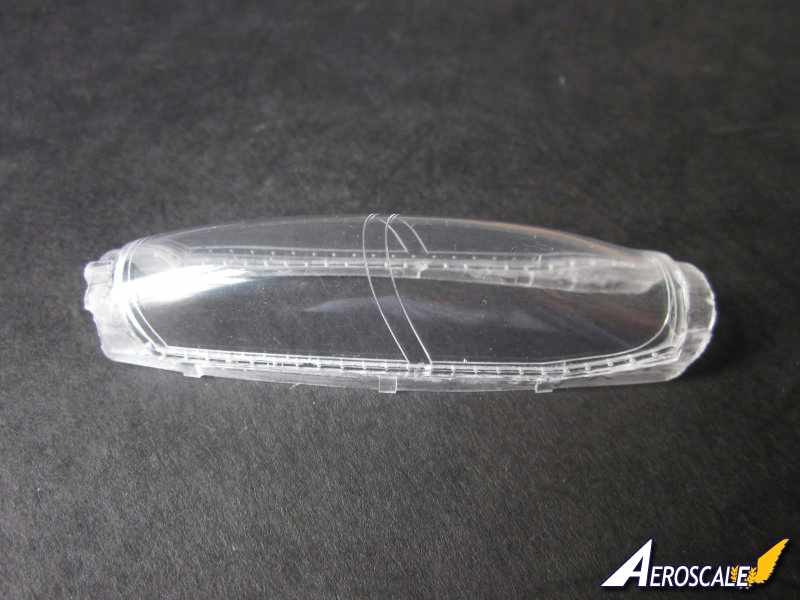
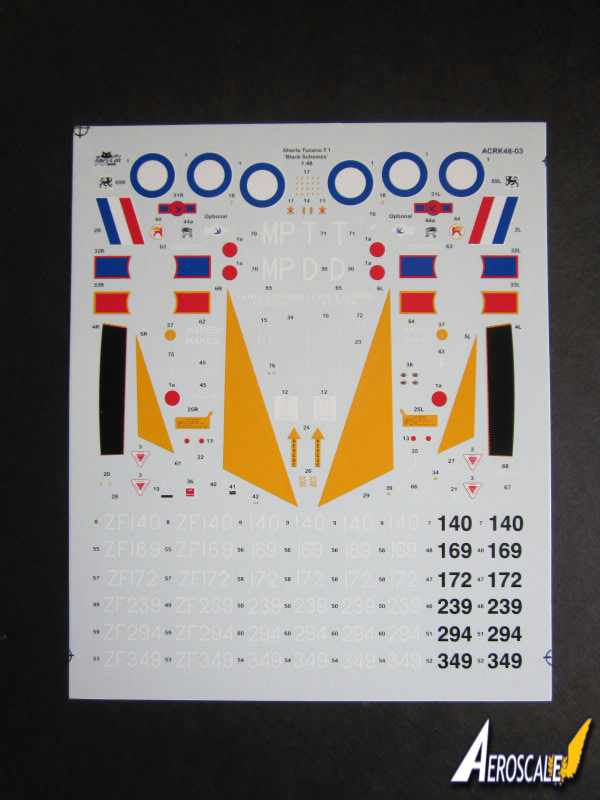
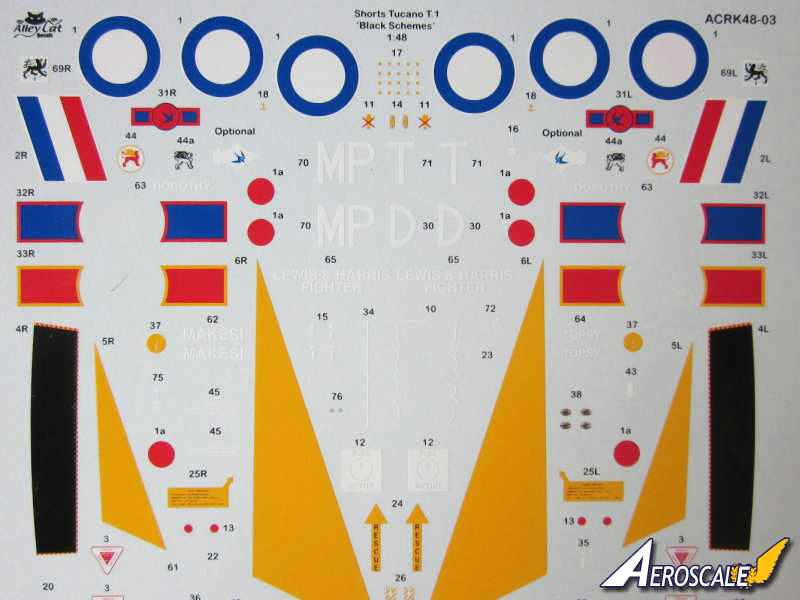
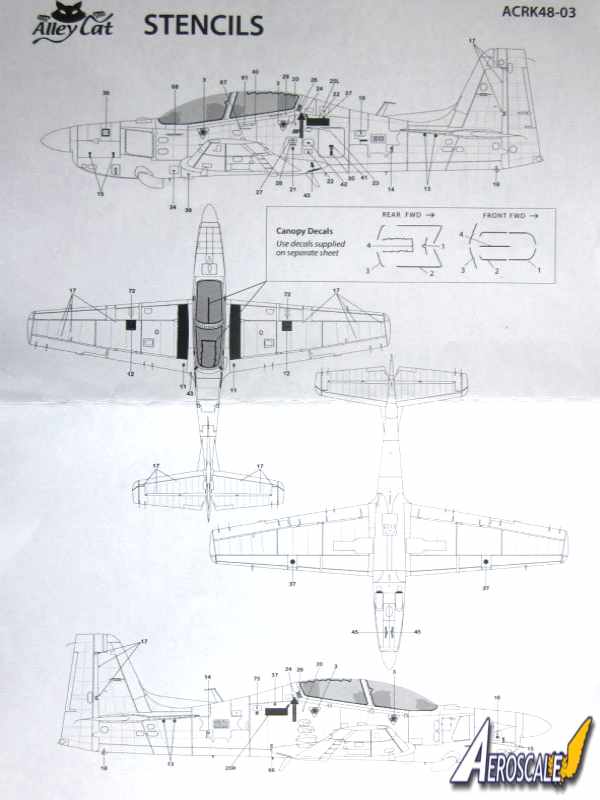
Cockpit: the one piece tub will need the casting block removing. Also the thin resin film that is located in the fuselage between the floor of the cockpit and the area where the one piece wing fits, will need to be removed to fit the tub. There are some very fine low relief details of dials and switches on the side consoles of the tub. The ejector seat rails are cast on the walls to the rear of the crew positions. There are photo etched levers to add to the side consoles. Also added to the tub are two white metal control sticks. These look crisply cast with just a very fine mould line to clean if your very fussy. Underneath the cockpit tub the anti tail sitting devices, yes a white metal weight is added, one of two. Both instrument panels come in two pieces. The main instrument panels are cast with the instrument hoods, the dials are beautifully and delicately represented. The instrument hoods have additional instrument cast onto them, four separate ones on the hood in the rear cockpit and a cluster of three on the hood in the forward cockpit. Also attached to the coaming around the instrument panels are four PE mirrors, two to each cockpit. The lower part of the instrument panels forms the wells for the pilots legs. The central instrument panel has some very fine detail cast onto them. There are one piece PE rudder pedals to attach to the back of the central instrument panel. The representations of switches and other details cast on the cockpit walls inside the one piece fuselage is stunning. Because of their location these details will be a little challenging to paint. The two Martin Baker MB 8LC resin seats look the business. They have seat harnesses and clasps cast onto them. I really like the way Alley Cat have managed to create a undercut between the seat and the harnesses creating a slight gap. This feature will also make it easier to paint the harnesses. Canopy: looks superb and is cast in one piece in clear resin. You will need to take care trimming the excess resin as this stuff can be pretty brittle. The framework on the canopy is well done as is the superb rivet detail on the sills. Alley Cat have produced masks for the inside as well as the outside of the canopy. There are a few PE items to fix after painting as well as decals for the explosive chords in the canopy. There are decals for these cords on the main decal sheet, but these are not used. Instead Alley Cat have produced a separate decals sheet for these very prominent features. The explosive cords are made up from 13 separate decals, so some patience will be required placing them, but it will be well worth the effort. The fine folk at Alley cat provide two sets of decals for the explosive cords just in case you mess up. I really like this attention to detail as the canopy is such a prominent feature on the aircraft. The instructions for the application of the decals are found on the stencil guide. Fuselage: is amazingly cast in one piece. The nose and the rudder are separate items. As mentioned early there is some excellent detail on the side walls of the cockpit. There is a casting block to remove from the rudder hinge line and there is also some resin film to remove between the cockpit floor and the top of the wing root. There is a small amount of flash on the underside of the fuselage. There is quite a wow factor looking at the fuselage with it's very fine recessed panel lines, particularly as the fuselage is one piece, none of this detail will be lost. The one piece fuselage will certainly speed up the build process as well. Very nicely designed Alley Cat. The one piece nose has a large cavity into which is placed the heavier of the two white metal weights. The undercarriage bay has some very fine low relief detail. There are a couple of holes underneath the nose where the resin exhaust pipes are fitted. The exhaust ends have slight indents to give the impression that the pipes are hollow. The propeller boss is resin and the four separate propellers are white metal. Wings: the one piece wings will also speed up the build process. There are cutouts for the flaps and the wingtip lights. Alley cat provide two different sets of flaps one for flaps dropped and the other retracted. Photo etched flap hinges are supplied. There are slots in the resin between the actuator link supports on the flaps to fit the hinges. Undercarriage bays are nicely detailed. Panel lines and hatches are finely recessed. There are separate clear resin parts for the landing and wing tip lights. The trailing edges of the wings have a hint of roughness about them, which should be clean up easily with a sanding stick. The airbrake situated in the centre of the lower wing is cast in the closed position. Tail planes have separate elevators. Undercarriage: with the weight of this kit Alley Cat have wisely made the undercarriage legs in white metal. The castings are very well done and I particularly like the landing light on the front undercarriage leg and the torsion links on the main undercarriage legs. The V support for the front undercarriage leg is made in resin, while the V supports for the main undercarriage legs are in white metal. The undercarriage doors are nicely detailed. If you don't know your starboard from your port, then now is a good time to learn as the doors are identified with P and S. Make sure you pay careful attention to the instructions as some of the doors are closed even when the undercarriage is down. The resin wheels are excellent and have weighted tyres. Main wheels have a radial tread pattern on them PE parts: are identified by name and/or letter. Parts include mirrors, hooks, flap hinges, rudder pedals, blade aerials, pitot tubes, handles, braces and control levers. Decals: the water slide decals are printed on two sheets. The bulk of the decals are on the larger sheet, the smaller sheet contains the canopy explosive chords. Decal colours, density are excellent as are their sharpness. The yellow wing stripes are included as decals as are the wing walkways. The central red portion of the roundels are separate. I like the attention to detail by Alley Cat for example they have reproduced the very fine white line around the outer circumference of the roundels and the outer edge of the fin flashes. The various badges also look very well done. There are quite a few stencils to apply and each one is numbered. Markings: Alley Cat have included six marking options:
-XF140, 207 [R] Sqr RAF, RAF Linton-on-Ouse, 2010.
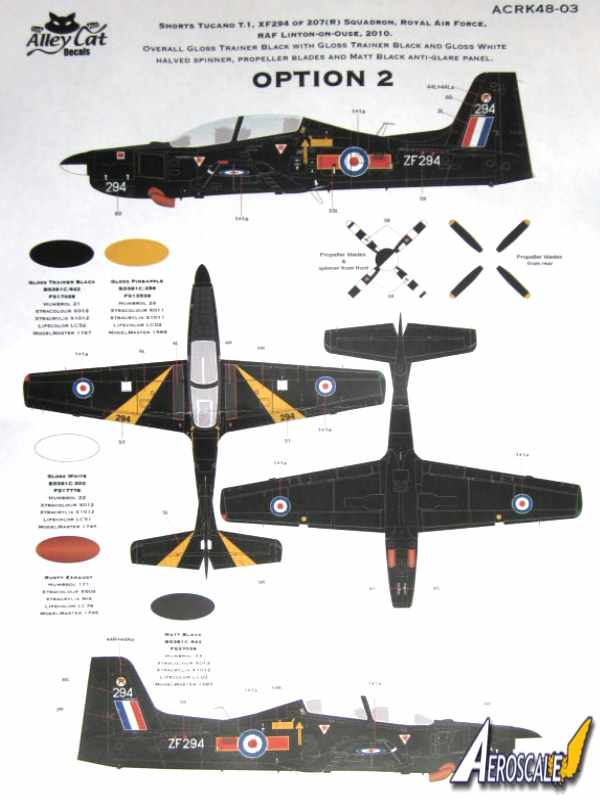
-XF294, 207 [R] Sqr,RAF, RAF Linton-on-Ouse, 2010.
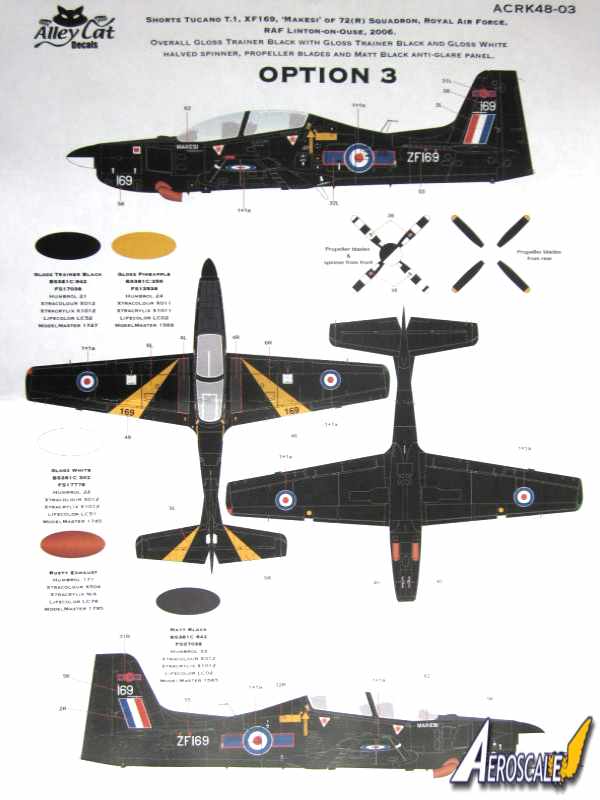
-XF169, 'Makesi', 74[R] Sqr RAF, Linton-on-Ouse, 2006.
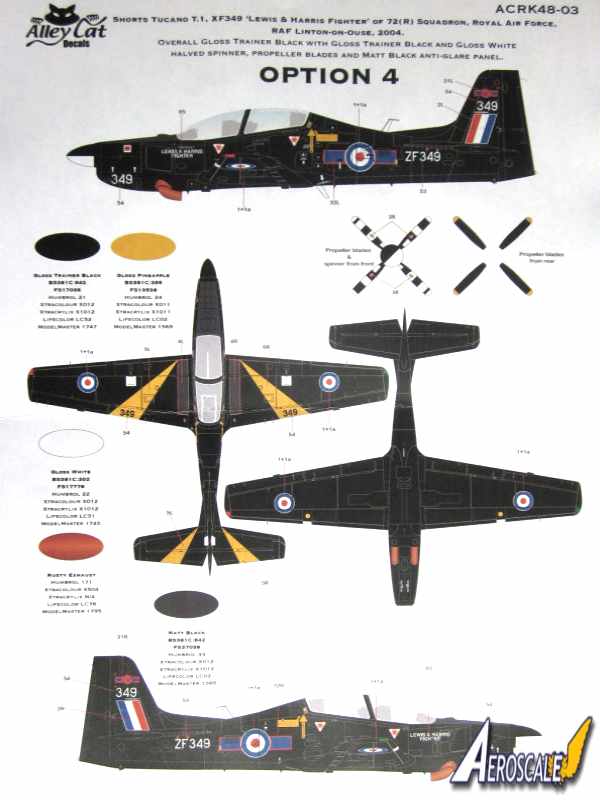
-XF349, 'Lewis & Harris Fighter', 72[R] Sqr RAF, Linton-on-Ouse, 2004.
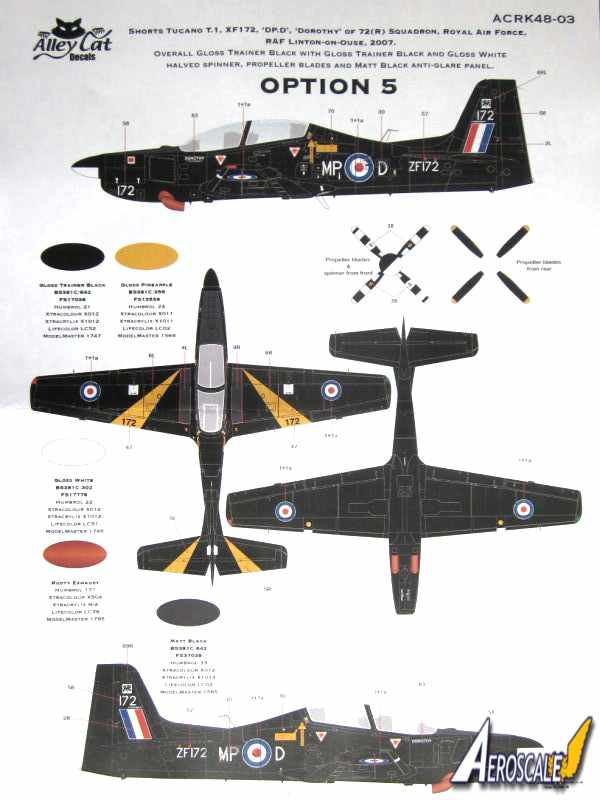
-XF172, 'DP.D', 'Dorothy', 72[R] Sqr RAF, Linton-on-Ouse, 2007.
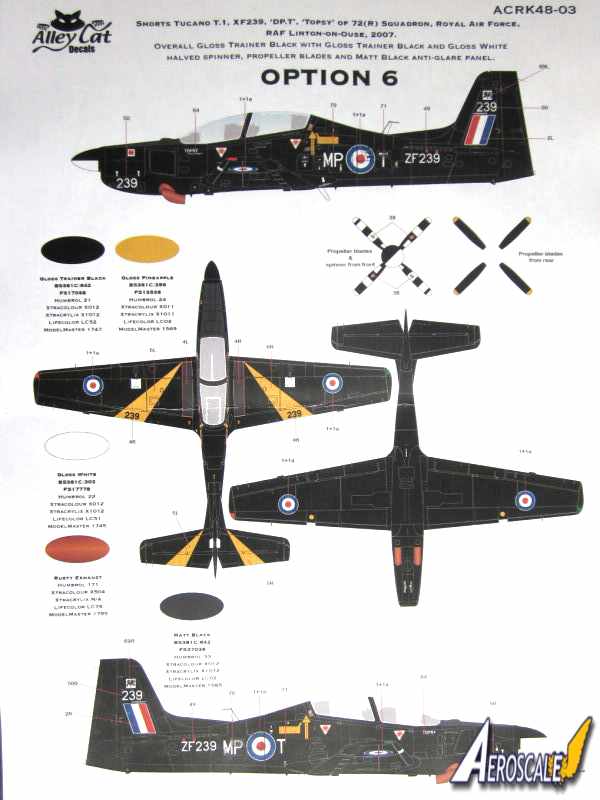
-XF239, 'DP.T', 'Topsy', 72[R] Sqr RAF, Linton-on-Ouse, 2004.
All aircraft are finished overall gloss trainer black with rather fetching gloss trainer black and gloss white halved spinners and striped propeller blades. Each aircraft sports yellow chevrons on the upper main and tail wings. Alley cat provide paint references for Humbrol, Xtracolour, Xtracrylix, Lifecolor and Model Master paints as well as FS references.
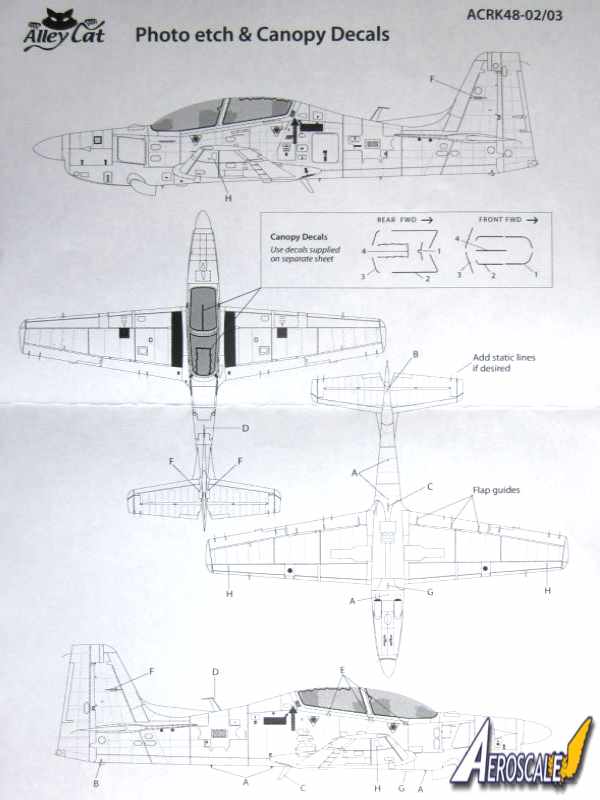
Masks: there are two sets of black coloured masks: one for the inside and the other for the outside. Each set is identified to avoid confusion. Instructions:there are two pages of written instructions, which are used in conjunction with the two pages of colour images illustrating the build process. Also included are eight images of the various areas of the cockpit and canopy. This rather unusual approach to building the kit works very well as the kit is not a complex one to construct. There is a PE placement instruction sheet providing port and starboard profile views as well as upper and lower plan views to assist the placement of the PE parts. There is also a illustration helping with the placement of the decals representing the explosive chords in the canopy.
Conclusion
This is a tremendous mixed media kit from Alley Cat and at £45 it is very good value for money. The design which keeps the parts count to a minimum and speeding up the build process will appeal too many. What will also appeal is the overall black colour of the aircraft and the colourful markings. I disagree with Alley Cats advice that this kit will need some experience of mixed media kits to build. Yes experience is useful, but I think this would be a good first subject for someone looking to try their hand at mixed media kits. Mainly because of the scale and the fact that it is not a complex build and it's a handsome looking aircraft. Nicely done Alley Cat, very nice.
SUMMARY
Highs: Too many to mention.Lows: None noted.Verdict: Very highly recommended.
Our Thanks to Alley Cat! This item was provided by them for the purpose of having it reviewed on this KitMaker Network site. If you would like your kit, book, or product reviewed, please contact us.


Comments