Skunkmodels Workshop have issued a good model of the HH-60J, and Joe Szczygielski, a.k.a. Mother, created a beautiful build of this beautiful bird for us!
(1:48) HH-60J Jay Hawk United States Coast Guard
Hello fellow modelers, here is one of my latest builds courtesy of AeroScale. Before we get started Id like to point out that this kit was reviewed by Fred Boucher (JPTRR) and can be seen through the link Review by Fred Boucher (JPTRR) below.
Also this will be built strictly out of the box as I will not add any missing detail or point out any inaccuracies.
Putting it Together
Like most kits you will have some flash that will need to be cleaned up. The plastic is pretty soft and there is some nice soft engraved detail and rivets around the fuselage. It does disappear on the underside and nose area which is no real problem.
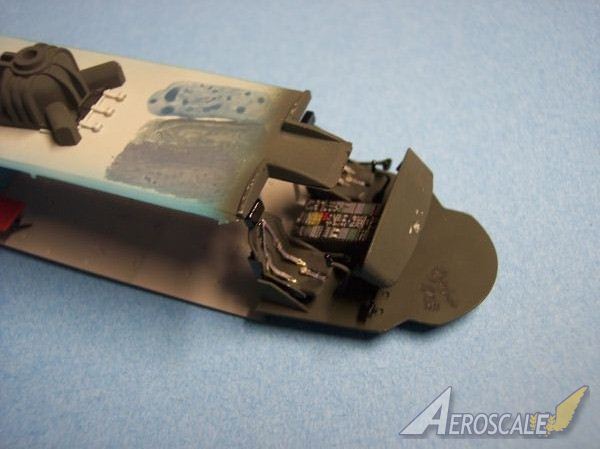
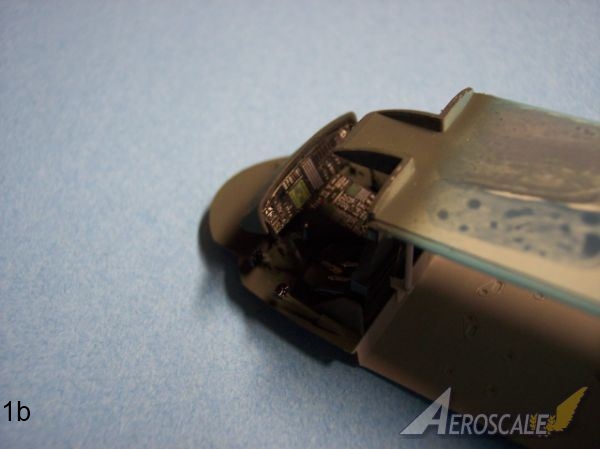
Like most aircraft you start off in the cockpit area. There is one critical part though, you must remove a section from the instrument panel to add the photo etch two piece instrument panel. It wont fit properly without doing so.
The photo-etch instrument panel, center and overhead console are a nice feature and they pretty much match the real J-Hawk. Photos 1a, 1b
Parts D11 are not found on the real HH-60J. They are support poles to hold up the ceiling.
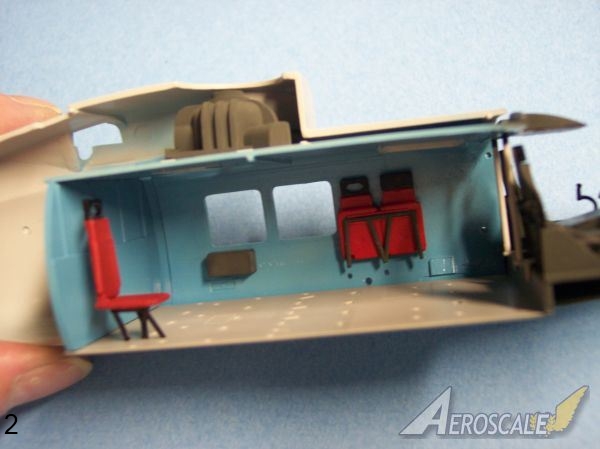
The cargo bay area lacks in detail throughout the whole area. On a real J-Hawk the area is pretty busy with seats, medical bags and rescue equipment.
There are some extra troop seats (parts 15, 16 and 19) in the kit so I added them to the wall for extra detail. Photo 1, 2, 3
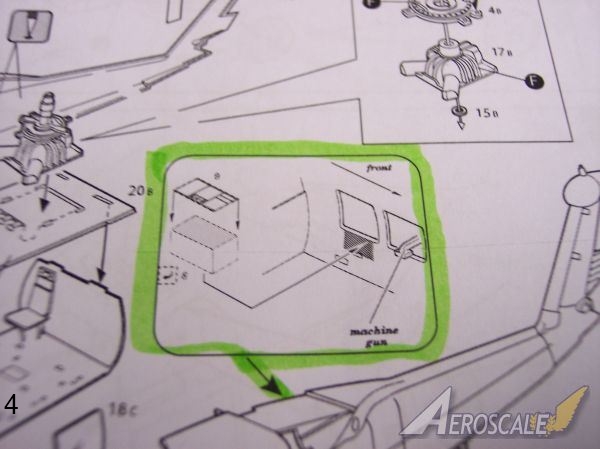
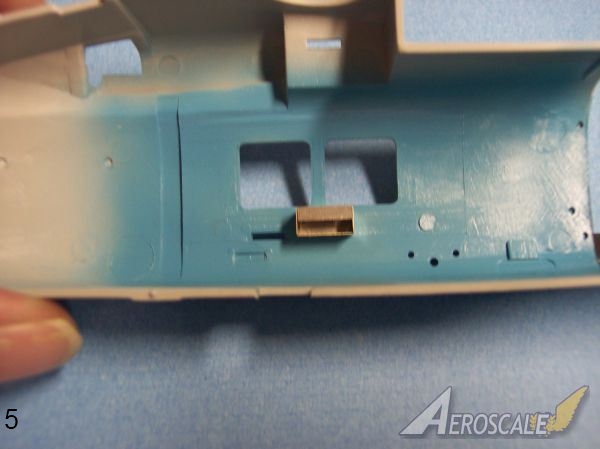
The instruction sheet is vague in step 2, photo etch parts 8 and 9. After folding the box youll notice a small square hole that needs to be aligned with the hole in the fuselage. Photo 4, 5, 6
Transmission and rotor shaft. I only installed the transmission (part 17B). The rest of the parts were assembled and will be added later in the build. I omitted (part 15a) a lock ring which holds the shaft in place.
Also in step 2 is where they have you install the side windows (parts 19c, 18c). They dont fit into opening and are installed in the sliding doors in step 7.
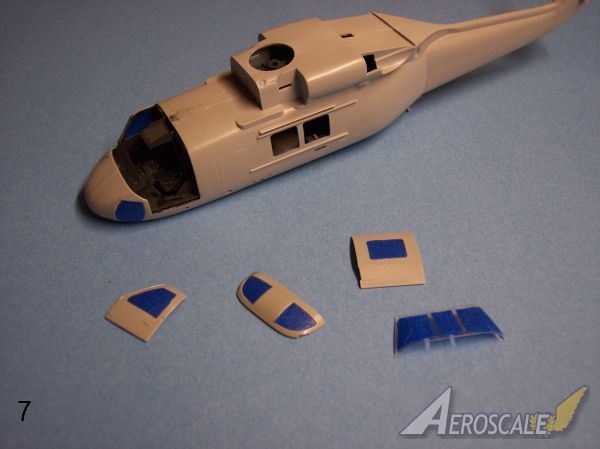
Word of advice, I skipped ahead and went and installed all the clear window pieces. Itll be a lot easier to get at with having nothing in the way, and save you from a headache. They parts fit terribly but managed to get them in place and masked. Photo 7
I went ahead and assembled the tail rotor and again opted to add it later. Before you close up the fuselage be sure to have your holes drilled.
Painting cockpit and cargo area
The cockpit was painted in Tamiyas NATO Black XF-69 with a few highlights in Tamiyas Semi-Gloss Black.
The cargo bay floor was painted in Tamiya Sky Grey XF-19.
And for the cargo bay walls and ceiling I mixed a close color match using Tamiyas Sky Blue X-14 AND Tamiyas Sky Grey XF-19. If you want a lighter color then mix in a touch of Tamiya Gloss White.
Closing up the Fuselage
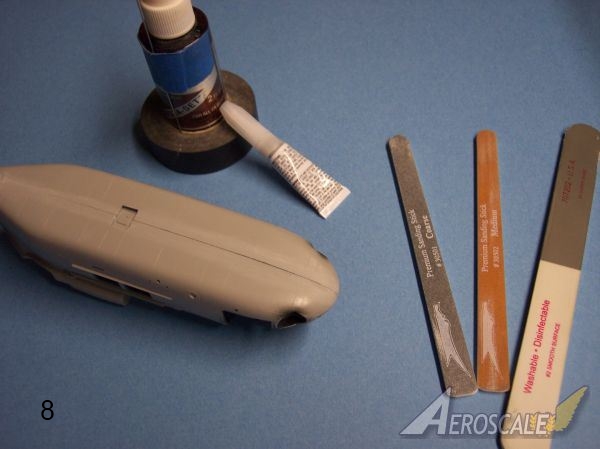
I started at the upper nose working the whole top of the fuselage to the rear. Once dried I started on the bottom from front to rear. There was a gap in the bottom section which I filled with super glue followed by a sanding. Photo 8
In step 2 there is an option to change out the pilots doors like the originals on the J-Hawk, I skipped this option.
Ok its guess-at-mation time! In step 5 there are 10 pieces (antenna, lights and such) that are placed on the bottom side of the fuselage. There are no indication marks to where they go.
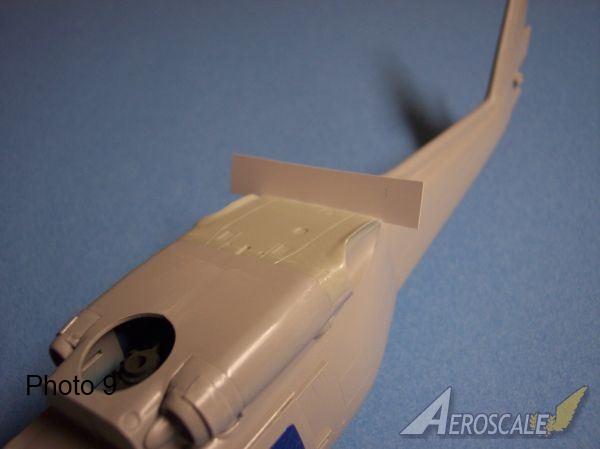
In step 6 you install the exhaust upper half (part3). There is a gap which I filled using a .005mm sheet. Once the liquid cement dried used a sharp knife to remove the piece followed by a light sanding. Photo 9
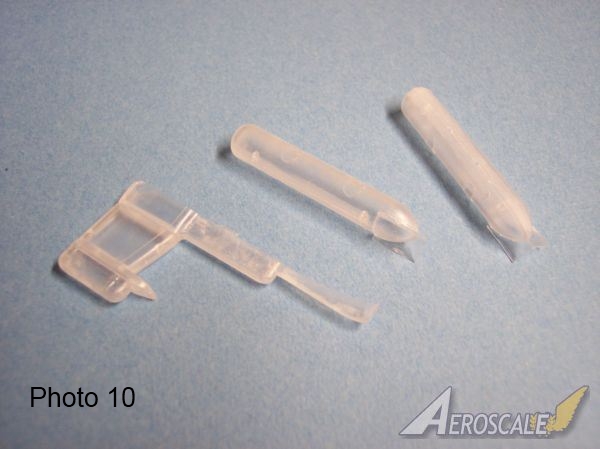
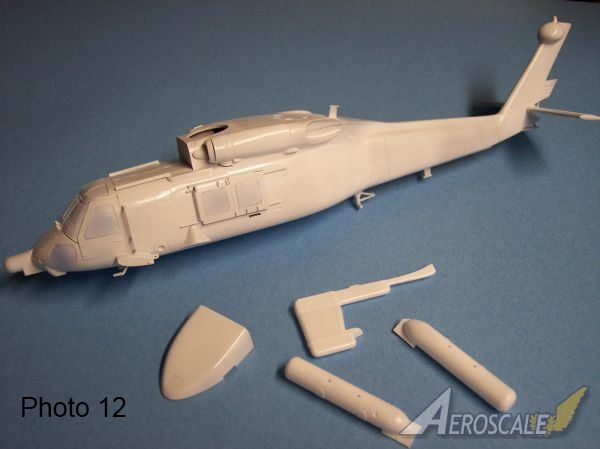
The extended pylons went together well. Photo 10
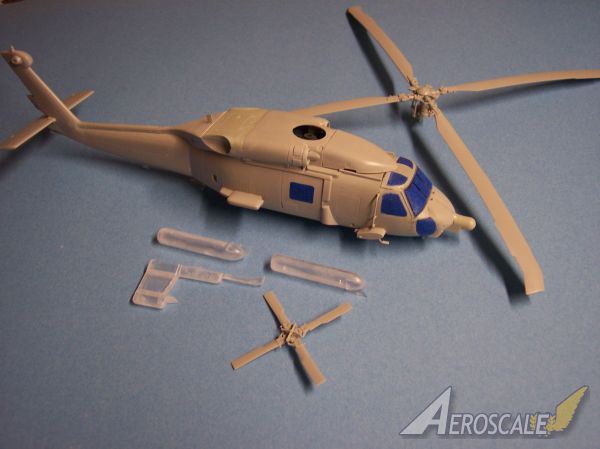
The rest of the build went together well. I left of a few more pieces to make painting easier.
1) wheels and struts
2) wiper blades
3) mirrors
4) pilots tubes
These parts were added after painting.
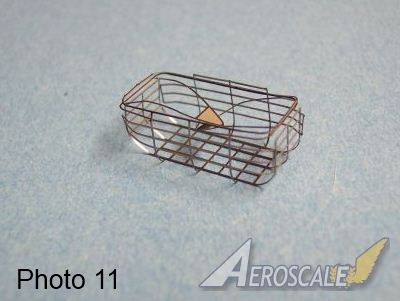
The photo etch basket was built without any problems and glued to cargo floor. Photo 11
Painting
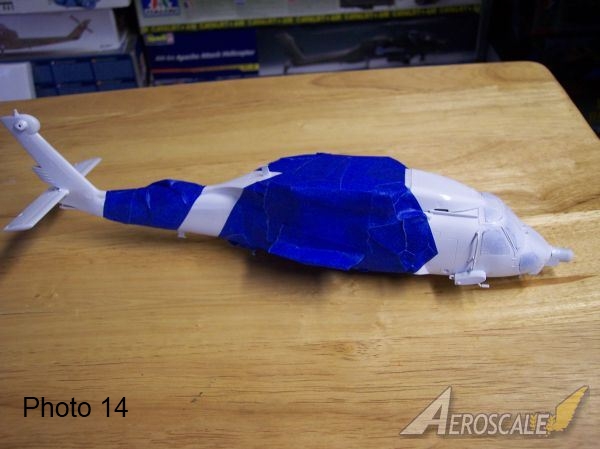
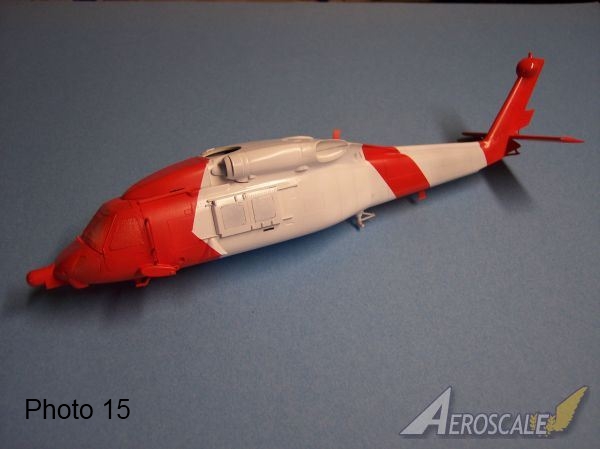
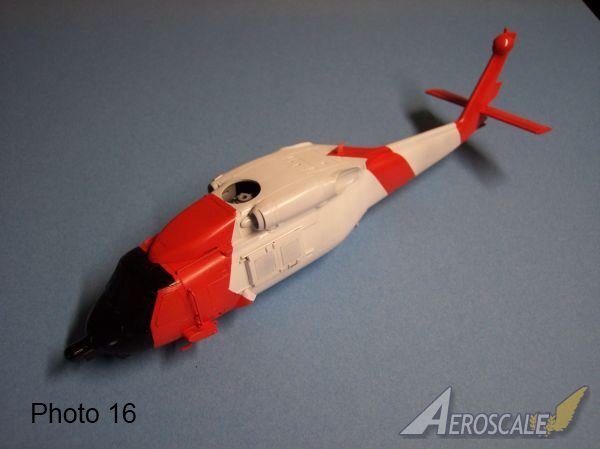
I started out by using Tamiyas White X-2. After it dried I masked of the orange area and sprayed it Model Masters International Orange. I then masked off for the flat black section and sprayed with Model Masters Flat Black.
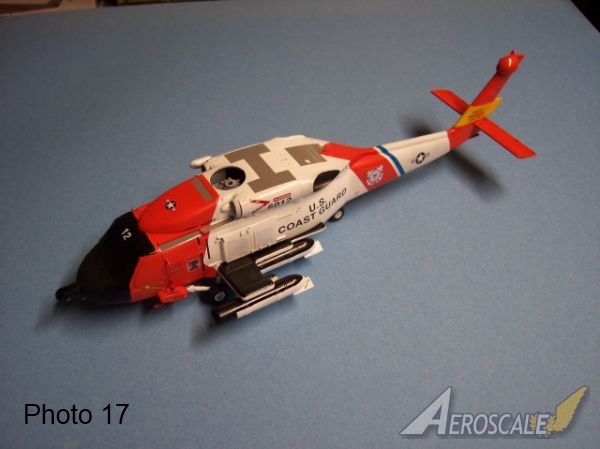
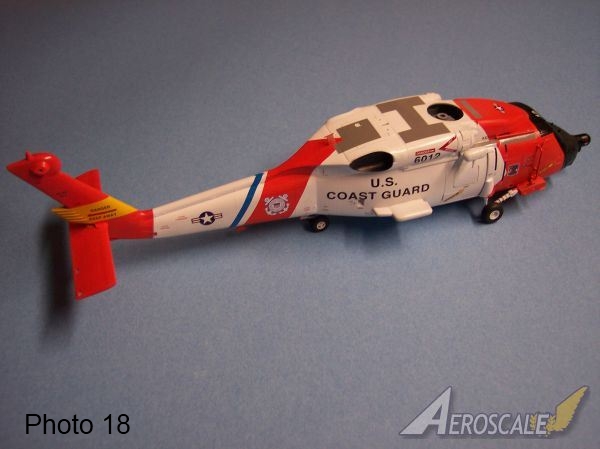
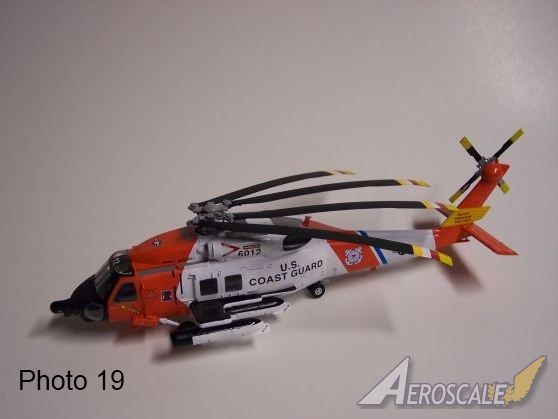
It was then given a coat of Future Floor wax and decaled. The decals went on like a charm and ran into no problems. Photos 12 thru 19
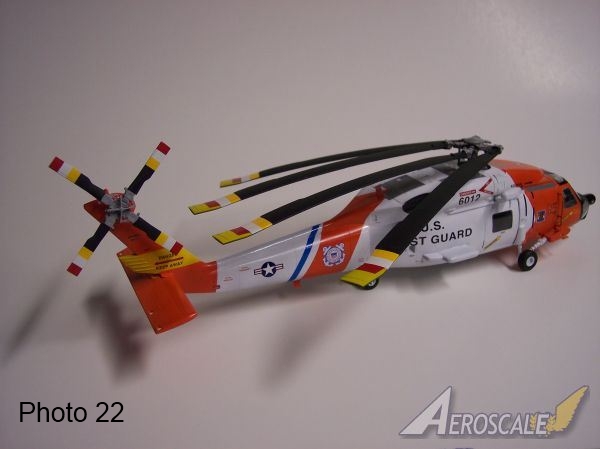
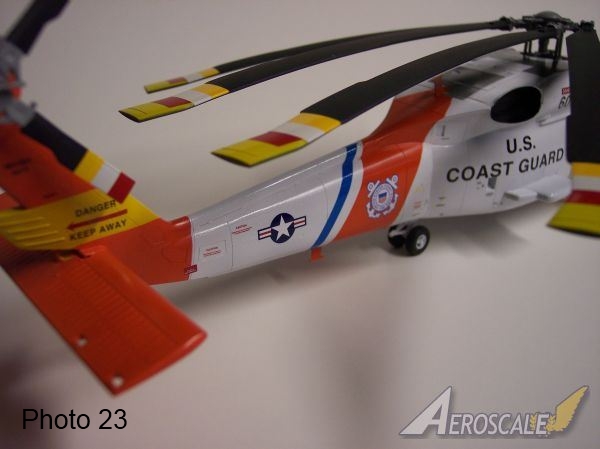
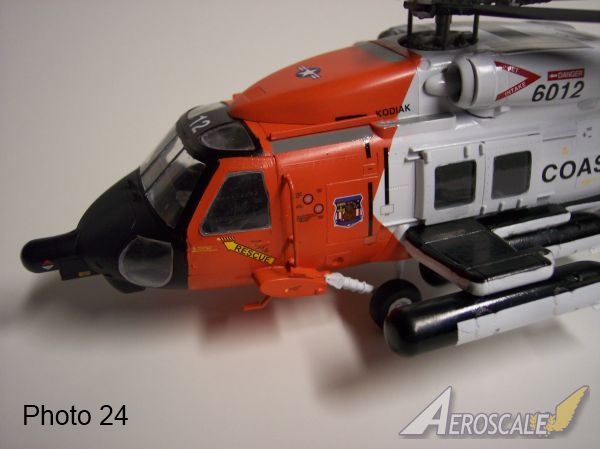
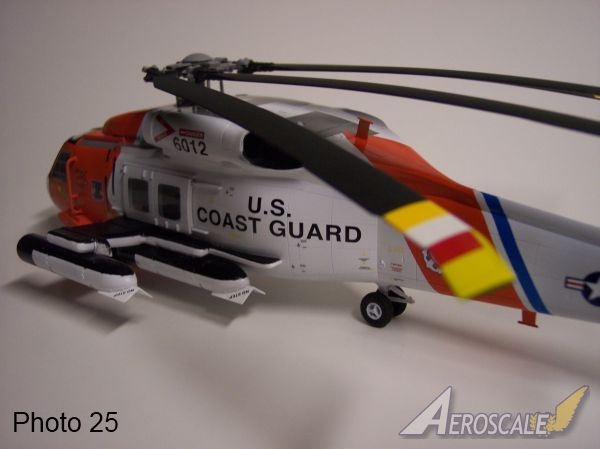
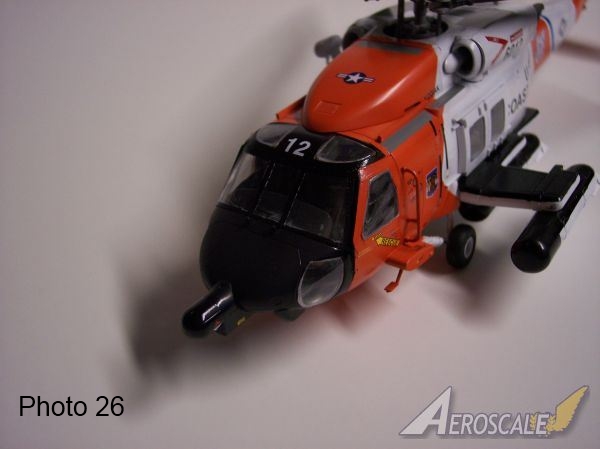
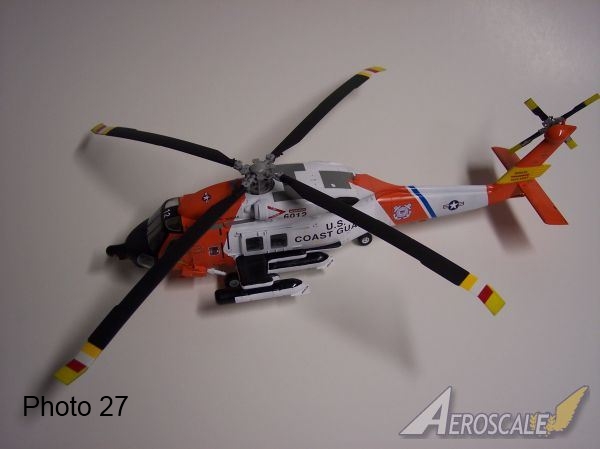
Finished!
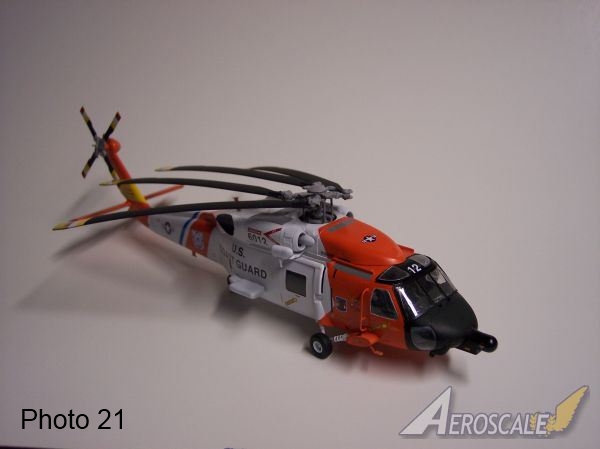
Photos 19 thru 27 Being that its an Italeri Sea Hawk kit with J-Hawk parts and decal mixed in it does build up nicely. I will add this though, if you really like to build this up I say get yourself Eduards Sea Hawk exterior Photo Etch set which will enhance if deeply.
Happy Modeling,
Joe!
Please remember to tell model manufacturers and sellers that you saw this model hereon AEROSCALE.
Highs: The only HH-60J Hawk in any scale. Nice to see the Color Photo Etch, the small details look great and bright decals that layed down without any solutions or solvents. Lows: Some of the surface detail was missing, cargo bay area lacks detail and the gaps around all the windows. Verdict: An alright kit that will turn out nice with some work. I suggest getting Eduards Sea Hawk photo etch exteior set for extra detail. Also look around for some 1/48th gear to add into the cargo bay area. Would I do another...yes.
Our Thanks to Skunk Models Workshop! This item was provided by them for the purpose of having it reviewed on this KitMaker Network site. If you would like your kit, book, or product reviewed, please contact us.
Thanks Gino and you're right about 1/35th. I did start doing the measurement and drawings for it, not only the Coast Guard version but it will work for the Sea Hawks helos as well.
Happy Modeling,
Joe


Comments