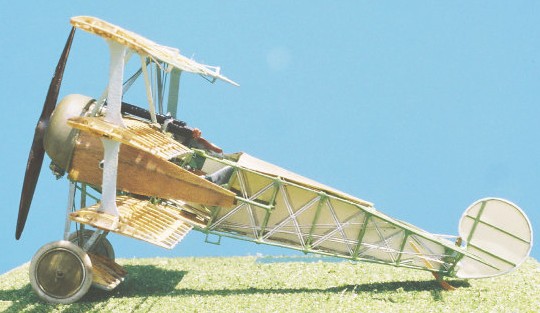
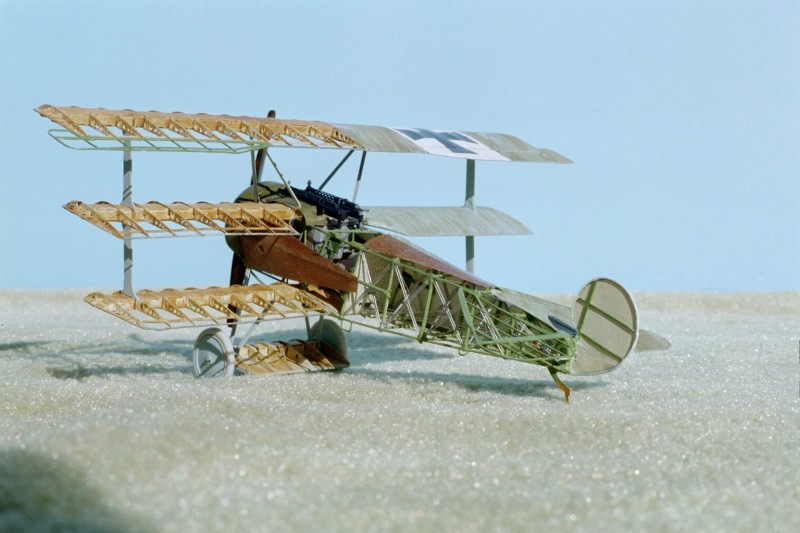
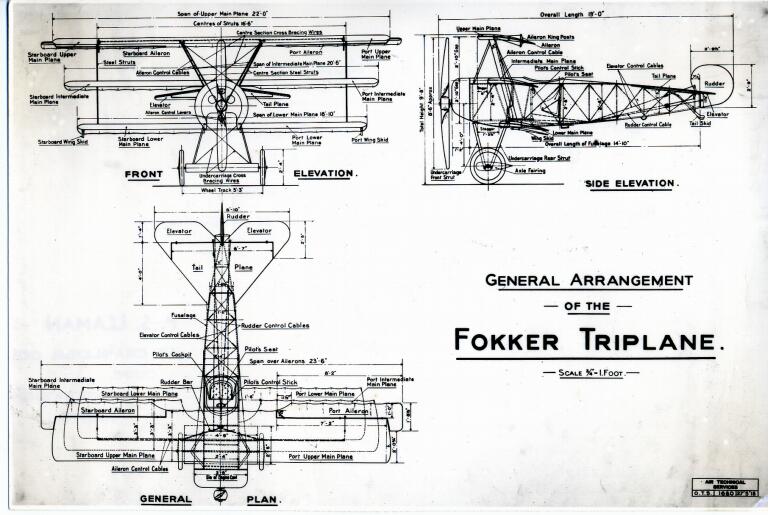
History
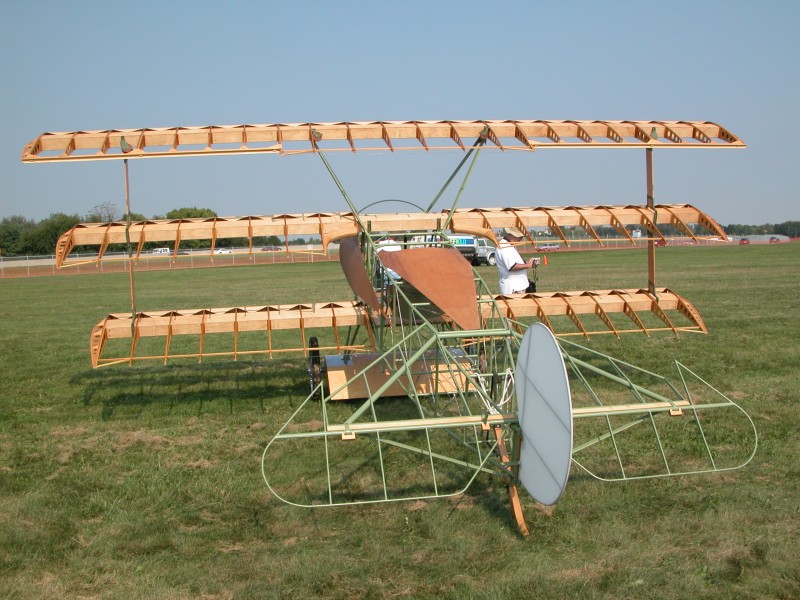
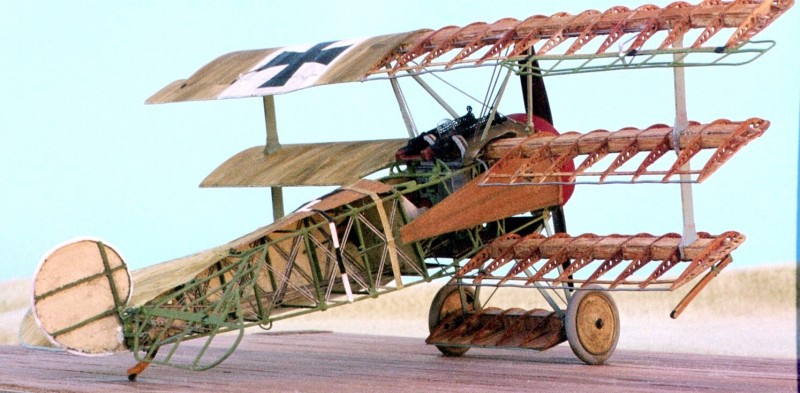
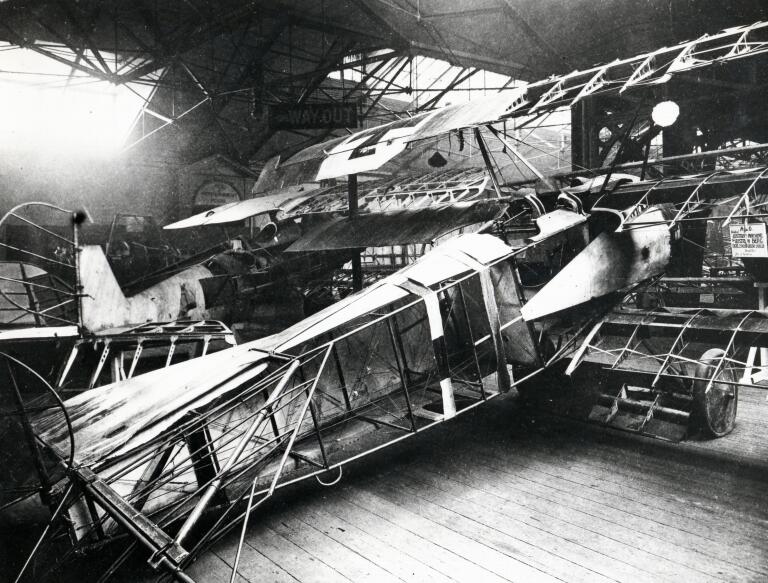
The first victory recorded in a Fokker Triplane was achieved by Rittmeister Manfred von Richthofen when he brought down an RE 8. The crew believed the oncoming machine to be a British Sopwith Triplane. Bad construction and the proximity of the top wing to the propeller wash caused in-flight failure. Being withdrawn and then re-emerging in strength in Jan.1918 the Fokker Triplane equipped most of the Jagdstafflen of the 3 Jagdgeschwaders (Fighter Wings) of the German Fliegertruppe during the first half of 1918.
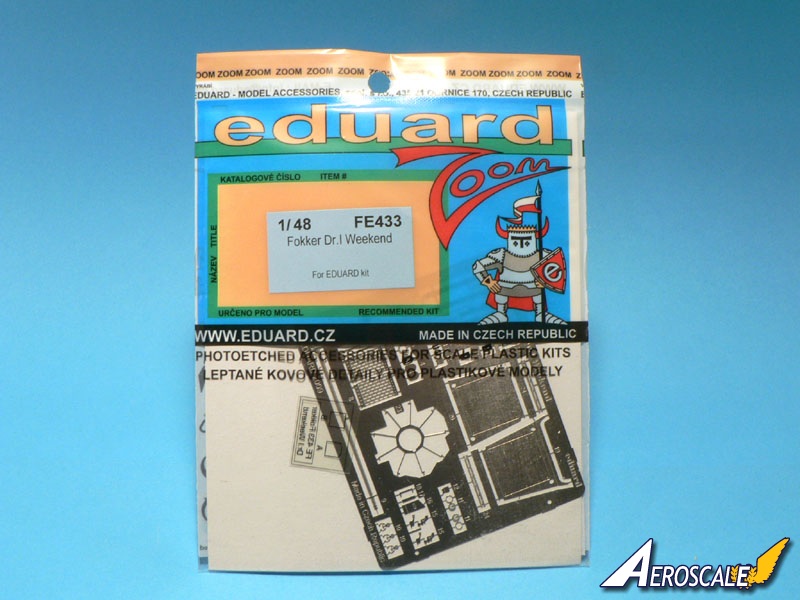
History of the set
First seen in the Eduard kits 1136 & 1136X Der Rote Flieger releases in June 2008. (see review of "Der Rote Flieger"
here.) It was also in the next issue called the Dual Combo kit #8161, also in 2008 (see review
here.) Then when the weekend kit was issued Eduard made a fret available as a separate purchase in 2009 (see review
Here)
Our man in France, Jean-Luc Formery (TedMamere) did the "first look" of this set back in 2009.
here.)
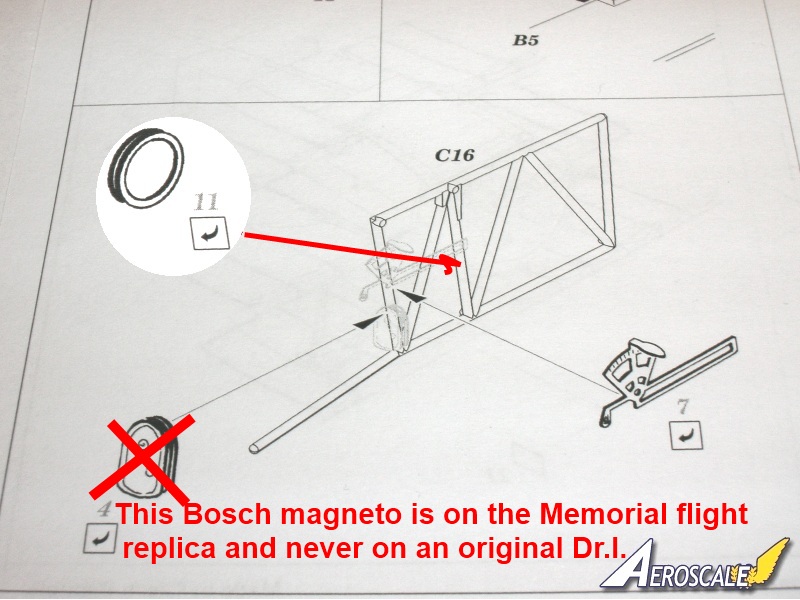
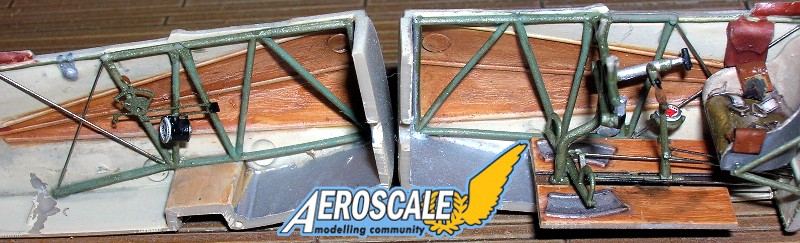
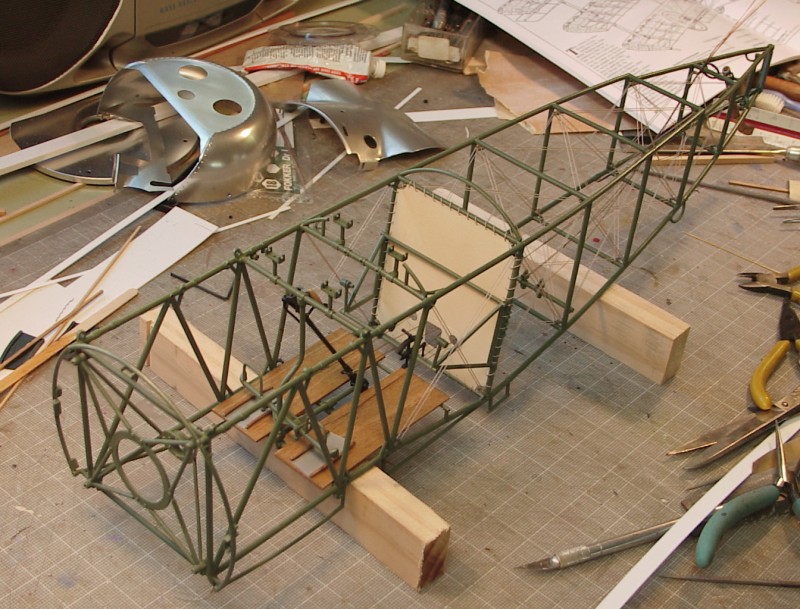
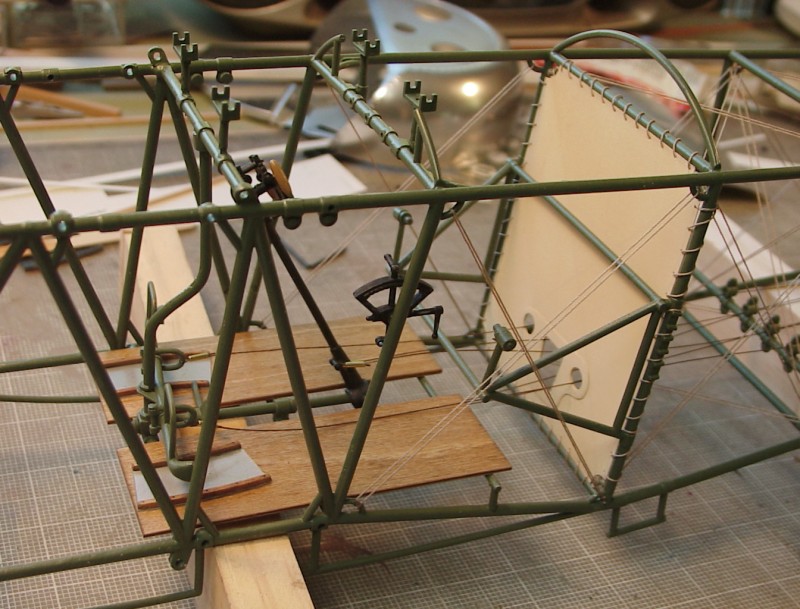
Here I will focus on specifics. Many times a kit manufacturers will visit organizations that have accurate or semi accurate replicas to assist them in designing parts & pieces for photoetch. Eduard evidently paid such a visit to the Memorial Flight Society in France. Their influence in some of the parts is keenly evident.
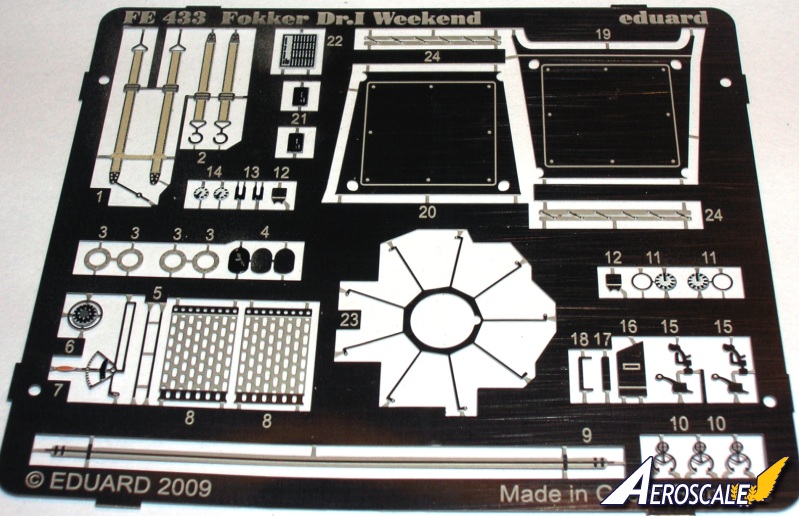
Contents
Eduard's "Zoom" range is for modelers who want to include quick, finer details to their kits.
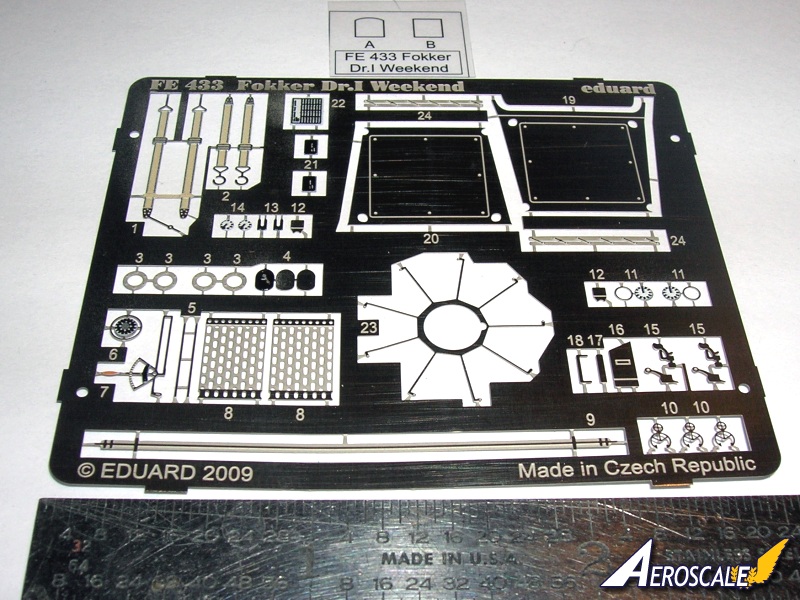
Parts for the Fokker Dr.I Weekend kit #8490 are:
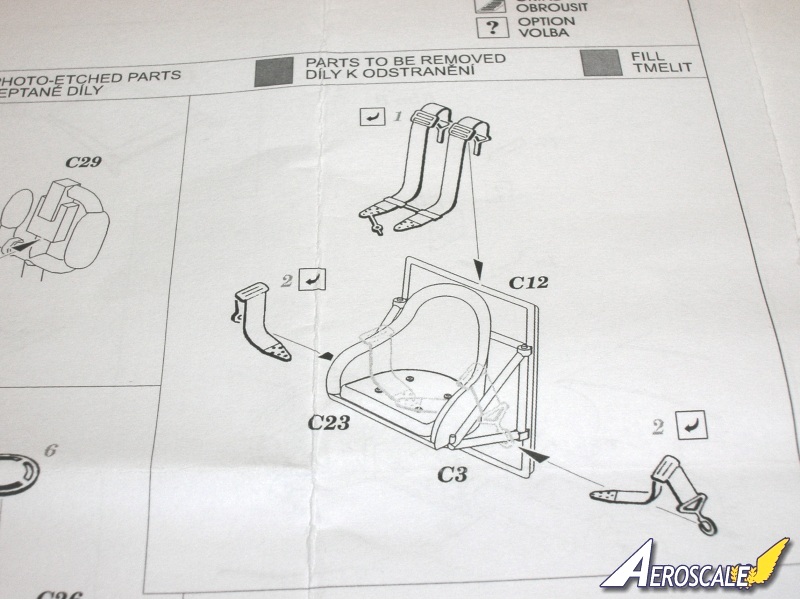
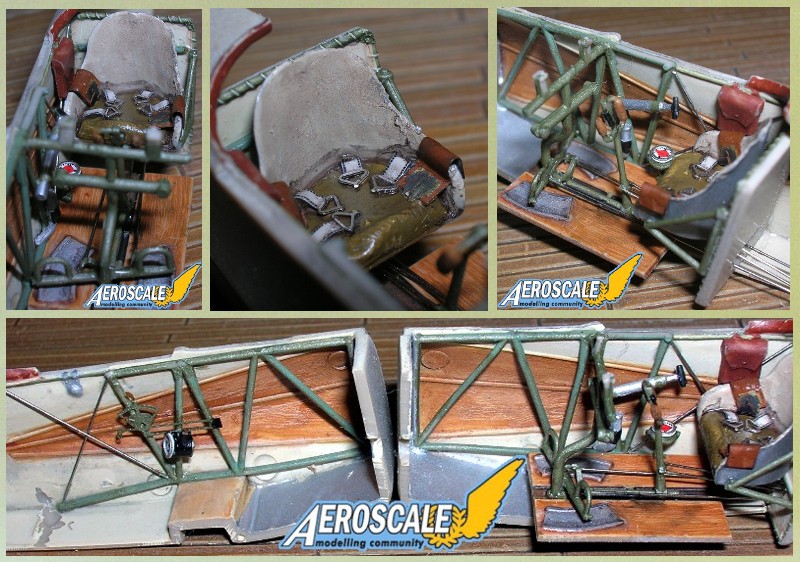
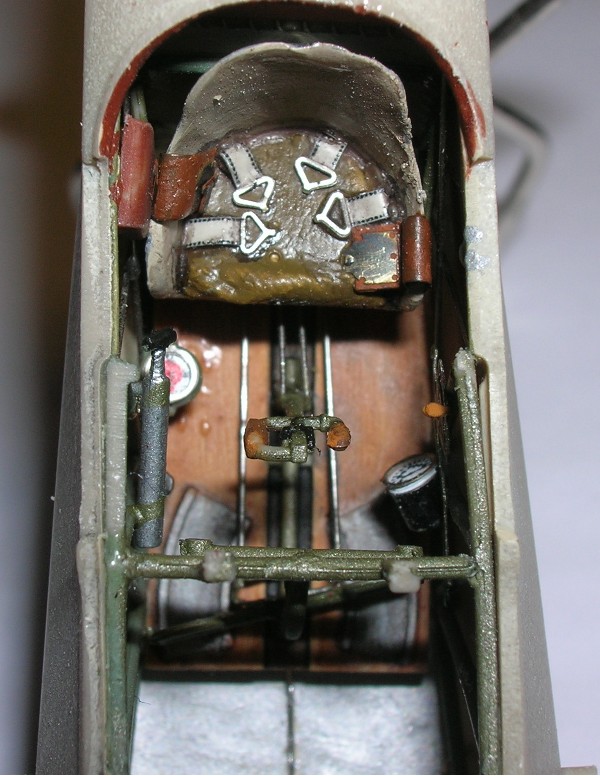
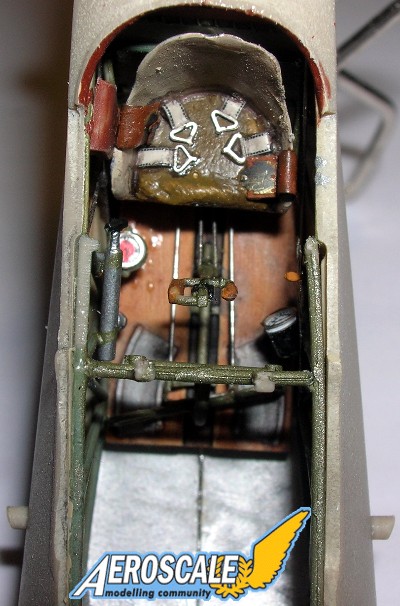
1. Lap & shoulder belts
2. Detail parts for the twin Spandau Maxim machine guns
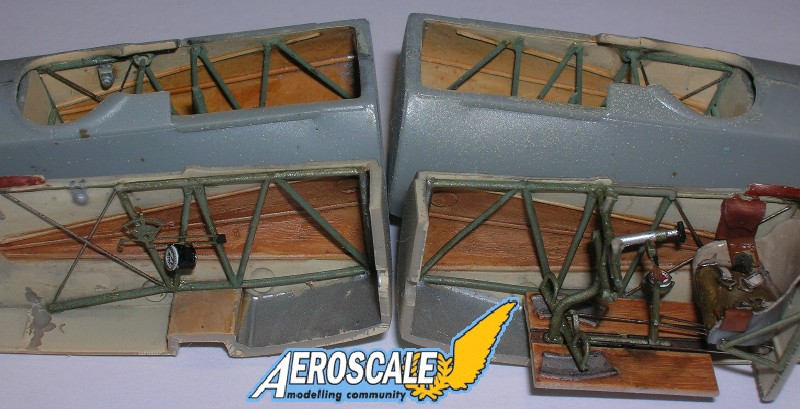
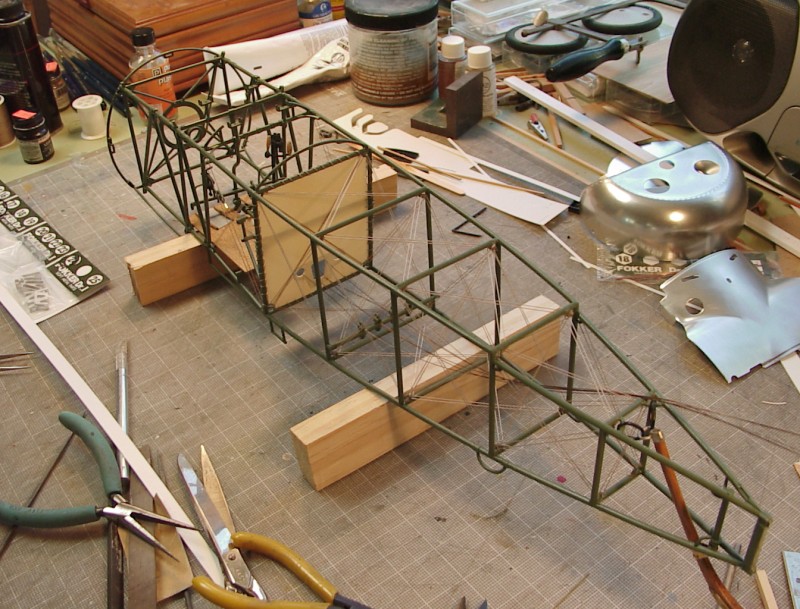
3. Detail parts to further detail the cockpit interior (instruments, placards, levers & etc. . .)
4. Push rods for the Ur.II rotary engine.
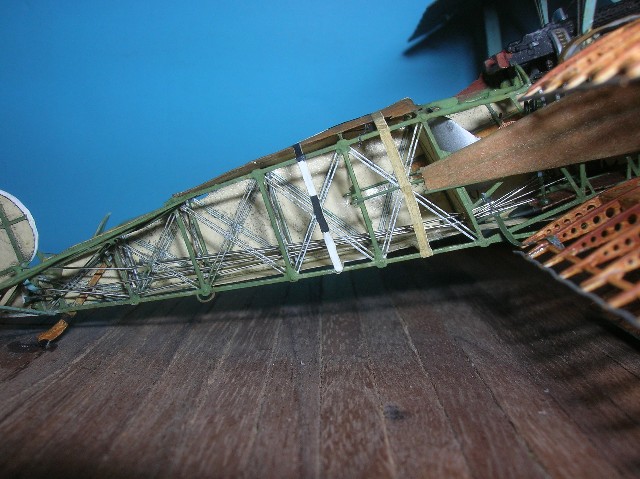
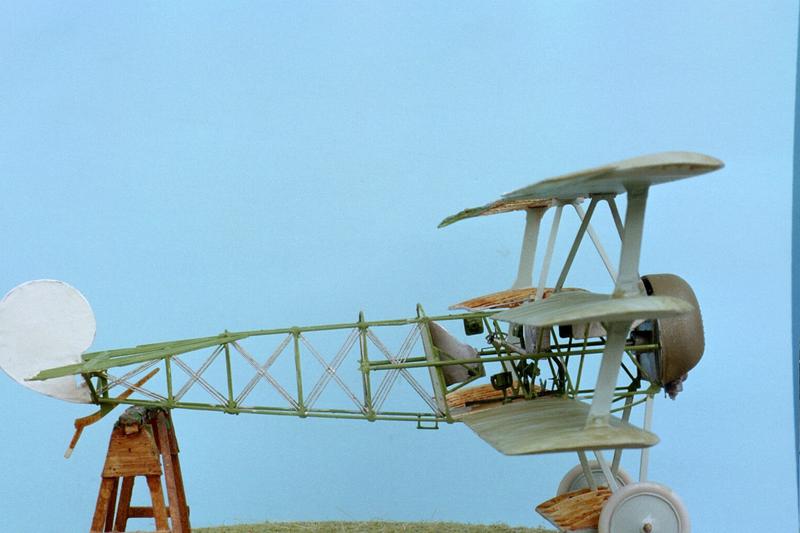
5. Lacings for access to clean (gravel, cinders & sand get in open cockpits)and repairs
6. A metal retaining strap for the engine cowling
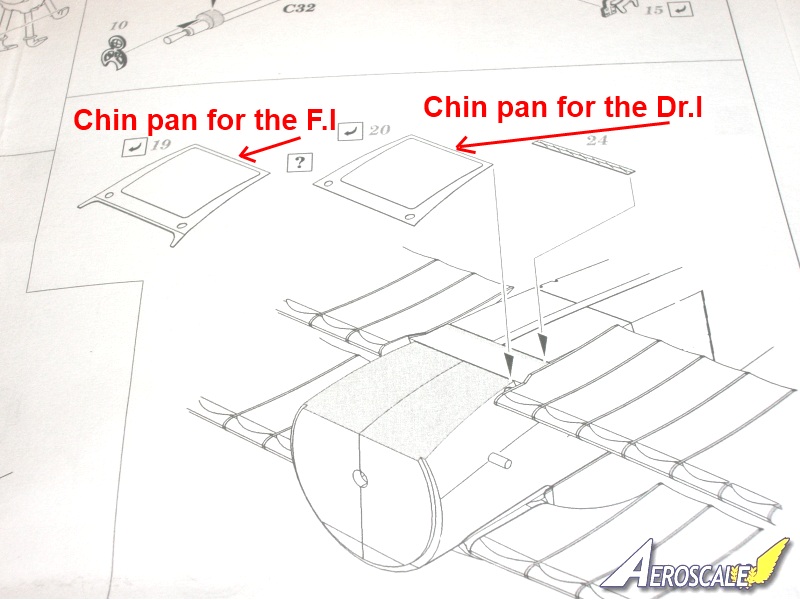
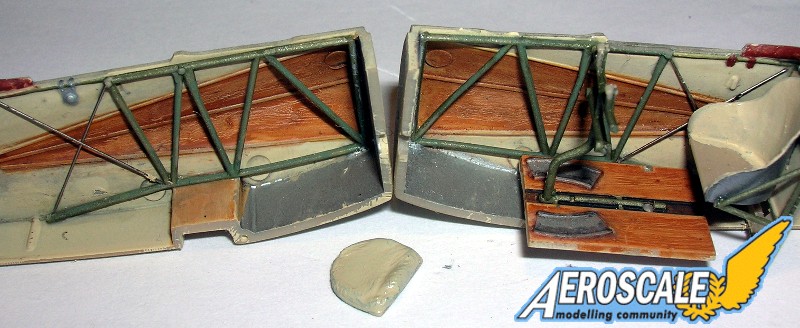
7. Underside access panels (one for the F.I and one for the Dr.I types.)
8. Various surface details in relief.
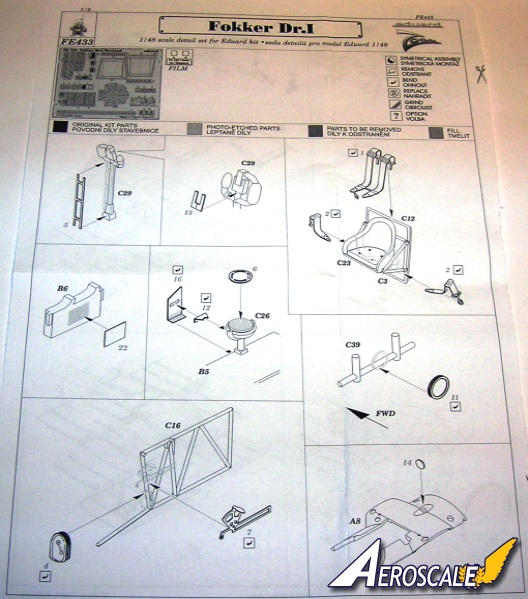
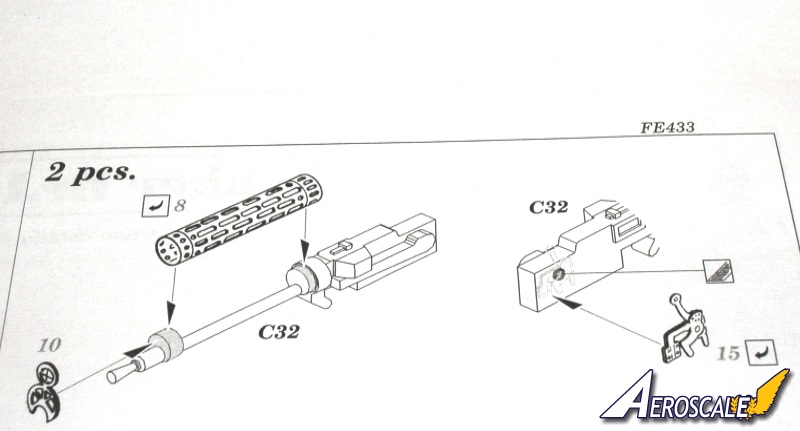
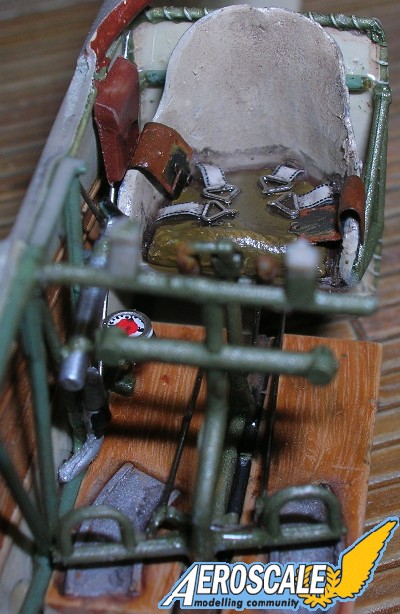
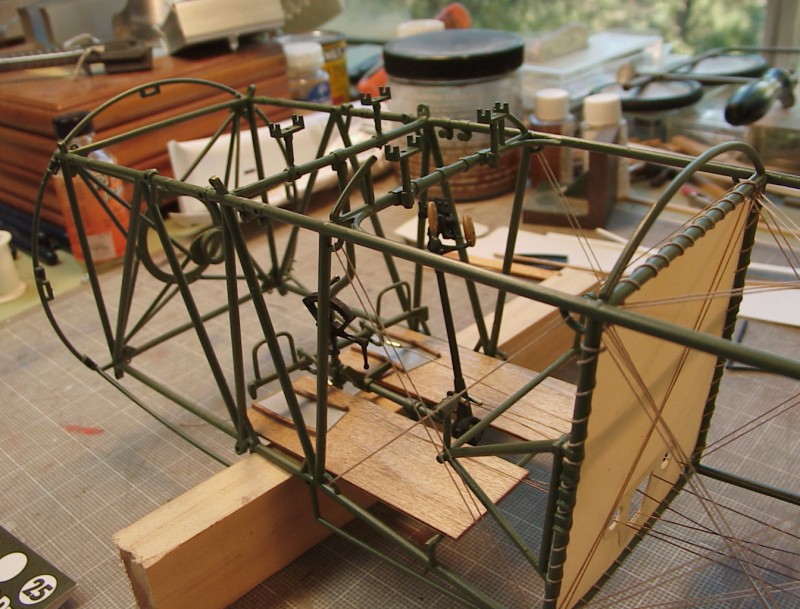
The first step adds PE 5 and is supposed to represent the gun triggering cables. I would replace these with painted brass wire and curve them back under the ammunition box and anchor them there for realistic appearance & support.
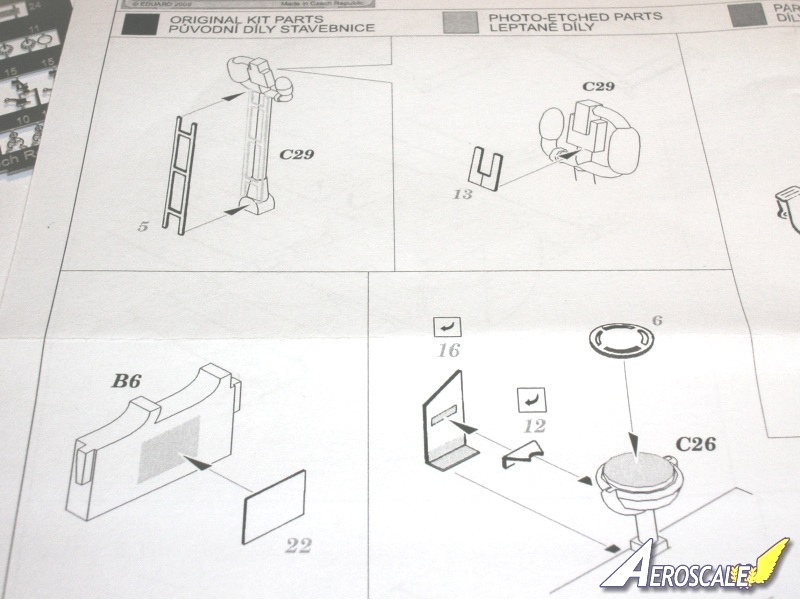
Next is the addition of the gun triggering levers (PE 13).
The PE 22 represents the compass Steuethertabelle, or deviation card. The aircraft was placed on a platform with known magnetic headings, as much deviation as possible was removed by placing magnets into slots below the compass. As not all deviation could be removed the amount of deviation was recorded on the card so the pilot could steer the correct course. This centered on the ammunition box (PP B 6).
Next is the compass (PP C 26) Gimble supports (PE 6, 12 & 16).
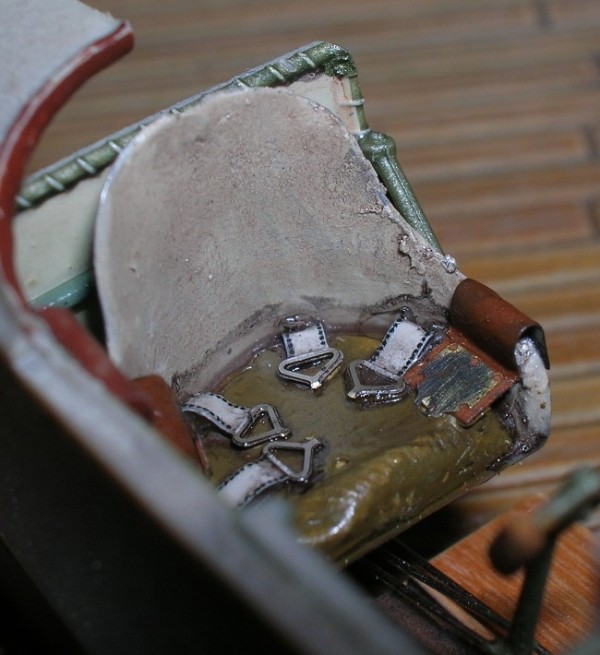
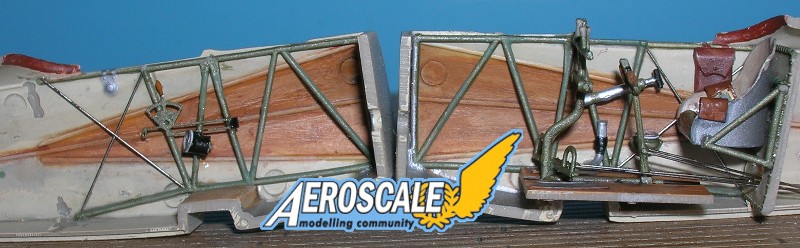
Lap (PE 2 X 2) & shoulder (PE 1) belts are attached to the seat (PP C 3) and its support assemblies (PP C 3 X 2 & 12).
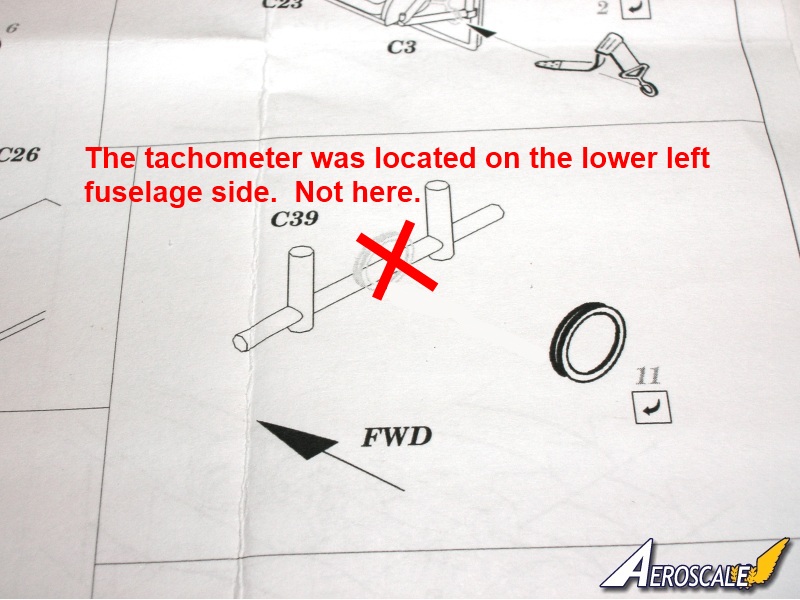
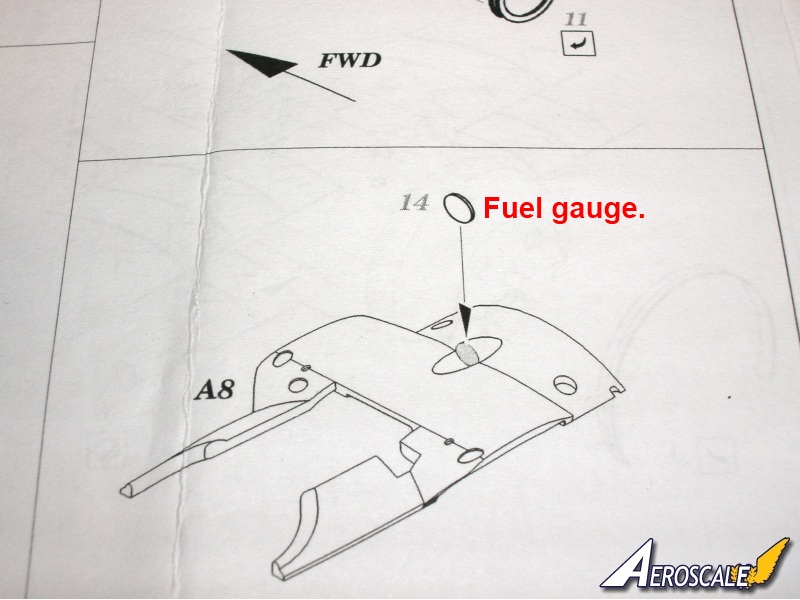
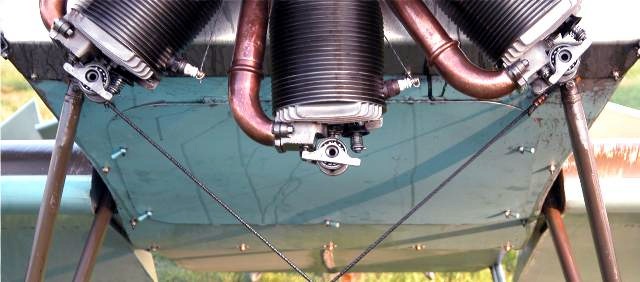
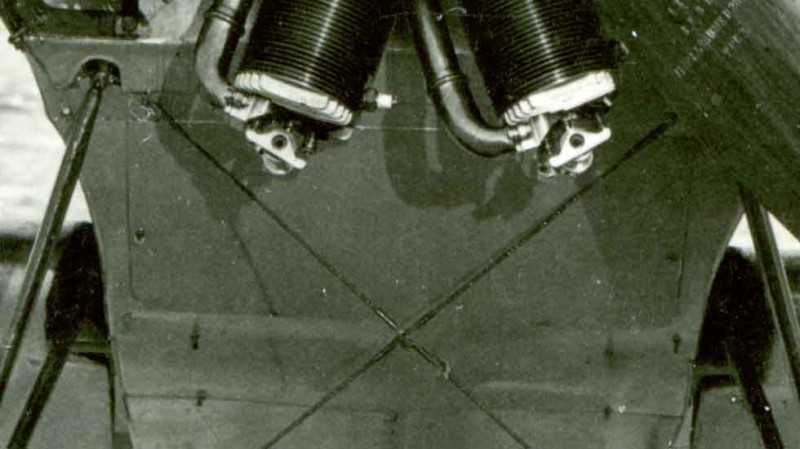
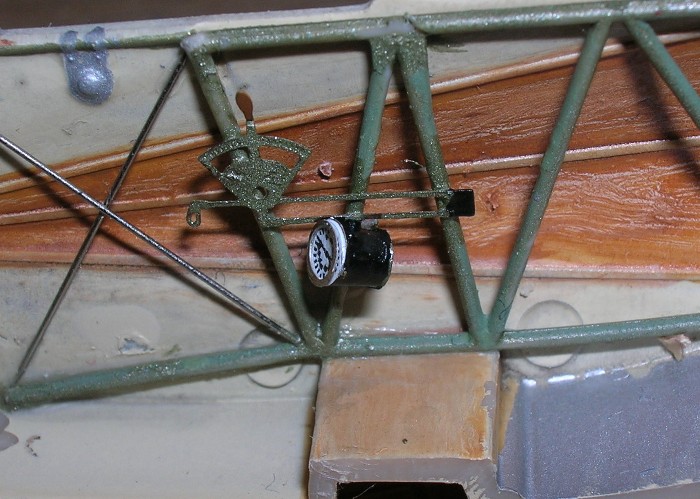
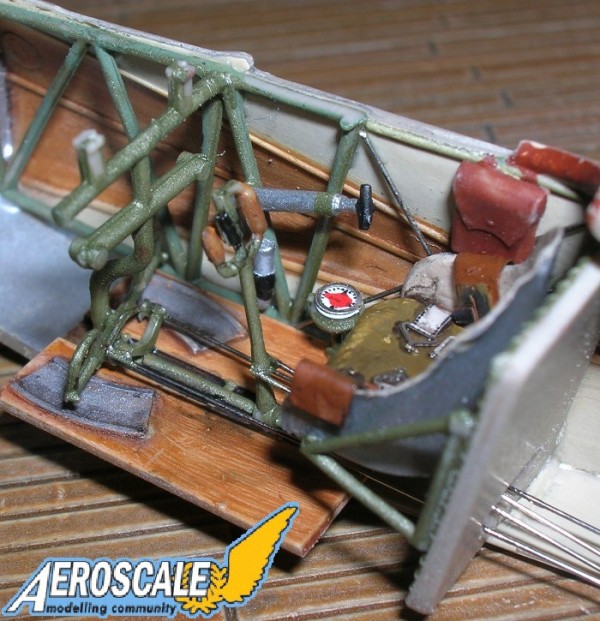
The tachometer ( PE 11 when fitted) was attached lower down on the pilots left fuselage side structure (PP C 16). The fuel gauge (PE 14) was fitted to the upper deck forward cowling(PP A 8). The "Bosch" starting magneto PE 4 they include (that they tell you to put near the pilot's foot) is bogus. It was designed for inline motors not rotary engines. The small rotary starter mag is molded to the pilots left side fuselage at shoulder level. Also the fuel air mix lever (PE 7) needs to have the handle bent in slightly.
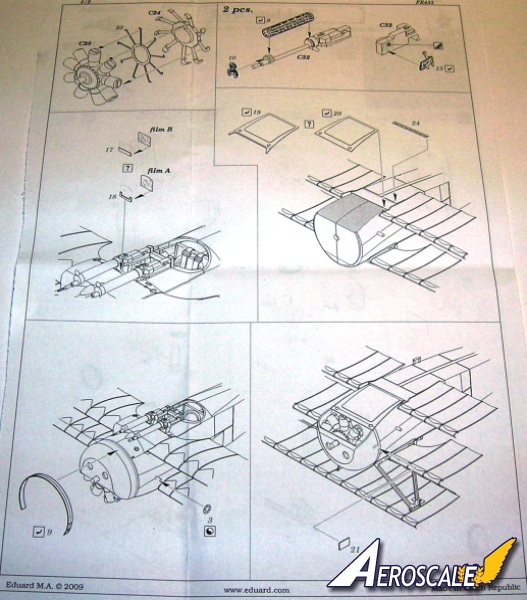
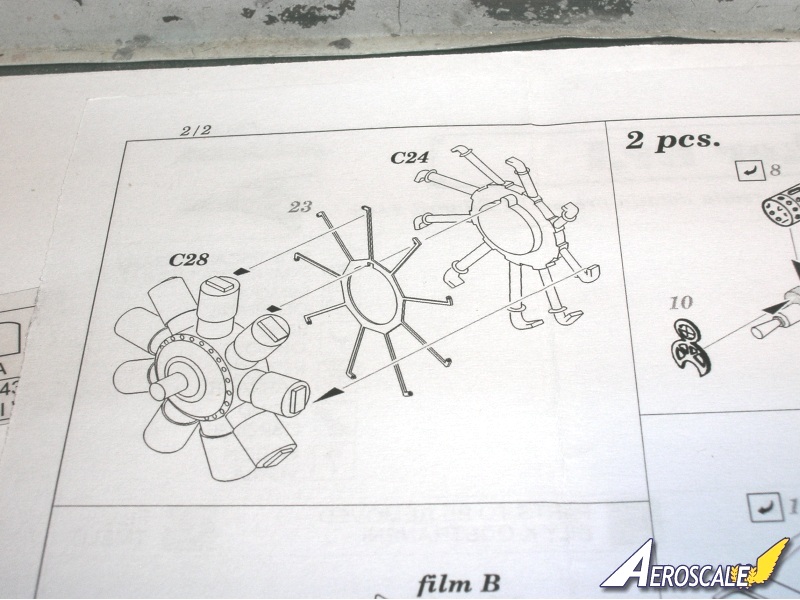
The Oberursel Ur. II motor ( PP C 24, 28 & PE 23 ) the PE parts are the push rods for the rotary engine. The photoetch machine gun ( PE 8 X 2, 10 X 2, 15 X 2 ) provided in the kit are very suitable. The jackets (PE 8 X 2) are easily rolled into a cylinder shape on an appropriate sized drill bit or the forming tool from the DML kit item.
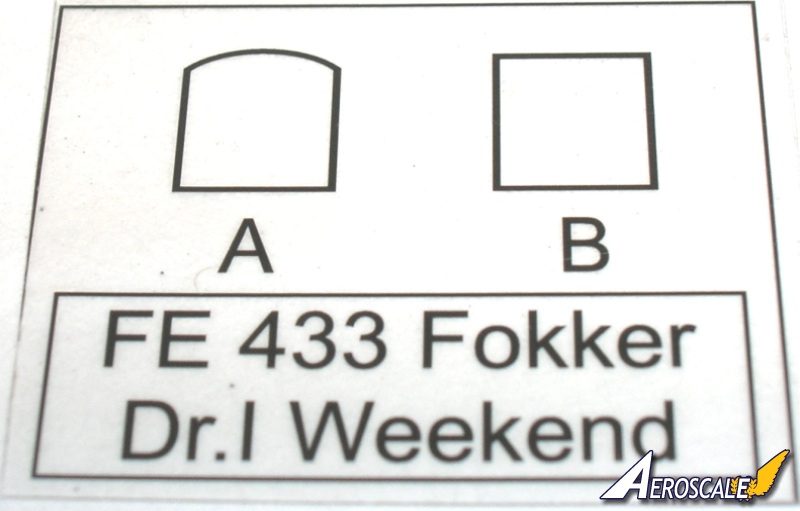
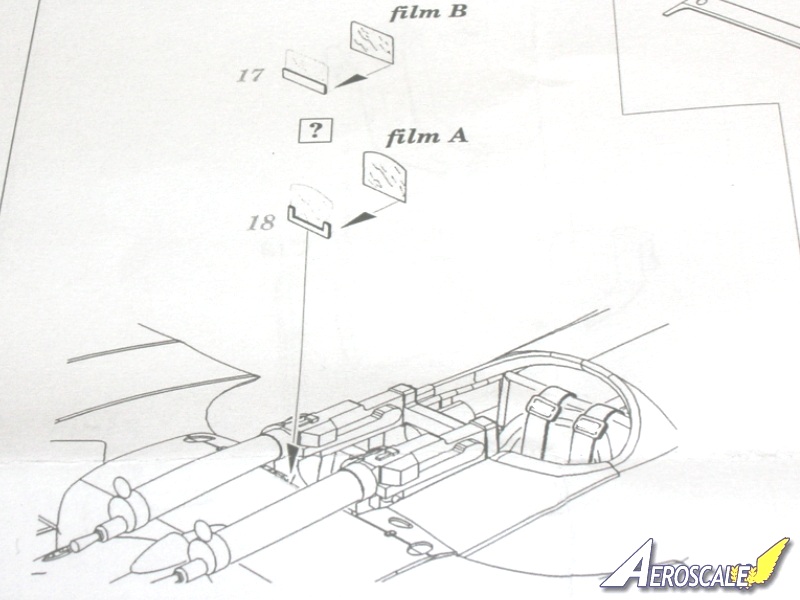
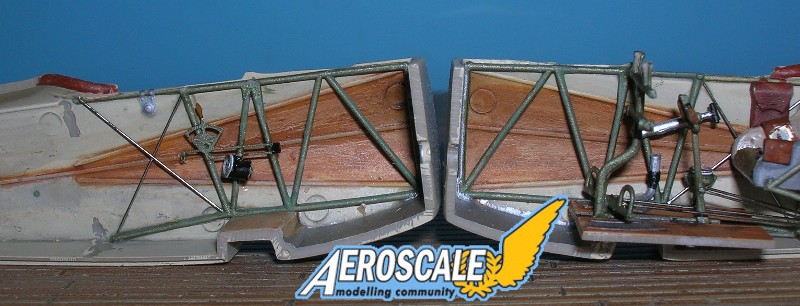
One small acetate sheet is also provided for the small windscreen located between the two Spandau guns. Two variants are provided (Film A & B) have support plates (PE 17 or 18)..
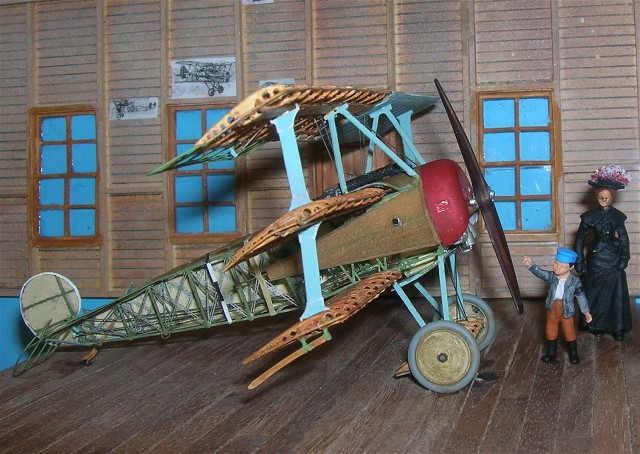
The chin plates (PE 19 for the F.I and PE 20 for the Dr.I types.) are a nice addition and help set the front landing gear legs so there is a an even placement of the whole under carriage.
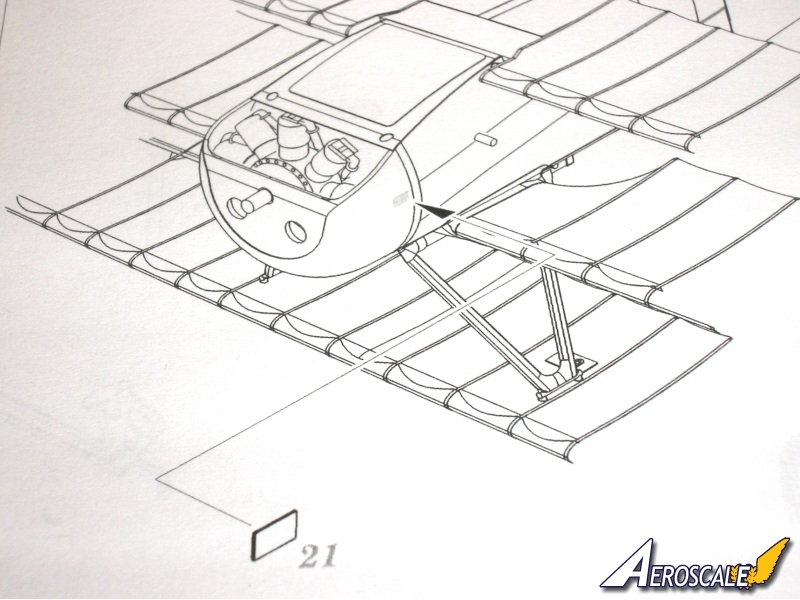
The Reich / government ownership plate ( PE 21 ) should be applied to the pilots right side of the cowling ( PP B 11.) It seems there should be a smaller plate over the larger one Eduard provides.
The black & white instructions are printed on a single sheet of A5 size paper. They are easy to follow.
When contacting manufacturers and publishers please mention you saw this review at AEROSCALE.


Comments