In 1959, Cessna built a prototype of a light jet transport version of the T-37, designated the Cessna "Model 407", which was stretched 60 centimetres (two feet) to accommodate a four-place pressurised cockpit with an automobile-type configuration. The prototype performed well in tests, but Cessna couldn't find any buyers. The company also proposed a similar four-place military light transport, the "Model 405", with a big clamshell canopy, but it was never built.
In the spring of 1954, the USAF awarded Cessna a contract for three prototypes of the Model 318, along with a separate contract for a single static test aircraft. The Air Force assigned the designation of "XT-37" to the type. The first XT-37 performed its initial flight in October 1954.
The XT-37 was fitted with two Continental-Teledyne J-69-T-9 turbojet engines with 4.1 kN. (420 kgp / 920 lbf) thrust each. These were actually French Turbomeca Marbore engines, built under license. The engines incorporated exhaust thrust deflectors so they could remain spooled up during landing approach, permitting shorter landings while still allowing the aircraft to easily make another "go-round" in case something went wrong. Total weight of the XT-37 was 2.27 tonnes (5,000 pounds).
Tests showed the XT-37 had a maximum speed of 630 KPH (390 MPH) at altitude, with a range of 1,500 kilometres (935 miles). The aircraft was non-pressurised, and so was limited to a ceiling of 7.6 kilometres (25,000 feet) by USAF regulations.
The first T-37A was completed in September 1955, and was delivered to the Air Force in June 1956. The USAF began cadet training in the T-37A during 1957. Instructors and students found the T-37A extremely pleasant to fly. It handled well and was agile and responsive, though it was definitely not overpowered. It was capable of all traditional aerobatic manoeuvres. The T-37A had one very noticeable and unpleasant characteristic: it was very noisy, even by the standards of a jet aircraft. Its little turbojets emitted a high-pitched shriek that led some to describe the trainer as a "Screaming Mimi", and it was referred to as the "6,000 pound dog whistle". The piercing whistle quickly gave the T-37 its name: "Tweety Bird", or just "Tweet".
Also during this year, the US Army evaluated three T-37As for battlefield observation and other combat support roles, but eventually procured the Grumman OV-1 Mohawk for the mission instead. The Air Force liked the T-37A, but felt it was underpowered. As a result, the service ordered an improved version, the "T-37B", with upgraded J-69-T-25 engines. The new engines provided about ten percent more thrust and better reliability. Improved avionics were also specified for the new variant.
The first T-37B was delivered in 1959. A total of 552 new-build T-37Bs were built through 1973. All surviving T-37As were eventually upgraded to the T-37B standard as well.
Due to a series of accidents caused by bird strikes between 1965 and 1970, all T-37s were later retrofitted with a new windscreen made of Lexan polycarbonate plastic 12.5 millimetres (a half inch) thick. The new windscreen was capable of tolerating the impact of a 1.8 kilogram (4 pound) bird at a relative speed of 460 KPH (288 MPH).
In August 1967, 25 of the A-37As were sent to Vietnam under the "Combat Dragon" evaluation program, and flew from Bien Hoa Air Force Base on USAF "air commando" missions, including close air support, helicopter escort, FAC, and night interdiction. Weapons included high-explosive bombs, cluster munitions dispensers, unguided rocket packs, napalm tanks, and the SUU-11/A Minigun pod. For most missions, the aircraft also carried two additional external tanks on the inner stores pylons.
The A-37As flew thousands of sorties. None were lost to enemy fire, though two were wrecked in landing accidents. The A-37A was formally named the "Dragonfly", but most pilots still called it the "Super Tweet". It is an interesting question if that meant the A-37A was even noisier than the T-37.
The USAF signed a contract with Cessna in early 1967 for an improved Super Tweet, designated the "A-37B". The initial order was for 57 aircraft, but this was quickly increased to 127. The A-37Bs were, primarily, intended to be supplied to the South Vietnamese Air Force as replacements for their Douglas Skyraiders. The A-37B prototype was rolled out in September 1967, with deliveries to the South Vietnamese beginning in 1968.
To get this greater weight off the ground, the A-37B was fitted with General Electric J85-GE-17A engines, providing 12.7 kN. (1,300 kgp / 2,850 lbf) thrust each. These engines were canted slightly outward and downward to improve single-engine handling. Air commando pilots in Vietnam operating the A-37A had found single-engine cruise an effective means of improving their flight endurance.
Modifications were made to control surfaces to improve handling. To improve aircraft and crew survivability, the A-37B was fitted with redundant elevator control runs that were placed as far apart as possible. The ejection seats were armoured, the cockpit was lined with nylon flak curtains, and foam-filled self-sealing fuel tanks were installed. The A-37B added a midair refuelling probe to the nose, leading to pipes wrapped around the lower lip of the canopy.
A total of 577 A-37Bs were built, with 254 delivered to the South Vietnamese Air Force. The A-37B was also exported to Latin American air arms, mostly during the 1970s. It was well suited to their needs because of its simplicity, low cost, and effectiveness for insurgent warfare. Most of the A-37Bs exported south had the refuelling probe shortened to act as a single-point ground refuelling probe, or deleted completely as same as the first South Vietnam Air Force A-37B Dragonflies.
Latin American countries that received the A-37B included Peru, Chile, Columbia, Ecuador, Uruguay, Honduras, Guatemala, and El Salvador.
The Kit
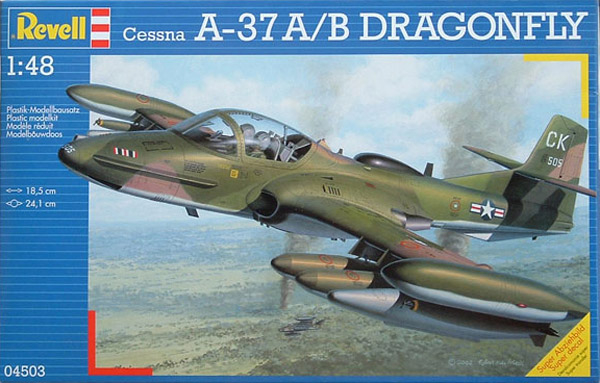
This Revell-Germany Cessna A-37A/B Dragonfly is a re-boxed kit from Monogram-USA, which the first release was in 1992 (kit #5486).
Contents
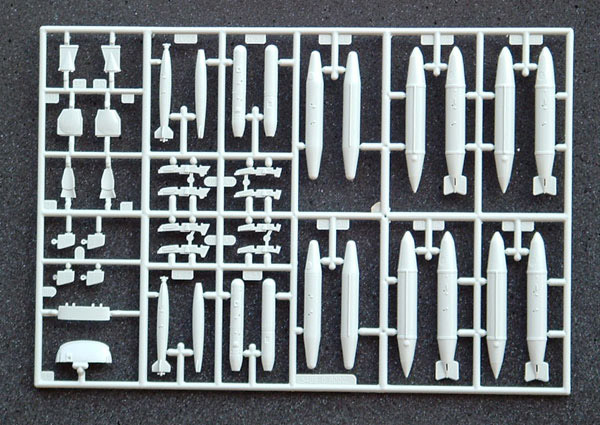
133 x Plastic Parts
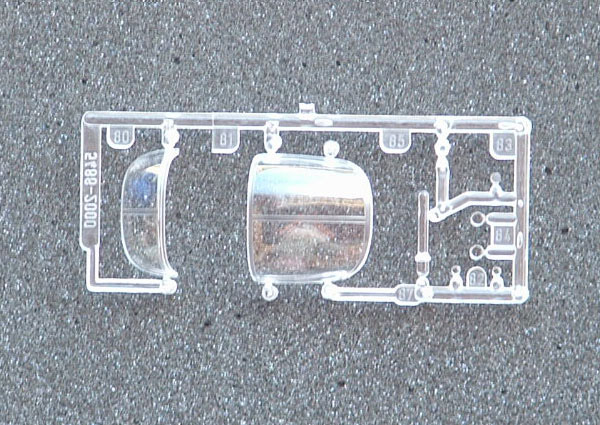
9 x Clear Parts
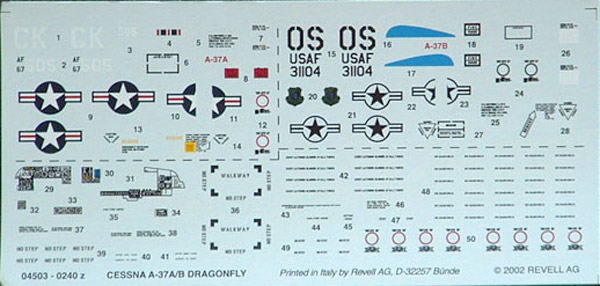
Decals for 2 aircraft
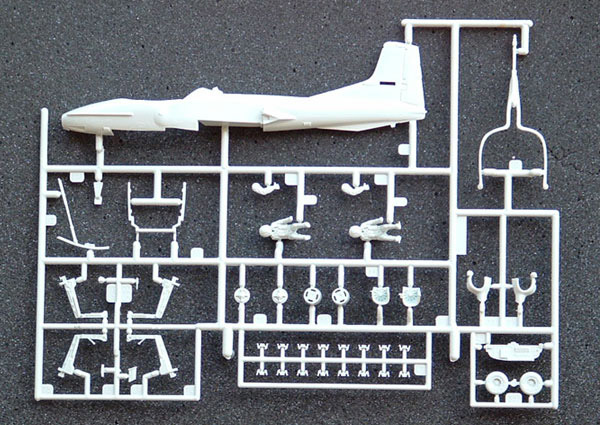
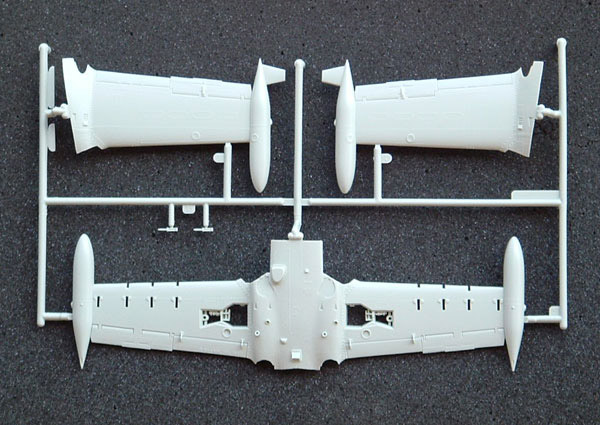
Plastic Parts
The main parts are moulded in light-grey plastic not in mid-grey as same as the first release of this kit by Monogram. These parts are very accurate in detail as on the wing with rivets, panel lines, wing flaps, etc.
Test Fit
Following a careful clean up, the test-fit of the plastic parts is always encouraging in each assembly step.
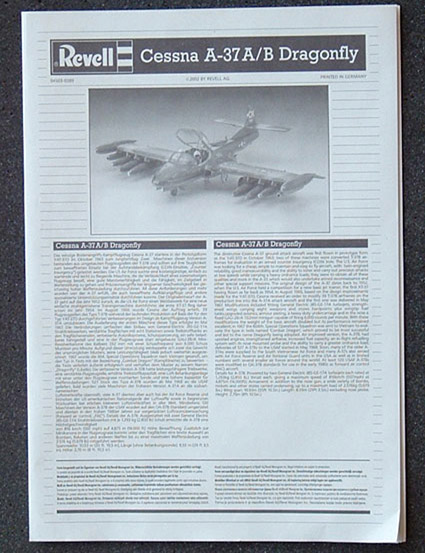
Instructions & decals
The assembly diagrams are quite easy to follow in 45 steps, 16 pages, and printed on recycled paper. The colour notes give FS references throughout and the painting diagrams are clear but I prefer the Monogram instructions due to the colour coding and without text notes, I must turn back and forward the instructions pages to find the right colour. The decals look excellent, printed in Italy, I guess that they were manufactured by Cartograf; they are printed in perfect register. Markings for an USAF A-37A Dragonfly, 604th SOS, 3rd TFW, Bien Hoa, S. Vietnam in 1968 an USAF OA-37B, 19th TASS, US Pacific Air Force, Osan, South Korea in 1983.
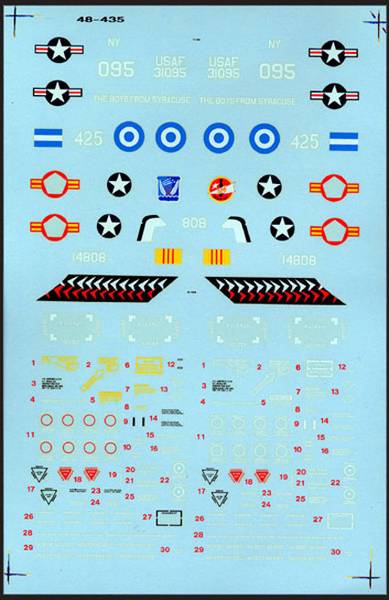
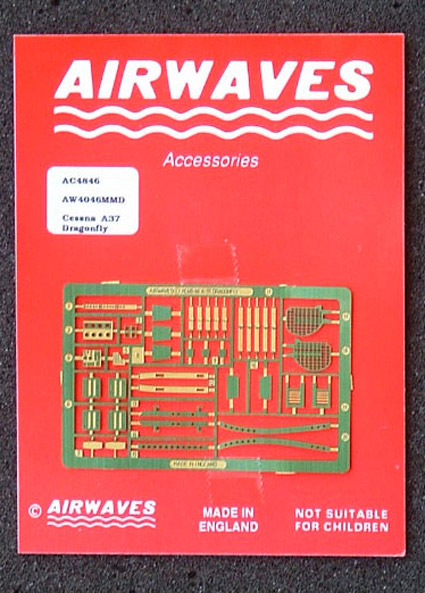
Extra detail & special decalsTo build this Revell-Germany A-37 kit in the VNAF markings, I had used the Photo-etched parts from Airwaves #AC4846 (sold by Hannants) and a SuperScale decal set #48-435, an excellent decal set manufactured by Microscale.
Building & painting
As you'll have guessed from the test fit, the first job with this kit is to trim and then clean up every part carefully.
Step 1 - 9: Assemble and paint the cockpit with throttles, control sticks, seat frames and seats then the pilots and place the decal on the instrument panel before assembling it to the panel shroud. I added the Airwaves PE parts: pedals, seat belts then the instrument panel. I had to sand off most of the plastic detail on this piece. I then painted the PE parts instruments in light grey and matt black before gluing these PE parts on the panel with cyanoacrylate glue. Finally, I glued these pieces, as per the assembly instruction and added the nose gear well.
Step 10 - 11: Assemble the cockpit and the nose gear then the landing gear, wheel and the nose gear door. In these steps I just painted all pieces but did not glue them together, in order to make painting the aircraft easier.
Step 12 - 14: Assemble the cockpit and nose gear between 2 halves of the fuselage then the instrument panel and the wing bottom. In these steps, if you like to install the refuelling probe, you must clean out a hole between the fuselage halves under the nose. To build an A-37 without the clear support post under the fuselage, you must add a weight of about 25 grammes in the aircraft nose, I used 2 small Blue-Tack balls placed beside the nose gear before assemble the fuselage.
Step 15 - 19: Assemble the intake fans to the wing bottom, the after burner rings and the tail pipe cone to the wing top then assemble the wing top to the wing bottom. I painted the intake fans in aluminium, the air intake in dark grey before glued them to the wing bottom. For the after burner rings and the tail pipe cones, I painted them in silver then in dry brushed with Testors Metalizer Burnt metal.
Step 20: Assemble the intake shrouds and the dust covers to the aircraft. In this step I had a problem, the intake left shroud was bigger than the wing. I glued it into the wing then adjusted this piece to the wing top level. In order to keep the rivets on the wing intact I just sanded the piece in the level of the bottom wing.
Step 21: Assemble the thrust attenuators to the fuselage. I added 2 PE parts by curving and glued them over the thrust attenuators. They were painted Burnt Metal.
Step 22 27: Assemble the main gears, the main wheels, the retract struts, the main covers, the door actuators and the main gear doors. I painted them following the assembly instructions but did not glue them to the aircraft.
Step 28: Assemble the fuselage housing and the stabiliser, specified for an aircraft in VNAF markings. I didnt glue the housing in this step.
Step 29 33: Assemble the speed brake, the inlet screens, the antennas and the position and landing lights. Following the aircraft model: A-37A or A-37B, there was a choice of many types of antenna. I kept the clear pieces of, the position and landing lights, until the final assembly. I glued 2 PE parts of the inlet screen to the aircraft.
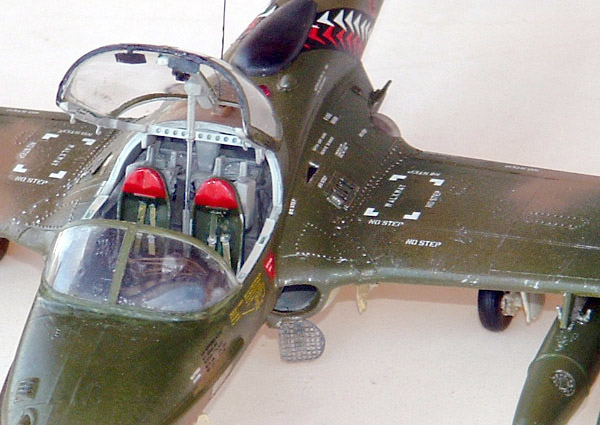
Step 34 39: assemble the refuelling probe, the nose cap, the gun blast tube, the taxi light, the windshield, the sight, the canopy, the canopy actuator and the canopy hinge arm. As the VNAF A-37B didnt have the refuelling probe I didnt use it. I wanted to build the aircraft with the canopy in the open position, I added some PE parts on the canopy hinge arm and the canopy actuator. As the canopys parts are too fragile, I painted them after masked the canopy with masking tape. I glued them on after painting the aircraft.
Step 40 44: Assemble the Napalm bomb halves together, then glue them to the sway braces.
Step 45: Assemble the pylons to the wings.
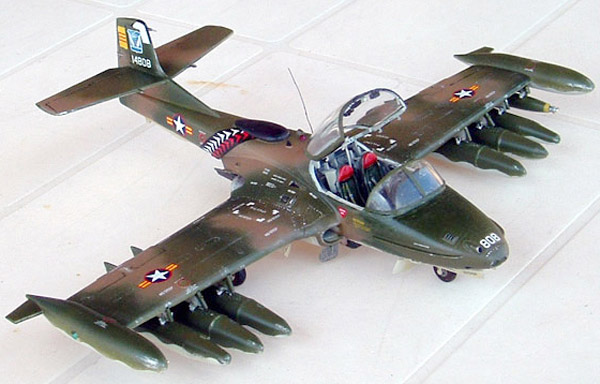
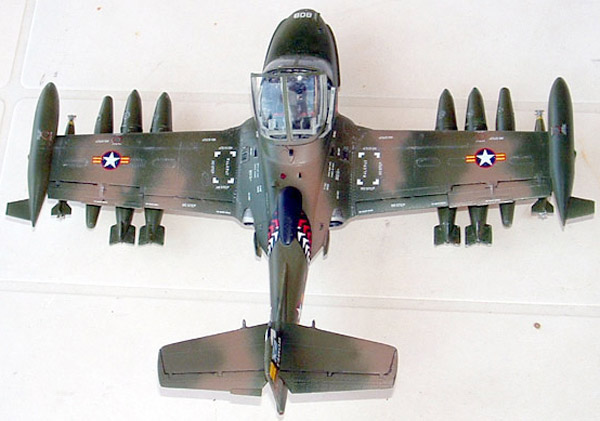
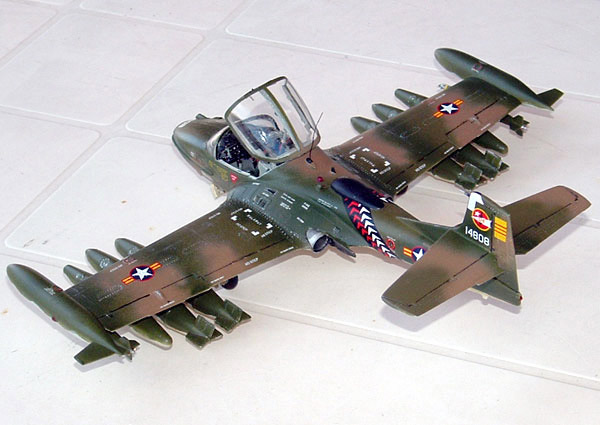
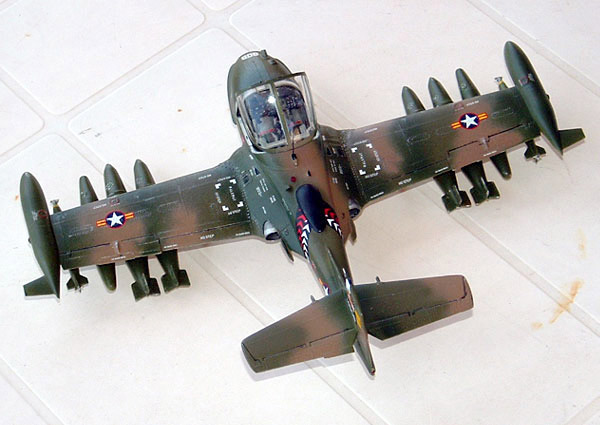
As the VNAF A-37B Dragonfly painted in the 4 tone SEA camouflage: Dark green FS-34102, Medium green FS-34079, Tan FS-30219 and Grey FS-36622. Following the painting diagram, I painted the aircraft bottom with Testors Camouflage grey #1733, I covered the aircraft bottom with masking tape then I painted the aircraft top with Testors Dark green #1710, Medium green #1713 and Dark tan #1742.
I sprayed a coat of Humbrol gloss varnish before applying the decals. I used MicroSol to get the VNAF markings to snuggle down, I used all of the stencils shown in the SuperScale instructions and by following the VNAF A-37 pictures. I now attached the following parts: Nose gear, main gear, doors and gear covers, fuselage housing, etc. A coat of Humbrol Semi-gloss to cover all, including the bombs, I weathered them separately. For both the Airframe and bombs I used Mig pigments: Black Smoke and Vietnam Earth. Finally, I glued the bombs to the pylons, the position lights and the landing lights to the wings. The coming the windshield and the canopy were added next. Finally I cut and glued a thin electric wire for the main antenna behind the canopy.
The Cessna Dragonfly in my review represents the South Vietnam Air Force A-37B, 524th Fighter Squadron, 62nd Tactical Wing, 2nd Air Division at Nha Trang, Vietnam in 1970.
Conclusion
Revell-Germany A-37A/B Dragonfly is an excellent kit in 1:48 scale. The assembly instructions are quite good. The Airwaves photo-etched parts are good and improve the look of this aircraft model. The SuperScale decal set is excellent, is printed in perfect register and is glossy and very thin, with minimal carrier film. Vietnam and Cold war aircraft fans should love this Dragonfly.
SUMMARY
A jet trainer/light attack aircraft may not have the same sort of status as a first-line fighter jet, but the need to perform adequate flight training, with the low cost, ease of maintenance, and combat effectiveness, of light attack aircraft. Has ensured that the trainer-attack type is in common use around the world. One of the most prominent of these types is the Dragonfly
My first built kit was an 1 :72 B-58 Hustler at age of 9 in the sixties, a gift of a military advisor in Vietnam. Through the seventies, I had built some aircraft and AFV: Monogram, Revell, Hasegawa, Tamiya, etc. till I was called on duty at 19. By many change in life and job, I abandoned this hobby...