

1⁄32Focke Wulf Fw 190 D-9
5
Comments
The wings
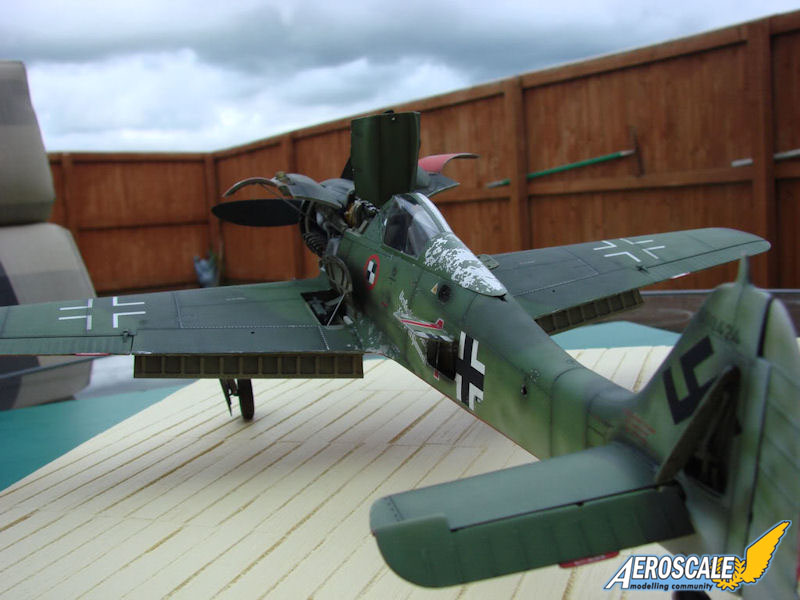
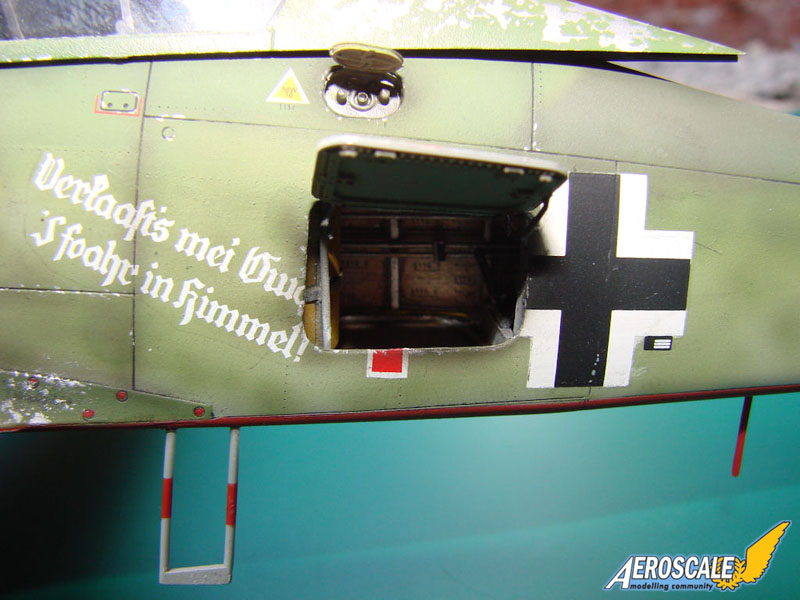
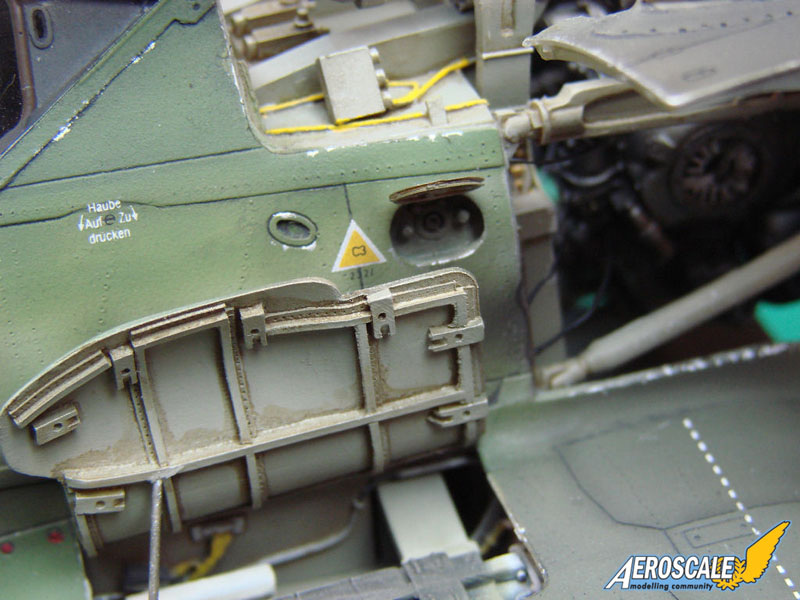
The wings required a lot of remedial work to make the resin and etch parts fit inside, but first they wereriveted whilst being easy to handle. With the Aires resin wheel well built and painted, and the gun bays built, careful alignment was needed to make sure these would fit inside the wing without causing the wing to bulge over it's upper skin. Constant checking against the fuselage section was needed in order to stave off disaster. All internal parts were fitted with CA then filleted with Devcon epoxy for strength. The upper wings needed to have their moulded closed gun blisters removed also. This required a little extrapolation of the panel lines under the bulge, then chain drilling out of the bay. Any remnants of the upper blister were then shaved and sanded down to the level of the wing and missing panel lines scribed onto the surface. At this point too, the part of the gun bay door on the fuselage was also removed.Some Mike Grant ALPS printed decals were used on the interiors of the gun bays too to represent manufacturer plates. A little dirt was added to the bays and undercarriage wells by using MIG Euopean Dirt pigment.
The Eduard etch metal flaps were also installed at this stage. These are deinfately fun to assemble and look great when installed, though some serious plastic thinning is required to add them. The kit already had an option for lowered landing flaps and had plastic detail but it was no where as good as this. All construction was done with the 5 speed Hold 'n Fold, and glued with CA gel.
Undercarriage and engine
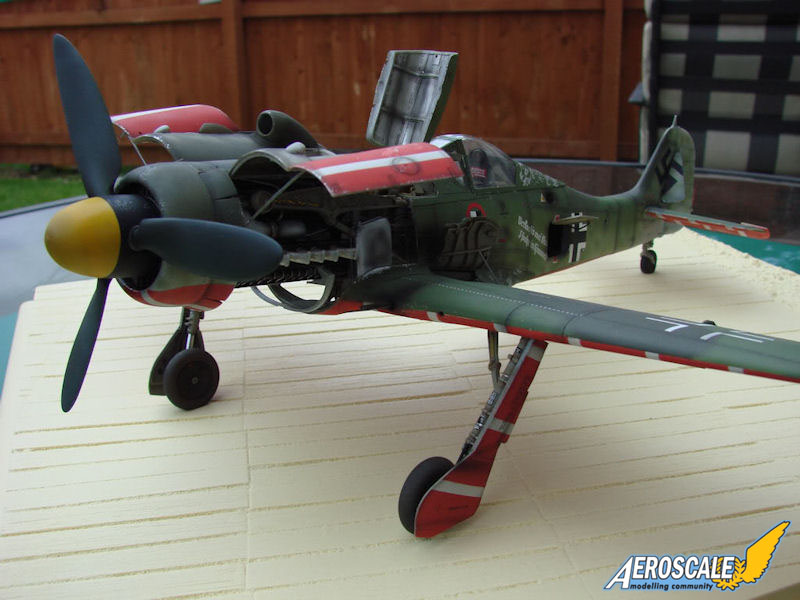
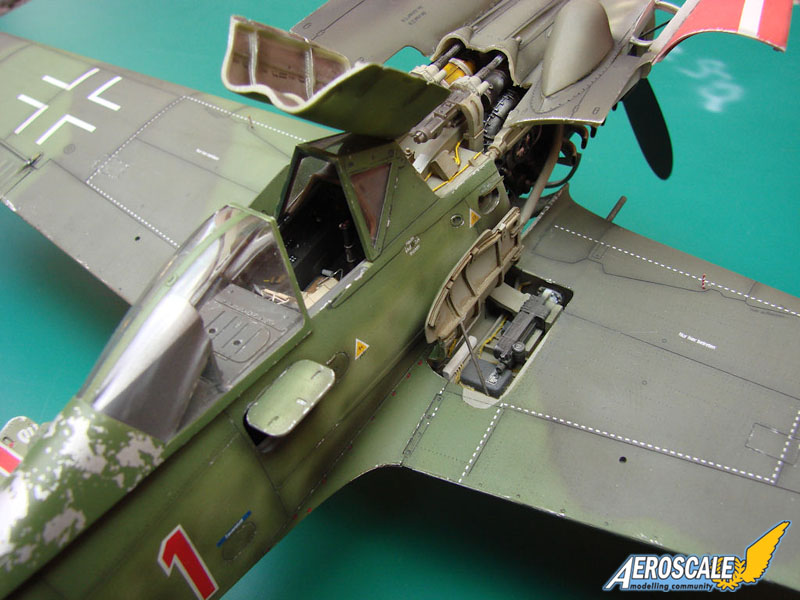
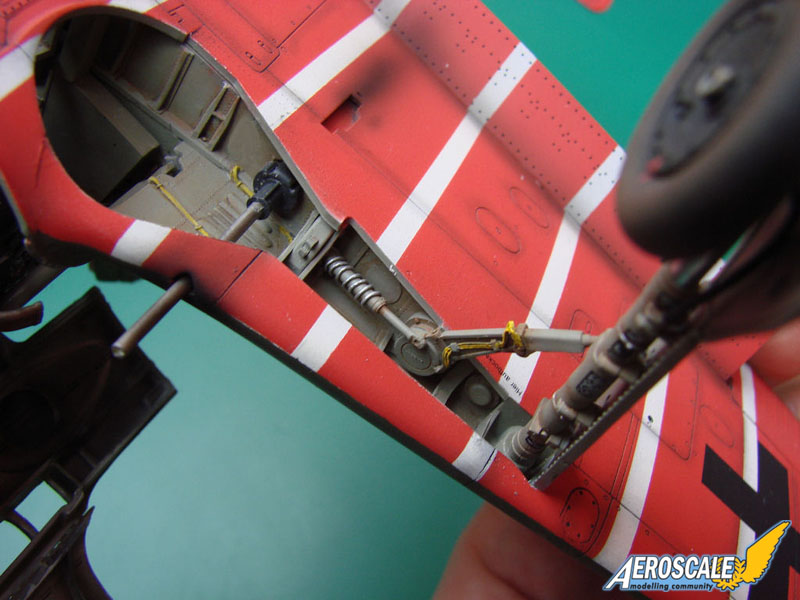
I figured early on that the extra weight of this model would need some serious support. After consideration, I opted for the very nice looking G-Factor undercarriage legs. The extra expense was money well spent as they are gorgeous. The casting is simply wonderful. I added a hydraulic line down each side with copper wire. After a coat of Alclad primer, I sprayed these in Gunze RLM02 and sprayed a little heavily thinned brown around the differing sections, and a burnt umber oil wash. The compression strut was then painted Vallejo Black and the whole leg given a coat of Klear. EagleCal decals were used for the Werke Nummer plates on the legs, then another sealing coat of Klear applied. The now shiny black compression strut was then airbrushed with Alclad Chrome and they came out real well. After masking the Chrome off, the whole leg was matted down with Xtracolour XDFF flat varnish thinned 50:50 with white spirit.The actuator leg was altered to add the various resin components, and the main spring was added with lead wire. The cabling on the upper section was also made with 0.2mm lead wire, clipped in with tin metal foil. These were then painted and washed with oils.
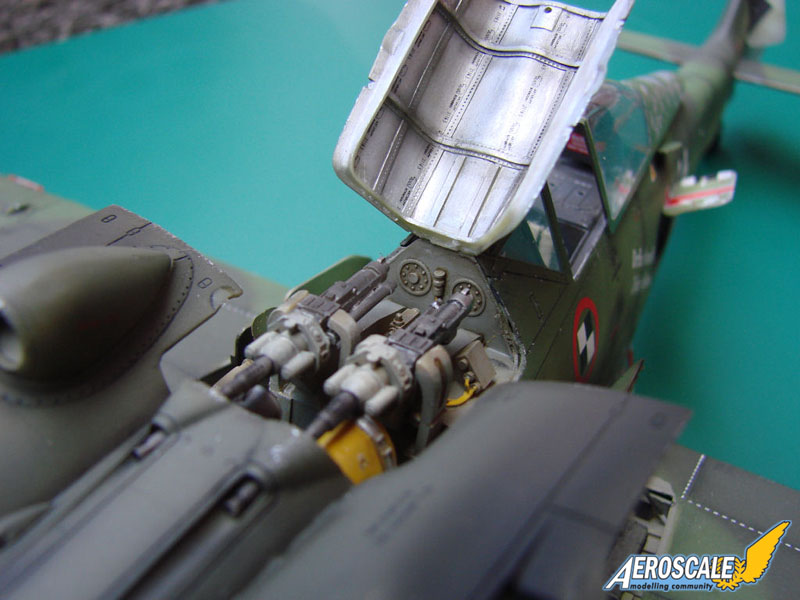
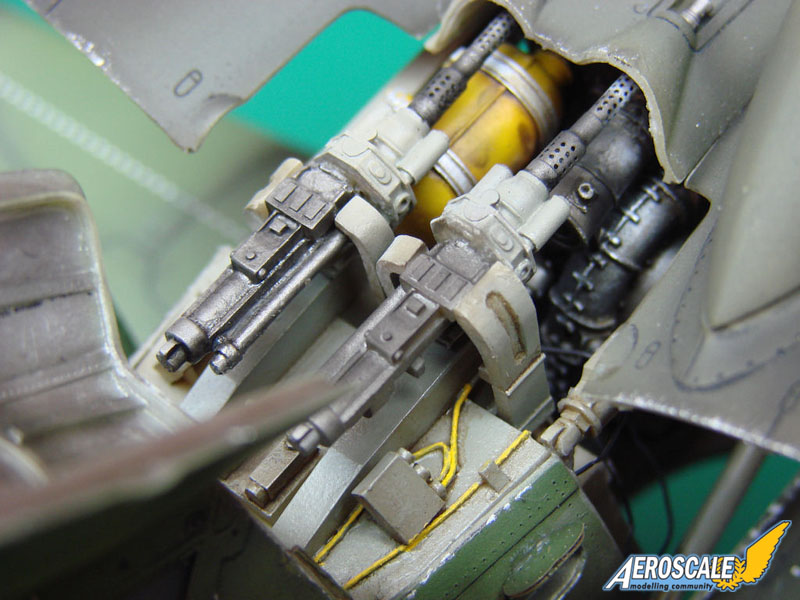
The resin engine assembly was quite simple and to it I added some extra piping and cabling.
Painting, decalling and weathering
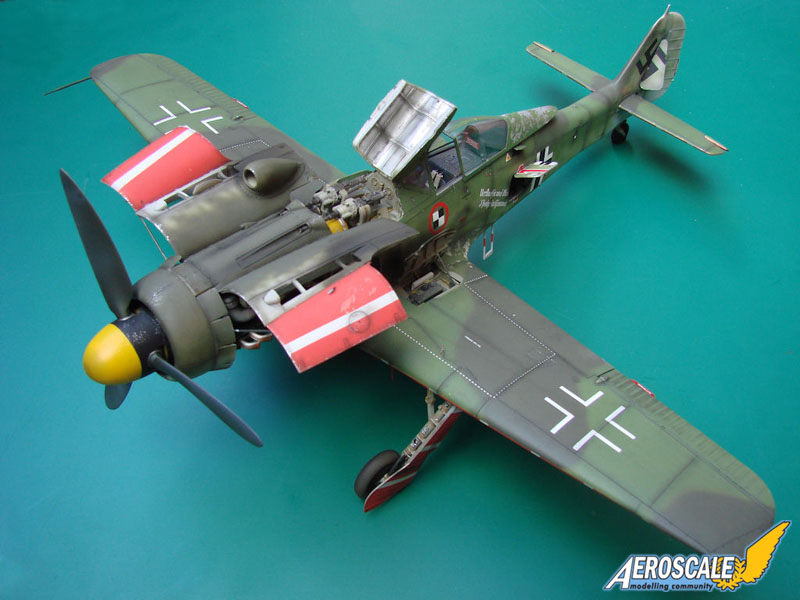
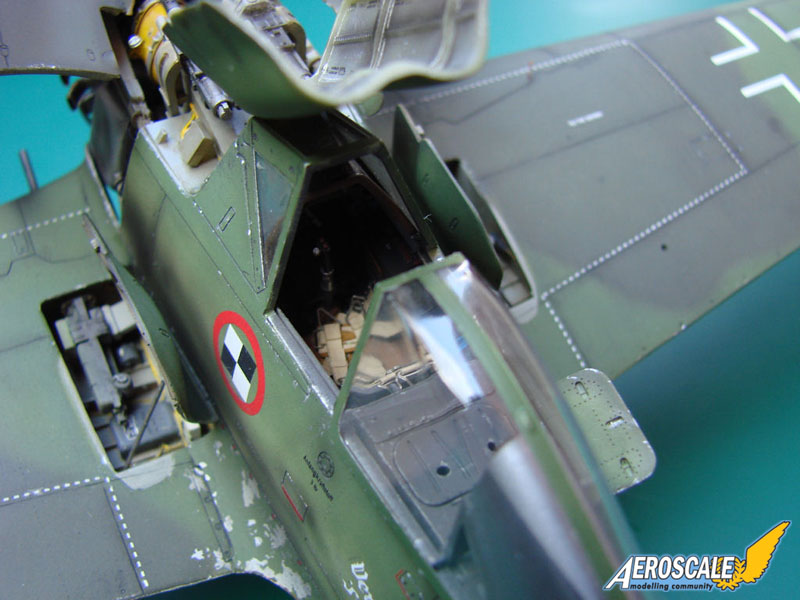
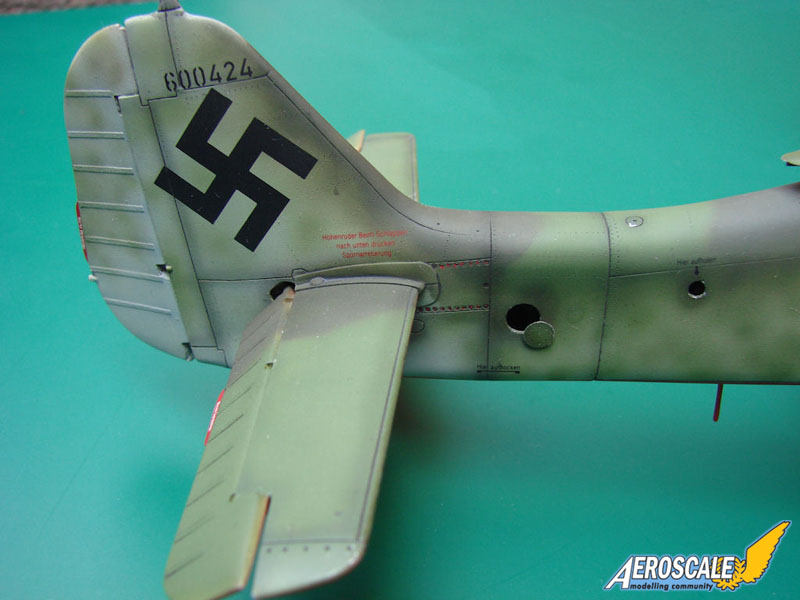
After carefully attaching the fuselage to the wing and eliminating any joins with a mixture of CA gel and Mr. Dissolved putty, the model was given a coat of Halfords white acrylic primer. This is a change from my usual Alclad use as I feel Alclad is too absorbant. The primer was then rubbed down with Micromesh and preshaded with Tamiya Black thinned 50:50 with X20A. Next up was to fade out the underside with Tamiya flat white, before masking off with Tamiya tape strips 1/8" wide. Gunze RLM23 red was then sprayed underneath and the model given it's distinctive candystripe look. Next up was to mask the completed underside and fuselage was then sprayed with RLM65 more or less up the full heigh of the fuselage. The model was given it's coat of Gunze RLM82 Light Green in the appropriate areas whilst controlling the paint to ensure the preshading was still visible. RLM83 was then sprayed free hand. I didn't spray overall one colour then add the other on top as I figure this would give a false representation of the RLM83.The next task sent chills down my spine....the mottling. I had never done this before, and if I'm really honest, this had been worrying me since I first took the project on. After some kind advice of a fellow online modeller (cheers Dave Pratt!) I thinned my paint mix down to 10% paint to thinner ratio, but didn't bother with the advice of practice first as I am far too impatient. I blasted the thinned paint over the model in small bursts as different distances and different pressures using my Iwata HPC+ with it's new MAC valve. The mottle was done with both RLM82 & 83 and made heavier as it reached the top area of the fuselage with it's regular camo. This did seem to blend it in quite well. At this point, I quit for the day while I was ahead!!
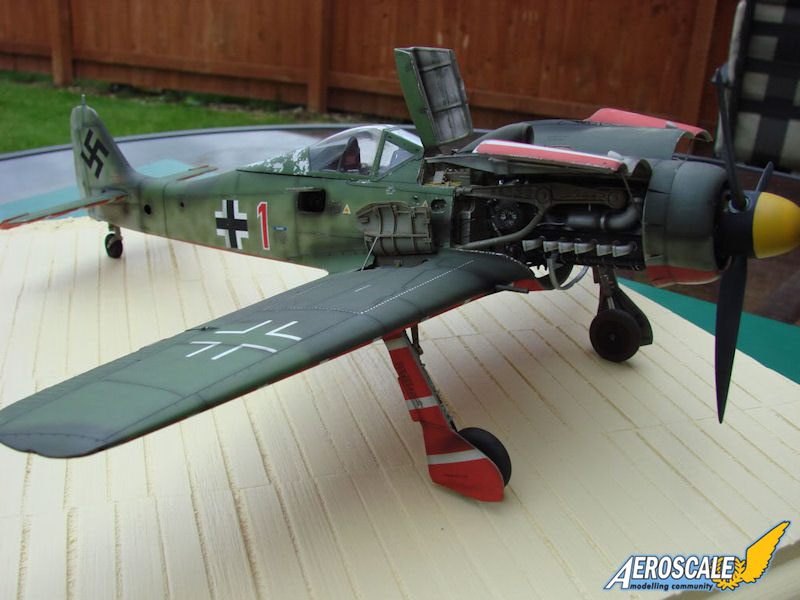
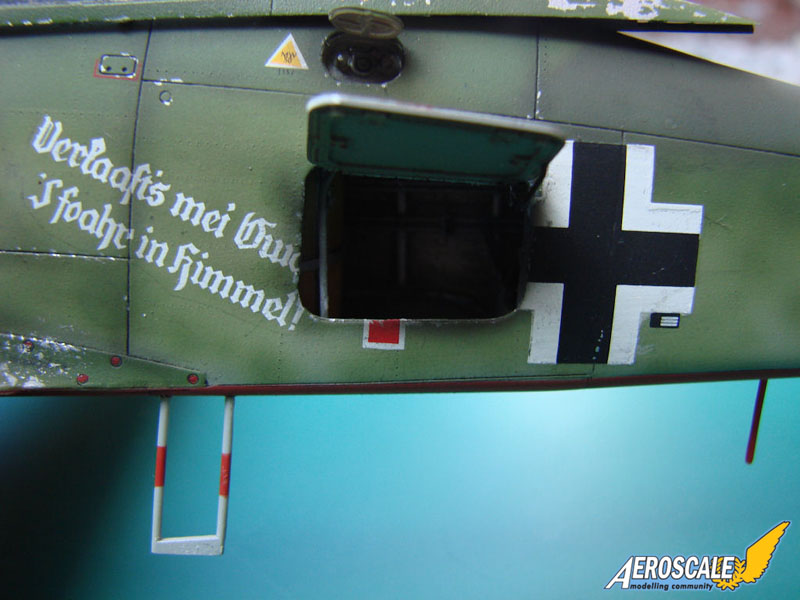
I gave the model 3 coats of Klear before adding the wonderful EagleCals decals set. I opted to built "Red 1", flown by Heinz "Heino" Sachsenberg at the outset of the project due to several physical differences in this particular build (no FuG antennae or lifting hole plates attached). The decals were added using Mr Mark Setter, then the decals sealed with Klear again.
Where I perhaps felt the preshading had suffered from overpaint, or I had forgotten to properly emphasize the panels, I sprayed heavily thinned Tamiya Black finely, at high pressure, using a sheet of paper to catch the main part of the jet and leave just a fine edge on the model.
The model was then given a coat of Xtracolor XDFF flat varnish to give it's 'in service' look. The transformation was quite unbelievable for a novice like me.
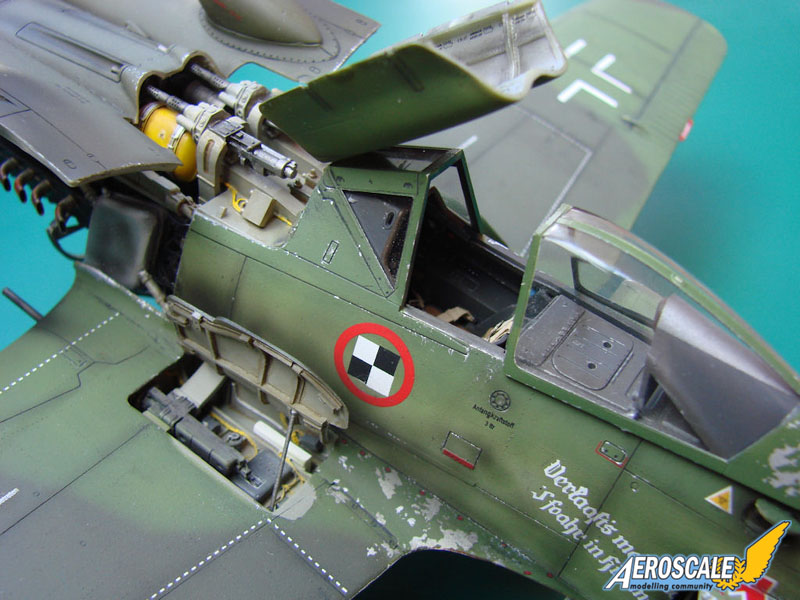
The engine was given a coat of Alclad Magnesium, but afterwards, it just didn't seem right despite me loving the colour, so I toned it down with Alclad Dark Aluminium. The engine cober was given a coat of Alclad Steel, and the associated pipework and tubed were sprayed with Alclad Aluminium. The finished assembly was then highlighted with a heavily thinned coat of Tamiya Black around bolt heads and recesses etc in order to create some depth. Afterwards, the whole lot was washed in heavily thinned Black oil paint, except for some of the pipework which I still wished to remain semi shiny. Engine bearers were painted RLM02, and wiring in yellow. Other detail work on the bulkhead area was also painted; yellow for electrical wiring etc, and then washed in burnt umber oils.
The badly paint chipped canopy which was specific to Sachsenbergs 190D was created by spraying the piece with Alclad Duralumin, then using a sponge to apply Abteilung Liquid Mask. When this was set, the canopy was sprayed with its appropriate camo colour, then the rubber mask removed by rubbing away with a finger. The same also applies to the wing root where the pilot would dismount from his machine.
Final assembly and painting
The engine was now mounted to the fuselage, and here is were a problem was encountered. Despite everything being checked against my Arthur Bentley technical drawings, the engine had a downward attitude when mounted, and it was quite obvious, There was nothing more I could do than to pack the lower bearer struts out by about 1mm. This had the desired effect on I was back on track. The bulkhead wiring was now added and the undercarriage legs placed. I used MDC resin wheels for this with the flexible resin brake hoses. The wheels were painted in Tamiya black, sprayed in Satin varnish and then thin brown paint sprayed around the tyres and some pigment added.Landing flaps and the horizontal tail sections now added, as well as the resin rudder.
The resin cowls were now painted in their appropriate colours, with the interiors being sprayed in Alclad Duralumin. Again, MDC Duralumin stamp decals were used, and the panels shaded with thinned black to create shadow. At this point, I also tried some of my new Alclad Hot Metal Sepia in random patches to simulate thje effects of heat within the cowls. The cowls and radiator ring were now fitted.
The propellor was from kit. The spinner was first painted white and a spiral added from a Montex Mask kit, then the whole lot sprayed black. Afterwards, the newly painted spinner was sprayed in a distempered yellow as to simulate the real machine which had a different colour spinner earlier in it's service history. The spiral can just be seen through the yellow finish. The prop was then added.
Small finishing details were now added, such as the crew step, pitot etc, and the model was completed.
Conclusion
Overall, I think I acheived what I set out to do, with some surprises for myself, especially with regard to the mottling. I know I could have improved upon things if I was to do this again, but this model is a learning curve, so I am more than happy with the result. Eventually, this model will be displayed sat upon a resin hardstand diorama, with some figures and accessories.The Hasegawa kit and Aires resin sets are exceptional, as are many of the items I bought for this. I seem to have been born with Advanced Modellers Syndrome, but I think that's part of the fun for me. I've been in contact with many helpful people while researching this build, and laid the way for my future modelling.
I did what I wanted to do since I was young, so now that the pressure is off, I can take things a little more leisurely. Or can I?

About the Author


FROM: ENGLAND - NORTH WEST, UNITED KINGDOM
I'm 47 yrs old and started modelling from about 6yrs old, mostly in plastic, but then also designing and flying scale model aircraft for Free Flight. Left the scene in the early 90's and ventured back in 2001 to build wooden period ships. Decided I missed plastic too much. Recently re-aligned my ...
Comments


Brilliant machine and an inspiration to, many of us.
and yes, you do have advanced modellers syndrome, in a very very very heavy state as well
but that is a very good thing if you enjoy it.
well done, i hope that i achieve the same level one day
AUG 07, 2009 - 12:14 AM

Thanks for the comments guys.
One thing this project has made me appreciate is just how good the Hasegawa kit was. I'm currently building the 1/32 Roden DH-2 kit and it's a total pig. The moulding is awful, the flash is dire and the fit is atrocious. This kit, with the gem of the Aires resin kit is a neat and fairly simple project, and with it's completion comes the realisation of the idea I had 20+ years ago. It was either going to make or break me with modelling.
This kit was a dream compared to the Roden kit I'm doing, so if anyone fancies doing a 190D with the Aires set, I say 'go for it'
Jim
AUG 08, 2009 - 10:42 AM

It`s really fascinating!
(If my memory serves me right - this one is from Galland`s circus)
AUG 09, 2009 - 08:08 AM
Excellent work Jim! I love the lower candy stripe scheme; it really came out well.
Speaking of pigs and FW 190s...can you say Airfix 1/24 scale Fw 190?
AUG 10, 2009 - 06:28 AM
Copyright ©2021 by Jim Hatch. Images also by copyright holder unless otherwise noted. The views and opinions expressed herein are solely the views and opinions of the authors and/or contributors to this Web site and do not necessarily represent the views and/or opinions of AeroScale, KitMaker Network, or Silver Star Enterrpises. Images also by copyright holder unless otherwise noted. Opinions expressed are those of the author(s) and not necessarily those of AeroScale. All rights reserved. Originally published on: 2009-08-01 00:00:00. Unique Reads: 20601

WEB HOSTING BY


Copyright ©2021 AeroScale and Kitmaker Network, a subsidiary of Silver Star Enterprises
All Rights Reserved. Please read our Conditions of Use and Privacy Policy.
All Rights Reserved. Please read our Conditions of Use and Privacy Policy.