

1⁄48IAR-80
7
Comments
3. The Build
Before I go ahead with the step-by-step description of this build, I have to make two important statements and a promise. 1st statement: I built this model under time pressure because it was part of a group build on a Romanian site which I joined in the very last moment. 2nd Statement: I had very limited time for research because the internet situation in Sint Maarten is still gloomy after passing of Hurricane Irma and I have meagre access to it. Besides, I ordered on Amazon one of Radu Brinzans excellent books on IAR 80/81 which got lost in the USPS Tenebrae (I eventually retrieved it but its still in transit at the time of writing this review). The Promise: I will be back with a new build on this aircraft (as White 344) as soon I buy a new kit, I clarify all the research voids and I have the necessary time to make a more detailed construction.Step-By-Step:
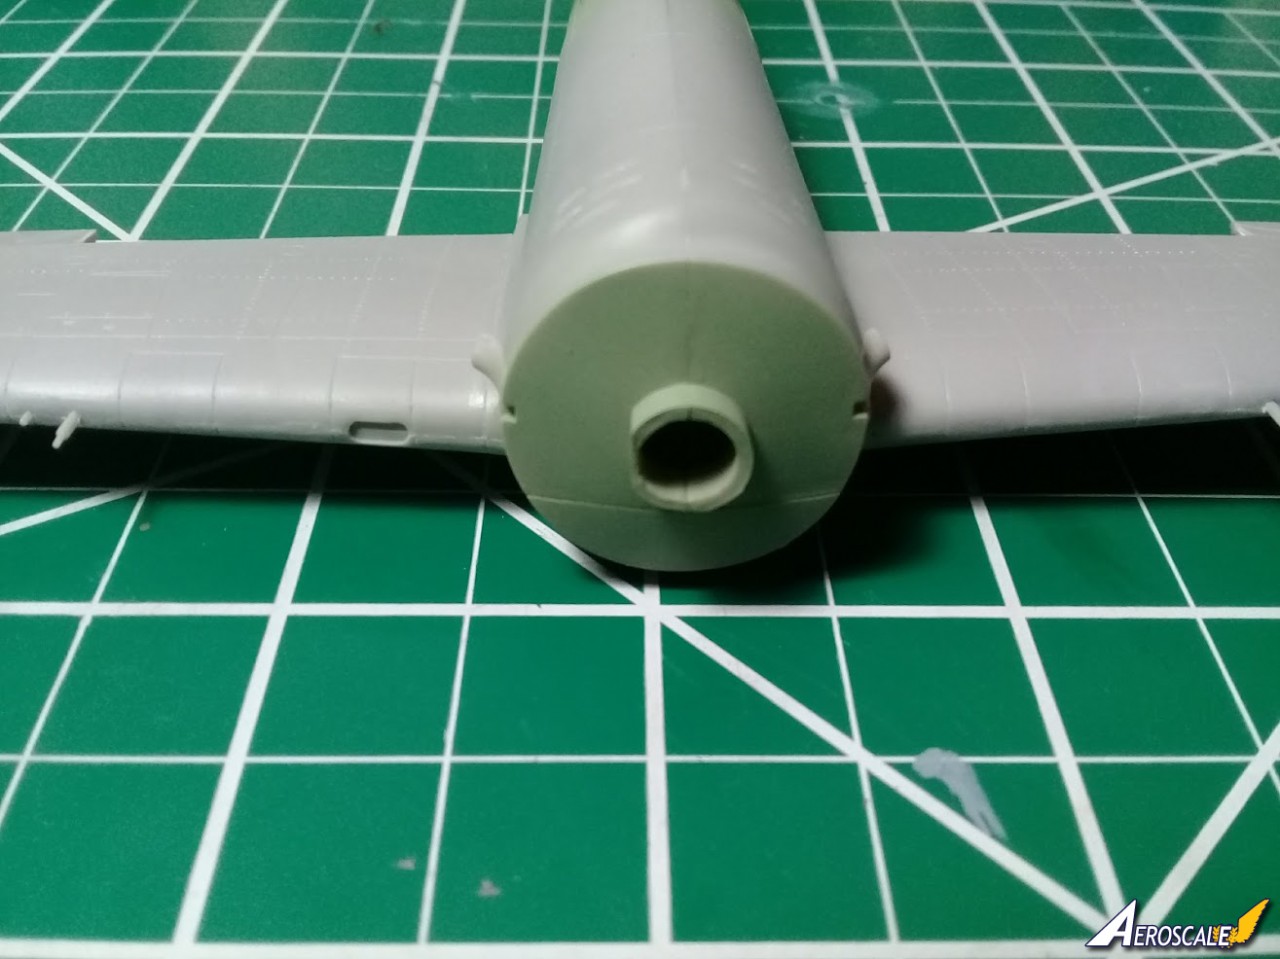
I have done this build following closely the instructions, and therefore Im going to present it as the instructions manual suggests:Step 1: assembly of the cockpit, seat harness and control levers. The whole fret of PE parts is consumed here. The detail on the rudder pedals is a little over-simplified but isnt all that visible once the cockpit buttoned up. There is no flash to deal with and the fit is exemplary. The control levers fit in keyed holes thru the cockpit floor, so the parts can be glued (not that any glue is required) from the invisible side, avoiding the risk of glue marks.
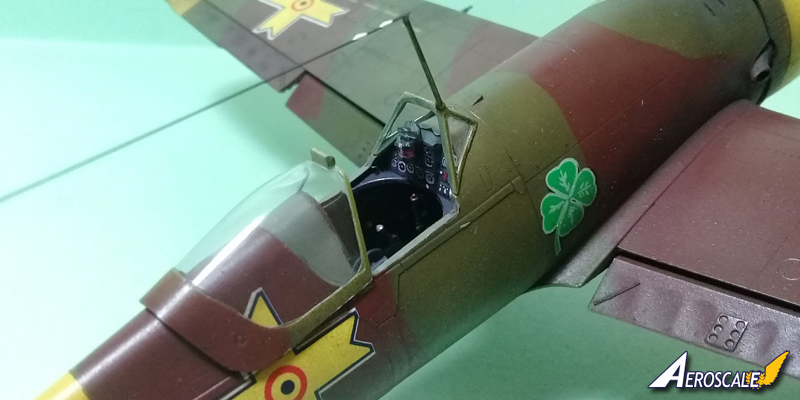
Step 2: attachment of the instrument panel to the dashboard. Here I had my first problem with the decals. The carrier film turned very soft and curled against itself. I was afraid until the last moment I wont be able to complete the task but eventually I was lucky. As you may note in the supporting picture, the center one is offset at one corner, because I wasnt able to unfold it properly after it stuck to itself. On the positive side, the decals are very malleable and conform easily to the panels raised detail. I didnt install the deflector sight at this step because I forgot to paint it first. I went ahead instead and attached the tail skid, the dashboard and the fire extinguisher to the appropriate fuselage side.
Step 3: joins the fuselage halves and the cockpit / seat assembly. No problem whatsoever.
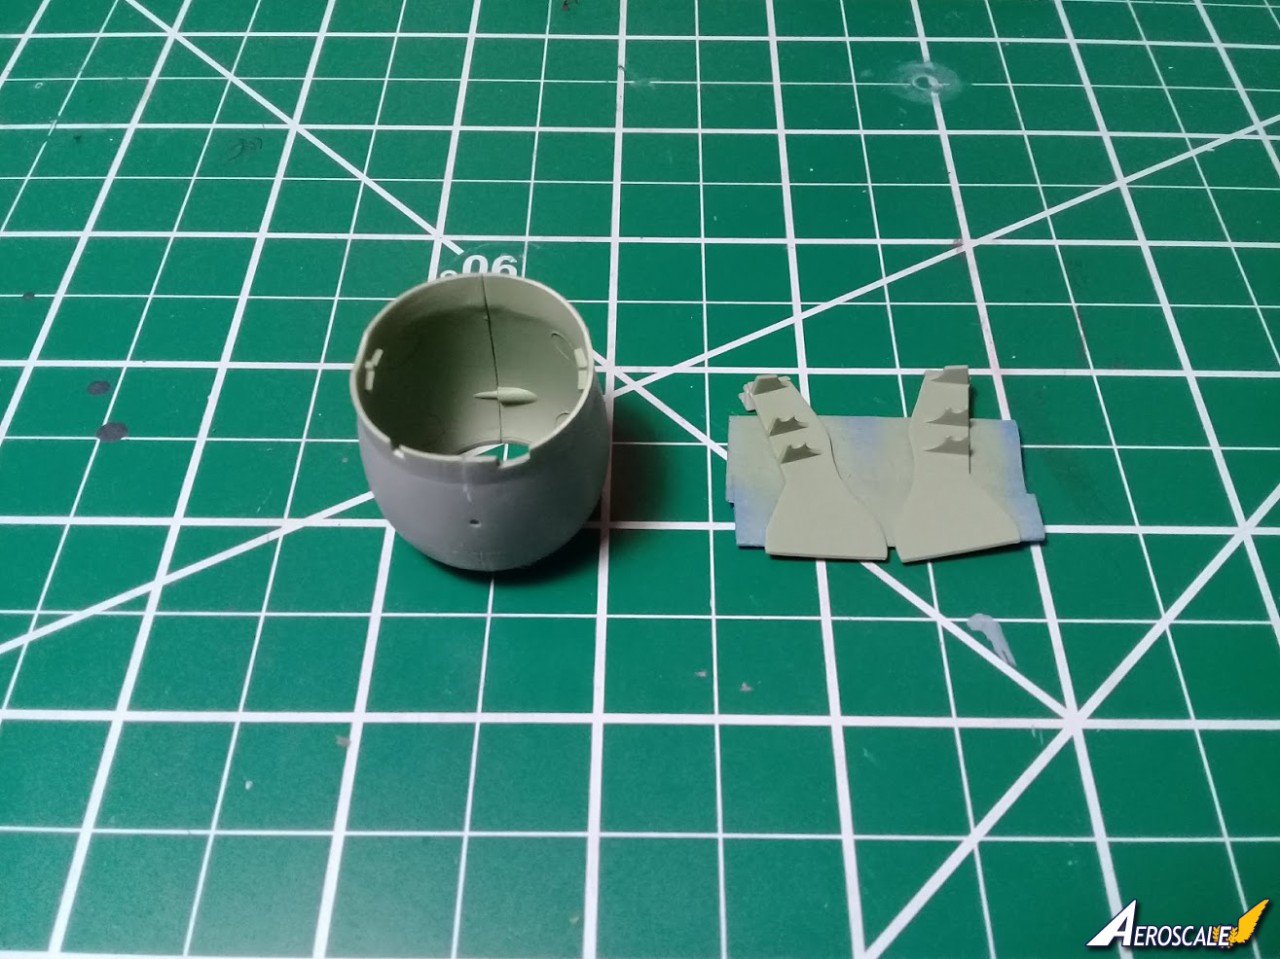
Step 4: the engine assembly. That was the only instance on this build where I encountered alignment and flash issues. The cylinder heads have hard to clean flash and the push rods ring (part C5) doesnt align properly to the assembly. Probably one can adjust the alignment issue by fiddling with the locator pins, but myself I wasnt paying enough attention and I have to correct the problem by holding the rods with a pincer into position one by one until the glue set. It worked out. I also have installed the exhaust pipes at this step.
Step 5: joining the upper wing halves to the bottom half. This is easily done because the engineering is gorgeous. The wing tips are molded with the upper sides and not split between halves. This solves the common problem of over-scale thickness as well as the ever-present seamline. The only complaint is the stick look of the MGs, molded with the lower wing. I should have them removed and replaced with stretched tube or hypodermic needles but the time factor decided against me and I let it go. This is one aspect Im going to address in my next build for sure.
Step 6: adding together the wings and fuselage assemblies. Again, Hobby Boss turned this normally difficult step into a piece of cake. The join line are well concealed by the aircrafts anatomy. I needed just a drop of filler liquid over the rear joint, but this could be again my lapse in preparing the parts prior to joining them.
Step 7: sees the installation of ailerons / flaps, rudder and tail stabilizers. Because the war time pictures show almost invariably the tail control surfaces and the flaps in dropped position, I decided to make some surgery which went easily. What a blessing would have been if Hobby Boss would have presented us with separate parts!
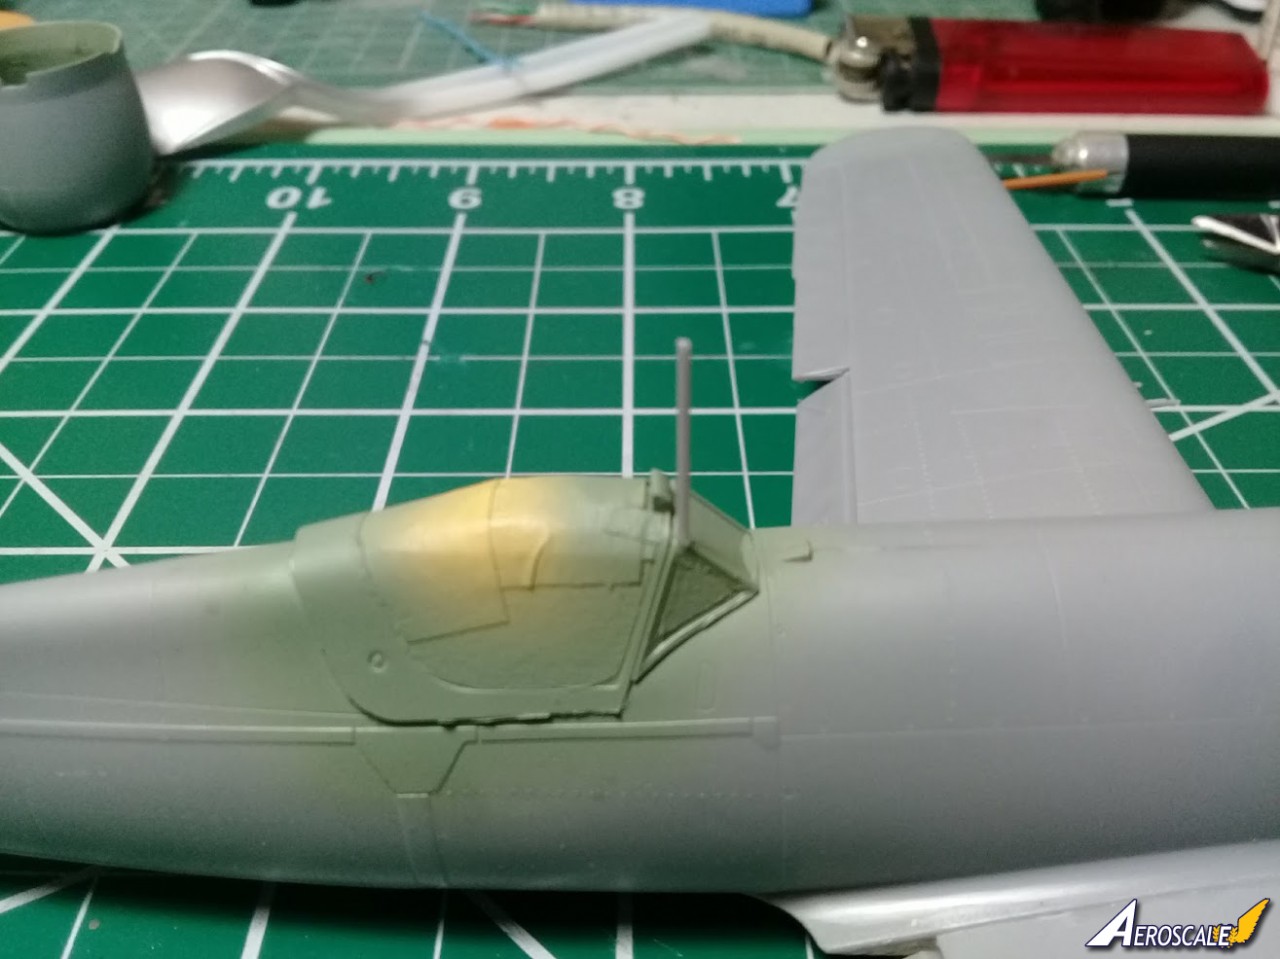
Step 8: attachment of the canopy halves and engine cowling halves. I assembled the cowling halves but I havent installed it right away because a visible seam line appeared between halves. I decided to correct the issue and paint the cowling interior before bonding it. I masked the canopy halves but I attached definitively only the front one. The sliding aft half I used only for masking purposes and secured it temporarily in place with white glue.
Steps 9 & 10: construction of the main undercarriage (left, respectively right). I built them as separate sub-assemblies because a few parts needed to be pre-painted before joining.
Step 11: attachment of undercarriage to the wings. I skipped this step to ease the painting process and to avoid accidents which Im pretty much prone to.
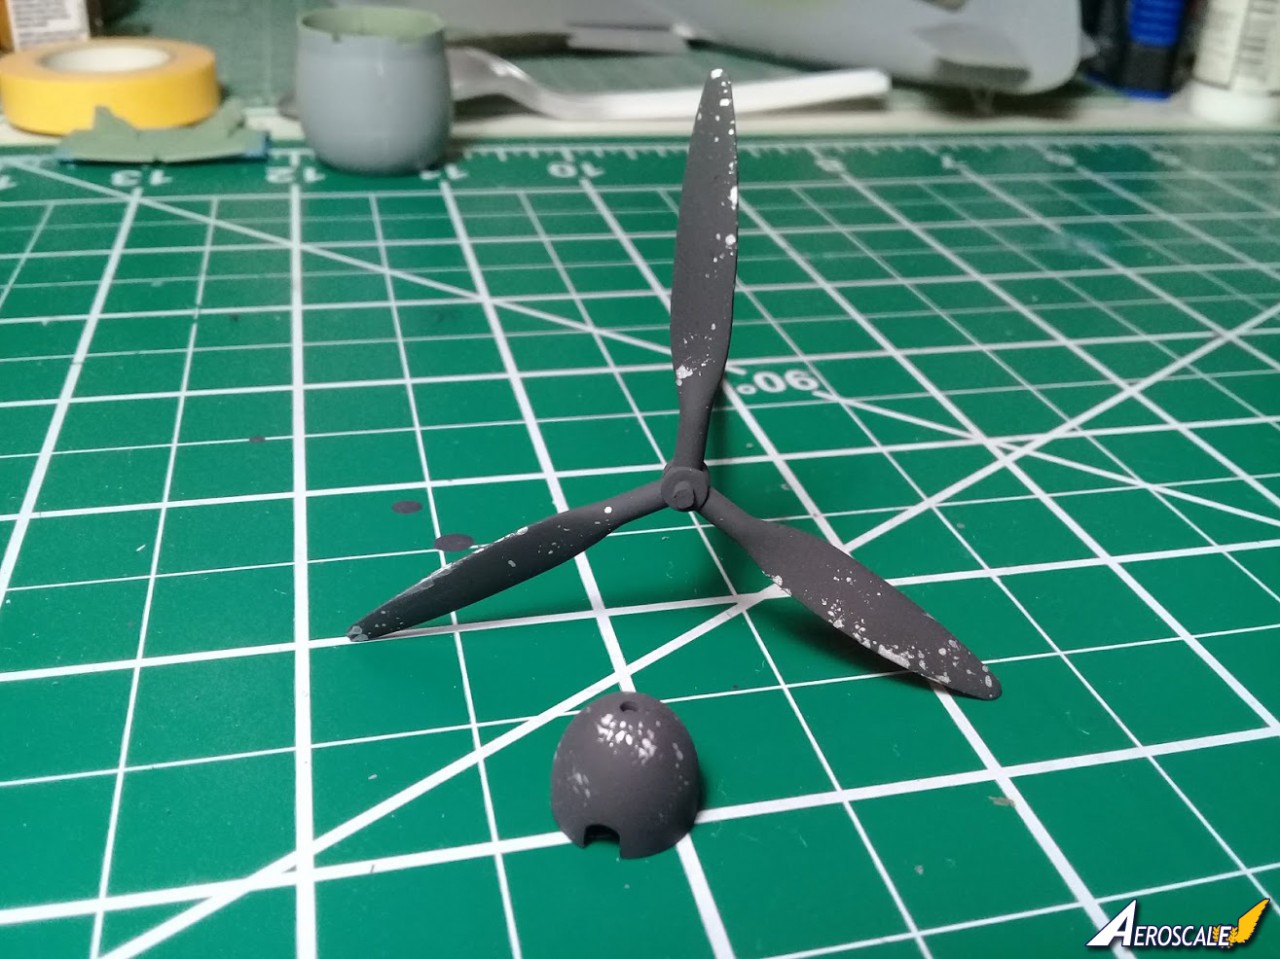
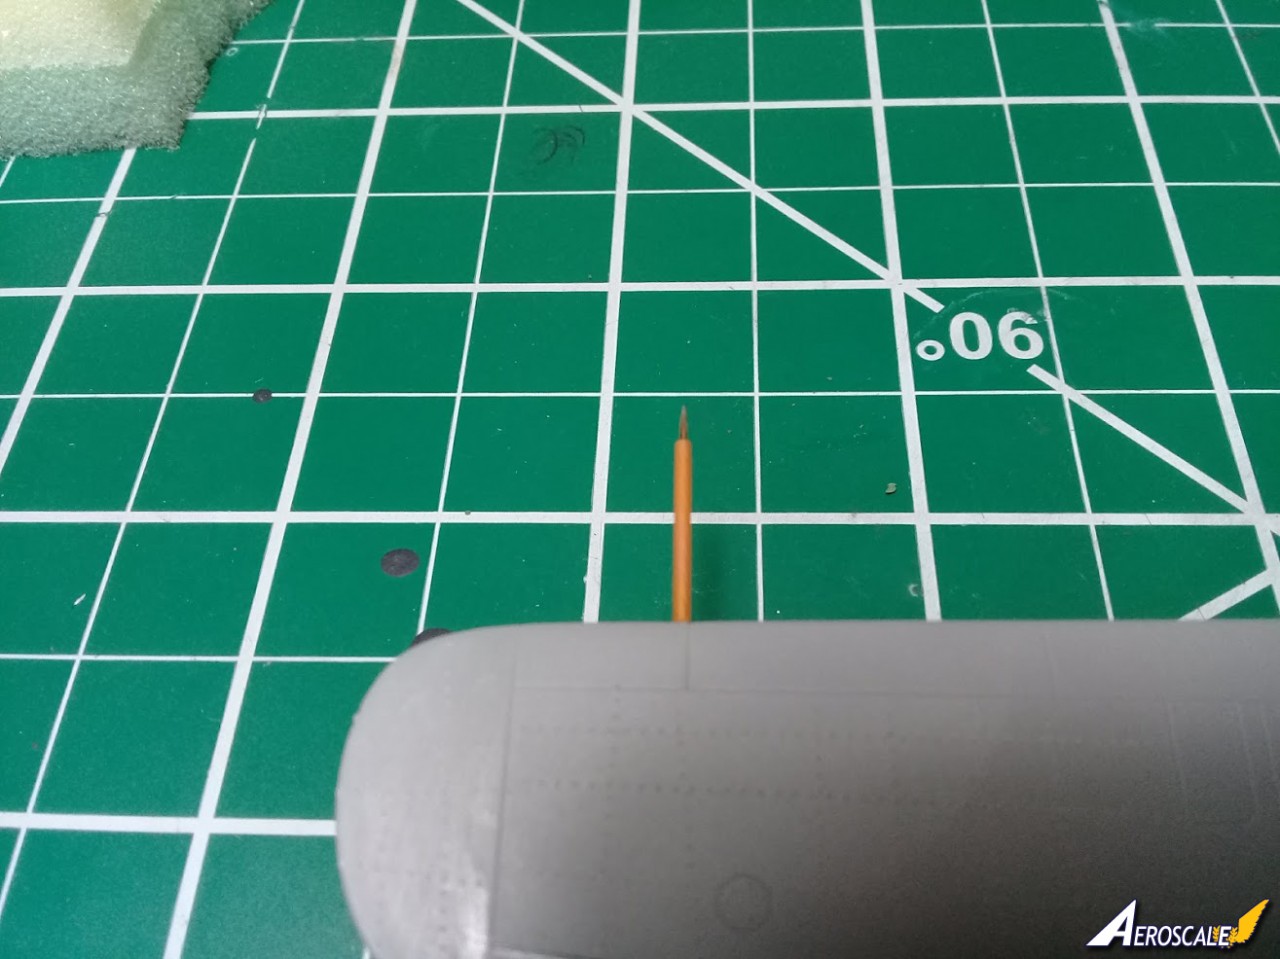
Step 12: this last step puts together the small exterior details: the antenna mast, the radiator housing, the radiator drip pipes, the counter-weights for the ailerons, the propeller and the propeller hub. First went in the radiator drip pipes, whom I hollowed in first. The radiator housing secured firmly the engine cowling to the fuselage. I added then the counter-weights for the ailerons, without realizing that they will interfere that much with the painting process. Later on I tear them off and added them back after I finished the painting / weathering process. Same happening with the antenna mast. I knocked it down twice during masking / painting. Fortunately, it didnt break and I re-installed it later. The propeller and the propeller hub I assembled and painted separately, also saving the assembly to the plane for later. The pilot tube was the only part damaged from the box. With the hindsight, Im actually happy it was broken because it forced me into a scratch building a new one. The kit provided part is unfortunately another featureless stick.
3.3. Riveting Although the box art suggests some rivet lines, there is almost none on the kits surface. On the real aircraft, the rivets are quite prominent and I decided to use for the first time my newly acquired rivet maker from Trumpeter. I choose not to duplicate the whole horde of rivets from the drawings, but just a few lines for that extra visual interest. I dont think was the wisest of choices, since my lack of experience corroborated with almost no visibility offered by the tool gave me doubtful results at best. It was a valuable experience however and Im thinking of modifying the rivet maker for better visibility. Buying another design its also an option and more practising is a must!
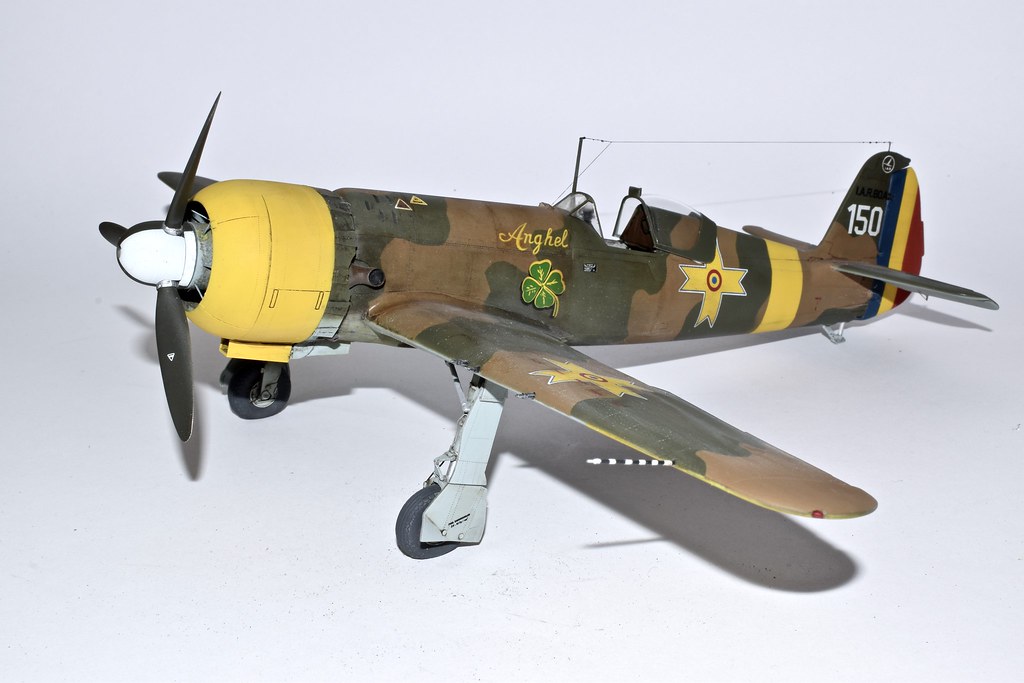
3.4. Conclusions to the build Comprising only 69 crisp molded parts, the build is fast and trouble-free. On the reverse, the number of options is quite limited to raised/lowered gear and closed/open canopy. Some detail needs to be modified or replaced (MG barrels, radiator drip hoses, front antenna wire insulator). The main advantage of the kit is the clever engineering which accelerates the build. Roughly, I think I build this kit in three days with scarce modeling time at my disposal. For whoever has the time, should be a week-end build. I also appreciated the fact that Hobby Boss added just the necessary modicum of PE parts.


About the Author


FROM: NETHERLANDS ANTILLES
Born in Romania, from a German father. Classical studies, Latin teacher. Currently holding French residency, business owner in a Dutch island where currently spoken language is English. At home I speak Spanish, though. Interest in history and modelling: since babyhood, I grown with my father's stor...
Comments

A REALLY nice in depth review of one of my favorite, obscure AC. Too bad about the decals though. So, who will be the first after market company to offer correct markings ? Gotta add this one to the stash !
Thanks for sharing !
FEB 10, 2018 - 06:59 PM
An excellent feature article for sure. The aircraft history in relation to the Allied oil field attack was something I literally knew nothing about.
Quite an in depth step by step build that is an excellent reference for those planning on building this kit, as well as a honest and thoughtful review of the Hobby Boss kit. The only AM options I would now consider a must are turned Brass MGs (my preference over other options), and a more accurate set of decals.
Joel
FEB 10, 2018 - 09:13 PM
I was so inspired I went (or tried) shopping for one. Squadron, Sprue Bros. and Lucky Models nobody had one ! I'll keep looking
FEB 11, 2018 - 05:42 PM

Gabriel,
Great looking model and a great time also reading the story and your tribulations during the build.
Will be looking out for the next IAR you present here.
Thanks for sharing, keep them coming!
Cheers
Pedro
FEB 11, 2018 - 08:30 PM

Hi, guys!
Thank you for posting and sorry for late answer - I's still having internet access problems (!).
Ivanhoe6:
Thank you! I subscribed myself to Scale Hobbist product notification and I filled up the basket, safe this item. I will proceed to check-out when is re-supplied (it will be the third time - I missed the first shipment) I've seen it on Amazon, though.
Joel
The praise I received here from an experienced modeler like you made my day! Thank You, sir! To be honest, I have to share credit with Rowan Baylis (Merlin) because he has a very sharp editing eye and slapped my wrist (kindly) more than once when I went wrong. I should thank him for that for sure!
The episode described in the review, together with Tidal Wave, are the pride of Romanian Aeronautics during WWII (for the period they were under Axis control). I found additional info in Squadron Signal book on Lightning. "Hutch" was the only pilot of his squadron do return home ( ). He was credited, erroneously, with downing five FW 190 (at the best he can be credited with damaging two IAR-80, based on post-war analysis).
Aber makes excellent gun barrels and they're affordable.
RB Productions based in Ireland, owned by the Romanian modeler Radu Brinzan makes accurate decals for Romanian aircraft. Last time I checked his online store had no decals for early IAR-80 (see infra, addenda)
Pedro:
Thank you, sir! I'm very eager to start the new build on the same kit: after buying the IAR 80/81 book by Radu Brinzan, I discovered yet another few mistakes which I like to correct in my future build(s).
ADDENDA
As my good luck goes, I have received the IAR 80/81 book after I built the aircraft and sent the review. Oh, well...
There are a few other things you may like to consider:
- the colors I chose are quite good, the brown should be less red;
- the interior seems to have been painted with under-surface blue, not RLM02 (not 100% sure);
- the camouflage scheme should be wrap-around, with light blue only under wings and stabilizers, but not under the main fuselage;
- the number of the aircraft should be between 1 and 20, and no higher for this version. White 137 is an IAR 80A (it carries three pairs of MGs, not two);
- the yellow theater marking should by applied only under the wings, and on a longer span (one panel line more towards inside of the wing);
- the factory applied camouflage seems to have a loose pattern from NE to SW but not as broad as I sprayed them.
Thank you all!
Gabriel
FEB 12, 2018 - 09:52 PM

The colors should be the one of the RAF as there were used by the Romanian Air Force before and early in the war! You have put the legs covers the wrong way! Hobby Boss could and should have done a greater job considering the very good infos available with Radu Brinzan! So they have few excuses. Thanks for spending your time to share your analysis with us. I include here a pic of my IAR 80-A in 32nd from AZUR-FRROM! Cheers
 DSC_0002 by jean Barby, sur Flickr
DSC_0002 by jean Barby, sur FlickrAUG 20, 2018 - 04:18 AM
Hi, Jean!
Yes, I have received Radu's book too late and I followed the instructions, safe the decal application. If you read the whole article, you'll see I made a promise to re-do the build as I have better information now. The origin of the paints is a supposition and Radu insist on that but it's the only workable hypothesis... so it's good for now. Yes, I hace installed the wheels on the wrong sides - I have noticed it later and re-installed them. Stupid mistake on my side.
The Azur kit is made in collaboration with Radu and should be much more accurate at least regarding the markings / paint scheme.
Hobby Boss are just making up their painting instructions - none of their kits I ever build have the correctly done so yes, much caution is needed. It's a shame, because the aircraft I made has a couple of very good war time pictures... well, now I know better!
Your aircraft looks superb! Rowan (Merlin) is building one right now - he has the blog running and he does also a superb job!
Thank you for tuning in!
Gabriel
AUG 20, 2018 - 04:26 AM
Copyright ©2021 by Gabriel. Images also by copyright holder unless otherwise noted. The views and opinions expressed herein are solely the views and opinions of the authors and/or contributors to this Web site and do not necessarily represent the views and/or opinions of AeroScale, KitMaker Network, or Silver Star Enterrpises. Images also by copyright holder unless otherwise noted. Opinions expressed are those of the author(s) and not necessarily those of AeroScale. All rights reserved. Originally published on: 2018-02-11 05:01:00. Unique Reads: 13817

WEB HOSTING BY


Copyright ©2021 AeroScale and Kitmaker Network, a subsidiary of Silver Star Enterprises
All Rights Reserved. Please read our Conditions of Use and Privacy Policy.
All Rights Reserved. Please read our Conditions of Use and Privacy Policy.