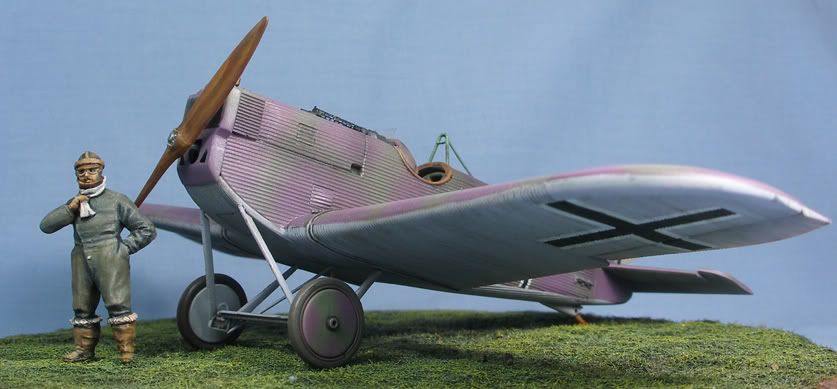
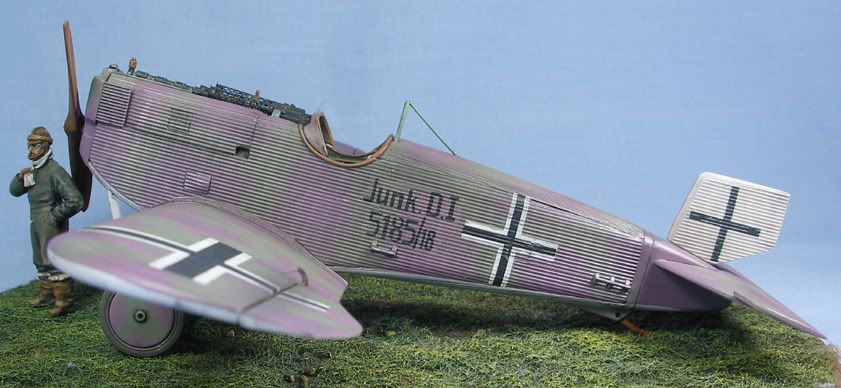
_GOTOBOTTOM
Early Aviation
Discuss World War I and the early years of aviation thru 1934.
Latest finished - Roden 1/48 Junkers D.I
BradCancian
_VISITCOMMUNITY
Queensland, Australia
Joined: August 30, 2006
KitMaker: 285 posts
AeroScale: 281 posts
Posted: Thursday, January 10, 2008 - 10:00 PM UTC
Hi all,

Here’s my latest off the bench – the Roden 1/48 Junkers D.I. The D.I was the worlds first operational all metal fighter and saw very limited service in the final weeks of the First World War.

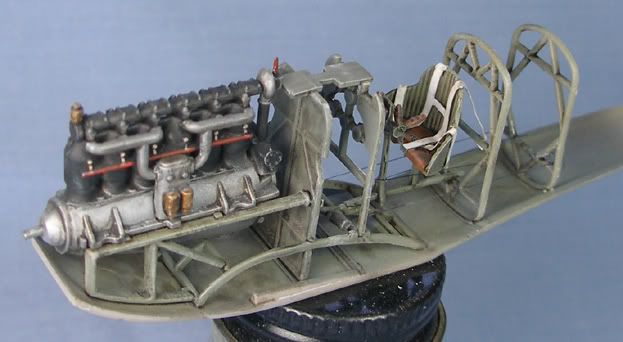
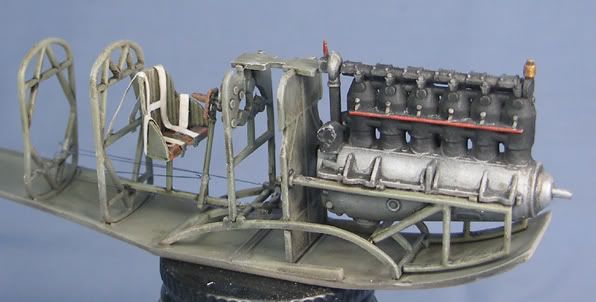
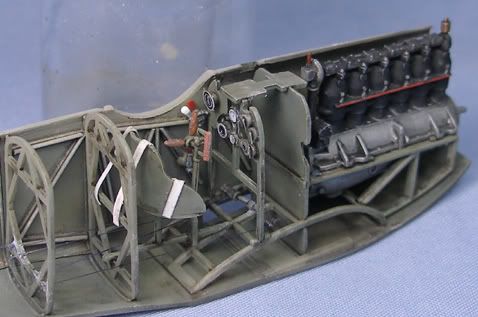
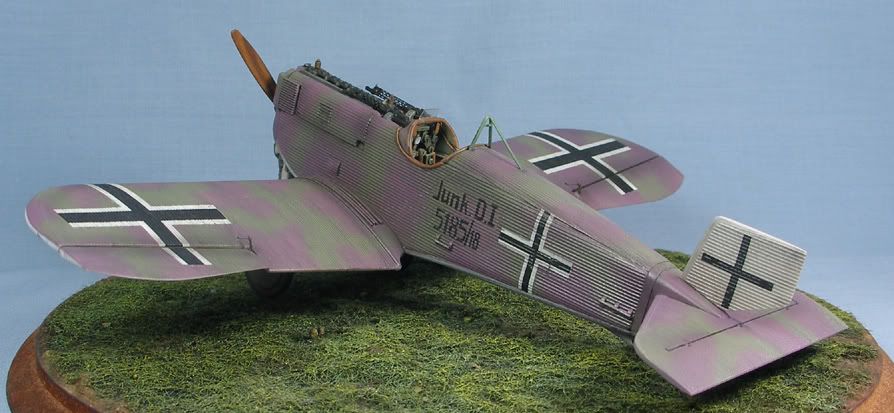
I wanted to go with a mainly OOB build - Modifications to the interior included enhancement of the fuselage framing, addition of the fuel pump on the starboard side of the cockpit, addition of switches and gauges to the instrument panel, and the addition of seat belts.


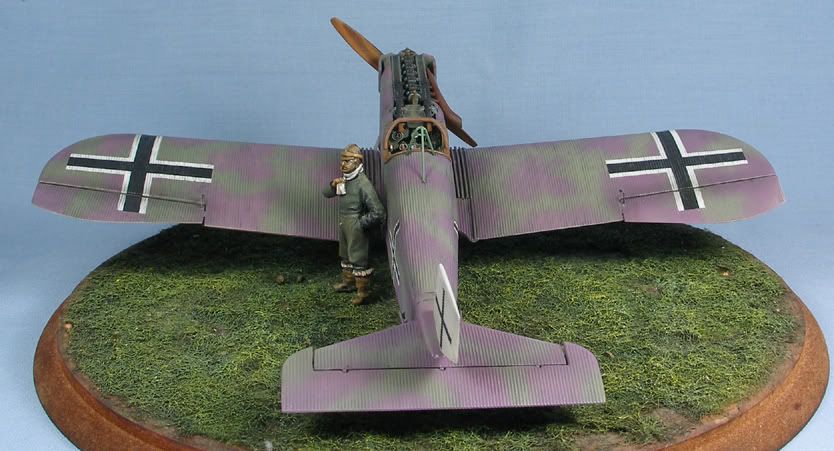
The only modifications to the exterior was the addition of the foot plates on the wings, the addition of the extra undercarriage braces, the replacement of the control horns and the addition of etched jackets for the spandau machine guns.

Decals are kit decals and represent the machine that was acceptance tested in late 1918. I found the decals were very nice and very easy to use, but had a little trouble settling down (even after microsol) but this was to be expected on this type of surface.
All of the paints were my own mixture.


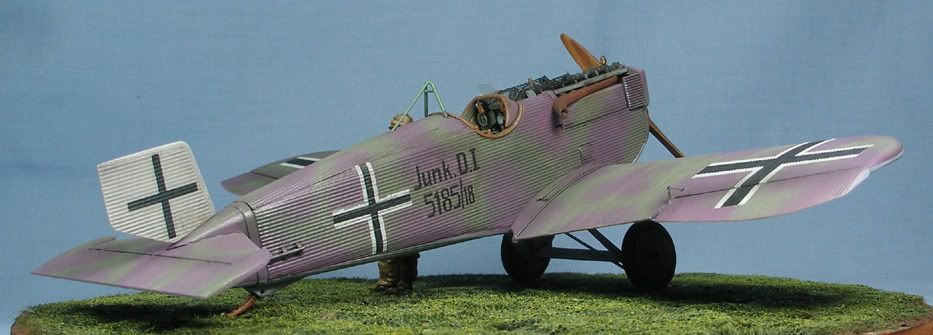
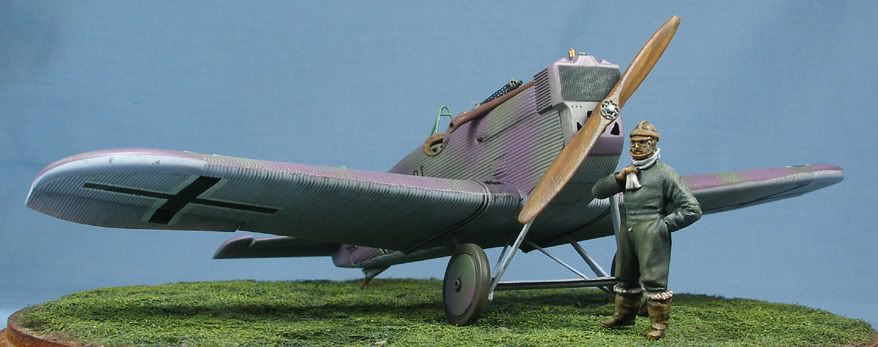
All in all, the build took me a total of 6 days. I found the Roden kit a delight to build with few vices from the builder’s perspective (apart from the tricky fuselage, but I think Roden chose the best way to do this) - and with virtually no rigging, this kit makes a very nice change or a perfect starter for someone wishing to get into WW1 models!

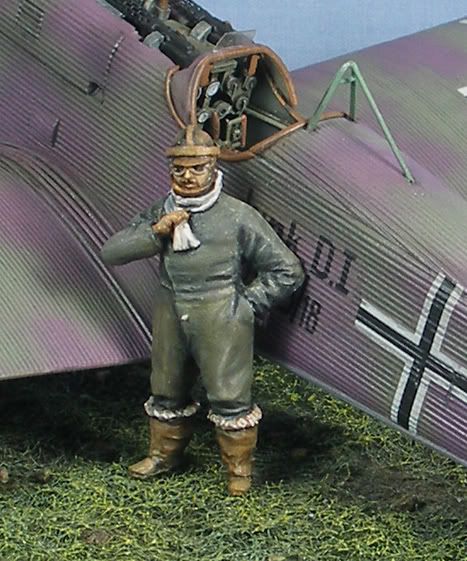
I also tried my hand for the first time at figure painting - the figure is a resin one that I bought off ebay with no box so I am not sure of the manufacturer, but it was very nicely cast. I painted the figure in one sitting with oil paints (I only used four colours for the whole figure - black, white, burnt sienna and yellow ochre). Not great but I am happy for my first attempt!

All feedback welcome!

BC
JackFlash
_VISITCOMMUNITY
Colorado, United States
Joined: January 25, 2004
KitMaker: 11,669 posts
AeroScale: 11,011 posts
Posted: Thursday, January 10, 2008 - 10:22 PM UTC
It is another fine build! Brad tell us about your version of the paint scheme.
Repainted
_VISITCOMMUNITY
Östergötland, Sweden
Joined: April 04, 2006
KitMaker: 1,058 posts
AeroScale: 1,004 posts
Posted: Thursday, January 10, 2008 - 10:37 PM UTC
Thats one for the book Brad. I like it. Good one
Larsa
Kitboy
_VISITCOMMUNITY
Gelderland, Netherlands
Joined: July 20, 2006
KitMaker: 258 posts
AeroScale: 256 posts
Posted: Friday, January 11, 2008 - 02:55 AM UTC
As always a briljant looking result. Only 6 days! Well how knows I may finish mine within such a short time period.

Cheers, nico
Grumpyoldman
Staff Member_ADVISOR
KITMAKER NETWORK
_VISITCOMMUNITY
Florida, United States
Joined: October 17, 2003
KitMaker: 15,338 posts
AeroScale: 836 posts
Posted: Friday, January 11, 2008 - 11:32 AM UTC
Turned out really nice.
A pleasure to view.
BradCancian
_VISITCOMMUNITY
Queensland, Australia
Joined: August 30, 2006
KitMaker: 285 posts
AeroScale: 281 posts
Posted: Friday, January 11, 2008 - 12:14 PM UTC
Thanks guys

Stephen - my colour notes were based on Dan San Abbot's description of the colour scheme on these aircraft:

"the lilac is the dominant color and is the dark color in the photographs. The green is pale and lighter than the lilac. The color of the green is a soft, pale mossy green."

Various sources state that the underside colour was essentially white with a tinge of blue. In addition, both hard edge and soft edge (is sprayed) camo seems to have been applied to these aircraft - I went with the soft edge scheme as I am lazy and prefer to spray!

My colour mixes were definately nothing scientific - the lilac was mainly Gunze Purple with some light gull grey mixed probably about 70%/30% with a dash of red. The green was mainly a mixture of Gunze Light Green (H319) with again a few drops of light gull grey and I think I even but in a drop or two of olive green... nothing exacting, I was just looking for something that could pass as light mossy green! The underside was simply white with a couple of drops of prussian blue, with the emphasis on keeping it fairly pale.

Cheers!

BC
CMOT70
_VISITCOMMUNITY
Victoria, Australia
Joined: August 23, 2007
KitMaker: 629 posts
AeroScale: 539 posts
Posted: Friday, January 11, 2008 - 10:05 PM UTC
I really like how you've done this one.

Also i've seen it questioned on another forum whether the interior should be painted at all. Well i definately agree with your interpretation. I'm sure that they would have painted the interior and i'll be doing it that way when i get around to mine finally.

And i'll be spraying the camo as well...being no fan of brush painting. Or more like being no good at it anyway!

Andrew
TedMamere
_VISITCOMMUNITY
Moselle, France
Joined: May 15, 2005
KitMaker: 5,653 posts
AeroScale: 4,347 posts
Posted: Saturday, January 12, 2008 - 09:59 AM UTC
Hi Brad!

Very nice model and the figure looks great too. I didn't purchased the kit so far but now it's definitely on my "to buy" list!

Jean-Luc
 _GOTOTOP