Air Campaigns
Want to start or join a group build? This is where to start.
I Feel the Need for Speed
VonCuda
_VISITCOMMUNITY
North Carolina, United States
Joined: November 28, 2005
KitMaker: 2,216 posts
AeroScale: 1,080 posts
Posted: Thursday, February 26, 2009 - 10:38 AM UTC
Andrew, glad to see you got the Hun finished. One of my favorite aircraft. Looks like you've done a beautiful job on her and the decals look great. Nice job all around. Congrats!

Hermon
Phantom2
_VISITCOMMUNITY
Östergötland, Sweden
Joined: April 18, 2006
KitMaker: 708 posts
AeroScale: 678 posts
Posted: Sunday, March 01, 2009 - 04:05 AM UTC
Wow, That was a really neat Sabre!

You just gotta love those colorful birds!

My bird is anything but colorful, It´s BLACK, BIG and MEAN!

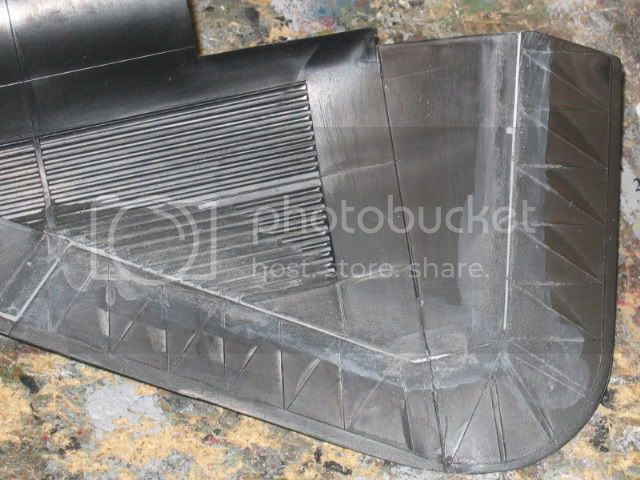
After I had completed the outer wing sections I had to fill the seams on the underside.

But as I didn´t want to destroy the fine detail on the wings, I had to use an old trick.

First, filling about 10cm (4") of the seam;

th

Then I used a cotton bud dampend with Acetone(?) to wipe off the excess.
It works fine as long as you don´t use too much Acetone as It can harm the plastic.


Seam filled, and the detail are still there, the miscolouring will dissapear when the model is painted.


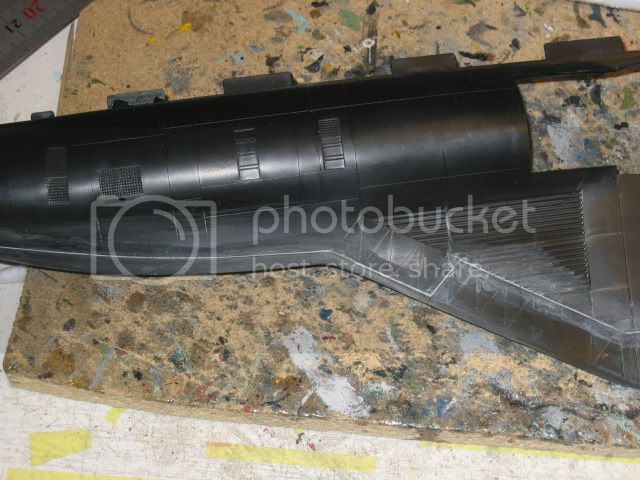
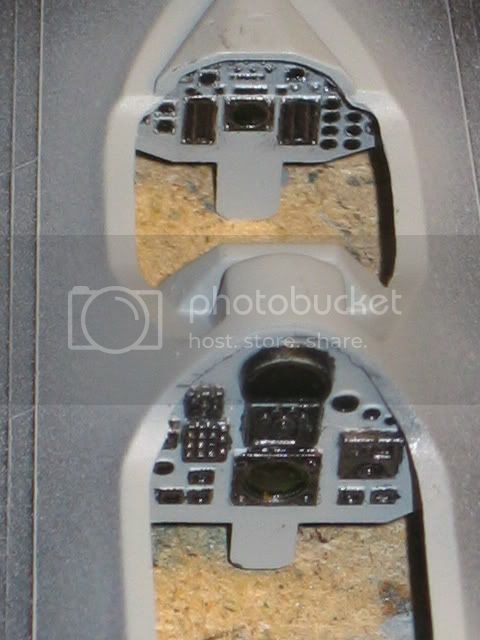
Instrument panels fitted to the upper forward fuselage;


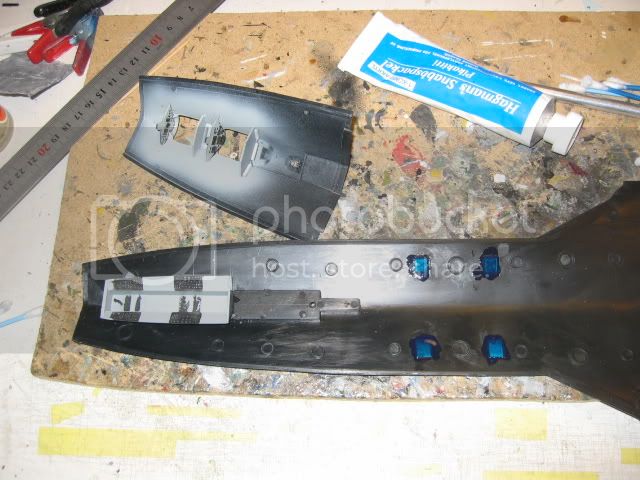
The cockpit tub fitted to the lower;


Camera ports painted clear blue and masked off with Tamiya tape;


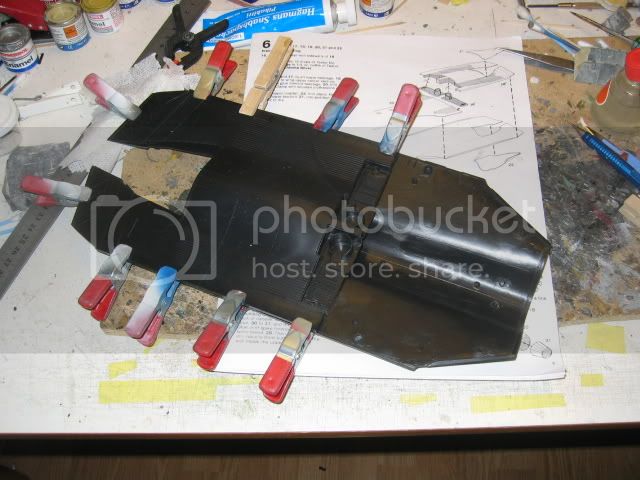
Now we are ready to join the upper and lower fuselage parts;


Done, and left overnight to dry;


The nose attatched;


...and the second upper fuselage section glued;


Not so many parts, but they are large, so the aircraft is really starting to show It´s sieze!


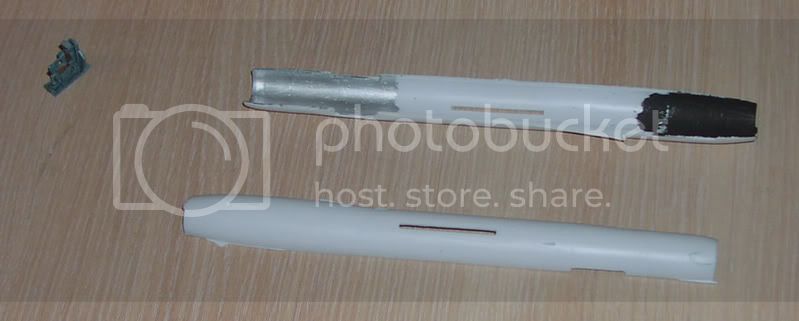
Then I turned to the aft fuselage section and assembled the wheel wells, upper and lower fuselage.


Amazingly good fit on this old kit!
Some filler will be needed, but not as much as one might expect on such an oldie!
Testor´s really made a good kit!

Soon it will be time to join all fuselage sections!

Cheers!

Stefan E
CaptainA
_VISITCOMMUNITY
Indiana, United States
Joined: May 14, 2007
KitMaker: 3,117 posts
AeroScale: 2,270 posts
Posted: Sunday, March 01, 2009 - 07:41 AM UTC
It is hard to get a real sense of the size from the photos. But It is starting to come together nicely.
Nito74
_VISITCOMMUNITY
Lisboa, Portugal
Joined: March 04, 2008
KitMaker: 5,386 posts
AeroScale: 635 posts
Posted: Sunday, March 01, 2009 - 02:58 PM UTC
First update on the A-model kit. A su-11 , 1:72.


The dryfitting showed my some major headaches on my Plastic Path...
The wings were an epidemic plague comparing to previous headache.

You were right Jesper !!
amegan
#243
_VISITCOMMUNITY
England - North East, United Kingdom
Joined: March 21, 2008
KitMaker: 996 posts
AeroScale: 915 posts
Posted: Monday, March 02, 2009 - 11:09 AM UTC
Thanks guys for the comments, it really was a pleasure to build. Got to finish a resin Grob 109B from Heritage Models before moving on to my next planned build in Rumblings in the Dark, a Sopwith 1 1/2 Strutter from Roden, looking forward to that. If I have time I will come back for a quick build here, two suitable in the stash, either a Revell Wright Flyer or a Hasagawa EE Lighting F6. The Flyer would be cool amongst all the streamlined machines. Hope to be back later but will keep watching

Andrew
Nito74
_VISITCOMMUNITY
Lisboa, Portugal
Joined: March 04, 2008
KitMaker: 5,386 posts
AeroScale: 635 posts
Posted: Sunday, March 08, 2009 - 04:46 PM UTC
Cockpit is almost done.
Tried some dry fitting and it's awful...
--*Why did I got these A-model kits*--
Nito74
_VISITCOMMUNITY
Lisboa, Portugal
Joined: March 04, 2008
KitMaker: 5,386 posts
AeroScale: 635 posts
Posted: Thursday, March 12, 2009 - 12:42 AM UTC
Finished the cockpit (there's a cover of the cockpit parts seen on the pics, that has both the front wheel bay and the base for the front cone).
Tried this morning the dryfitting and the 2 halves of the fuselage won't close, maybe 1 cm gap at the front... I will dismantle the cockpit there is no other way.
jaypee
_VISITCOMMUNITY
Scotland, United Kingdom
Joined: February 07, 2008
KitMaker: 1,699 posts
AeroScale: 1,384 posts
Posted: Sunday, March 15, 2009 - 09:21 PM UTC
Well it wouldn't be me if there wasn't a disaster.

I got a picture of the MC.72 showing that there is not
ventral radiator as depicted on the kit. And I wasn't
too happy with the paint finish

AMS or is it OCD kicked in.
I stripped it all back with oven cleaner.

I forgot that the legs where pinned and glued with CA.
When I rinsed over cleaner off one the legs detached and
disappeared down the kitchen sick. Arse!

I don't even have a trap on the sink as the house is
getting renovated it is just a temporary sink. So this bit is gone.

Better break out the evergreen and wittle a new one.
Luckily I have the other leg to base the copy on.

I thought I'd used poly cement on the legs.
But I'd never have thought oven cleaner removes/weakens CA

The next few builds I've got are Hobbyboss and Tamiya so all this
mucking about will not happen. Phew!

I console myself that I'll make a better job of the paint next time
around

JP
jaypee
_VISITCOMMUNITY
Scotland, United Kingdom
Joined: February 07, 2008
KitMaker: 1,699 posts
AeroScale: 1,384 posts
Posted: Monday, March 16, 2009 - 11:20 AM UTC
well that wasn't too bad sandwiched two bits of evergreen and sanded and trimmed and
sanded and trimmed and I got a replacment leg. It even fits and everything is square(ish).
Now to paint the thing properly this time.
SGTJKJ
#041
_VISITCOMMUNITY
Kobenhavn, Denmark
Joined: July 20, 2006
KitMaker: 10,069 posts
AeroScale: 3,788 posts
Posted: Monday, March 16, 2009 - 08:24 PM UTC
Stefan, that is a monster you are building! looking forward to see it get into shape.

John, these kits have a real bad reputation and it seems they deserve it. Top points to you for tackling such a tough build.

Looking forward to see more
HeyLoad
_VISITCOMMUNITY
Illinois, United States
Joined: December 06, 2005
KitMaker: 64 posts
AeroScale: 33 posts
Posted: Sunday, March 22, 2009 - 11:44 AM UTC
Since the Speed Campaign is for Mach 1, I am entering this, a 1970 Ford Mach One. Just kidding, the F/A-18F will be finished soon. Just thought I would show you what else was on the workbench. This is the first car model I've built in probably 35 years. It was great to do something different for a change.

Tom


jaypee
_VISITCOMMUNITY
Scotland, United Kingdom
Joined: February 07, 2008
KitMaker: 1,699 posts
AeroScale: 1,384 posts
Posted: Sunday, March 22, 2009 - 07:52 PM UTC
ok i am really crap at putting on cooper leaf. It looks good if only I could
get it to sit without tearing. I've given up and painted the radiators copper
it will have to do. I'll let it cure this weeks then mask it and
spray the mc72 red and white again. Not such a speedy build
Nito74
_VISITCOMMUNITY
Lisboa, Portugal
Joined: March 04, 2008
KitMaker: 5,386 posts
AeroScale: 635 posts
Posted: Thursday, April 09, 2009 - 03:33 AM UTC
Yep Jesper...
I had to dismember the cockpit parts otherwise the 2 halves of the fuselage won't fit...

I still have 4 or 5 A-model kits waiting....

Will make some progress on the weekend I hope, too many campaigns, so little time...
HeyLoad
_VISITCOMMUNITY
Illinois, United States
Joined: December 06, 2005
KitMaker: 64 posts
AeroScale: 33 posts
Posted: Monday, April 13, 2009 - 01:53 PM UTC
I've now finished the Hasegawa F/A-18F in 1/48. I really liked the kit. The fit and details were very good.

Tom


Red4
_VISITCOMMUNITY
California, United States
Joined: April 01, 2002
KitMaker: 4,287 posts
AeroScale: 1,164 posts
Posted: Wednesday, April 15, 2009 - 03:01 PM UTC
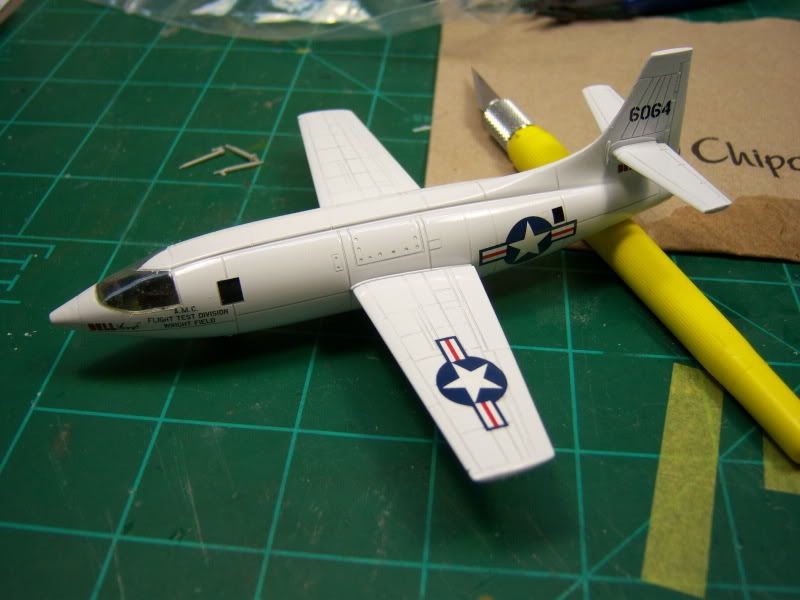
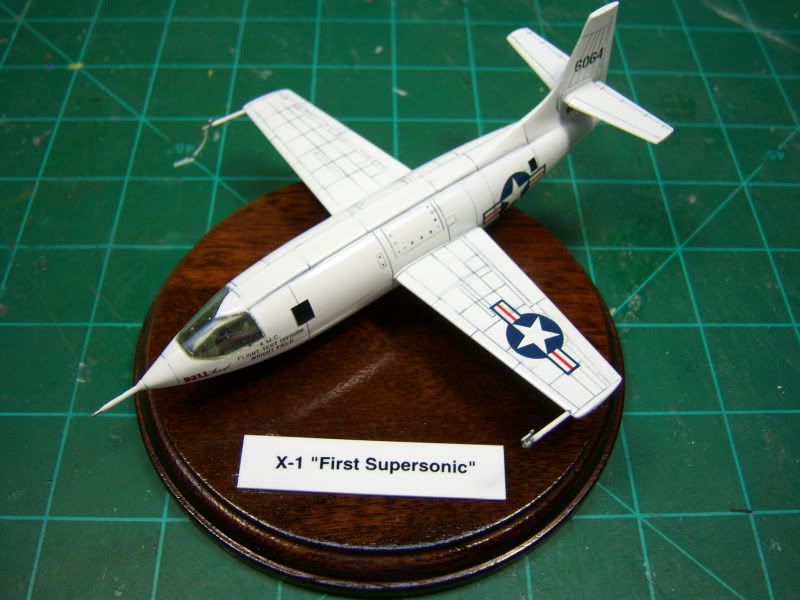
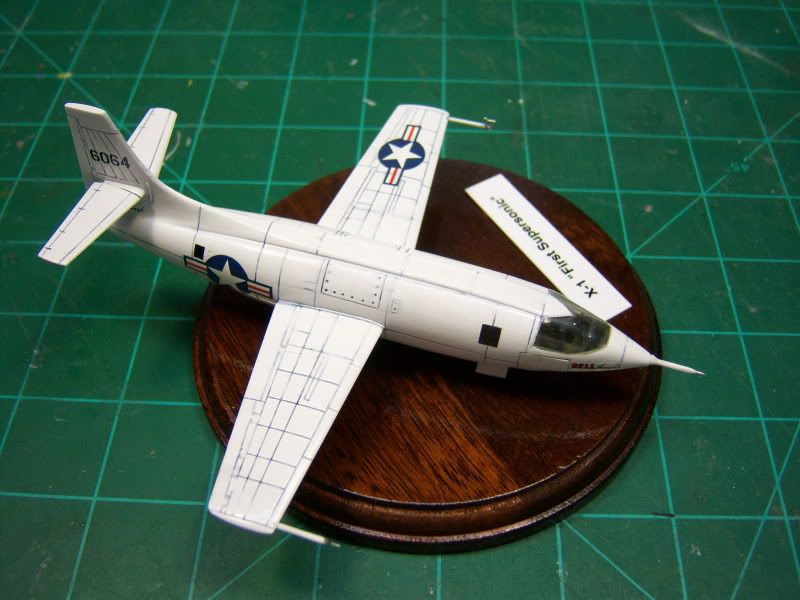
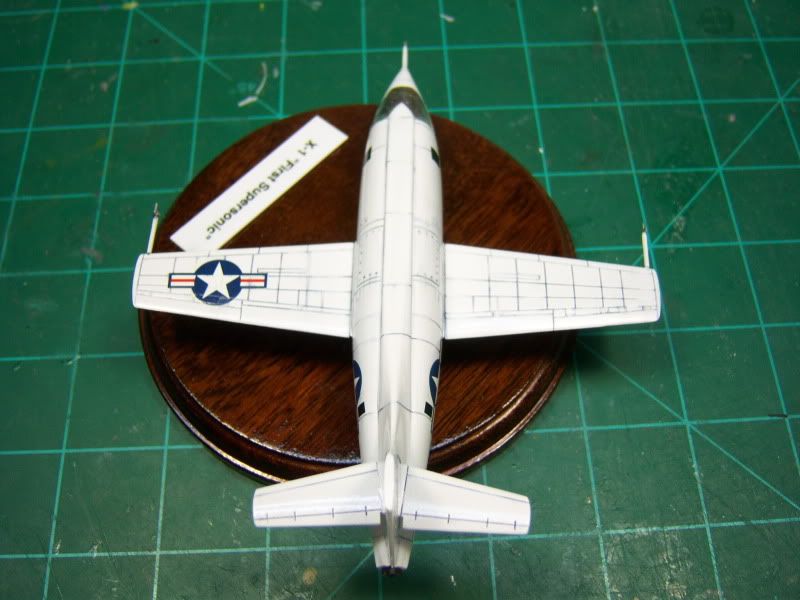
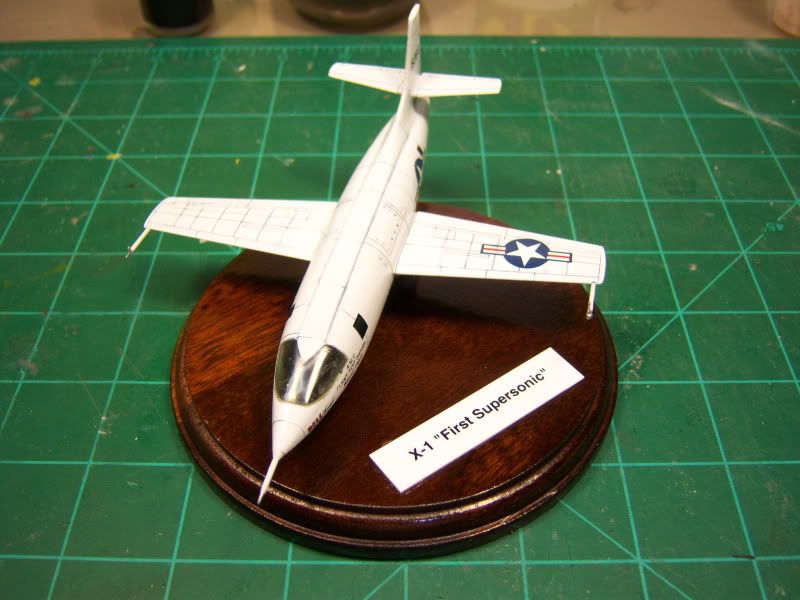
It's been quite awhile since I chimed in with any sort of progress report so I figured I probably should Have finally been able to sit down at the bench and get in a little modeling time. I got my X-1A painted a few days ago, and got the decals on it tonight. All that is left is to install the fiddly bit and add a light wash to the panel lines. Its the 1/72 Hobbycraft kit. Kit decals were more than accomodating....thankfully! Thats about it for me. Thanks, "Q"
CaptainA
_VISITCOMMUNITY
Indiana, United States
Joined: May 14, 2007
KitMaker: 3,117 posts
AeroScale: 2,270 posts
Posted: Thursday, April 16, 2009 - 11:38 AM UTC
Chalk up a few more great builds. Good job Speed-Demons.
Red4
_VISITCOMMUNITY
California, United States
Joined: April 01, 2002
KitMaker: 4,287 posts
AeroScale: 1,164 posts
Posted: Thursday, April 16, 2009 - 02:16 PM UTC
Why it took me so damn long to finish this little kit is beyond me Just put the wraps on it a few minutes ago. I was trying to figure out how to make a little title card for it, then looked at the decal sheet. Right there across the top was my answer. I sprayed the remainder of the sheet with decal set from Testors, let it dry, and then applied it as a regular decal on a piece of scrap plastic sheet I had gloss coated and glued to the base. Worked like a charm. The kit is the Hobbycraft 1/72 offering of the X-1. As I have seen a lot of builds in Chuck Yeagers markings, I decided to go with something a little different. This isn't my best effort by far, but it looks good in the case, and "finished is better than perfect". One down, oh so many more to go! Thanks, "Q"


jaypee
_VISITCOMMUNITY
Scotland, United Kingdom
Joined: February 07, 2008
KitMaker: 1,699 posts
AeroScale: 1,384 posts
Posted: Saturday, April 18, 2009 - 09:39 PM UTC
looks fine from here Matthew. And a great line finished is better than perfect.
Tom that is a lovely model. I'm not a jet fan but this campaign may tempt me.

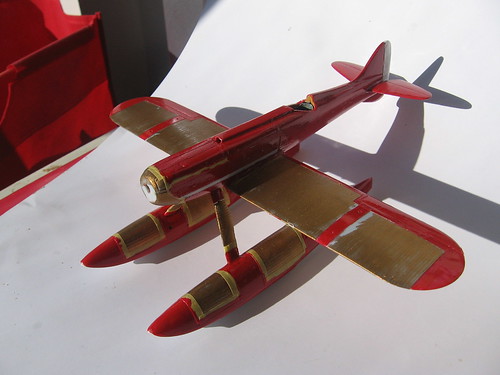
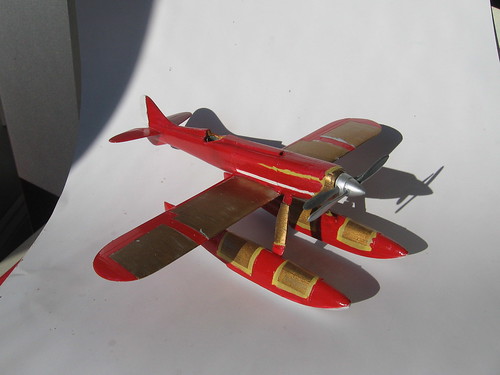
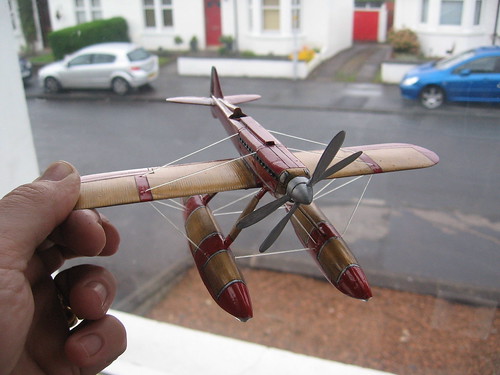
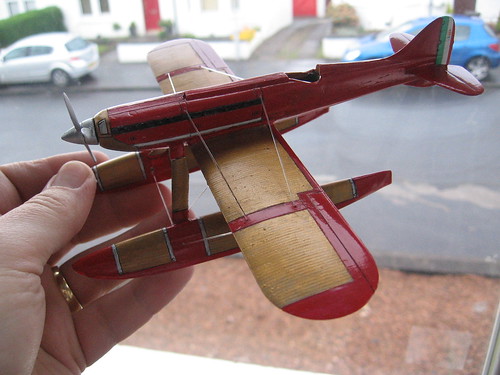
Here is my efforts so far.

Well we have been here before.
This is the second paint job. Humbrol 220 gloss
acrylic. Goes on nice. Would benefit from a primer
though. I need touch ups where the tape as lifted
some of the copper/brass colour.
Can you guess which float leg had to be scratch built
after one fell down the drain?

mc-72

mc-72

Thanks for looking.

jaypee
_VISITCOMMUNITY
Scotland, United Kingdom
Joined: February 07, 2008
KitMaker: 1,699 posts
AeroScale: 1,384 posts
Posted: Wednesday, April 22, 2009 - 10:16 PM UTC
Masking removed. Touch ups. Slowly we creep to the finish line
so much for the need for speed

Smer 1/50 mc 72
amegan
#243
_VISITCOMMUNITY
England - North East, United Kingdom
Joined: March 21, 2008
KitMaker: 996 posts
AeroScale: 915 posts
Posted: Monday, April 27, 2009 - 09:05 AM UTC
Jp, hare and tortoise, keep going, you'll get there and it is both different and beautiful. I'm not a jet fan either but I enjoyed the Hun
Q, great X1 simple but very nice.
jaypee
_VISITCOMMUNITY
Scotland, United Kingdom
Joined: February 07, 2008
KitMaker: 1,699 posts
AeroScale: 1,384 posts
Posted: Wednesday, April 29, 2009 - 09:16 PM UTC
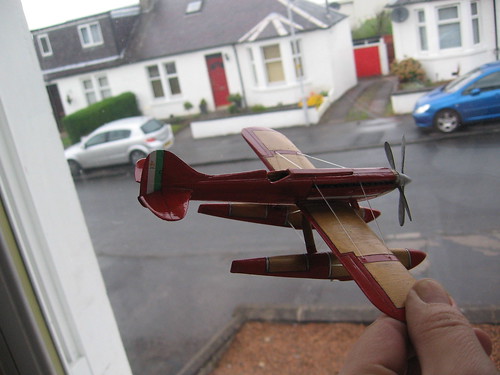
Couple of hours last night sees an ink wash into the panel lines and the rigging installed.
It is *almost* square. The problem being the legs are so long there is a lot of flex.
The rigging does hold it solid though.
Touch ups, paint on the rigging and the cockpit cover to do. The prop is not glued
which is why it looks wonky.

img_0200.jpg
img_0199.jpg
img_0198.jpg
SGTJKJ
#041
_VISITCOMMUNITY
Kobenhavn, Denmark
Joined: July 20, 2006
KitMaker: 10,069 posts
AeroScale: 3,788 posts
Posted: Wednesday, April 29, 2009 - 09:48 PM UTC
Looks good, JP. A unique looking aircraft for sure!

Looking forward to see it finished
LongKnife
_VISITCOMMUNITY
Jönköping, Sweden
Joined: April 25, 2006
KitMaker: 831 posts
AeroScale: 688 posts
Posted: Thursday, April 30, 2009 - 01:19 AM UTC
Thats a glossy one JP. I guess that would be the right thing to start with practicing rigging.

Tony
jaypee
_VISITCOMMUNITY
Scotland, United Kingdom
Joined: February 07, 2008
KitMaker: 1,699 posts
AeroScale: 1,384 posts
Posted: Thursday, April 30, 2009 - 02:49 AM UTC
no way tony.
a normal biplane is easier than this. There was no structural integrity with this at all,
at least with a biplane you have struts to help you. and you can get jigs
as well.

i had most of the holes drilled, with foresight i would have drilled them all
but i forgot about some lines. The rigging should be flat wires but i could
not find any suitable material.

A fokker d.vii or dr.1 you only need rig the undercarriage. you would have
no problem with rigging anyway tony. it is more the fear of rigging than
the real difficulty that put folk off i think.
a/c is nothing compared to the magic the ship guys do.
LongKnife
_VISITCOMMUNITY
Jönköping, Sweden
Joined: April 25, 2006
KitMaker: 831 posts
AeroScale: 688 posts
Posted: Thursday, April 30, 2009 - 06:18 AM UTC
Aha. Like Roosevelt said then, "we have nothing to fear but fear itself".

I have a CR 42 (was aimed for this campaign but failed miserably) and a Gladiator in my future. Guess I'll start with the Fiat, huh?

Tony