Pennsylvania, United States
Joined: June 17, 2009
KitMaker: 566 posts
AeroScale: 507 posts
Posted: Thursday, September 24, 2009 - 08:25 PM UTC
"...Fat, drunk, and stupid is no way to go through life son"
United Kingdom
Joined: March 08, 2009
KitMaker: 719 posts
AeroScale: 691 posts
Posted: Thursday, September 24, 2009 - 08:56 PM UTC
Looking great Mike!
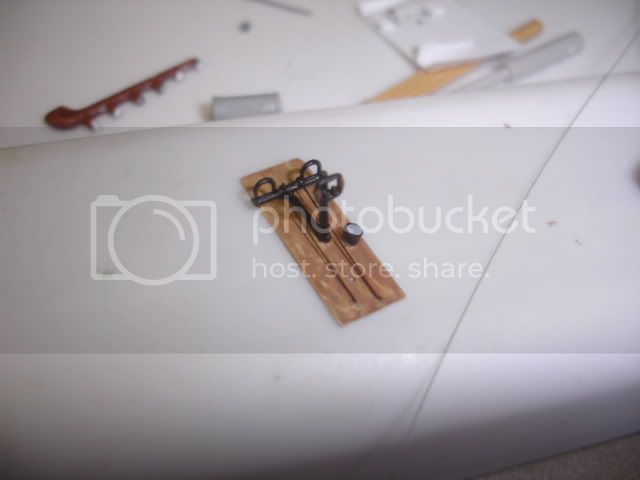
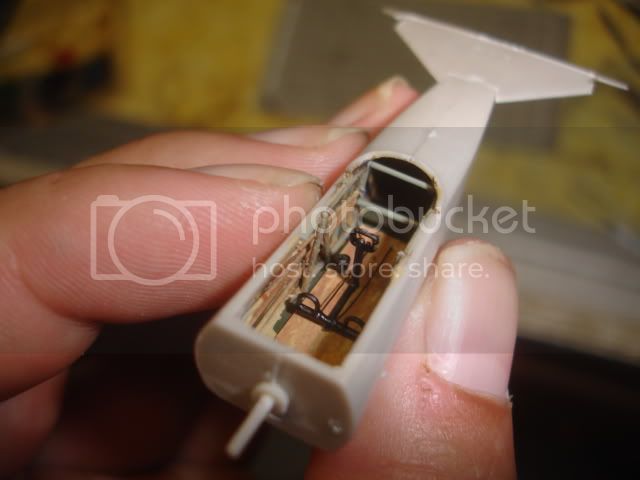
I've got a couple of WWI kits in the pipeline in 1/72 scale, so it is nice to have some inspiration. Was the seat really covered in lozenge fabric like that? Seat belts and buckles look good- I know how hard it is when they are this small!
I'll be watching your progress!
Scotland, United Kingdom
Joined: February 07, 2008
KitMaker: 1,699 posts
AeroScale: 1,384 posts
Posted: Thursday, September 24, 2009 - 09:36 PM UTC
Wow now I know what to upholster my armchair with. Now to find a source of 1:1 lozenge fabric.
Any ideas folks?
Great work with that little fokker. Once I clear the decks of my current builds it'll be ww1 builds
all next year. Salamander, Camel, Spad 13, Fokker Dr1, D.7x3. Looking forward to seeing more of yours.
Alberta, Canada
Joined: January 19, 2008
KitMaker: 6,743 posts
AeroScale: 6,151 posts
Posted: Friday, September 25, 2009 - 01:02 AM UTC
Nicely done Mike !
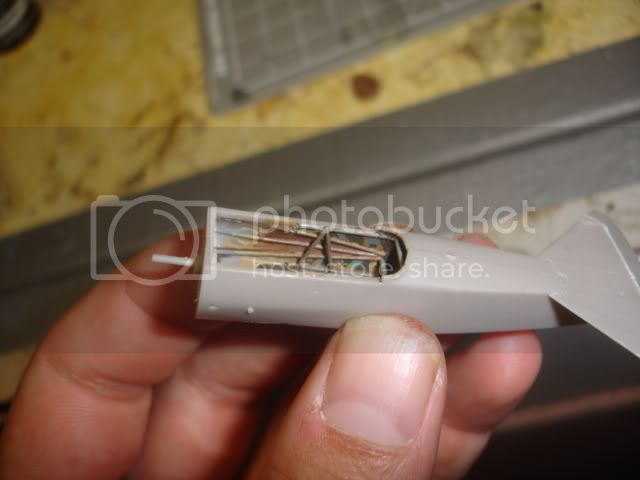
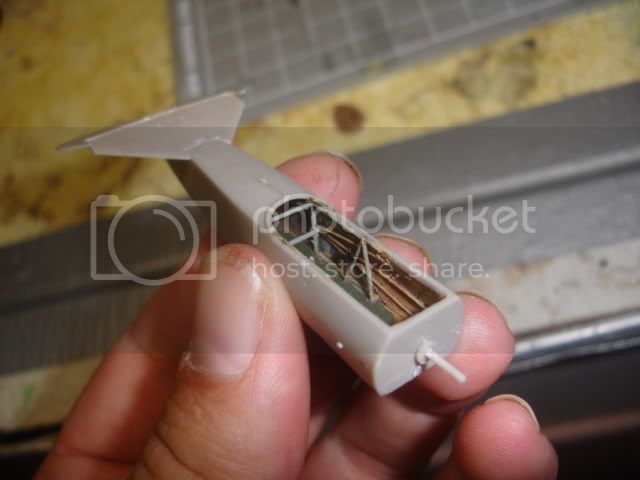
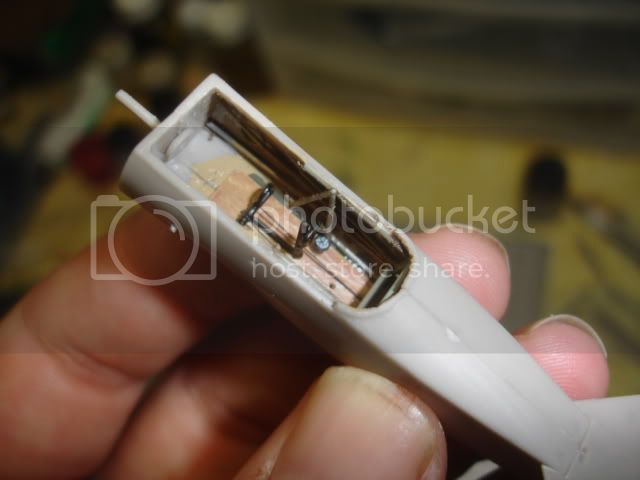
Ben , yes the back and front of the seat are cover in lozenge. The seats are stamp froma piece of alum with the fabric dope to the surface . Only the vertical parts were covered .
Colorado, United States
Joined: January 25, 2004
KitMaker: 11,669 posts
AeroScale: 11,011 posts
Posted: Friday, September 25, 2009 - 02:04 AM UTC
Yes but the lozenge was only one piece one the inner face of the uppright back. Not a big deal as no one will see the back of the seat.
". . .The most important thing is to know why you build and then get the most that you can out of building." via D.D.
Pennsylvania, United States
Joined: June 17, 2009
KitMaker: 566 posts
AeroScale: 507 posts
Posted: Friday, September 25, 2009 - 03:37 AM UTC
Stephen, good to know for the future. So I take it that the aluminum on the outside surfaces of the seat were left bare then?
This kit came with 4 decal options; Erich Lowenhardt, Theo Osterkamp (the undecorated one he is photographed with) and postwar Dutch or Polish airforces. I am doing Lowenhardt's aircraft. I know he died (in a D.VII) not long after these reached the front, did he actually use this aircraft or is this also a scheme with little documentation?
"...Fat, drunk, and stupid is no way to go through life son"
Colorado, United States
Joined: January 25, 2004
KitMaker: 11,669 posts
AeroScale: 11,011 posts
Posted: Saturday, September 26, 2009 - 05:51 PM UTC
Quoted Text
Stephen, good to know for the future. So I take it that the aluminum on the outside surfaces of the seat were left bare then?
This kit came with 4 decal options; Erich Lowenhardt, Theo Osterkamp (the undecorated one he is photographed with) and postwar Dutch or Polish airforces. I am doing Lowenhardt's aircraft. I know he died (in a D.VII) not long after these reached the front, did he actually use this aircraft or is this also a scheme with little documentation?
Yes the fabric was sewn into the seat back periphery through about 200 eyelets. The backside of the back support was left natural metal. Now let me guess - they say Löwenhardt's machine has black and white stripes with a fuselage band that has a a white wavy line through it? Sorry not his machine. Though he did go over to Jasta 6 (from his unit Jasta 10) and evidently test flew this aircraft.
". . .The most important thing is to know why you build and then get the most that you can out of building." via D.D.
Attica, Greece / Ελλάδα
Joined: May 01, 2008
KitMaker: 1,437 posts
AeroScale: 1,241 posts
Posted: Sunday, September 27, 2009 - 09:04 AM UTC
Pennsylvania, United States
Joined: June 17, 2009
KitMaker: 566 posts
AeroScale: 507 posts
Posted: Sunday, September 27, 2009 - 10:32 AM UTC
Quoted Text
Yes the fabric was sewn into the seat back periphery through about 200 eyelets. The backside of the back support was left natural metal. Now let me guess - they say Löwenhardt's machine has black and white stripes with a fuselage band that has a a white wavy line through it? Sorry not his machine. Though he did go over to Jasta 6 (from his unit Jasta 10) and evidently test flew this aircraft.
Thats exactly what it claims. A bit of a downer, but I am not suprised, as I haven't found any connection between Lowenhardt and the E.V aside from the test flight you mentioned. So did an aircraft with this scheme exist, or is it fantasy. If it was real, regardless of pilot I will proceed as planned. If its bogus, I may do the aircraft Osterkamp was photographed with.
"...Fat, drunk, and stupid is no way to go through life son"
Pennsylvania, United States
Joined: June 17, 2009
KitMaker: 566 posts
AeroScale: 507 posts
Posted: Sunday, September 27, 2009 - 10:36 AM UTC
Quoted Text
Wow now I know what to upholster my armchair with. Now to find a source of 1:1 lozenge fabric.
Any ideas folks?
I can't remember where I saw/read it, but most likelyaround here somwhere. There is/was a company printing lozenge fabric for museum restorations and replica builds. I recall somthing like $50 a yard
"...Fat, drunk, and stupid is no way to go through life son"
Colorado, United States
Joined: January 25, 2004
KitMaker: 11,669 posts
AeroScale: 11,011 posts
Posted: Sunday, September 27, 2009 - 03:57 PM UTC
Quoted Text
Thats exactly what it claims. A bit of a downer, but I am not suprised, as I haven't found any connection between Lowenhardt and the E.V aside from the test flight you mentioned. So did an aircraft with this scheme exist, or is it fantasy. If it was real, regardless of pilot I will proceed as planned. If its bogus, I may do the aircraft Osterkamp was photographed with.
Not Bogus definately a Jasta 6 machine photographe in late Aug. 1918 at Bernes with other E.V and Fokker D.VII aircraft of that unit.
". . .The most important thing is to know why you build and then get the most that you can out of building." via D.D.
Colorado, United States
Joined: January 25, 2004
KitMaker: 11,669 posts
AeroScale: 11,011 posts
Posted: Sunday, September 27, 2009 - 04:01 PM UTC
Quoted Text
"Wow now I know what to upholster my armchair with. Now to find a source of 1:1 lozenge fabric. Any ideas folks?. . ."
Yes fellow by the name of Ross Walton does full sized lozenge for replica aircraft. Either in aircraft grade cotton or "Ceconite". I think he advertises in "Over the Front."
". . .The most important thing is to know why you build and then get the most that you can out of building." via D.D.
Pennsylvania, United States
Joined: June 17, 2009
KitMaker: 566 posts
AeroScale: 507 posts
Posted: Sunday, September 27, 2009 - 05:31 PM UTC
Thanks for the verification Stephen.
"...Fat, drunk, and stupid is no way to go through life son"
Pennsylvania, United States
Joined: June 17, 2009
KitMaker: 566 posts
AeroScale: 507 posts
Posted: Thursday, November 12, 2009 - 04:42 PM UTC
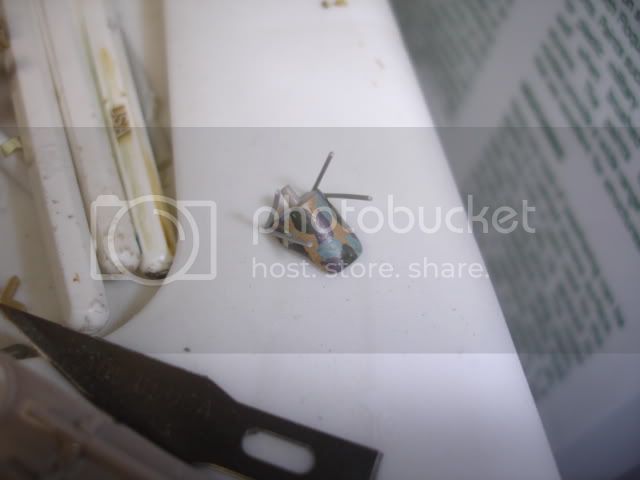
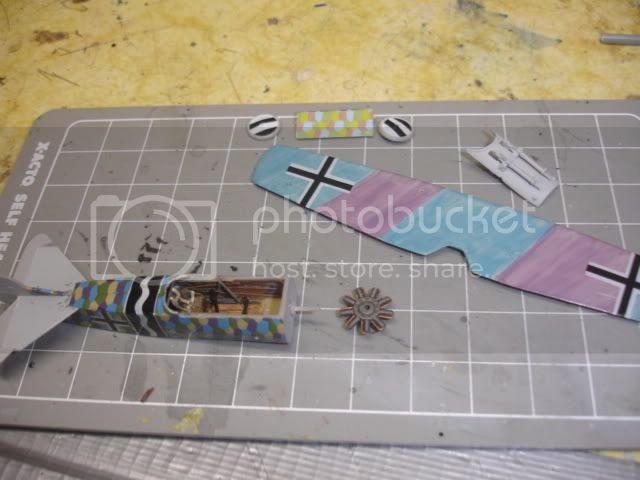
Here is an update on the progress. I recently rejoined the ranks of the employed so modelling time has taken a hit, but I am slugging on. The interior was assembled and the major assemblys were primed with a Light grey enamel. I painted the wings in accordance with the more recent research I found on this site The engine was also painted and given a dark oil wash. I then applied the lozenge decals, and I must say, Rodens decals are lacking, to say the least( non PC... they suck out loud). The colors on the lozenge are too bright and may be toned down later on. They were also quite fragile, and didn't turn out to good on the upper surface of the fuselage, but That has as much to do with me as with the decals. The Balken kreuz were out of register to, as are the roundels of the roden SE5a that recently joined the stash. I then gave it several coats of future so i can mask off and paint the white base and black stripes on the tail. I think it should have done that before decaling, but I got excited. I have a couple other things that need some white , so this will wait til i can shoot them all at once.

"...Fat, drunk, and stupid is no way to go through life son"
Colorado, United States
Joined: January 25, 2004
KitMaker: 11,669 posts
AeroScale: 11,011 posts
Posted: Thursday, November 12, 2009 - 05:04 PM UTC
Excellent progress and the underside of the wing is great!
". . .The most important thing is to know why you build and then get the most that you can out of building." via D.D.
Alberta, Canada
Joined: January 19, 2008
KitMaker: 6,743 posts
AeroScale: 6,151 posts
Posted: Friday, November 13, 2009 - 01:22 AM UTC
Very nicely done indeed Mike ! looking great so far on this tiny project . Nice to see more of the 72 scale builds on line .

England - South East, United Kingdom
Joined: March 07, 2005
KitMaker: 868 posts
AeroScale: 690 posts
Posted: Friday, November 13, 2009 - 01:44 AM UTC
Quoted Text
Here is an update on the progress. I recently rejoined the ranks of the employed
..painstaking work..nicely done..and congratulations on landing the job !
United Kingdom
Joined: March 08, 2009
KitMaker: 719 posts
AeroScale: 691 posts
Posted: Friday, November 13, 2009 - 06:14 AM UTC
Excellent looking plane this will be! Even though it is a bit colourful, I think it is very cool looking. Thanks for the update, and good luck!