California, United States
Joined: April 01, 2002
KitMaker: 4,287 posts
AeroScale: 1,164 posts
Posted: Monday, May 31, 2010 - 02:34 PM UTC
"Don't fear the night, fear what hunts at night"

#439
Washington, United States
Joined: November 05, 2005
KitMaker: 4,950 posts
AeroScale: 3,192 posts
Posted: Monday, May 31, 2010 - 02:44 PM UTC
Neat, I've got this one in a bag somewhere. Looking forward to your build.
Hanger Queens in Waiting:
Monogram 1/72 F8F-1
Corsair the Sky Pirate - 1/72 Ace A-7D
Century Series - Airfix 1/72 F-105G
Anti Shipping - Academy 1/72 PBJ-1D
Academy 1/72 F-84E
Texas, United States
Joined: February 22, 2008
KitMaker: 5,026 posts
AeroScale: 2,811 posts
Posted: Monday, May 31, 2010 - 07:05 PM UTC
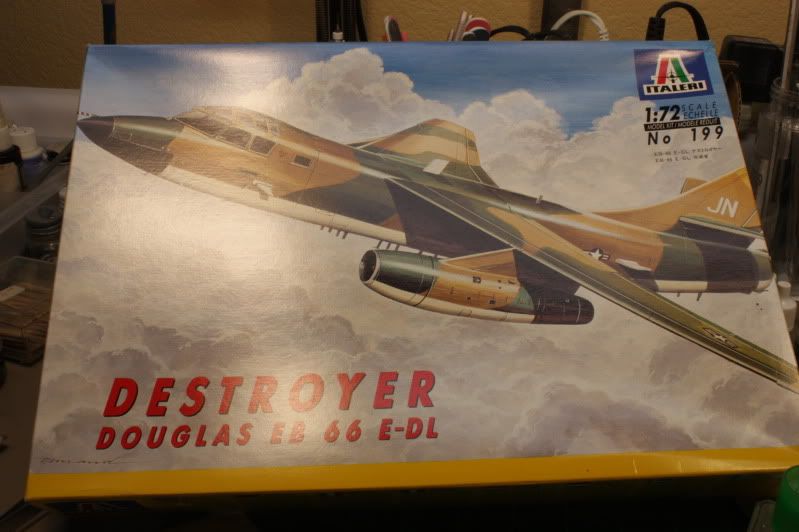
Matt, that is a pretty box. I have always loved the vietnam camo. Which scheme will this build be in and what are your impressions of this kit?
Bob
If it aint broke dont fix it.
California, United States
Joined: April 01, 2002
KitMaker: 4,287 posts
AeroScale: 1,164 posts
Posted: Tuesday, June 01, 2010 - 02:29 AM UTC
Quoted Text
Matt, that is a pretty box. I have always loved the vietnam camo. Which scheme will this build be in and what are your impressions of this kit? Bob
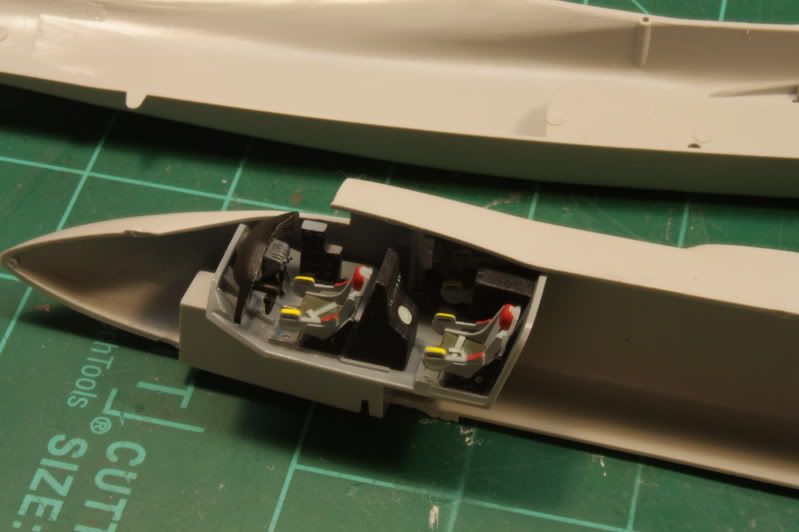
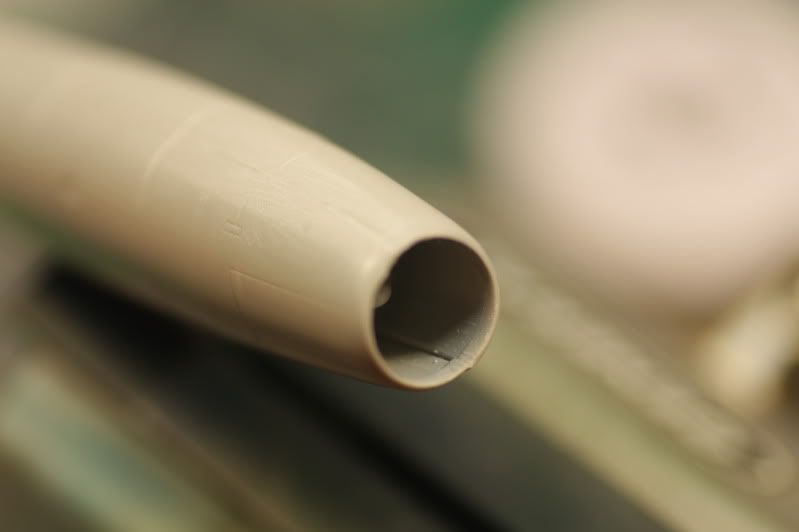
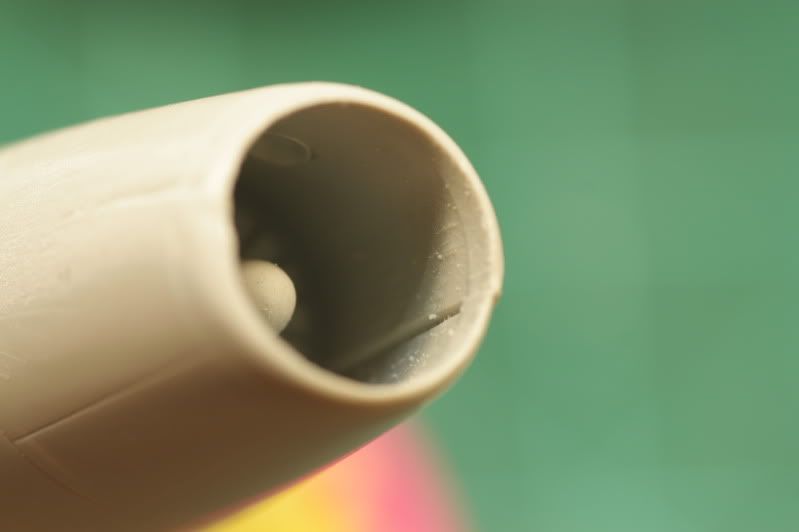
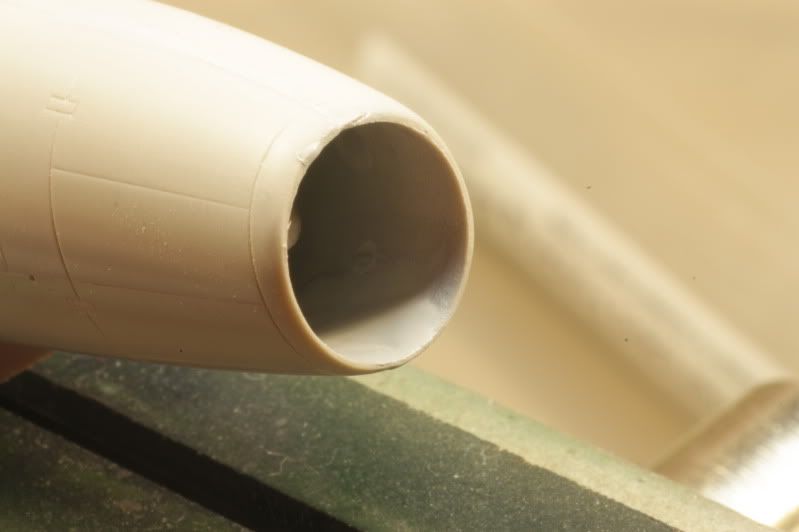
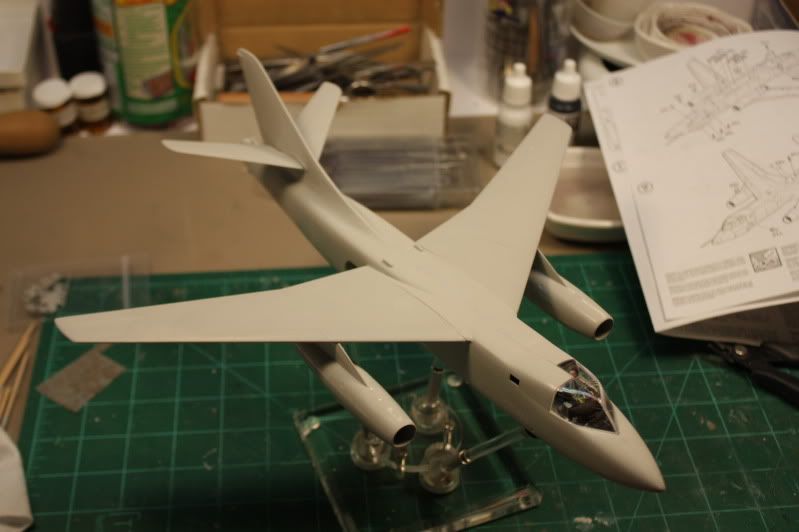
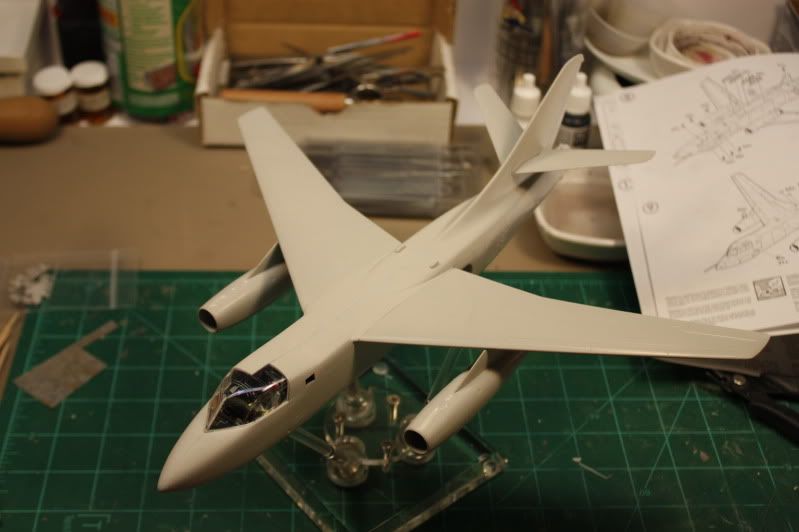
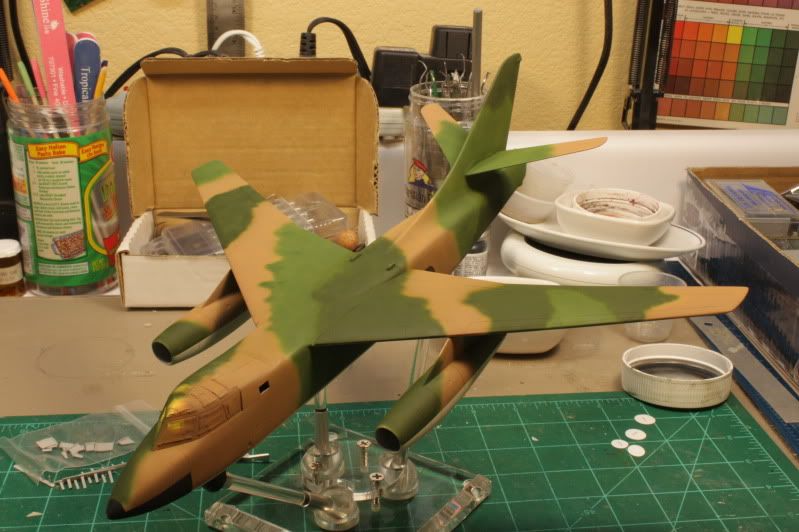
Hi Bob, She will wear a SAE Camo like my Thud. Instructions call for a flat white belly, but I'm thinking more of the camo gray that the thud wore. It looks white when first laid down, but with weathering etc, it quickly changes colors a bit. First impressions of the kit aren't bad. Recessed panel lines that aren't too heavy for the scale. The cockpit is nicely detailed for what there is visible. I added belts to the seats, but the only one you can see is the pilots seat. Had to guess at belt arrangement as there were no clear pics of how the belts routed from the seat back. Call is artistic lisence.

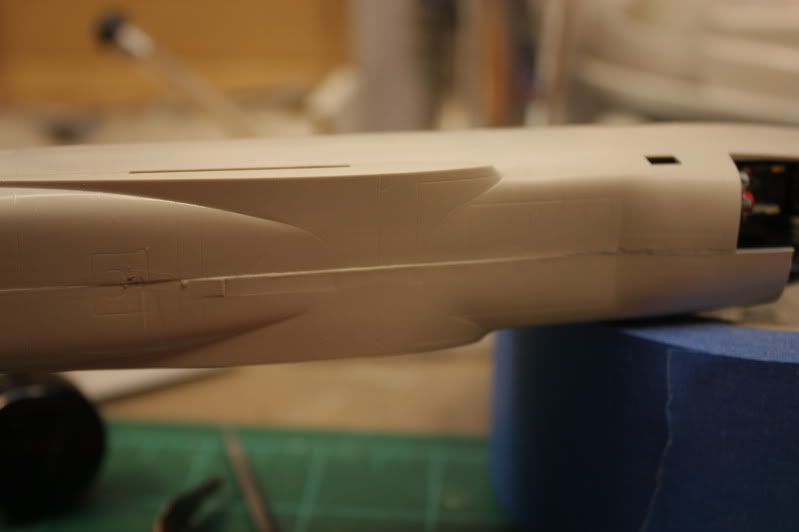
Fit of the fuselage could be better in some places. Didn't realize I needed some shims in a couple of places to keep the fuselage from dipping. Took a minor bit of coaxing to get things lined up, but nothing too terrible. The call-out of 20gm weight in the nose is good to know. I added a full ounce to make sure it stays down. Wings went together with just some minor seams to fill and dress on the leading edges. Could be attributed to the age of the molds. Mr. Surfacer 500 filled them easily. More progress to follow shortly. Thanks, "Q"
"Don't fear the night, fear what hunts at night"
California, United States
Joined: April 01, 2002
KitMaker: 4,287 posts
AeroScale: 1,164 posts
Posted: Wednesday, June 02, 2010 - 05:16 AM UTC
"Don't fear the night, fear what hunts at night"
Texas, United States
Joined: February 22, 2008
KitMaker: 5,026 posts
AeroScale: 2,811 posts
Posted: Wednesday, June 02, 2010 - 06:43 AM UTC
Matt, it looks like this is a BONDO a/c with those seams. Nice work (tough work though) so far.
Bob
If it aint broke dont fix it.
California, United States
Joined: April 01, 2002
KitMaker: 4,287 posts
AeroScale: 1,164 posts
Posted: Wednesday, June 02, 2010 - 06:52 AM UTC
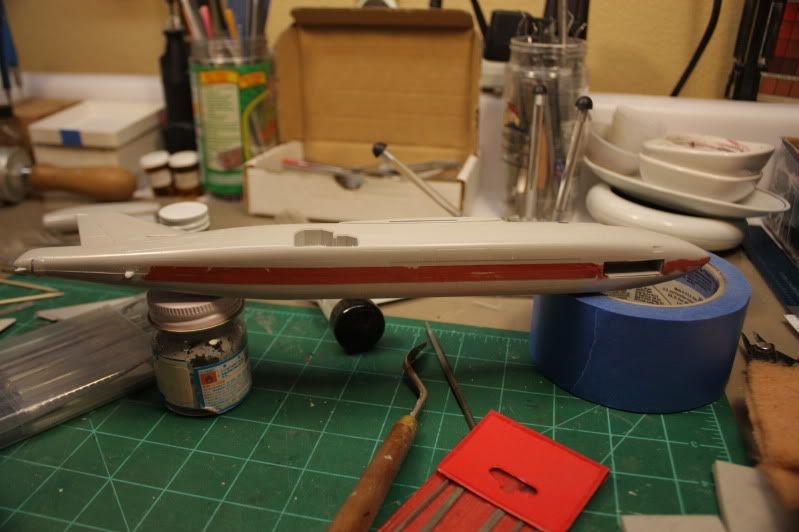
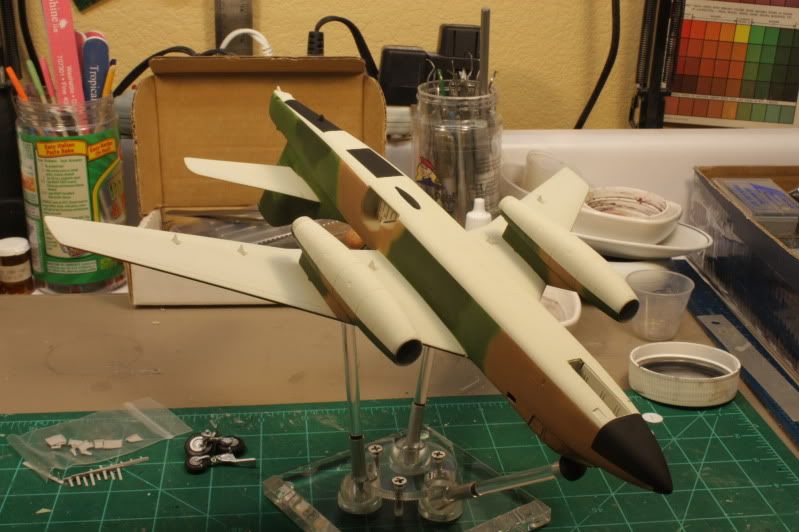
Once all the seams were dressed and polished out I re-scribed what few panel lines I lost in sanding. It actually came out really well. I thought it was going to be considerably more effort. Granted I did use a fair amount of putty, but most if it sanded out/away. Thanks for the kudos. I got the canopy taped up while everything was drying. Should have the first coats of paint on it this evening.
"Q"

"Don't fear the night, fear what hunts at night"
Texas, United States
Joined: February 22, 2008
KitMaker: 5,026 posts
AeroScale: 2,811 posts
Posted: Wednesday, June 02, 2010 - 07:27 AM UTC
If it aint broke dont fix it.
California, United States
Joined: April 01, 2002
KitMaker: 4,287 posts
AeroScale: 1,164 posts
Posted: Thursday, June 03, 2010 - 09:50 AM UTC
"Don't fear the night, fear what hunts at night"
#439
Washington, United States
Joined: November 05, 2005
KitMaker: 4,950 posts
AeroScale: 3,192 posts
Posted: Thursday, June 03, 2010 - 10:00 AM UTC
Dang, you're fast. You've got this kit in the paint shop in less time than it would take for me to find it

Looking good...

Hanger Queens in Waiting:
Monogram 1/72 F8F-1
Corsair the Sky Pirate - 1/72 Ace A-7D
Century Series - Airfix 1/72 F-105G
Anti Shipping - Academy 1/72 PBJ-1D
Academy 1/72 F-84E
California, United States
Joined: April 01, 2002
KitMaker: 4,287 posts
AeroScale: 1,164 posts
Posted: Thursday, June 03, 2010 - 10:09 AM UTC
lol...

Thanks Mark. Glad you like it. "Q"
"Don't fear the night, fear what hunts at night"
South Australia, Australia
Joined: August 14, 2007
KitMaker: 5,926 posts
AeroScale: 2,201 posts
Posted: Thursday, June 03, 2010 - 10:41 AM UTC
Keep up the good work 'Q'.. You are a speed builder in the same vein as I am by the look of it.
JP was amazed at how quickly I finished a Revell 1/32 Mirage IIIR last year for the Recon Campaign.
The faster you build, the more kits you can build..
You may be right, I may be crazy.
California, United States
Joined: April 01, 2002
KitMaker: 4,287 posts
AeroScale: 1,164 posts
Posted: Thursday, June 03, 2010 - 12:05 PM UTC
Thanks for the encouragement Warren. I do build faster than some folks, but I do have the time to build currently. No school until August, don't have to work etc. Between this and riding my Harley I have lot of free time. More updates and progress to follow.
Thanks, "Q"
"Don't fear the night, fear what hunts at night"
litespeed
 News Reporter
England - North West, United Kingdom
Joined: October 15, 2009
KitMaker: 1,976 posts
AeroScale: 1,789 posts
Posted: Friday, June 04, 2010 - 11:06 AM UTC
Hi Matthew
Your Destroyer is looking excellent despite the challenging steps in the joins. Enjoying seeing your progress so far.
tim
California, United States
Joined: April 01, 2002
KitMaker: 4,287 posts
AeroScale: 1,164 posts
Posted: Friday, June 04, 2010 - 11:48 AM UTC
Thank you Tim. I just put the finishing touches to it a few minutes ago. Need to fix dinner and then will shoot some pics of the completed build and get them posted. Thanks again for the kind words. "Q"
"Don't fear the night, fear what hunts at night"
California, United States
Joined: April 01, 2002
KitMaker: 4,287 posts
AeroScale: 1,164 posts
Posted: Friday, June 04, 2010 - 02:18 PM UTC
"Don't fear the night, fear what hunts at night"
#439
Washington, United States
Joined: November 05, 2005
KitMaker: 4,950 posts
AeroScale: 3,192 posts
Posted: Friday, June 04, 2010 - 02:34 PM UTC
Looks good, hope I can find this thread when I finally get around to the B-66 in the stash.
Hanger Queens in Waiting:
Monogram 1/72 F8F-1
Corsair the Sky Pirate - 1/72 Ace A-7D
Century Series - Airfix 1/72 F-105G
Anti Shipping - Academy 1/72 PBJ-1D
Academy 1/72 F-84E
Texas, United States
Joined: February 22, 2008
KitMaker: 5,026 posts
AeroScale: 2,811 posts
Posted: Friday, June 04, 2010 - 02:49 PM UTC
Ok Mark, you are showing off now
great build and in a time I can only dream about.
Bob
If it aint broke dont fix it.
#439
Washington, United States
Joined: November 05, 2005
KitMaker: 4,950 posts
AeroScale: 3,192 posts
Posted: Friday, June 04, 2010 - 03:09 PM UTC
Ah, that's
Matt who's showing off
Hanger Queens in Waiting:
Monogram 1/72 F8F-1
Corsair the Sky Pirate - 1/72 Ace A-7D
Century Series - Airfix 1/72 F-105G
Anti Shipping - Academy 1/72 PBJ-1D
Academy 1/72 F-84E
Texas, United States
Joined: February 22, 2008
KitMaker: 5,026 posts
AeroScale: 2,811 posts
Posted: Friday, June 04, 2010 - 03:19 PM UTC
Sorry Mark and Matt, I was thinking about the Gator Glue that Mark wanted a report on and got my posts mixed up. Matt this still goes for you. Ok Mark, you are showing off now, great build and in a time I can only dream about.
Bob
If it aint broke dont fix it.
California, United States
Joined: April 01, 2002
KitMaker: 4,287 posts
AeroScale: 1,164 posts
Posted: Friday, June 04, 2010 - 03:36 PM UTC
Thanks for the kind words guys. There isn't a lot of parts to this thing to start with, so that was half the battle there. Add to the fact that I have a lot of free time with little else to do...and well, you get the idea. Thanks for the kudos, much appreciated. The next build is coming shortly. I will tell you this much about it...it'll go on a different forum and different site. Totally scratch built too. More to follow...

"Q"
"Don't fear the night, fear what hunts at night"
litespeed
News Reporter England - North West, United Kingdom
Joined: October 15, 2009
KitMaker: 1,976 posts
AeroScale: 1,789 posts
Posted: Saturday, June 05, 2010 - 03:42 AM UTC
Hi Matt
Congratulations on a outstanding build. The subtle shading of the colours is very effective. So what's next for the modeling machine.
tim
California, United States
Joined: April 01, 2002
KitMaker: 4,287 posts
AeroScale: 1,164 posts
Posted: Saturday, June 05, 2010 - 01:40 PM UTC
"Don't fear the night, fear what hunts at night"
Texas, United States
Joined: February 22, 2008
KitMaker: 5,026 posts
AeroScale: 2,811 posts
Posted: Saturday, June 05, 2010 - 02:37 PM UTC
Matt, this I would like to see I (sci-fi) and have you looked at Von Cuda's End of Days campaign?
Bob
If it aint broke dont fix it.
Utah, United States
Joined: May 27, 2003
KitMaker: 1,026 posts
AeroScale: 215 posts
Posted: Saturday, June 05, 2010 - 03:42 PM UTC
Matt,
Another 'Post Shaded' masterpiece! Your technique caught my attention as I followed your Su-24 build and I just read your 'how-to' article. I can't wait to try it out on a few kits I have with raised panel lines.
Keep up the good work!
Keith
Build 'em better than the box art!