_GOTOBOTTOM
Pre-Flight Check
Constructive critique of your finished or in-progress photos.
Trumpeter MI-24 1/35 Build
Gundam-Mecha
_VISITCOMMUNITY
England - South East, United Kingdom
Joined: August 05, 2009
KitMaker: 1,019 posts
AeroScale: 66 posts
Posted: Thursday, December 30, 2010 - 10:02 AM UTC
Being an Armorama regular and having worked a lot on AFV's and ground vehciles, I've decided to give something totally new a try... aircraft!

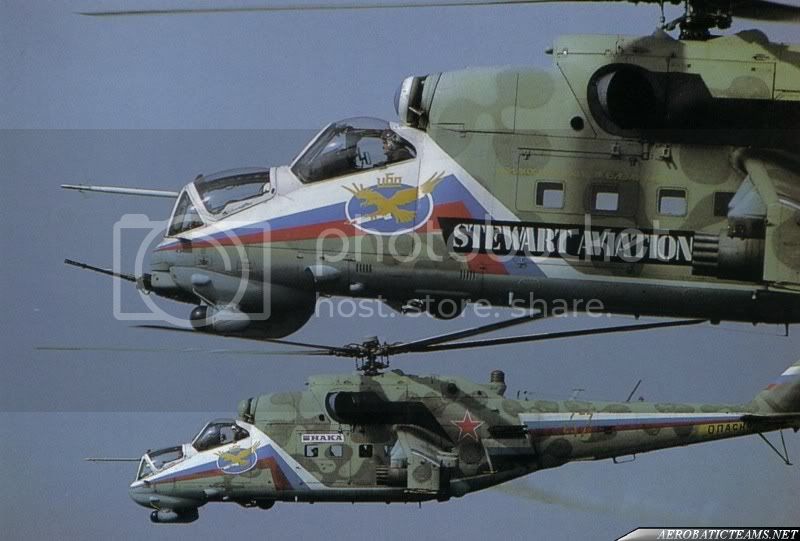
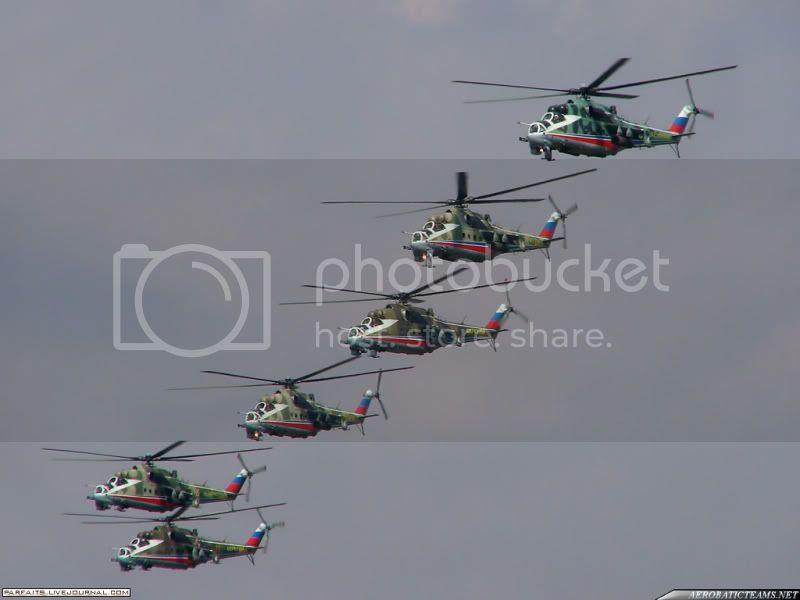
This will be my first ever aircraft build, I've often had an interest in aircraft but never got round to building a serious kit (bar a few sci fi topics). I decided to start this adventure in a familiar scale, 1/35, and having seen a Hind Gunship up close at the Stalin Line Museum in Minsk I decided to give it a go with this iconic Soviet helicopter.

This project really is a labour of love and I've decided to go full out on aftermarket kits and the scratch building to try and produce as accurate a Hind as possible. Some of the kits I am using include:

Eduards Big Ed set for the Mi-24 (Interior, and exterior PE sets, plus masks)
Part Etching of Poland's Mi-24 PE Cargo/Crew Cabin Interior super detail set
Cobra Company's Mi-24 Cockpit and Interior Resin upgrade kit
Replacement white metal landing gears
Linden Hill Aftermarket Stencil Decal set
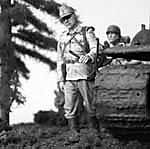
Blast Models 1/35 Hind pilot figure
Lot's of lead wire, electrical wire, tape, plasticard, filler, etc!

I've also done a lot of research into the topic and will be using extensive walkaround guides, my own personal photos from Minsk, Osprey's recent book on the Hind, and Russian Air Power by Yefim Gordon (this is a fantastic reference book and covers all aspects of the modern Russian Airforce).

Here is the box art of the Trumpeter kit, a rather impressive illustration!


The small reference library, that includes Verlindens excellent Lock on Guide, as well as the equally impressive Kageroo book, Yefim's book is also a fascinating read and a great hardback. I got mine on amazon for a very respectable 20 pounds (RRP is £40):


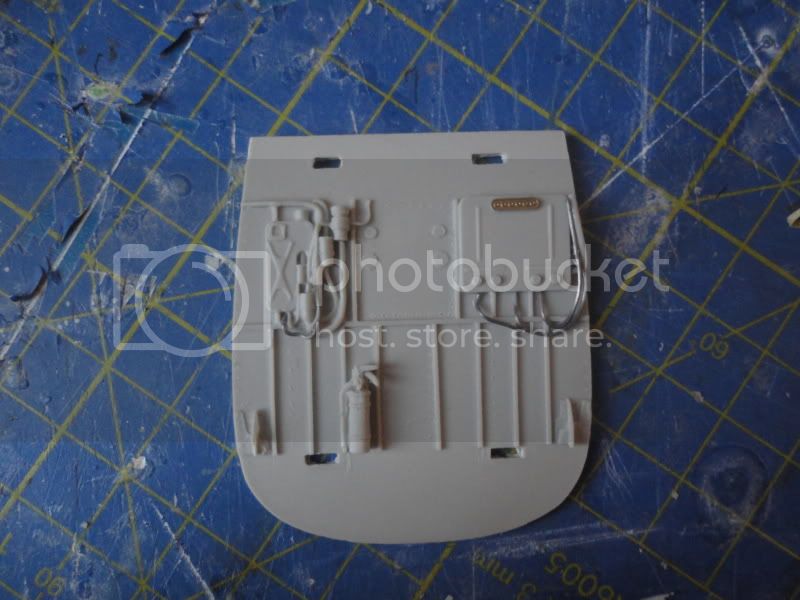
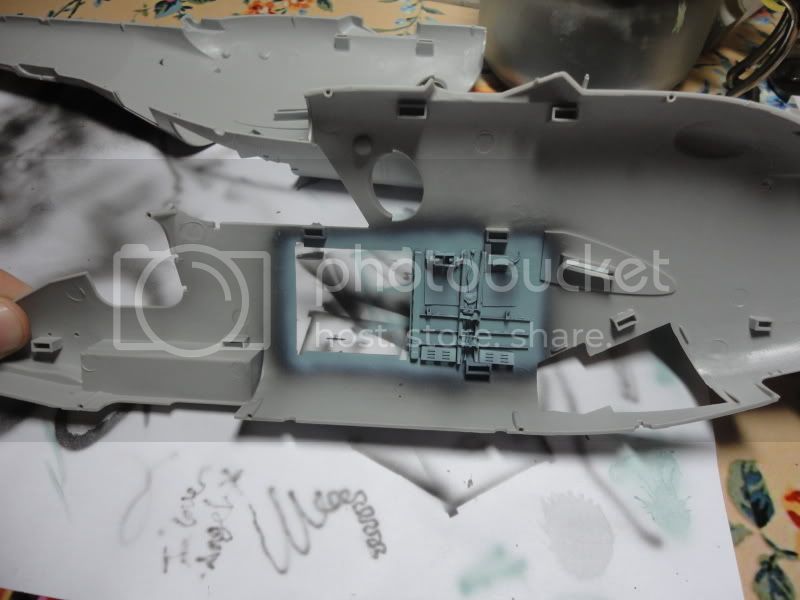
As always with aircraft the build starts with the cockpit, and in the case of the Hind also the crew cabin. This stage has taken me a lot of time, the Photo etch parts in particular. Whilst the Cobra Company cockpit and interior is very good there are a few areas where I have mixed elements of the Part PE Interior set, and the Eduard Set along with some kit bashing and surgery. One area I was keen to change was the large avionics rack in the rear of the cockpit. Cobra give you a resin part for this, but I really loved the Part PE rack, so I chopped up the resin Cockpit to accomodate the Part set (which is designed for use with the basic plastic trumpeter interior). Actually while Cobra's set is good it isn't without errors or flaws and this surgery helped correct some anyway.


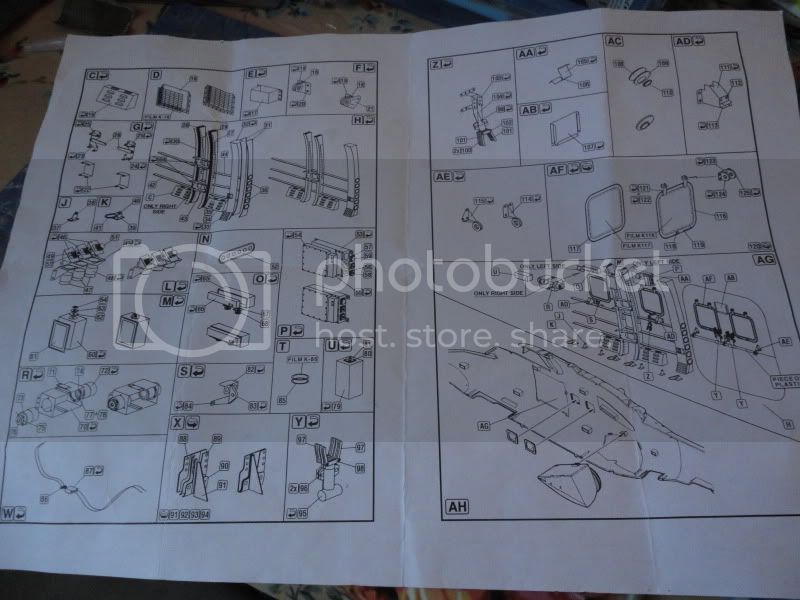
Part's PE set really isnt for the feint hearted (this is just one page of a four page instruction sheet:


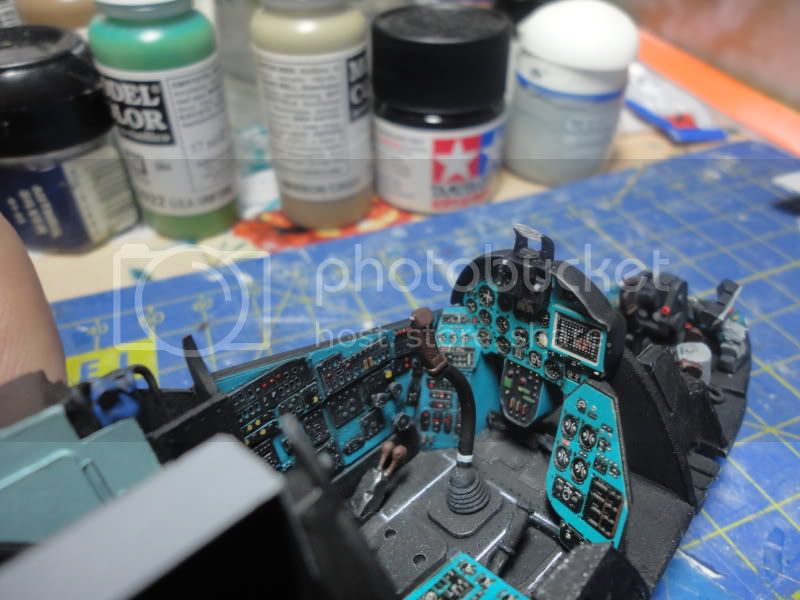
Cobra's resin cockpit is a huge improvement over the kit supplied plastic parts and is exquisitely done. However I was keen to use Eduard's excellent PE painted instrument panels so I did some work ammending the Cobra parts and sanding down the raised detail on the areas effected to allow a flat and smooth fit for the PE panel screens.


Gundam-Mecha
_VISITCOMMUNITY
England - South East, United Kingdom
Joined: August 05, 2009
KitMaker: 1,019 posts
AeroScale: 66 posts
Posted: Thursday, December 30, 2010 - 10:11 AM UTC
Some more work on the cockpit. It's certainly an amazing piece, I'm not quite sure where to start with the painting though .

Here are the resin replacement seats provided by Cobra Company, they are very well done with nice belt detail:

Weapon System Operator (front seat)


Pilot


I did some work on the back of the pilot seat, Cobra recommend you to use the plastic mountings and frame that come with the Trumpy kit. However these are way oversized, so I did some work on them chopping bits up and thinning them out to get them to match the reference photos more accurately. I also added the wiring on the back of the seat that is clearly visible from the crew cabin (it's odd that Cobra for the most part overlooked this detail).


With the seats in place it starts to look a little more like a cockpit!


Much like the real thing the cockpit is a busy place and not a good environment for a large gentleman!

Following my walkarounds closely I worked on detailing up the rear of the cockpit, and the passage way leading into the troop cabin. Again I mixed and matched the Part and Eduard PE sets and added some electrical wire to represent the thick heavy duty cabling by the bulkhead. The Hind can carry an infantry squad and was initially intended to be a flying IFV, dropping off troops and giving fire support. The Crew cabin features various firing ports for AK's by all the main windows.


Being designed the carry troops the rear cabin is also rather busy, here is Cobra Company's replacement resin floor that has significantly more surface detail than the Trumpeter part. Although it was badly cast and warped so it took some sanding down to level it out and some re-scribing of the surface detail. I also added the seat belts and will be putting more into the seating soon:


Now onto the two parts that gave me the most work and the biggest head ache! The crew cabin walls! The Trumpeter kit comes with absolutely no detail at all in this area, so this has been built up by mixing the Cobra Company and Part Etchings components. The clear windows and window frames were particularly tricky! I had to do this twice on both sides and those PE strips were a nightmare to get into position!


Heres a dry fit of the other side with the floor, roof, and rear wall, it's starting to come alive!

redcap
_VISITCOMMUNITY
England - East Midlands, United Kingdom
Joined: November 06, 2005
KitMaker: 753 posts
AeroScale: 311 posts
Posted: Thursday, December 30, 2010 - 10:19 AM UTC
Great progress so far Jon - and something refreshingly different!

Bookmarked this build and I shall follow it with great interest.

Cheers mate!
Gary
litespeed
Staff MemberNews Reporter
AEROSCALE
_VISITCOMMUNITY
England - North West, United Kingdom
Joined: October 15, 2009
KitMaker: 1,976 posts
AeroScale: 1,789 posts
Posted: Thursday, December 30, 2010 - 11:05 AM UTC
Outstanding progress so far Jon. The kit looks great, and with the addition of the PE bits the interior your building is looking excellent.
Nice one Jon.
All the best.
tim
Gundam-Mecha
_VISITCOMMUNITY
England - South East, United Kingdom
Joined: August 05, 2009
KitMaker: 1,019 posts
AeroScale: 66 posts
Posted: Thursday, December 30, 2010 - 10:21 PM UTC
Thanks guys. It's my first serious aircraft so it's been a pretty steep learning curve. I figure though it's best to throw yourself in the deep end! I'm really pleased that you think it's coming out okay.

I really found filling and sanding quite tough at first, there are so many new skill sets to learn in this aspect of modelling that are very different to AFV modelling skills.

Well here is some info about how I plan to model this kit. My Mi-24 will be one of the Russian Berkuts "Golden Eagles" display team. The colour schemes of these Helicopters really caught my eye and looked like an interesting challenge. Also a big public thank you to Mal Mayfield who has been very helpful in giving me advice about masking and how bets to approach this mamouth task.

Pictures below for discussion purposes only:


After a lot of thought I decided on this Hind in particular, yellow 52:


The next problem of course is I need to have this large nose art of the Eagle made into a 1/35 custom decal. I'm currently looking into options for that at the moment, Mal has said that's it's possible so fingers crossed!

Gundam-Mecha
_VISITCOMMUNITY
England - South East, United Kingdom
Joined: August 05, 2009
KitMaker: 1,019 posts
AeroScale: 66 posts
Posted: Thursday, December 30, 2010 - 10:29 PM UTC
heres a photo of the pilot's main instrument panel. It's made up of a mix of the original Trumpeter kit parts with some surgery and the Eduard painted Photo Etch. The Eduard instrument panels took a lot of work, and this panel alone is made up of five sub-assemblies! The raised map screen alone is made up of 5 PE parts!


This panel was fiddly to put together but I think it was definitely worth the effort. Also these Eduard panels are essential as the kit contains no decals for the dials, in fact all you get is a clear piece of acetate with pre printed dials for the main panel and a smaller one for the side panel that attaches to the right of the pilots main instrument panel.

The cobra company parts also have no decals and feature no raised detail for the dials. Painting them free hand onto the resin Cobra part would be impossible, so thank god that Eduard released this set. Of course there is some surgery required to get the PE screens to fit the resin cockpit. You need to trim a few bits here and there to get the shape right, this is tricky as the pre-painted surfaces are prone to chipping and flaking off. You have to cut the parts VERY carefully to avoid this. Also the only other downside is that Eduard's colour for the blue doesn't really match the reference photos so well. I can understand why they chose this shade, if you look at flash images of the cockpit it appears brighter, but actually I used a blue paint that more closely matched the photos in the Verlinden Lock On book and found that the shade is slightly different from Eduards. I did try mixing the blue to get it to match but I couldn't get it exact, it was always slightly off. It's a small thing and not ideal but I'm happy to let it go given the distinct lack of options for blue in this shade, and also as there is nothing else in the way of dial decals etc.

I found the best match for this odd blue shade is actually a Citadel Colour paint, Hawk Turquoise. I couldn't find anything in Vallejo's Model Colour Range, but Hawk Turquoise actually matches pretty close to the interior photos. I'm glad the Russian's painted the cockpit this colour as while it's slightly odd it certainly makes the big space within the cockpit interesting to look at in terms of a model.

Here are some images of the cockpit to give you all an idea of the task that I found myself faced with in terms of painting, all images are for discussion only and copyright belongs to both Verlinden and Kageroo (for the excellent dial diagrams):


Gundam-Mecha
_VISITCOMMUNITY
England - South East, United Kingdom
Joined: August 05, 2009
KitMaker: 1,019 posts
AeroScale: 66 posts
Posted: Thursday, December 30, 2010 - 10:35 PM UTC
To say this is a busy cockpit is an understatement! Painting it has taken me a lot of time.

I started with the chairs for the Pilot and WSO. They might not be the most exciting in the world (black leather on a black metal frame with grey belts...) but I wanted to be accurate rather than artistic on these.

The wiring on the back of the pilots chair was fun to do though and I think adding detail here (on a part that Cobra left strangely bare) really is useful as this can be clearly seen from the crew cabin.


The black leather has been weathered with a mix of drybrushing humbrol enamels, and Citadel Acrylics, and different stages of oil washes and acrylic washes. In these photos the weathering looks a bit extreme but in reality it's more subtle.

Pilot's chair:


WSO's chair


I tried to make the grey belts looks as interesting as possible with shading, washes, and highlighting. Unfortunately the Soviets didn't have modellers in mind when they designed these, and the colours are a little drab... Khaki, or greens would have been nice
seb43
_VISITCOMMUNITY
Paris, France
Joined: August 30, 2005
KitMaker: 2,315 posts
AeroScale: 17 posts
Posted: Friday, December 31, 2010 - 12:32 AM UTC
Not bad for a rookie in aircraft.
i am impressed.
Good luck
Cheers
Seb
Gundam-Mecha
_VISITCOMMUNITY
England - South East, United Kingdom
Joined: August 05, 2009
KitMaker: 1,019 posts
AeroScale: 66 posts
Posted: Friday, December 31, 2010 - 01:32 AM UTC
Thanks Seb, nice to have you on board! Actually I held off on posting on an aviation board for sometime because I wasn't so confident this being a new area for me.

I've seen a lot of flame wars and arguements on some aviation forums. I was convinced that someone would say that my conversion or scratch built parts were a few mm too big or small etc, and go off on a rant. I've seen some kit manufacturers get a real hard time off people when they post WIP shots or model masters... What chance do I have I thought!
seb43
_VISITCOMMUNITY
Paris, France
Joined: August 30, 2005
KitMaker: 2,315 posts
AeroScale: 17 posts
Posted: Friday, December 31, 2010 - 02:40 AM UTC
Jon
Build your model for your own joy for the rest you don't give a F****
Cheers
Seb
The-Mechanic
_VISITCOMMUNITY
England - East Anglia, United Kingdom
Joined: June 11, 2010
KitMaker: 103 posts
AeroScale: 46 posts
Posted: Friday, December 31, 2010 - 04:00 AM UTC
This is looking great so far. Can't wait to see the end result.

Mick
Gundam-Mecha
_VISITCOMMUNITY
England - South East, United Kingdom
Joined: August 05, 2009
KitMaker: 1,019 posts
AeroScale: 66 posts
Posted: Friday, December 31, 2010 - 05:10 AM UTC
Seb, haha thanks you are right!

Mick welcome onboard also!

Here is the cockpit!

It's a big, busy old area, and I've been following my reference photos very carefully. The Lock on Book is a godsend and absolutely essential. I wanted to replicate the dirty, dusty, chipped and weathered look shown in real Hind's as much as possible. The Hind Cockpit gets very battered an knocked up during daily use. Please note though that these close ups have made the paint work seem quite grainy, to the naked eye however the finish isn't as rough as this.

There are a lot of colours in the Hind Cockpit and matching them all is a hard task! All in all though I enjoyed painting the cockpit very much and even though its taken me nearly two weeks I think it's important as the area is so visible and exposed through that large canopy. There will be more detail and wiring etc added once the cockpit is fitted into the fuselage sides and the canopy is secured in place.


The view from the crew cabin


I've also starting painting the fuselage sides for the crew cabin walls:


Red4
_VISITCOMMUNITY
California, United States
Joined: April 01, 2002
KitMaker: 4,287 posts
AeroScale: 1,164 posts
Posted: Friday, January 07, 2011 - 10:07 AM UTC
Looking good Jon. Keep at it. "Q"
Jurjen
_VISITCOMMUNITY
Groningen, Netherlands
Joined: September 21, 2003
KitMaker: 3,040 posts
AeroScale: 30 posts
Posted: Tuesday, January 18, 2011 - 02:03 PM UTC
Hi Jon!

You have put a lot of good work on it, well done sofar! I can't for your next update. Afterall, it is still some kind of flying tank...
WARLORD
Staff MemberAssociate Editor
HISTORICUS FORMA
_VISITCOMMUNITY
Warszawa, Poland
Joined: April 23, 2003
KitMaker: 1,923 posts
AeroScale: 100 posts
Posted: Wednesday, January 19, 2011 - 12:54 AM UTC
Great work so far!
Cockpit looks very busy and painting it must have been really time consuming.
jhoog59
_VISITCOMMUNITY
Florida, United States
Joined: November 13, 2005
KitMaker: 189 posts
AeroScale: 129 posts
Posted: Wednesday, January 19, 2011 - 02:52 AM UTC
The cockpit looks great. the finish and attention to detail is top notch.
Jim
Gundam-Mecha
_VISITCOMMUNITY
England - South East, United Kingdom
Joined: August 05, 2009
KitMaker: 1,019 posts
AeroScale: 66 posts
Posted: Friday, January 21, 2011 - 10:20 AM UTC
Thanks guys, its nice to get some feedback from the aviation community .

I have lots to post for updates, so expect that very soon!

Definately the cockpit was time consuming, Eduard PE only covers three screens so all the other instrument panels were hand painted. Finding a good colour for this was real tricky.

Also I'm not used to painting things before building them, so thats a whole new skill that needed patience!

I know very little about the Hind, so I don't know if the Trumpeter kit is accurate in terms of shape (looks like a hind to me!), so I'm pretty much building it out of the box in that way. I am also posting on a russian model forum... wow tough crowd! They are fast to point out inaccuracies. It's interesting to get their feedback though and I've found comments to be of two extremes there. Either they love it, or they find something to complain about.

I'm new to aircraft, and I'm not much of a rivet counter at Tanks anyway... so maybe if there are errors on Trumpeter's part so be it. I'm happy to live with them. For me I'm building this chopper for fun and enjoyment, not to win a competition!
AussieReg
Staff MemberAssociate Editor
AUTOMODELER
#007
_VISITCOMMUNITY
Victoria, Australia
Joined: June 09, 2009
KitMaker: 8,156 posts
AeroScale: 3,756 posts
Posted: Friday, January 21, 2011 - 11:09 AM UTC

Quoted Text

For me I'm building this chopper for fun and enjoyment, not to win a competition!


THAT is what it's all about, well said Jon !! You are doing a superb job on this so far mate, and the whole thread is very well done, entertaining and very informative for me.

If you wanna give the rivet counters a coronary, take a look at what Grubby is doing with the same kit to build an Aussie Hind Gunship

Looking forward to more progress.

Cheers, D
Gundam-Mecha
_VISITCOMMUNITY
England - South East, United Kingdom
Joined: August 05, 2009
KitMaker: 1,019 posts
AeroScale: 66 posts
Posted: Sunday, January 23, 2011 - 05:40 AM UTC
Thanks Damian, yeah I've seen that hind! Excellent build and a really fun subject .

I think if that was posted on some forums I visit people would literally self combust with confusion/ anger.
CanDid
_VISITCOMMUNITY
Stockholm, Sweden
Joined: May 03, 2010
KitMaker: 123 posts
AeroScale: 98 posts
Posted: Wednesday, January 26, 2011 - 05:16 AM UTC
That really is a stunning job you have done so far. A lot of superlatives can be added.

You wrote that it is Yellow 52 that is in the making. As a AFV builder, do you plan to make a diorama to go with the build? I have seen you asking for such vehicles in other treads.
Gundam-Mecha
_VISITCOMMUNITY
England - South East, United Kingdom
Joined: August 05, 2009
KitMaker: 1,019 posts
AeroScale: 66 posts
Posted: Wednesday, January 26, 2011 - 01:35 PM UTC
Thanks! Actually I'm not sure about the hind. I've been asking a lot about vehicles on armorama for 1/48 dioramas mostly. I have a 1/35 hind pilot from blast models, I have considered using the figure, but honestly a full blow diorama in 1/35 with a chopper! I don't know if I'd have the room it would be pretty massive!
Gundam-Mecha
_VISITCOMMUNITY
England - South East, United Kingdom
Joined: August 05, 2009
KitMaker: 1,019 posts
AeroScale: 66 posts
Posted: Sunday, March 27, 2011 - 10:05 PM UTC
Okay it's been a long time! Sorry for not posting sooner!

However onwards and upwards! I've continued work on the cockpit by adding some of Linden Hill's excellent aftermarket stencil decals. The set gives you not only exterior but also full interior stencils which really helps bring the area to life and adds great detail.

Heres the set in question, as well as 1/35 they also produce stencil sets for the Hind in 48th and 72nd scales.


Nice set that gives you options for three different Soviet red stars and also numerous options for exterior stencil types. But... and this is a a big but...
For a set that claims to be "Authentic Cyrillic stencil data, based on tech manuals and close up photos" there are errors. Simple errors that you don't even need close up photos to notice.

On the decal sheet decal number 22, which should be two sets of markings for each side of the wall between the crew cabin and cockpit should be different one for each side:

One side should read ру правое
One side should read ру лeвое

However (and here is the strange part, even the diagram on the Linden Hill Sheet shows this difference) what the decal sheet actually contains is four stencils that all read ру правое.

So it's a small difference but not when you know the meaning, because ру правое in Russian means Right Side! Both sides if you use Linden Hill's set will read Right Side!

It is a small error, and I've checked my reference material closely to confirm the accuracy of the rest of the stencils for this wall (thankfully they are all correct) however it is something which has now made me question the rest of the stencil data provided, and given that in this scale most of it is legible to the naked eye it's an important problem. I expected errors from Trumpeters decals but not from an aftermarket set that was researched from technical manuals and in co-operation with native Russian speakers. It just goes to show that typos and errors happen in any language.

So to get around this problem (thankfully the two phrases are very similar with only the front two letters of the second word being different) I carefully cut the front off the decal with a scalpel blade, and plan to hand paint these two letters with a very fine brush.

Problems aside here are the stencils in place:


The correct side (I also added the printed paper sheets that are often seen of the bulkhead, sadly this slipped while the glue set and I can't move it straight now, its a small thing I'll have to overlook )


The offending side


Gundam-Mecha
_VISITCOMMUNITY
England - South East, United Kingdom
Joined: August 05, 2009
KitMaker: 1,019 posts
AeroScale: 66 posts
Posted: Sunday, March 27, 2011 - 10:10 PM UTC
Well I've moved on with construction, and following the order in the Trumpeter booklet I have gone onto the engines. These are well done and make up into nice TW3-117MT engines. Detail is good and they closely match the real thing, Trumpy also give you the basic plumbing in plastic parts. They will make up into good representations out of the box, but given that a big part of this kit is the option to leave the engine hatches open I decided to super detail them up a bit more as this area will be very exposed.

Here are the parts built up out of the box, the fit is okay but not the best and I needed to filler and sanding to get the two main halves to fit together, there is also a bit of flash and lots of mould lines to remove so cleaning them up took some time:


Here are my main references, images from the net and the excellent technical diagrams from the Kageroo book were invaluable. Images for discussion only:


The plumbing is a real maze, and is made up of numerous layers, from basic wiring and plumbing on the engines, to the full thing installed into the engine bay. So far following the images and diagrams of the engines uninstalled I have started detailing them up with numerous lead wires, brass, and left over resin parts to scratch build some extra components. This has been very time consuming, but I've tried to follow the references as closely as possible.


Gundam-Mecha
_VISITCOMMUNITY
England - South East, United Kingdom
Joined: August 05, 2009
KitMaker: 1,019 posts
AeroScale: 66 posts
Posted: Sunday, March 27, 2011 - 10:17 PM UTC
At first I figured... hey the Trumpeter engine is okay, maybe it doesn't need that much extra work. Then I thought... well actually let's just detail up the engine as it is in my technical diagrams... then I thought, actually once it's fitted into the engine bay it's going to need plumbing in...

It's been a very slow process, that's involved me using three different reference books, loads of internet images, and has gone from just adding some wiring and plumbing, to scratch building lots of extra parts as well.

So after two weeks work the left side engine was fully finished! It involved adding numerous layers of wiring, scratch building (what I think) is some kind of fuel canister, adding extra exhaust piping, and scratch building various little extra details like valves and little bits.

Here's the engine bay dry fitted (I had to do ALOT of dry fits while detailing this area up), to the fuselage half:


Here it is out of the fuselage. Working out what parts would be visible and what wouldn't took a bit of planning and again more dry runs. I tried to make things as accurate as possible working from my reference photos. I found myself just adding and adding little bits all the time. Once I noticed detail was there in a reference photo I just couldn't stop seeing it, so had to add it to my model!

Also I found that this large open area really ended up looking bare without the extra work, for example the fuel(?) canisters by the front of the engine are a noticeable feature that Trumpeter left out. Okay mine aren't perfect (the shape is a little different on the real thing but I tried to match it as much as possible) but I felt having something was better than leaving that big gaping hole. Annoying thing was that I thought there was only one of these and I only had enough left over parts for one side. Afterwards I realised they were on both sides (some aspects of the engine are mirrored and some aren't so you have to be very careful). For the second side I had to make one from tin foil rubbed over the plastic part, and painted with Mr Surfacer 1000. It's not ideal but I think it passes as alright, I'm hoping once paint is on it it may look a little better. I actually ended up having to make this twice as the first one got my finger print in it, I spent hours trying to fix it but started over in the end.


Gundam-Mecha
_VISITCOMMUNITY
England - South East, United Kingdom
Joined: August 05, 2009
KitMaker: 1,019 posts
AeroScale: 66 posts
Posted: Sunday, March 27, 2011 - 10:21 PM UTC
Here finally is the completed engine bay! With the right hand side.


 _GOTOTOP