Air Campaigns
Want to start or join a group build? This is where to start.
OFFICIAL: The Cats Out of the Bag Campaign
Keeperofsouls2099
_VISITCOMMUNITY
Florida, United States
Joined: January 14, 2009
KitMaker: 2,798 posts
AeroScale: 2,443 posts
Posted: Tuesday, June 28, 2011 - 10:17 AM UTC
i glue mine swept havent done extended yet.had ideas but there just ideas i always attach them after painting depending on the paint scheme
Littorio
_VISITCOMMUNITY
England - South East, United Kingdom
Joined: September 15, 2004
KitMaker: 4,728 posts
AeroScale: 1,351 posts
Posted: Thursday, June 30, 2011 - 10:14 AM UTC
Keep at it guy's.

Justine it's nice to see how you tackle the 1/48 Tomcat as I have 10 1/48 F-14's waiting in the stash for when I get up the nerve.
_Viper_
_VISITCOMMUNITY
Roma, Italy
Joined: April 15, 2010
KitMaker: 163 posts
AeroScale: 19 posts
Posted: Thursday, June 30, 2011 - 10:32 AM UTC
Hey Tomcatters!

About time I showed up again...
I wish to thank (albeit very late) all that pitched in their input in the issue with future. Still have not solve it yet... But in the meantime I have at least been able to get a hold of both the Contacta Clear and Microscale Kleer.
Thanks for the hints.

Anyhow, life got much in the way and time was quite little to be spent on the build.
Plus, I am slow, when it comes to...

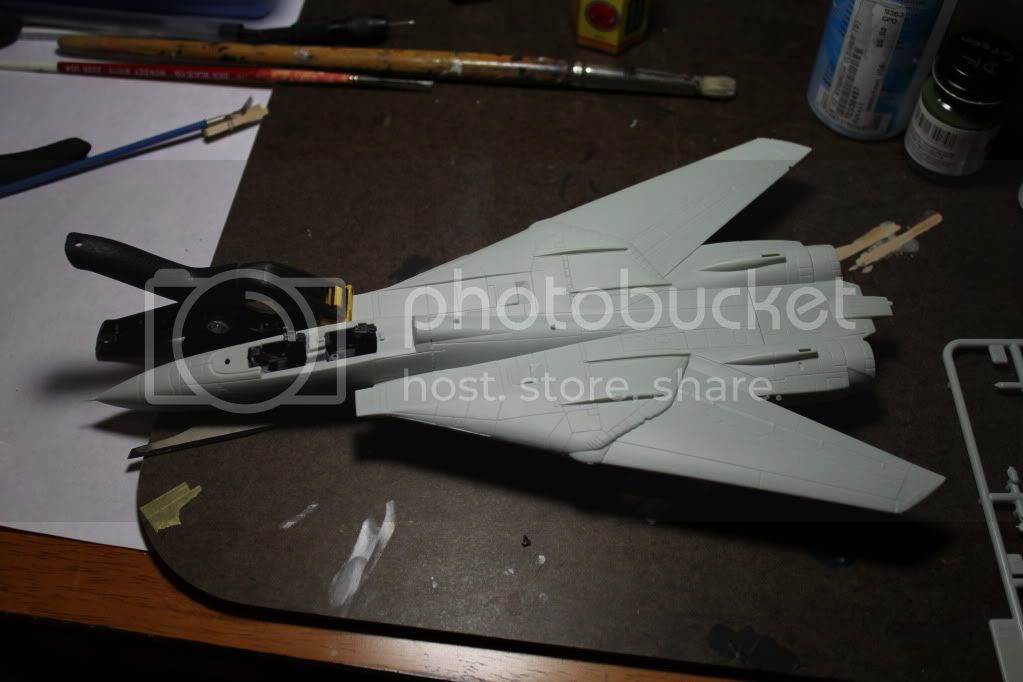
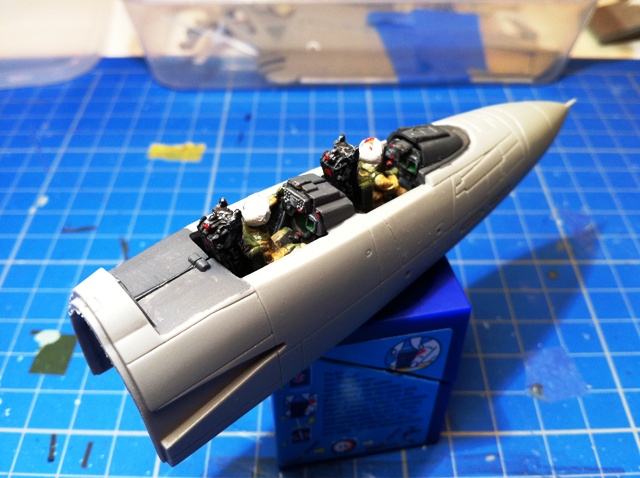
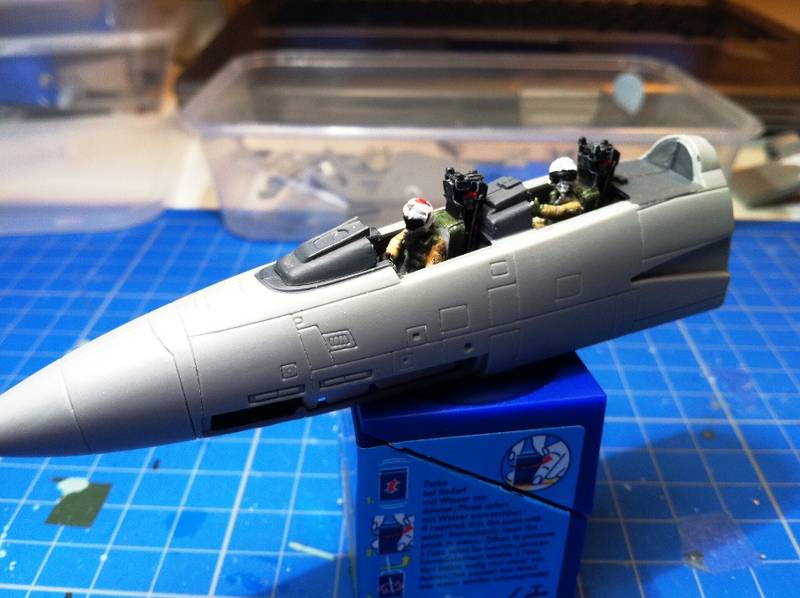
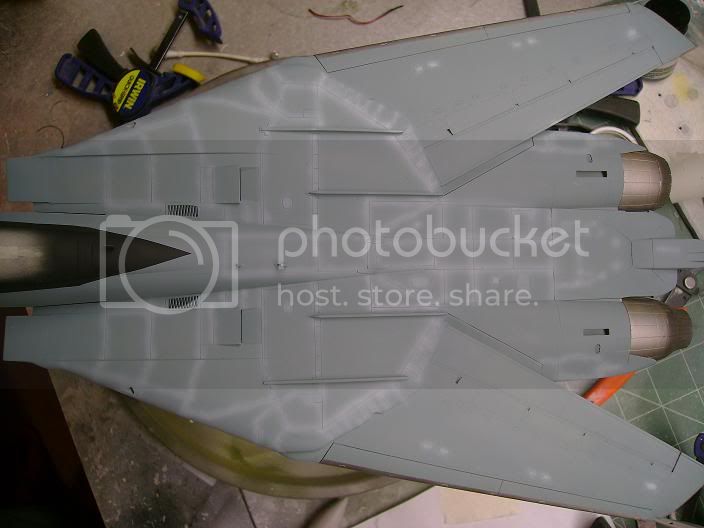
Painting!! (Yeah, FS16440 all over, so it is still looking VERY gray!)


But, wait, let me rub my eyes...


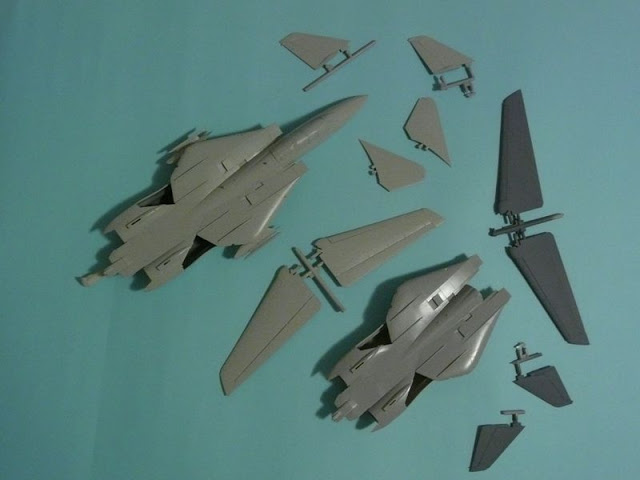
Am I seeing double?????????????????

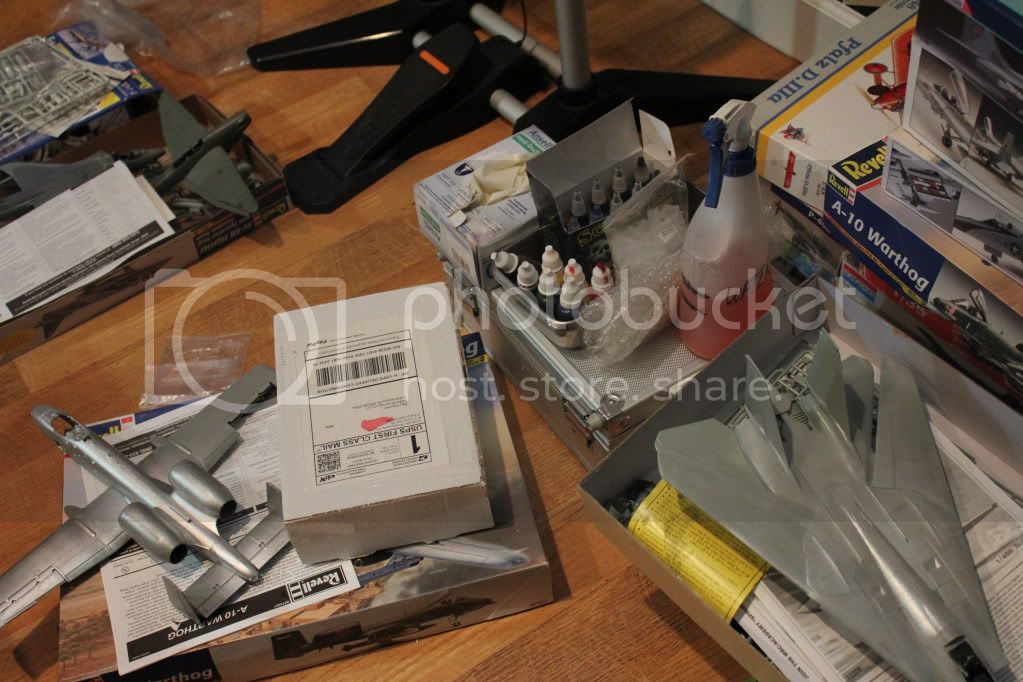
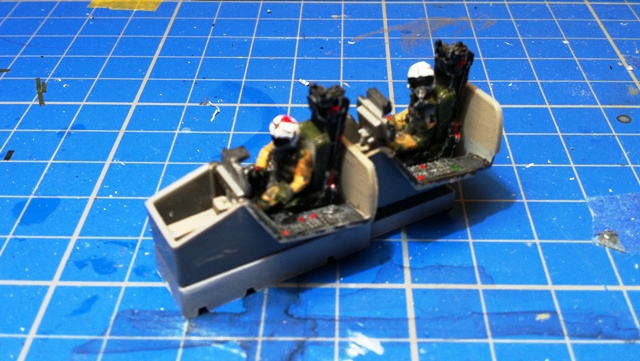
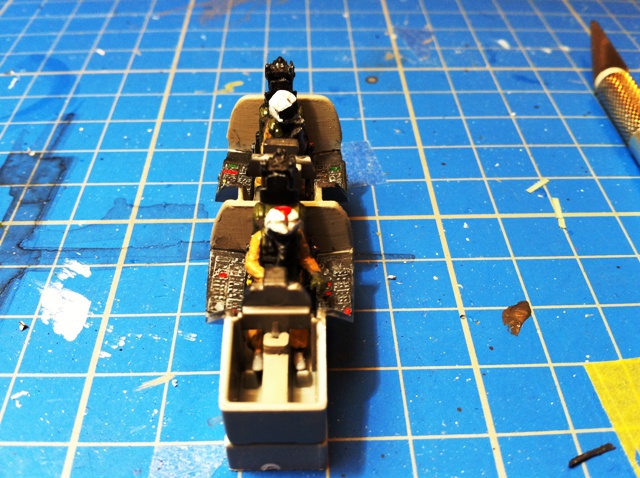
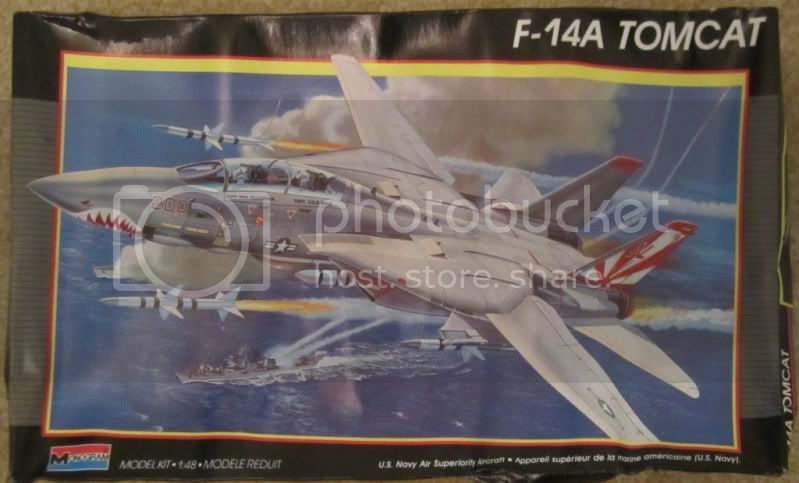
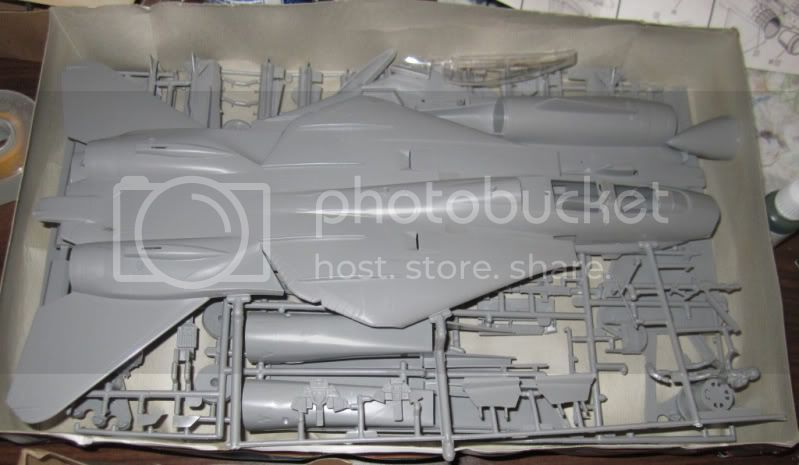
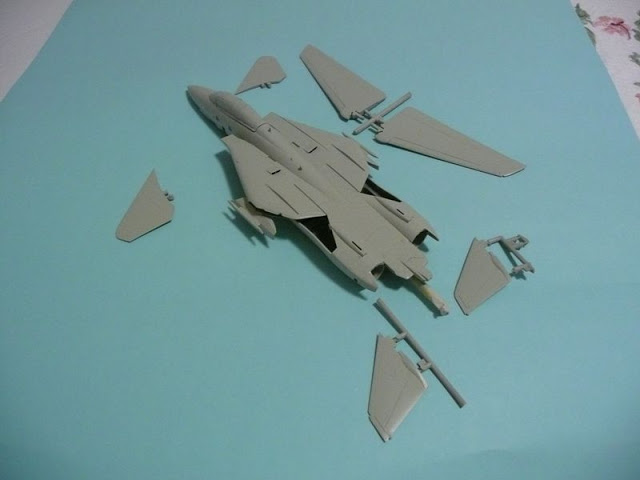
I could not resist it! I picked up another Hase 'Cat of the bay for an OK price, so here it is! I am using it to put immediately into practice the lessons learnt with the first build (examples: intakes and exhausts, when to paint the gear wells, the dreaded attachment of the nose section to the rest of the fuselage, etc.)

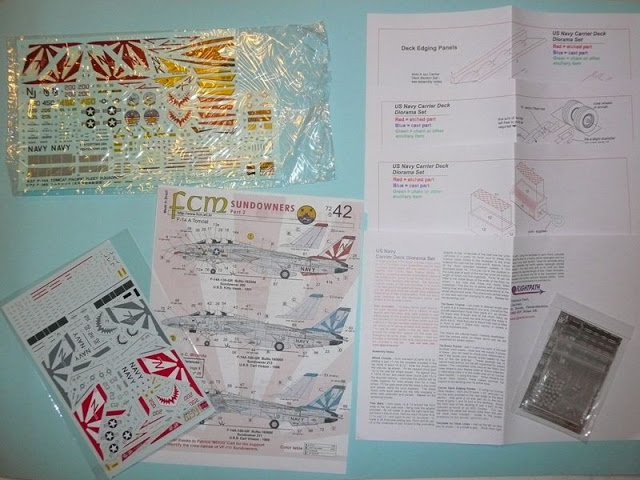
And since I cannot manage to keep my mind still, here is a little hint at what is coming (lok at the decals + the - really awesome - Flightpath set)...mmm...I'll keep the mystery for a little bit more.


BTW, the Fujimi kit had also made it, though to the wrong address (my parents'). I will have a chance to pick it up this weekend. Not sure it will be part of this campaign though.

For Ray: I am learning the ropes as well. A good inspiration on what to do and when are two articles: one by Magnus right here on Aeroscale

https://armorama.kitmaker.net/forums/172904&page=1

and the other is by the craziest Tomcat fan I have come across (just pick some of the completed models and he has in-progress pics):

http://www.andysmodels.me.uk/models/Tomcats_001.htm

Keeperofsouls2099
_VISITCOMMUNITY
Florida, United States
Joined: January 14, 2009
KitMaker: 2,798 posts
AeroScale: 2,443 posts
Posted: Thursday, June 30, 2011 - 01:00 PM UTC
Good looking progress guys keep at it
Littorio - 10 hasegawas your just asking for punishment
Littorio
_VISITCOMMUNITY
England - South East, United Kingdom
Joined: September 15, 2004
KitMaker: 4,728 posts
AeroScale: 1,351 posts
Posted: Thursday, June 30, 2011 - 02:33 PM UTC

Quoted Text

Good looking progress guys keep at it
Littorio - 10 hasegawas your just asking for punishment


Ahh no not 10 Hasegawa's, only 6 Hasegawa's (2 x A, 3 x B & 1 x D), plus 2 Revell F-14D's and 2 HobbyBoss F-14A's. All for VF-101 and NSAWC.
SellSword
_VISITCOMMUNITY
Indiana, United States
Joined: February 15, 2010
KitMaker: 167 posts
AeroScale: 141 posts
Posted: Monday, July 04, 2011 - 02:34 AM UTC
Hey Nicola! Thanks for the links. There's a lot of helpful info there. I got a couple of very helpful tips for filling with putty and weathering that I will try out for sure. That one guy is seriously crazy! But I bet he can put a Cat together in his sleep!
litespeed
Staff MemberNews Reporter
AEROSCALE
_VISITCOMMUNITY
England - North West, United Kingdom
Joined: October 15, 2009
KitMaker: 1,976 posts
AeroScale: 1,789 posts
Posted: Monday, July 04, 2011 - 12:40 PM UTC
Hi all
Started my Academy 1/48 F-14A over the weekend. Completed the cockpit minus the seats. The radar scopes are a bit too green and need toning down. Gluing the port wing to the fuselage was a bit of a problem. In trying to get a tight fit, the clamp broke and cracked the plastic on the wing root. Filled the hole left by the broken plastic with sprue and filler. Also I think I may have used too much liquid glue on the lip of the engine air intake. I removed the clamps holding the parts together and they had left a imprint on the plastic. A bit more filler there as well!!!
I used some plasticard to fill in the gap where the wings fold into on the fuselage. Rest of the kit is going together pretty well. Not a great start, but the problems are minor and easily fixed.
All the best.
tim


Keeperofsouls2099
_VISITCOMMUNITY
Florida, United States
Joined: January 14, 2009
KitMaker: 2,798 posts
AeroScale: 2,443 posts
Posted: Monday, July 04, 2011 - 03:11 PM UTC
Good to see you join the party light and looks like your having issues just like me.......ahhhhhh......modeling
SGTJKJ
#041
_VISITCOMMUNITY
Kobenhavn, Denmark
Joined: July 20, 2006
KitMaker: 10,069 posts
AeroScale: 3,788 posts
Posted: Tuesday, July 05, 2011 - 01:01 AM UTC
Looks good, Tim. Great to hear "minor" will not throw you of track. The cockpit looks good.
Are you using the kit seats? The quality of the kit overall so far?
_Viper_
_VISITCOMMUNITY
Roma, Italy
Joined: April 15, 2010
KitMaker: 163 posts
AeroScale: 19 posts
Posted: Tuesday, July 05, 2011 - 07:00 AM UTC
Ray, glad to have been of some help. Can't wait to see you started and back on track!

Tim, nice cockpit you have there! As for the little issues you have experienced with the joining of the fuselage, wings, intakes, etc. I will look forward to your fixes as they will be very helpful for me: frankly speaking I would have tossed the kit if I had experienced the same, so it will be very informative on how not to give up. Your morale gets all my respect! Keep it up!

litespeed
Staff MemberNews Reporter
AEROSCALE
_VISITCOMMUNITY
England - North West, United Kingdom
Joined: October 15, 2009
KitMaker: 1,976 posts
AeroScale: 1,789 posts
Posted: Tuesday, July 05, 2011 - 12:21 PM UTC

Quoted Text

Are you using the kit seats? The quality of the kit overall so far?


Hi Jesper.
I think I will be using the kits seats, this build is purely about the paint scheme and the application of the Afterburner decals. So I not too worried about acquiring highly detailed aftermarket products. For the price, I think the kit is very good and any faults are my doing really. I was a bit surprised that the wing root cracked in two places, but I think the clamp was a bit too strong.
Plenty of weapons with this release:
-6 x Phoenix missiles.
-4 x Sparrow missiles.
-2 x Sidewinders.
-2 x under fuselage fuel tanks.
-1 x Tarps pod.
Cockpit and wheel bays have a good bit of detail and the undercarriage is very well done. Construction and fit is so far pretty good, some filler is needed in places. Panel lines are fine and recessed. The kit includes retractable glove vanes, which were used in the early Tomcats. These were later disabled and perhaps removed. I trimmed the glove vanes down and used them to fill the gap. With this kit you can reveal the radar if you choose to have the radome open.
I will be giving update during the campaign so stay tuned.
Hope this helps with your query Jesper.
All the best.
tim
SellSword
_VISITCOMMUNITY
Indiana, United States
Joined: February 15, 2010
KitMaker: 167 posts
AeroScale: 141 posts
Posted: Tuesday, July 05, 2011 - 12:59 PM UTC
My pile of half finished planes


makes me feel guilty really! Jaysus Tim! I agree I would have boxed that bird and called it a day! Tons of respect to you for bashing on through! It inspires me to have hope that all the builds I've messed up may yet still have some hope as my own skills progress...

Here's my latest attempt, Whoever did the sculpt was a bit heavy handed when it came to engraving, but it's going together nicely...

competing with a couple of other builds at the moment, but I'm confident I'll finish... on time even!
Tomcat31
#042
_VISITCOMMUNITY
England - North East, United Kingdom
Joined: November 18, 2006
KitMaker: 2,828 posts
AeroScale: 1,720 posts
Posted: Thursday, July 07, 2011 - 07:43 AM UTC

Quoted Text

I used some plasticard to fill in the gap where the wings fold into on the fuselage.


Hi Tim I noticed that you filled the gaps in but what would be best is to fill the entire area over with some filler. These are actually air bag that inflate and deflate to keep the wing fold area sealed hopefully the following pictures from the book uncovering the Grumman F-14 A/B/D Tomcat by Danny Coremans (which I would highly recommend to any Tomcat Fan) will help to show what I mean.


Unfortunately not all manufacturers give you the option of inflated or deflated bags for if you want the wings swept or not

Anyway not much progress to show for my build as yet. I've painted the gloss white parts and some last minute parts to attach before hitting the spray bay

P.S. these images are posted for discussion purposes only
litespeed
Staff MemberNews Reporter
AEROSCALE
_VISITCOMMUNITY
England - North West, United Kingdom
Joined: October 15, 2009
KitMaker: 1,976 posts
AeroScale: 1,789 posts
Posted: Thursday, July 07, 2011 - 10:54 AM UTC
Fantastic, nice one Allen. Good old Danny Coremans eh. Must buy the book. He does some fantastic decals as well.
Many thanks Allen.
All the best.
tim
Dermo245
_VISITCOMMUNITY
Dublin, Ireland
Joined: April 07, 2010
KitMaker: 42 posts
AeroScale: 29 posts
Posted: Friday, July 08, 2011 - 02:32 PM UTC
Hey Tomcatters and some great work around these parts.

Nicola - thanks for the links and really like the look of those "Sundowners" decals. Might just have to get a set myself.
Allen - that book looks superb and thanks for posting the pics

Sorry for no update in so long but finally back on track with my 'Cat. Have finished the cockpit tonight - as this will be built in-flight, added 2 crew from the Hasegawa Pilots & Groundcrew set (some major weightloss needed to get them in there!)


They won't win any awards but I really like the subtle animation (e.g. hand on throttles/RIO's head turned)


Overall, I think this Revell kit fits really nicely and am enjoying this build....and campaign!

Thanks as always for looking and happy modelling.

Best wishes,
Dermot
Keeperofsouls2099
_VISITCOMMUNITY
Florida, United States
Joined: January 14, 2009
KitMaker: 2,798 posts
AeroScale: 2,443 posts
Posted: Friday, July 08, 2011 - 04:10 PM UTC
Looks good my man nice looking pit I started painting progress pics soon!your leader over and out
SGTJKJ
#041
_VISITCOMMUNITY
Kobenhavn, Denmark
Joined: July 20, 2006
KitMaker: 10,069 posts
AeroScale: 3,788 posts
Posted: Saturday, July 09, 2011 - 10:32 AM UTC
Great cockpit, Dermot. The pilots fit nicely. Good to see some inflight builds. There are too few of these around.
Looking forward to see more.

I am getting ready to start on this campaign. I will be building the Monogram kit. I got this kit very cheap on ebay as I was water damaged. However, since I am going for after market decals generously supplied by Justin it did not matter that the kit decals were damaged.


Keeperofsouls2099
_VISITCOMMUNITY
Florida, United States
Joined: January 14, 2009
KitMaker: 2,798 posts
AeroScale: 2,443 posts
Posted: Saturday, July 09, 2011 - 12:11 PM UTC
_Viper_
_VISITCOMMUNITY
Roma, Italy
Joined: April 15, 2010
KitMaker: 163 posts
AeroScale: 19 posts
Posted: Saturday, July 09, 2011 - 12:35 PM UTC
Hey Dermot,
Great cockpit you have there.Love the RIO pose and the ensemble altogether.

Jesper,
Look forward to see your big cat come together.

Allen,
Thanks for the scans. I agree with Tim, that's got to be one heck of a reference for our feline.

Keep it up guys, also for me: my workbench has currently been taken down because the room is taken by friends we have forthe weekend - gotta buy a bigger house next time
The good part (modellingwise) of having people over is it gives me chance to clean things up a bit from time to time!


Keeperofsouls2099
_VISITCOMMUNITY
Florida, United States
Joined: January 14, 2009
KitMaker: 2,798 posts
AeroScale: 2,443 posts
Posted: Saturday, July 09, 2011 - 04:31 PM UTC
Keeper actually has a question I'm wanting to get my finish like the pics that tomcat posted.I was thinking a layer of salt then over spraying with maybe a thinned down smoke any ideas
Littorio
_VISITCOMMUNITY
England - South East, United Kingdom
Joined: September 15, 2004
KitMaker: 4,728 posts
AeroScale: 1,351 posts
Posted: Saturday, July 09, 2011 - 08:46 PM UTC
Dermot nice looking pit.

Justin not sure how you'd do that, if using salt (not done this myself) you may need to use quite fine grains. Check for any pics of the aircraft your doing as it may have lots of panel lines repainted giving that USN patch work look.


Check the star and bar on the wing in the last photo!!!!
Keeperofsouls2099
_VISITCOMMUNITY
Florida, United States
Joined: January 14, 2009
KitMaker: 2,798 posts
AeroScale: 2,443 posts
Posted: Sunday, July 10, 2011 - 02:46 AM UTC
Well that's the effect I'm going for thanks for posting
_Viper_
_VISITCOMMUNITY
Roma, Italy
Joined: April 15, 2010
KitMaker: 163 posts
AeroScale: 19 posts
Posted: Sunday, July 10, 2011 - 06:29 AM UTC
Keeper,

Check your bearing on this:

http://www.modelclub.gr/forums/index.php?topic=9431.0

If you scroll down to the middle of the page the guy thoroughly describes his technique for the weathering and shows off, among others, a turkey which to me looks as close to the real thing as possible.

In one of my reference books I have found that indeed what brings out the "camouflaged weathering" of the tomcat seen in so many pictures is the fact that panels replaced/dismounted on each aircraft were then re-painted once put back on mainly in the area of the joint with other panels to prevent corrosion from going through. Perhaps by following this "criteria" you can achieve some of the effects you desire.

I just wish my airbrush skills were up to the challenge now...gotta keep practicing!


Tomcat31
#042
_VISITCOMMUNITY
England - North East, United Kingdom
Joined: November 18, 2006
KitMaker: 2,828 posts
AeroScale: 1,720 posts
Posted: Sunday, July 10, 2011 - 09:36 AM UTC
If you look at the last picture i posted the fuzzy writing on the left does say "whenever a panel is removed for maintenance, the area around the screws and edges is repainted to prevent corrosion while at sea. The result is depicted above"

I've been mulling this same problem over for a few years now and when I build my next large scale Cat I'm going to try paint the panel lines fresh over the dirt aircraft to see what effect I get.
Keeperofsouls2099
_VISITCOMMUNITY
Florida, United States
Joined: January 14, 2009
KitMaker: 2,798 posts
AeroScale: 2,443 posts
Posted: Sunday, July 10, 2011 - 01:53 PM UTC
well I started my little experiment by spraying my base color first then came back and post shaded with a lightened base coat color and highlighted the panels and what........next step a coat of future decals and weathering wish me luck and thanks for the pointers