Early Aviation
Discuss World War I and the early years of aviation thru 1934.
Hasegawa 1:32 F4B-4
DougN1
_VISITCOMMUNITY
Georgia, United States
Joined: August 08, 2011
KitMaker: 410 posts
AeroScale: 409 posts
Posted: Saturday, August 04, 2012 - 06:38 AM UTC
Went ahead and attached the rigging, using Gator Grip PVA glue. One side done:


Wing rigging complete:


Put the first coat on the exhausts so I can get them finished up and attached to the engine:


Put the wheels on, and then set the model aside to await the next work session. I went to put the blind back down (since I was done with photos), and it came out of the bracket, and landed on the F4B-4, and then knocked it to the floor. Here are the pieces:


Fortunately, the damage is not major, just a bit of a setback, requiring more work to get this one done I am beginning to wonder if this one really does not want to be finished!

Doug
lcarroll
_VISITCOMMUNITY
Alberta, Canada
Joined: July 26, 2010
KitMaker: 1,032 posts
AeroScale: 1,025 posts
Posted: Saturday, August 04, 2012 - 02:17 PM UTC
Doug,
First my sincere sympathies, second I commend you for your patience and positive outlook, and third it's looking very sharp and will be more so when you have done the repairs. Hang in there, she's a beauty!
Cheers,
Lance
sobrien
Joined: August 14, 2007
KitMaker: 5 posts
AeroScale: 4 posts
Posted: Sunday, August 05, 2012 - 02:13 PM UTC
Doug,
This is looking great! One of my favorite planes of all time.
Real sorry to see the accident. Don't give up on her.
Where did you get your orthodontic stainless steel flat wire for rigging?

Sean
Mgunns
_VISITCOMMUNITY
Arizona, United States
Joined: December 12, 2008
KitMaker: 1,423 posts
AeroScale: 1,319 posts
Posted: Monday, August 06, 2012 - 02:37 AM UTC
Hello Doug:

Really sorry to see this. I hate it when stuff that is supposed to work falls apart and ruins stuff. Hopefully you can maintain the motivational level to do the repairs, and continue on to completion. You have certainly done a great job on this up to date. As Stephen is wont to say, "Model On".

Best
Mark
JackFlash
_VISITCOMMUNITY
Colorado, United States
Joined: January 25, 2004
KitMaker: 11,669 posts
AeroScale: 11,011 posts
Posted: Monday, August 06, 2012 - 07:05 AM UTC
Absolutely. If I can finish the Battle Axe 1:32 Fokker D.VII and then repair it after a similar mishap, I believe you can fix this. "Model On!"
DougN1
_VISITCOMMUNITY
Georgia, United States
Joined: August 08, 2011
KitMaker: 410 posts
AeroScale: 409 posts
Posted: Tuesday, August 07, 2012 - 08:23 AM UTC
Thanks for the support everyone!

Fortunately, this really is a tough model. Only a few breaks to deal with, and several paint chips and things should be back on track. I've actually had worse things happen during a build and still managed to get the model finished

I've started the fun with repairing the broken landing gear:


After some glue, added some Mr Surfacer 500 so I can get rid of the remains of the crack (you can also see one of the chips in the black walkway):


Also added some more paint to the chips in the upper wing. I'll see how this goes, otherwise it's more Mr Surfacer 500 and sanding, blending and respraying:


More later!

Thanks for looking! Comments/questions welcomed!

Doug
dioman13
_VISITCOMMUNITY
Indiana, United States
Joined: August 19, 2007
KitMaker: 2,184 posts
AeroScale: 54 posts
Posted: Tuesday, August 07, 2012 - 11:11 AM UTC
Hey Doug, sorry to see a misshap as you had. Seems your rebuild is going to work. I have the black box of this kit and the P-12. P/U at a yard sale for about $10 total. Unfortunetly, I didn't notice the upper right wing by the flaps has some kind of screw up. A bad extra imprint in the plastic which I tried to sand out, but left a large dip in the wing surface. They now reside in the cabinet of coulda, shoulda, woulda, maybe one day. Shame as it one cool looking bird. The colors are what brought my attension to these early planes, just look too cool with pre war paint. Hope all goes well with yours.
DougN1
_VISITCOMMUNITY
Georgia, United States
Joined: August 08, 2011
KitMaker: 410 posts
AeroScale: 409 posts
Posted: Friday, August 10, 2012 - 09:04 AM UTC
Thanks again everyone, grabbed a few minutes to work on this bird between some other modelling commitments. After repairing the cracks, I filled in most of the chips, but some are still visible if you look closely. Since the only place this one is going is my display case, I'm not worried

I drilled out and pinned the wheels since they were snapped off (they now turn freely):


I ended up having to use Mr. Surfacer, sanding and then respraying the yellow on the upper wing (since it was in a pretty visible area) to get it fixed:


After getting everything re-attached, I put the rigging back on:


Now we're back to where we were before it was attacked by the window blind

Thanks for looking, comments/questions welcomed!

Doug
lcarroll
_VISITCOMMUNITY
Alberta, Canada
Joined: July 26, 2010
KitMaker: 1,032 posts
AeroScale: 1,025 posts
Posted: Friday, August 10, 2012 - 09:58 AM UTC
Doug,
Great recovery, and well worth the effort, glad you saved it. It's a real eye catcher, the unique colours of these little "beasts" always have impressed me and I am very impressed with the rigging as well, nicely done!
Looking forward to your finished product.
Cheers,
Lance
AussieReg
Staff MemberAssociate Editor
AUTOMODELER
#007
_VISITCOMMUNITY
Victoria, Australia
Joined: June 09, 2009
KitMaker: 8,156 posts
AeroScale: 3,756 posts
Posted: Friday, August 10, 2012 - 10:33 AM UTC
Beautiful build Doug, inspiring effort especially with the rebuild.

Important question, is the offending blind a mangled mess in the back yard now, or did it get refitted as well ?

Cheers, D
Middle_Franconian
_VISITCOMMUNITY
Bayern, Germany
Joined: January 02, 2011
KitMaker: 279 posts
AeroScale: 239 posts
Posted: Sunday, August 12, 2012 - 07:39 AM UTC
Hi Doug,

I am glad to see that everything is fine again with your F4B-4.

I emjoy your buildblog because it is a rare subject you are working on.

By the way: what is this Gator Grip glue?

Regards,

Sebastian
JackFlash
_VISITCOMMUNITY
Colorado, United States
Joined: January 25, 2004
KitMaker: 11,669 posts
AeroScale: 11,011 posts
Posted: Sunday, August 12, 2012 - 05:04 PM UTC
Nicely Done!
Fister30
_VISITCOMMUNITY
Iowa, United States
Joined: May 11, 2012
KitMaker: 195 posts
AeroScale: 38 posts
Posted: Tuesday, August 14, 2012 - 04:53 AM UTC
Excellent!!!! I'm not much of a biplane kind of guy, but watching you assemble this beauty not once but twice . I might just have to give one a try

Thanks
Jon
DougN1
_VISITCOMMUNITY
Georgia, United States
Joined: August 08, 2011
KitMaker: 410 posts
AeroScale: 409 posts
Posted: Wednesday, August 15, 2012 - 05:28 AM UTC
Thanks guys

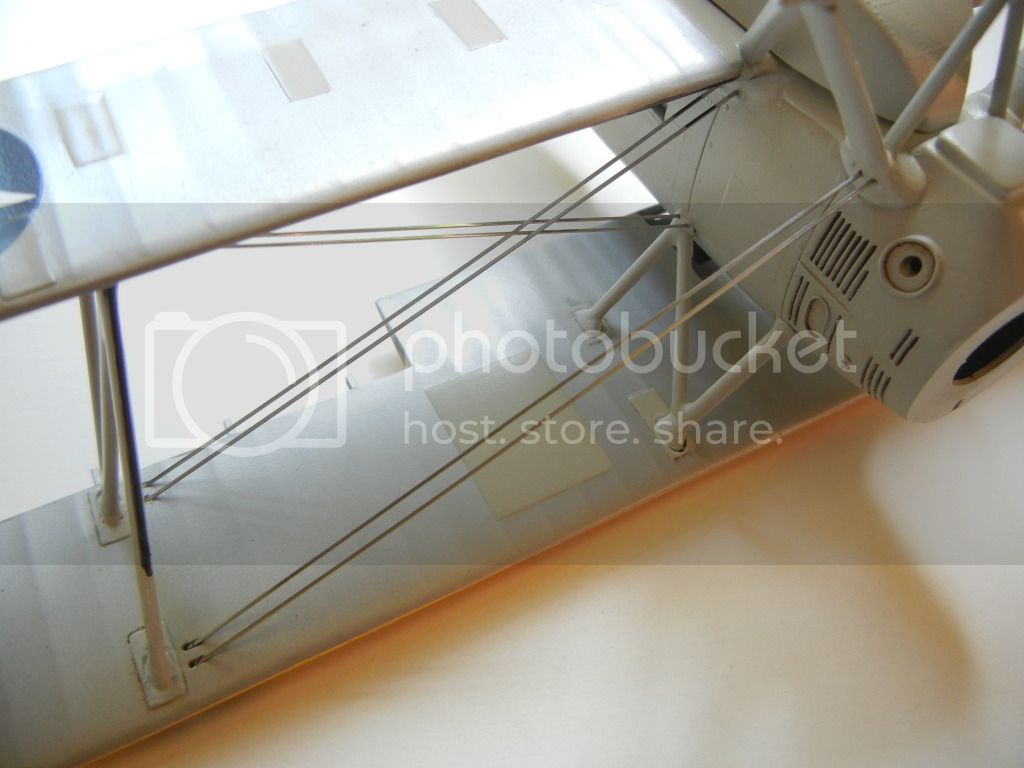
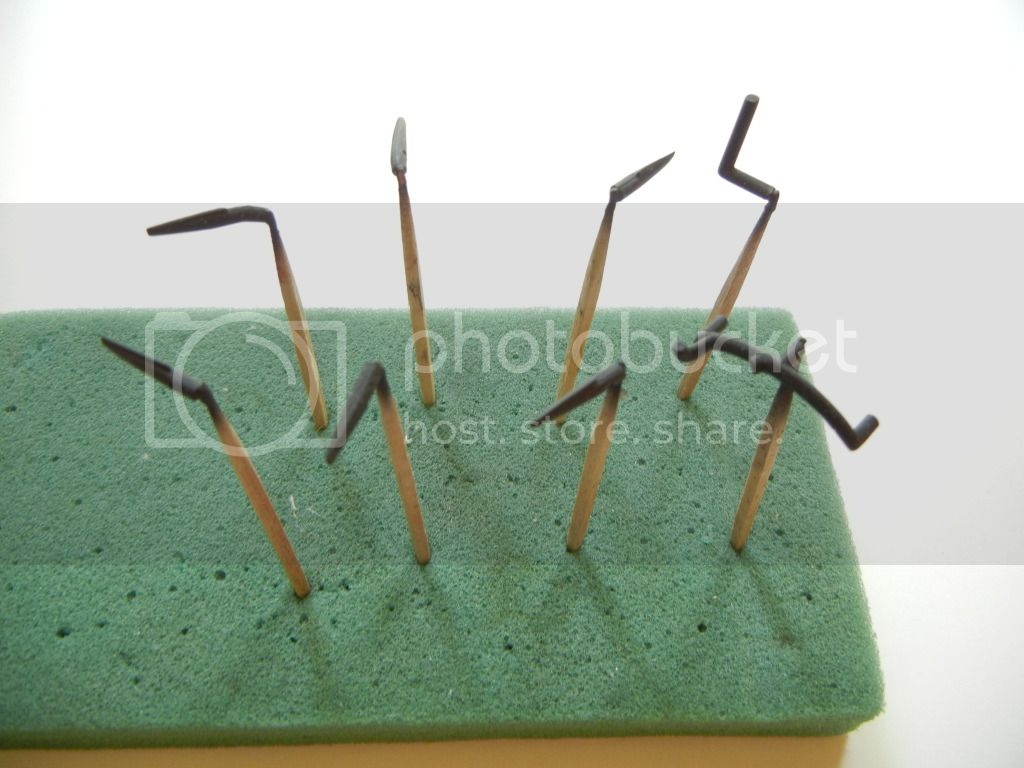
@ Sean - I got a few pieces initially from a friend (where I got the idea), and then searched the internet and found a dental supply place in Colorado that had some. The size to get is .010 X .020, and unfortunately it seems to have been mostly discontinued in favor of thicker SS flat wire for ortho purposes. It's also not cheap, but you can get 20 pieces which should last for at least 5 or 6 models

@ Damien, no I put it back up, but I still need to address the issue that caused it to fall in the first place

@ Bob, you should be able to find another kit for $10 at a show or elsewhere, so that you can finish your build. I'm glad I'm finally getting this one done, as it should add some nice color to the display case

@ Sebastian - Gator Grip Glue is an acrylic white glue. See here I know that A2Zee carries it for at least one EU distributor.

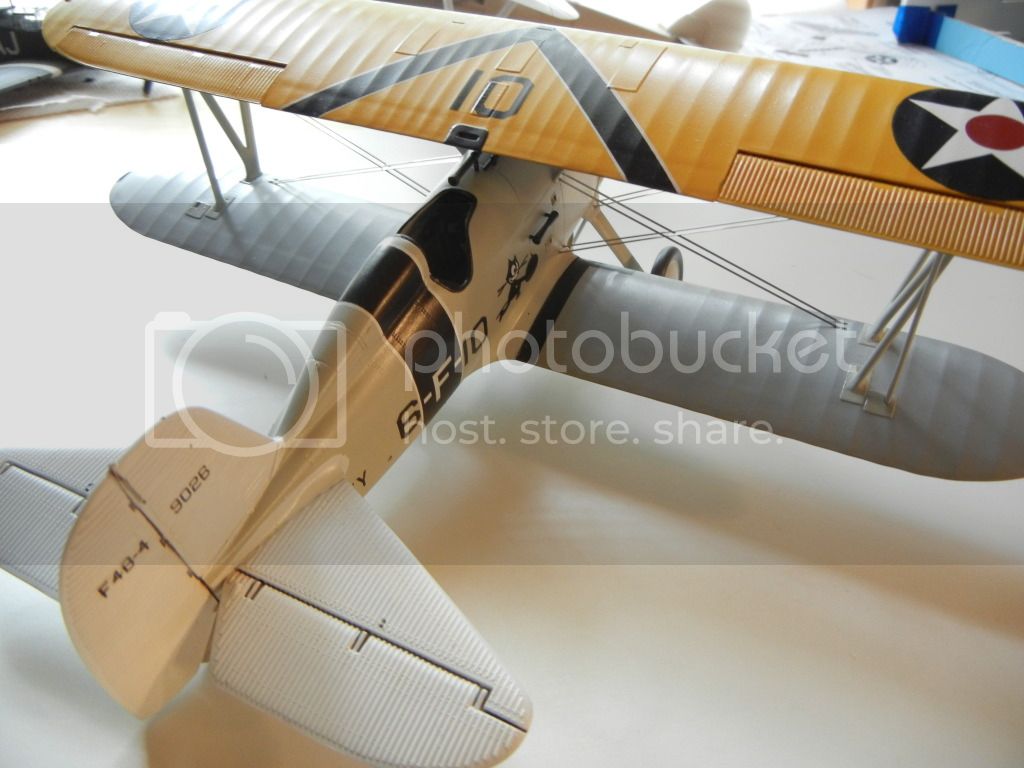
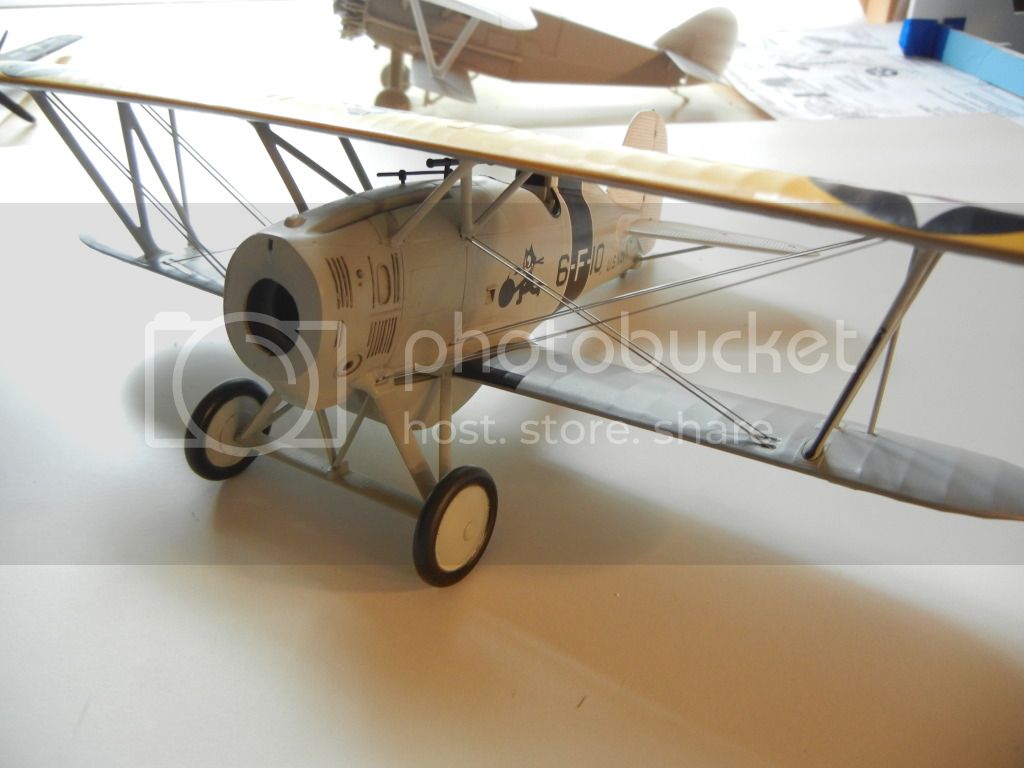
@ Jon - the only hard part of the kit is getting the upper wing together and getting rid of the step on the bottom. Once that is done, it's a great kit that fits well and is (obviously) very tough - I highly recommend it!

I think that is everyone, if I missed a question, please let me know!

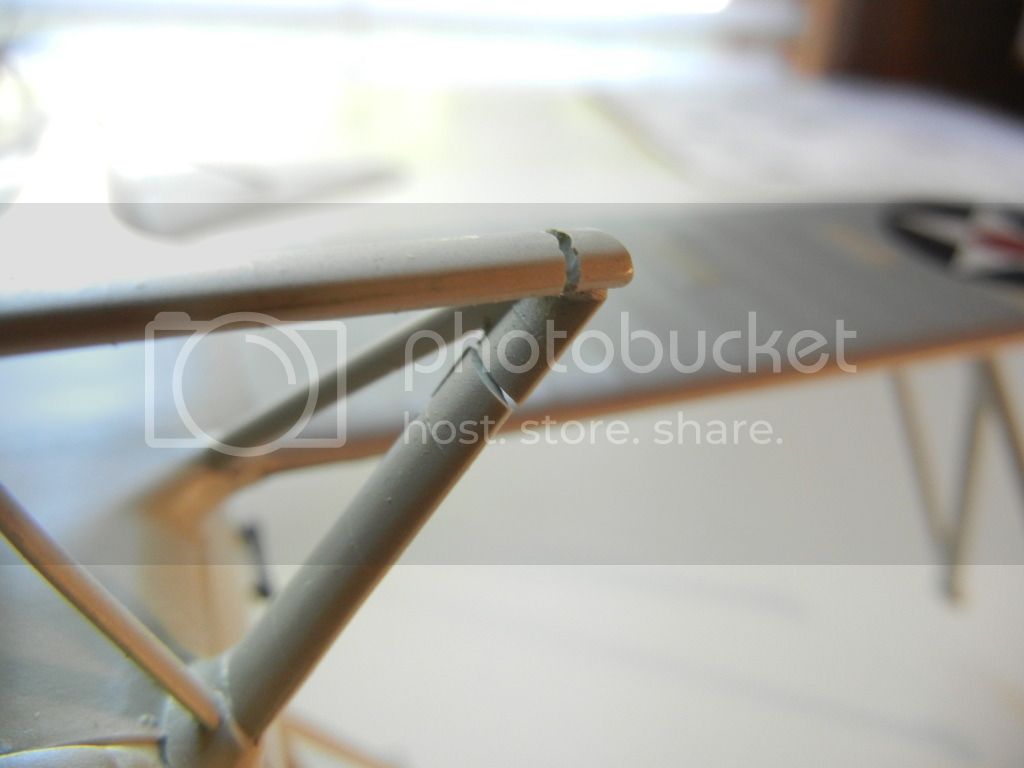
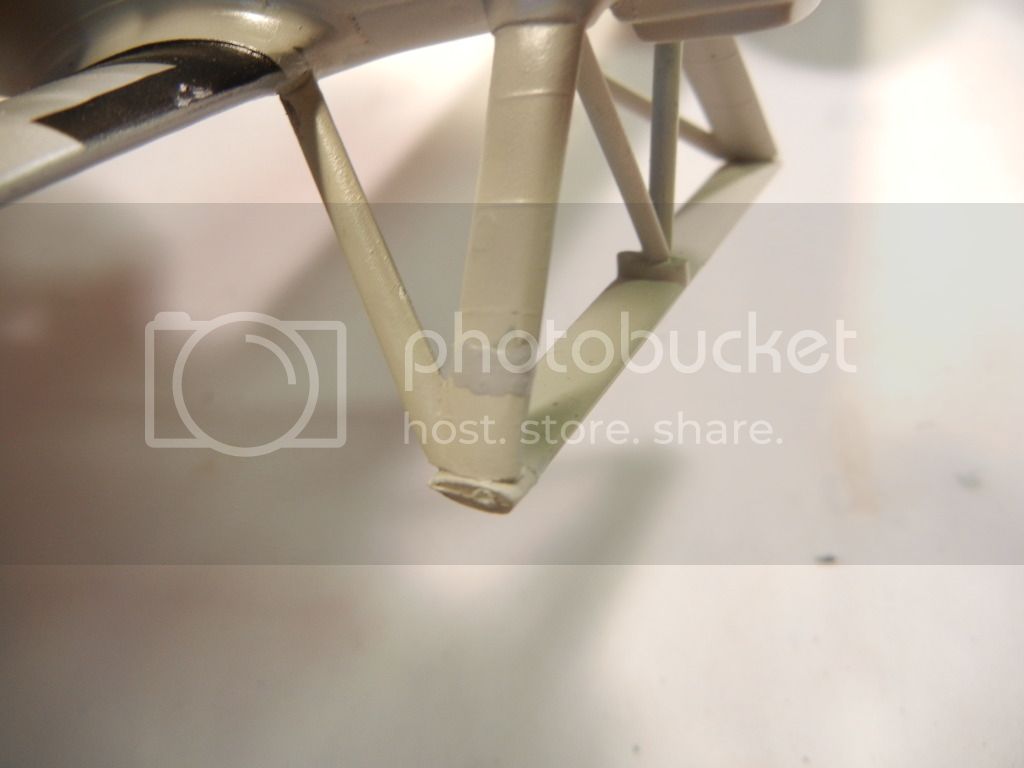
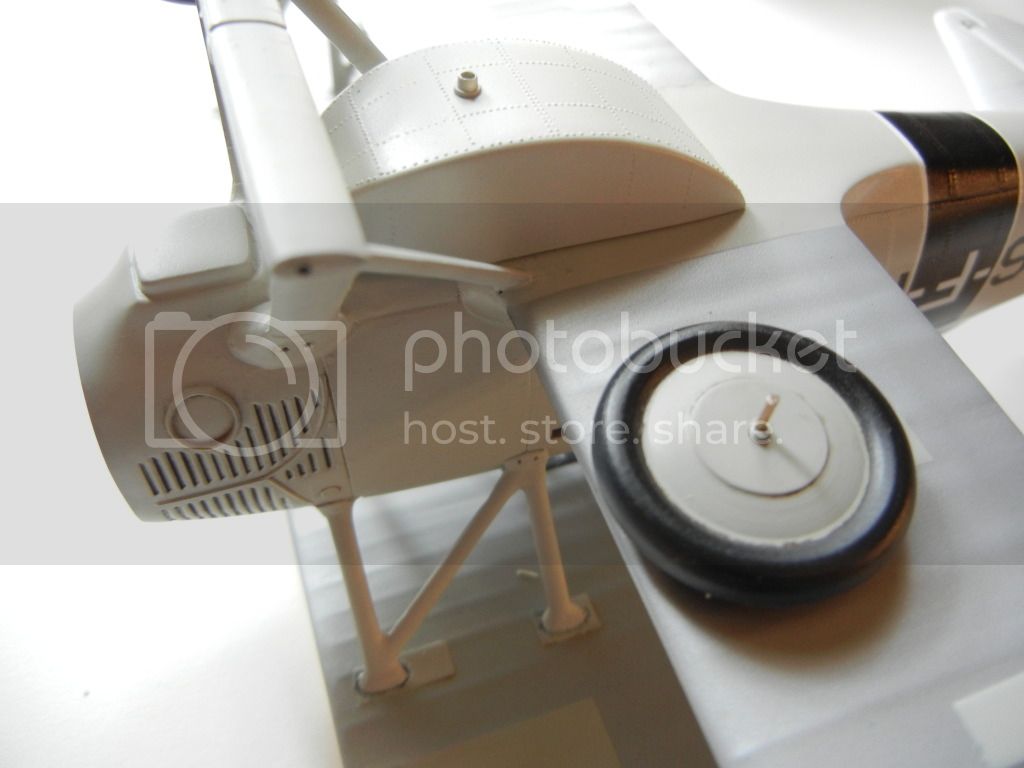
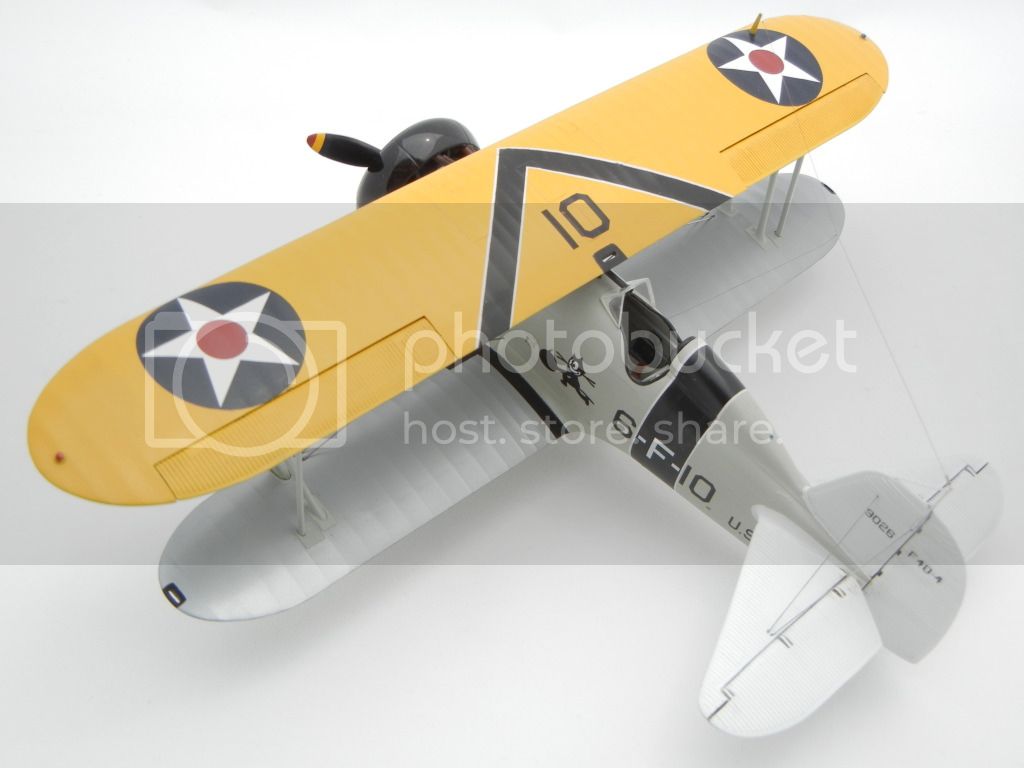
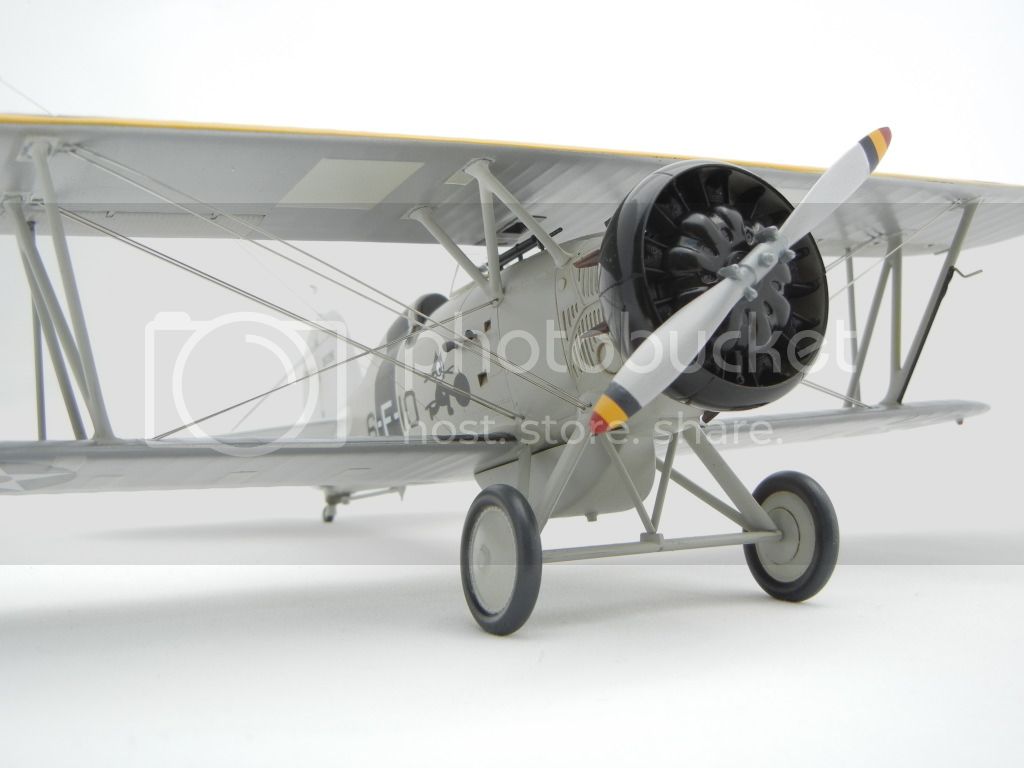
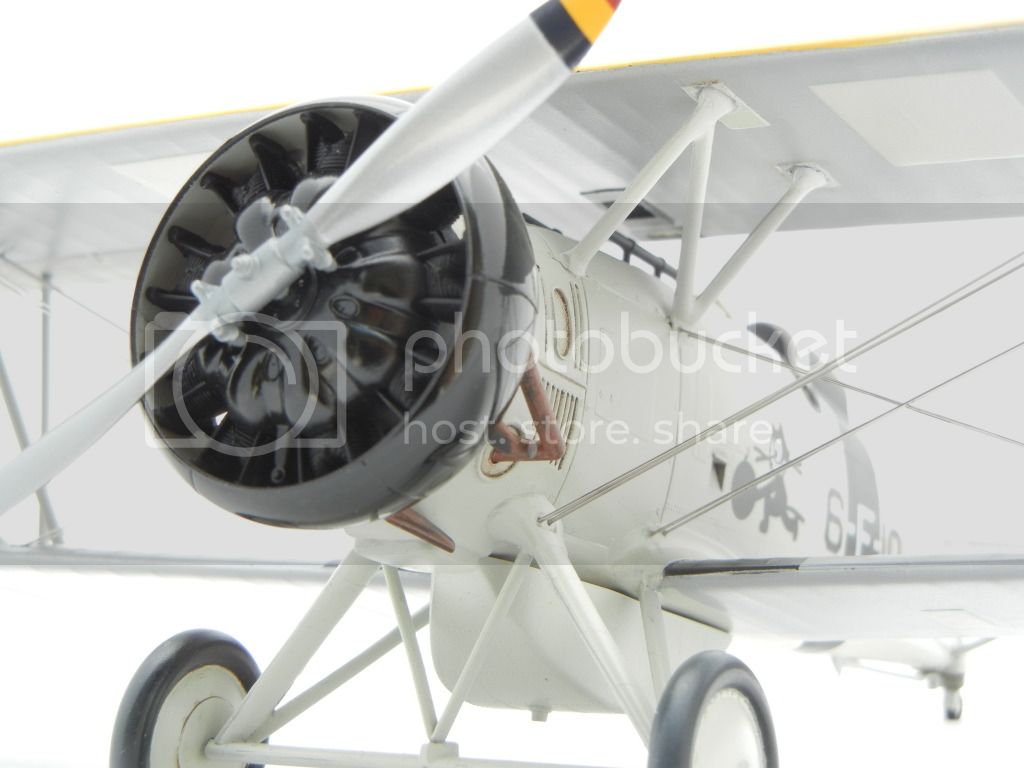
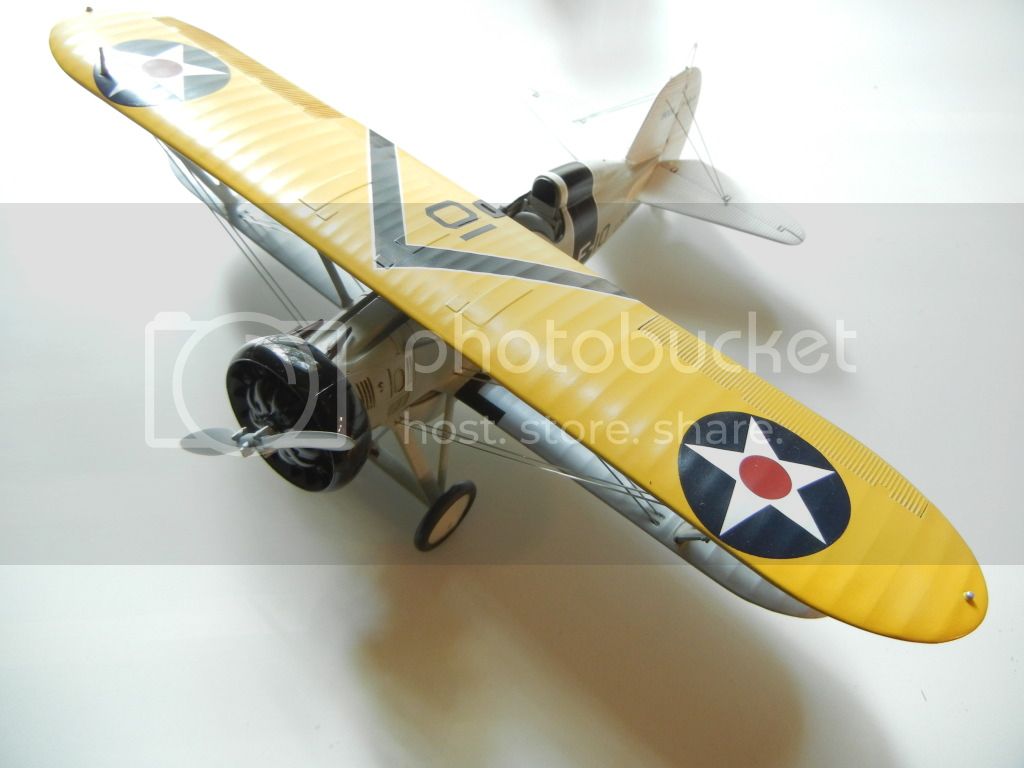
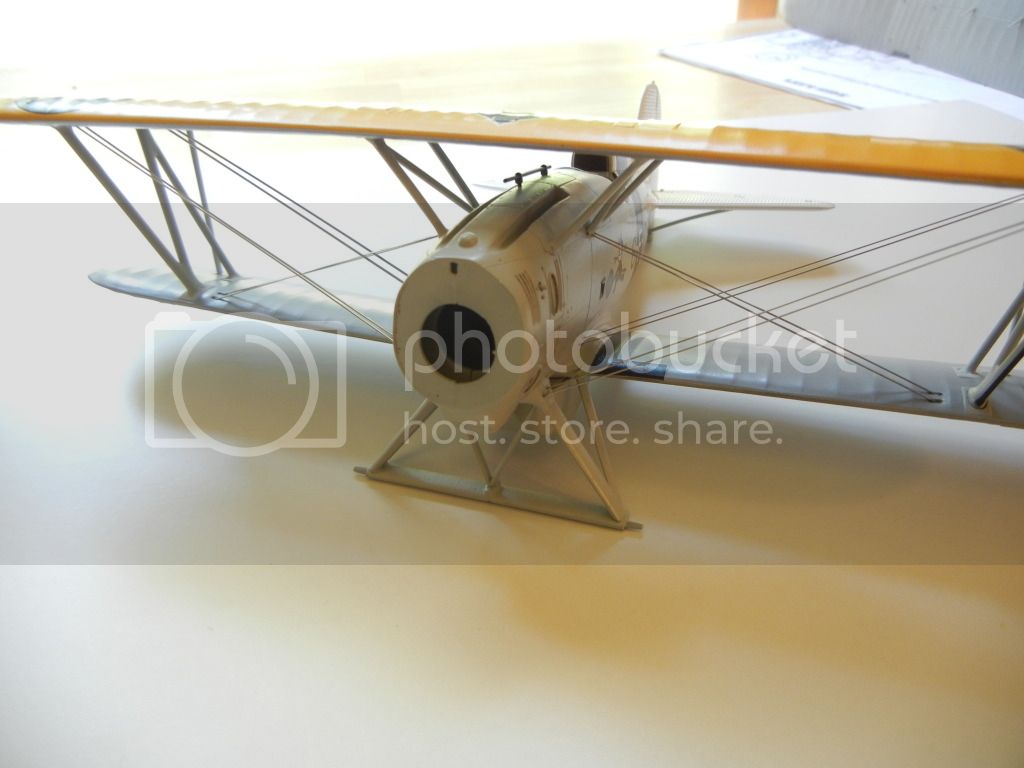
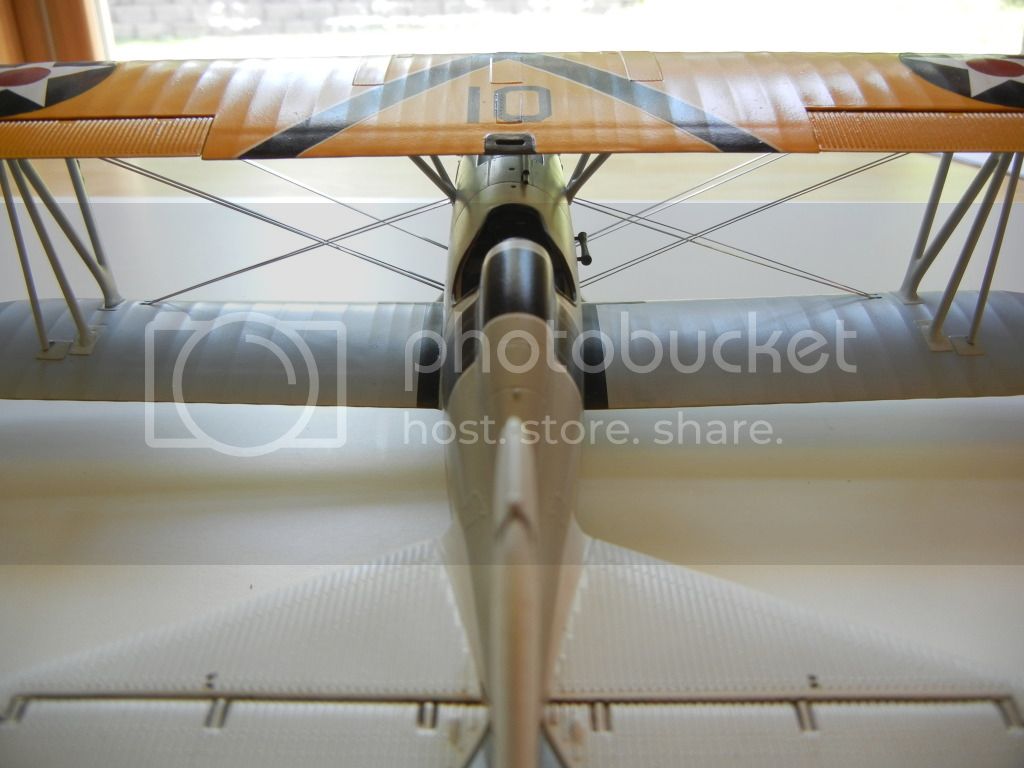
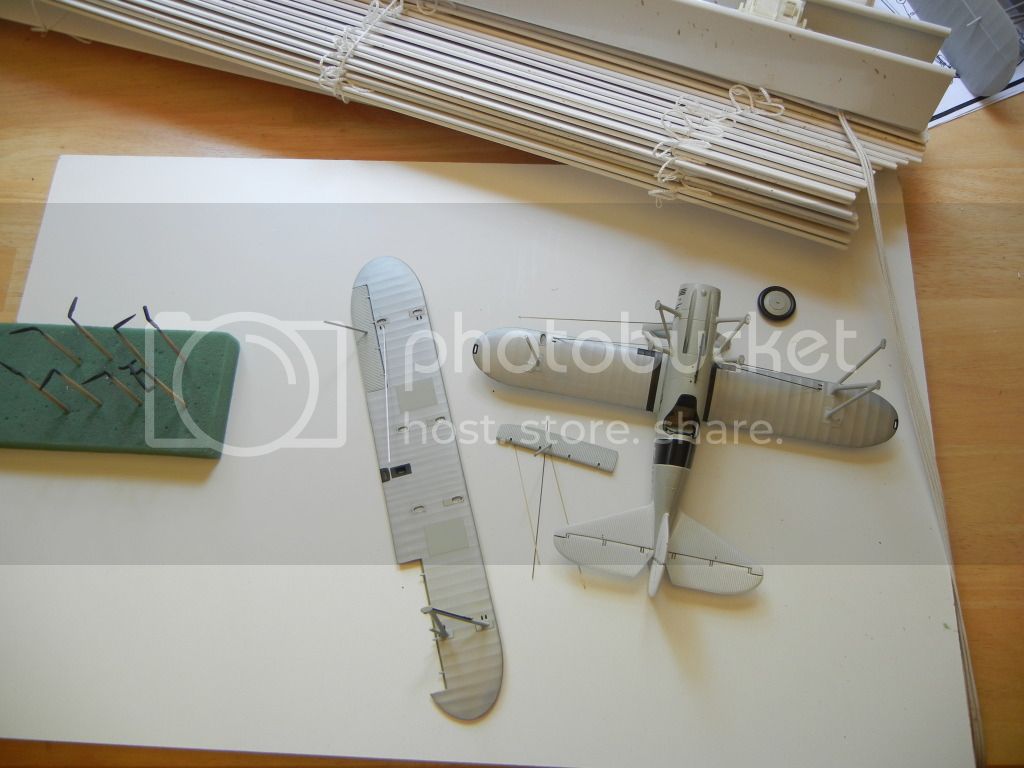
Ok, made some more progress now that I've finished up another project. Added the rigging to the tailplane, rebuilt the aerial mast on the vertical stab, added the aerial mast to the upperwing, and took the big step of getting the engine together and attached to the fuselage! On the home stretch now (prop is just lightly stuck on for photo op):


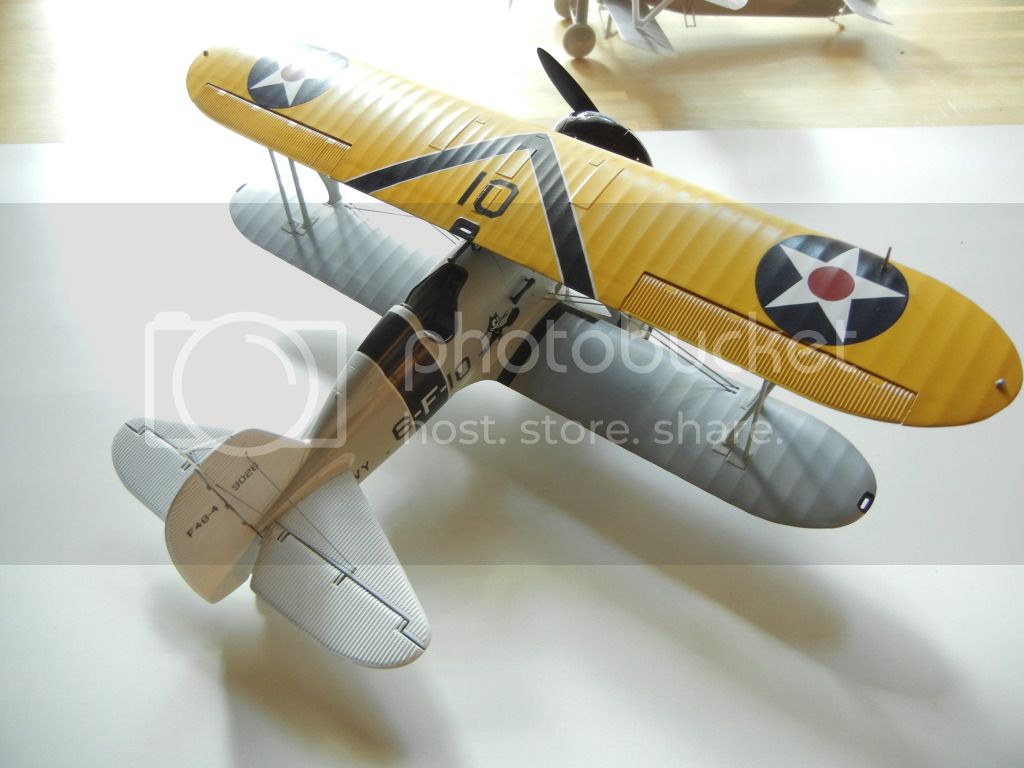
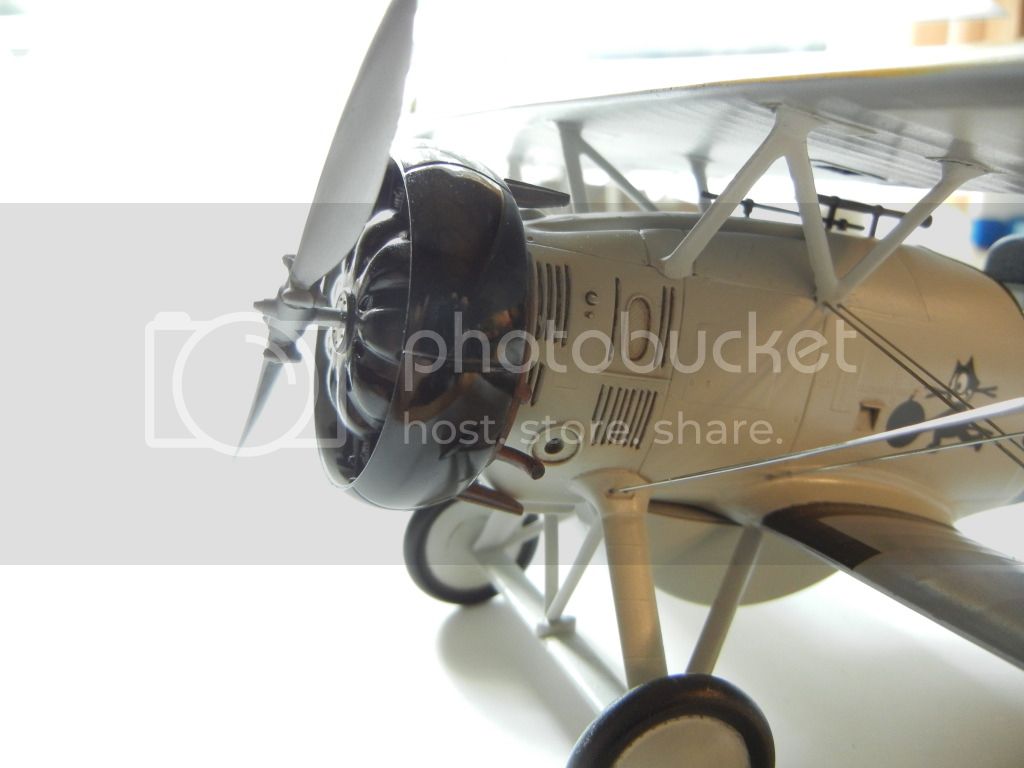
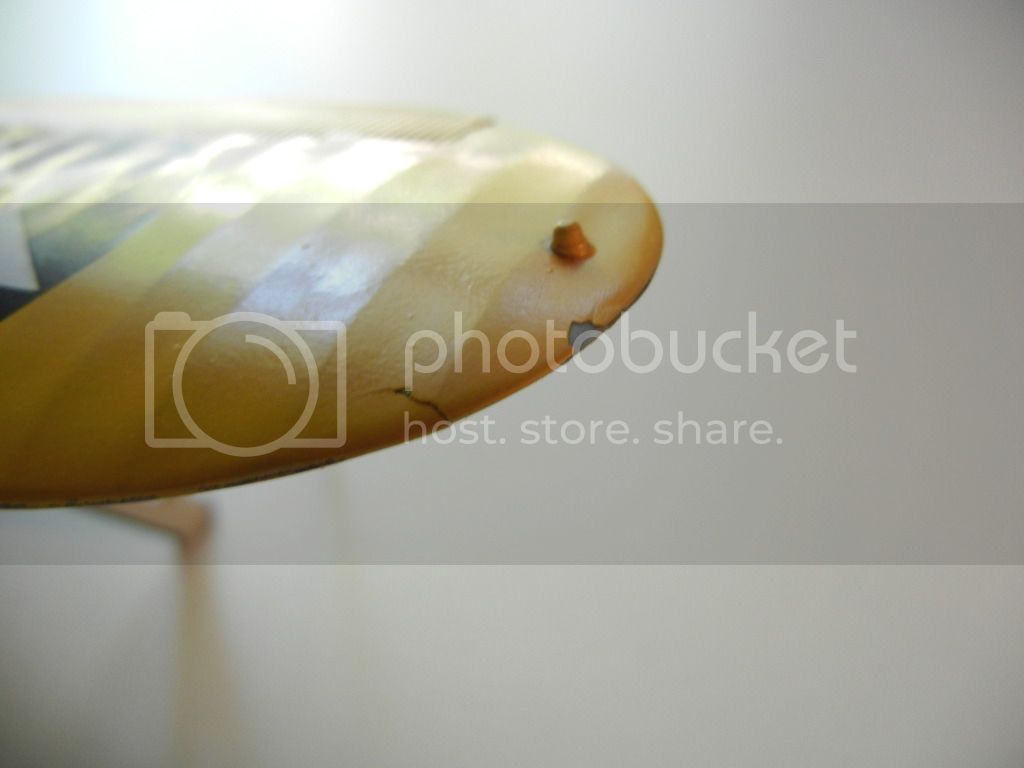
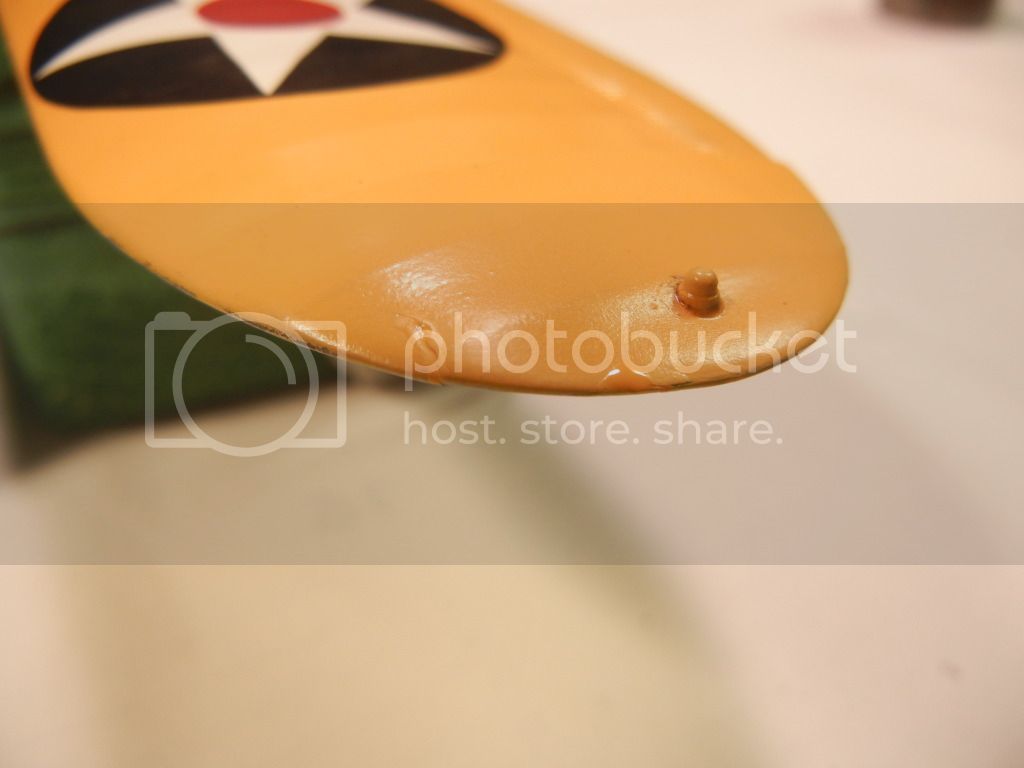
Still have to paint/decal the prop, add the aerial wire (and the one into the fuselage), paint the formation lights, and add one more piece of the exhaust, as well as the windscreen.

Thanks for looking, comments/questions welcome as always!

Doug
DougN1
_VISITCOMMUNITY
Georgia, United States
Joined: August 08, 2011
KitMaker: 410 posts
AeroScale: 409 posts
Posted: Thursday, August 16, 2012 - 05:52 AM UTC
Ok, you can put a fork in this one, it's finally done! Took a long time (approximately 3 years and 9 months), and it's been through a flood, been attacked by a window blind and subjected to my modeling efforts. Still, it's survived to the end, so here are a couple glamour shots:


As always, thanks for looking, comments/questions welcome!

Doug
lcarroll
_VISITCOMMUNITY
Alberta, Canada
Joined: July 26, 2010
KitMaker: 1,032 posts
AeroScale: 1,025 posts
Posted: Thursday, August 16, 2012 - 06:05 AM UTC
Doug,
Fabulous finish after a a couple of really gruelling challenges to your patience! Pretty to look at, rare niche in the Early Aviation period, and impressive testimony to your modelling skills.
What's next on the bench?
Cheers,
Lance
TAFFY3
_VISITCOMMUNITY
New York, United States
Joined: January 21, 2008
KitMaker: 2,531 posts
AeroScale: 38 posts
Posted: Thursday, August 16, 2012 - 06:26 AM UTC
Looks great Doug, you did the old girl proud. The only complaint I have is that it looks so good that it makes me want to add another kit to my to do list, instead of thinning the stash. Al
Jessie_C
_VISITCOMMUNITY
British Columbia, Canada
Joined: September 03, 2009
KitMaker: 6,965 posts
AeroScale: 6,247 posts
Posted: Thursday, August 16, 2012 - 06:33 AM UTC
"A thing of beauty is a joy forever."
Middle_Franconian
_VISITCOMMUNITY
Bayern, Germany
Joined: January 02, 2011
KitMaker: 279 posts
AeroScale: 239 posts
Posted: Sunday, August 19, 2012 - 01:20 AM UTC
Hi Doug,

congratulations! That´s a very nice model. I wish I could deal with rigging like the way you do.

I think your F4-B should be posted as Feature Article. It´s a plane which you see very rarely as a finished model.

Thanks for the advice on the Gator Grip Glue by the way. I think I will order a bottle.

Regards,

Sebastian
DougN1
_VISITCOMMUNITY
Georgia, United States
Joined: August 08, 2011
KitMaker: 410 posts
AeroScale: 409 posts
Posted: Monday, August 20, 2012 - 04:47 AM UTC
Thanks everyone

@ Lance, I'm about to start the build blog on the 1/32 Dragon 110D-3 as I committed to in my review. I've also got the Stuka to attempt to correct/build, but I've already pulled out the Hasegawa 1/32 P26 kit, which I might do a little side work on

@ Sebastian - this kit is simple to rig since Hasegawa already put slots for all the rigging in place, you just need to measure and cut some wire and stick it in there. I've got an old article I did the first time I used a simple method featuring fishing line for rigging, and can dig it out and get it posted if that would be of interest to the readership

Doug
Rebilda
#057
_VISITCOMMUNITY
Bayern, Germany
Joined: May 11, 2010
KitMaker: 248 posts
AeroScale: 123 posts
Posted: Monday, August 20, 2012 - 06:20 AM UTC
@sebastian: Yeah, order some. And be sure to order it from Aerospezial. If you just want to give it a try, do as I suggested a few modelling sessions ago and try MINE! I told you that stuff needs to be had and that I glue all my canopies with it....

''Observe....BlamBlamBlam.....have a nice day...''
OEFFAG_153
_VISITCOMMUNITY
Västra Götaland, Sweden
Joined: February 19, 2010
KitMaker: 1,473 posts
AeroScale: 1,450 posts
Posted: Tuesday, August 21, 2012 - 12:47 AM UTC
Brilliant Recovery and brilliant build – looks very handsome with its yellow wings and grey fuse!

Congratulations on finishing her!

Mikael
windysean
_VISITCOMMUNITY
Wisconsin, United States
Joined: September 11, 2009
KitMaker: 1,917 posts
AeroScale: 563 posts
Posted: Wednesday, January 02, 2013 - 02:53 AM UTC
Doug,
Over in the Hangar Queen 2 campaign gallery, here , we're awaiting a photo of this completed beauty, so you can receive a ribbon for your profile.
thanks,
Sean H.
DougN1
_VISITCOMMUNITY
Georgia, United States
Joined: August 08, 2011
KitMaker: 410 posts
AeroScale: 409 posts
Posted: Friday, January 04, 2013 - 09:42 AM UTC
I can't seem to get the photos uploaded, I get a "The category you chose for this photo can't contain photos" error when I try?

Doug
windysean
_VISITCOMMUNITY
Wisconsin, United States
Joined: September 11, 2009
KitMaker: 1,917 posts
AeroScale: 563 posts
Posted: Monday, January 07, 2013 - 02:46 AM UTC
Doug,
I hate to hihack your excellent build thread here, but maybe another one of the Aeroscale admins can help you post to the gallery. Maybe the gallery was closed.
-SEan.