OFFICIAL: Hangar Queen III Campaign
Lisboa, Portugal
Joined: August 27, 2010
KitMaker: 679 posts
AeroScale: 669 posts
Posted: Wednesday, July 24, 2013 - 04:39 AM UTC
Hi all,
Want to share a couple of pictures from the current stage of the build, hope you don't mind
Here is the before and the after of the port side, basically the only fuselage side i managed to work so far
Before

After


Weathering sure helps breaking the rather dull looks of this night camo. Still need to add a few more washes and a bit of chipping before moving to the aircraft's underside.
Cheers
Pedro
Utah, United States
Joined: May 27, 2003
KitMaker: 1,026 posts
AeroScale: 215 posts
Posted: Wednesday, July 24, 2013 - 06:09 AM UTC
@Pedro--it's looking good. The decals look like paint. I take it they were applied over a layer of Future or some other gloss? Did you weather before decaling? Will you weather the decals later, or just let them be?
Thanks for answering my other questions. I don't think I've ever airbrushed with the pressure that low, hmm...something to experiment with. I was curious about what airbrush you use because my Iwata Eclipse does a smaller, tighter pattern than my ol' Badger 150 seems to, even with an XF tip and needle. The more modern technology wins out.
Thanks again,
Keith
Build 'em better than the box art!
Lisboa, Portugal
Joined: August 27, 2010
KitMaker: 679 posts
AeroScale: 669 posts
Posted: Wednesday, July 24, 2013 - 07:25 AM UTC
Keith,
Never used an Iwata, but i still own a couple of Badgers and i really don't see much difference when it comes to fine lines...now with paint brands that i see, that's why i prefer Gunze for more delicate works.
Decals- i apply them over a similar future local brand, and i did wheather them a bit already. However i need to use the airbrush over those black crosses to achieve a good wear efferct.
Thanks for your feedback

Cheers
Pedro
Ontario, Canada
Joined: March 29, 2010
KitMaker: 1,151 posts
AeroScale: 985 posts
Posted: Wednesday, July 24, 2013 - 09:55 AM UTC
Okay I'm going to do another. An old Fujimi Bf110 modifying kit decals to create LN + IR.
74, 75, 76 splinter with heavy mottling. Different sources show this aircraft with white spinners with one-quarter black, others with solid RLM 70 spinners. Some show no fuselage band, others show an undersides yellow band.
Texas, United States
Joined: February 22, 2008
KitMaker: 5,026 posts
AeroScale: 2,811 posts
Posted: Wednesday, July 24, 2013 - 03:37 PM UTC
@ Pedro: great looking paint and decals on your Junkers.
@ Richard: what does it look like?
Bob
If it aint broke dont fix it.
Tennessee, United States
Joined: September 20, 2005
KitMaker: 1,747 posts
AeroScale: 1,673 posts
Posted: Wednesday, July 24, 2013 - 03:39 PM UTC
Pedro, good job. Excellent airbrush work. Good looking model. Russell
To Thine Own Self Be True
Siderius
A.K.A., RTA
Holdfast
 President
#056
England - South West, United Kingdom
Joined: September 30, 2002
KitMaker: 8,581 posts
AeroScale: 4,913 posts
Posted: Wednesday, July 24, 2013 - 06:42 PM UTC
Excellent airbrush work Pedro, I have a similar scheme on the Ju88 of the Mistel that I am building

Mmmm, thinking about it that should be on here as well as it's been in the making for 10 years at least!

MAL the MASK
BULLDOG # 6 (President)
BEWARE OF THE FEW
Sappers: First in, last out. (UBIQUE)
It's not the same, better, but not the same.
Ontario, Canada
Joined: March 29, 2010
KitMaker: 1,151 posts
AeroScale: 985 posts
Posted: Thursday, July 25, 2013 - 02:39 AM UTC
Ontario, Canada
Joined: March 29, 2010
KitMaker: 1,151 posts
AeroScale: 985 posts
Posted: Thursday, July 25, 2013 - 04:24 PM UTC
Got the wind at my back now boys!


Holdfast
President #056
England - South West, United Kingdom
Joined: September 30, 2002
KitMaker: 8,581 posts
AeroScale: 4,913 posts
Posted: Thursday, July 25, 2013 - 05:40 PM UTC
That is looking sweat Richard
MAL the MASK
BULLDOG # 6 (President)
BEWARE OF THE FEW
Sappers: First in, last out. (UBIQUE)
It's not the same, better, but not the same.
Texas, United States
Joined: February 22, 2008
KitMaker: 5,026 posts
AeroScale: 2,811 posts
Posted: Thursday, July 25, 2013 - 06:00 PM UTC
Richard, what is the base color in the first photo? Your 110 is looking good so far and I cannot wait to see the next photo.
Bob
If it aint broke dont fix it.
Lisboa, Portugal
Joined: August 27, 2010
KitMaker: 679 posts
AeroScale: 669 posts
Posted: Thursday, July 25, 2013 - 07:30 PM UTC
Hi Richard,
Judging by photos you're using a 70/02 camo, not the 74/75 you wrote before

Personally I don't like the RLM 70 and 71 shades from valejjo, they just don't look right, but the other shades are just fine.
That aside, that's a fine looking plane, looks the very real. And you're fast man!

Cheers
Pedro
Ontario, Canada
Joined: March 29, 2010
KitMaker: 1,151 posts
AeroScale: 985 posts
Posted: Friday, July 26, 2013 - 07:08 AM UTC
Thanks Mal, it's amazing what a couple slow work days can yield on the bench!
Bob: The very first shot is just Tamiya rattle can grey primer. I hadn't applied any paint yet then. When I did I used tamiya sky grey for the lower surfaces I think.
Pedro: Yeah I need to write what Vallejo is what RLM
right on the bottle and I could avoid this sort of thing... Definetly not 74/75/76 but still within the realm of outside possibility that a 110C would have had this scheme.
I thought about redoing it to the planned scheme but, well... I didn't.
I'm jealous of your nachtjager, I was saving this kit for a decal sheet and upgrade kit to make this one a Lichtenstein radar Bf110 with that same camouflage as you have there. But in the end I just got bored and built it oob. I really want to build a bird with mottled grey night camo soon though. I quite like the look of it.
Here's a poser: I snapped off the mg barrel at the aft of the canopy. What's the solution?

Lisboa, Portugal
Joined: August 27, 2010
KitMaker: 679 posts
AeroScale: 669 posts
Posted: Friday, July 26, 2013 - 08:37 AM UTC
Richard,
Regarding your mishap, is the body of the machine gun still fixed to the canopy?
If so i suggest you use any clear, canopy friendly, glue to get it back on it's place.
Cheers
Pedro
Lisboa, Portugal
Joined: August 27, 2010
KitMaker: 679 posts
AeroScale: 669 posts
Posted: Sunday, July 28, 2013 - 05:37 AM UTC
Hi all,
my Junkers is coming to completion, reckon some 90% work done.


Still a few glitches to fix as is the case of the exhaust dampers, cockpit, etc, plus a last hand on weathering.
Since my summer vacations begin soon, this kit has to be completed within a few days.
Cheers, and thanks Russel, Bob and Mal for the feedback

Pedro
Ontario, Canada
Joined: March 29, 2010
KitMaker: 1,151 posts
AeroScale: 985 posts
Posted: Sunday, July 28, 2013 - 07:00 AM UTC
Your mottling is perfect. What airbrush do you use?
Lisboa, Portugal
Joined: August 27, 2010
KitMaker: 679 posts
AeroScale: 669 posts
Posted: Sunday, July 28, 2013 - 07:22 AM UTC
I used an H&S Evolution on this one. Fine needle and tip.
To be honest, i can do mottling with any honest spray gun, the "secret" is paint dilution ratio, low air pressure (to avoid those nasty splatters) and lots of patience
Cheers
Pedro
Tennessee, United States
Joined: September 20, 2005
KitMaker: 1,747 posts
AeroScale: 1,673 posts
Posted: Sunday, July 28, 2013 - 02:39 PM UTC
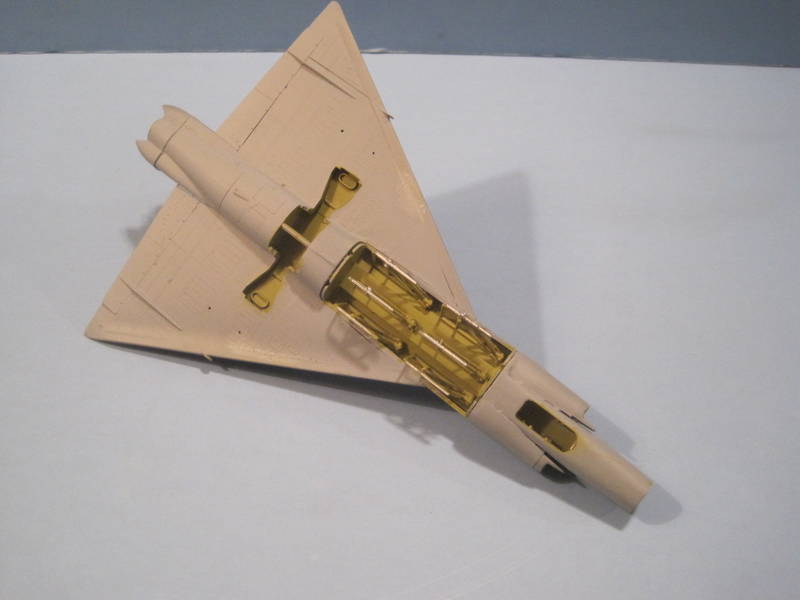
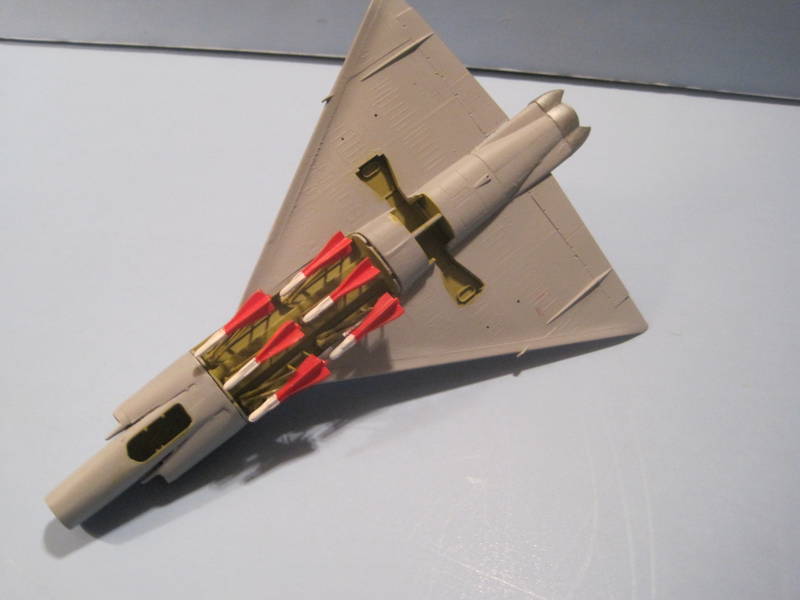
Well, it has been six months since I've done much at the model table! It is great to get back at it. I've got the interior green on the inside of the 102 and the missile rails on, next paint the missiles!! Take a look. Russell
To Thine Own Self Be True
Siderius
A.K.A., RTA
Ontario, Canada
Joined: March 29, 2010
KitMaker: 1,151 posts
AeroScale: 985 posts
Posted: Sunday, July 28, 2013 - 04:13 PM UTC
Thanks Pedro,
Russell that's coming along. I'm kinda dreading my dart build for the lottery.
Here's where I am:


I started the chipping with a lightened paint colour, then did silver. I'm trying to replicate Jean Luc's method but meeting heavy resistance. I built a little sponge brush and the effect was great for the lightened paint chips but very poor for metallic ones... I believe the solution is to go back over the chips with the sponger, first with the lightened paint and then normal colour. Staying away from panel seams to keep the chipping strongest at joints....
I tried something new at the exhaust stains as well. I sprayed a light grey stain first and then black over that. I may go back over the black again with grey gently.
#439
Washington, United States
Joined: November 05, 2005
KitMaker: 4,950 posts
AeroScale: 3,192 posts
Posted: Sunday, July 28, 2013 - 05:00 PM UTC
Russell, I gotta say the F-102 pose looks eerily familiar.
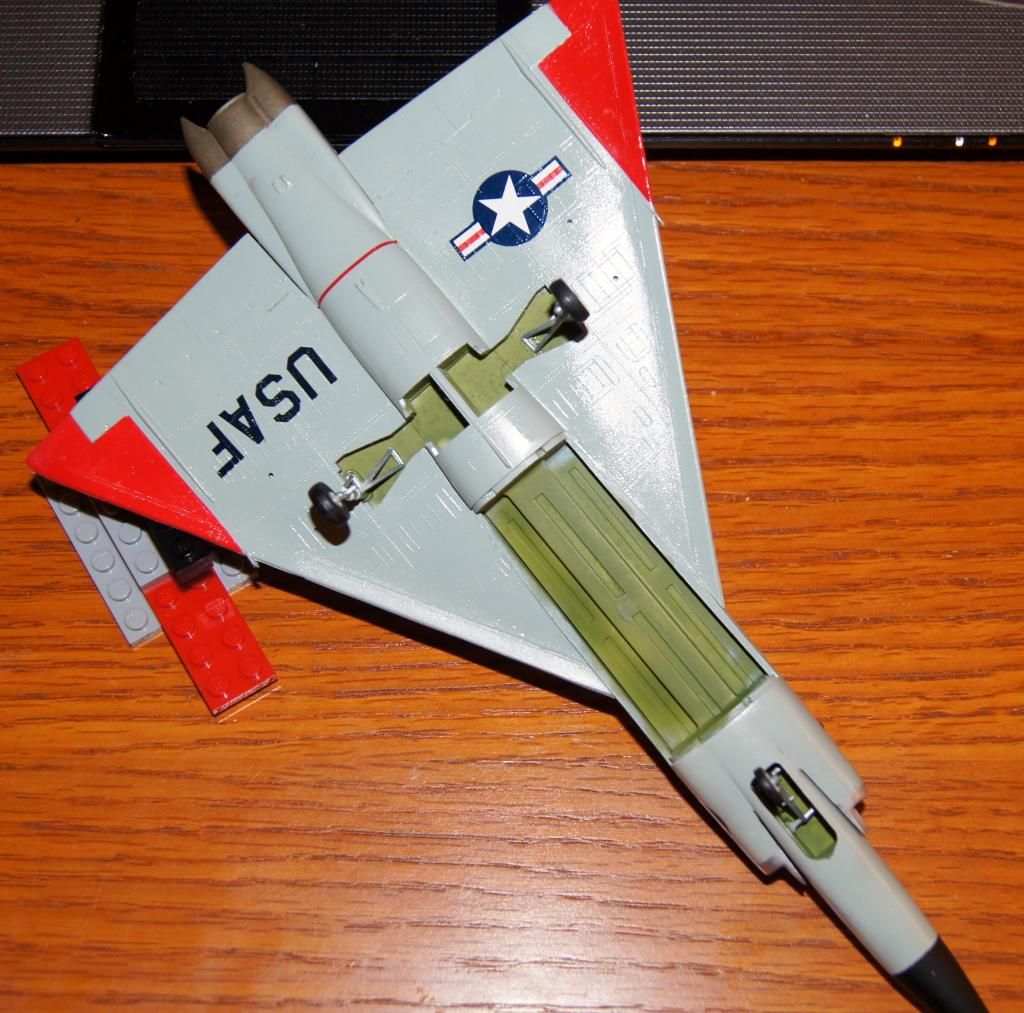
Left over from Delta Dawn
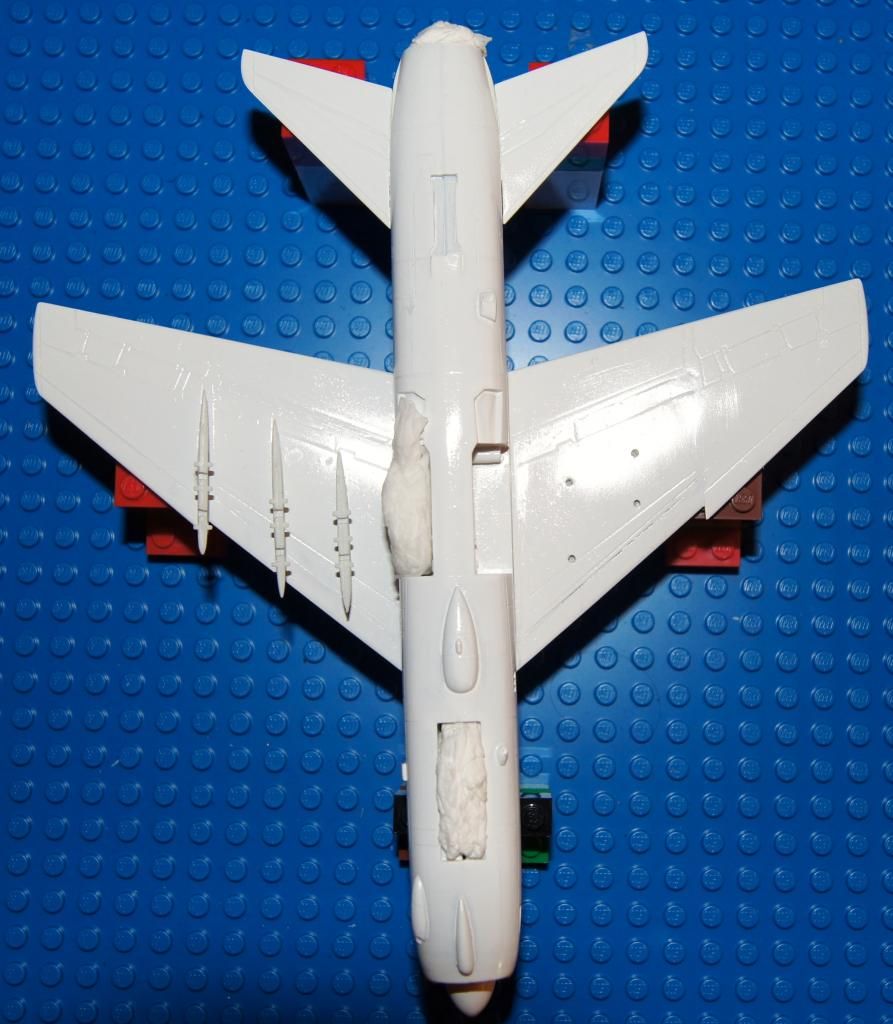
Minor progress on the A-7D
Hanger Queens in Waiting:
Monogram 1/72 F8F-1
Corsair the Sky Pirate - 1/72 Ace A-7D
Century Series - Airfix 1/72 F-105G
Anti Shipping - Academy 1/72 PBJ-1D
Academy 1/72 F-84E
Tennessee, United States
Joined: September 20, 2005
KitMaker: 1,747 posts
AeroScale: 1,673 posts
Posted: Sunday, July 28, 2013 - 05:07 PM UTC
Well Mark, great minds think alike, what else can I say! Are you going to button up the missile bay of the 102 or like me are you going to display the missiles extended on their trapeze like device? Just curious. Russell
To Thine Own Self Be True
Siderius
A.K.A., RTA
#439
Washington, United States
Joined: November 05, 2005
KitMaker: 4,950 posts
AeroScale: 3,192 posts
Posted: Sunday, July 28, 2013 - 06:11 PM UTC
I was planning on having the trapeze open and the missiles in place. Had a couple on before I started to decal and managed to knock them off and knock loose a couple of actuators. so that's all on hold till I finish the decals. I've got an OLD Microscale sheet that I'm using, there must be 100 decals between unit markings and stencils. Managed to trash the ones for the nose on the drop tanks, so they'll just have the filler decals.
Hanger Queens in Waiting:
Monogram 1/72 F8F-1
Corsair the Sky Pirate - 1/72 Ace A-7D
Century Series - Airfix 1/72 F-105G
Anti Shipping - Academy 1/72 PBJ-1D
Academy 1/72 F-84E
Texas, United States
Joined: February 22, 2008
KitMaker: 5,026 posts
AeroScale: 2,811 posts
Posted: Monday, July 29, 2013 - 02:04 PM UTC
Russell, both yours and Marks 102's look good and I bet it does feel goog to get back to some modeling.
Richard, the 110's paint is coming along nicely and the photo shows that your exhaust stains look realistic.
Pedro, ditto" what everyone else states about the mottleling.
Bob
If it aint broke dont fix it.
Tennessee, United States
Joined: September 20, 2005
KitMaker: 1,747 posts
AeroScale: 1,673 posts
Posted: Tuesday, July 30, 2013 - 12:44 PM UTC
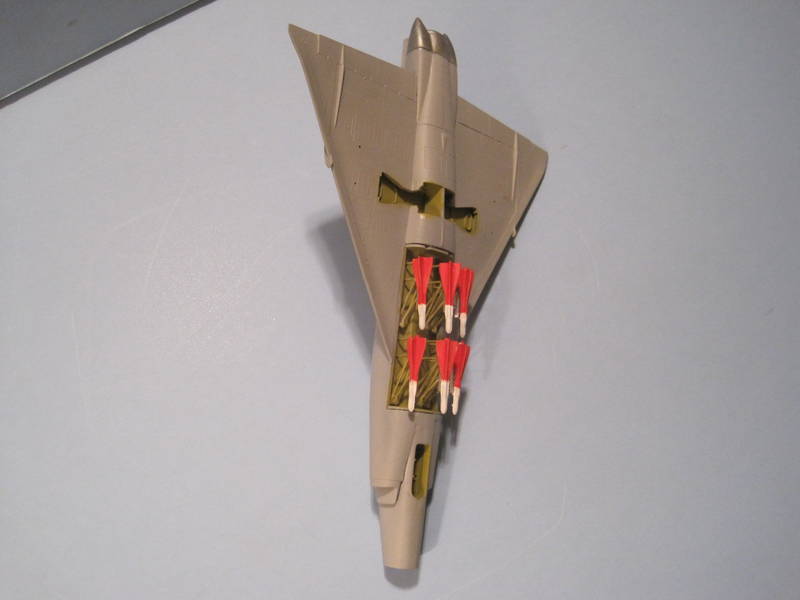
Well, installed the missiles in the 102. Airbrushed them all Vallejo white, then took some Vallejo flat red, and VERY carefully painted the tails red with a fine brush. I think I got things more or less even on them. I hope with the missiles extended the bird will sit on its gear alright!
Thanks for looking. Russell
To Thine Own Self Be True
Siderius
A.K.A., RTA
#439
Washington, United States
Joined: November 05, 2005
KitMaker: 4,950 posts
AeroScale: 3,192 posts
Posted: Tuesday, July 30, 2013 - 02:02 PM UTC
IIRC, my missiles cleared the ground when the plane was on it gear, but I knocked the 2-3 I had installed when I started decaling. Good luck!
Hanger Queens in Waiting:
Monogram 1/72 F8F-1
Corsair the Sky Pirate - 1/72 Ace A-7D
Century Series - Airfix 1/72 F-105G
Anti Shipping - Academy 1/72 PBJ-1D
Academy 1/72 F-84E


