
#372
United Kingdom
Joined: March 10, 2010
KitMaker: 2,568 posts
AeroScale: 1,619 posts
Posted: Thursday, June 13, 2013 - 09:48 AM UTC
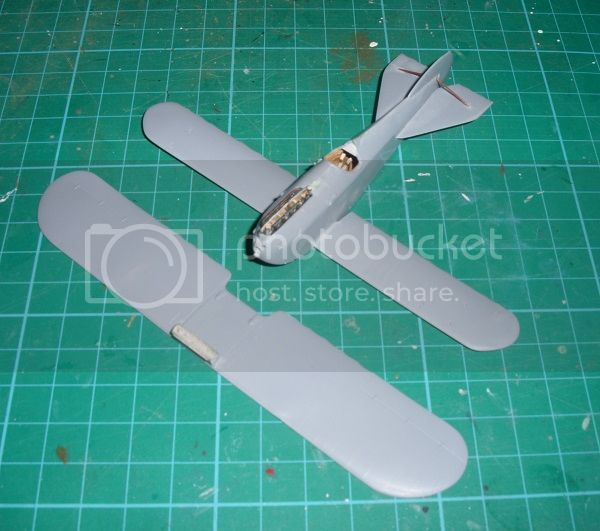
So after after putting this little kit on hold while I concentrated on college work, she's finally back on the bench and I had a chance to put in an hour or so of work tonight. Just a matter of sanding the filler smooth, adding a little of the squadrons green putty mixed with a little liquid glue to fill in some minor crevices. Nothing terribly exciting but progress nonetheless. I also noticed a little gap on the front on the engine fairing. I filled this with a sliver of plastic strip which I'll trim and carve to shape when its hardened up.
I'm not sure if the depression just above the prop shaft and bellow the cooling holes should be hollowed out. Wondering if it might have been another air vent.
Comments welcome.
On the bench: 1/72 Mosquito, Lightning F.6, DH.2,
AMT Vulcan Shuttle Surak.
Cyber-Hobby 1:35 Sherman Firefly IC - still stalled.
Västra Götaland, Sweden
Joined: February 19, 2010
KitMaker: 1,473 posts
AeroScale: 1,450 posts
Posted: Sunday, June 16, 2013 - 07:42 PM UTC
Coming on very nicely, surface details look pretty good for a short run?
Mikael
_________________________________________________________
Just finished the Wingnut Wings Taube. On to the Junkers D.1
#372
United Kingdom
Joined: March 10, 2010
KitMaker: 2,568 posts
AeroScale: 1,619 posts
Posted: Monday, July 15, 2013 - 07:38 AM UTC
Mikael, sorry for my lateness in replying. Yeah the surface detail is very nice in these kits considering that they're short runs. I'd say they're equal to a more mainstream manufacturer of WWI subjects like Roden.
Quick update as to where she stands at the minute. The tail plane and rudder is know on and its starting to look more like an aeroplane. I'm also starting to clean up the white metal struts and they're a devil to work with!
On the bench: 1/72 Mosquito, Lightning F.6, DH.2,
AMT Vulcan Shuttle Surak.
Cyber-Hobby 1:35 Sherman Firefly IC - still stalled.
#372
United Kingdom
Joined: March 10, 2010
KitMaker: 2,568 posts
AeroScale: 1,619 posts
Posted: Tuesday, October 01, 2013 - 09:49 AM UTC
Hi all,
I realise its been a LONG time since my last update, but I have not forgotten about it. Just got sidetracked with a large scale ank build that was taking up space on the bench.
With that nearing completion I have been able to get a little more work done on the Phonix.
The lower wings have now been glued to the fuselage and all the metal parts have been cleaned up. The metal is a lot softer than I expected and has results in a few accidental bends, but I have been able to straighten them out with care. A dry fit has revealed that the cabane and undercart struts fit into the fuselage notches neatly first time and need no trimming!
I have replaced the kits wheels with a spare set from a Roden Albatros. The kits originals were quite poor in comparison and they also fit better on the axle. I'm finding Roden to be a goldmine of spares to help with short run and older kits (eg, Airfix).
All going well I should have the first set of struts fitted by the weeks end.
Comments welcome.
Stephen
On the bench: 1/72 Mosquito, Lightning F.6, DH.2,
AMT Vulcan Shuttle Surak.
Cyber-Hobby 1:35 Sherman Firefly IC - still stalled.
#372
United Kingdom
Joined: March 10, 2010
KitMaker: 2,568 posts
AeroScale: 1,619 posts
Posted: Sunday, November 03, 2013 - 08:31 AM UTC
Quick update for tonight.
I'm now calling construction done for now. The rest will follow after a coat of paint and decals.
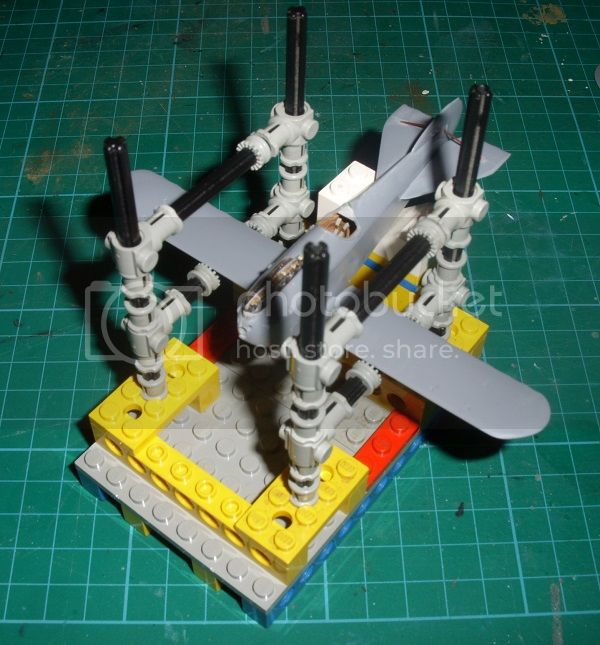
I used some scrap plastic rod to build the tailplane struts rather than the bent piece included in the kit. Be watchful of those if anyone buys a Pegasus kit. They have a habit of cramming the provided strut and rod into the boxes, with little thought of the resulting damage or bending that results.
I've also decided to build a jig with some old Lego Technic to help with final construction. Hopefully this will hold the fuselage in place while I attach the upper wings and struts. Of course, it might all go disastrously wrong

Comments welcome
On the bench: 1/72 Mosquito, Lightning F.6, DH.2,
AMT Vulcan Shuttle Surak.
Cyber-Hobby 1:35 Sherman Firefly IC - still stalled.
Lisboa, Portugal
Joined: August 27, 2010
KitMaker: 679 posts
AeroScale: 669 posts
Posted: Sunday, November 03, 2013 - 11:57 AM UTC
Uau, not sure what impresses me most...the kit or that space looking jig you got there
The Phönix would be a super choice for WnW anytime if you ask me. Looking forward to see some camo on the bird.
Cheers
Colorado, United States
Joined: January 25, 2004
KitMaker: 11,669 posts
AeroScale: 11,011 posts
Posted: Sunday, November 03, 2013 - 04:25 PM UTC
Legos do the trick. From the factory they are plumb and square.
". . .The most important thing is to know why you build and then get the most that you can out of building." via D.D.
#372
United Kingdom
Joined: March 10, 2010
KitMaker: 2,568 posts
AeroScale: 1,619 posts
Posted: Monday, November 04, 2013 - 10:26 AM UTC
Thanks guys.
I always knew there was a reason why I never got rid of it all. I figured Lego Technic would give me more freedom to adjust the heights of the wings than the regular block stuff. Seems to work so far.
Got a little bit of paint on tonight, mainly linen on the flying surfaces.
On the bench: 1/72 Mosquito, Lightning F.6, DH.2,
AMT Vulcan Shuttle Surak.
Cyber-Hobby 1:35 Sherman Firefly IC - still stalled.
#372
United Kingdom
Joined: March 10, 2010
KitMaker: 2,568 posts
AeroScale: 1,619 posts
Posted: Wednesday, November 13, 2013 - 08:44 AM UTC
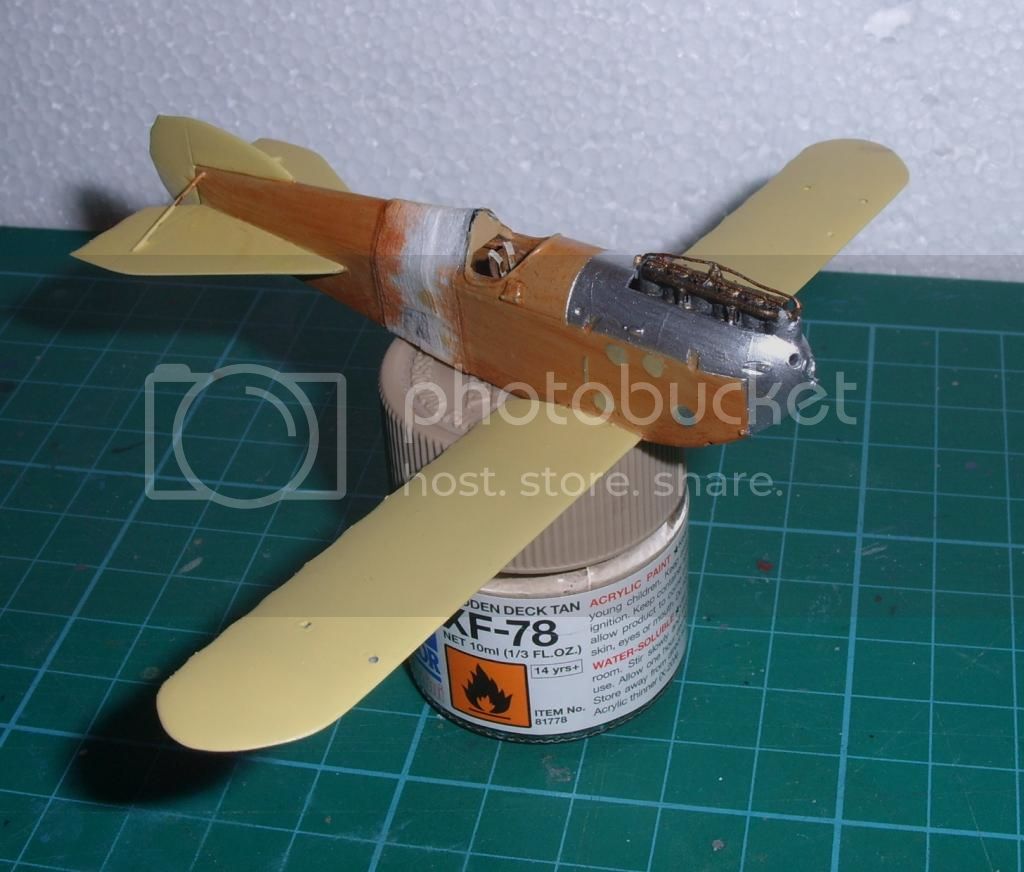
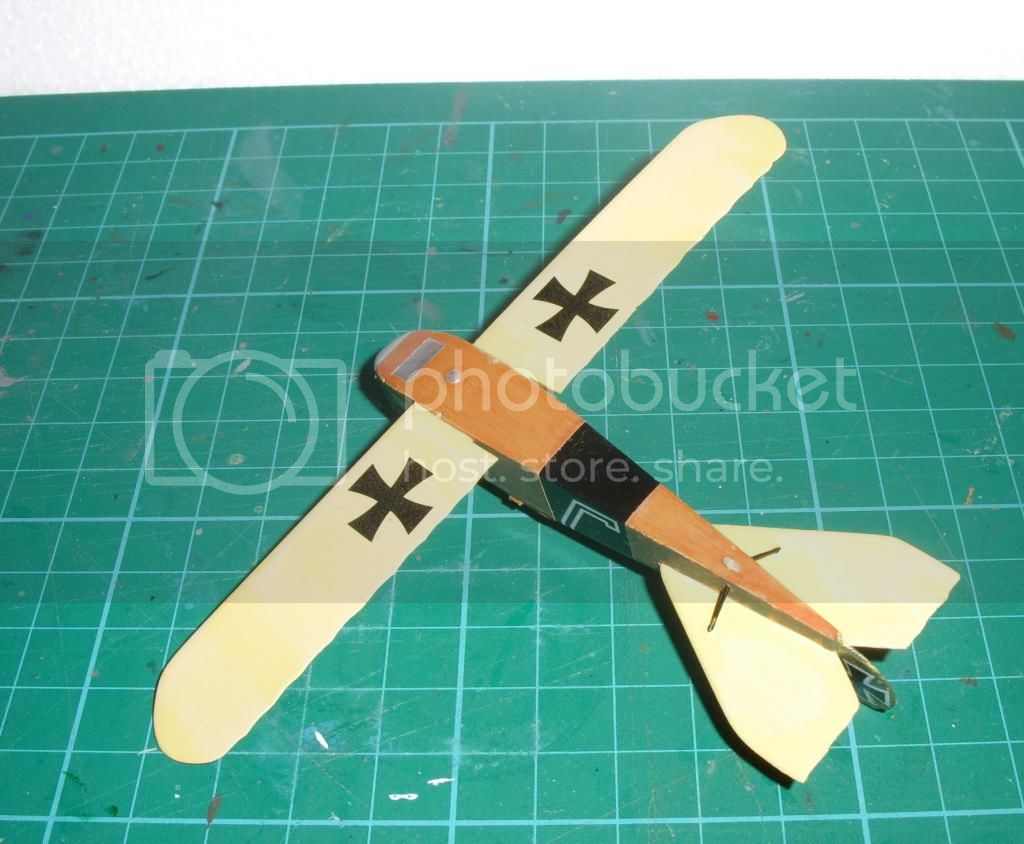
Been a while since my last update, so here's where she's at currently.
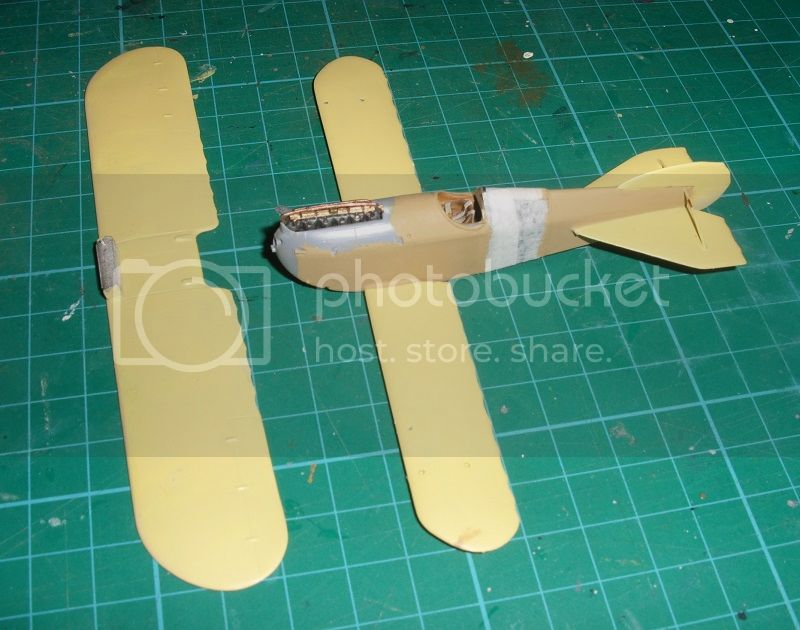
I used Humbrol enamels throughout. Hu74 Linen on the flying surfaces and Hu94 Desert Yellow on the fuselage. The linen turned out very yellow and much brighter than I hoped, so I toned it down with a drybrush of Hu103 Cream on the lower surfaces. Its also given it a slightly used and faded look as well as highlight the subtle rib detail. The top side is less important as around 90% will be covered by the green mottle. The aluminium engine cowling and various small panels are still left to do. I also painted in and masked the black fuselage band. Its only in writing it up that I know realise I did this on the wrong order and probably should have done that last. Live and learn.
The fuselage bottom also got a treatment of oilpaint woodgrain. The colour is a lot richer than I had planned for but still looks ok. I should probably also do the rest of the fuselage before the mottle goes on. You can probably tell that this ones been a bit of a steep learning curve for me. This will now be left to dry before I can mask out and paint the cowlings.
As always comments are welcome.
Stephen
On the bench: 1/72 Mosquito, Lightning F.6, DH.2,
AMT Vulcan Shuttle Surak.
Cyber-Hobby 1:35 Sherman Firefly IC - still stalled.
#372
United Kingdom
Joined: March 10, 2010
KitMaker: 2,568 posts
AeroScale: 1,619 posts
Posted: Tuesday, November 19, 2013 - 09:52 AM UTC
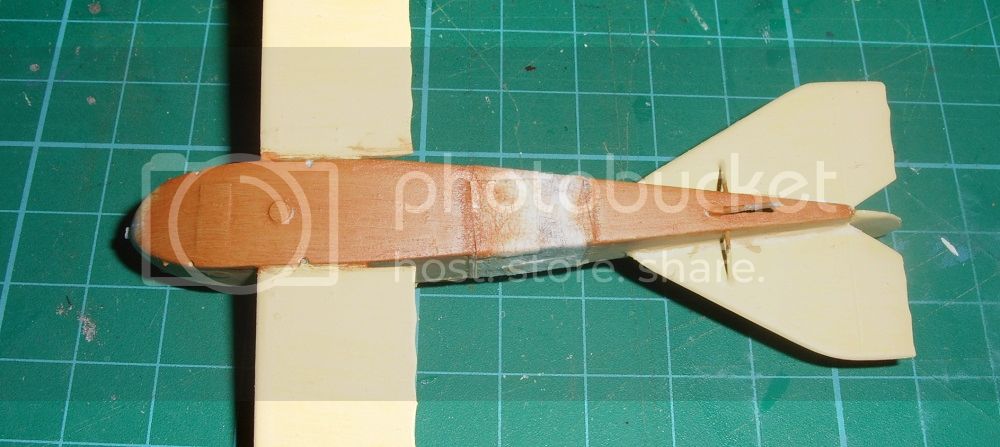
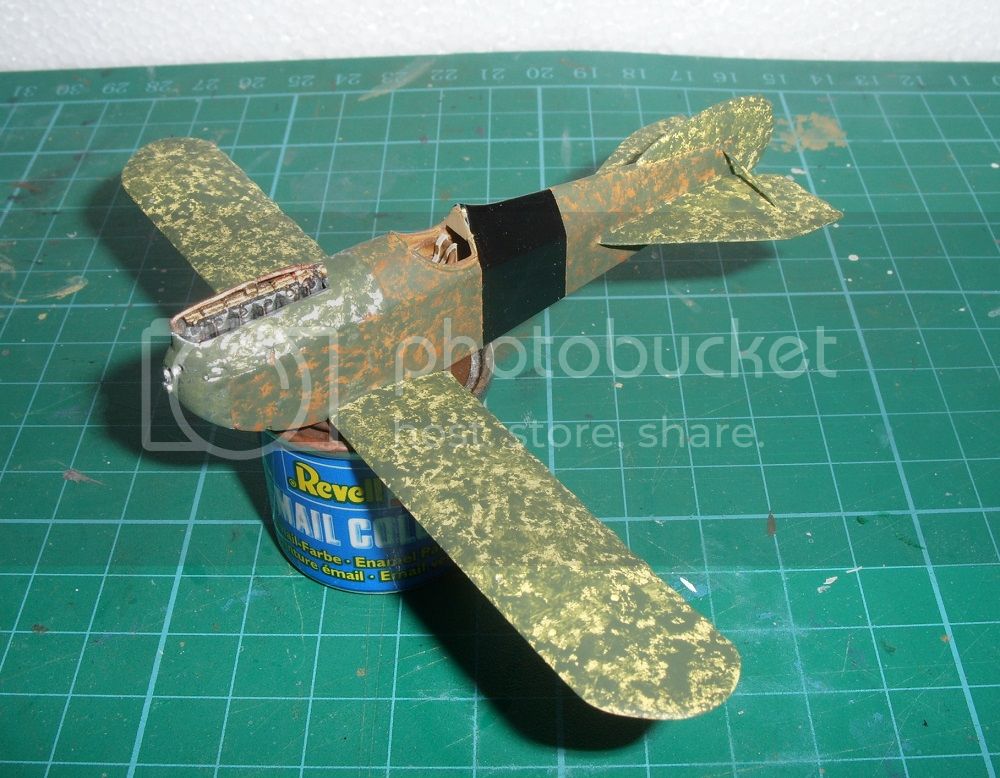
Painting is now nearing completion.
To match the underside I decided an oil wood grain was the best way forward. I used a slightly thinned oil this time for speed, greater brush control around the tail/wings, and faster drying time. While not as good as the underside the effect should look the part beneath the green mottle which will cover around 90% of the upper surfaces. I also painted in the engine cowling and access panels with Humbrol Polished Aluminium. A panel on the upper wing was also painted in too. The fuselage has also had a coat of Klear to seal everything in and gloss the fuselage wood.
Now to add the cammo.
Stephen
On the bench: 1/72 Mosquito, Lightning F.6, DH.2,
AMT Vulcan Shuttle Surak.
Cyber-Hobby 1:35 Sherman Firefly IC - still stalled.
#372
United Kingdom
Joined: March 10, 2010
KitMaker: 2,568 posts
AeroScale: 1,619 posts
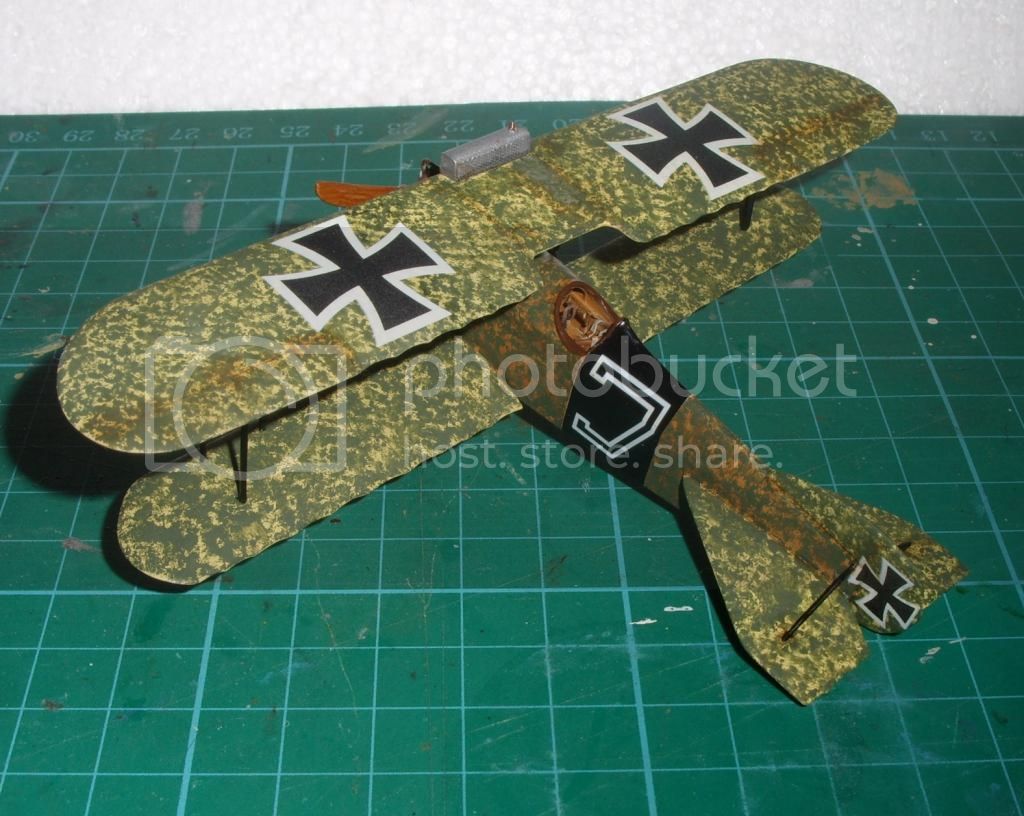
Posted: Monday, November 25, 2013 - 10:07 AM UTC
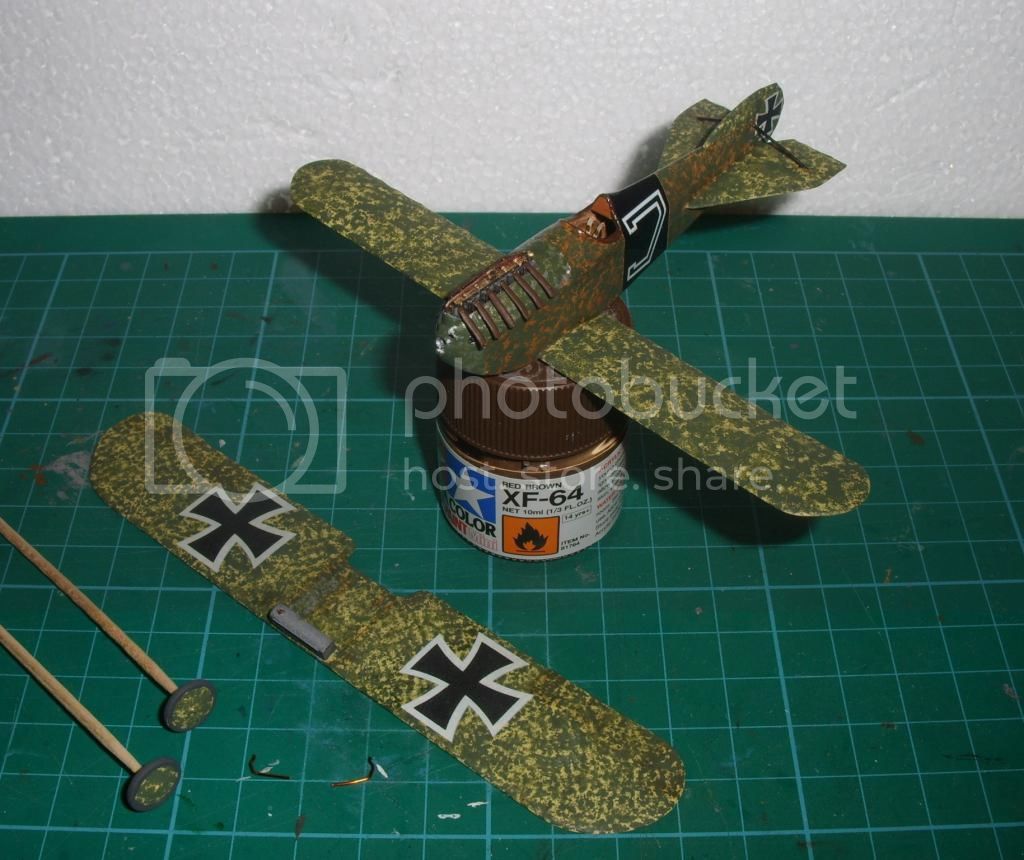
Camouflage now applied.
I used Hu117 acrylic green stippled on with an old brush. I wanted to capture the rough and ready field applied cammo I'd seen in what few photo's I could find.
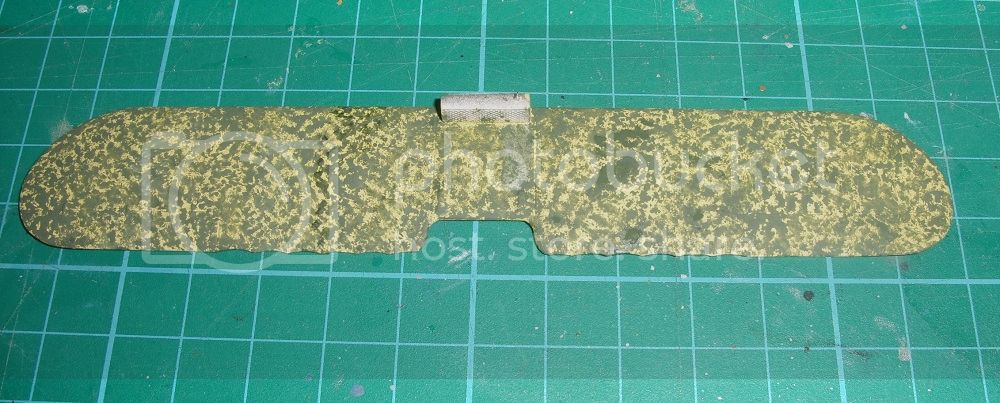
I'll leave it for a day or so to harden and then its time for decals.
Comments welcome.
Stephen
On the bench: 1/72 Mosquito, Lightning F.6, DH.2,
AMT Vulcan Shuttle Surak.
Cyber-Hobby 1:35 Sherman Firefly IC - still stalled.
Colorado, United States
Joined: January 25, 2004
KitMaker: 11,669 posts
AeroScale: 11,011 posts
Posted: Monday, November 25, 2013 - 02:01 PM UTC
". . .The most important thing is to know why you build and then get the most that you can out of building." via D.D.
#372
United Kingdom
Joined: March 10, 2010
KitMaker: 2,568 posts
AeroScale: 1,619 posts
Posted: Monday, December 02, 2013 - 09:21 AM UTC
Thanks Stephen.
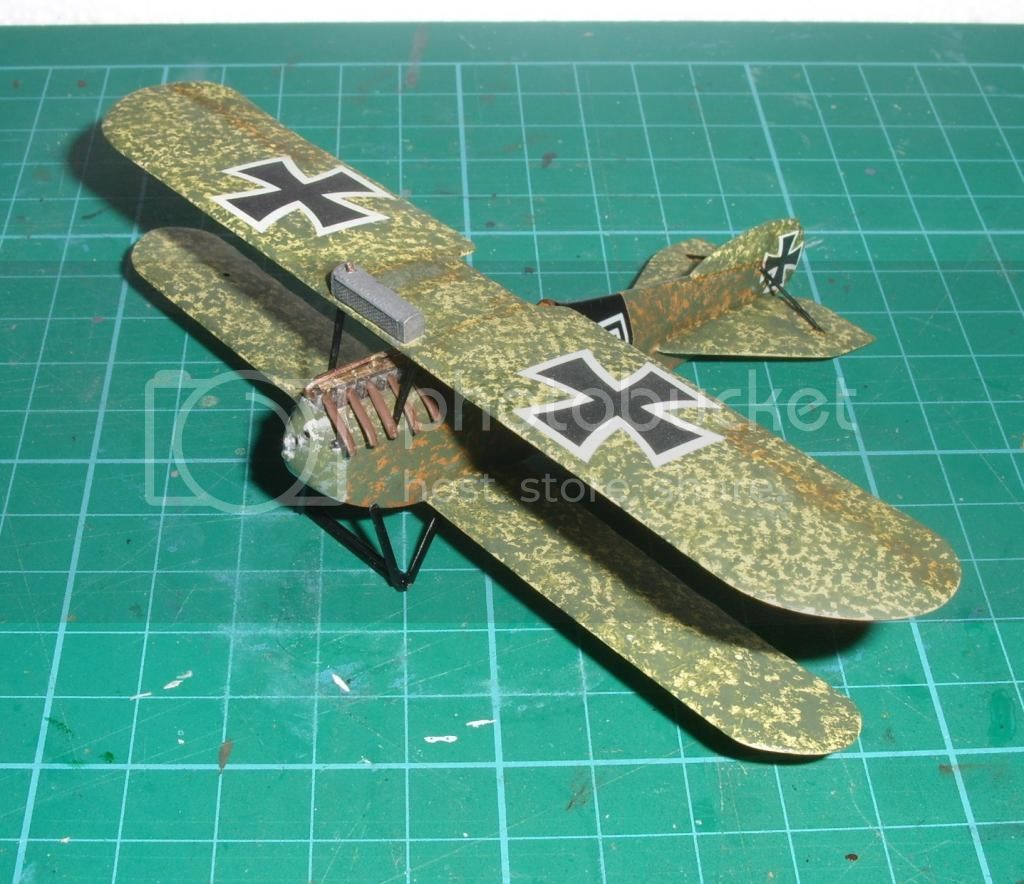
The decals have now been applied. They came from an old Formadecal set I've had for a while. They behaved themselves very well, just needed the carrier film trimming a little. I think the crosses on the tail are a bit too big, but were the smallest on the sheet.
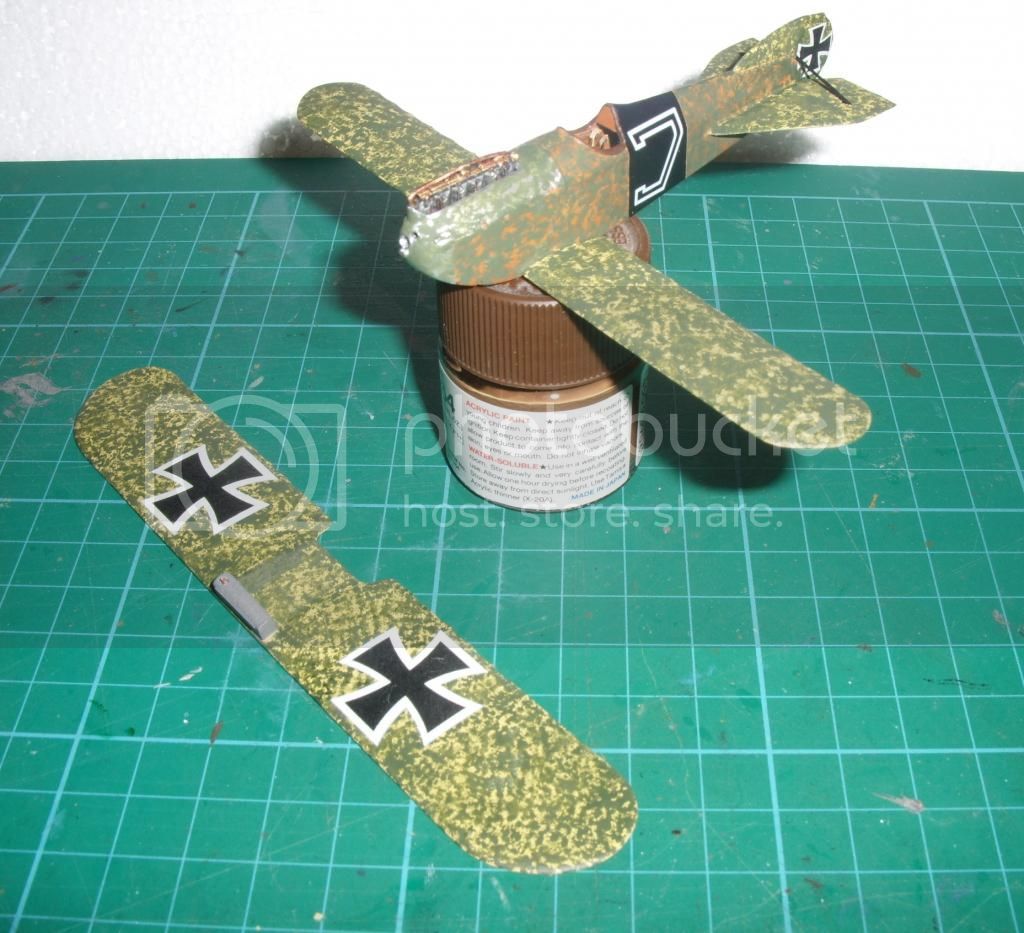
After these have dried out I'll add a coat of matt on the flying surfaces and another of Klear on the fuselage. And then I'll take a deep breath and start final assembly.
Ste
On the bench: 1/72 Mosquito, Lightning F.6, DH.2,
AMT Vulcan Shuttle Surak.
Cyber-Hobby 1:35 Sherman Firefly IC - still stalled.
South Australia, Australia
Joined: August 14, 2007
KitMaker: 5,926 posts
AeroScale: 2,201 posts
Posted: Monday, December 02, 2013 - 09:46 AM UTC
Very nice Stephen!
With that huge white metal engine up front did you have to put weight in the tail to hold it down??
You may be right, I may be crazy.
#372
United Kingdom
Joined: March 10, 2010
KitMaker: 2,568 posts
AeroScale: 1,619 posts
Posted: Monday, December 02, 2013 - 10:04 AM UTC
Quoted Text
Very nice Stephen!
With that huge white metal engine up front did you have to put weight in the tail to hold it down??
Cheers Warren. You know, I never thought of that. The engine is roughly above the main gear so it should stay balanced.
On the bench: 1/72 Mosquito, Lightning F.6, DH.2,
AMT Vulcan Shuttle Surak.
Cyber-Hobby 1:35 Sherman Firefly IC - still stalled.
#372
United Kingdom
Joined: March 10, 2010
KitMaker: 2,568 posts
AeroScale: 1,619 posts
Posted: Tuesday, December 10, 2013 - 10:01 AM UTC
With only a week to go here's how she's looking.
Fuselage and wings have been satin or matted wherever was appropriate. Wheels are painted up and exhausts are glued on. Next to the wheels are two of the water pipes that feed from the radiator to the engine. I made these from thin copper wire using the instructions templates as guides. A third is needed that runs from the centre to the front of the engine. I'll scrounge that one from a Roden Albatros D.II as its practically identical. I have yet to paint the struts. Had a minor disaster as I had done thos elast week but found the paint had dried tacky even after being left. I don;t think I did a very good job of stirring the paint, so I thought it best to strip them rather than attempt to paint over. I'll use acrylic on those this time to speed up drying times. I only really have one more working night as my other half has a lot planned this time of year. Fingers crossed I can make it to the finish line.
On the bench: 1/72 Mosquito, Lightning F.6, DH.2,
AMT Vulcan Shuttle Surak.
Cyber-Hobby 1:35 Sherman Firefly IC - still stalled.
Colorado, United States
Joined: January 25, 2004
KitMaker: 11,669 posts
AeroScale: 11,011 posts
Posted: Tuesday, December 10, 2013 - 04:05 PM UTC
Two thumbs way up!

". . .The most important thing is to know why you build and then get the most that you can out of building." via D.D.
Noord-Holland, Netherlands
Joined: January 28, 2007
KitMaker: 1,945 posts
AeroScale: 388 posts
Posted: Wednesday, December 11, 2013 - 12:37 AM UTC
Hi Stephen,
what a nice thread to read! The neat black stripe with the J is a nice contrast to the irregular camo.

Jelger
On the workbench:
- Tamiya P-47D 1/48
- Eduard Mig21 1/144
#372
United Kingdom
Joined: March 10, 2010
KitMaker: 2,568 posts
AeroScale: 1,619 posts
Posted: Wednesday, December 11, 2013 - 11:14 AM UTC
Quoted Text
Hi Stephen,
what a nice thread to read! The neat black stripe with the J is a nice contrast to the irregular camo.
Jelger
Thanks guys.
It's been a fairly trouble free kit given its short-run nature. I've now collected a small stash of Pegasus kits to work my way through since starting this one. The same Phonix appears on the cover of Ospreys Austro-Hungarian Aces. Its shown with a red band, but the rest of the book shows black bands for the squadron in the profile section. The black stands out much better I think.
I managed to repaint the struts tonight along with some touching up on the rest of the model. All going well I should be able to start final assembly tomorrow.
On the bench: 1/72 Mosquito, Lightning F.6, DH.2,
AMT Vulcan Shuttle Surak.
Cyber-Hobby 1:35 Sherman Firefly IC - still stalled.
#372
United Kingdom
Joined: March 10, 2010
KitMaker: 2,568 posts
AeroScale: 1,619 posts
Posted: Thursday, December 12, 2013 - 11:57 AM UTC
Had some real 'fun' tonight with this.
Undercarriage struts went on just fine, then it came to attaching the cabane struts ready for the upper wing. Well that's when I found that both sets of struts are different sizes! Great. One is noticeably smaller in height than the other and because of the 'N' shape I can't see how to trim the larger accurately. I just knew that some spanner would be thrown into the works at some point.
Something to think about while I'm away from the bench the next three days.
On the bench: 1/72 Mosquito, Lightning F.6, DH.2,
AMT Vulcan Shuttle Surak.
Cyber-Hobby 1:35 Sherman Firefly IC - still stalled.
Alberta, Canada
Joined: July 26, 2010
KitMaker: 1,032 posts
AeroScale: 1,025 posts
Posted: Monday, December 16, 2013 - 12:56 AM UTC
Stephen,
Hope you've made it back and the strut problem is resolved. I'm within 3-4 hours of completion of my entry with today being "doomsday" for KotS III, looks like we both played it pretty close to the wire!
That camo is magnificent, well done!
Cheers,
Lance

Officially Retired as of 20 August 2013 and looking forward to some un-interrupted bench time. Currently starting Roden's Nieuport 28 and hoping to follow that with another WNW Fokker DVII.
#243
England - North East, United Kingdom
Joined: March 21, 2008
KitMaker: 996 posts
AeroScale: 915 posts
Posted: Monday, December 16, 2013 - 01:31 AM UTC
Nice bird, Stephen, if you can't finish it here the Hangar Queen campaign gives you two more weeks
Somehow you knew Phonix struts would be either brilliant or a total swine, like doing a Warren truss wing, the Italieri Cr42 could have gone either way but fortunately Italieri got it right.
Andrew
Pfalz DIIIa, Eduard 1/48 Uffz Max Hitschler Jasta 18 Late 1917
#372
United Kingdom
Joined: March 10, 2010
KitMaker: 2,568 posts
AeroScale: 1,619 posts
Posted: Monday, December 16, 2013 - 09:39 AM UTC
Thanks guys. It doesn't look like I'll make the deadline despite my best efforts tonight. Rushing will only make things worse.
I was able to file the longer struts down a little to match the shorter ones. I put it down to a casting fault. But I really should have double checked that earlier in the build. I'll remember that next time.
I have been able to attach the cabane struts and then the upper wing. The upper wing does look a little lopsided when viewed from the front, but its better than it was before.
The salvaged struts I had planned on using are a little too short so looks like I'll have to make a set from the kits extruded strut. I'll keep posting till she's done.
On the bench: 1/72 Mosquito, Lightning F.6, DH.2,
AMT Vulcan Shuttle Surak.
Cyber-Hobby 1:35 Sherman Firefly IC - still stalled.
#243
England - North East, United Kingdom
Joined: March 21, 2008
KitMaker: 996 posts
AeroScale: 915 posts
Posted: Monday, December 16, 2013 - 10:48 AM UTC
Good, keep going, the suspense is killing me! Phonix struts are a pattern I have never tried, they could square things up a bit, good luck
Andrew
Pfalz DIIIa, Eduard 1/48 Uffz Max Hitschler Jasta 18 Late 1917
#372
United Kingdom
Joined: March 10, 2010
KitMaker: 2,568 posts
AeroScale: 1,619 posts
Posted: Monday, December 16, 2013 - 12:46 PM UTC
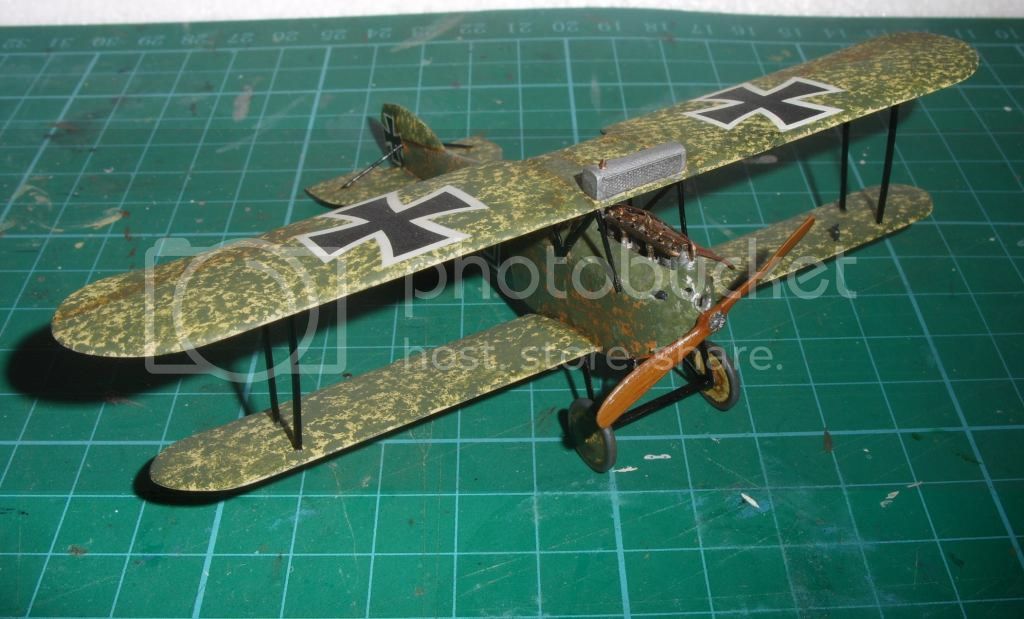
I'm coming in at the last moment but I'm calling it done. The kit had just enough strut material to make up a full set. Not sure what I would have done if I'd ballsed those up! She may not be perfect and some bits could do with smartening up, but it finally looks like a Phonix.
Enjoy.

I'd like to thank everyone for the words of encouragement during the build, especially at the end. I think I would have given up had it not been for the interest everyone showed.
All I can say is go out and get one. I learned more from building this than I have from a lot of other kits and I'll be starting another Pegasus kit in the near future.
Stephen
On the bench: 1/72 Mosquito, Lightning F.6, DH.2,
AMT Vulcan Shuttle Surak.
Cyber-Hobby 1:35 Sherman Firefly IC - still stalled.


