_GOTOBOTTOM
Early Aviation
Discuss World War I and the early years of aviation thru 1934.
1/32 Roden Siemens-Schuckert D.III Kessler
StukaJr
_VISITCOMMUNITY
California, United States
Joined: April 26, 2010
KitMaker: 346 posts
AeroScale: 292 posts
Posted: Friday, June 06, 2014 - 11:41 AM UTC
The build continues:

The guns and all of fuselage detail is in place... The tail skid has been fused back together and pinned - no longer going anywhere... Struts and landing gear supports have been pinned to the fuselage, I've also put pins through wheel axles - overall rigidity is very solid now. The clear part (windscreen) was missing from the kit so I have used WnW replacement from my spares box.


The wheels are pre-weathered flat, on each side. This aircraft will receive light weathering but heavy where it counts.

Both Spandau sights have lost their internal crosshairs - I need to remember to always install those last, as I happen to knock them around in all of the builds... Will be snipping these off and installing spare replacement from my WnW spares box.

Next step is installation of the top wing and onto the home stretch.

berndm
_VISITCOMMUNITY
Niedersachsen, Germany
Joined: March 26, 2014
KitMaker: 844 posts
AeroScale: 630 posts
Posted: Friday, June 06, 2014 - 08:12 PM UTC
Hi Ivan, what a beauty !Thumbs up : - )

Bernd
JackFlash
_VISITCOMMUNITY
Colorado, United States
Joined: January 25, 2004
KitMaker: 11,669 posts
AeroScale: 11,011 posts
Posted: Saturday, June 07, 2014 - 05:58 AM UTC
Very decent. It looks like its coming along well.
thegirl
_VISITCOMMUNITY
Alberta, Canada
Joined: January 19, 2008
KitMaker: 6,743 posts
AeroScale: 6,151 posts
Posted: Saturday, June 14, 2014 - 12:10 AM UTC
I have been missing in action for a spell .

Very nicely done so far Ivan . Can't even notice your repair job on the tail skid .


Terri
wing_nut
_VISITCOMMUNITY
New Jersey, United States
Joined: June 02, 2006
KitMaker: 1,212 posts
AeroScale: 468 posts
Posted: Monday, June 16, 2014 - 03:45 AM UTC
Hmmm... nice!
BoRoss78
_VISITCOMMUNITY
California, United States
Joined: February 28, 2013
KitMaker: 36 posts
AeroScale: 36 posts
Posted: Friday, June 20, 2014 - 12:45 AM UTC
It might be that the SSW D.III & IV simply used the late version ring & bead sights without the cross hair-centers.
JPTRR
Staff MemberManaging Editor
RAILROAD MODELING
#051
_VISITCOMMUNITY
Tennessee, United States
Joined: December 21, 2002
KitMaker: 7,772 posts
AeroScale: 3,175 posts
Posted: Friday, June 20, 2014 - 01:17 AM UTC
Beautiful work!
CaptnTommy
_VISITCOMMUNITY
Connecticut, United States
Joined: October 26, 2009
KitMaker: 424 posts
AeroScale: 389 posts
Posted: Friday, June 20, 2014 - 01:32 AM UTC
In the Profile Publication (yes I'm that old) on the SSW D-III, the author writes of a formation of DeHavilands at 18--20 thousand feet being surprized as a flight of D-IIIs climbed vertically through their formation.

I look at your model and I think of that image. The model is brought to life by your work.

Captn Tommy
StukaJr
_VISITCOMMUNITY
California, United States
Joined: April 26, 2010
KitMaker: 346 posts
AeroScale: 292 posts
Posted: Friday, June 20, 2014 - 01:51 PM UTC
Thanks everybody for the comments! The crate is complete, down to the weathering - it's awaiting the arrival of the Propeller blade factory decals (Thanks again, Terri!) and then the final process to be shared shortly!

BoRoss78 - it's quite possible that the guns utilized rings only and the model is built with cables suspending two frames - one before windscreen and one right at the edge where engine cowling picks up. Superimposing two frames (right in pilot's view) produces aiming point for the guns/aircraft - there are even pictures in my Windsock volume suggest that no-cross-hairs may very well be the case. I have, however, double guessed myself and installed spare PE sights I had with cross-hairs.

CaptnTommy - Thanks for the mental picture! I'll need to give that a read too. The aircraft was indeed liked by its pilots if the early versions did not destroy their engines early on. Going to post the exact quotes later
StukaJr
_VISITCOMMUNITY
California, United States
Joined: April 26, 2010
KitMaker: 346 posts
AeroScale: 292 posts
Posted: Monday, June 30, 2014 - 07:50 PM UTC
And without further ado... It's (practically) finished! The prop decals that Terri kindly have sent are still en route and I will adorn them onto the prop blades (when the Postal Service decides to deliver them to me)...

Jage II pilots have penned an amusing poem, based on the "Ten Little Indians", about the engine problems of the early Sh.III engine. I feel it's a fitting closure to this (nearly) completed build:

1) Piston ring seizure


2) Spark plug ejection


3) Loss of piston


4) Faulty magneto


5) Piston Rod "Salad"


6) Faulty Throttle


7) Cylinders turning blue


8) Bearing failure


9) Total engine seizure and


10) Hardly reach 3000 metres then too it was "kaputt"


"For us an engine useless is that devours itself too quick"


Though notably, the late model (such as this) did not suffer the same problems as aforementioned initial delivery Sh.III's

Note - all photos are 1600 pixel in width - view image in separate tab to inspect in zoom detail.

berndm
_VISITCOMMUNITY
Niedersachsen, Germany
Joined: March 26, 2014
KitMaker: 844 posts
AeroScale: 630 posts
Posted: Tuesday, July 01, 2014 - 05:05 AM UTC
Hi Ivan, what a beautiful model ! It was tricky to build
and you produced a masterpiece. Well done, i like it very much.
Wood effect, metal effects, rigging and more TOP !

Bernd
JackFlash
_VISITCOMMUNITY
Colorado, United States
Joined: January 25, 2004
KitMaker: 11,669 posts
AeroScale: 11,011 posts
Posted: Tuesday, July 01, 2014 - 07:55 AM UTC
I like it! Give us your opinion on the aftermarket PE.
lcarroll
_VISITCOMMUNITY
Alberta, Canada
Joined: July 26, 2010
KitMaker: 1,032 posts
AeroScale: 1,025 posts
Posted: Tuesday, July 01, 2014 - 03:11 PM UTC
Ivan,
That's a lot of hard effort and significant talent to produce a model of this quality from a less then perfect Kit!
Congratulations on a really wonderful Build, you can be very proud of this one!!
Cheers,
lance
StukaJr
_VISITCOMMUNITY
California, United States
Joined: April 26, 2010
KitMaker: 346 posts
AeroScale: 292 posts
Posted: Tuesday, July 01, 2014 - 08:55 PM UTC
Lance, Bernd - Thank you very much!

Jack, sure thing!

BrenGun.cz's photo-etch - I really liked it! The ordering process was smooth and I had it fast and no hassle. No Spandau jackets and no seatbelts included in the specific plane PE is a bit of a head scratcher, but value is still very good for what you get.

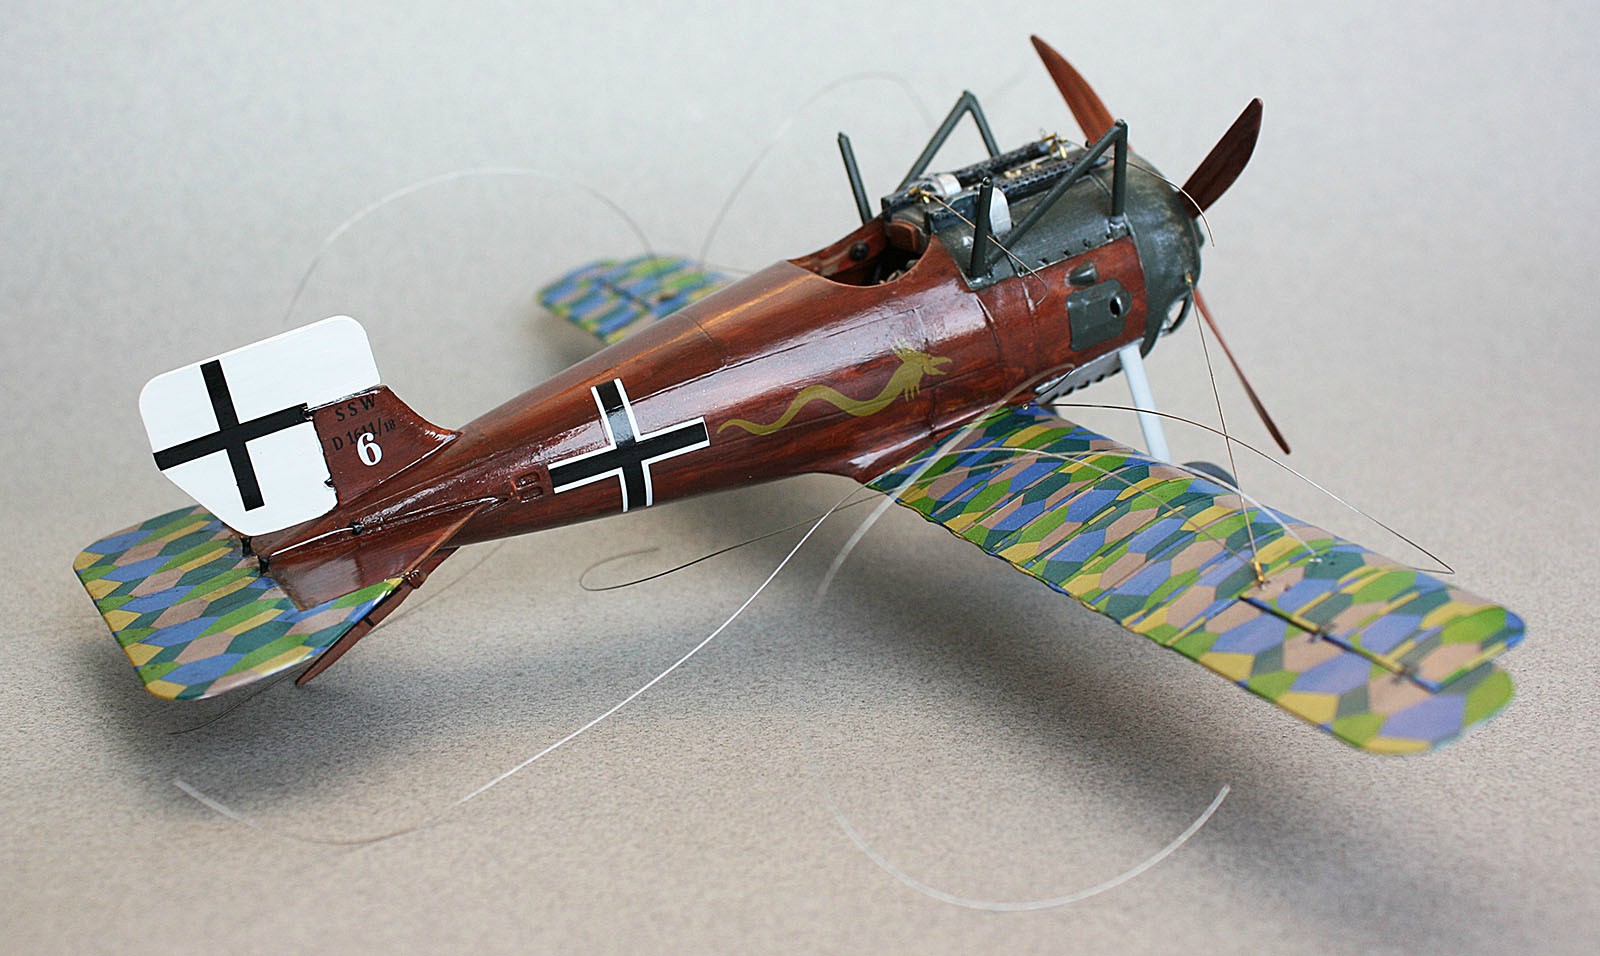
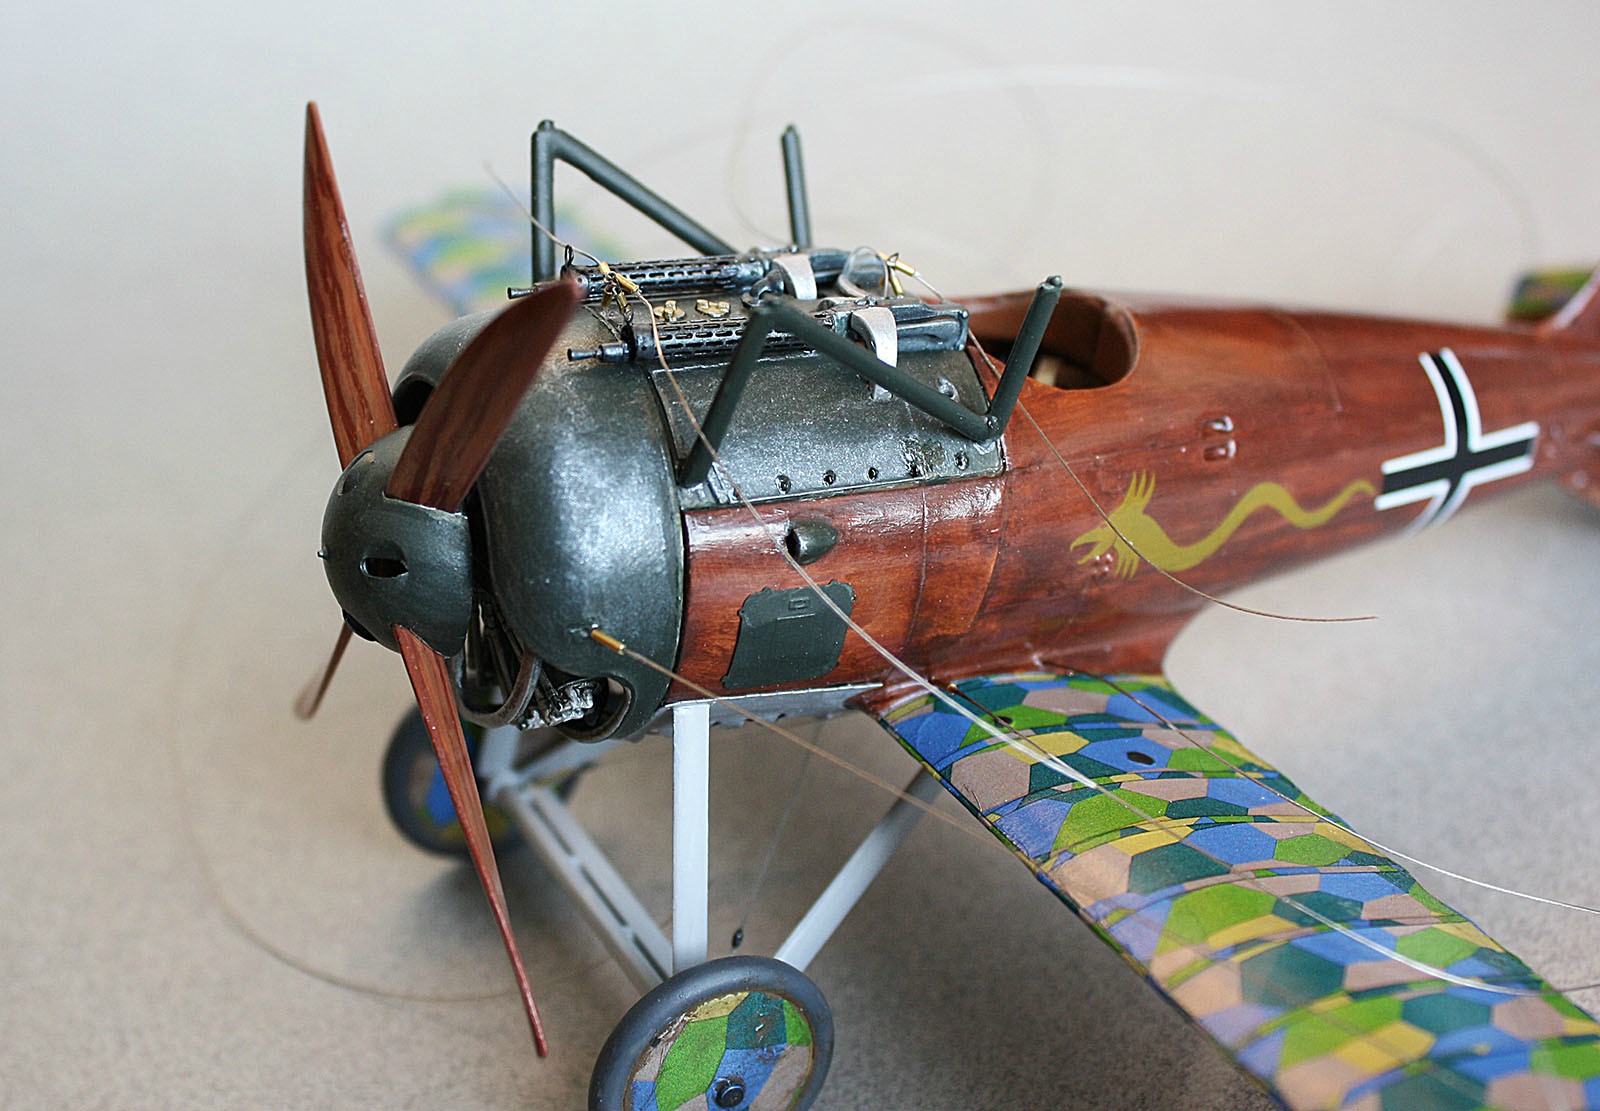
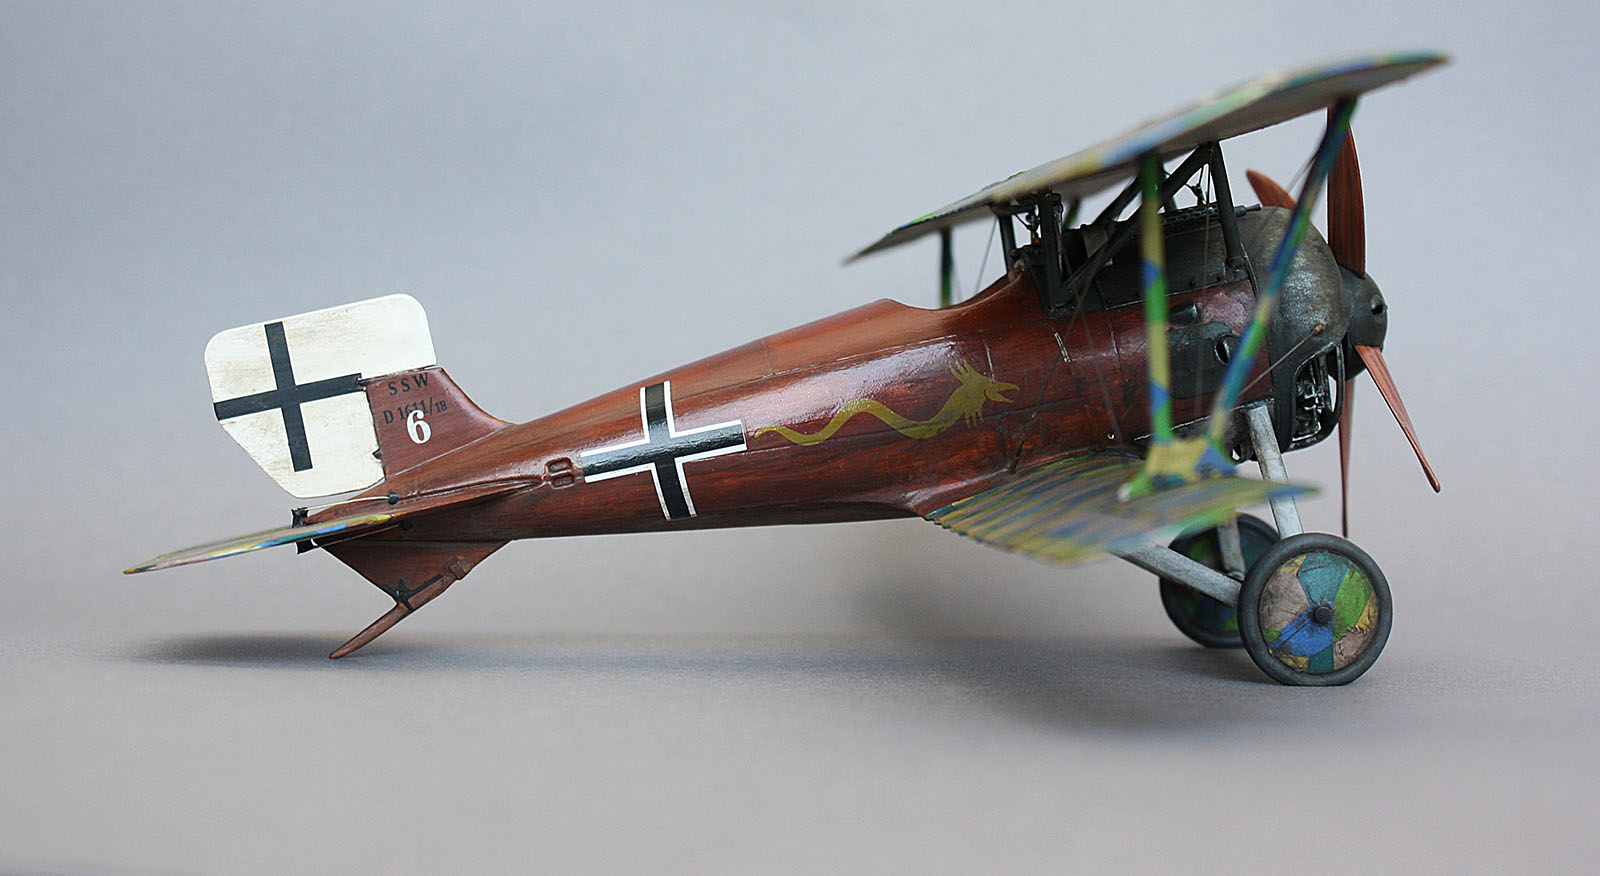
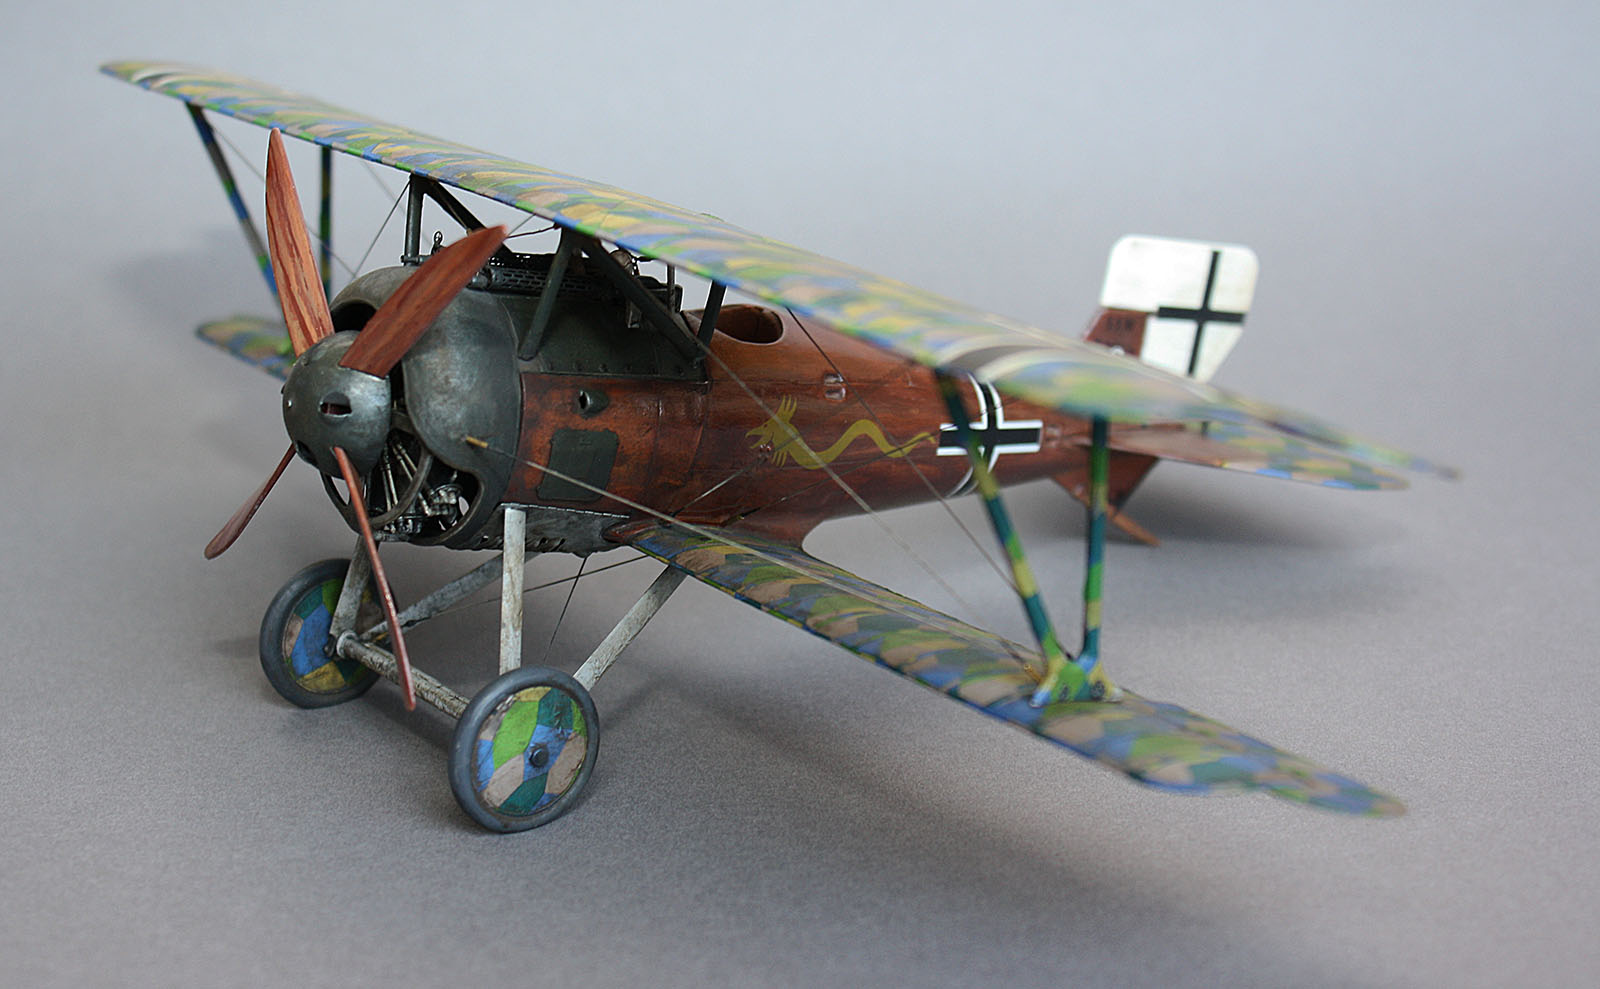
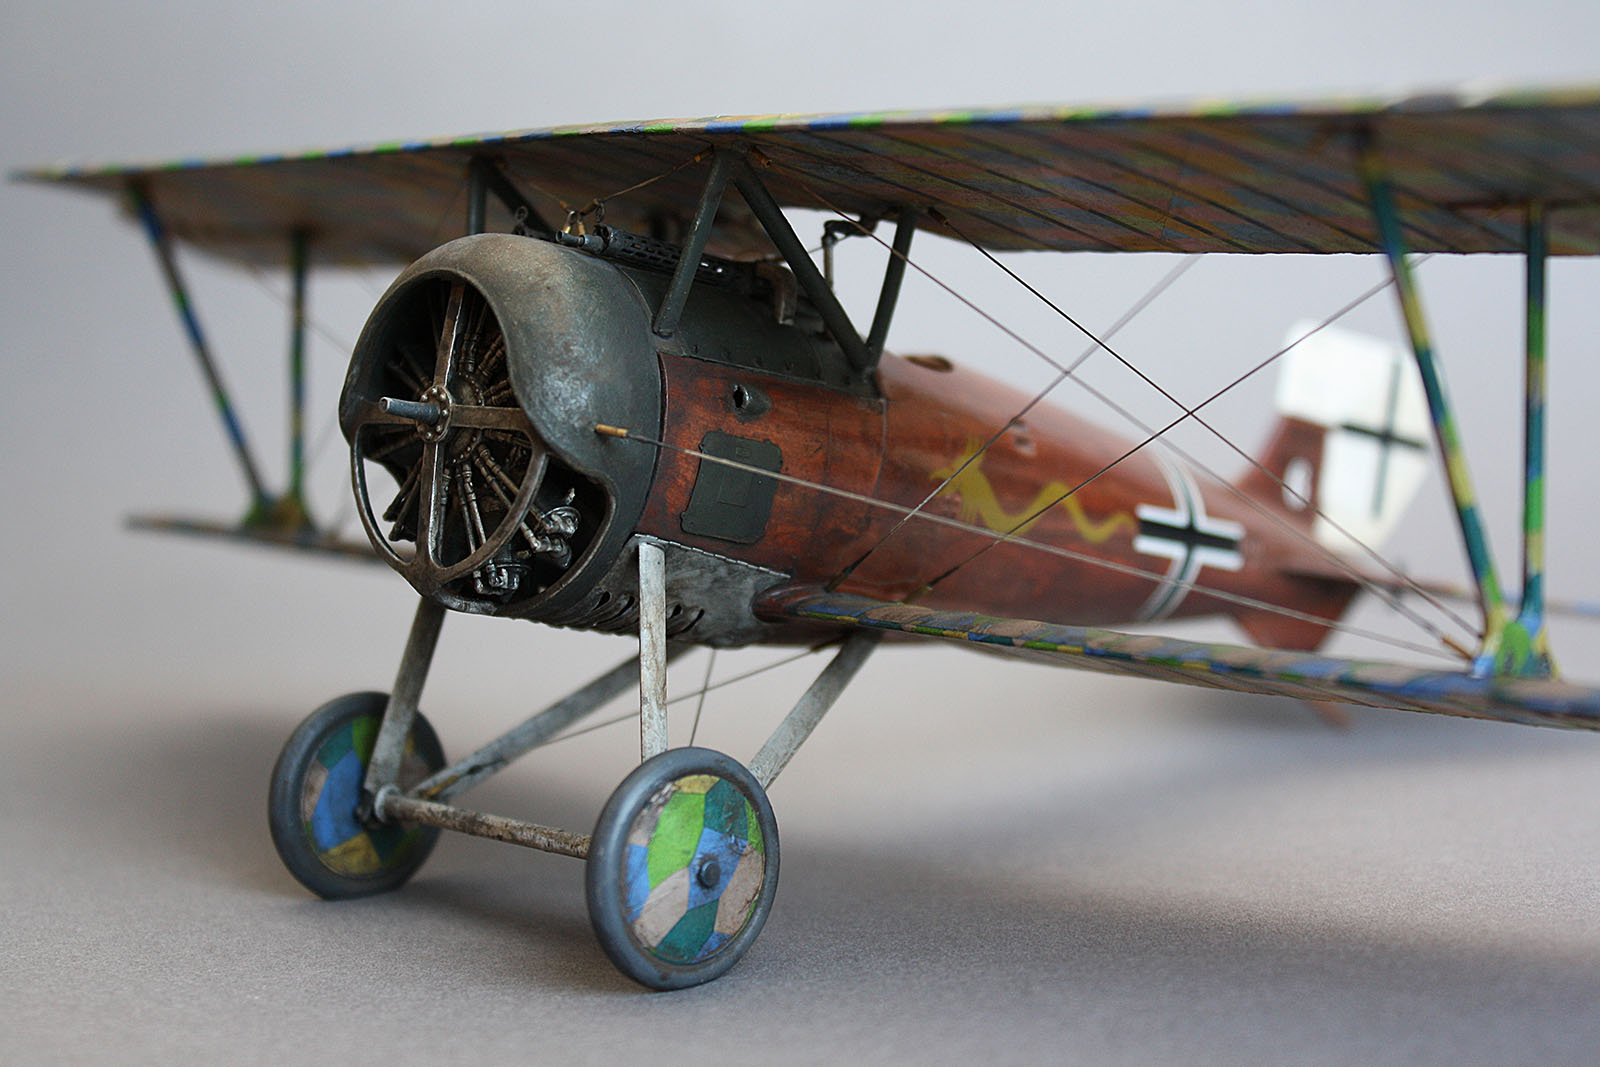
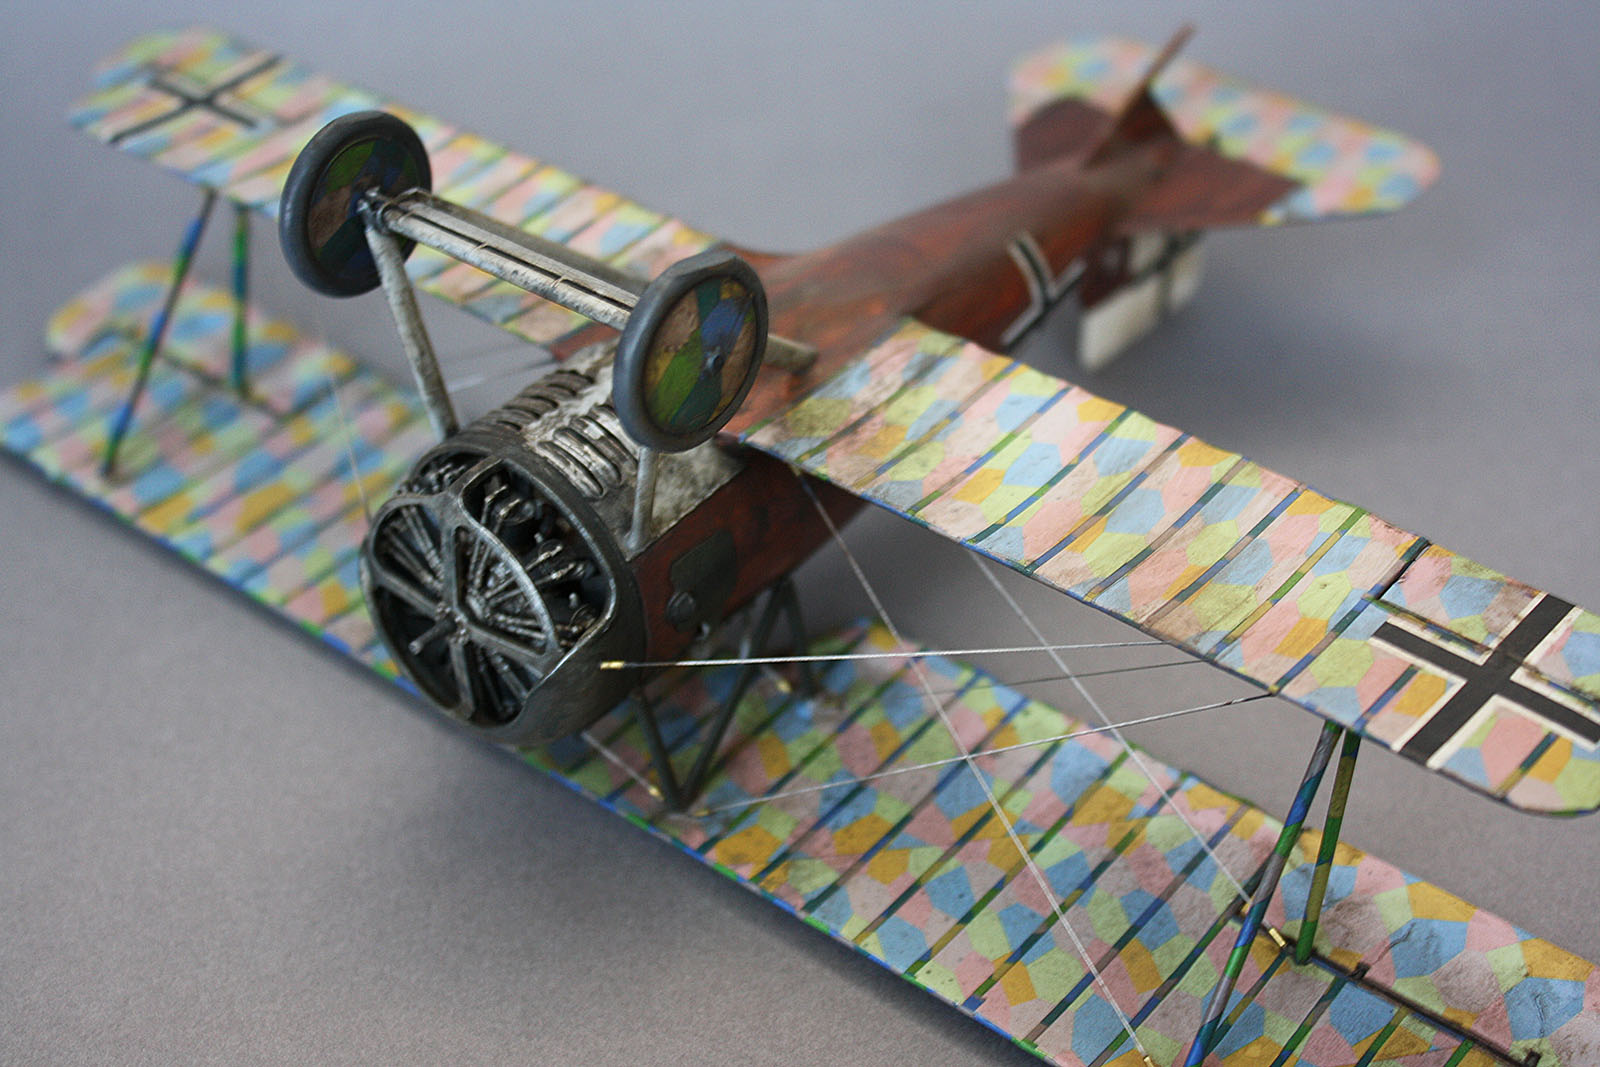
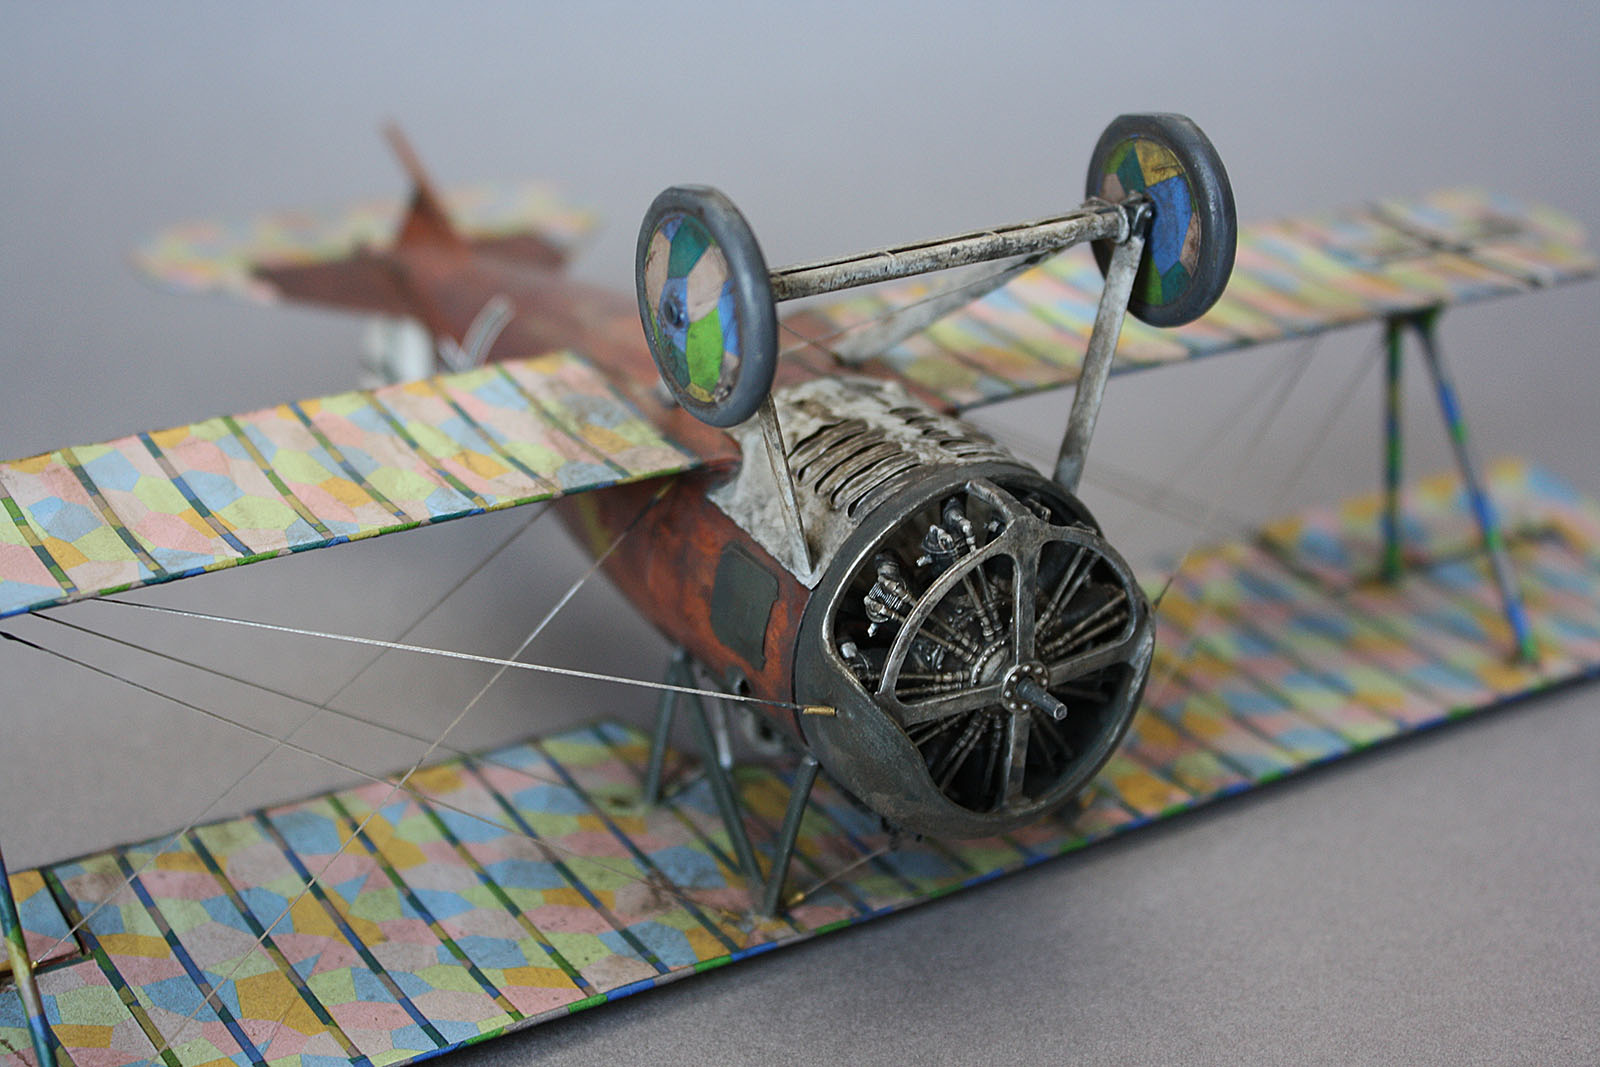
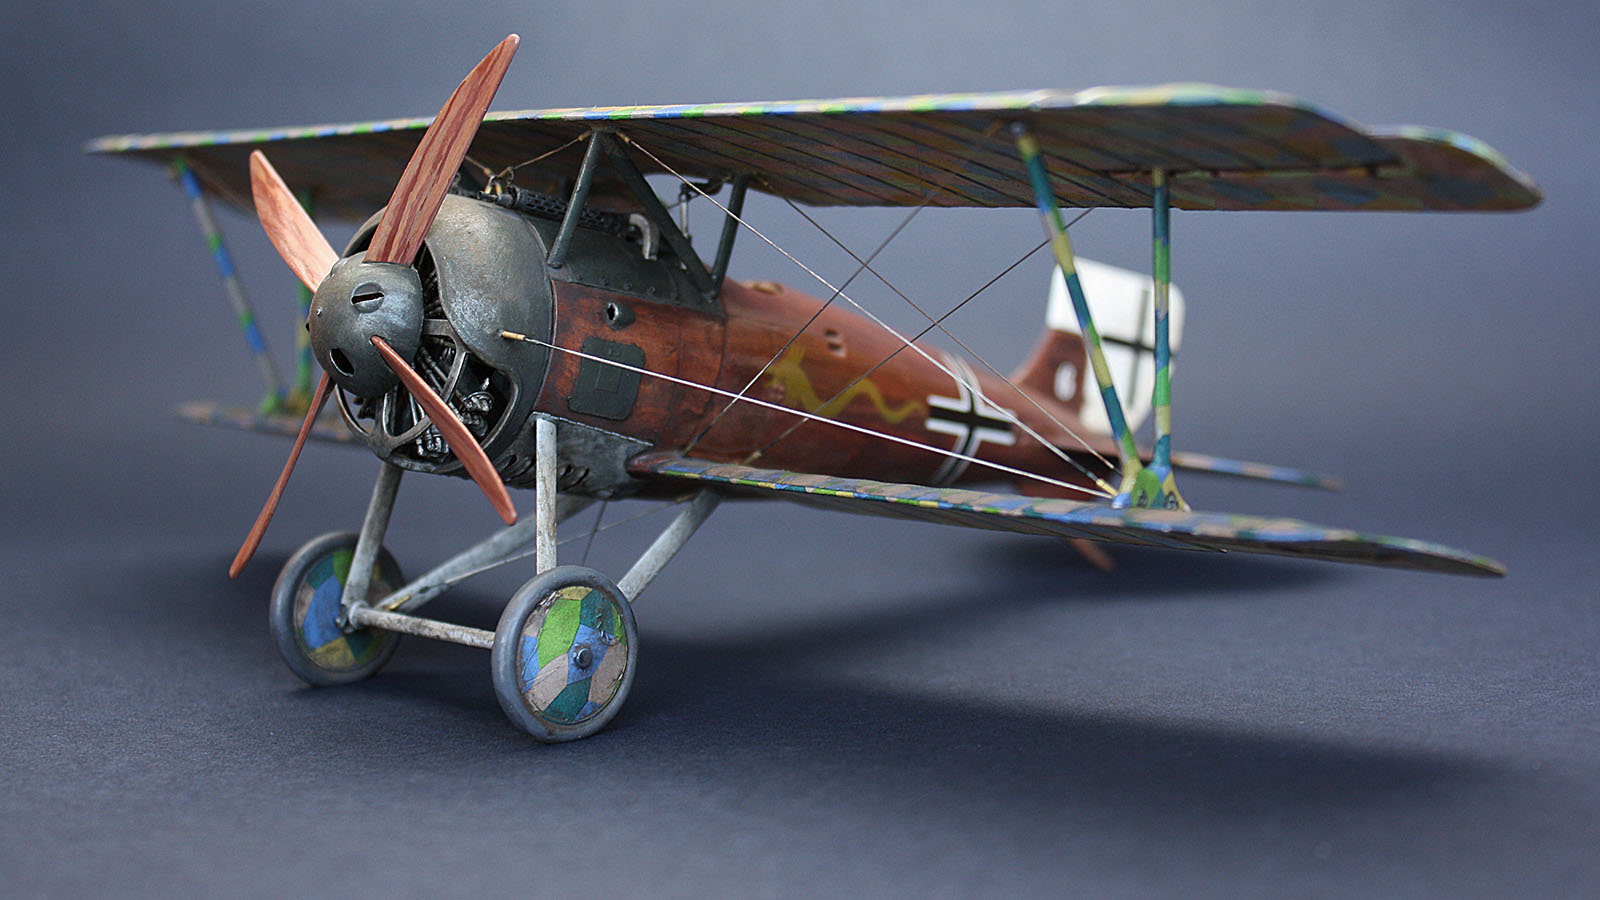
PROS:

-It really adds to the kit! Corrected "chin pan" with open louvers and extending correctly over the fuselage, additions to interior framing and controls (visible through cockpit opening), separate access hatches over wood and metal fuselage and landing skid hardware - all provide that extra touch. There is respectable number of improvements to the original plastic, even if one is shy of real fine and tiny details.

-Brass is "just right". It can be bent and rolled without annealing, though the latter helps. Details range from big hatches to tiny wingnuts and full set of "loop and length" for making turnbuckles.

-Early and late details are clearly marked in the instructions.
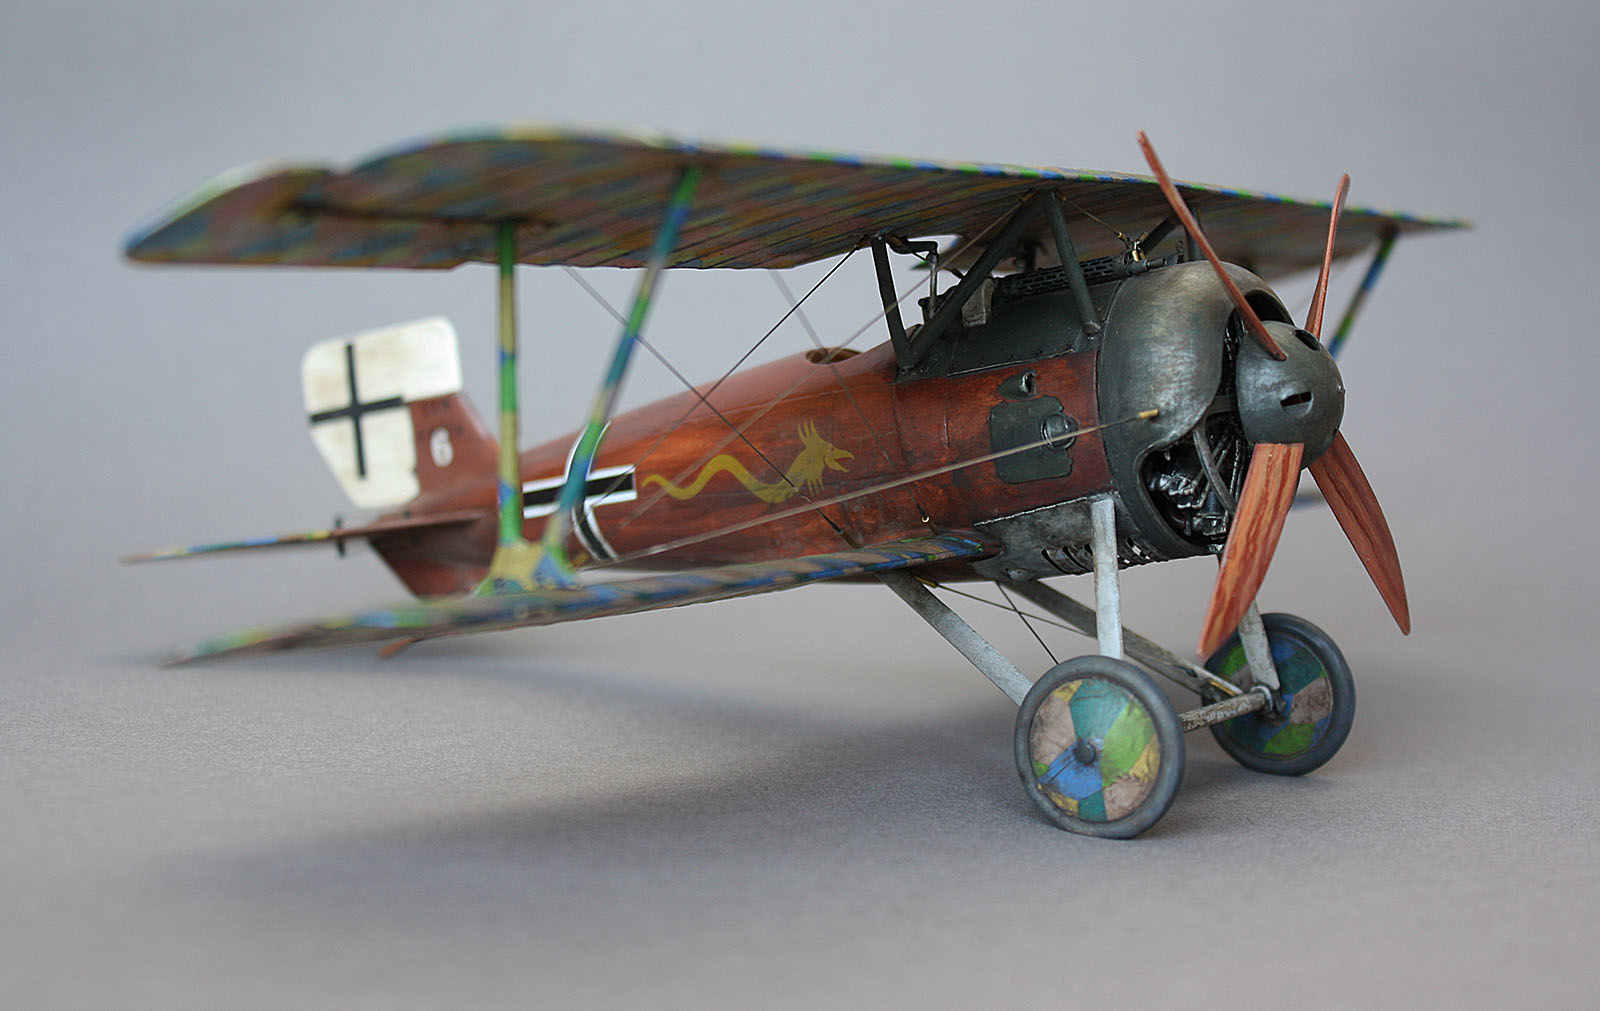
CONS:

-instructions are not really sufficient for the task of applying some of the detail pieces. Make sure to have Windsock Datafile 029 or other reference material on the subject. Some elements are straightforward and easy to place, some are drawn awkwardly, some are not clear and one detail illustrated completely wrong. The latter is the reason why my aim guide frames are too high - I corrected early on, but instructions place it with lines too far apart and aiming point way over pilot's point of view.

-instructions also don't clue you in when modifications are needed on Roden's plastic for parts to be installed. I was hoping for Eduard level of PE instructions, though most are rather obvious / can be guessed correctly.

Somewhere in between:

-this is a precision Photo-etch kit for a very loosely fitting styrene kit... I had a couple of fitting difficulties, but I cannot tell if it was poorly fitted styrene or if brass was slightly undersized... My initial reaction would be to make "chin pan" slightly larger as it's pretty easy to mess that one up.

In retrospect, the CONS are really more of an "Experienced Builder only" - I'd probably have a lot less issues second build around or if I were more experience with building Roden kits.

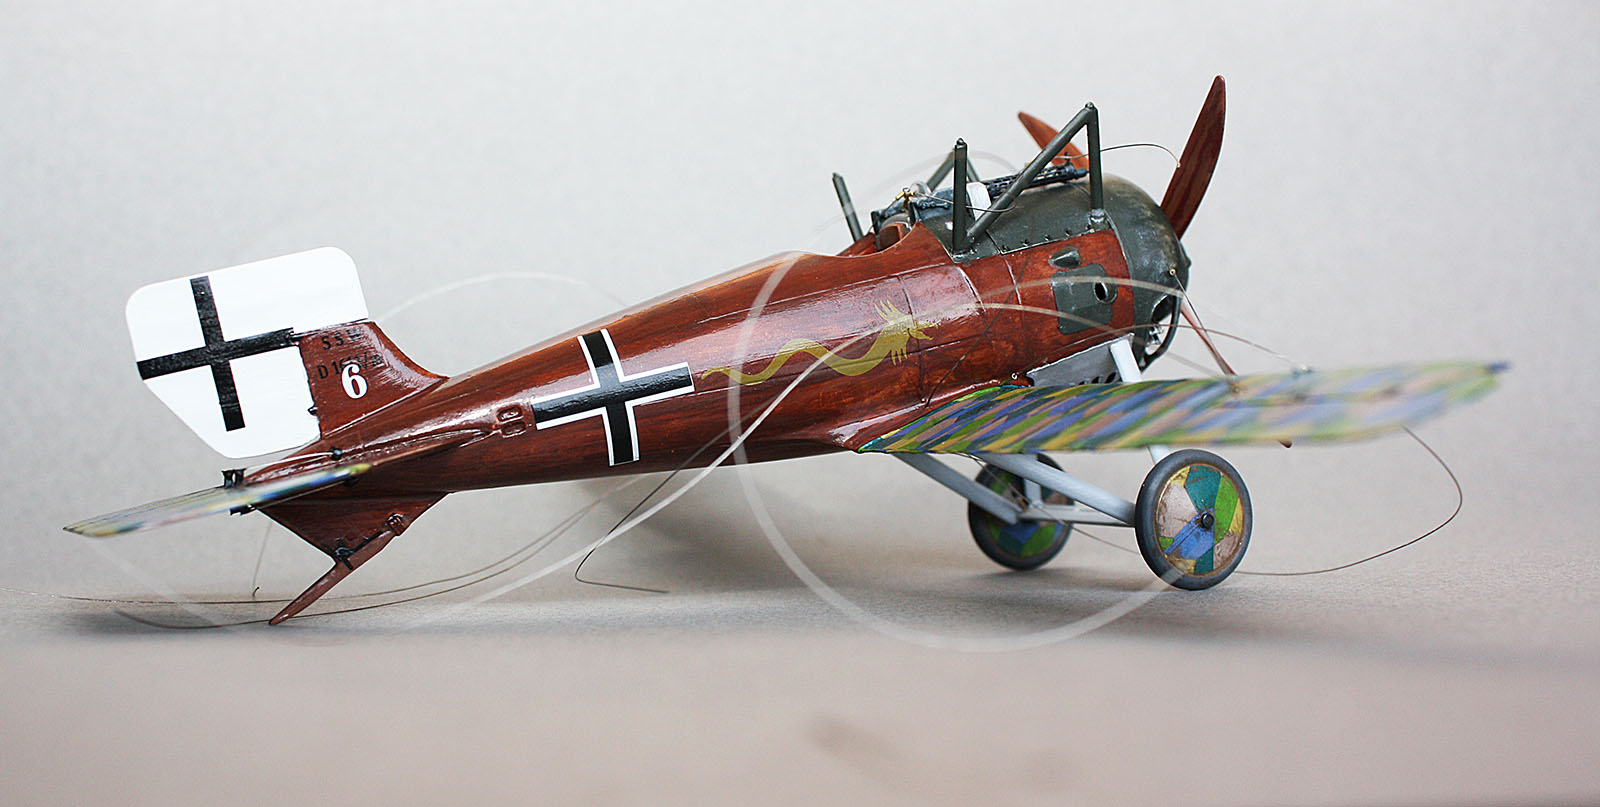
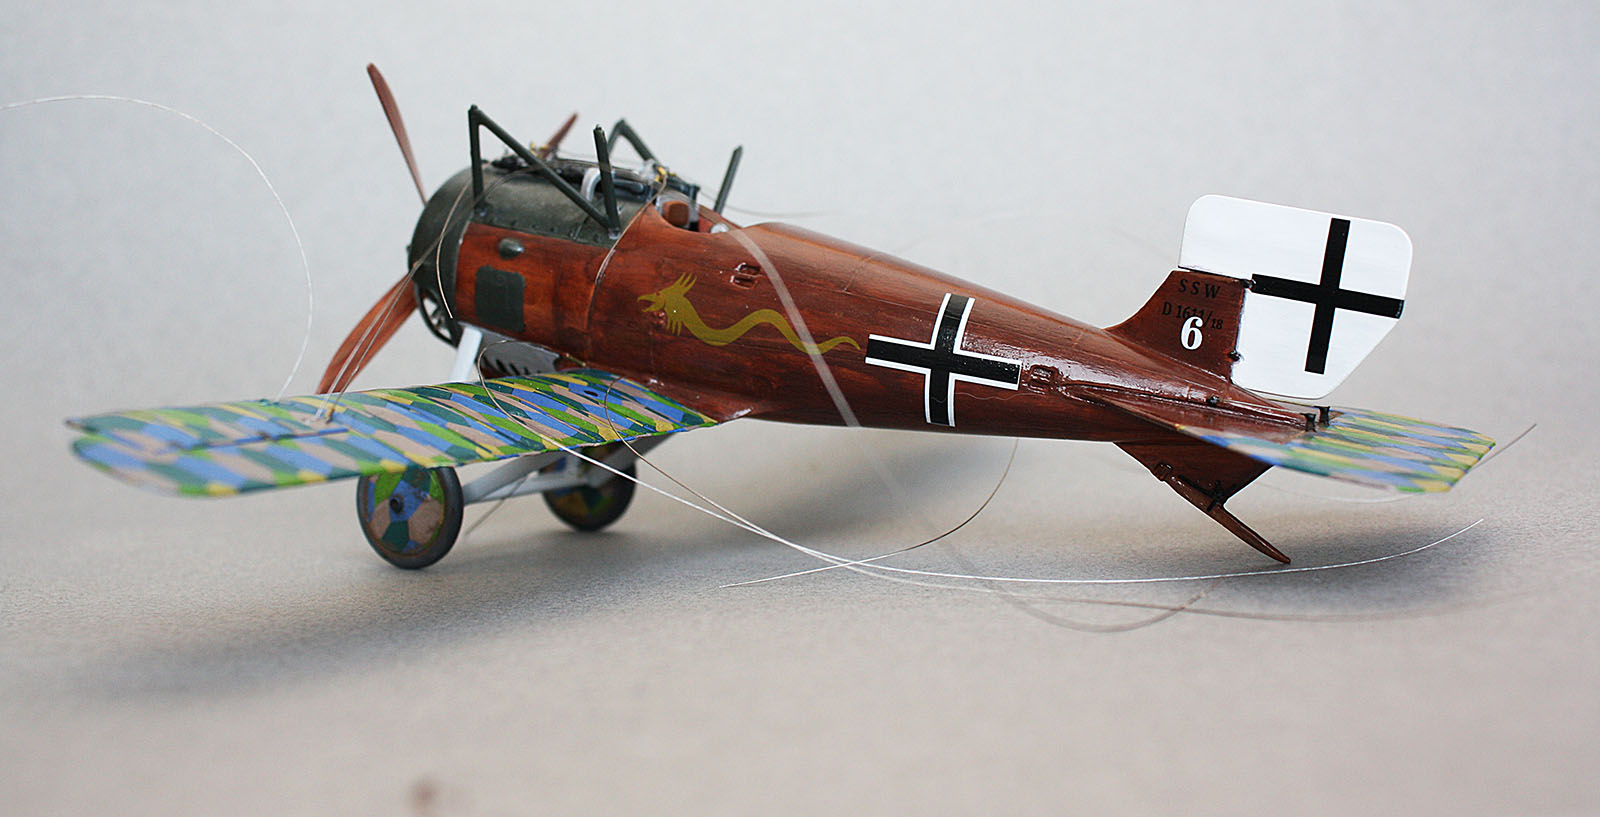
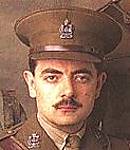
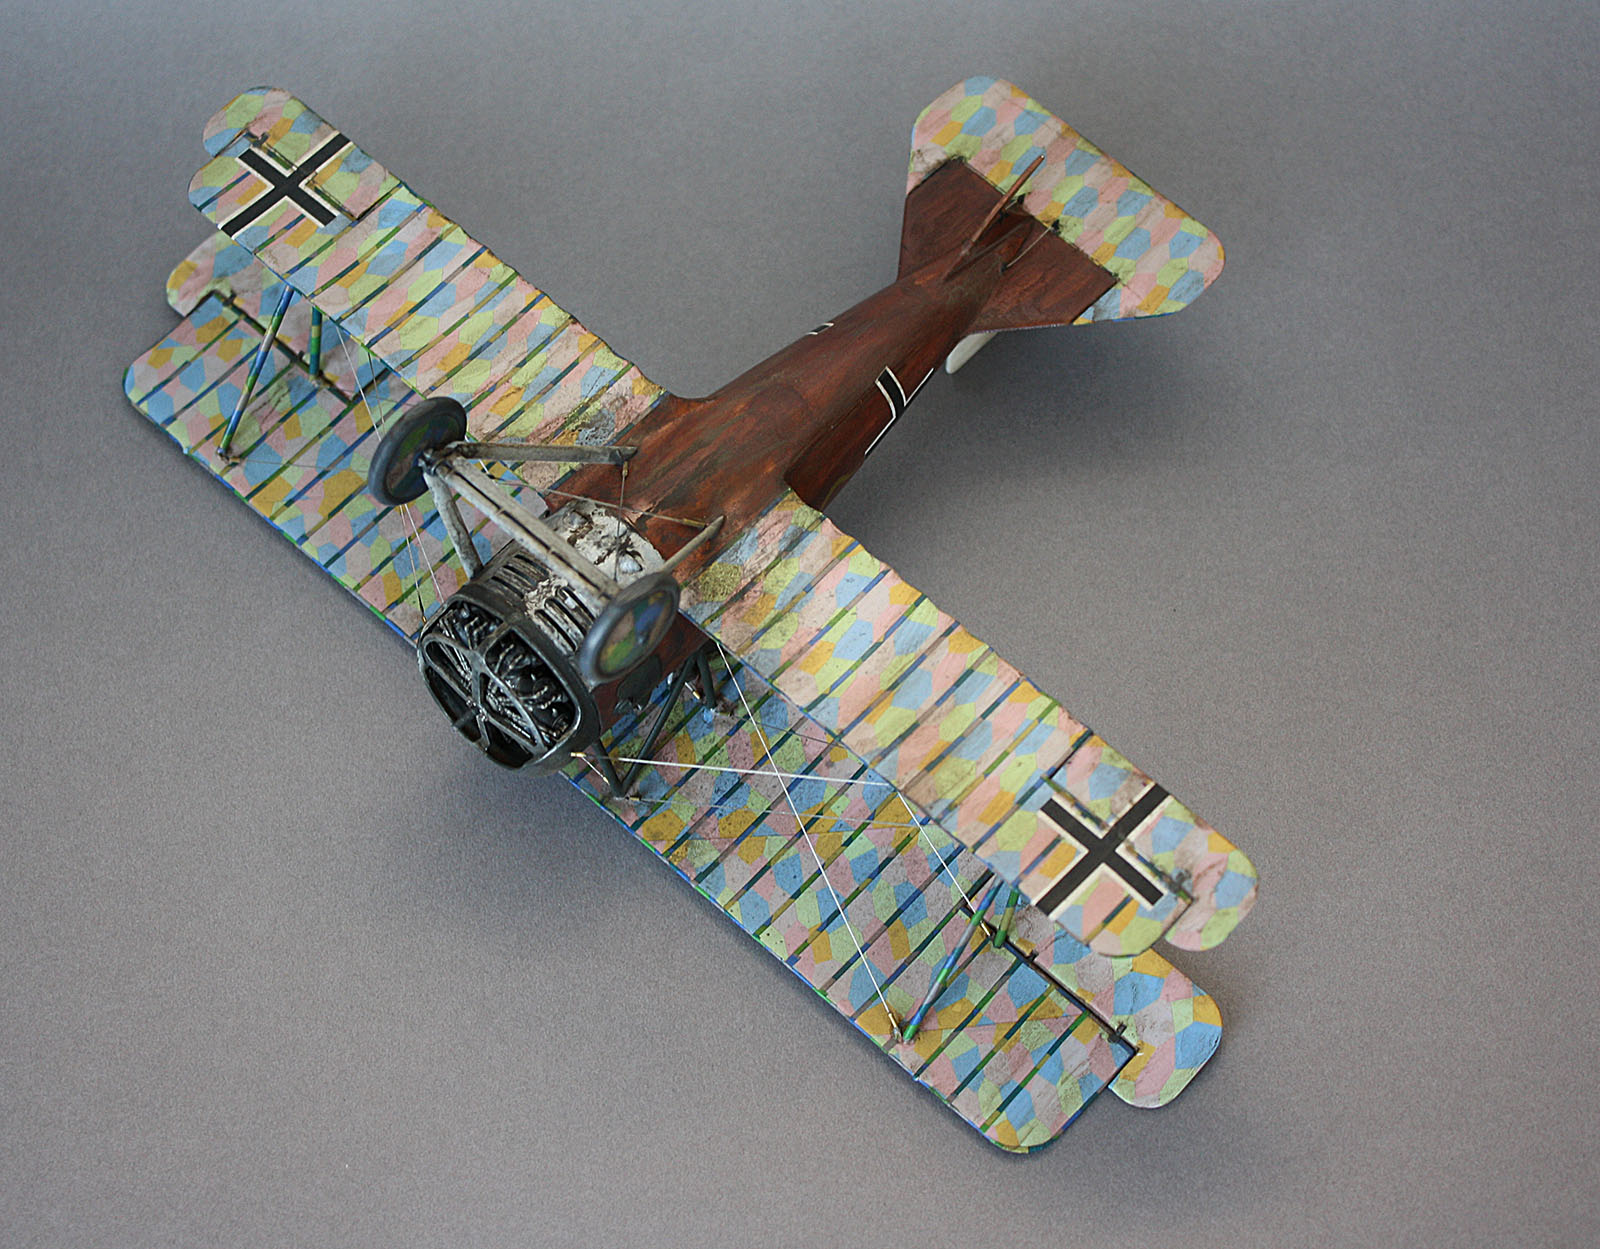
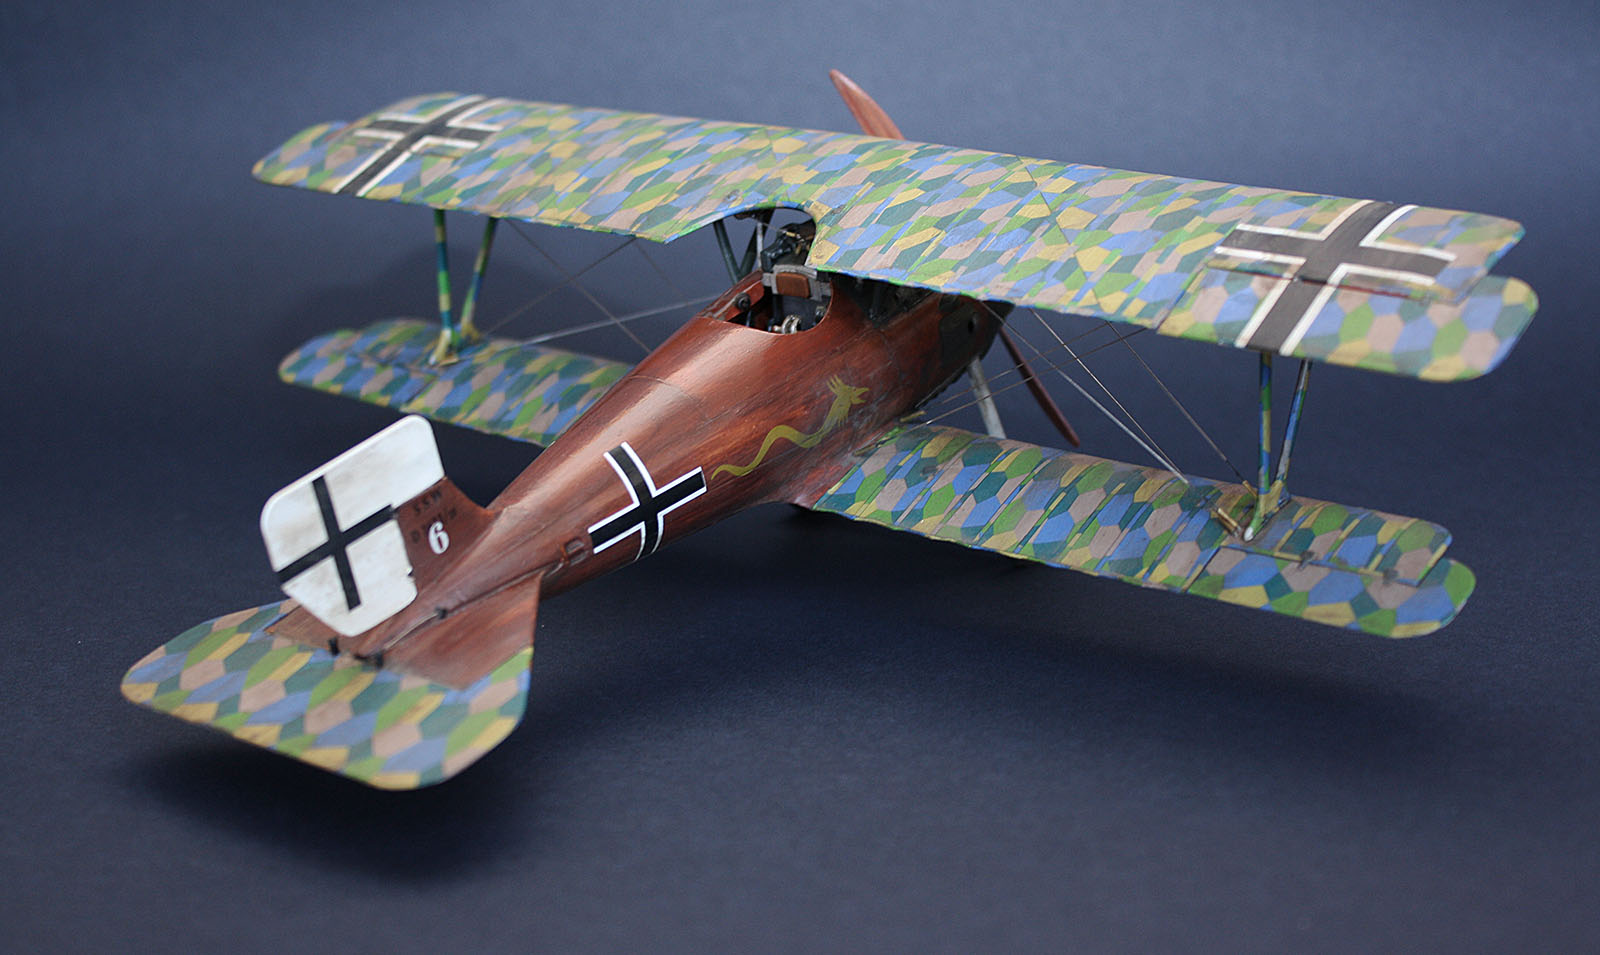
In Conclusion, the kit is a welcome addition to the 1/32 Roden Siemens-Schuckert D.III (Late or early modification) - I certainly glad I have included the details in this build as they both noticeably enhance and add to the model... Makes the build more enjoyable process too.

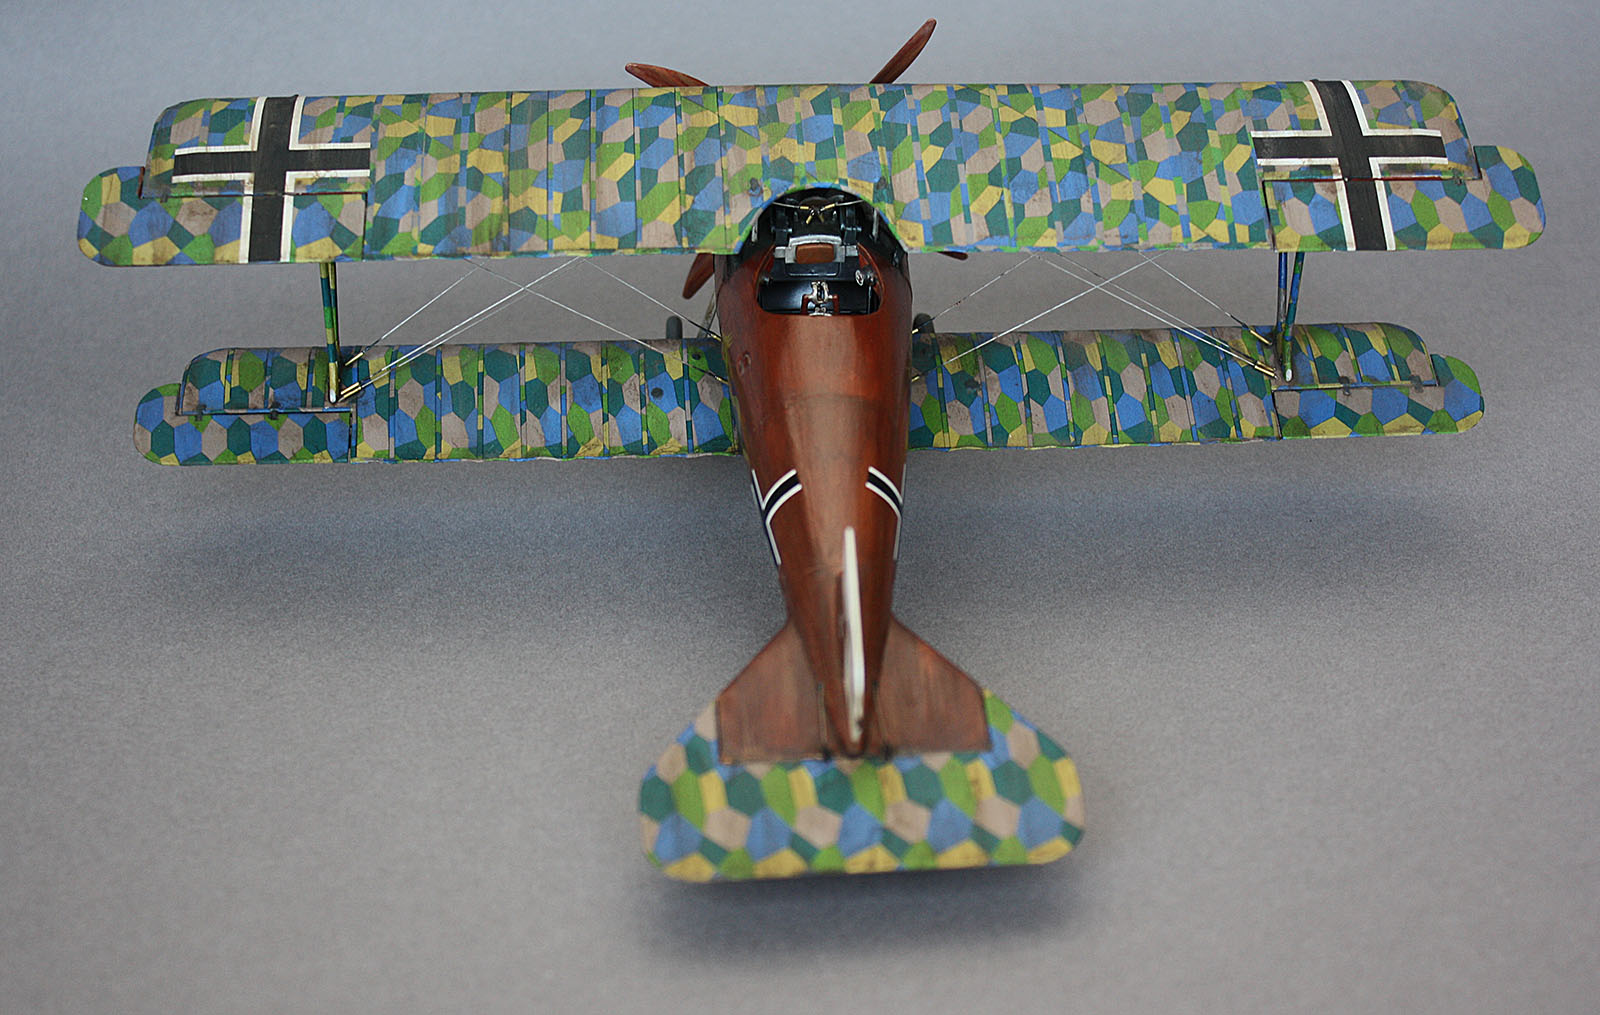
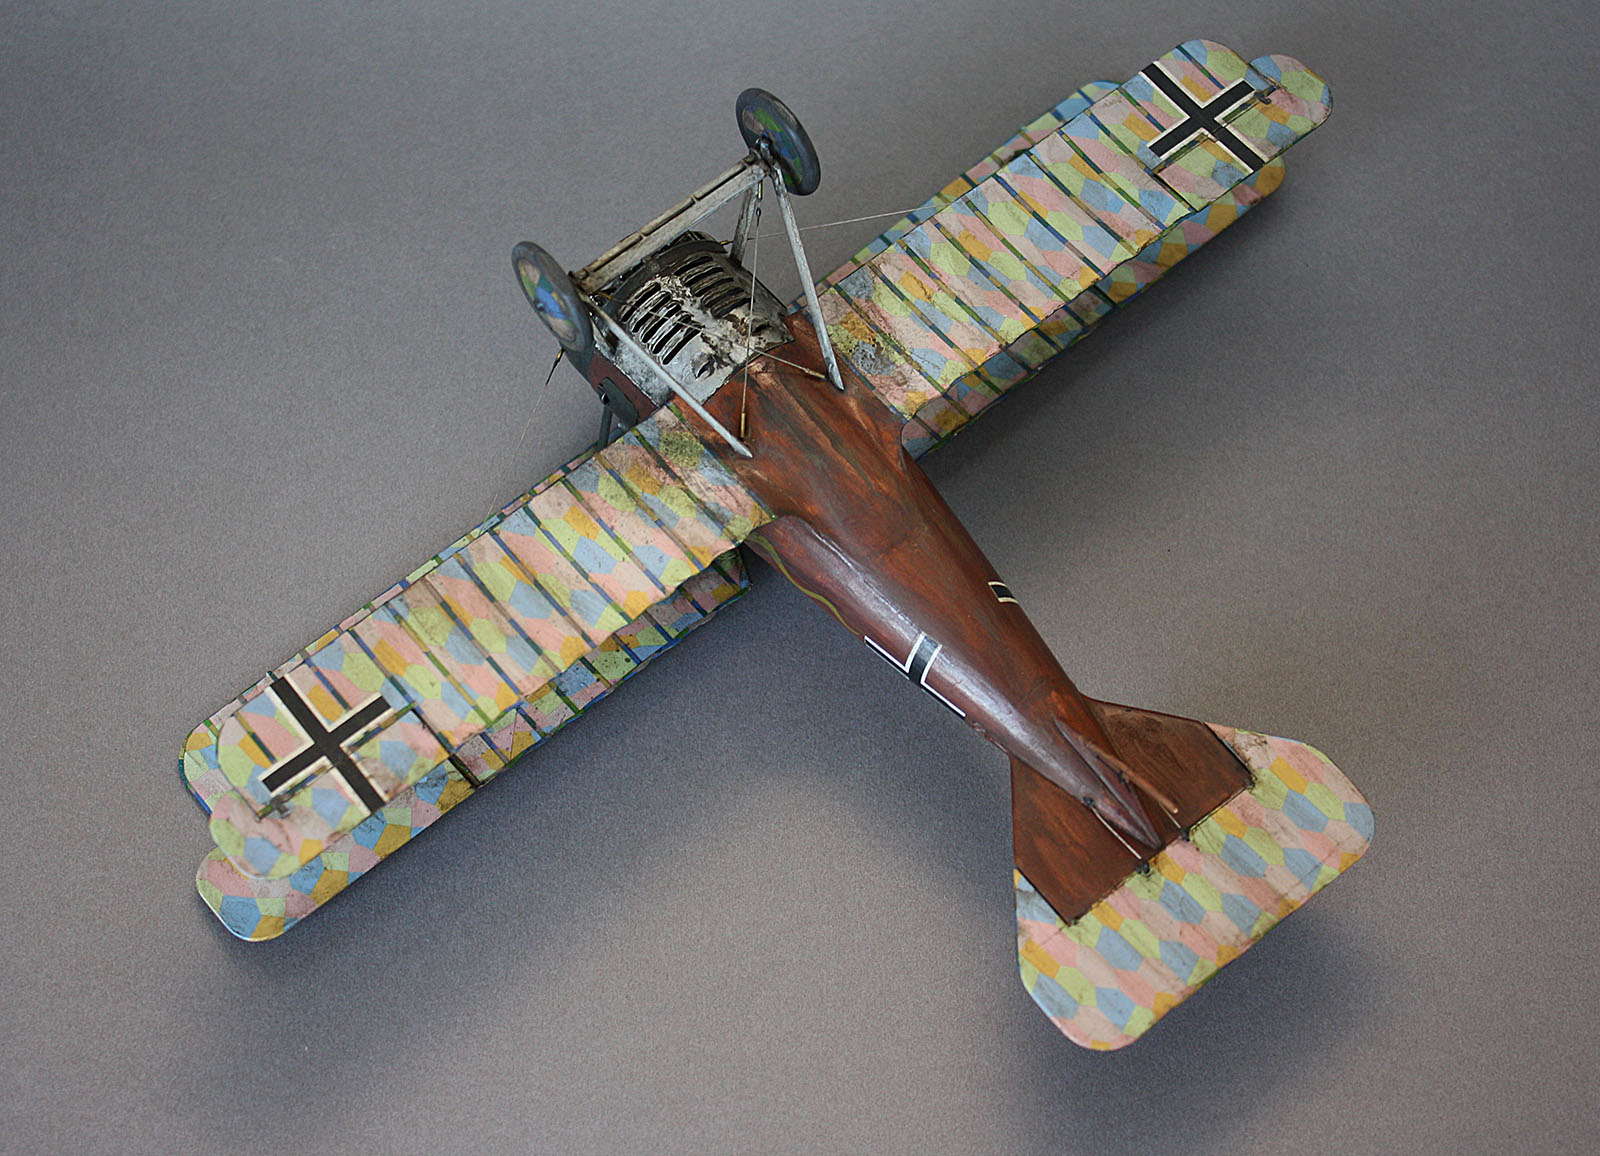
Trying out a different backdrop (whitebalance is a tricky mistress):


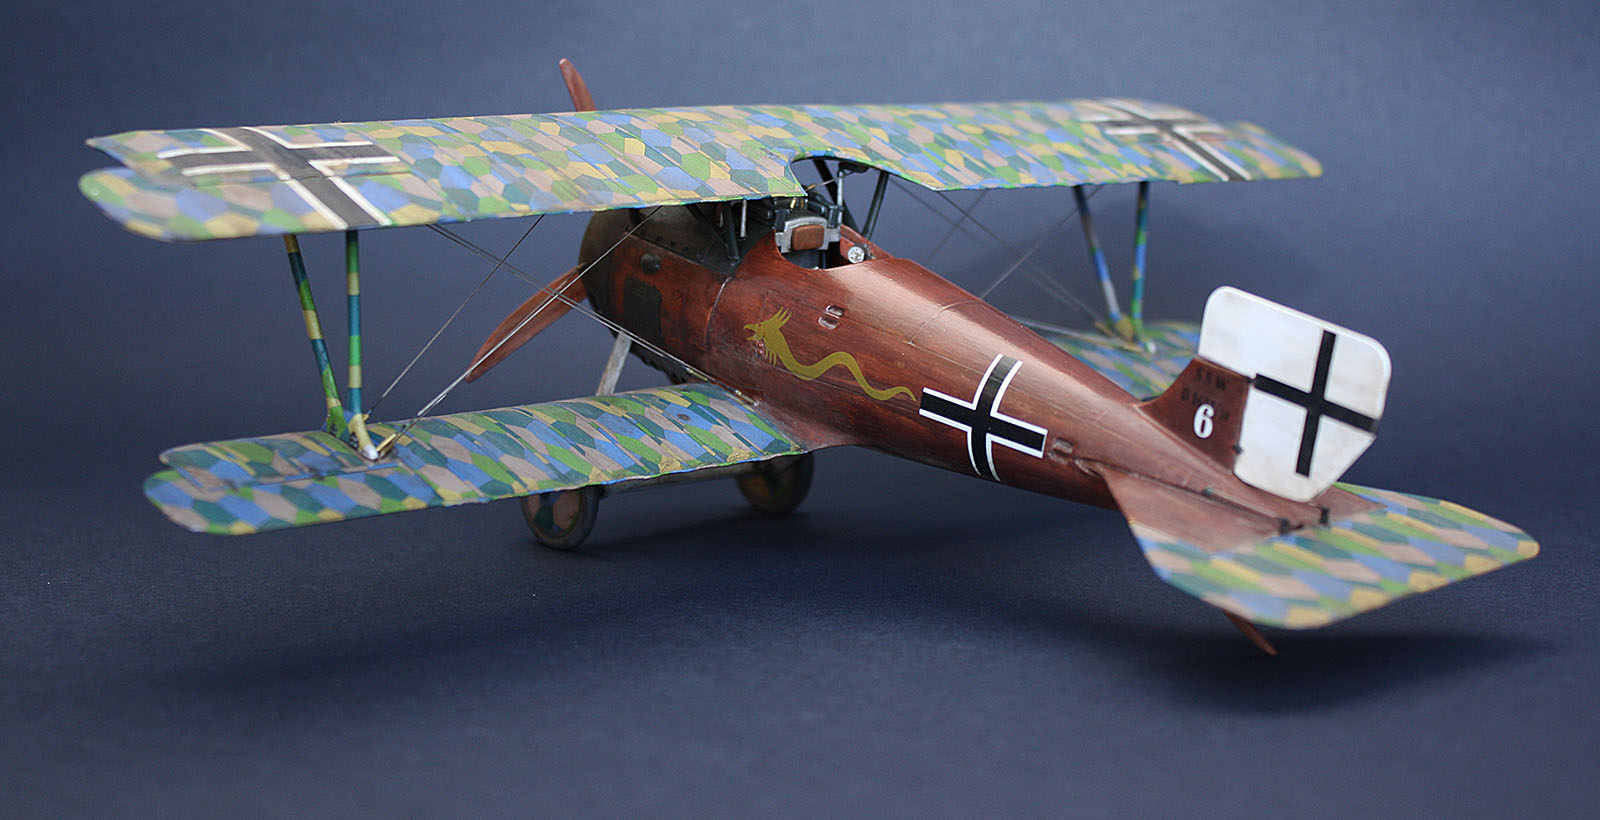
P.S. I noticed that SSD.III feels to me like a German-built Camel...
JackFlash
_VISITCOMMUNITY
Colorado, United States
Joined: January 25, 2004
KitMaker: 11,669 posts
AeroScale: 11,011 posts
Posted: Wednesday, July 02, 2014 - 02:09 AM UTC
Nice! Thanks for the insights.
wing_nut
_VISITCOMMUNITY
New Jersey, United States
Joined: June 02, 2006
KitMaker: 1,212 posts
AeroScale: 468 posts
Posted: Thursday, July 03, 2014 - 01:20 AM UTC
Ivan, that's $100 well spent right there. It really turned out nice indeed.
CaptnTommy
_VISITCOMMUNITY
Connecticut, United States
Joined: October 26, 2009
KitMaker: 424 posts
AeroScale: 389 posts
Posted: Thursday, July 03, 2014 - 02:05 AM UTC
Ivan

Truely beautiful. I especially like your Black cowel. It looks as though it was taken off every day for servicing, which with the HS engine was probably true. Great work I will probably use your turnbuckle style on my Hannover.

Awesome
Captn Tommy
StukaJr
_VISITCOMMUNITY
California, United States
Joined: April 26, 2010
KitMaker: 346 posts
AeroScale: 292 posts
Posted: Monday, July 14, 2014 - 08:20 PM UTC
And a cherry on top:

Terri (aka thegirl) was very nice to send me a set of these fantastic Wotan factory badges to grace the propeller with:


The badges are from Pheon Decals SSD.III set, that include 4 sets of these beauties along with some of the more interesting schemes. Pheon Decals are known for their quality and along some of the top tier on the market - needless to say, they went on without a problem.

CaptnTommy - brass tubes seem to be the way to go. I've tried many other alternatives and amount of time that gets eaten up by not using quality brass just becomes not worth it.
Louis
_VISITCOMMUNITY
Bas-Rhin, France
Joined: May 21, 2006
KitMaker: 472 posts
AeroScale: 471 posts
Posted: Monday, July 14, 2014 - 11:45 PM UTC
A plane weathered as if she had gone to war! I love that!
thegirl
_VISITCOMMUNITY
Alberta, Canada
Joined: January 19, 2008
KitMaker: 6,743 posts
AeroScale: 6,151 posts
Posted: Wednesday, July 16, 2014 - 11:21 AM UTC
Ivan , this was a very enjoyable build to follow along on

Beautifully built with outstanding weathering !


Terri
 _GOTOTOP