_GOTOBOTTOM
Modern (1975-today)
Discuss the modern aircraft age from 1975 thru today.
1:32 OV-10D Bronco
Merlin
Staff MemberSenior Editor
AEROSCALE
#017
_VISITCOMMUNITY
United Kingdom
Joined: June 11, 2003
KitMaker: 17,582 posts
AeroScale: 12,795 posts
Posted: Thursday, January 01, 2015 - 12:59 AM UTC


Hi there

No, me starting a Blog isn't a symptom of over-indulging in New Year's Eve grog! - but the result of a classic c*ck-up with my camera's memory card going AWOL with all the pictures I'd taken for the review on it (plus hundreds of other unedited shots for planned reviews...).

Having done a test-fit of the bulk of the airframe, I can't exactly go back and take fresh sprue-shots, so here we are with Plan B!

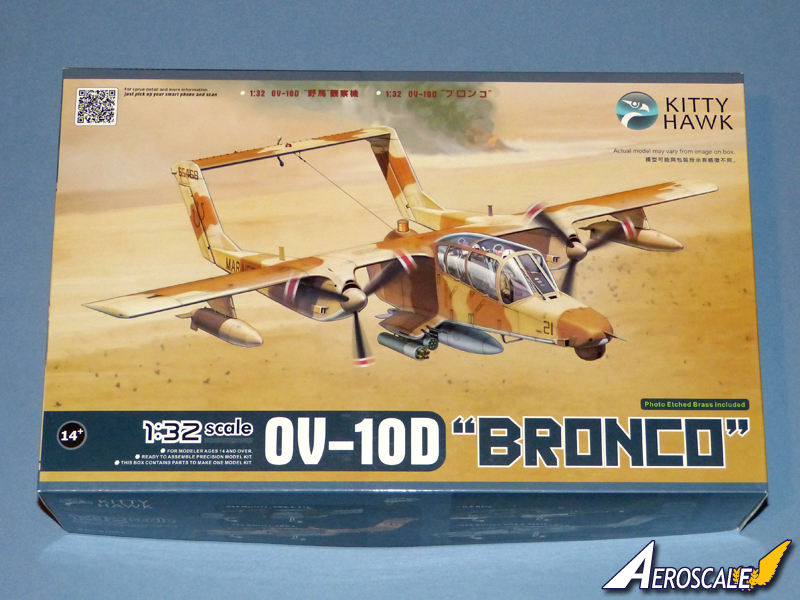
Kity Hawk's Bronco is a kit I've wanted to build anyway - I was just planning to do an In-Box review first and clear the decks of existing projects before starting it later this year. Still, the silver lining in losing the photos is that it will force me to find some time at the work bench - probably not a bad way to make good on my annual New Year's Resolution to try to actually build something!

Of course, a big kit of a modern subject is somewhat outside my comfort zone, so any tips and advice on colours and details will be very welcome - and could help others avoid pitfalls in their own builds.

All being well, I'll try to make a start tomorrow. And, of course, there's always the chance that starting the Blog will trigger Sod's Law so the memory card hopefully turns up!

All the best

Rowan
Joel_W
Staff MemberAssociate Editor
AUTOMODELER
_VISITCOMMUNITY
New York, United States
Joined: December 04, 2010
KitMaker: 11,666 posts
AeroScale: 7,410 posts
Posted: Thursday, January 01, 2015 - 09:19 PM UTC
Rowan,
1/32 scale is still out of my comfort zone, as you're a braver man than I for entering that realm with such a complex kit. Rest assured that I will be following your every step. Hoping that you clean the decks and start your build sooner then later.
Joel
SgtRam
Staff MemberEditor-at-Large
AEROSCALE
#197
_VISITCOMMUNITY
Ontario, Canada
Joined: March 06, 2011
KitMaker: 3,971 posts
AeroScale: 511 posts
Posted: Thursday, January 01, 2015 - 09:52 PM UTC
Looking forward to this, Santa delivered the Bronco under my tree, and I am looking forward to building it.

JPTRR
Staff MemberManaging Editor
RAILROAD MODELING
#051
_VISITCOMMUNITY
Tennessee, United States
Joined: December 21, 2002
KitMaker: 7,772 posts
AeroScale: 3,175 posts
Posted: Thursday, January 01, 2015 - 11:00 PM UTC
Yummy! I've always liked the ugly Bronco and was intrigued that a few years ago, Boeing was offering to crank up production again for COIN Bronocs for the War on Terror.

I also like the OV-10 for a story involving one showing off to a MU-2 after a series of derogatory cat calls.

I've wanted a big OV-10 after building Hawk's 1/48 model long ago. Looking forward to this.
Merlin
Staff MemberSenior Editor
AEROSCALE
#017
_VISITCOMMUNITY
United Kingdom
Joined: June 11, 2003
KitMaker: 17,582 posts
AeroScale: 12,795 posts
Posted: Friday, January 02, 2015 - 01:36 AM UTC
Cheers everyone

Well - I've made a start.

Construction begins with the ejector seats - and they are reasonably complex with 14 parts each (plus an decals and an etched harness):


The head-rest firing handle (Part H19) isn't shown being fitted in the instructions, but there should also be another one mounted to the seat pan - so far, I haven't found that lurking hidden on the sprues. Also missing (but ironically shown in the instructions illustrations) is the cut-out above the head-rest, which I presume allowed the seat to be hoisted into the cockpit.

Overall, there's plenty of extra detail that can be added, including the arming toggle, pipes and cablings.

Very useful refs for the North American/Rockwell LW-3B can be found at:

The Ejection Site and Silicon Valley Scale Modellers

In preparing the seat parts, I hit the first clunking great ejector pin marks:


Taking a quick look at the wheel-wells, I can see there are going to be plenty to deal with - what joy! :


All the best

Rowan
SgtRam
Staff MemberEditor-at-Large
AEROSCALE
#197
_VISITCOMMUNITY
Ontario, Canada
Joined: March 06, 2011
KitMaker: 3,971 posts
AeroScale: 511 posts
Posted: Friday, January 02, 2015 - 01:39 AM UTC
Just a few ejector marks to deal with, and with todays molding technologies, thought these were a thing of the past.

Merlin
Staff MemberSenior Editor
AEROSCALE
#017
_VISITCOMMUNITY
United Kingdom
Joined: June 11, 2003
KitMaker: 17,582 posts
AeroScale: 12,795 posts
Posted: Friday, January 02, 2015 - 02:24 AM UTC
Hi Kevin

Even on a brief hunt, I think this could well turn out to be something of an "ejector-mark city". Some of them are very irritatingly placed too.

All the best

Rowan
SgtRam
Staff MemberEditor-at-Large
AEROSCALE
#197
_VISITCOMMUNITY
Ontario, Canada
Joined: March 06, 2011
KitMaker: 3,971 posts
AeroScale: 511 posts
Posted: Friday, January 02, 2015 - 02:35 AM UTC
As soon as I get these current builds of my bench, and finish the Tadpole build log, I will be starting mine. So I will be following you.

Kevin
Holdfast
Staff MemberPresident
IPMS-UK KITMAKER BRANCH
#056
_VISITCOMMUNITY
England - South West, United Kingdom
Joined: September 30, 2002
KitMaker: 8,581 posts
AeroScale: 4,913 posts
Posted: Friday, January 02, 2015 - 12:36 PM UTC
Errrr, weren't you building something else? Mind you its been so long since you post anything about that, that I have forgotten what it was, or even if it is a figment of my imagination!

But this is 1/32! What do you think you are doing? Actually I quite like this aircraft and I had forgotten that Kitty Hawk had released it in this scale, I need one so I will be watching this closely mate, but will I need to refrain from saying that I will eat my shorts if you actually finish this?
Merlin
Staff MemberSenior Editor
AEROSCALE
#017
_VISITCOMMUNITY
United Kingdom
Joined: June 11, 2003
KitMaker: 17,582 posts
AeroScale: 12,795 posts
Posted: Friday, January 02, 2015 - 01:27 PM UTC

Quoted Text

Errrr, weren't you building something else?...


Hi Mal

Do you mean the Eindecker? That has to take a backseat for this emergency Review-build.

All the best

Rowan
JPTRR
Staff MemberManaging Editor
RAILROAD MODELING
#051
_VISITCOMMUNITY
Tennessee, United States
Joined: December 21, 2002
KitMaker: 7,772 posts
AeroScale: 3,175 posts
Posted: Friday, January 02, 2015 - 06:09 PM UTC

Quoted Text

...this emergency Review-build.


We do those? I'll prep a sterile cutting mat and autoclave the Xacto and clamps!
JPTRR
Staff MemberManaging Editor
RAILROAD MODELING
#051
_VISITCOMMUNITY
Tennessee, United States
Joined: December 21, 2002
KitMaker: 7,772 posts
AeroScale: 3,175 posts
Posted: Friday, January 02, 2015 - 06:12 PM UTC

Quoted Text

Just a few ejector marks to deal with, and with todays molding technologies, thought these were a thing of the past.


Yes, extremely disappointing. Nowadays for me these are a deal breaker if they are on a 'modern' kit.
Joel_W
Staff MemberAssociate Editor
AUTOMODELER
_VISITCOMMUNITY
New York, United States
Joined: December 04, 2010
KitMaker: 11,666 posts
AeroScale: 7,410 posts
Posted: Saturday, January 03, 2015 - 01:26 AM UTC
Rowan,
I'm more then impressed that you finally found some bench time. I'll be following your build with more then a casual interest.

I'm more then quite surprised at the number of ejection pin marks. I can live with a few here and there, but with today's current level of design and molding standards, it seems that HK has contracted with a Chinese based company not up to current standards. The cockpit/seat parts have injector pin marks on virtually every piece, and as you pointed out the wheel well has a unusually high number of them, with a few that look nearly impossible to deal with.
Joel
Merlin
Staff MemberSenior Editor
AEROSCALE
#017
_VISITCOMMUNITY
United Kingdom
Joined: June 11, 2003
KitMaker: 17,582 posts
AeroScale: 12,795 posts
Posted: Saturday, January 03, 2015 - 01:38 AM UTC

Quoted Text


Quoted Text

...this emergency Review-build.


We do those? I'll prep a sterile cutting mat and autoclave the Xacto and clamps!


Hi Fred

Well, we do when one of us (me!) is stupid enough to lose all the photos intended for the In-Box Review! Sadly, starting the build hasn't encouraged my camera's memory card to put in a reappearance, so it looks like you're all stuck with me doing a build.

I made a little progress today, and I'm becoming a little bit wary of the instructions. As I mentioned before, the section for the ejector seats doesn't quite match the actual parts and is incomplete. Now, skipping ahead to build the circuit breakers behind the observer's seat (I never promised I'd follow the suggested construction sequence - in fact I can promise I won't! ) I've found a case of double (or triple?) identity... will the real Part G36 please stand up!


This is actually Part G36, but it's double-numbered as 38 on Sprue G - which is shown as Sprue J on the parts layout. A small point, but indicative of not doing final checks before release.

This growing mistrust brings me back to the fit-out of the observer's cockpit. The instructions show the left-hand console totally bare, but the kit parts include what looks suspiciously like a fascia for it - so, should it be fitted? Zone-Five has some excellent photos of a preserved 'D - but, would you believe it... Sod's Law steps in and the console is stripped out:


So, can anyone post or point me to some shots of an operational OV-10D cockpit - or the pilot and observer's manual? (The OV-10A seems to differ in not having a left console at all - just a document case and a throttle quadrant.)

All the best

Rowan
Merlin
Staff MemberSenior Editor
AEROSCALE
#017
_VISITCOMMUNITY
United Kingdom
Joined: June 11, 2003
KitMaker: 17,582 posts
AeroScale: 12,795 posts
Posted: Saturday, January 03, 2015 - 01:58 AM UTC
Hi again

I nearly forgot - I did more!

Jumping ahead again, I joined up the separate nose section. It's a small joint that doesn't offer much of anything by way of support. I couldn't hold it together while I cemented it, and it wouldn't sit flat on a surface, so a "second pair of hands was called for". Cue: Wilder's Takk (kindly supplied by The Airbrush Co. and reviewed by Fred HERE).


It supported the parts perfectly - it seems firmer than a certain well-established product with a very similar name - but that could because it's winter and such stuff does tend to harden up. Anyway, it seems very good and, importantly, compared with some of the cheap and nasty alternatives, left no greasy residue (seriously, do beware some of the $- or £-shop stuff - it's not always a bargain, because the clean-up afterwards can more than outweigh any cost-saving).

All the best

Rowan
Merlin
Staff MemberSenior Editor
AEROSCALE
#017
_VISITCOMMUNITY
United Kingdom
Joined: June 11, 2003
KitMaker: 17,582 posts
AeroScale: 12,795 posts
Posted: Saturday, January 03, 2015 - 02:11 AM UTC

Quoted Text

...The cockpit/seat parts have injector pin marks on virtually every piece, and as you pointed out the wheel well has a unusually high number of them, with a few that look nearly impossible to deal with.
Joel


Hi Joel

Cheers for tuning in. I'm trying Mr. Dissolved Putty as a quick fix, as I'm conscious of the clock ticking on this project. Given time, and if I really thought people would be peering into the wheel wells, I'd go for more serious remedial work. But, even though you know it'll never be seen, it's hard not to do something to fix the pin marks.

I have to say, the positioning of some of the pin marks (and sprue attachments) convinces me that all mould designers attend a course dedicated to ensuring the maximum frustration to modellers as part of their training!

I'm sure, as modellers, we'd all love to have a hand in kit design and it wouldn't be long before a fight broke out with the engineers, along the lines of "I don't care how much easier you say this will make the kit easier to mould... you can't put that ejection pin (or sprue attachment) there!"

All the best

Rowan
drabslab
_VISITCOMMUNITY
European Union
Joined: September 28, 2004
KitMaker: 2,186 posts
AeroScale: 1,587 posts
Posted: Sunday, January 04, 2015 - 06:42 PM UTC

Quoted Text


Quoted Text

Just a few ejector marks to deal with, and with todays molding technologies, thought these were a thing of the past.


Yes, extremely disappointing. Nowadays for me these are a deal breaker if they are on a 'modern' kit.


Ejection marks can be a sign of ejecting before the plastic has cooled down long enough in the mold.

Otherwise, this could be a beautiful kit, for me it is in "the wrong" scale howevr as I milit myself to 1/48.
Joel_W
Staff MemberAssociate Editor
AUTOMODELER
_VISITCOMMUNITY
New York, United States
Joined: December 04, 2010
KitMaker: 11,666 posts
AeroScale: 7,410 posts
Posted: Monday, January 05, 2015 - 01:25 AM UTC
Rowan,
I really feel your frustrations when the instructions are plain wrong, or so vague that one has no idea of where a part goes or doesn't go. Worse is the case where the part has more then one possible number on the sprue tree or no number at all. Seems to me that this should be engineering 101, and at least some form of Quality control should have caught it.

I've never had any luck with any companies Blu-Tac. Just never sticks for me, so residue hasn't been a issue. I just bought some Silly Putty to try instead.
Joel
Merlin
Staff MemberSenior Editor
AEROSCALE
#017
_VISITCOMMUNITY
United Kingdom
Joined: June 11, 2003
KitMaker: 17,582 posts
AeroScale: 12,795 posts
Posted: Monday, January 05, 2015 - 01:59 AM UTC
Cheers Drabslab and Joel

The instructions not quite matching the kit is one of the stories of the build - i.e. parts not shown, telling you to open up holes that are already open, not showing holes where ones exist... No problem for anyone with a few builds under their belt, but a beginner would be running in circles.

I did manage an hour or so on the kit earlier, but didn't take any photos. I'll get a bit of News done and try to shoot some for an update.

All the best

Rowan
Merlin
Staff MemberSenior Editor
AEROSCALE
#017
_VISITCOMMUNITY
United Kingdom
Joined: June 11, 2003
KitMaker: 17,582 posts
AeroScale: 12,795 posts
Posted: Monday, January 05, 2015 - 04:02 AM UTC
Hi again

Where were we?...

Things have been a bit held up by Mr. Dissolved Putty - it's good, but does need multiple applications due to shrinkage.

So, darting about a bit while it cures - the nose:


The main fuselage and nose sections joined up neatly, but I recommend removing the locating pins on the nose - they'll just throw the alignment out, and you're better off without them.

Building some stuff... I couldn't resist jumping ahead to the wings and the tail booms:


The instructions show fitting the mainwheel wells before assembling the booms. I threw caution to the winds and did the booms first to ensure the fit to the wings (it did need adjusting). The wells will slot in fine later, provided you don't cement the front of each boom until they're in place.

The wheels:


The mainwheels look a bit chunky compared with photos online, but the nose wheel just seems wrong: as far as I can tell, the full-sized item on all variants is an anti-shimmer wheel. I'll fudge it with a filed slot and raised bands, but I expect a proper aftermarket alternative will soon be available.

To save paradise - support your LHS! (Sorry, Joni! ) Mine is more of a toy shop than a true model shop, but it was great to walk in and find all the FS colours I needed (regardless of whether Humbrol are your favourite paints):


We all love the Web, but the day there isn't a shop nearby with the paints etc. we need ... Well - "You don't know what you've got 'till it's gone."

All the best

Rowan
Holdfast
Staff MemberPresident
IPMS-UK KITMAKER BRANCH
#056
_VISITCOMMUNITY
England - South West, United Kingdom
Joined: September 30, 2002
KitMaker: 8,581 posts
AeroScale: 4,913 posts
Posted: Monday, January 05, 2015 - 10:50 AM UTC
I'm liking this Rowan


Quoted Text

To save paradise - support your LHS! (Sorry, Joni! ) Mine is more of a toy shop than a true model shop, but it was great to walk in and find all the FS colours I needed (regardless of whether Humbrol are your favourite paints):


Quite right, I needed to get some paint for Tom see Tom's Talon) and luckily there is a model shop within the small industrial complex adjacent to RNAS Culdrose. It is "only" a radio control shop but he does have a few Airfix kits. No Humbrol unfortunately so the Revell paint will have to do. T7 Models in Truro was just a bit far to go.

The dilemma for me though is whether to actually get this kit or not? I do like the subject, but I don't really build modern stuff, the scale is right but I have so many other kits on the go, and I'm starting more! Would it ever get built!
Joel_W
Staff MemberAssociate Editor
AUTOMODELER
_VISITCOMMUNITY
New York, United States
Joined: December 04, 2010
KitMaker: 11,666 posts
AeroScale: 7,410 posts
Posted: Monday, January 05, 2015 - 08:07 PM UTC
Rowan,
Nice, steady progress.

Some what surprising that the front fuselage locating pins throws the alignment out of whack. I would have thought that with today's CAD programs, and computer cut molds, that issues such as this was a thing of the past.

Joel
WoodshedWings
_VISITCOMMUNITY
Ontario, Canada
Joined: October 11, 2012
KitMaker: 141 posts
AeroScale: 139 posts
Posted: Tuesday, January 06, 2015 - 06:51 AM UTC
Good work so far Rowan. Skipping back a bit to 'ejector pin marks and how to deal with them', depending on their depth, I punch a thin disc of styrene, pop that in the hole and cement with extra thin (Tamiya). Then scoop some goo from the bottom of a bottle of un-mixed Mr Surfacer and plop that on top to fill any gaps. Then sand down. I have to agree though that the pin mark count does seem excessively high for a modern kit. And in very visible areas too. Disappointing.
SGTJKJ
#041
_VISITCOMMUNITY
Kobenhavn, Denmark
Joined: July 20, 2006
KitMaker: 10,069 posts
AeroScale: 3,788 posts
Posted: Tuesday, January 06, 2015 - 04:00 PM UTC
Strange that the pin marks are so visible and widespread. I feel your pain, Rowan.

This kit is not going on the shopping list. It will be interesting to see what you get out of it none the less.

Looking forward to see more.
Merlin
Staff MemberSenior Editor
AEROSCALE
#017
_VISITCOMMUNITY
United Kingdom
Joined: June 11, 2003
KitMaker: 17,582 posts
AeroScale: 12,795 posts
Posted: Wednesday, January 07, 2015 - 01:28 AM UTC
Hi Mike

I often punch disks to fill pin-marks myself, but I thought I'd give Mr. Dissolved Putty a try. It's actually pretty good, but I didn't make enough allowance for shrinkage - hence the extra applications. It certainly sands easily to a very smooth finish, so it's useful stuff to keep handy.

I built the other wing this morning before work and made a start on tailplane (no photos yet). I found the tail is a little deeper than the roots, so I quickly took it apart before it dried and will sand it down before trying again. I should have checked before cementing it...

All the best

Rowan
 _GOTOTOP