_GOTOBOTTOM
Pre-Flight Check
Constructive critique of your finished or in-progress photos.
Lightning Strikes Twice!
PeeJay74
#363
_VISITCOMMUNITY
Pennsylvania, United States
Joined: January 08, 2014
KitMaker: 425 posts
AeroScale: 401 posts
Posted: Sunday, May 03, 2015 - 06:53 AM UTC
I had so much fun doing a blog for my build of Accurate Miniatures' P-51 Mustang, I thought I would do another. This time I am going to try something new: my first dual build. We have the Lockheed Air & Space and Fork Tailed Devil Campaigns running concurrently, so I decided to build a pair of Academy's 1:48 P-38 Lightning kits. Well, sort of Academy's kits.

For my Lockheed entrant and first P-38, I chose Eduard's Limited Edition Pacific Lightnings re-boxing of the Academy P-38L kit. Eduard have added an amazing amount of extras to the kit, including lots of PE and some of the best looking resin I have ever seen. I wish they would release the cockpit pieces as an aftermarket set, I'd pick one up in a minute. The decals are also excellent, being done by Cartograf. No need for aftermarket replacements there. I wanted to model one of the 475th FG's Satan's Angels, so will be going with the box art scheme.


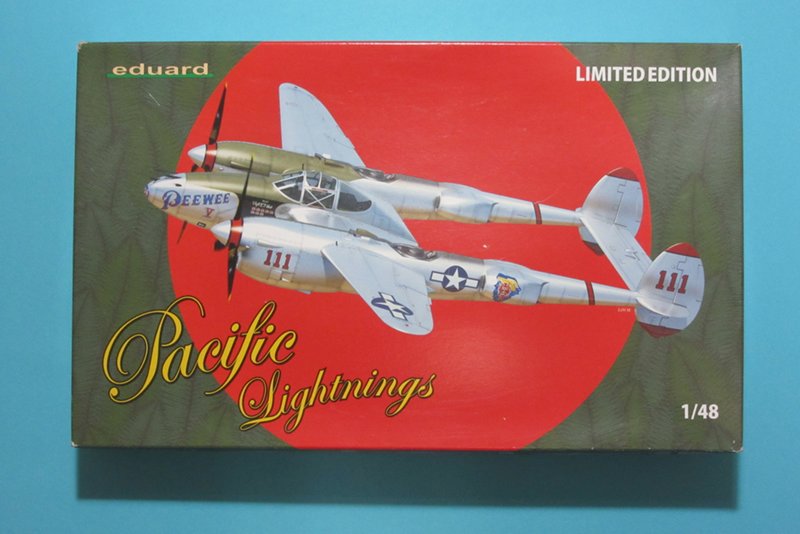
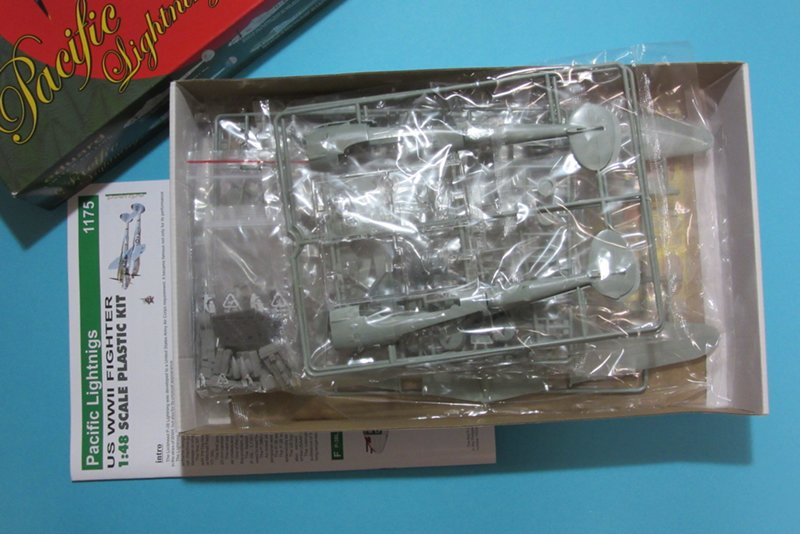
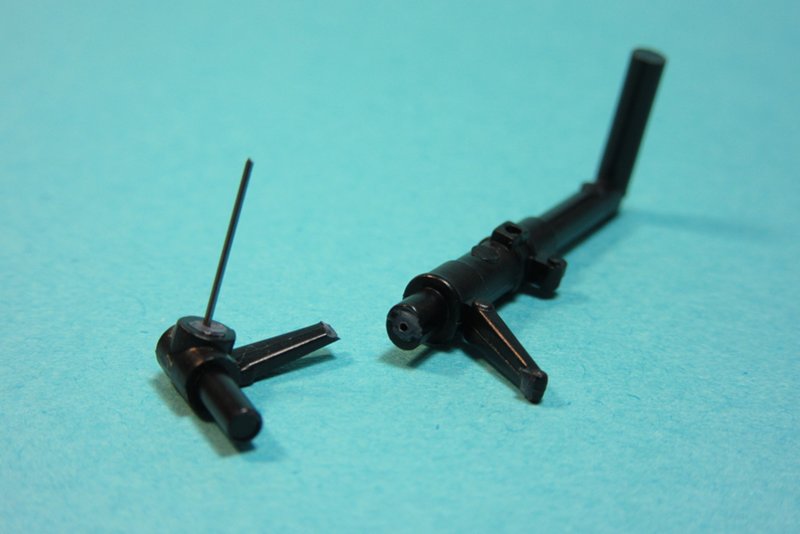
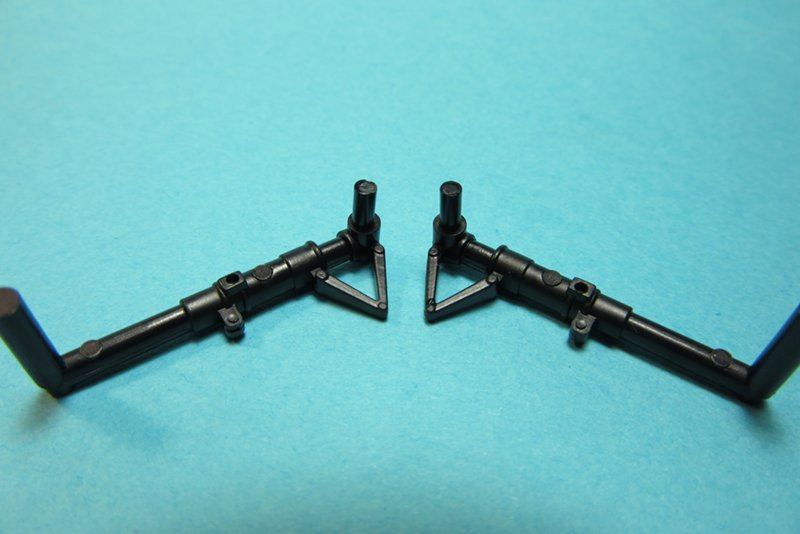
I am not going to go into great detail about what Eduard have included with the kit, if you want a better look check out the Eduard site. Take my word for it, it's nice! In fact, the only thing they overlooked was providing better gun barrels. The kit plastic is lacking here and could use help. I grabbed a set of jacketed late model barrels from Master Model to fix this. With all of the armament tightly clustered in the nose, I wanted it to look as good as the rest of the kit.

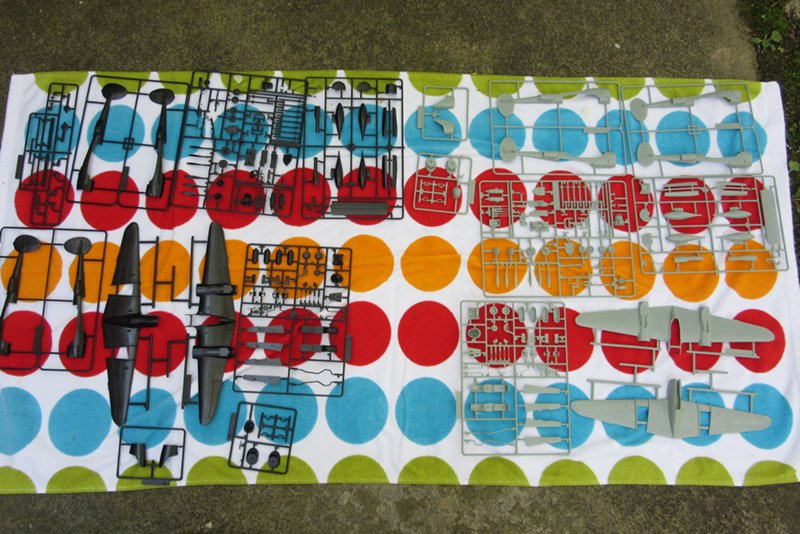
For my Fork Tailed Devil entrant and second Academy P-38, I picked something that always caught my eye: the P-38M Night Lightning. Academy's multi-version boxing contains nearly every part you would need to build the rare P-38M except one - the upper wing/pod with the raised hump for the R/O's station. This forced me to look for the discontinued Night Lightning boxing. I found one on Ebay for a reasonable $20 shipped.


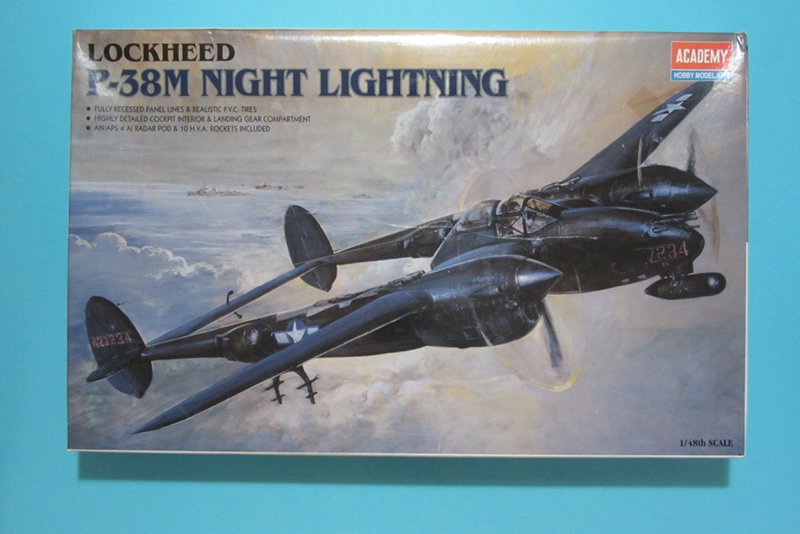
The kits are nearly identical plastic except for the change to the upper wing/pod and being molded in black vs. gray. This gives me a great number of R/O station spares for the P-38M in case I mess things up trying to add detail. I may even take advantage of the lighter plastic first, I don't enjoy working with black as it makes some details difficult to see.

Looking at the kits side by side it was pretty obvious to me the Night Lightning was going to come out a distant second in the looks department if I didn't give it some help. Since the Eduard P-38L includes upgrades for nearly everything, I decided to invest in some goodies for the -M to bring it up to par with her. A quick order to BNA Models and I was set.
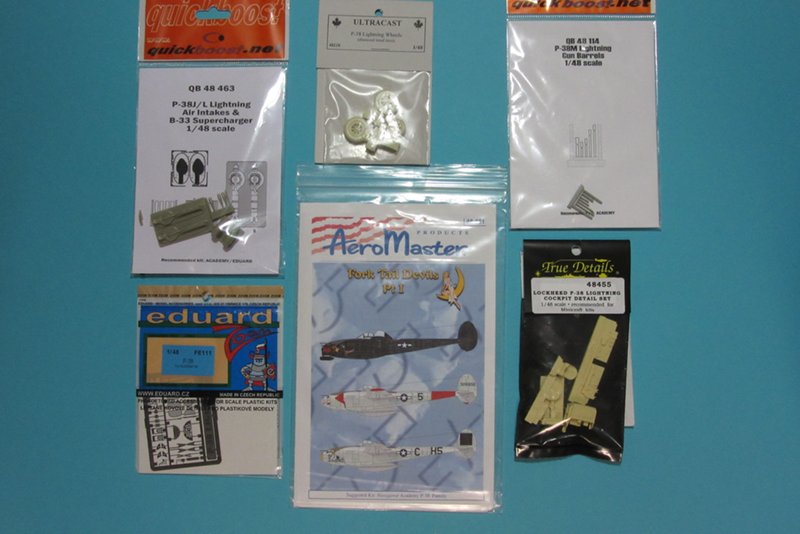


I grabbed:
- a set of Quickboost's shrouded barrels for the P-38M;
- Quickboost P-38L air intakes and superchargers;
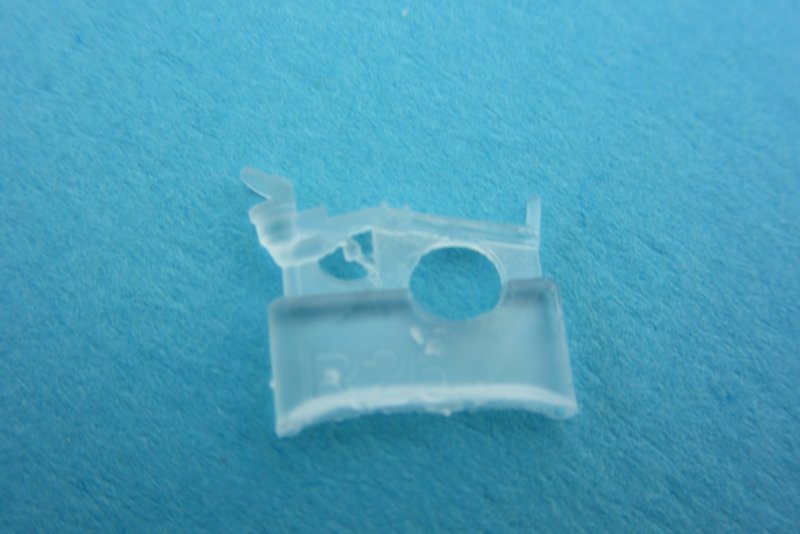
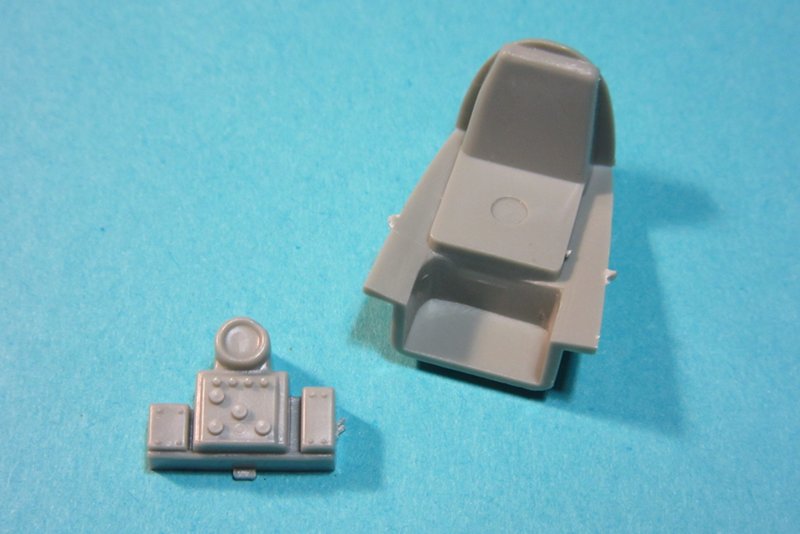
- True Details resin cockpit set for the pilot's compartment (I will scratch improvements to the R/O);
- Ultracast diamond tread spoked wheels (with the correct front wheel pattern);
- Eduard Zoom for the PE panel and acetate dials along with radiator screens and oleo scissors;
- and finally Aeromaster decals to replace the poor ones included with the kit.

This collection of upgrades should help her keep up with the Eduard kit. I am really looking forward to working on them but I first I am determined to finish off my YP-80 and P-51D. I am hoping to get into the project soon.

Please follow along and feel free to offer suggestions and input. I really appreciate the tips everyone has offered me in the past.
AussieReg
Staff MemberAssociate Editor
AUTOMODELER
#007
_VISITCOMMUNITY
Victoria, Australia
Joined: June 09, 2009
KitMaker: 8,156 posts
AeroScale: 3,756 posts
Posted: Sunday, May 03, 2015 - 06:30 PM UTC
This looks like it will be a very interesting thread, I love the twin-engine fighters!

I have the Academy boxing of the P-38M in my stash as well Paul, so I will be following your build here.

Cheers, D
Joel_W
Staff MemberAssociate Editor
AUTOMODELER
_VISITCOMMUNITY
New York, United States
Joined: December 04, 2010
KitMaker: 11,666 posts
AeroScale: 7,410 posts
Posted: Monday, May 04, 2015 - 08:39 PM UTC
Paul,
Talk about a major build blog. You've jumped into it with both feet. You can bet that I'll be following along every step of the way with both builds.

The Eduard Limited edition boxing is something that I should have gone for rather then buying all the AM stuff separately for my P-38 build.

The Quickboost turbos are just beautifully molded, however I opted not to use the intakes. the Legends cockpit is well detailed, but I had issues with the seat mounting brackets and the seat as well. They were molded so thin that both literally fell apart between my fingers. Most likely I just got a bad molding. I ended up reworking the kit parts. And those Ultracast wheels are just exquisite.

Joel
PeeJay74
#363
_VISITCOMMUNITY
Pennsylvania, United States
Joined: January 08, 2014
KitMaker: 425 posts
AeroScale: 401 posts
Posted: Monday, May 04, 2015 - 09:11 PM UTC
Heh thanks Joel, this is indeed going to be a bigger project than my last blog effort. I am trying to approach it in a smart manner though. I am almost finished with my YP-80 which will just leave me with the Tamiya P-51D to clear the bench. Once the YP-80 is done I will likely get this moving, the P-51 practically falls together by itself so I am not worried about needing extra time for it. I can get started on the P-38's while I watch paint dry on the Mustang.

I chose the identical Academy plastic to make the effort easier, having familiarity with the kit from building their F-5E. I just hope the noses fit better on the armed birds.

I figure I can stagger the work so as I am waiting for something on the first kit to set up or dry I can repeat my efforts on the second. The biggest hurdles should be the cockpits and the paint jobs. There is a lot of resin between them, and I picked a real pair with NMF and overall Gloss Black. NMF doesn't worry me as much as the black. I don't want it to be a solid monotone, boring shade.

I got the idea for the Ultracast wheels from your build, they are pricier than the TD set I used on my F-5E but they do look so much better. I plan to cut things open this weekend and do the boring prep work like washing parts.
Joel_W
Staff MemberAssociate Editor
AUTOMODELER
_VISITCOMMUNITY
New York, United States
Joined: December 04, 2010
KitMaker: 11,666 posts
AeroScale: 7,410 posts
Posted: Monday, May 04, 2015 - 09:49 PM UTC
Paul,
My build wasn't exactly the greatest, as it had it's issues. Since you've already built the kit once, I don't need to tell you about the main wheel wells. The fit isn't perfect, and it just looks too bulky for my tastes. Still, it's a nice kit, and with your skills, I'm sure that both P-38s will be show stoppers.
Joel
Joel_W
Staff MemberAssociate Editor
AUTOMODELER
_VISITCOMMUNITY
New York, United States
Joined: December 04, 2010
KitMaker: 11,666 posts
AeroScale: 7,410 posts
Posted: Monday, May 04, 2015 - 09:53 PM UTC
Paul,
I'm looking forward to seeing your pictures of both the YP-80 and the P-51. Your our resident expert on all things related to the P-51 series.

Joel
PeeJay74
#363
_VISITCOMMUNITY
Pennsylvania, United States
Joined: January 08, 2014
KitMaker: 425 posts
AeroScale: 401 posts
Posted: Thursday, May 07, 2015 - 04:12 AM UTC
I broke down and opened everything up today despite not being finished with my other projects. I just couldn't resist getting some of the preliminary chores done.


Everything washed and lightly scrubbed with an old toothbrush to remove any mold agents, then set out to dry in the sun.

I haven't even touched glue to plastic and I already have a problem with both kits. Somehow both kits suffered damage to part E16, the gear leg being sheared off in the middle of the oleo. The broken end for the P-38M was in the bag, but there was no sign of the Eduard end anywhere to be found. Apparently it was eaten by the carpet monster.


Both kits have identical damage to the same part, E16. I have no idea how it occurred to either kit.

I am not sure how I want to resolve this particular issue. I will most likely drill out both halves and pin it back together with some glue and 0.015 steel wire. I am a tad leery given it is a load-bearing part. For the Eduard kit I really don't have any options other than to get replacement gear from SAC or the like, unless the missing half suddenly shows up. At least if I go that route I won't have to worry about how much weight I put in the nose.

Eduard have included an nice gunsight for their P-38L in clear resin. The Academy kits don't include any sort of accurate gunsight, instead mounting it to the retractable coaming over the instrument panel. The real one is far more complicated, being mounted on an arm bolted to the front windscreen on late model P-38's. Eduard have done an excellent job capturing this detail.


Above: Eduard's gunsight in clear resin. Below: The real thing, only about $650 on Evilbay!


I am going to try and scratch something similar together for the P-38M out of strip or scrap, and add an acetate reflector glass. I've seen builds where people cast their own small resin parts but I don't have any experience doing that sort of thing. If only Eduard sold that cockpit set as an aftermarket option!

There is a ton of resin between these two kits, the end result being what I hope will be some excellent looking cockpits. I don't have any concerns for the Eduard P-38L. There is resin for every detail you could want in the cockpit, plus some colored photo-etch to add details like placards and instrument gauges. The front office of the P-38M will end up with close to the same treatment between the True Details resin and Eduard's Zoom. The PE isn't colored (it's a very old set) but the acetate gauges should pop nicely against some white Evergreen sheet. The R/O station is another story...


This just won't do! (Eduard's grey plastic shown since photographing black would look like an even less detailed lump)

I'm planning to flesh this out by building sidewalls on 0.005 Evergreen sheet and laminating them into the tub after I add some boxes and wires. The seat will have to go as well, it's totally wrong. The real one is armor plate for the seatback and a canvas bench. The radar will also need some work; wiring, some additional boxes, and a hood. I'll get to work on all of that once I get the resin primed, it should make for fun work.
Bigrip74
_VISITCOMMUNITY
Texas, United States
Joined: February 22, 2008
KitMaker: 5,026 posts
AeroScale: 2,811 posts
Posted: Thursday, May 07, 2015 - 05:02 AM UTC
[quote] I already have a problem with both kits. Somehow both kits suffered damage to part E16, Paul[quote]

OUCH!
magnusf
_VISITCOMMUNITY
Stockholm, Sweden
Joined: May 02, 2006
KitMaker: 1,953 posts
AeroScale: 1,902 posts
Posted: Thursday, May 07, 2015 - 11:20 AM UTC
Paul! You might already have seen my take on the same subject, same scale but from a different kit and for different purposes ! The black paintjob was my main worry as well but it turned out a lot easier than expected. I used gloss black from a Tamiya rattlecan and faded it afterwards with thin, grey, transparent layers applied with the airbrush.

I intended to join the Fork Tail campaign with a Dragon 1/72 Night Lightning (but realised that I won't have time for it) and for that one I would probably have tried using Gunze H77 "Tire Black" for the overall finish but on the other hand they do look REALLY black on photos so my original rattlecan tactic might be the right one anyway...

Will follow with interest, it's an impressive aircraft and you have really stocked up on goodies for them!


Magnus
PeeJay74
#363
_VISITCOMMUNITY
Pennsylvania, United States
Joined: January 08, 2014
KitMaker: 425 posts
AeroScale: 401 posts
Posted: Thursday, May 07, 2015 - 07:31 PM UTC
@Bob - Yeah, Ouch isn't quite the word I was using when I discovered the damages.

@Magnus - I have checked out your build of the old Monogram kit several times while planning mine. Nice work! I really like the finish. I am debating going with straight gloss black over some red or blue pre-shading to give it a subtle tint on panels, or using Tamiya NATO Black to fade it with some color "scale".

I have lots of pics from the net showing 'Shady Lady' looking pretty weathered, and many more showing shiny new Night Lightnings so I guess I can go either way with it. I think I will run some tests preshading black with colors to see how it looks then decide.
Joel_W
Staff MemberAssociate Editor
AUTOMODELER
_VISITCOMMUNITY
New York, United States
Joined: December 04, 2010
KitMaker: 11,666 posts
AeroScale: 7,410 posts
Posted: Thursday, May 07, 2015 - 09:36 PM UTC
Paul,
One broken strut would have been more then enough, but two is just plain unfair. Your idea of pinning the broken pieces works very well, as I've compressed the oleos that way on a few kits.

I'm assuming that you're referring to an AM set of struts to replace struts with the missing piece?

I really like the idea of Nato Black over Red rather then Blue.

BTW, I had to laugh when I saw the Twister mat

Joel
PeeJay74
#363
_VISITCOMMUNITY
Pennsylvania, United States
Joined: January 08, 2014
KitMaker: 425 posts
AeroScale: 401 posts
Posted: Thursday, May 07, 2015 - 10:04 PM UTC
Joel,

Yeah I am a little annoyed at the gear. The breaks are honestly in a good spot for effective repairs, but losing the Eduard one is a pain. I figure I have 3 options:

1. Pick up a dirt cheap Academy P-38 on Ebay for spares. I assume the landing gear are the same for all of their P-38 kits so this might be doable. Sometimes started or partial kits go really cheap. Saw an -E model for like $8 yesterday.

2. Scavenge the gear legs off of my F-5E. This is actually a possibility. I am not happy with it, it being one of my very early builds once I came back to the hobby. I plan to build another improved, far more detailed one anyway. So maybe...

3. Or finally, AM replacements along the lines of Scale Aircraft Conversions (SAC) white metal landing gear series. This has the benifit of neutralizing any weight concerns of the completed kit since they are much stronger than plastic. The downside is they retail for about $15 a set plus shipping and as far as I can tell are no more detailed than the kit plastic. For that kind of money I would like better detail.

For now, I am going to hold off on the gear assemblies until much later in the build. I have been spending a lot of cash lately so my wallet needs a rest.
Joel_W
Staff MemberAssociate Editor
AUTOMODELER
_VISITCOMMUNITY
New York, United States
Joined: December 04, 2010
KitMaker: 11,666 posts
AeroScale: 7,410 posts
Posted: Friday, May 08, 2015 - 12:58 AM UTC

Quoted Text

Joel,

Yeah I am a little annoyed at the gear. The breaks are honestly in a good spot for effective repairs, but losing the Eduard one is a pain. I figure I have 3 options:

1. Pick up a dirt cheap Academy P-38 on Ebay for spares. I assume the landing gear are the same for all of their P-38 kits so this might be doable. Sometimes started or partial kits go really cheap. Saw an -E model for like $8 yesterday.

2. Scavenge the gear legs off of my F-5E. This is actually a possibility. I am not happy with it, it being one of my very early builds once I came back to the hobby. I plan to build another improved, far more detailed one anyway. So maybe...

3. Or finally, AM replacements along the lines of Scale Aircraft Conversions (SAC) white metal landing gear series. This has the benifit of neutralizing any weight concerns of the completed kit since they are much stronger than plastic. The downside is they retail for about $15 a set plus shipping and as far as I can tell are no more detailed than the kit plastic. For that kind of money I would like better detail.

For now, I am going to hold off on the gear assemblies until much later in the build. I have been spending a lot of cash lately so my wallet needs a rest.


Paul,
I stuffed a fair amount of weight into the nose of my just ok P-38, and so far the kit gear has held up with no issues.

If you're going to replace your F-5E anyway, you might as well salvage the gear from it. Worse case scenario is that the gear snaps during the removal.

My wallet, or should I say double secret modeling fund has been taking serious hits since day one of my return. This sure isn't exactly a cheap hobby like it was in the good old days.

Joel
PeeJay74
#363
_VISITCOMMUNITY
Pennsylvania, United States
Joined: January 08, 2014
KitMaker: 425 posts
AeroScale: 401 posts
Posted: Tuesday, May 26, 2015 - 06:34 AM UTC
Just a very brief update. I successfully fixed the Night Lightning's landing gear by drilling and pinning it. I'm going to break down and buy a set of metal gear for the Eduard kit I think. I just can't bring myself to destroy my F-5E, even though I want to build a better one.


Above: Just in case someone out there isn't familiar with the procedure: Pinning the broken gear by drilling each end with a 0.016" (#78) bit and then inserting a length of 0.015" steel wire before gluing the ends together. Below: The end result of the repair. The repaired gear leg is on the right, the fix barely noticeable from its unbroken mate. It should be as good as new, the hidden wire adding strength.


Most people probably knew that tip, but I thought I'd show it anyway in case anyone else out there is like me and trying to learn new things.

I should be able to focus a lot more time on this project soon. I primed all of the resin and PE so I can begin constructing the cockpits. More to come in a bit, thanks for following along.
AussieReg
Staff MemberAssociate Editor
AUTOMODELER
#007
_VISITCOMMUNITY
Victoria, Australia
Joined: June 09, 2009
KitMaker: 8,156 posts
AeroScale: 3,756 posts
Posted: Tuesday, May 26, 2015 - 08:27 AM UTC
Very nice fix Paul, neat work indeed!

Cheers, D
SGTJKJ
#041
_VISITCOMMUNITY
Kobenhavn, Denmark
Joined: July 20, 2006
KitMaker: 10,069 posts
AeroScale: 3,788 posts
Posted: Wednesday, June 17, 2015 - 04:56 PM UTC
Interesting project, Paul.

Looking forward to see more.
PeeJay74
#363
_VISITCOMMUNITY
Pennsylvania, United States
Joined: January 08, 2014
KitMaker: 425 posts
AeroScale: 401 posts
Posted: Wednesday, June 17, 2015 - 07:56 PM UTC
Thanks guys. I have been a little stalled lately, it's been hard to find time to spend at the bench. I did decide how I want to do the paint jobs. The NMF bird is easy, I am comfortable with Alclad so it should work out easily if I can get it put together smoothly. For the black night fighter, I recently picked up issue #1 of Aces High with all of the Luftwaffe night fighters. There is a nicely weathered Bf 109 in all black camo. I am going to use that for inspiration and try something similar with my P-38M. It's a blend of lots of shades of dark grey which gives a look of weathered, scale black when its all done. Now to just find time to work on them!
Joel_W
Staff MemberAssociate Editor
AUTOMODELER
_VISITCOMMUNITY
New York, United States
Joined: December 04, 2010
KitMaker: 11,666 posts
AeroScale: 7,410 posts
Posted: Wednesday, June 17, 2015 - 08:45 PM UTC
Paul,
Excellent repair on that broken oleo.

As for finding time at the bench during the summer months, it can be hard, especially for you newlyweds.

Looking forward to how you deal with the all black finish on the night fighter. To me it's a much harder finish to pull off then a NMF.

Joel
 _GOTOTOP