Bf 109G-4 - Eduard 1/48 Overtrees Kitbash
Germany
Joined: September 07, 2005
KitMaker: 5,609 posts
AeroScale: 5,231 posts
Posted: Sunday, June 05, 2016 - 10:59 PM UTC
Well, I sure have more than one JG 52 model (kit) and there will be more...
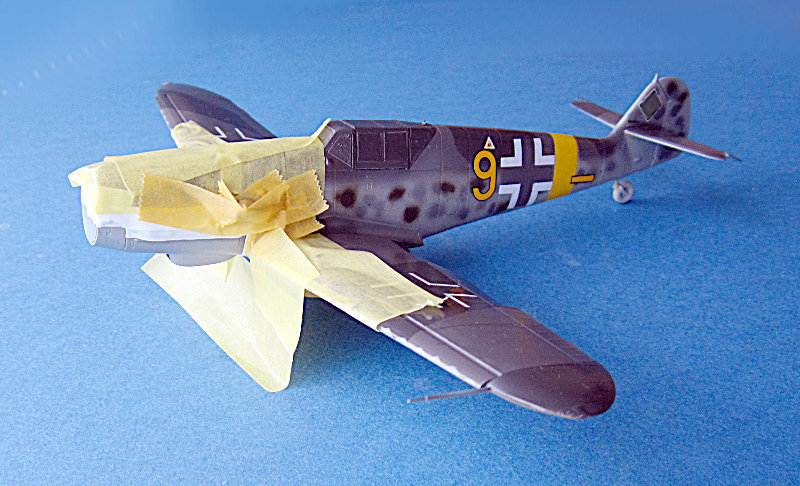
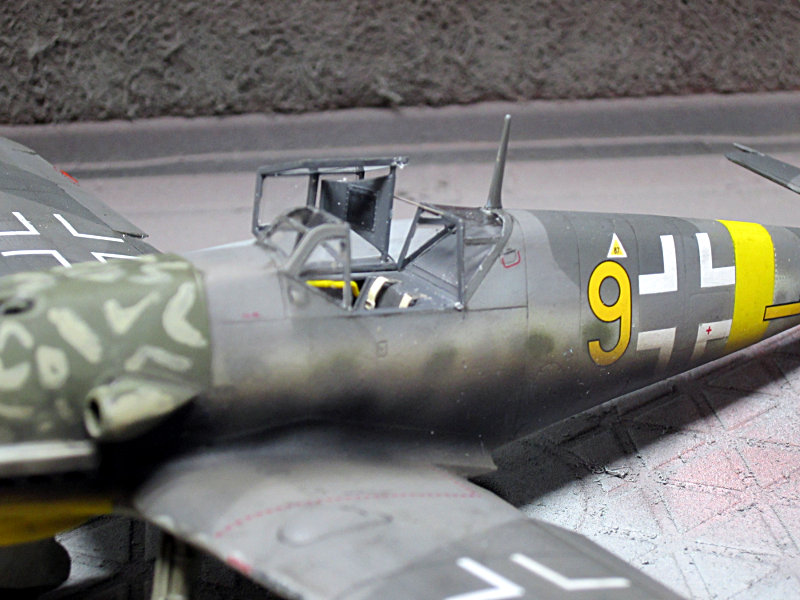
Here is the hood camouflaged. To me it looks like brush painting on the pictures of this crate thus I did that too.
The rhs is done after photos. Even though this is not fully correct I am o.k. with the result ... the other side is very badly visible on the pictures and thus I went with the instructions. Then some more Klear to seal it.
all the best
Steffen
DULCE ET DECORUM EST PRO HOBBY MORI
Germany
Joined: September 07, 2005
KitMaker: 5,609 posts
AeroScale: 5,231 posts
Posted: Thursday, June 09, 2016 - 11:03 PM UTC
Slow but steady I am moving forward with this (I even managed to get som more decals on my Gnat)
Sadly it is 2 steps forward one back. Due to the gloss laquer I wanted to get away with just using Daco and not my usual decal application with Klear. Well, when I masked the fuselage crosses for the RLM 75 inlay I pulled the decal up. So I had to find a replacement.
The cross from the Aeromaster generic set was a little bit smaller than the original - but obviously the right size fitting excactly between the panel lines of the fuselage - so both sides were replaced... but all taking some time....
all the best
Steffen
DULCE ET DECORUM EST PRO HOBBY MORI

#424
Queensland, Australia
Joined: April 23, 2015
KitMaker: 4,648 posts
AeroScale: 1,938 posts
Posted: Friday, June 10, 2016 - 02:09 AM UTC
It looks really nice, Steffen. I hate it when decals lift up. I've started to experiment with Panzer Putty instead of tape for masking
Gaz
"Artillery adds dignity, to what would otherwise be an ugly brawl."
Frederick The Great
Germany
Joined: September 07, 2005
KitMaker: 5,609 posts
AeroScale: 5,231 posts
Posted: Friday, June 10, 2016 - 12:46 PM UTC
Well normally this aint an issue... maybe a day drying time was to short. I better stick to my normal Klear procedure which works in most cases and glues the decals to the kit.
all the best
Steffen
DULCE ET DECORUM EST PRO HOBBY MORI
Joel_W
 Associate Editor
New York, United States
Joined: December 04, 2010
KitMaker: 11,666 posts
AeroScale: 7,410 posts
Posted: Friday, June 10, 2016 - 06:51 PM UTC
Steffen,
It's the final results that count, and those replacement decals look great.
I've had absolutely no luck masking over decals no matter what the clear was applied to protect them, and always managed to damage them. I have one hard fast rule, never, ever mask with tape over a decal. If I had to mask a decal like you did, I would try to use small pieces of Post-It and hope for the best that they worked.
Joel
On my Workbench:
Monogram 1/24 scale 427 Shelby Cobra
Just Completed:
Beemax 1/24 scale BMW M3 E30 1992 Evolution II
Germany
Joined: September 07, 2005
KitMaker: 5,609 posts
AeroScale: 5,231 posts
Posted: Saturday, July 16, 2016 - 03:11 PM UTC
Soooo work took the better part of my days for a good two months which meant no progress... at all... on none of my projects! Very depressing.
It got a little better over the past 2 weeks which meant I could work down some backlog on my website and still I managed to start something new

(it is a disease.... )
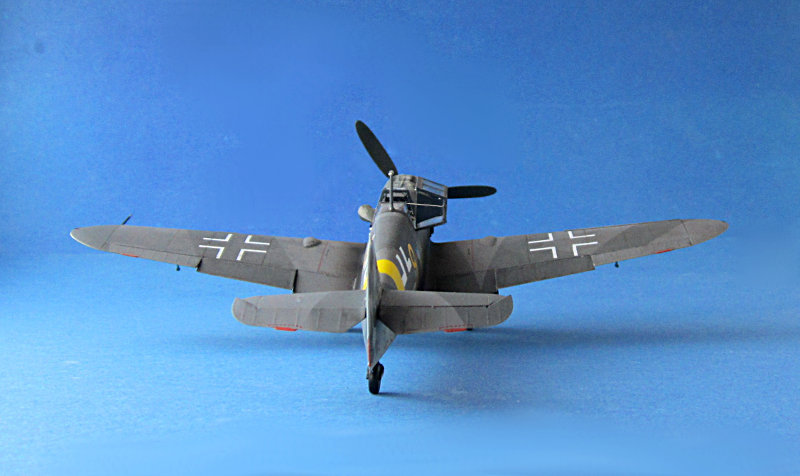
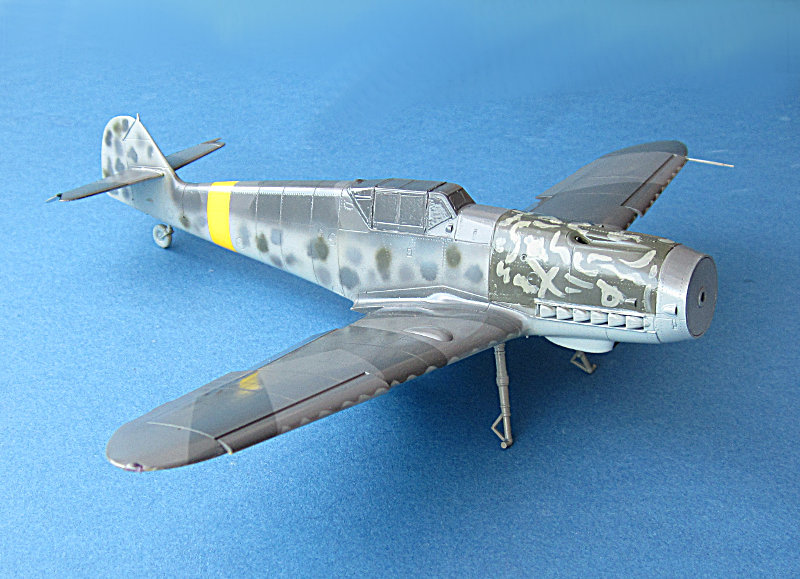
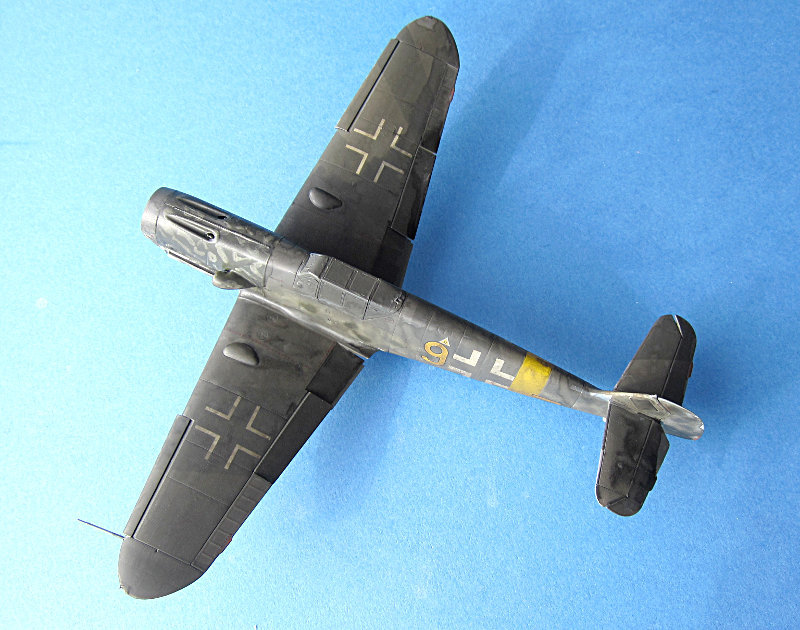
Anyway I also added one or another stencil on my Bf 109G-4. One thing is bothering me since I checked the pix in the above mentioned publication, especially the lhs full view .. lower cowl, wing tip and fuselage band look like the same color.
Thinking back and forth and with the new Tamiya flexible tape at hand I decided to make it yellow...
hope to post some more progress soon
all the best
Steffen
DULCE ET DECORUM EST PRO HOBBY MORI
Merlin
Senior Editor #017
United Kingdom
Joined: June 11, 2003
KitMaker: 17,582 posts
AeroScale: 12,795 posts
Posted: Saturday, July 16, 2016 - 07:17 PM UTC
Nice one Steffen
Good to see you back at work on this. I'm looking forward to seeing it finished.
I'm just at the end my sick leave - and I had such big plans to get in masses of quality time at the workbench in my first opportunity in ages. But, inevitably, to begin with I wasn't well enough - and then everything else that had been piling up made equal demands on my time.

Still, progress is progress, and I've enjoyed what I have managed to do.

All the best
Rowan

BEWARE OF THE FEW...
As I grow older, I regret to say that a detestable habit of thinking seems to be getting a hold of me. - H. Rider Haggard
Joel_W
Associate Editor New York, United States
Joined: December 04, 2010
KitMaker: 11,666 posts
AeroScale: 7,410 posts
Posted: Saturday, July 16, 2016 - 08:15 PM UTC
Steffen,
Glad to hear that you've got some time at the bench again. Looking forward to all those corrections, as your work is always top notch.
Joel
On my Workbench:
Monogram 1/24 scale 427 Shelby Cobra
Just Completed:
Beemax 1/24 scale BMW M3 E30 1992 Evolution II
Germany
Joined: September 07, 2005
KitMaker: 5,609 posts
AeroScale: 5,231 posts
Posted: Saturday, July 16, 2016 - 09:40 PM UTC
Thank you Rowan and Joel!
I just hope I can get through with this project now .. but we will see.
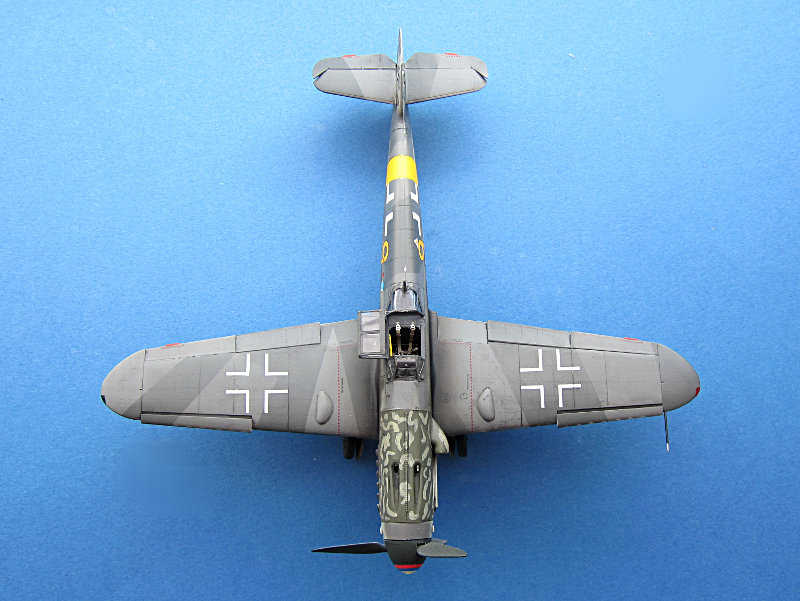
Here is a picture with the masks removed:
I'll let it dry for some more time...
all the best
Steffen

DULCE ET DECORUM EST PRO HOBBY MORI
Germany
Joined: September 07, 2005
KitMaker: 5,609 posts
AeroScale: 5,231 posts
Posted: Tuesday, July 19, 2016 - 11:41 PM UTC
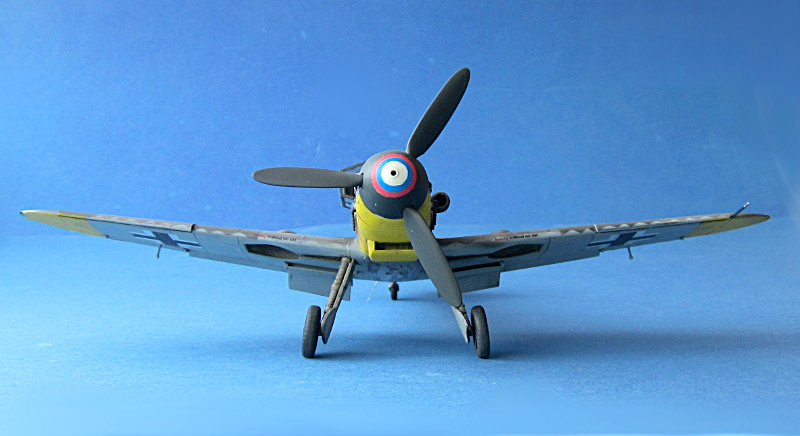
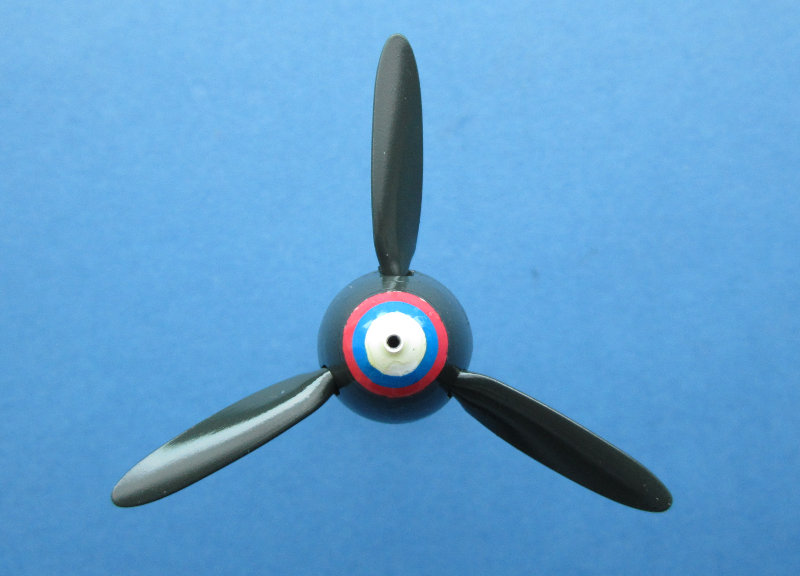
I worked on the propeller for the past evenings.
First I airbrushed the tip white then I applied the decal, then masking the tip, spraying RLM 70 and finally a gloss coat. The decal did not perform flawless, but it also shows much more on the close up photo than in "real life"
all the best
Steffen
P.S. the G-5 is also glossy now
DULCE ET DECORUM EST PRO HOBBY MORI
Germany
Joined: September 07, 2005
KitMaker: 5,609 posts
AeroScale: 5,231 posts
Posted: Friday, July 22, 2016 - 12:28 PM UTC
Hi again,
after adding most of teh small stencils I sprayed another layey of Klear on the model.
and now it's grime time
as in most cases just water color umbra and black mixed on the model.
all the best
Steffen
DULCE ET DECORUM EST PRO HOBBY MORI
Lisboa, Portugal
Joined: August 27, 2010
KitMaker: 679 posts
AeroScale: 669 posts
Posted: Friday, July 22, 2016 - 03:45 PM UTC
Cool kitbash Steffen. Hope to see it completed soon
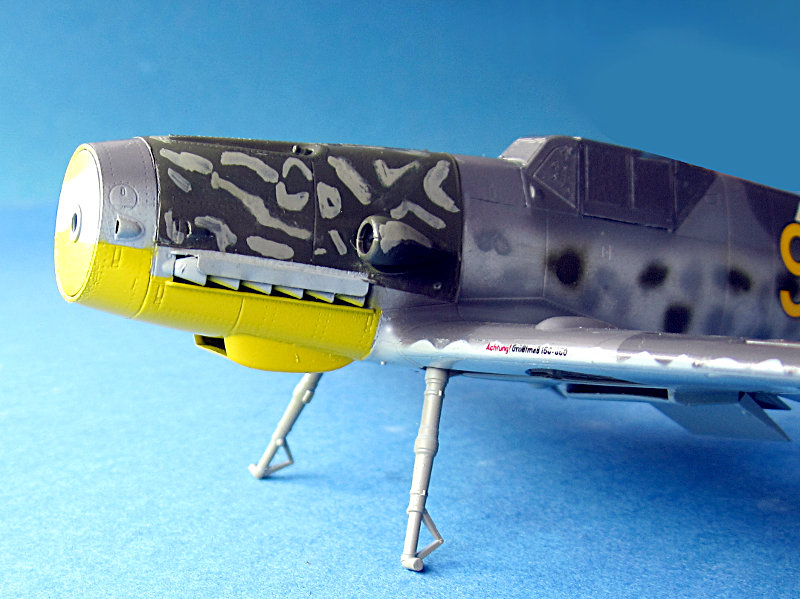
The specific JG.52 engine cowling camo is a good challenge to mix airbrush and brush (or sponge) techs. I believe these were the preferred mediums for that field applied camouflage, though airbrush could also be used I guess.
Cheers
Pedro
Germany
Joined: September 07, 2005
KitMaker: 5,609 posts
AeroScale: 5,231 posts
Posted: Friday, July 22, 2016 - 05:11 PM UTC
Thanks Pedro!
I hope to finish it soon...
On the pix it looks like painted on with a very large brush (Quast) so I wehnt for brush application too ... might be wrong, but I am quite happy with the result.
all the best
Steffen
DULCE ET DECORUM EST PRO HOBBY MORI
Joel_W
Associate Editor New York, United States
Joined: December 04, 2010
KitMaker: 11,666 posts
AeroScale: 7,410 posts
Posted: Saturday, July 23, 2016 - 05:41 AM UTC
Steffen,
the prop and spinner really looks quite good to me. As you said, we're looking at pictures much greater then 1:1, so naturally it would look rougher in texture then in real life. I always have that exact issue with macro close ups of small detail parts. The IP on my Mossie is a perfect example.
Joel
On my Workbench:
Monogram 1/24 scale 427 Shelby Cobra
Just Completed:
Beemax 1/24 scale BMW M3 E30 1992 Evolution II
Germany
Joined: September 07, 2005
KitMaker: 5,609 posts
AeroScale: 5,231 posts
Posted: Saturday, July 23, 2016 - 11:38 AM UTC
Cheers Joel!
I agree on the close ups...
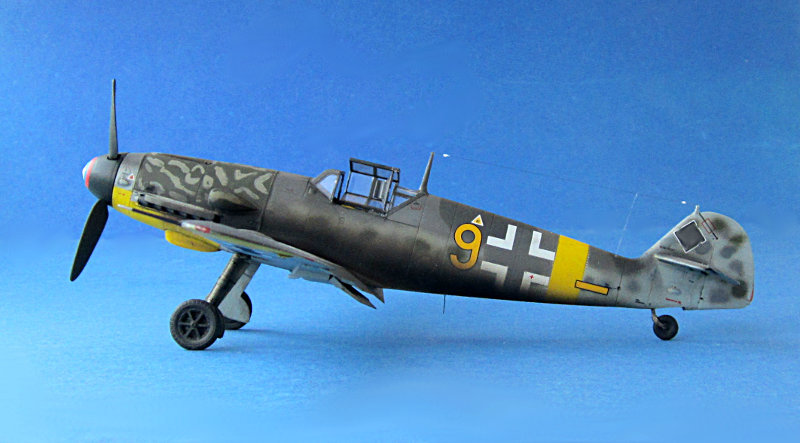
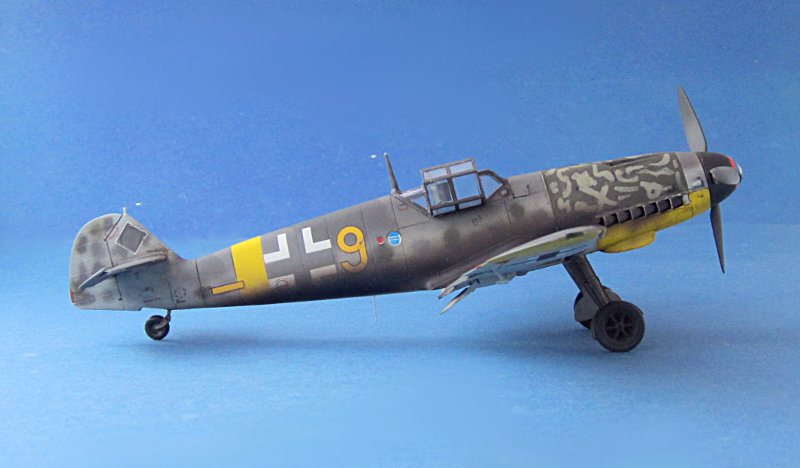
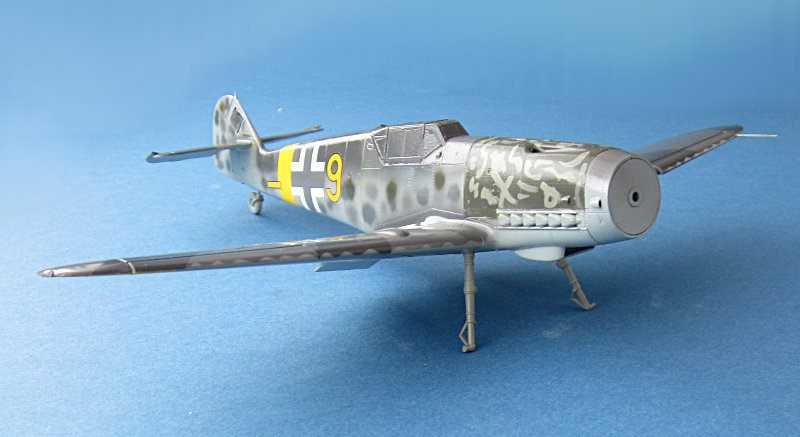
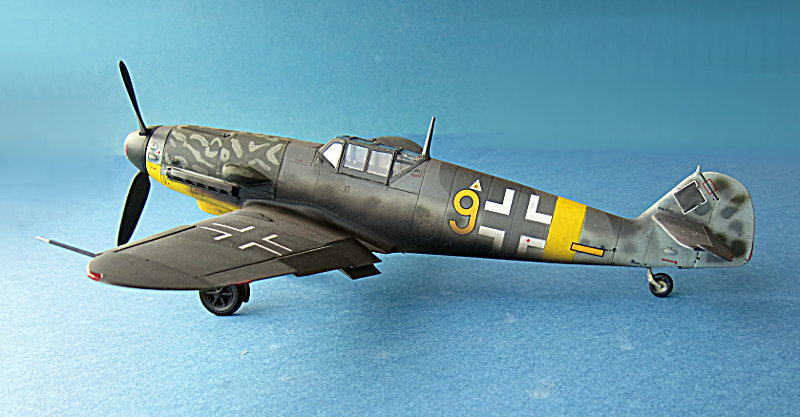
So I have removed the excess wash and added some smallparts. Then I shot a good layer of Tamiya XF 86. This is how it looks now.


Next will be a test of bravery... this crate has heavy exhaust stains...
all the best
Steffen
DULCE ET DECORUM EST PRO HOBBY MORI
#424
Queensland, Australia
Joined: April 23, 2015
KitMaker: 4,648 posts
AeroScale: 1,938 posts
Posted: Saturday, July 23, 2016 - 12:54 PM UTC
Steffen,
Nstarting to look very good. Great job on the spinner.
Gaz
"Artillery adds dignity, to what would otherwise be an ugly brawl."
Frederick The Great
Germany
Joined: September 07, 2005
KitMaker: 5,609 posts
AeroScale: 5,231 posts
Posted: Saturday, July 23, 2016 - 01:58 PM UTC
Thanks Gary,
but beauty is in the eye of the beholder....
to me it looks better now
cheers
Steffen
DULCE ET DECORUM EST PRO HOBBY MORI
Germany
Joined: September 07, 2005
KitMaker: 5,609 posts
AeroScale: 5,231 posts
Posted: Saturday, July 23, 2016 - 08:25 PM UTC
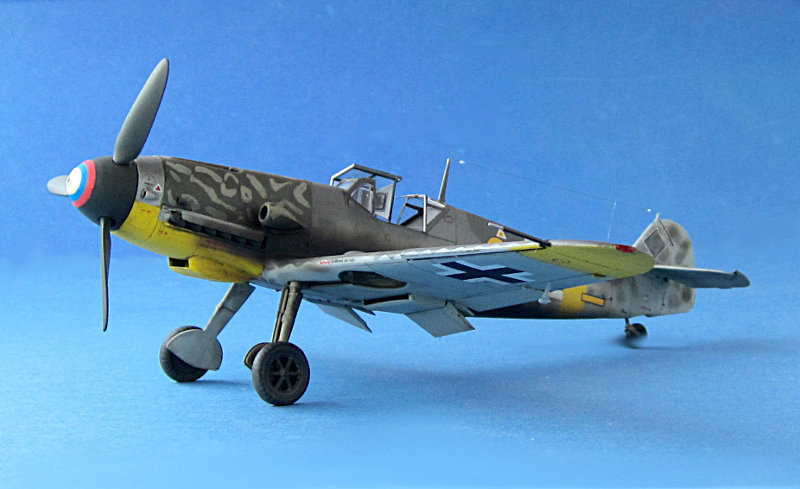
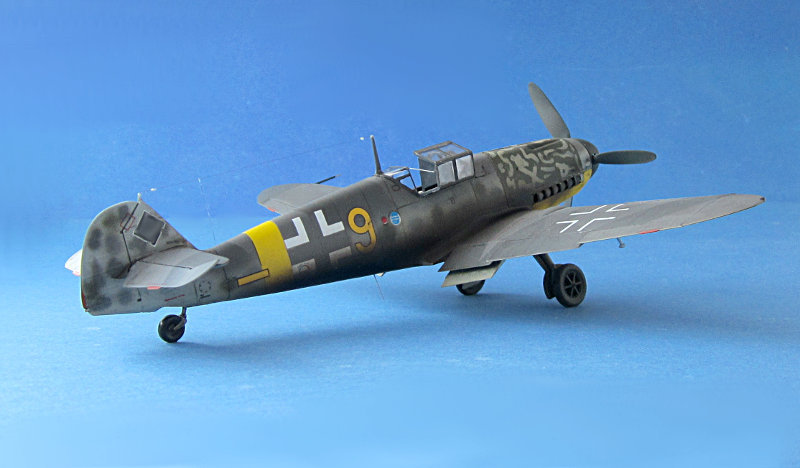
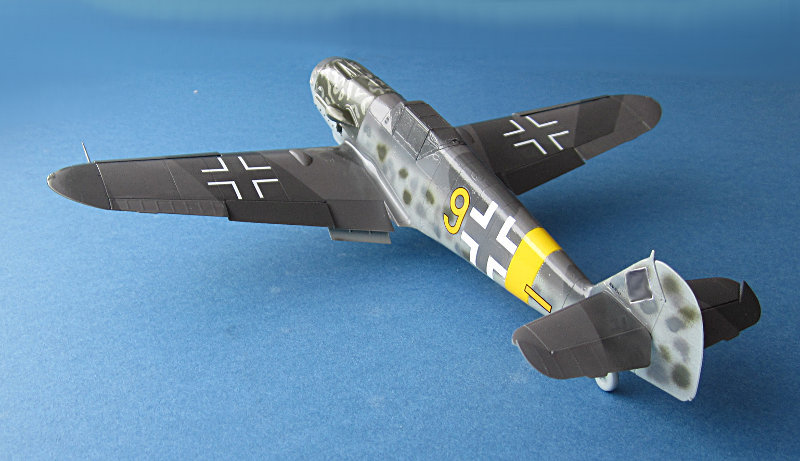
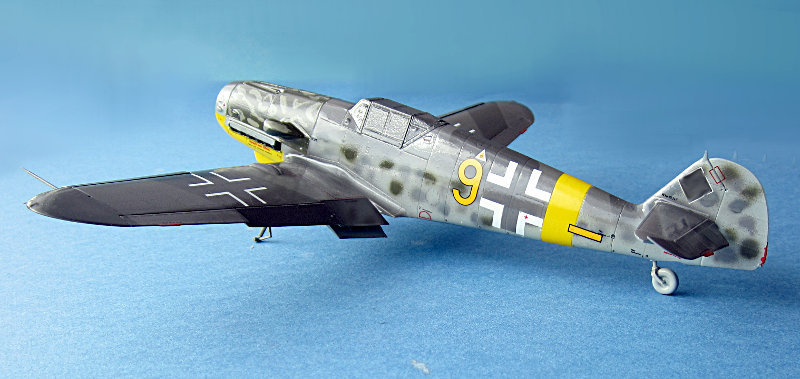
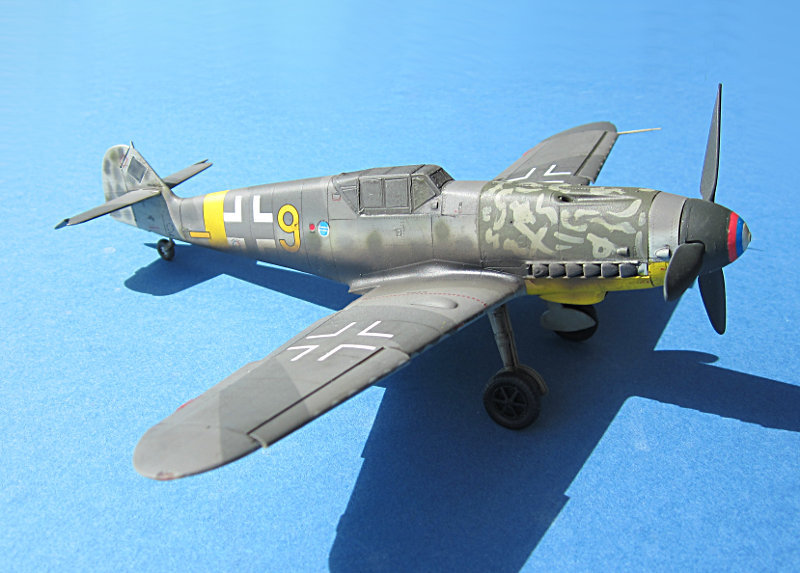
Some more bits done. position lights, antenna mast and demasking are the most obvious.
the canopy on this one shall be open so I'll add the head armour and the hodling wire next
all the best
Steffen
DULCE ET DECORUM EST PRO HOBBY MORI
Joel_W
Associate Editor New York, United States
Joined: December 04, 2010
KitMaker: 11,666 posts
AeroScale: 7,410 posts
Posted: Sunday, July 24, 2016 - 03:17 AM UTC
Steffen,
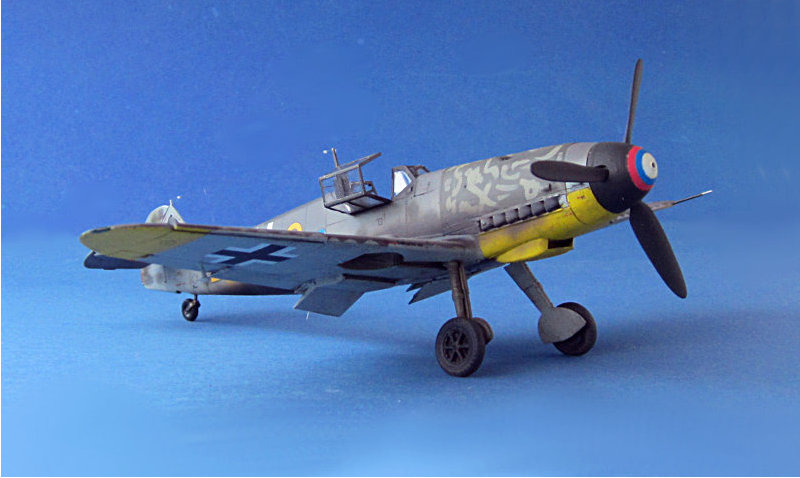
Outstanding to say the least. The final weathering and exhaust staining adds that well used look to an operational aircraft that spent most of it's time in the air.
The one pic of the spinner where one can see the Red, Blue & Gray really jumps right out at you.
Joel
On my Workbench:
Monogram 1/24 scale 427 Shelby Cobra
Just Completed:
Beemax 1/24 scale BMW M3 E30 1992 Evolution II
Germany
Joined: September 07, 2005
KitMaker: 5,609 posts
AeroScale: 5,231 posts
Posted: Sunday, July 24, 2016 - 10:40 PM UTC
Thank you Joel!
I find the red a bit washed out but I will live with it.
Today I added som small parts .. it is weather warm and moist here and that is not my preferred working environment. So I am rather happy with the few things done.
all the best
Steffen
DULCE ET DECORUM EST PRO HOBBY MORI
Merlin
Senior Editor #017
United Kingdom
Joined: June 11, 2003
KitMaker: 17,582 posts
AeroScale: 12,795 posts
Posted: Wednesday, July 27, 2016 - 01:27 AM UTC
Hi Steffen
I missed this update. Really nice exhaust stains - very effective.
How did you apply them?
All the best
Rowan
BEWARE OF THE FEW...
As I grow older, I regret to say that a detestable habit of thinking seems to be getting a hold of me. - H. Rider Haggard
Germany
Joined: September 07, 2005
KitMaker: 5,609 posts
AeroScale: 5,231 posts
Posted: Wednesday, July 27, 2016 - 04:23 PM UTC
Hi Rowan,
thanks for watching!
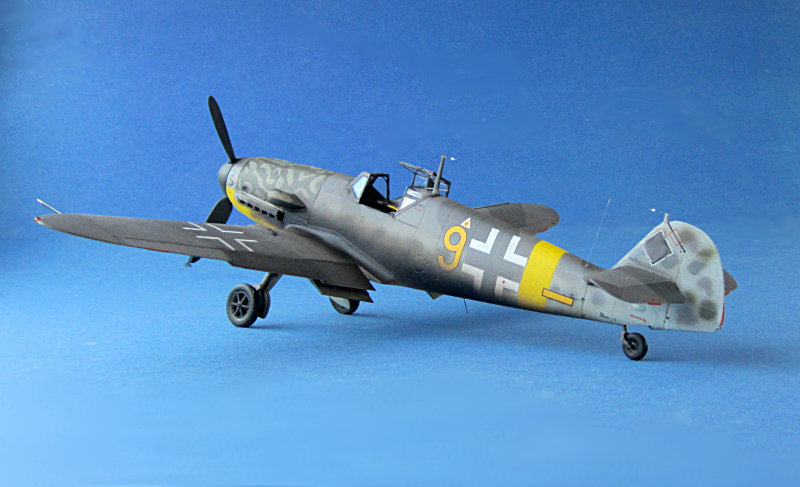
Normally I am not a big fan of that much exhaust stains .. but the pictures show them so I had to apply some. No big deal really just applied with the airbrush. first a thin layer of brown, then a greyish brown mixture and finally some black in the center. I used X-18 (semi gloss) for the latter as there is often a larger amount of oil involved when you get that much exhaust residue...
all the best
Steffen
DULCE ET DECORUM EST PRO HOBBY MORI
Germany
Joined: September 07, 2005
KitMaker: 5,609 posts
AeroScale: 5,231 posts
Posted: Thursday, July 28, 2016 - 11:46 PM UTC
Nearly there, just a few more touch ups
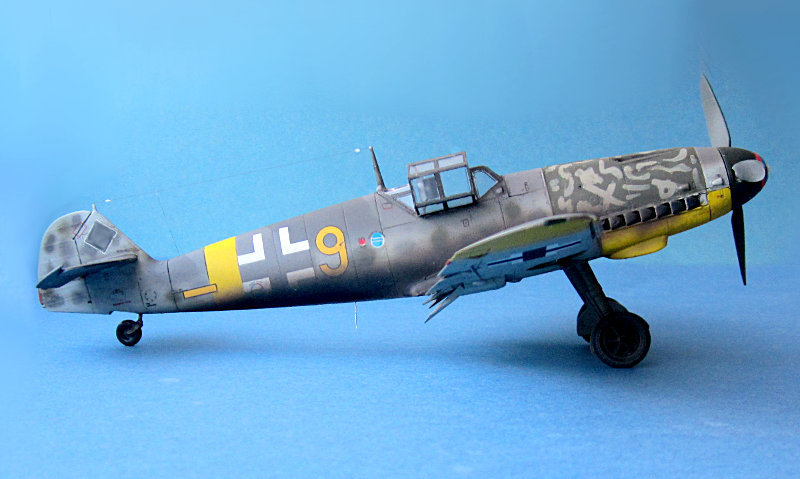
all the best
Steffen
DULCE ET DECORUM EST PRO HOBBY MORI
Germany
Joined: September 07, 2005
KitMaker: 5,609 posts
AeroScale: 5,231 posts
Posted: Friday, July 29, 2016 - 05:12 PM UTC
DULCE ET DECORUM EST PRO HOBBY MORI
Joel_W
Associate Editor New York, United States
Joined: December 04, 2010
KitMaker: 11,666 posts
AeroScale: 7,410 posts
Posted: Saturday, July 30, 2016 - 12:56 AM UTC
Steffen,
A most impressive conversion. Well done my friend, very well done.
Joel
On my Workbench:
Monogram 1/24 scale 427 Shelby Cobra
Just Completed:
Beemax 1/24 scale BMW M3 E30 1992 Evolution II