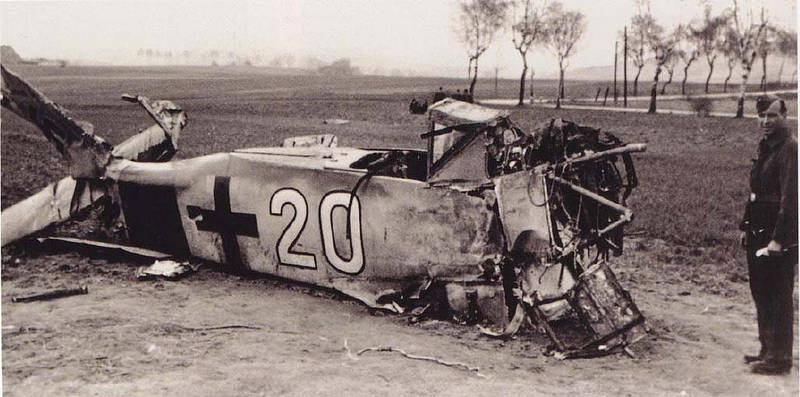
My friends all good things must come to an end.
The Dan Jayne tribute build has been finished.
Summary:
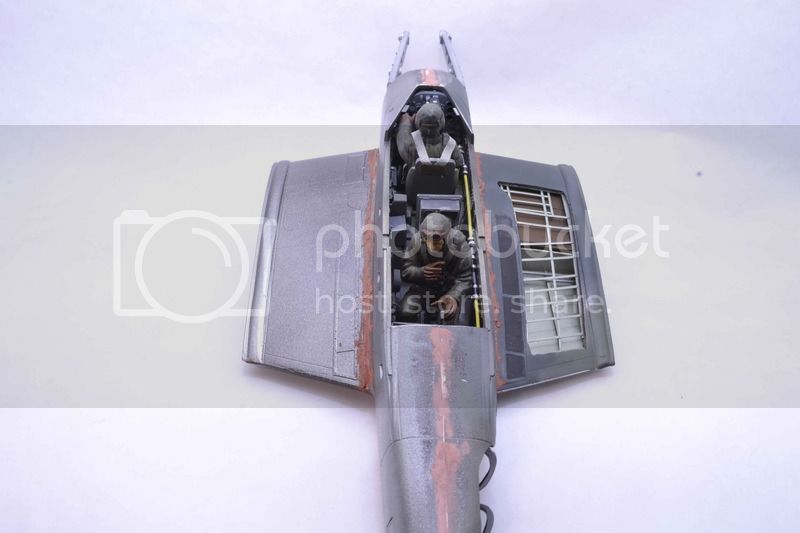
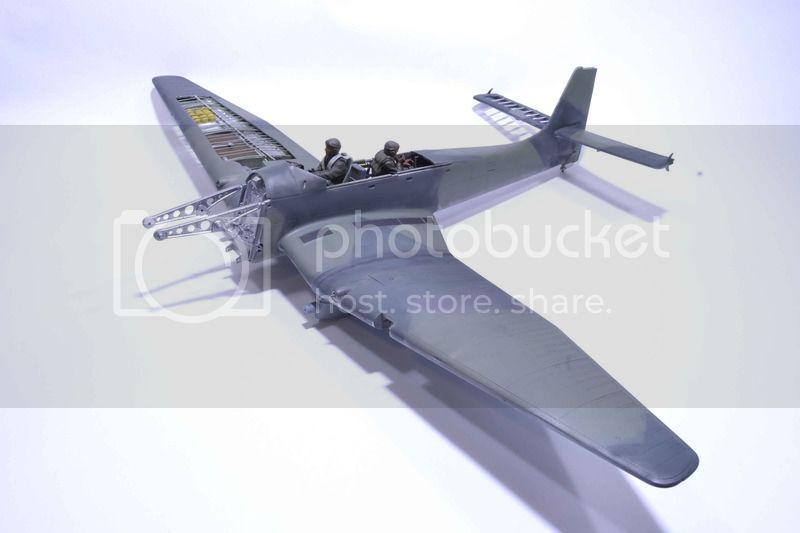
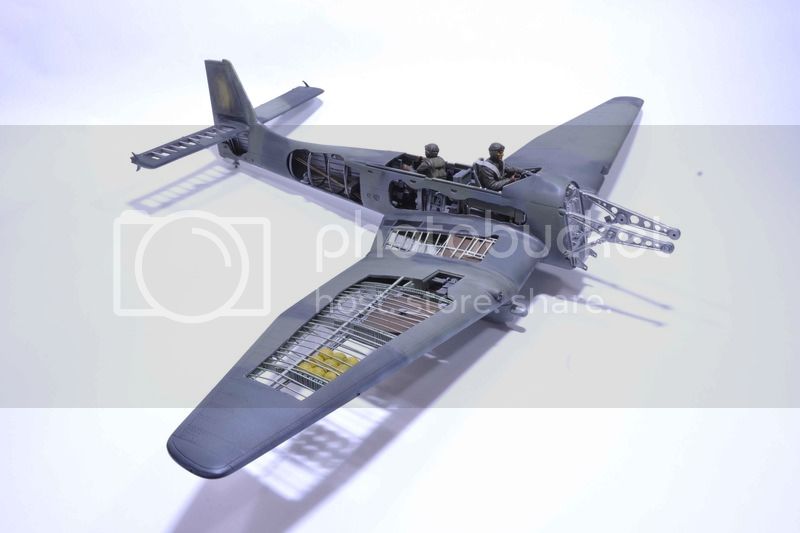
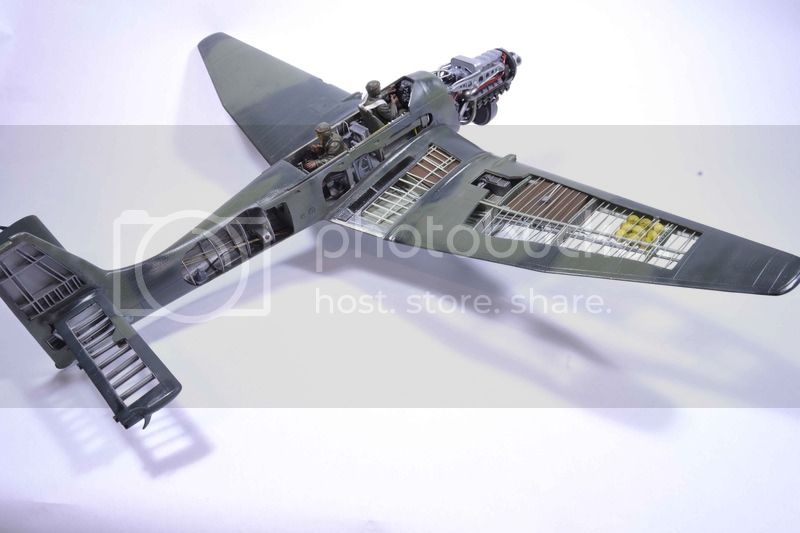
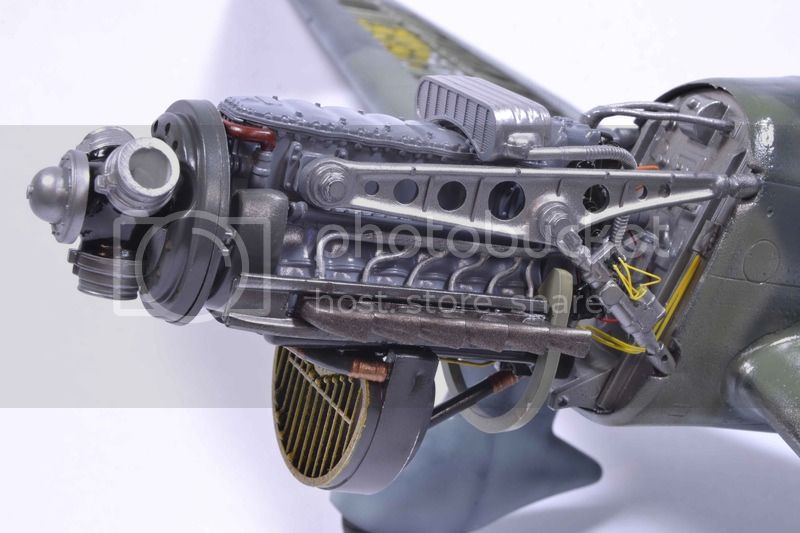
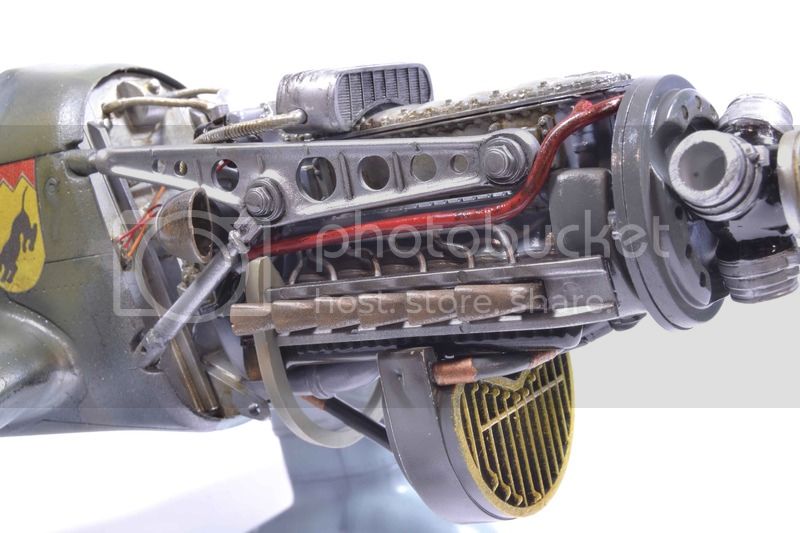
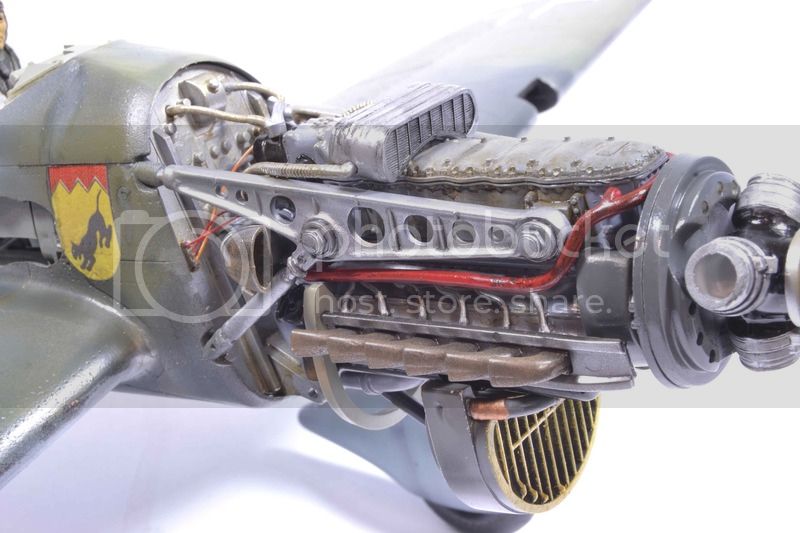
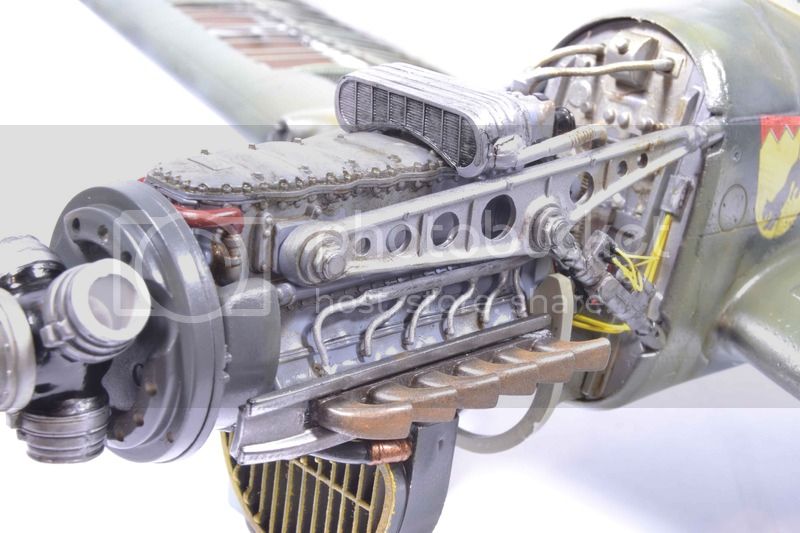
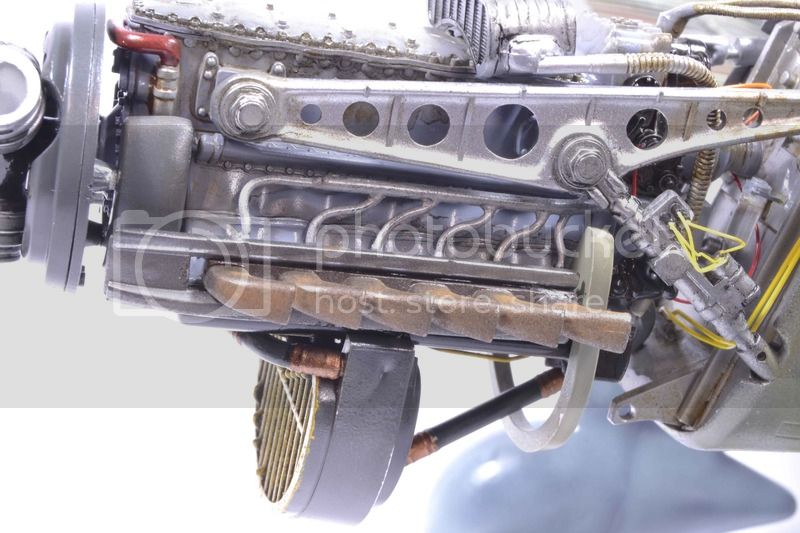
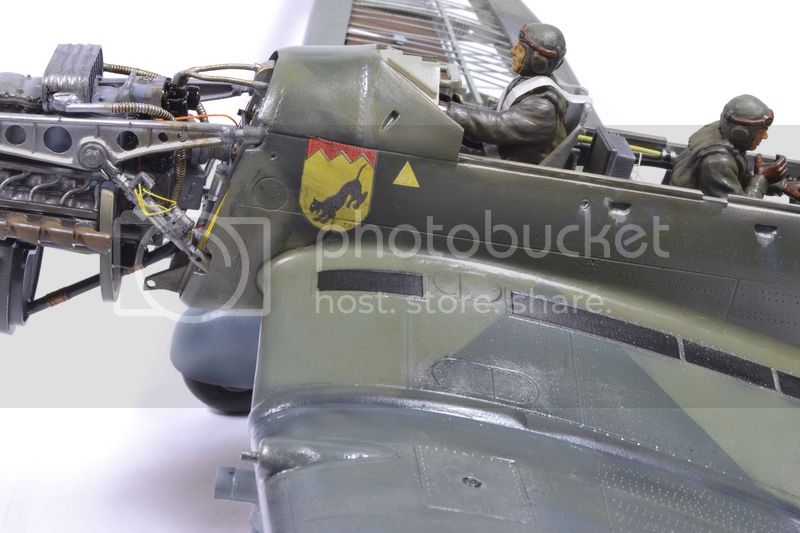
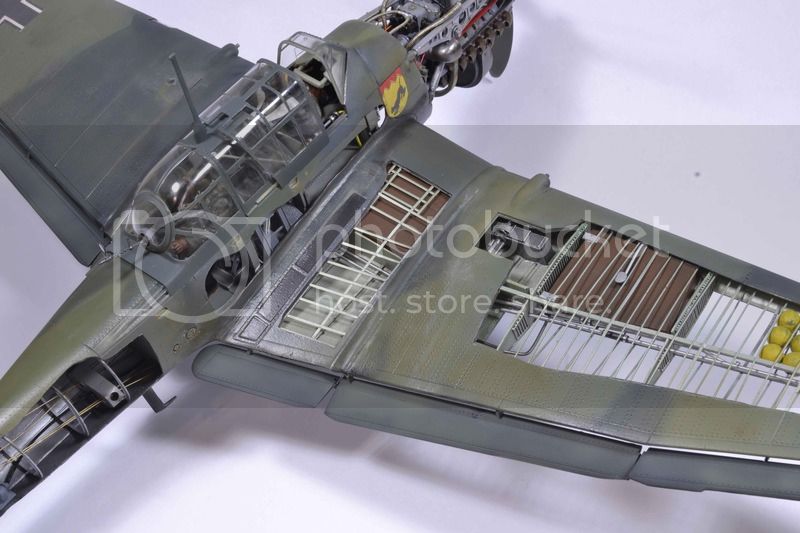
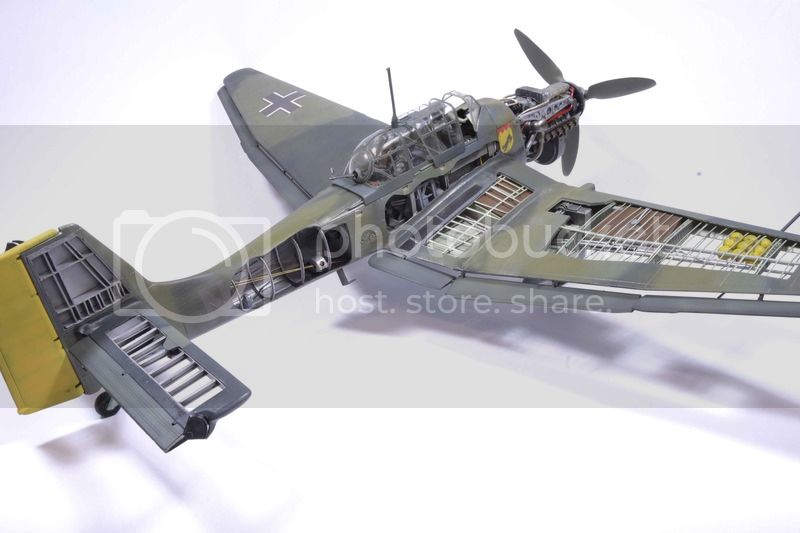
Interior aft the cockpit is scratchbuilt.
Wing internals are scratchbuilt.
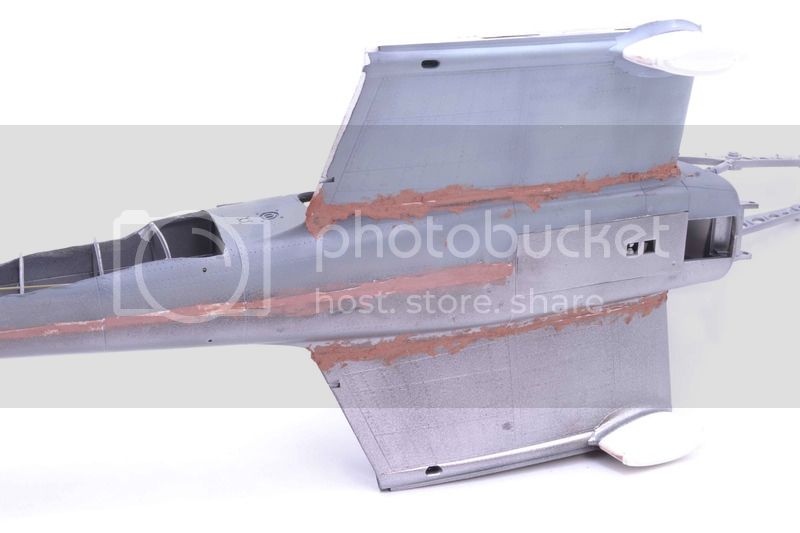
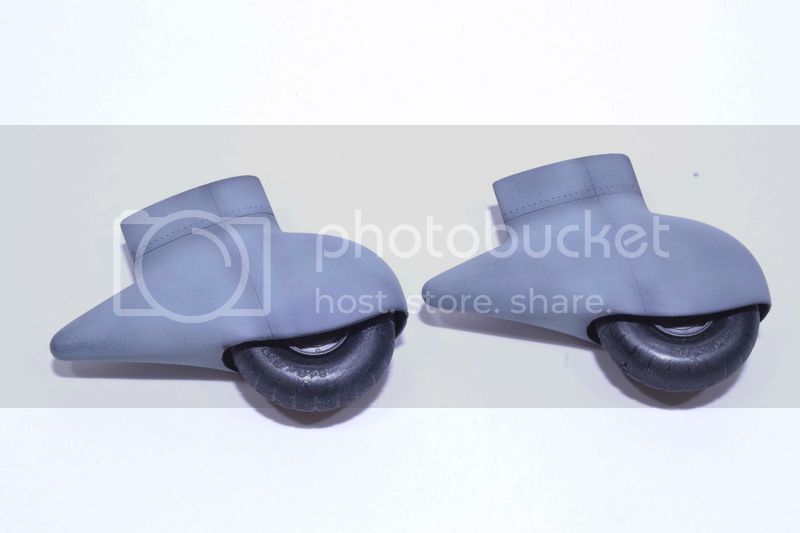
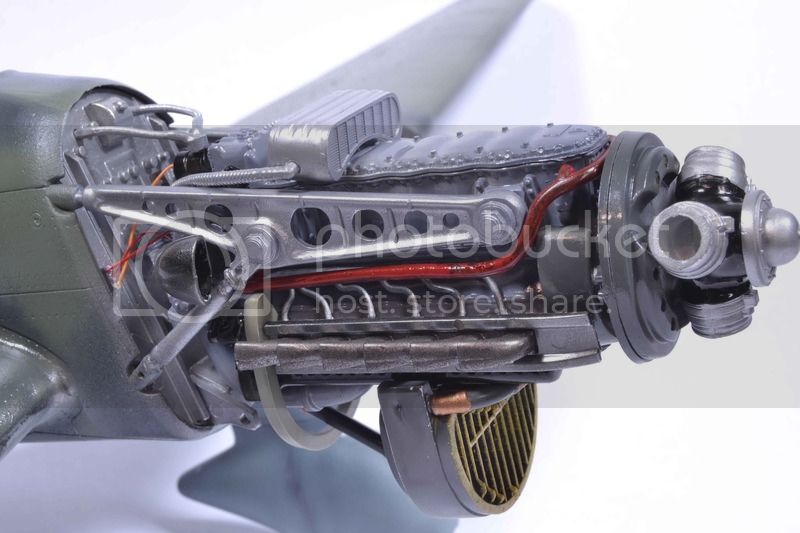
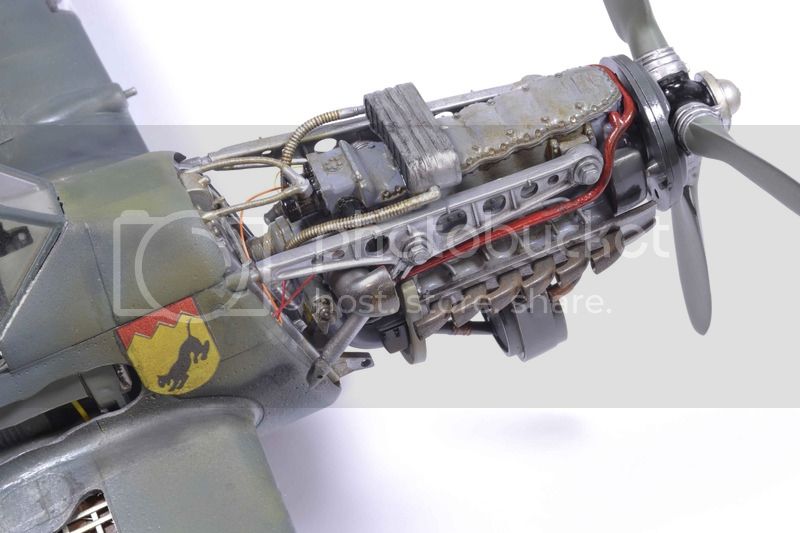
Paints include Model Master Enamel RLM 02, 65, 70, and 71.
Paints also include Alclad, Rustoleum, and Model Master Metallics.
Various strip, rod, square, and sheet styrene was used.
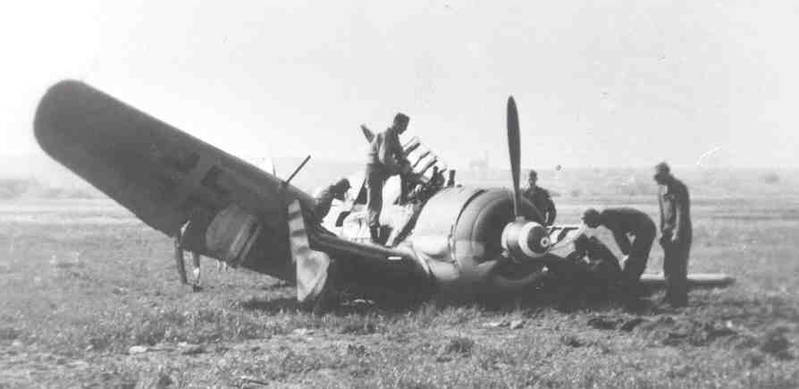
This is not intended to be an exact replica. It is intended to give the illusion of the real thing.
Paints include Model Master Enamels, Alclads, Rustoleum, and Testors.
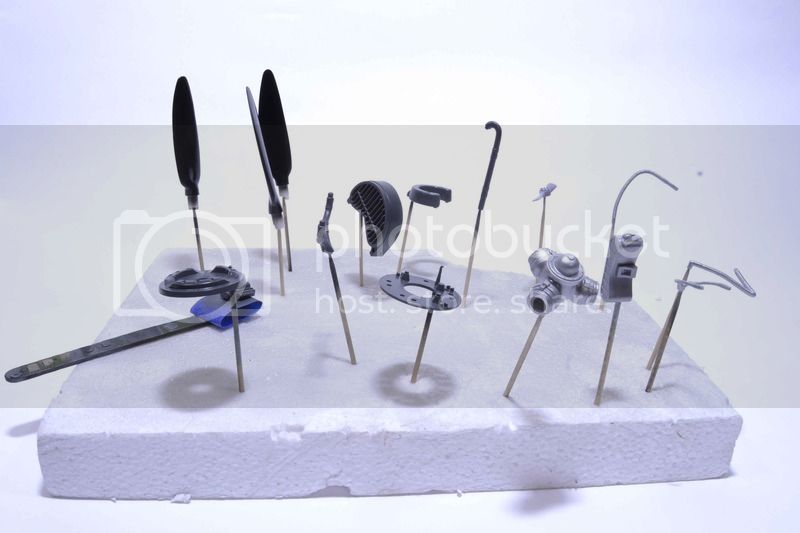
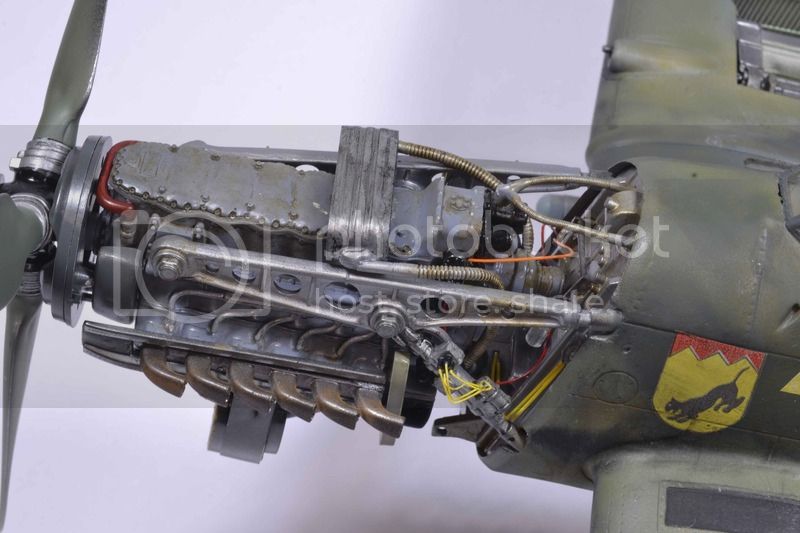
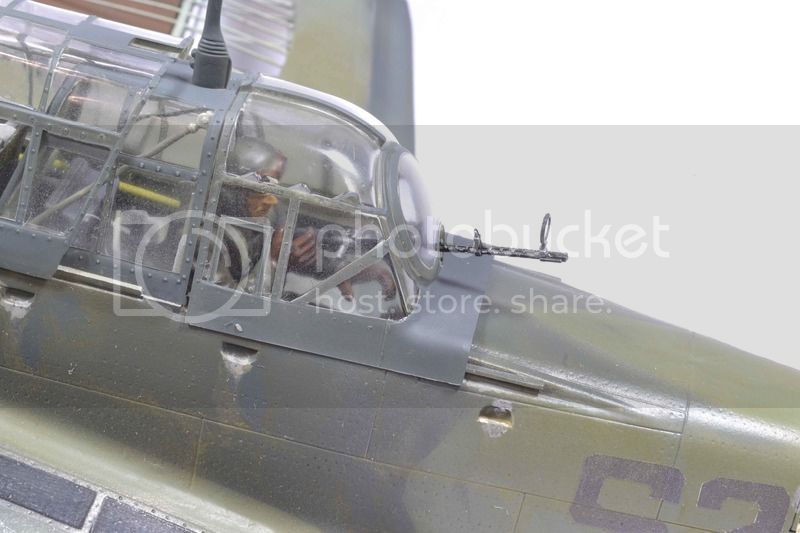
Details.
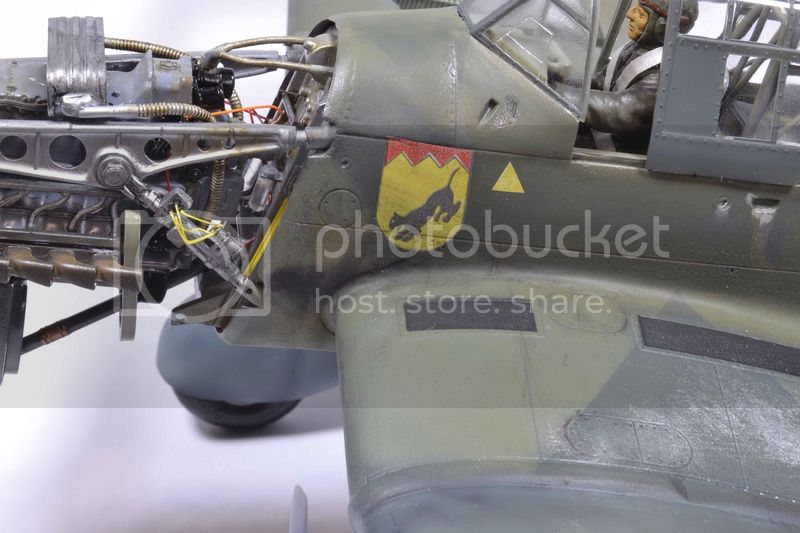
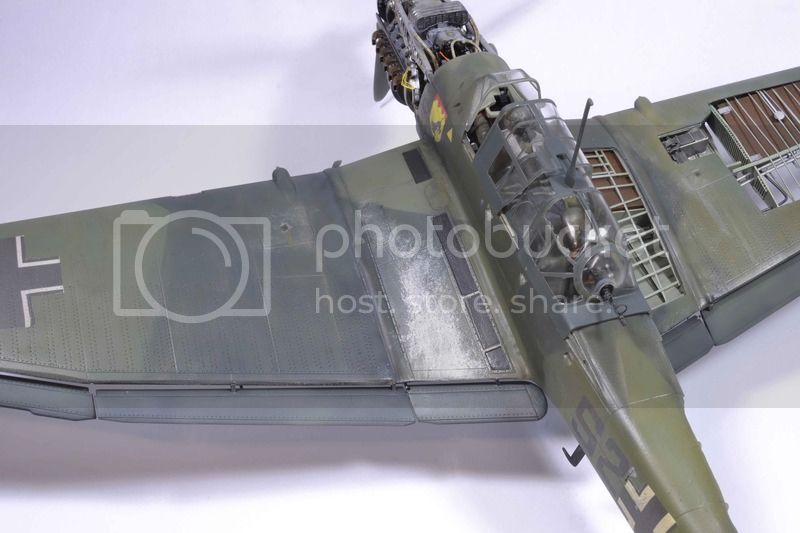

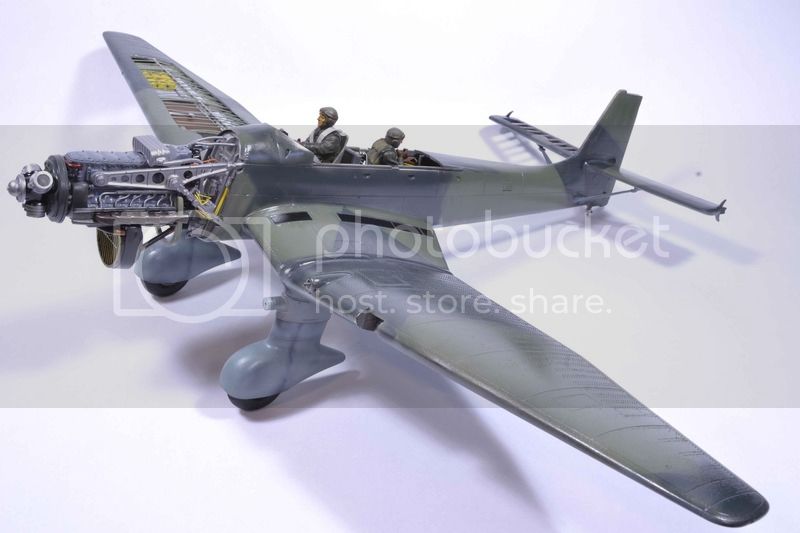
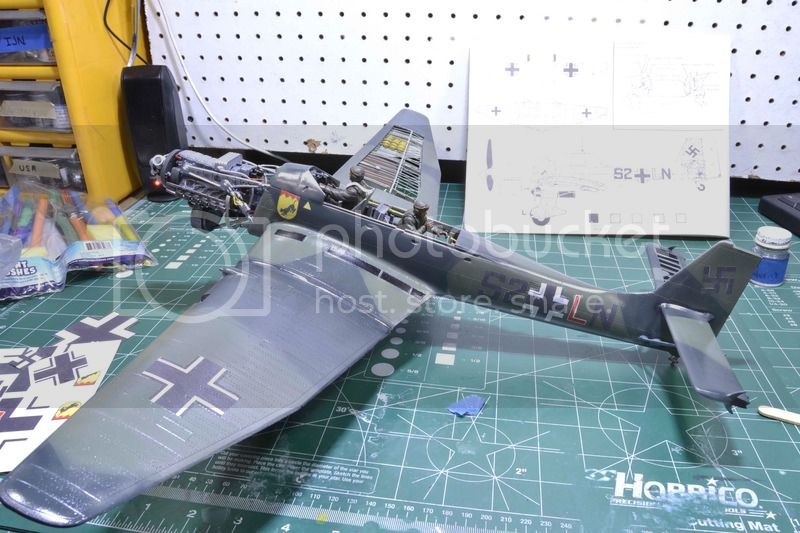
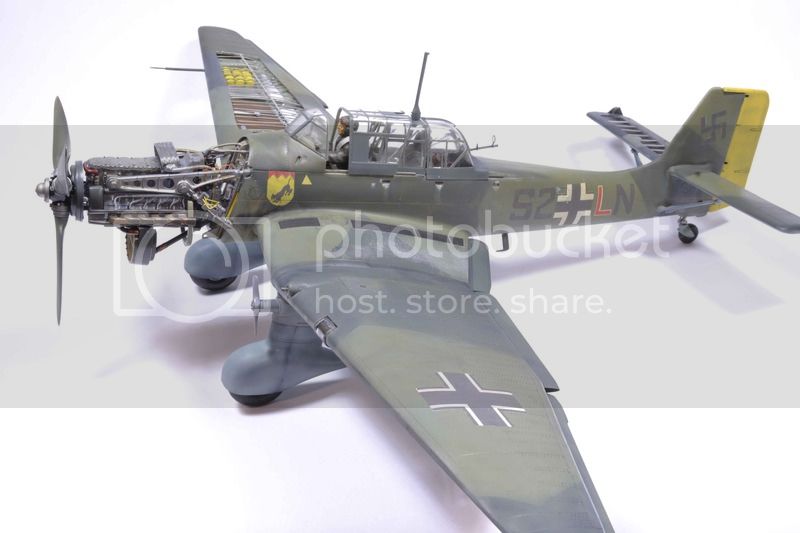
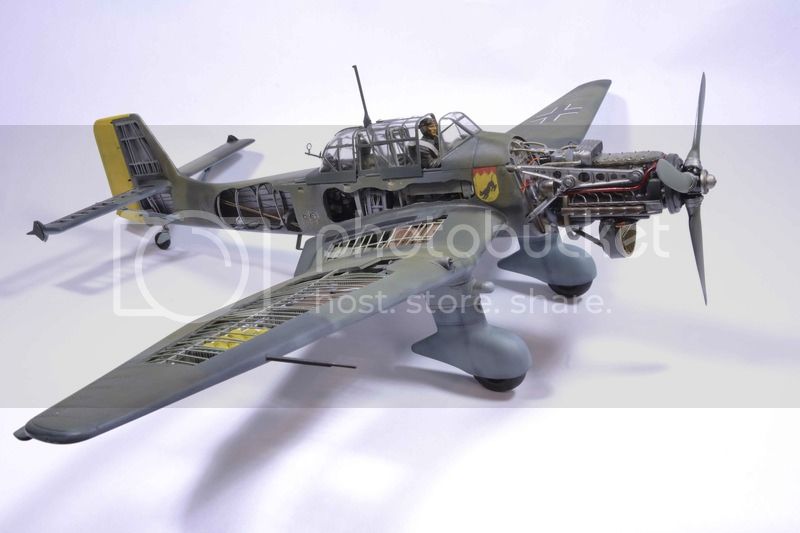
And the overall.
Started in August and finished in Feb. I was fortunate that I was able to chat with Dan over the course of three years. He was gracious with his knowledge and encouragement. I am proud to say he was my friend.
Miss you my friend.
All comments, critiques, and criticism are encouraged.
Joe