OFFICIAL: Biplanes of WWII Campaign

#306
Victoria, Australia
Joined: June 27, 2010
KitMaker: 3,959 posts
AeroScale: 598 posts
Posted: Tuesday, May 12, 2020 - 09:56 AM UTC
It's a
yes from me

Stay home and build models!
In 1/72
Gloster Gladiator MkII for the Bi-planes Campaign
In 1/350
Airfix 1:350 Type 45 Destroyer
#439
Washington, United States
Joined: November 05, 2005
KitMaker: 4,950 posts
AeroScale: 3,192 posts
Posted: Tuesday, May 12, 2020 - 10:37 AM UTC
Ribbon looks pretty good. If I might make a suggestion, pull a couple of pixels off of the length of the bottom wing. Seems like most bipes have shorter bottom wings than the top ones.

Hanger Queens in Waiting:
Monogram 1/72 F8F-1
Corsair the Sky Pirate - 1/72 Ace A-7D
Century Series - Airfix 1/72 F-105G
Anti Shipping - Academy 1/72 PBJ-1D
Academy 1/72 F-84E
MichaelSatin
 Campaigns Administrator
Colorado, United States
Joined: January 19, 2008
KitMaker: 3,909 posts
AeroScale: 2,904 posts
Posted: Tuesday, May 12, 2020 - 12:08 PM UTC
On the bench:
Sorta depends on your definition of "on the bench"...
#439
Washington, United States
Joined: November 05, 2005
KitMaker: 4,950 posts
AeroScale: 3,192 posts
Posted: Tuesday, May 12, 2020 - 12:18 PM UTC
Yes, that's the ticket. It looks a little more like a biplane than a movie logo.
Hanger Queens in Waiting:
Monogram 1/72 F8F-1
Corsair the Sky Pirate - 1/72 Ace A-7D
Century Series - Airfix 1/72 F-105G
Anti Shipping - Academy 1/72 PBJ-1D
Academy 1/72 F-84E
Texas, United States
Joined: February 22, 2008
KitMaker: 5,026 posts
AeroScale: 2,811 posts
Posted: Wednesday, May 13, 2020 - 06:09 AM UTC
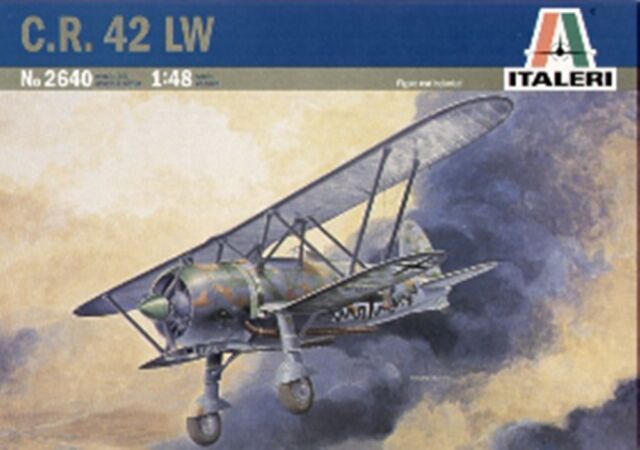
I ordered the Italeri C.R. 42.
I like the ribbon also.
If it aint broke dont fix it.
Dublin, Ireland
Joined: August 14, 2016
KitMaker: 148 posts
AeroScale: 123 posts
Posted: Friday, May 15, 2020 - 06:58 PM UTC
@Magnus - I really like how your Gladiator is progressing. I have the very same kit in my stash, so I follow your build thread very closely. Can I ask why brown colour on the wings is lighter than the fuselage brown? This is something new to me.
Currently in the workshop:
1:72 Spitfire Mark 1A by Airfix
Texas, United States
Joined: February 22, 2008
KitMaker: 5,026 posts
AeroScale: 2,811 posts
Posted: Monday, May 18, 2020 - 04:32 AM UTC
My entry for this campaign.

If it aint broke dont fix it.
Texas, United States
Joined: February 22, 2008
KitMaker: 5,026 posts
AeroScale: 2,811 posts
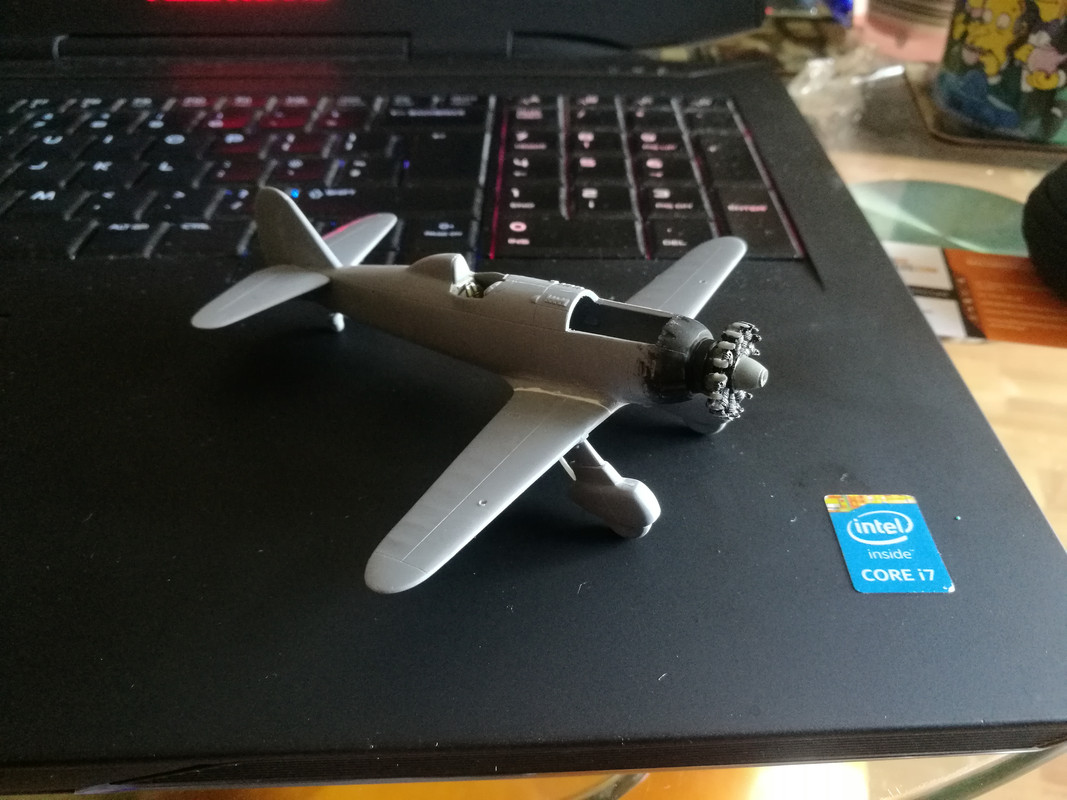
Posted: Wednesday, May 20, 2020 - 05:42 PM UTC
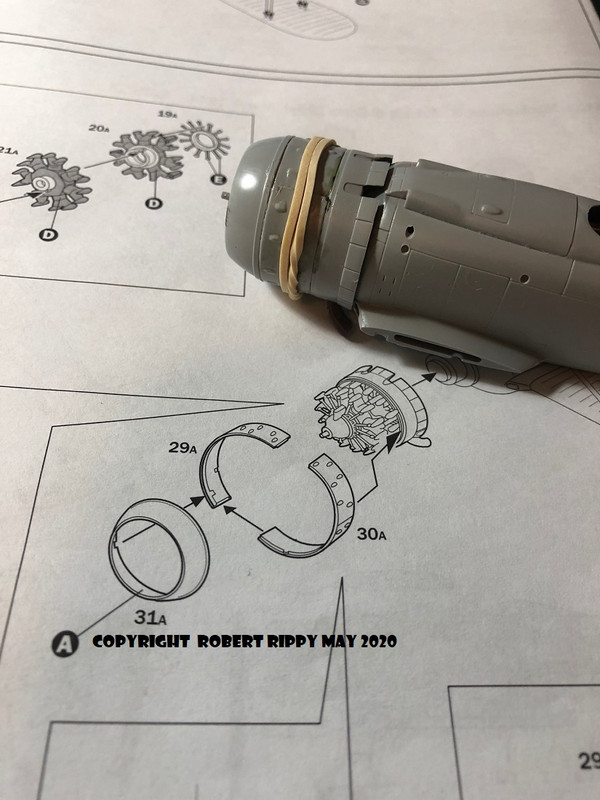
Started work on the engine today and it was a simple build.

If it aint broke dont fix it.
#306
Victoria, Australia
Joined: June 27, 2010
KitMaker: 3,959 posts
AeroScale: 598 posts
Posted: Wednesday, May 20, 2020 - 10:54 PM UTC
Looking good!

Stay home and build models!
In 1/72
Gloster Gladiator MkII for the Bi-planes Campaign
In 1/350
Airfix 1:350 Type 45 Destroyer
Stockholm, Sweden
Joined: May 02, 2006
KitMaker: 1,953 posts
AeroScale: 1,902 posts
Posted: Thursday, May 21, 2020 - 08:33 AM UTC
Michael! Ribbon gets a solid thumbs up from me!
Bob! Lovely choice of subject, I'm saving mine for the BoB-campaign (and it's in tiny-scale as well

)!
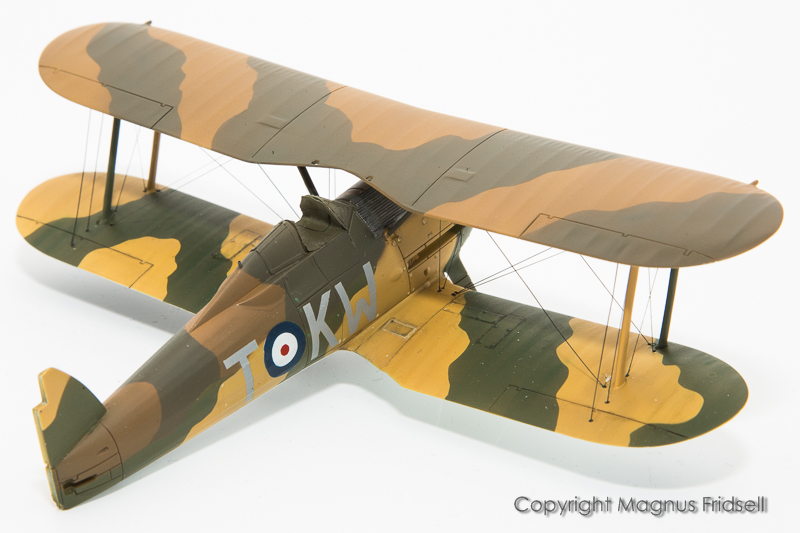
Iwan! This camo was used on the Gladiator and I think also on the Tiger Moth, the theory was that the upper wing put the lower one in a shadow so it should be painted in lighter colours. There was a discussion over at IPMS Stockholm where someone told me that the Walrus also was painted this way but in different colours.
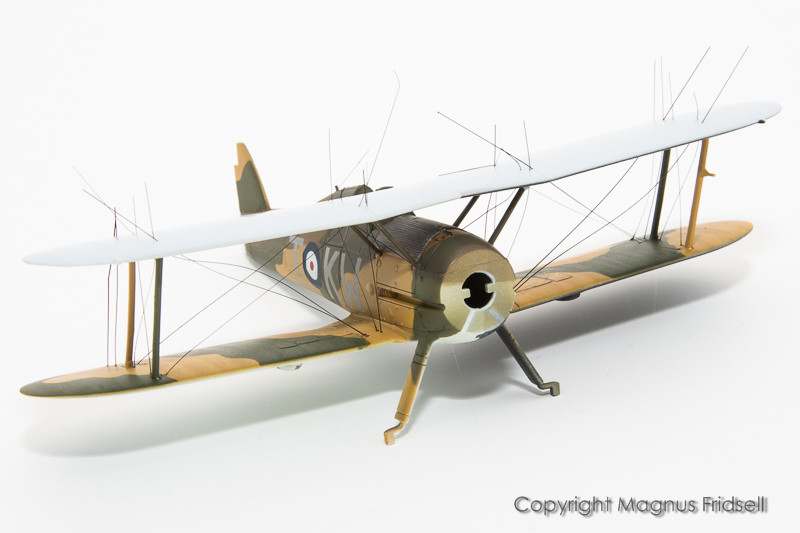
Rigging and upper wing in place, a major worry for me that I am happy has been overcome now
!
Magnus
Press banner to the right to follow my trail to the new forums!
Texas, United States
Joined: February 22, 2008
KitMaker: 5,026 posts
AeroScale: 2,811 posts
Posted: Thursday, May 21, 2020 - 12:20 PM UTC
Magnus I am building in 1/48 since my eyes are not as good even with glasses. I need to look at your rigging more closely to aid in my attempts for WWI.
Too much glue on the cowl halves plus fingers in the glue also make for a not so good looking cowl. Ill need to do some sanding later after it dries.
If it aint broke dont fix it.
MichaelSatin
Campaigns Administrator Colorado, United States
Joined: January 19, 2008
KitMaker: 3,909 posts
AeroScale: 2,904 posts
Posted: Thursday, May 21, 2020 - 12:42 PM UTC
Quoted Text
Magnus I am building in 1/48 since my eyes are not as good even with glasses. I need to look at your rigging more closely to aid in my attempts for WWI.
Too much glue on the cowl halves plus fingers in the glue also make for a not so good looking cowl. Ill need to do some sanding later after it dries.
Let's face it, we've all ID'd our models by imprinting our fingerprints on them at one time or another. Model on!
Michael

On the bench:
Sorta depends on your definition of "on the bench"...
United States
Joined: September 01, 2011
KitMaker: 123 posts
AeroScale: 37 posts
Posted: Thursday, May 21, 2020 - 01:33 PM UTC
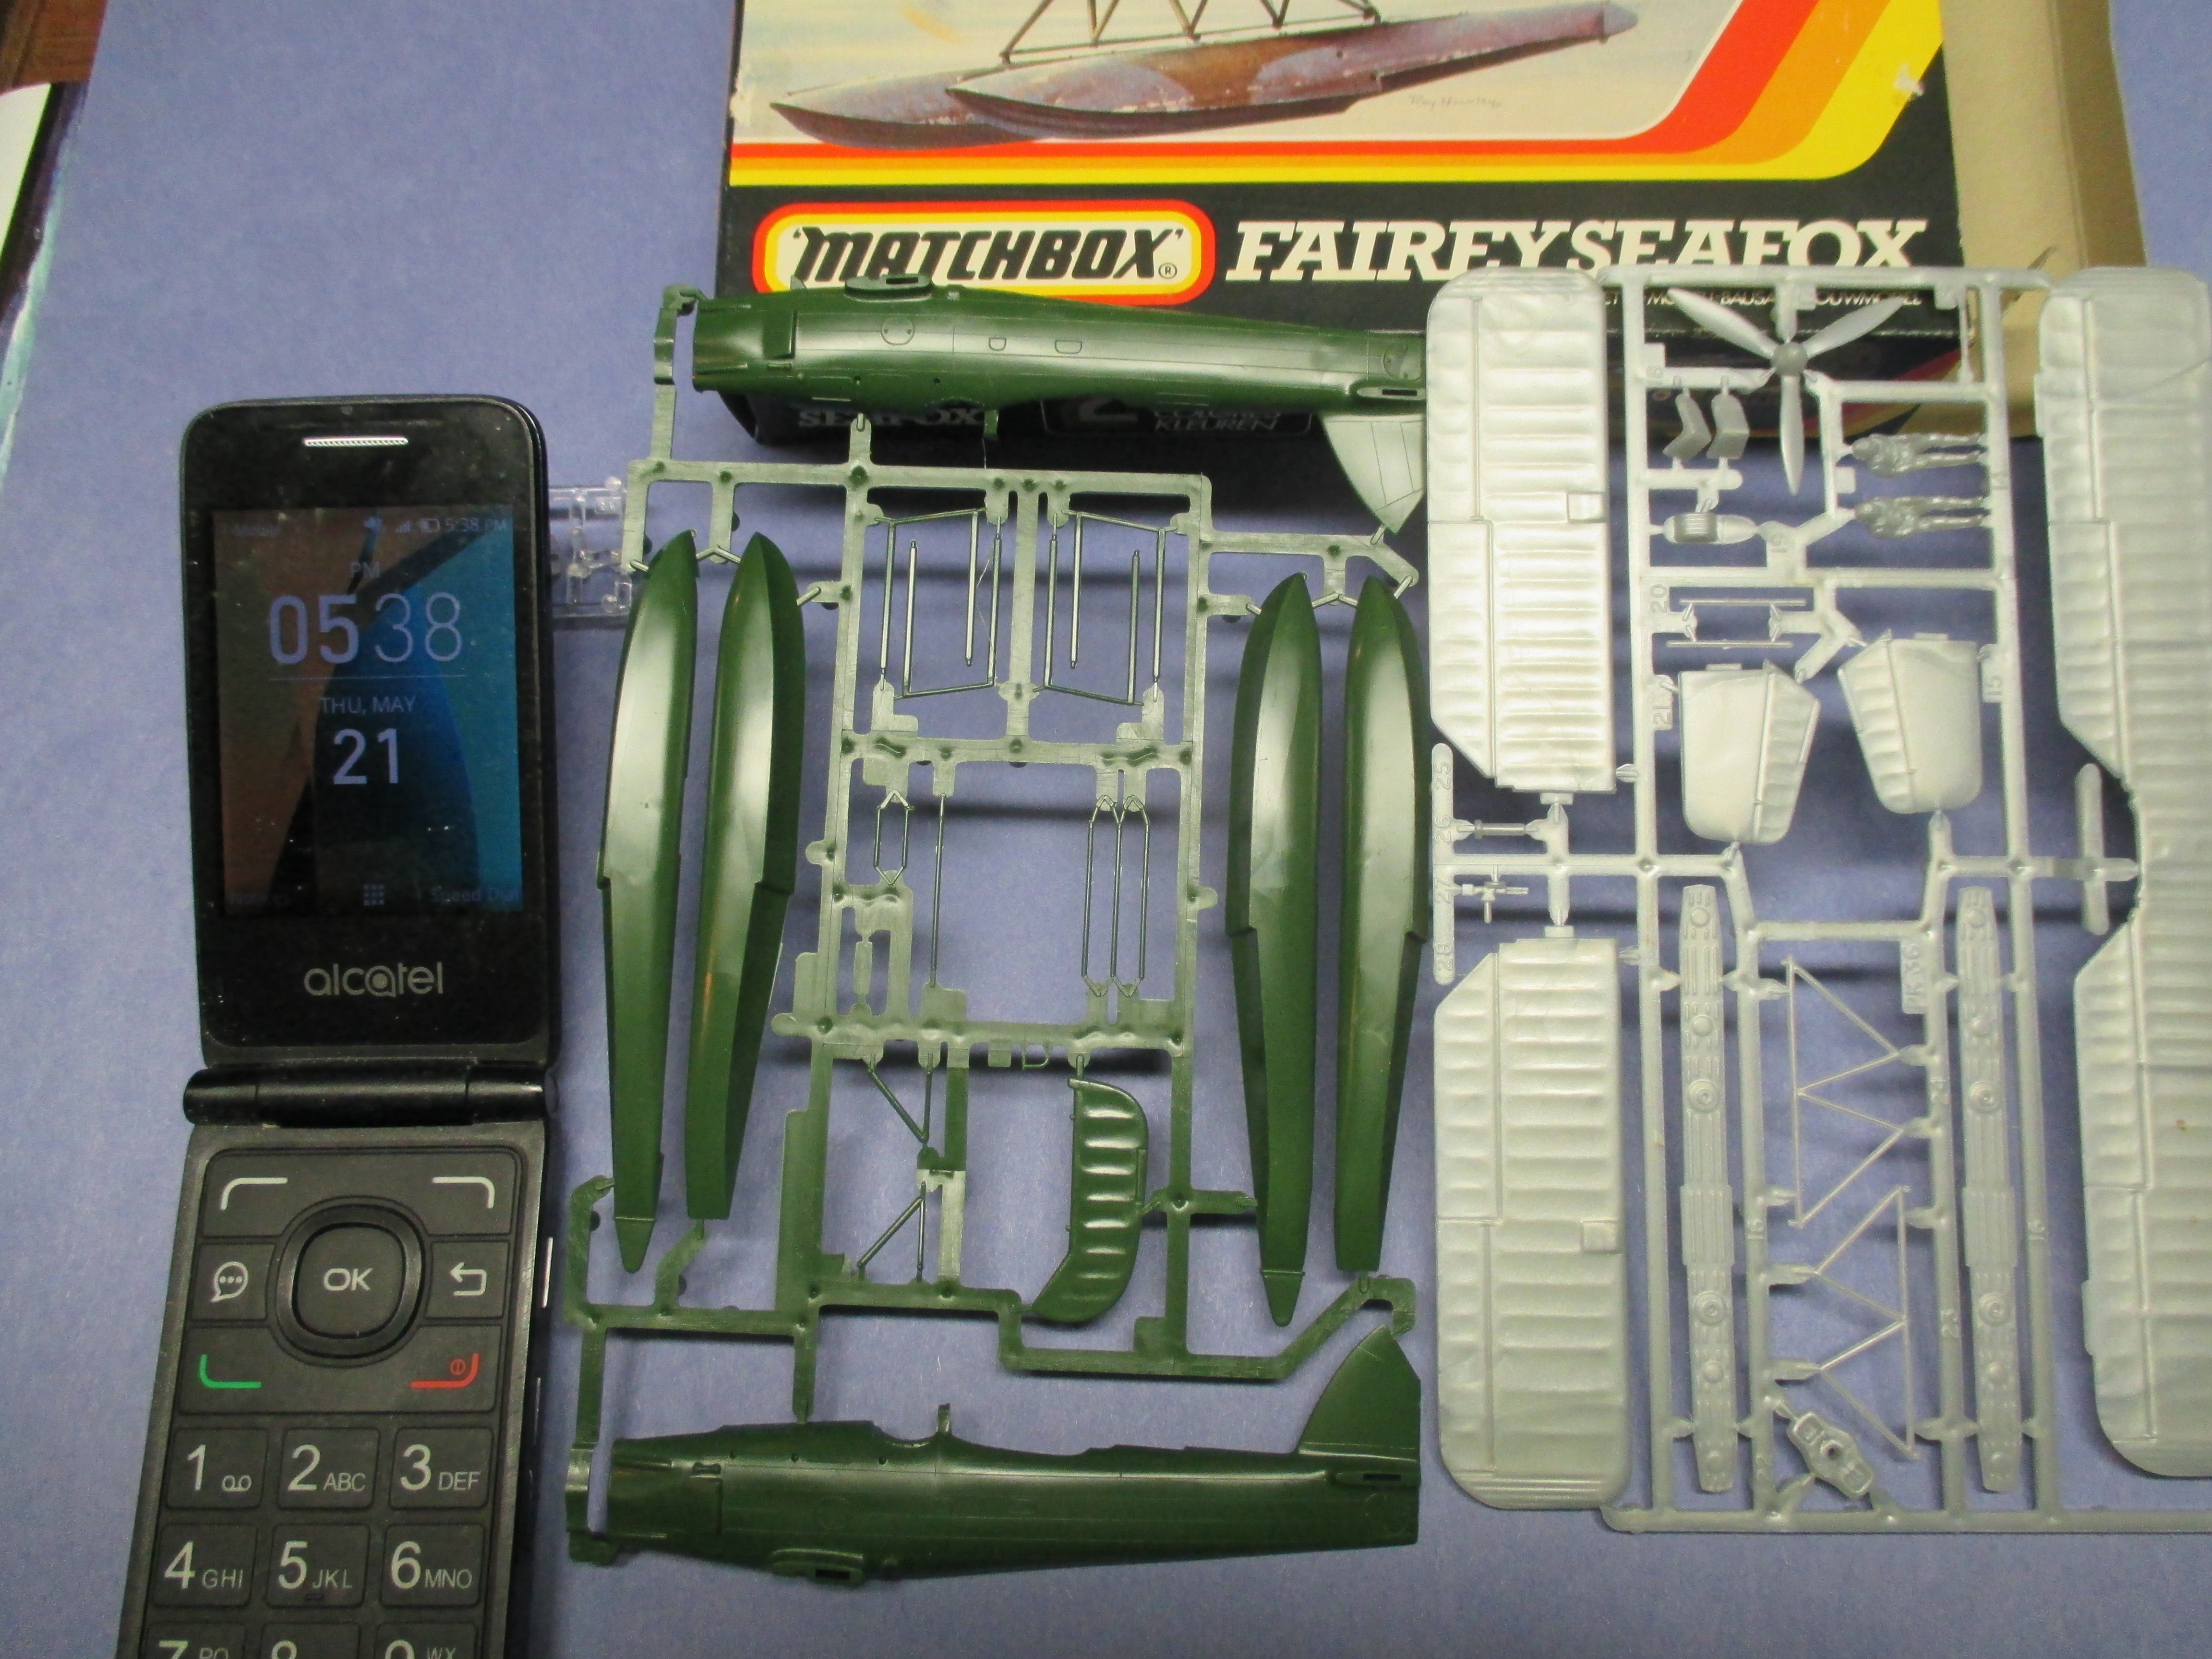
I'm in with the Fairy Seafox by Matchbox. It came out of my time machine tote. The box is dated 1981
Dublin, Ireland
Joined: August 14, 2016
KitMaker: 148 posts
AeroScale: 123 posts
Posted: Thursday, May 21, 2020 - 06:59 PM UTC
Currently in the workshop:
1:72 Spitfire Mark 1A by Airfix
United States
Joined: September 01, 2011
KitMaker: 123 posts
AeroScale: 37 posts
Posted: Saturday, May 23, 2020 - 02:38 PM UTC
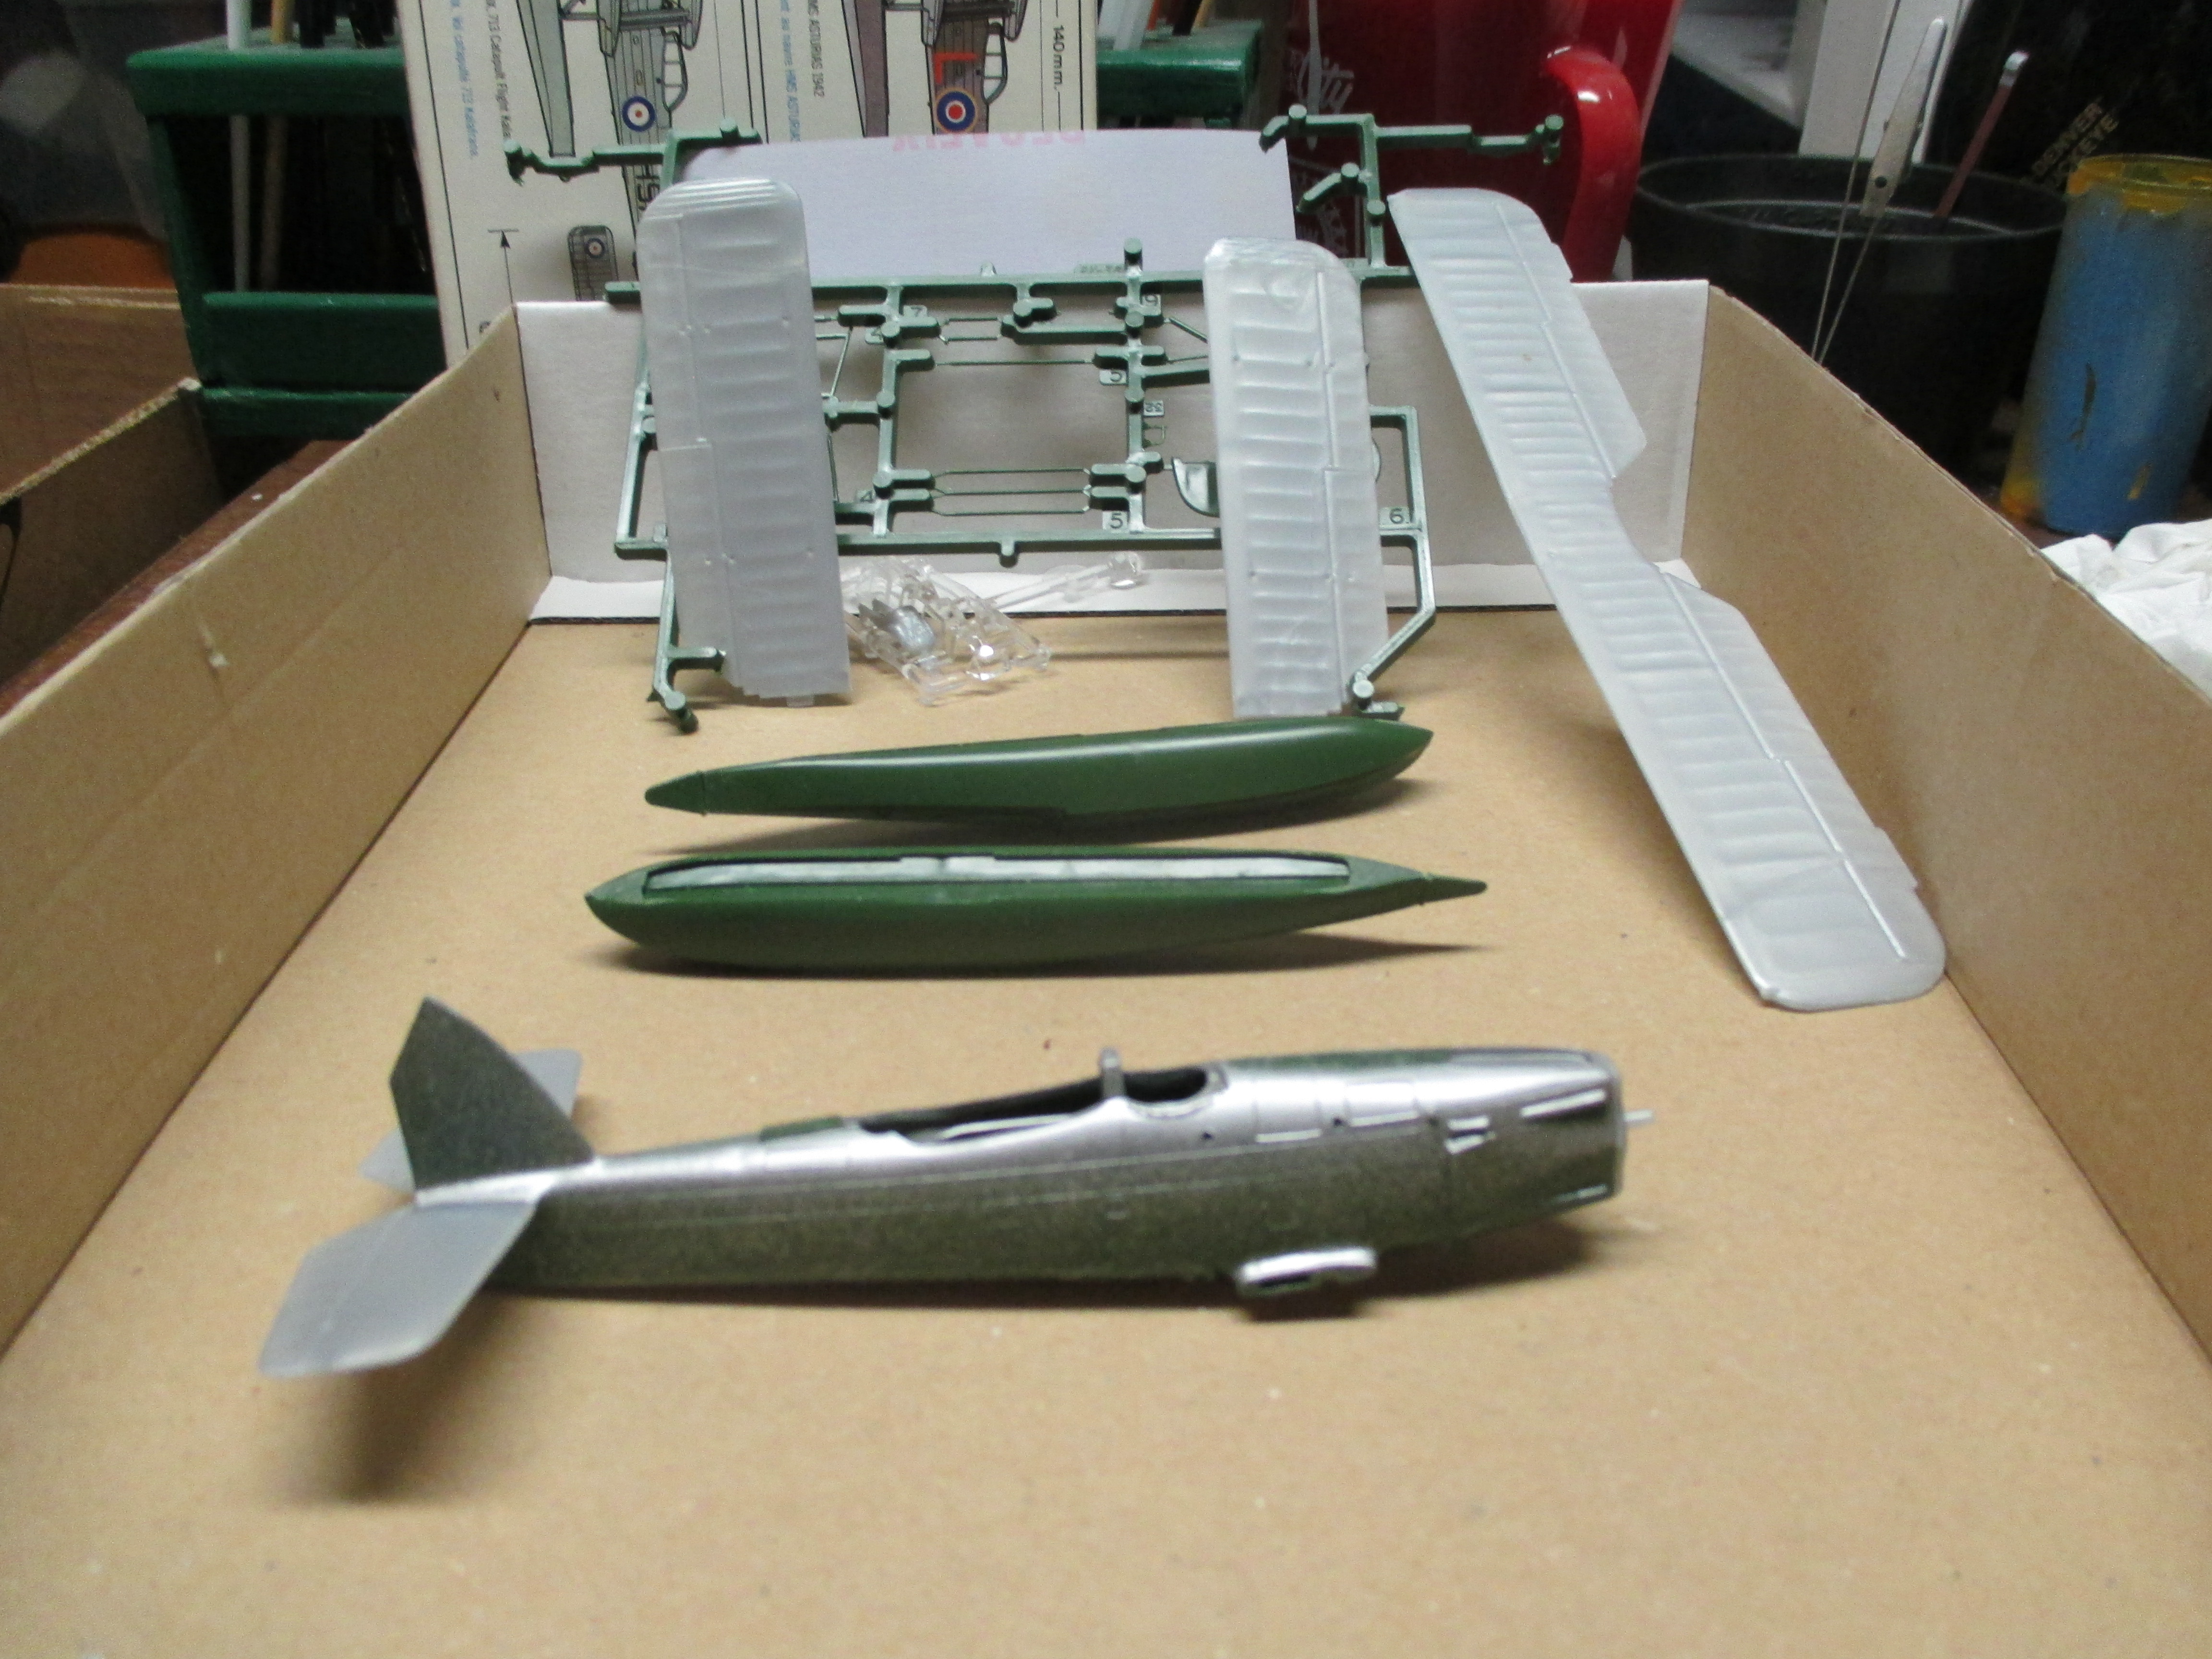
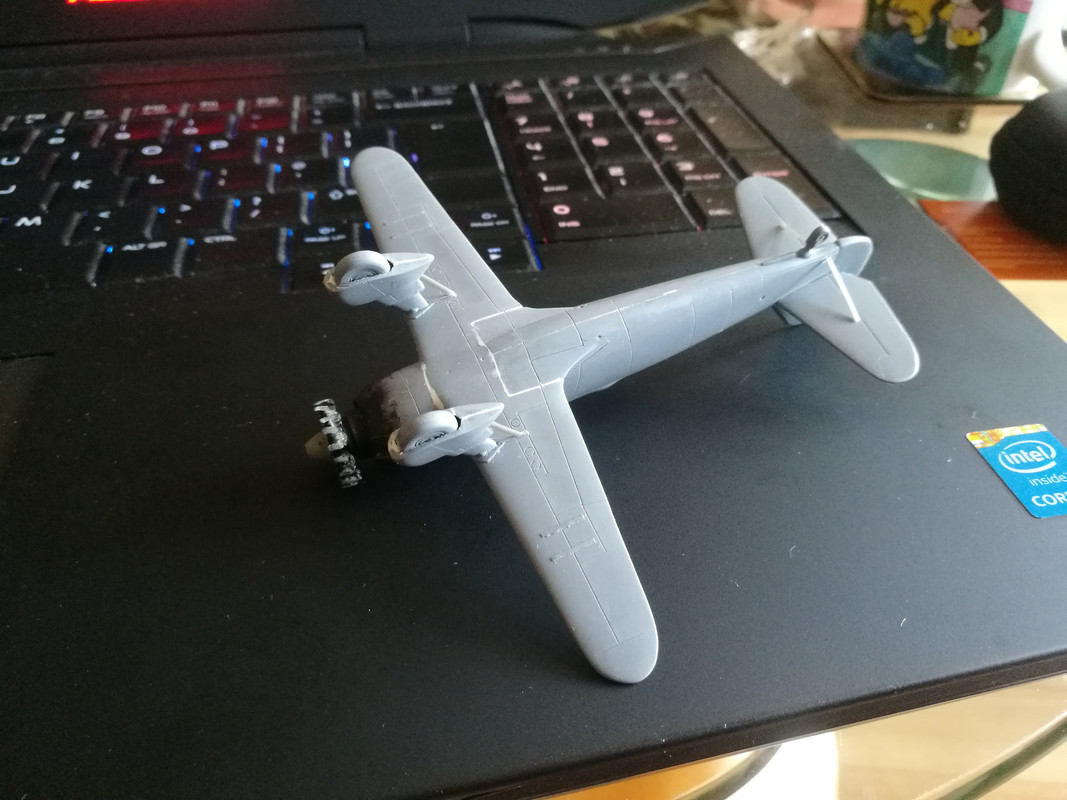
Fuselage and floats assembled and given a coat of primer to pick up any seam problems (there were)
Texas, United States
Joined: February 22, 2008
KitMaker: 5,026 posts
AeroScale: 2,811 posts
Posted: Saturday, May 23, 2020 - 03:22 PM UTC
Iwan, nice job on the office.
Steve, that will be a cool looking biplane.
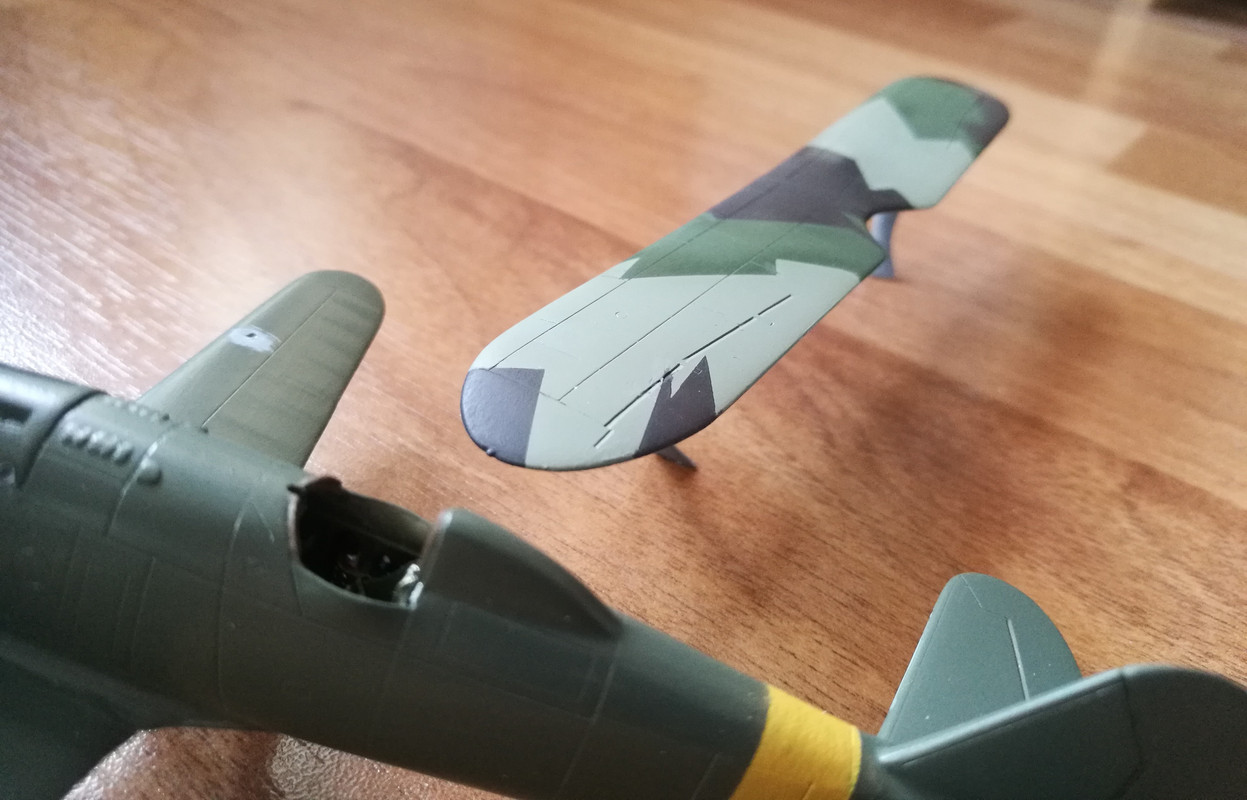
While not being new to the hobby, Biplanes are another story since Ive tired to keep clear of them. The painting sequence is a little different than what I have been used to. This time I will paint before the top wing is attached.
I have been lucky so far with the wing and struts.
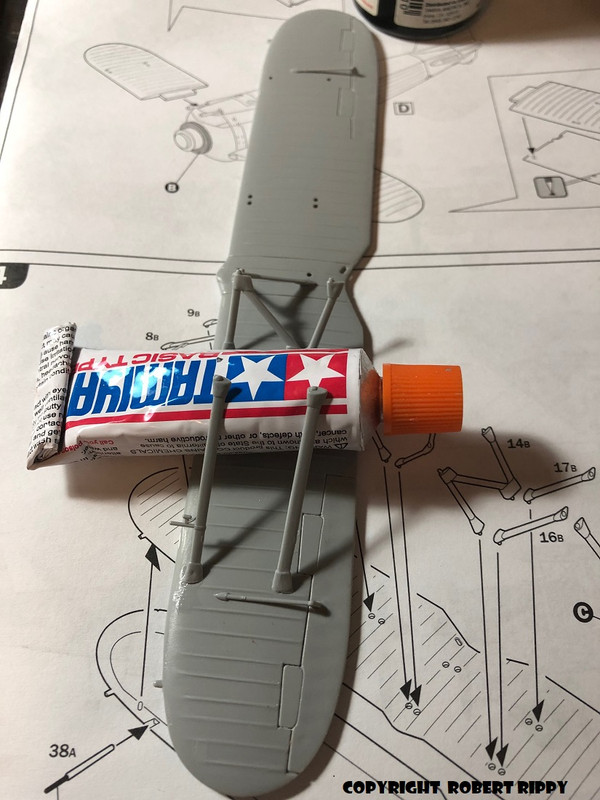
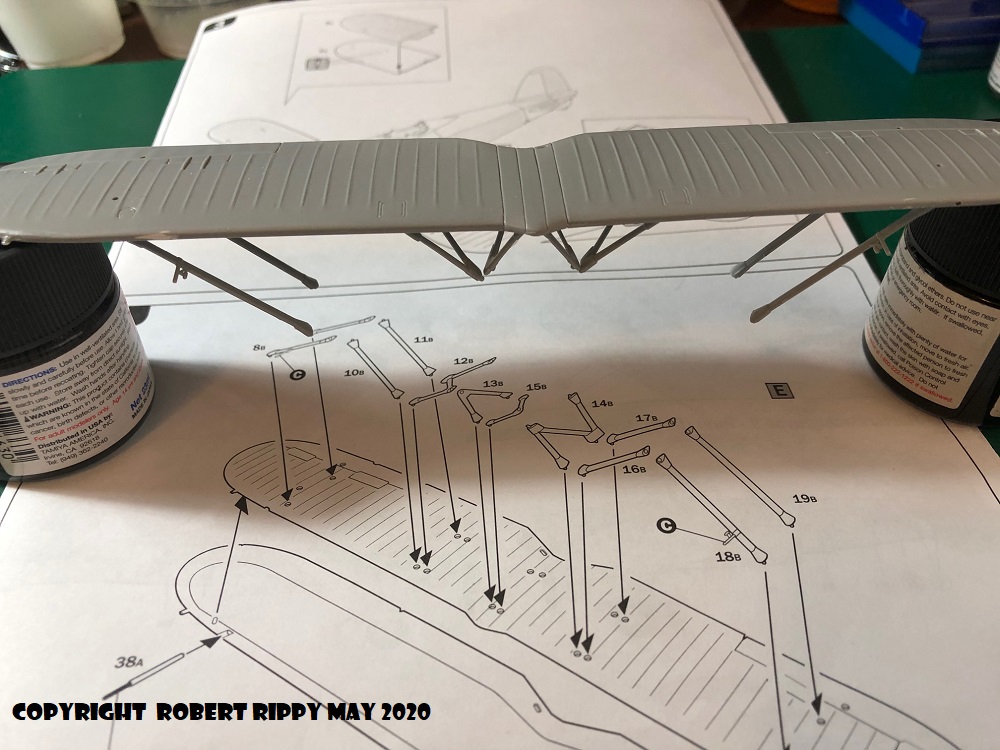

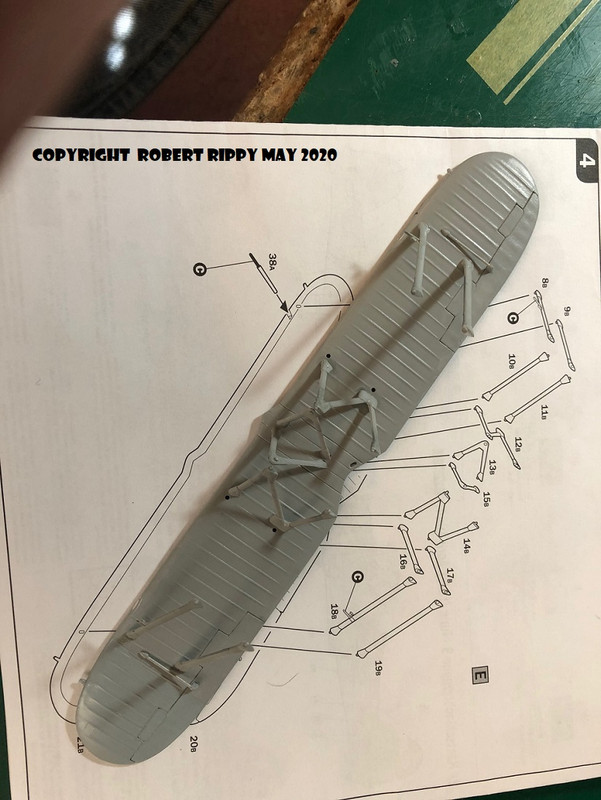
The photo below is just to see if I will be able to align the struts for attachment after painted.

If it aint broke dont fix it.
Pennsylvania, United States
Joined: April 22, 2012
KitMaker: 344 posts
AeroScale: 8 posts
Posted: Sunday, May 24, 2020 - 01:09 PM UTC
The Gladiator, CR 42 and the Henschel are all on my short list of biplanes I would love to build some day, great to see them fall together here.
I am plodding along on my Curtiss Hawk. Most of the painting is complete, but plenty of touch up work. The tail decals did not fit very well and hid some detail so I opted to mask and paint them. The attachment points for the wing struts are little pin holes, so adding the upper wing is going to be an exercise in patience.
-Nate
Dublin, Ireland
Joined: August 14, 2016
KitMaker: 148 posts
AeroScale: 123 posts
Posted: Tuesday, May 26, 2020 - 11:46 PM UTC
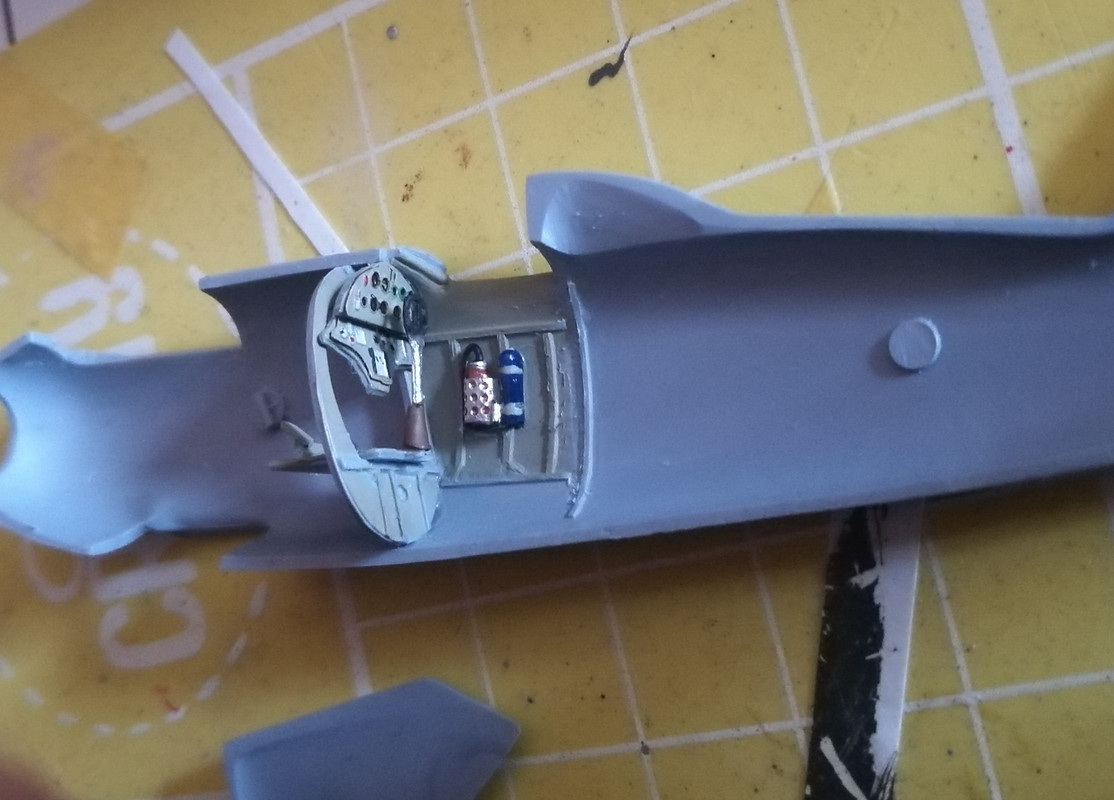
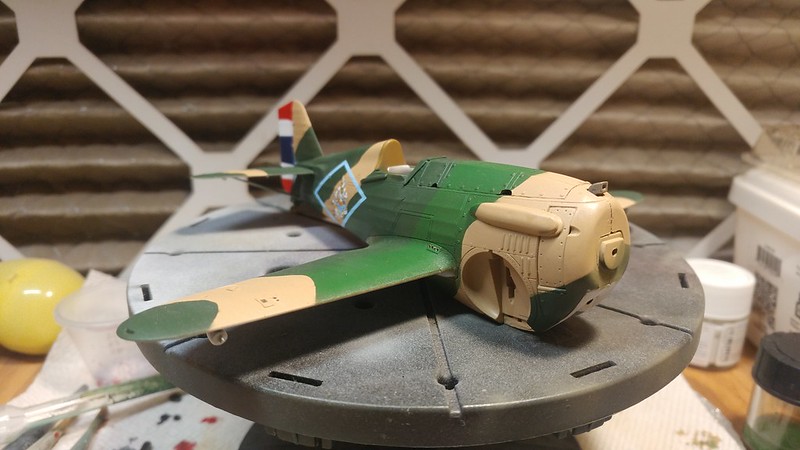
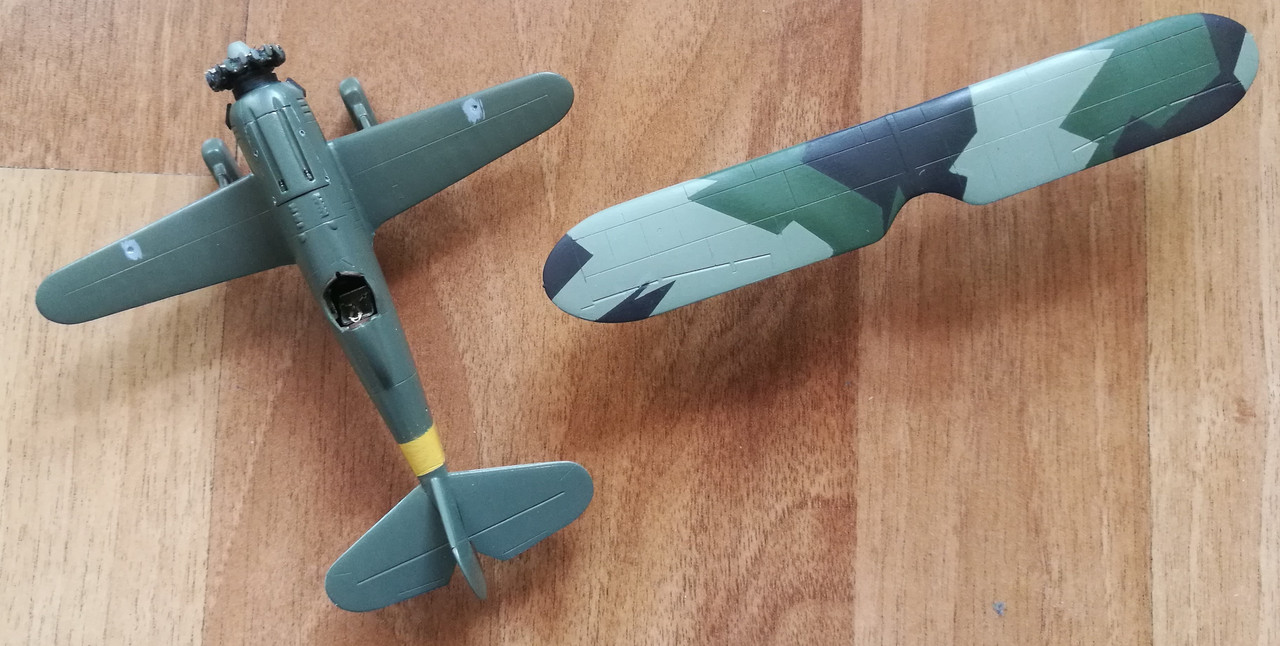
Progress photos on Henschel Hs 123. I have serious trouble with parts fit. Huge amounts of sanding, evening out and then putty is required to put together any two parts. There are no locator pins, so this is additional challenge. I am getting ready to paint now, will attach top wings afterwards. So far lot of fun with it.
Currently in the workshop:
1:72 Spitfire Mark 1A by Airfix
Stockholm, Sweden
Joined: May 02, 2006
KitMaker: 1,953 posts
AeroScale: 1,902 posts
Posted: Wednesday, May 27, 2020 - 03:50 AM UTC
You all seem to have rougher rides than me, the Airfix Gladiator certainly is a quite forgiving kit
!
 Bob!
Bob! Good to see that you have the struts sorted! I do get the feeling that the struts on my short-run Fiat will be a horror show... And never mind that fingerprint, we have all seen it before
!
Steve! I think the Seafox is one of the nicer Matchbox kits, if nothing else it is pretty much the only game in town!
Nathan! Camo on that Hawk of your's is really nice!
Iwan! I won't put the Fly Henschel on my "I need to buy it immediately-list"... I must say that you are doing a pretty good job of it though!
And there is a build blog
here!
Magnus
Press banner to the right to follow my trail to the new forums!
Texas, United States
Joined: February 22, 2008
KitMaker: 5,026 posts
AeroScale: 2,811 posts
Posted: Saturday, May 30, 2020 - 02:13 PM UTC
Magnus, Iwan, Steve, and Nathan. Ya'lls builds are really looking good.
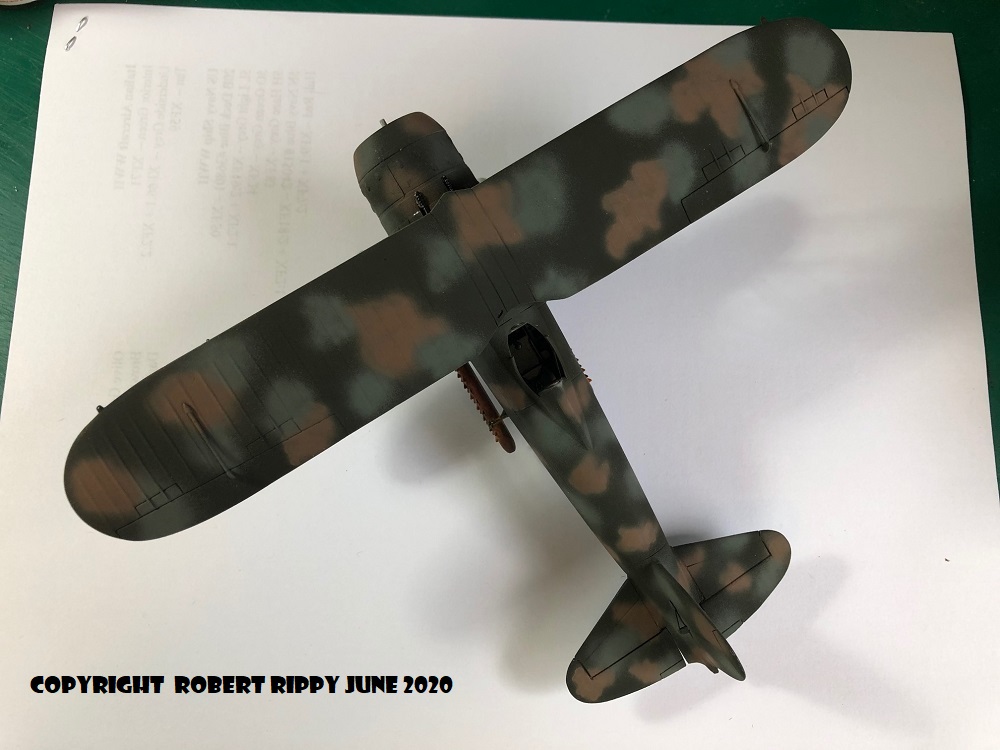
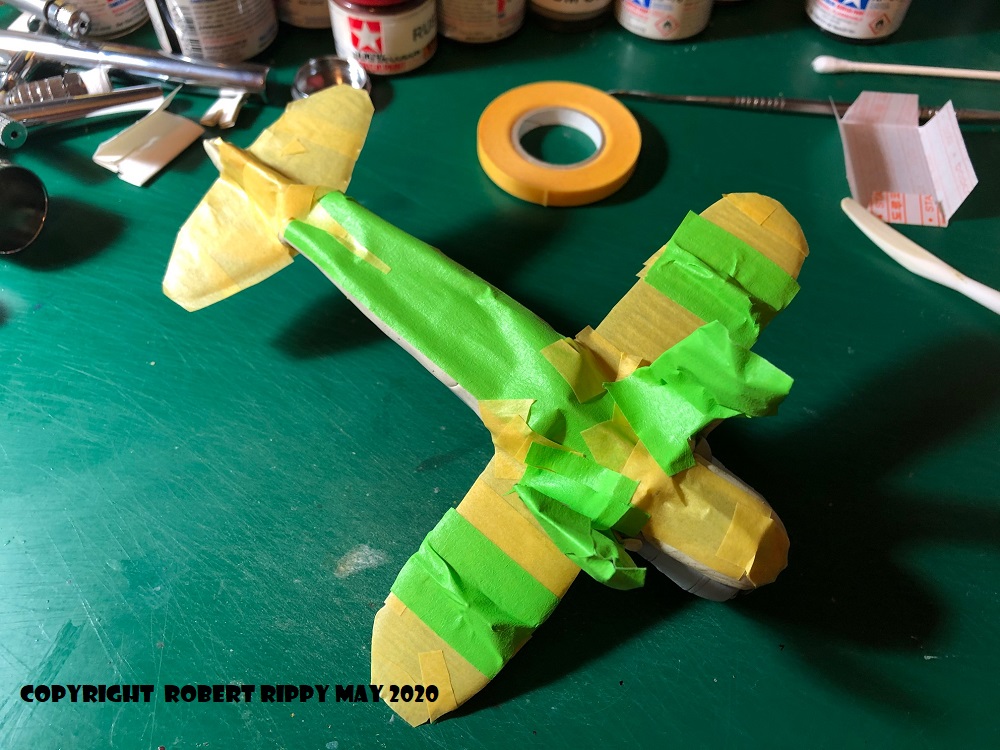
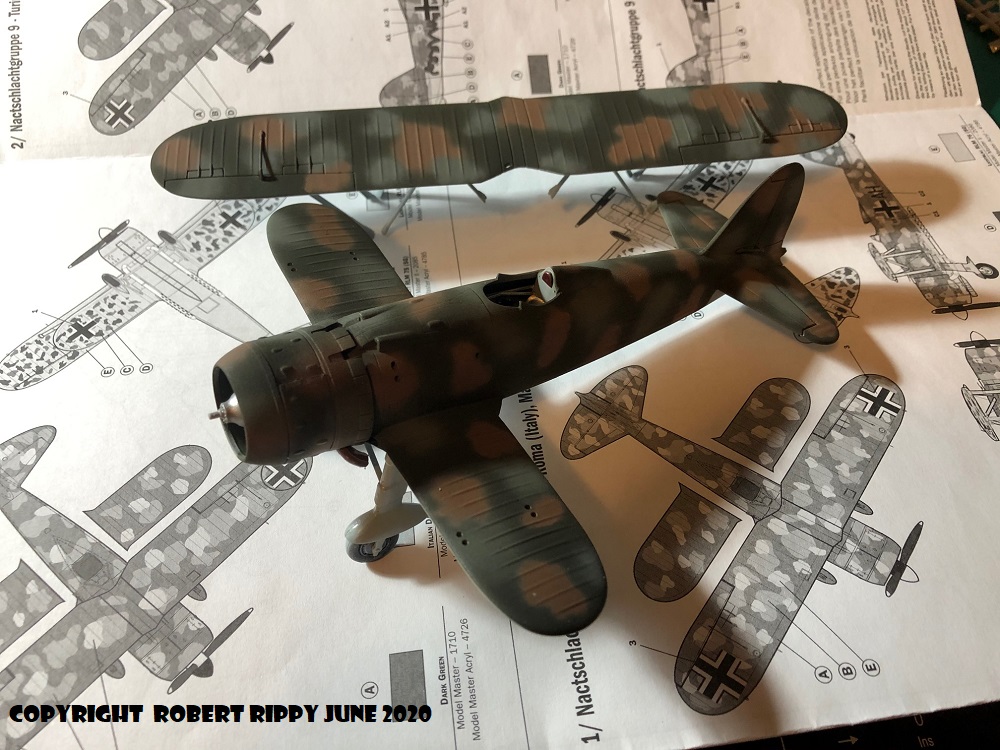
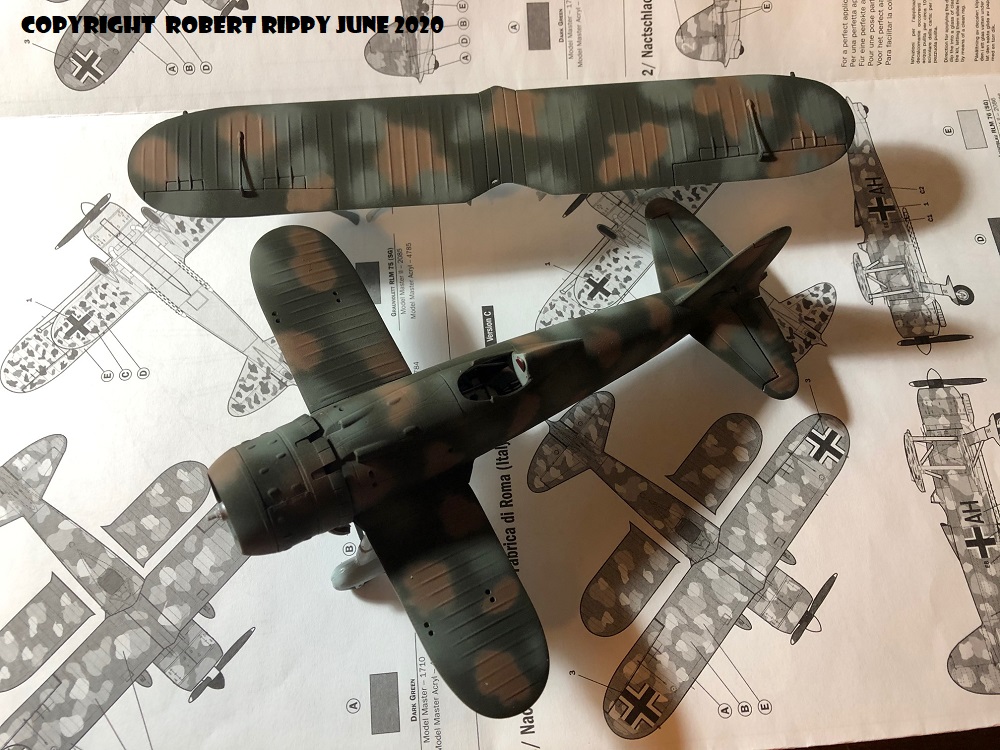
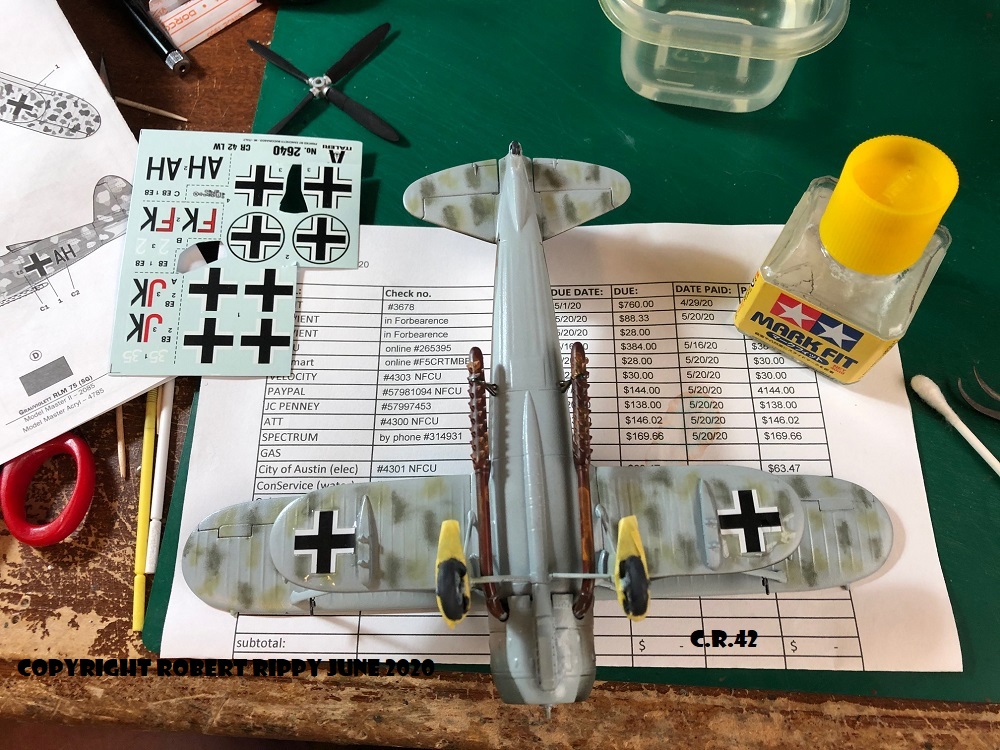
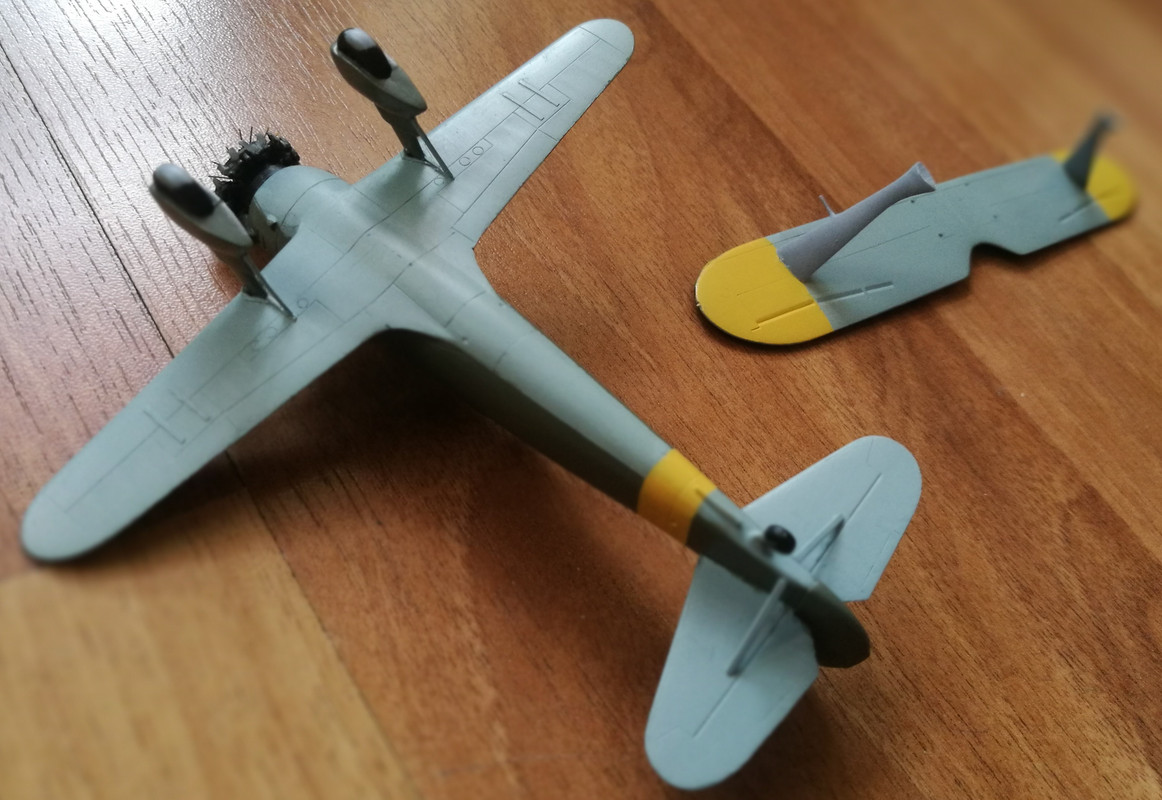
Finally got up enough courage to pull out the airbrush and put my lazy bones to work. Painted the C.R.42 under surfaces RLM76. Then let it dry for 24 hours and masked the bottom of the fuselage to get ready for the top which will be XF-61.

If it aint broke dont fix it.
United States
Joined: September 01, 2011
KitMaker: 123 posts
AeroScale: 37 posts
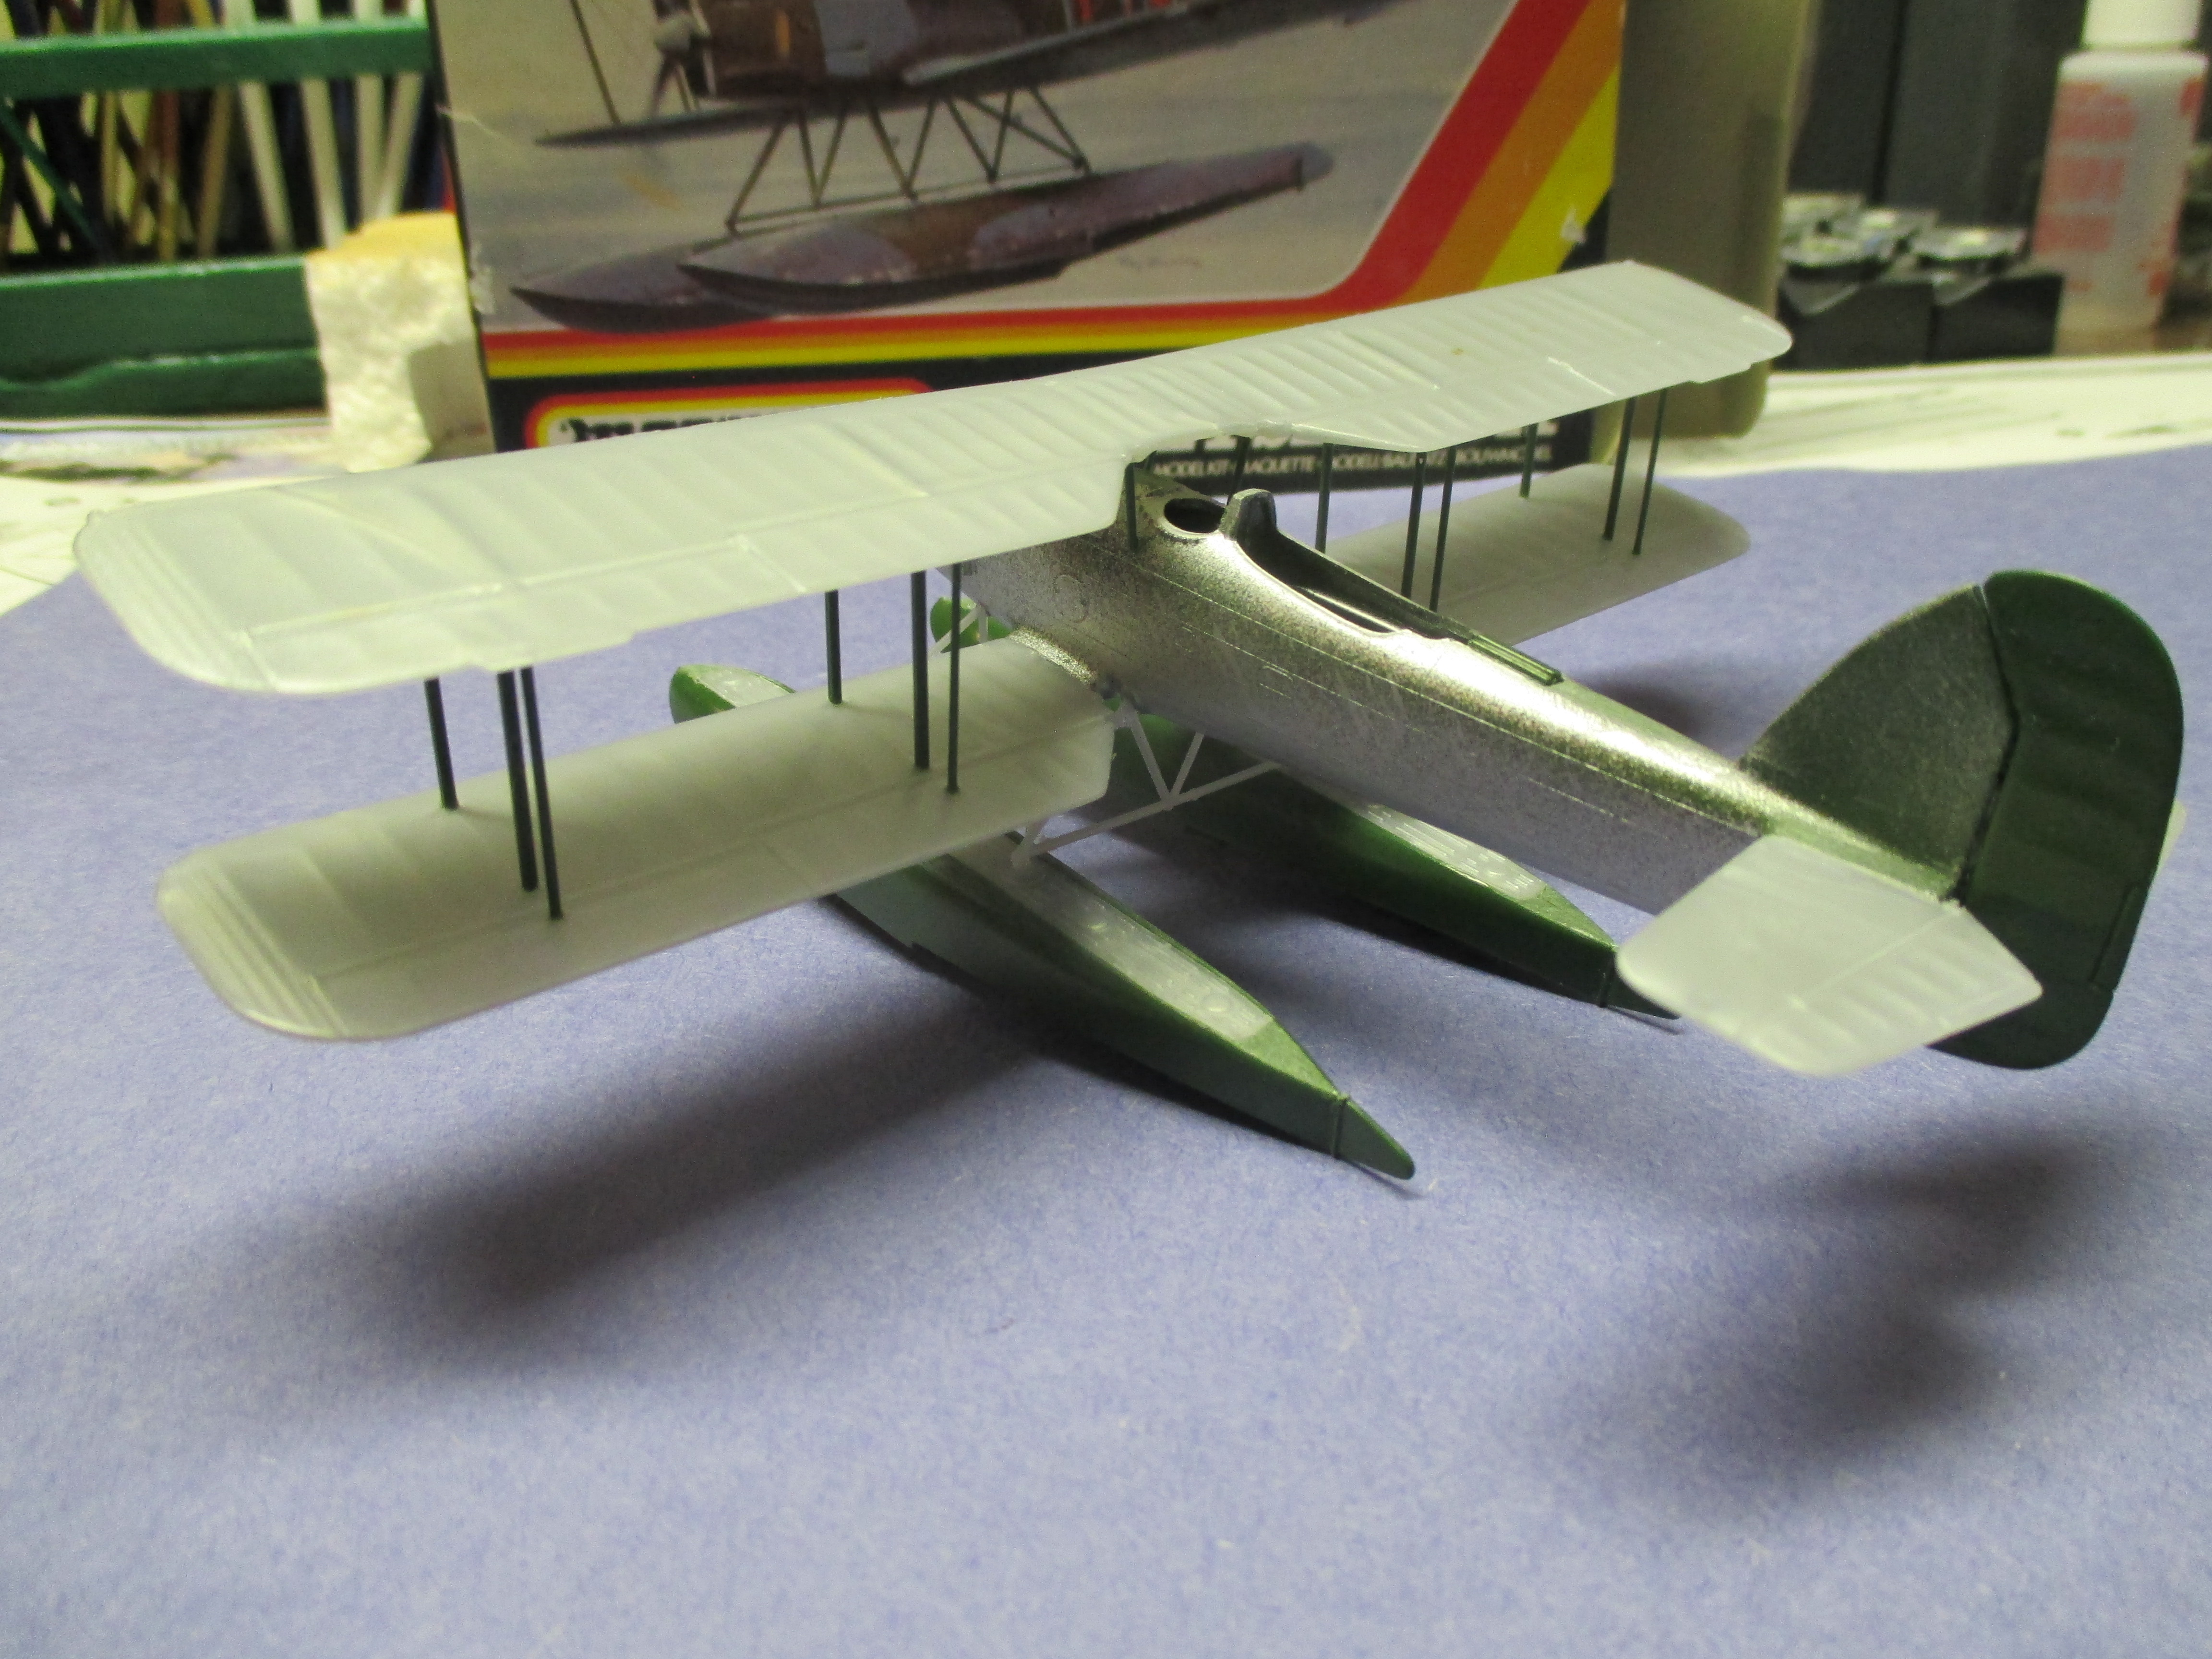
Posted: Sunday, May 31, 2020 - 01:02 PM UTC
On floats and ready to paint
Texas, United States
Joined: February 22, 2008
KitMaker: 5,026 posts
AeroScale: 2,811 posts
Posted: Sunday, May 31, 2020 - 01:46 PM UTC
WOW! Steve, that was fast especially for a biplane. Did you use a jig?
I have been practicing with my a/b and found that just not being lazy and start practicing on an old build to find which a/b worked or needed work to clean up. Took a look on YouTube and saw a couple of tricks to use for free hand camo.
If it aint broke dont fix it.
Texas, United States
Joined: February 22, 2008
KitMaker: 5,026 posts
AeroScale: 2,811 posts
Posted: Thursday, June 04, 2020 - 06:57 AM UTC
If it aint broke dont fix it.
Texas, United States
Joined: February 22, 2008
KitMaker: 5,026 posts
AeroScale: 2,811 posts
Posted: Sunday, June 07, 2020 - 09:30 AM UTC
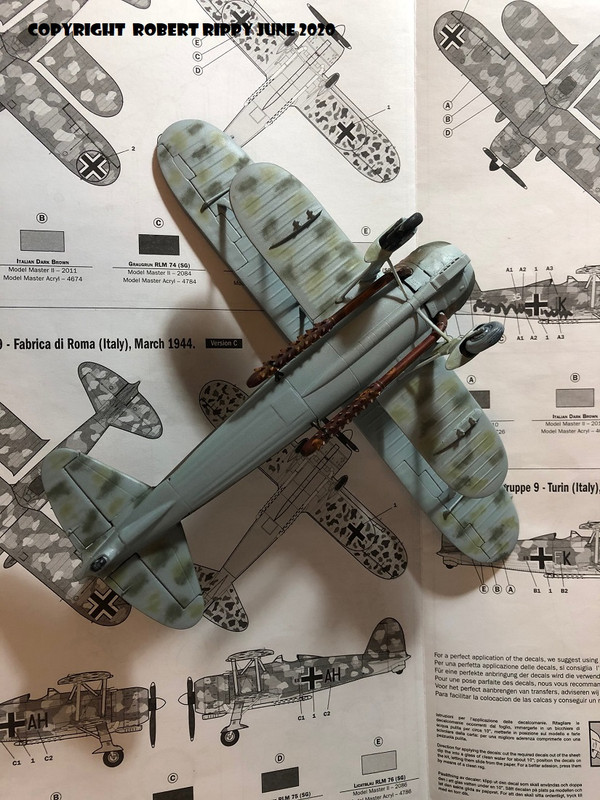
A coat of Future has been applied so it was time to start the decals.
If it aint broke dont fix it.
Dublin, Ireland
Joined: August 14, 2016
KitMaker: 148 posts
AeroScale: 123 posts
Posted: Saturday, June 13, 2020 - 11:58 PM UTC
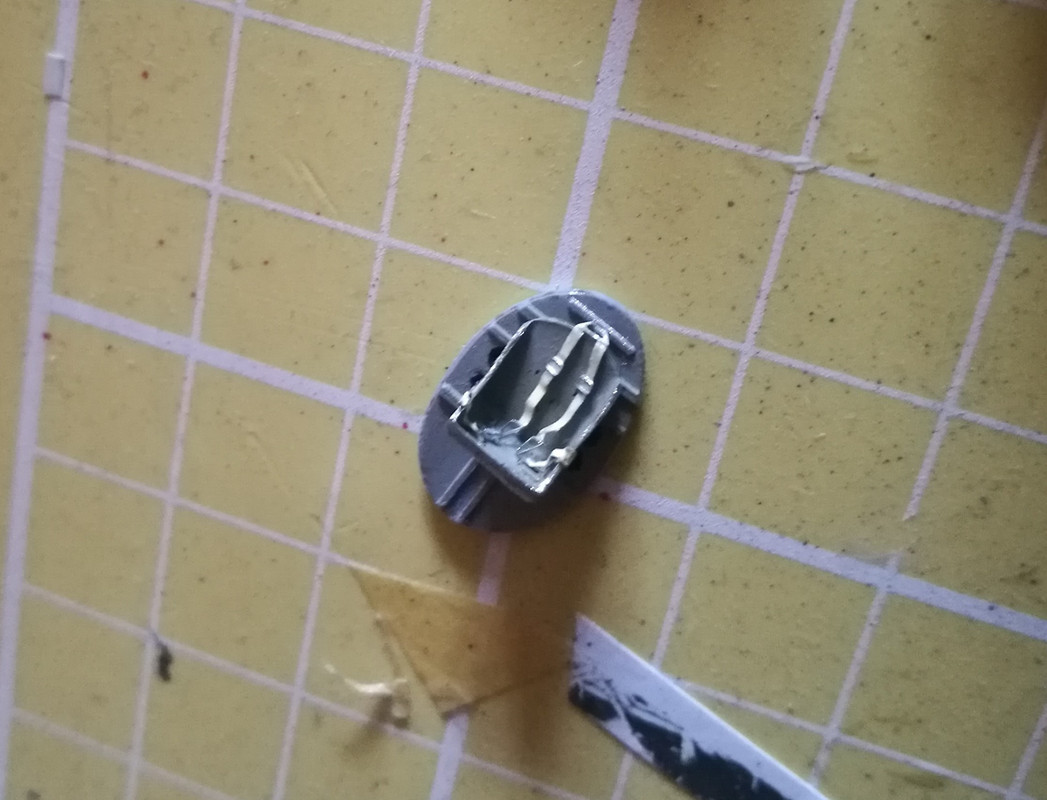
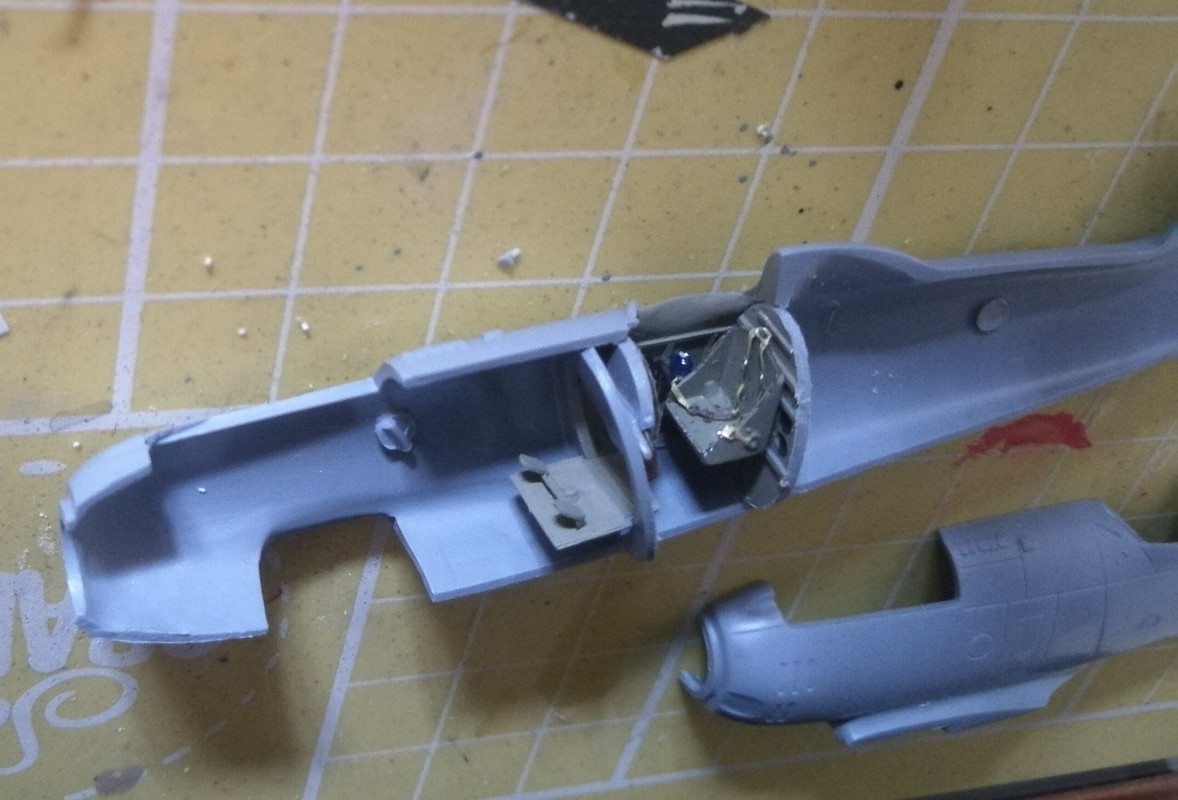
These are some great looking models! It only makes me want to build them all too. I like bi planes a lot. I attach progress photos og my Henschel. I have decided to paint first and then attach top wing. Reason is that I am brush painting, so I would have no chance to evenly paint space in between wings. I've done my best paint job ever, no visible brushstrokes whatsoever and I can't feel a slightest ridge from the masking tapes. I was very pleased with myself until I attempted to attach top wing. Everything went south, pictures were taken after a hasty amputation this morining. I am trying to salvage what I can. Yesterday I actually was close to smashing the whole thing with a fist.
First of all main wing struts are out of shape: pieces profile bends them too much inwards. Then bottom wing has a hole for pin mark, but the strut doesn't have a bolt, and also wing is curved while the piece is flat, meaning it couldn't attach properly and kept sliding all over my paint job. In the end it did not hold and I had to remove it. Small struts connecting wing to fuselage were too short and I couldn't attach them to fuselage - they just hang in mid air. I had to remove them and will try to scratch build new ones out of the sprue. All in all I think I will be able to fix it, but it is unlikely to look as good I hoped.
Currently in the workshop:
1:72 Spitfire Mark 1A by Airfix