

1⁄35Savoia - Marchetti SM79 Sparviero
5
Comments
Decals
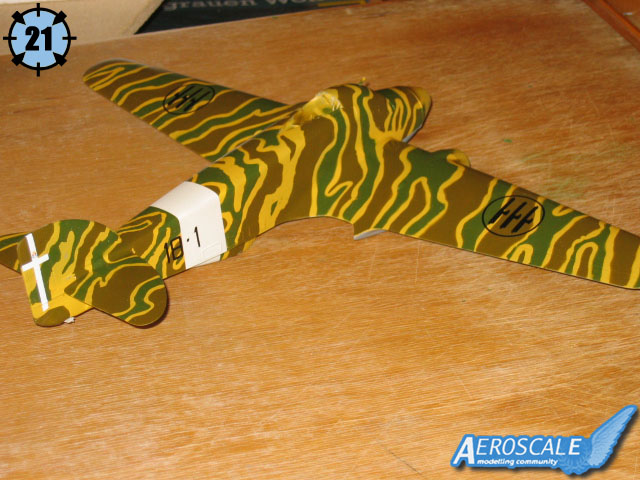
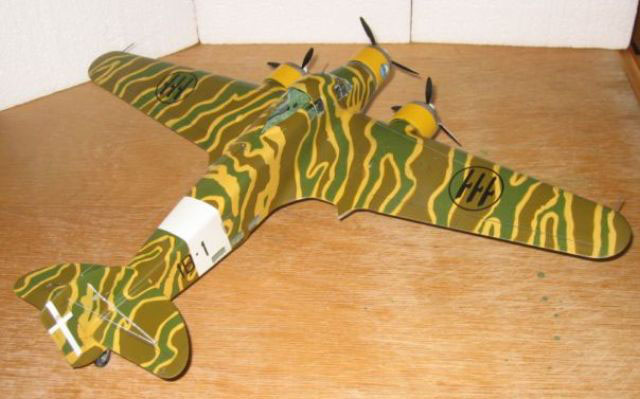
Flashback provides decals for three different options and cammo patterns. The decals are of after market quality, being well and thinly printed, opaque and in perfect register. The decals (all 12 of them) settled down nice and easily with only a little Micro-set and sol (Picture 21).After cleaning off the whole model with a damp cloth, I let it dry for at least a week to let everything cure. I then sprayed the whole model with a satin clear coat and let it sit for a couple of days again.
Gears
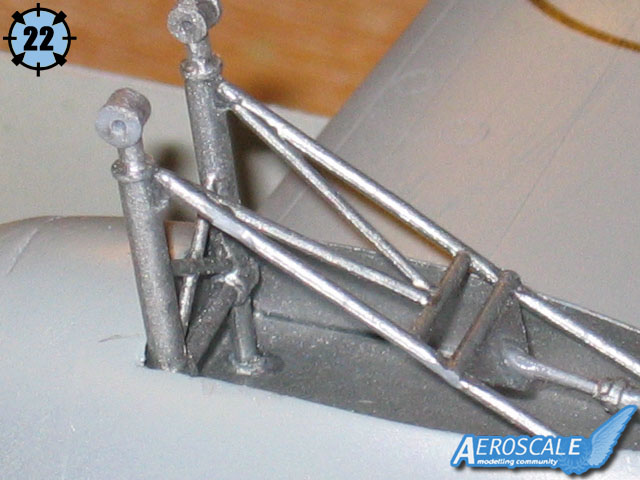
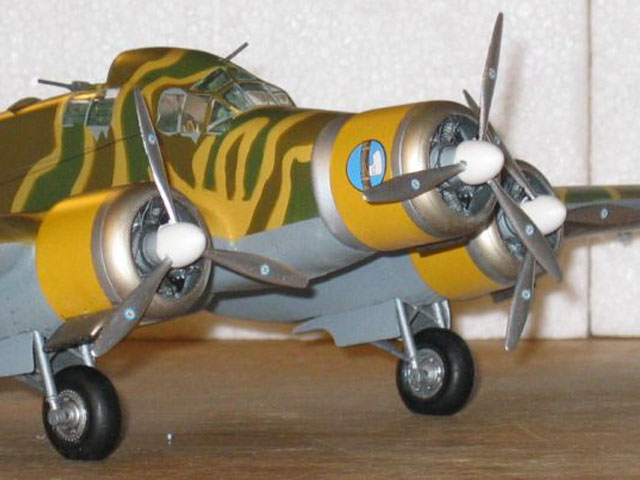
As there were no mounting lugs or pins on the undercarriage or the wheels I had to do something myself. I drilled a 1mm hole trough the wheels and through the gear parts E9. Then I could put a steel pin (left over from the Trumpeter 1/32 Wildcat), 1mm in diameter, through gear and wheel, securing it with superglue. Finally I filled and sanded the outside of the gears to hide the holes. I painted the undercarriage parts Aluminium (H56) and the wheel hubs Silver (H11), and the tires a matt black. As I had improved the mounting holes earlier, the undercarriage fitted very well (picture 22).I forgot to glue the tail wheel strut into the fuselage before closing it up, and then I broke the very fragile resin tail strut (pt.RP24) when I tried to get it in place later! So I glued the tail wheel fork to a steel pin that I attached to a home made bulkhead from plasticard, which I managed to get into the tail wheel opening.
Attaching the engines to the fuselage
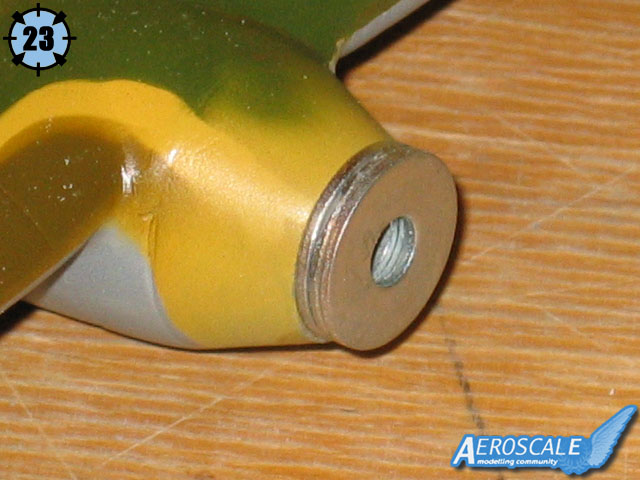
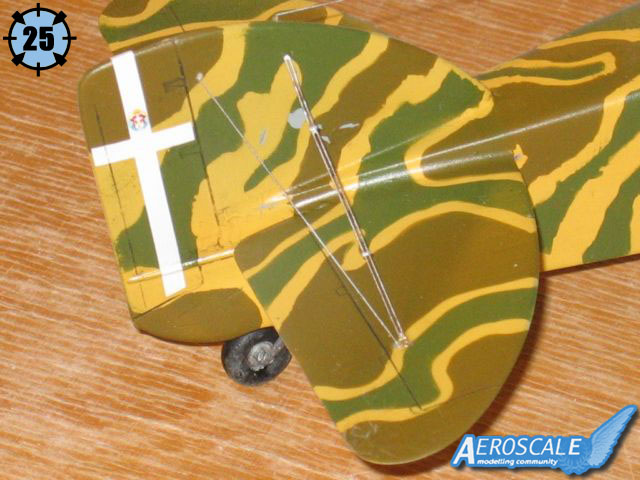
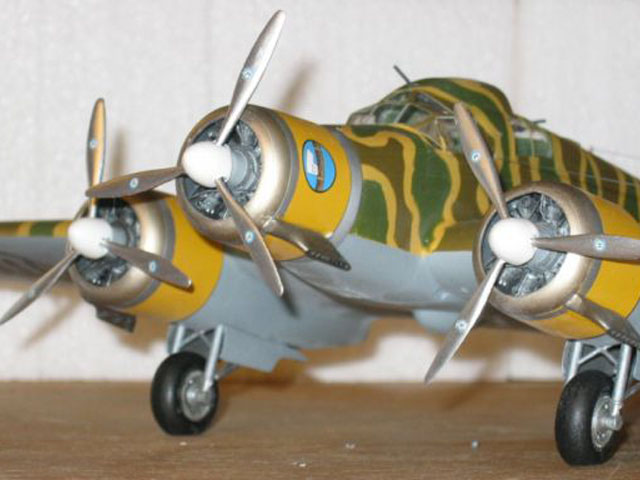
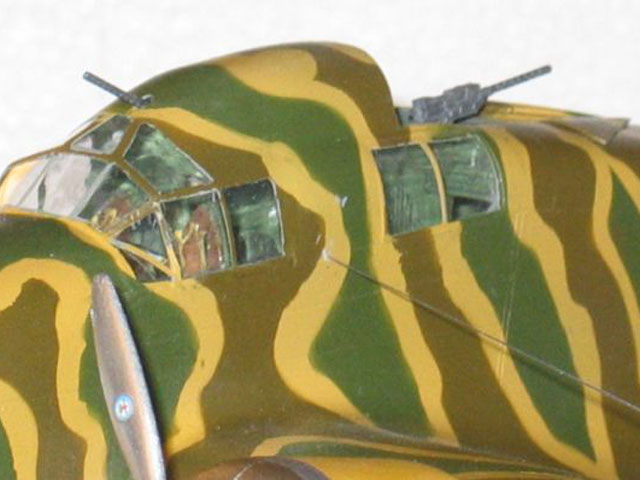
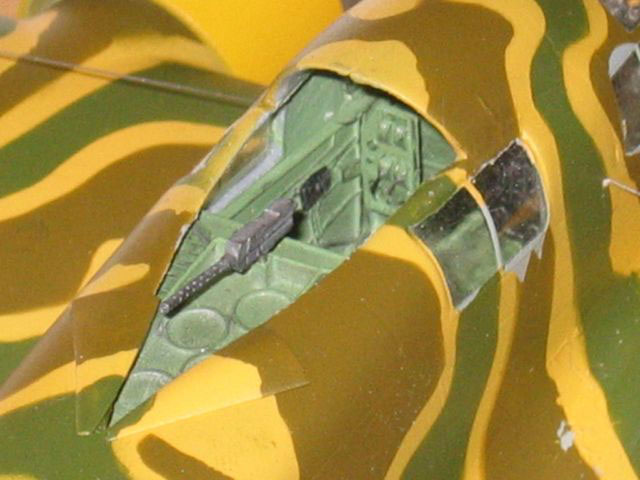
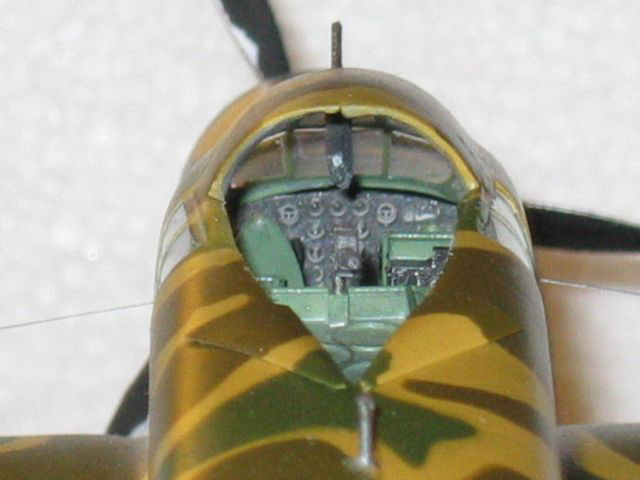
As the resin engine sits too far forward there's no good locating for the cowlings. I used small washes, 3-4 on each engine mount, 1mm thick and 12mm in diameter, as spacers (picture 23). Note that all engines should point perfectly straight forward, parallel with the fuselage. To ensure this you have to sand the mounting parts D8/9 to get the correct direction, otherwise the engines will point slightly outwards, as on a JU-52! (picture 24)From here it was downhill all the way, mounting all the small fiddly bits as gun barrels, pitots and the little windmill on the starboard fuselage side. All rigging was done with Lycra thread, painted an Aluminium colour except for the (double) tail bracing that came from an etched set for Trumpeters 1/72 An-2 Colt, cut to fit. (picture 25)
Conclusions
This is not an easy "shake and bake" kit! As all limited run kits with resin and etch it forces you to think and plan ahead, before doing anything! Most important is: dry fit, sand, dry fit, sand, repeat until the parts fits together and THEN glue! I had to stretch my modelling abilities and got to learn some new techniques. This is what modelling is about, and makes it so much satisfying!I started the build 2004-11-14 and finished it 2006-01-26, more than 14 months in total. When I reached the point when it was all masked up and all seams were done, I was quite fed up with it, so it just sat there for almost 4 months! I also wanted to learn how to handle an airbrush, as I wanted to do the kit justice. The SM79 was my second air-brushed model!
This was a fun kit to do and I can recommend it to anyone with some experience with resin and etch. This was also my very first build-up feature ever so I hope you enjoyed reading it!

About the Author


Comments
Stefan, wonderful stuff, particularly, as I note, that this is your first feature article, the first of many I hope.
I have the original Classic Airframes kit and your article points out what can be expected and will actually bring the building of my kit forward, so thanks for that too I like the colour sceme and now I'm torn between it and the scheme I have been planning on doing
I am now going to spend 1/2 an hour going over my kit contents, again.
Thanks Stefan
Mal
AUG 26, 2006 - 05:37 PM

Hi Mal!
I have published a review of the Flashback kit. Could you check it out and tell us what is different from the Classic Airframe boxing?
I didn't found a review on the net wich cleary showed the content of a C.A. SM 79 kit.
Jean-Luc
AUG 26, 2006 - 11:43 PM
Yes Jean-Luc I'll take a look, but remind me please, I'm bretty busy right now and I'm likely to forget I f I get the work done to the house, that I am doing this bank holiday week end I'll take a look later today
Mal
AUG 27, 2006 - 01:09 PM

[quote]Stefan, wonderful stuff, particularly, as I note, that this is your first feature article, the first of many I hope.
Hi Mal!
Thanks, it was quite fun to write and if it´s well recieved, i have some ideas for following features!
I have the original Classic Airframes kit and your article points out what can be expected and will actually bring the building of my kit forward, so thanks for that too
Well, no need to to the same mistakes as i did!
Now You´ll have to make up some of your own!
This is not a difficult kit, it only recures a LOT of patience and TLC!
Jean-Luc, thanks for promting me to do the rewiew, and helping me trough!
Greetings!
Stefan E
AUG 27, 2006 - 01:23 PM

Copyright ©2021 by Stefan Ericsson. Images also by copyright holder unless otherwise noted. The views and opinions expressed herein are solely the views and opinions of the authors and/or contributors to this Web site and do not necessarily represent the views and/or opinions of AeroScale, KitMaker Network, or Silver Star Enterrpises. Images also by copyright holder unless otherwise noted. Opinions expressed are those of the author(s) and not necessarily those of AeroScale. All rights reserved. Originally published on: 2006-08-26 00:00:00. Unique Reads: 11652

WEB HOSTING BY


Copyright ©2021 AeroScale and Kitmaker Network, a subsidiary of Silver Star Enterprises
All Rights Reserved. Please read our Conditions of Use and Privacy Policy.
All Rights Reserved. Please read our Conditions of Use and Privacy Policy.