

1⁄35Fokker D.VII Royal Class
14
Comments
1000 royals!
On a bleak and starless night the merchant sailing ship the Mariposa was being loaded. The cargo was one hundred oversized - oblong crates. The ships manifest read only 1000 Royals. As the Captain, a grizzled 40 year sea veteran squinted into the darkness at the imperceptible horizon he noted the three lightning strikes. A storm was coming. He knew that this voyage would be far from easy. Deep in the bowels of the ship the crates began to glow with an eerie incandescence. The sailors worked feverishly stowing the cargo. Twisted boney hands cast of the mooring ropes fore and aft. In the flickering lamp light of the docks the Mariposa slipped into the night. As if chased by Davy Jones his-self the Captain orders every stitch of canvas to be unfurled. He had never seen the like before. Three thunder-heads colliding dead ahead. As the shrink wrapped cargo heaves and rolls within the ship, out from the darkness comes a thin, pale, tuxedo clad figure clutching his high necked and flowing cape and he steps into the night rain. One of the sailors hooks the volume knob on the 1923 Philco radio and turns up the blasts of Edgar Winters Frankenstein. Moments later, suddenly the tuxedo clad figure cries out, That will do Dutchman ...that will do!!! Thus another scale wonder is borne to the worlds hobby shelves.the build
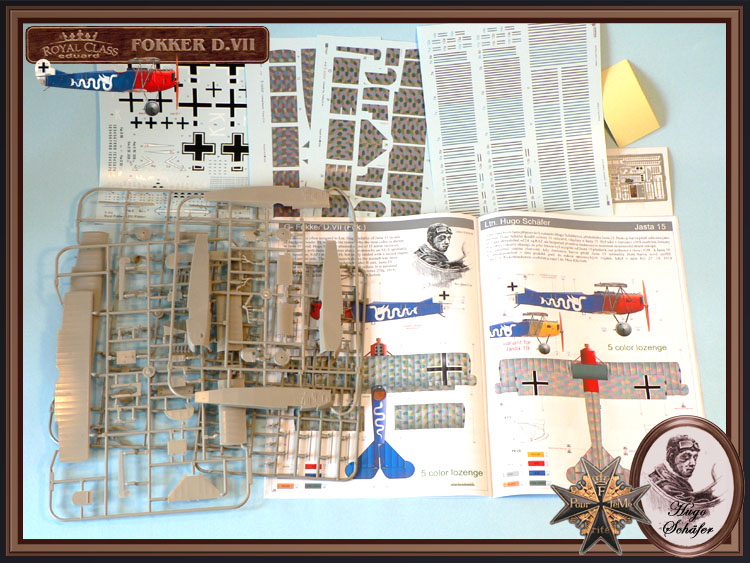
Pages 1-4. Text and history. Eduard has modified the historical comments and corrected several misspellings from the very first and second issues of their kit #8131 to good advantage. Taking note from my earlier comments about his misidentification Reinhold Platz is now rightly identified in the Fokker history. The main alteration is the addition of the three fuselage sprues and the identification E, F, and D. Express masks dealing with the 12 colour profiles are limited to colour demarcations of the striping and wheel covers. Also there are the legend, parts map and colour references. Before beginning, wash your kit plastics in mild dish soap & water, dry completely, then pre-drill and clean up all rigging and strut locator holes.engine and cockpit
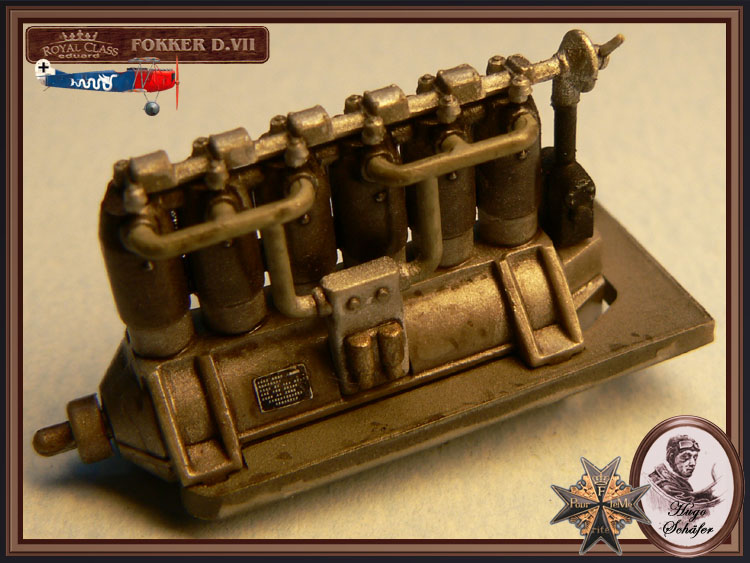
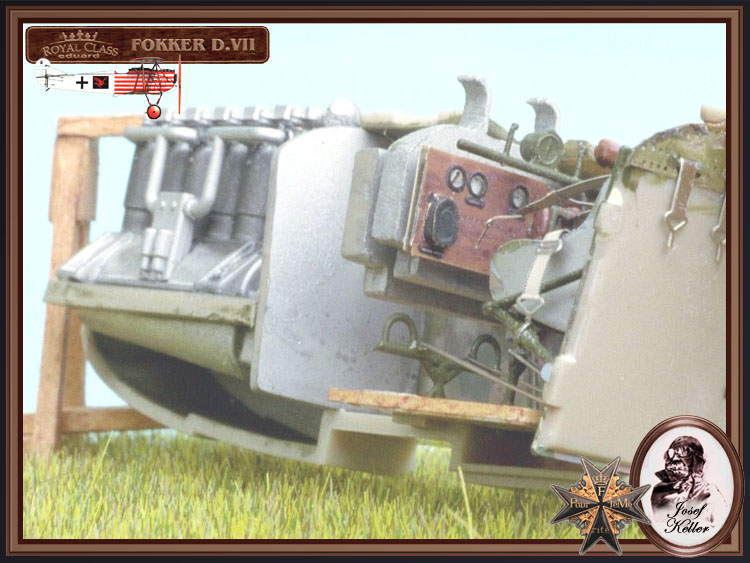
Page 5. The inline motor assembly is a generic representation that has pieces for the Mercedes D.IIIaü 180hp (PP B 5, 6, 8, 14 - C 4, 13, 34) or the BMW IIIa 185 hp assembly (PP B 5, 6, 8, 13 - C 4, 13, 34). Truthfully, most non WWI modelers wont know the difference. Check the references provided for some keynote differences in the types installed. The cylinder jackets of both engines were the color of blued metal.The BMW sat higher in the compartment so about 1" more of the cylinders could be seen. Its air induction pipes (PP B 13) were unified where the Mercedes (PP B 14) was divided. The immediate visual difference in the early Mercedes D.III 160hp / D.IIIa 170hp and its progeny the D.IIIaü 180hp or D.IIIav 200hp are in the rocker boxes above the cylinder jacket heads. On the early D.III and D.IIIa motors the rocker springs (B 6) are centered on the sides of the rocker box covers. On the D.IIIaü and D.IIIav motor the springs are located on the forward leading edge of the same covers. They were also that way on the BMW IIIa 185hp. The rest is below the cowling and not readily visible.
Several good manufacturers (specifically Roden) note the difference and have two distinct castings. The Mercedes D.III160hp was outclassed by 1917. The Mercedes D.IIIaü 180hp was the standard engine in both of the Albatros late built D.V and all D.Va types starting in late 1917 and then the Fokker D.VII through 1918. Then in early 1918 came the Mercedes D.IIIav 200hp. The BMW IIIa 185hp was highly prized by pilots. Many, many D. III and IIIa type motors were rebuilt to the D.IIIaü specs at the airparks as the war progressed. That is why some captured examples had motors with the i.d. designation of D.III 160hp cast into their crankcases. This has caused the misconception that the standard 160hp and 170 hp were used in 1918 at a time when they had become obsolete. Often these were referred to as 160hp over-compressed engines.
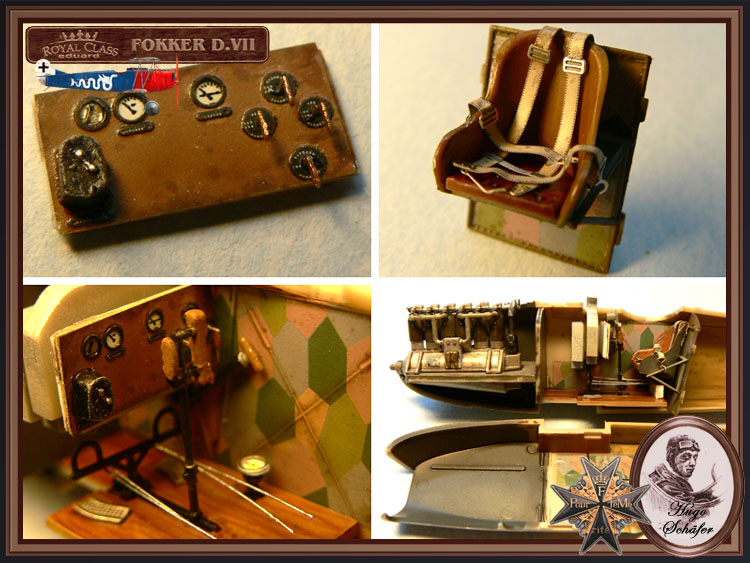
Next the cockpit flooring (PP A 7). The rudder bar (PP C 33) inserted through the flooring (PP A 7) and needs a vertical bar attached centrally. Like the DML Fokker Dr.I set up, this vertical column should angle back and up behind the ammunition box (PP A 16). On the control column (PP C 27) note the throttle lever has one handle We also have photos where two are present. Check your references. Set the rudder bar (PP C 33) to the desired position to compliment the attitude you have chosen for the rudder. Scratchbuild an aileron control V for cables and attach the V at the front end of the lower control bar molded to the cockpit flooring (PP A 7). Also add the compass (PP C 14 & PE 10). Also here, add bent and shaped brass wire for the throttle and the cables for the Spandau machine guns. Later you will have to add all the control rigging material to the elevator control column (PP C 27) and the rudder bar column (PP C 33) when the cockpit rear bulkhead / screen (PP A 11) is added. Some of these cables should to go through holes that you need to cut in the rear bulkhead / screen (PP A 11). Check your references for the various cables and wiring that are attached to these units.
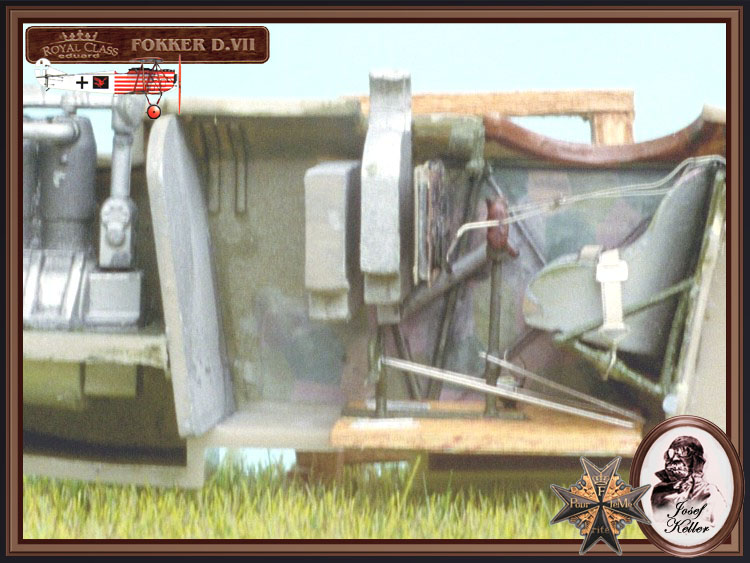
The seat (PP B 12 & 15) sets into its supports that are to be built up in a box frame (C 17, 18 & 32) and attached to the rear cockpit bulkhead / screen (PP A 11). I trimmed down the inside surfaces of the seat (PP B 12). The seat was known to be covered in fabric that was held by attaching it to eyelets in the seat backs outer rim. I also deleted the seat cushion (B 15). As parachutes had come into use the seat was made deeper to accommodate the chute pack as a cushion. There was not any tucked leather or buttons on the chute pack surface. In the cockpit rear bulkhead / screen (PP A 11), note there needs to be holes for the rudder control cables to pass through. Next remember the rudder control cables that will be added between the bar and the stirrups will need to go through these holes. Whatever the fuselage covering use the same covering on the bulkhead / screen (PP A 11). In this case of 4 or 5 colour lozenge. The pilots shoulder harness straps (PE 1) are attached to the seat framing (PP C 18) behind the seat (PP B 12). Next the location for the fuel pressure hand pump (PP C 10). You my want to add a half loop of painted brass wire to simulate the air hose leading toward the front of the cockpit strapped to the framework.
fuselage
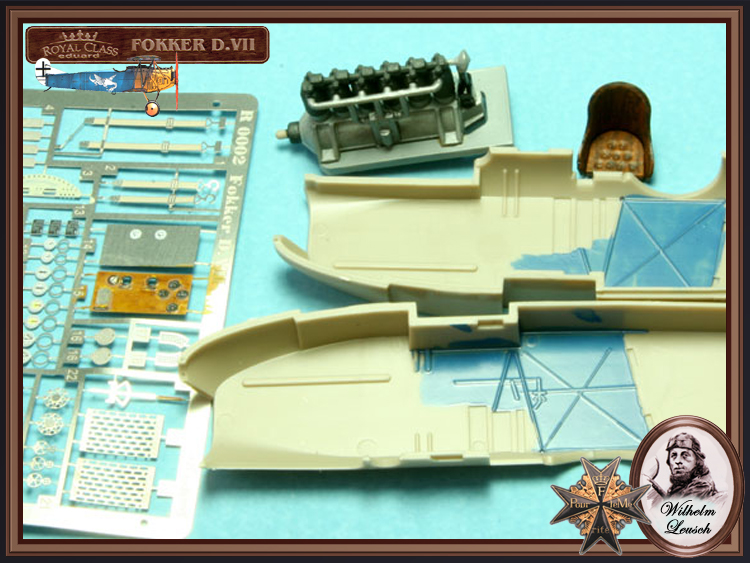
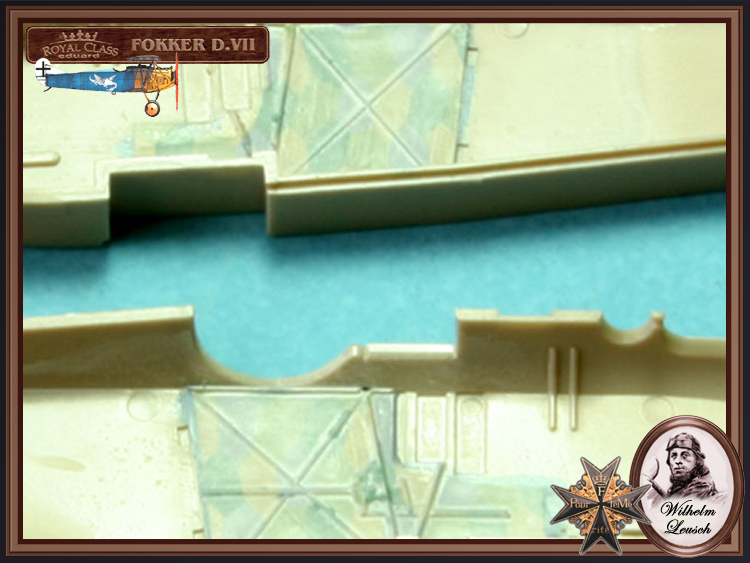
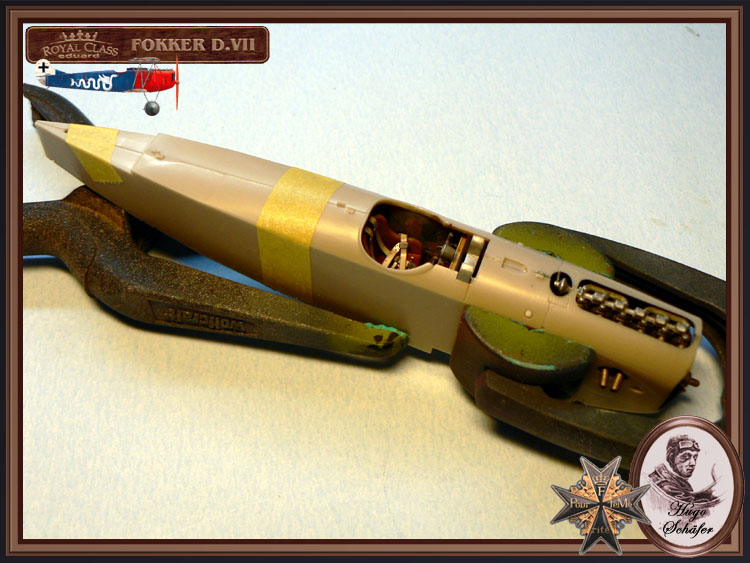
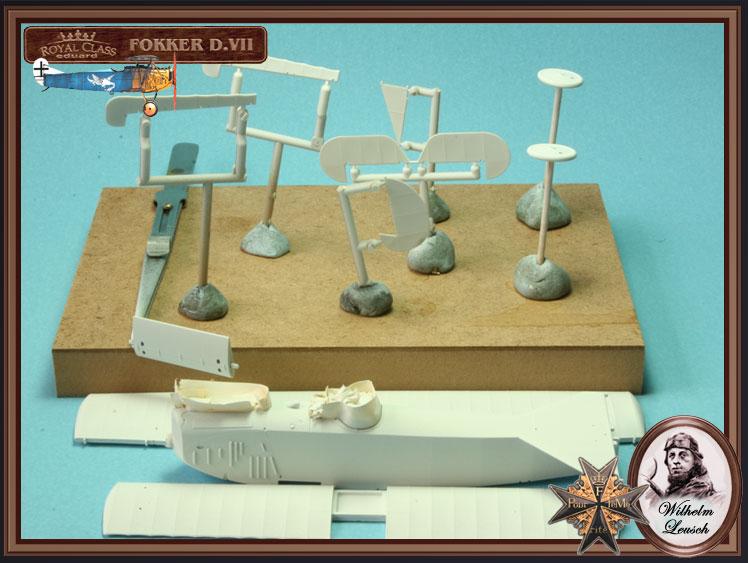
Page 6 - 8. First of all choose which fuselage versions you are going to build. You can replace the molded cockpit structure in the fuselage halves (PP E, F, D 1-4, 13) with painted brass rod sections or after you apply the interior surface lozenge decals and they thoroughly set, dry brush the details with a light grey or grey-green to bring out the airframe skeleton. Note that the factory printed lozenge pattern fabric used on the Fokker D.VII showed through the interior of the cockpit sides in reverse in lighter shades. For the exterior the kit supplied four and five colour lozenge colours are way too light. But in an attempt to help the modeler work with what comes out of the box I will offer a fix. Several light washes of translucent dark blue and / or black over all tends to help greatly. I have to admit that this is one of their better efforts to provide the lozenge camouflage compared to what they have offered in their past. I prefer the Eagle Strike lozenge decals instead of the kit provided items. Their clear carrier film on the Eagle Strike lozenge decals allows them to be easily reversed. Just apply a little decal Micro Sol & Set.There is no main fuel, reserve fuel & oil tank assembly. Then we see the method of attachment of the engine and the typical Eduard bearing shelf to the raised edges within the engine compartment. Note Eduard has provided for a vertical installation of the Firewall (PP A 8). This is incorrect. This should have an incline at the top toward the engine compartment with a cutout for the engine decompression bell. To do it right you will have to erase the forward most, lower locating ridges. Then line the rear face of the firewall up on the outside of the forward most, upper locating ridges. On the early fuselage without louvres it is easily noticeable. Out of the box the pilot's right side upper engine cowling has a larger cutout for the cylinders and exhaust opens up that area for scrutiny. On the Late style version out of the box the cowling opening for the engine cylinders are overlapped by the exhaust manifold and it is not too noticeable.
Concerning the instrument panel (PP A 14 or PE 14 & 15), I will usually paint Fokker company instrument panels black and give OAW or Albatros types a varnished wood look. Eduard has pre-painted theirs a drab brown colour. They have also given the modeler a great set of photoetch instrument panel parts and fuel gauges for two complete kits. I also added a hand crank spare part as a handle to magneto and flip levers (PE 25 X 4) to fuel and air controls. I also add the tachometer (PE 11) dial to the machine gun rear brace (PP C 28). Finally they discuss the engine compartment assemblies. As mentioned earlier cowling side panels are a known hallmark in determining the parentage of your D.VII. But in mid-summer these items upper cowlings would be removed during flight operations. This would be typical of a machine in mid to late June - November 1918. The late Fokker types came to the front on very late summer early fall (autumn) 1918. Now assemble the fuselage halves (PP F 1- 4, 13) with its internal component assemblies.

About the Author


FROM: COLORADO, UNITED STATES
I was building Off topic jet age kits at the age of 7. I remember building my first WWI kit way back in 1964-5 at the age of 8-9. Hundreds of 1/72 scale Revell and Airfix kits later my eyes started to change and I wanted to do more detail. With the advent of DML / Dragon and Eduard I sold off my ...
Comments

No worries mate! Actually it would not take much to finish your build ... with the fuselage closed up and all... Ok, ok I'll quit ...for now. Your entirely welcome. Labor of love and all. So many kits so little time... Say where is that Camel build as well? Hah!
OCT 02, 2006 - 09:29 PM
You and the Aeroscale membership are welcome Rick;
I try to do the same kind of work on all my kit reviews. At least those that have visited my website (see the banner at the bottom of my post )seem to like what I do as well. But I am very fortunate to be tied into WWI aviation research as deeply as I am. For most people its a passing fancy for me it replaces more expensive hobbies and I get to stay close to the family.
Here is the non-profit org that I volunteer for;
http://www.lafayettefoundation.org/
OCT 02, 2006 - 09:38 PM
Greetings Steffen,
I totally understand about money. (I and my wife have 5 children and money is always tight.) BUT! Thats why I started my website. It helps me pay for my hobby and I get to help people like you.
When it comes to great information and solid research on WWI aviation you cannot go wrong with anything written by Greg VanWyngarden. With the kits you have mentioned I have given you the bare bones of my experience to have a good build in this and the other review / features here at Aeroscale. But I got what I know from reading.
I am one of the fortunate few that has an entire archive at my disposal. It has the life's gatherings of 6 major WWI aviation research giants at its core. Even Greg comes to me for photographs at times.
Do yourself a favor. You have already spent quite a lot for the kits. You have these reviews and features to acomplish the builds. But if you do not invest in solid research monographs like the Albatros publications Fokker D.VII Anthology, you do yourself a tremendous dis-service. I admit its is a chunk of money to buy all three. It took me three years to put enough money aside, one year for each volume.
Anthology 1 is about the Fokker Schwerin product and the first 20 Jastas.
Anthology 2 is about the OAW builds and the next 28 Jastas.
Anthology 3 is about the Albatros production series and the remaining Jastas.
The first has some typos in it but the last two have few faults. The great thing is they will always be there on your shelf waiting for you to spend some time and flights of fancy.
OCT 05, 2006 - 04:09 PM
Greetings all; For some of the forum feedback during the build see;
banter bout the builds
OCT 10, 2006 - 08:04 PM
Ay laddie e went into it and took ou the unnecs bits and twiggs. Shes a workin in fine form ne.
OCT 11, 2006 - 12:28 AM

Aye wee man....it wasnae working earlier mate....the whole website was acting up today error 404 etc etc, must have been wee beasties....ok noo though....
geeza a beer and I'll read it from the start....
OCT 11, 2006 - 12:35 AM
ay matie ta bruwnies nd ae fairies do the dark mischef ae times. But you'll be doing ae jig if n I pour you a single malt of abou 30 years in age.
 http://www.ladyofthecake.com/mel/frank/sounds/alive.wav
http://www.ladyofthecake.com/mel/frank/sounds/alive.wav OCT 11, 2006 - 12:54 AM
Nae chance wee man....it'll take mere than a 30 year auld whisky to get ma to act like an Eejit blootered ootae ma coupon
gee over here and I'll take ye on a pubcrawl.....son
OCT 11, 2006 - 01:25 AM
ay laddie if your going to do a pubcrawl, I'll stroll of you don't mind. I get stiff in the joints...my doctor told me to stay outta the joints but what does e know.
OCT 11, 2006 - 01:50 PM
Copyright ©2021 by Stephen T. Lawson. Images also by copyright holder unless otherwise noted. The views and opinions expressed herein are solely the views and opinions of the authors and/or contributors to this Web site and do not necessarily represent the views and/or opinions of AeroScale, KitMaker Network, or Silver Star Enterrpises. Images also by copyright holder unless otherwise noted. Opinions expressed are those of the author(s) and not necessarily those of AeroScale. All rights reserved. Originally published on: 2006-09-30 00:00:00. Unique Reads: 19825

WEB HOSTING BY


Copyright ©2021 AeroScale and Kitmaker Network, a subsidiary of Silver Star Enterprises
All Rights Reserved. Please read our Conditions of Use and Privacy Policy.
All Rights Reserved. Please read our Conditions of Use and Privacy Policy.