

1⁄35Fokker D.VII Royal Class
14
Comments
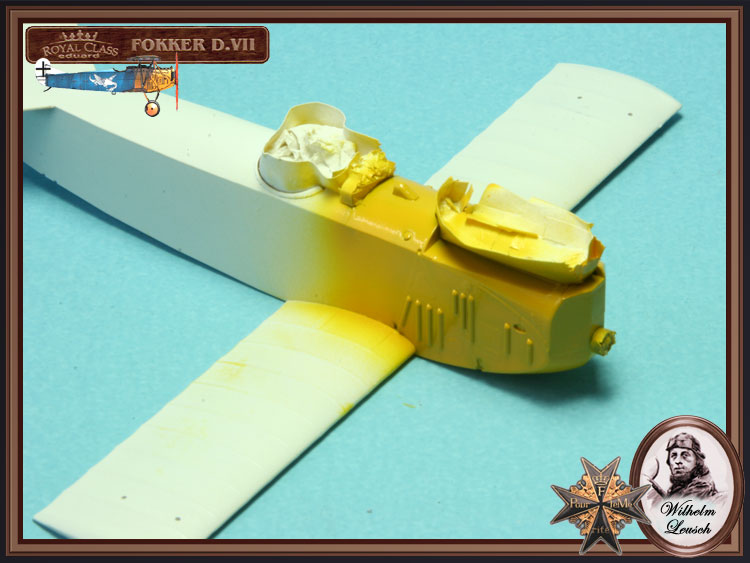
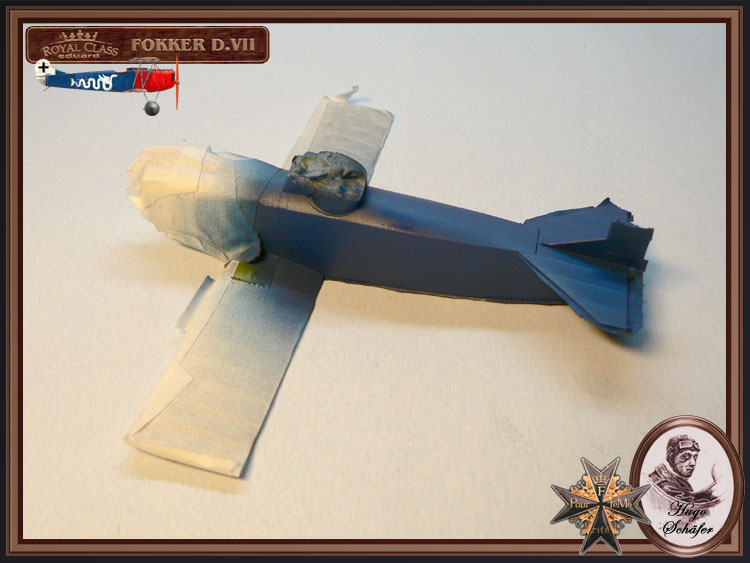
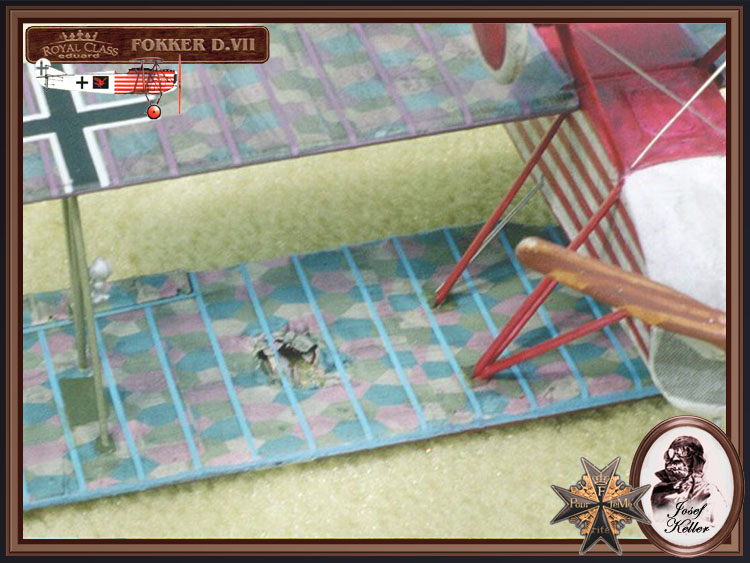
lower wings assembly
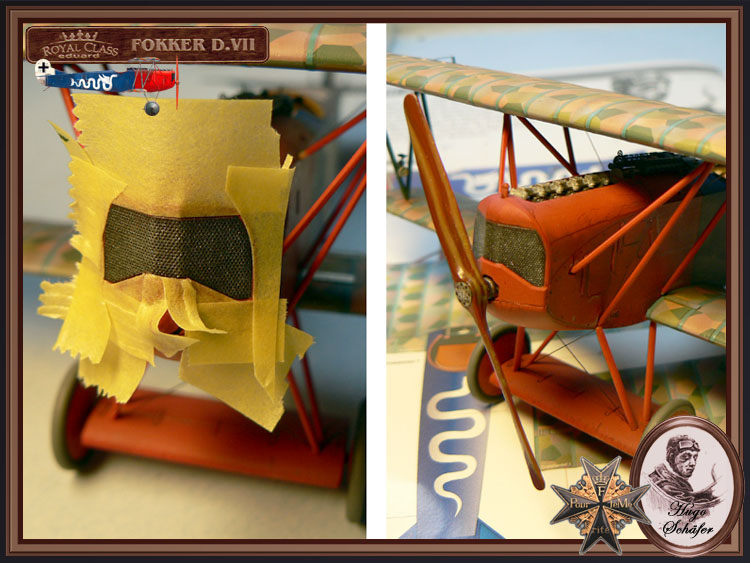
Page 9 - 10. Here we assemble the lower wing parts (PP A 2 & 3, B 1.) One could actually insert spars held in place with double sided tape or glued in place. This type of wing assembly is great for the modeler who wants to simulate damage. By thinning down the inner surfaces, internal structure is easy to replicate. Also, before putting the lower wing together sand the vertical edge of the lower wing at the roots of all three lower wing components (PP A 2 & 3, B 1). The unmodified fit between the lower wing an fuselage is tight and cause anhedral just like the Roden kit. This fix will eliminate the fit problem. Do Not narrow the whole fuselage by taking away from the center union area.The fuel gauge (PP C 16) can have a decal (#30) or a metal gauge face (PE 12). Note that the large ammunition round counter gauges (PE 5 X 2) are located on both sides of the machine gun rear brace (PP C 28 ) not just one. ( On page 7 you will have the option to install smaller round counters (PE 6 X 2 ) directly to the gun breeches). The radiators (PP F 7 or 11) have plain internal faces and no shutter assembly. Eduard chose completely enclosed cowling types and thusly no detail was added. The early and mid production versions were known to operate with upper cowling panels removed during the hot summer months. Check your references. If you decide to open up this area, you may need to alter the rear face of the radiator (PP F 7 or 11) before you attach it. By scribing some crisscross lines in the rear face of the radiator you create a better simulation. Also the radiator fillets (PP D5, E2, F12 or 14 - mislabeled on the parts map as another F13) are given for six aircraft. After painting or decal applications, assemble the horizontal stabilizer (PP A 10). Eduard has given the modeler an easy way to deal with the undersurface fuselage fabric seam (PP C 21). A first for WWI aviation modelers. The altimeter gauge (PE 5) is optional as some pilots used wrist watch sized types.
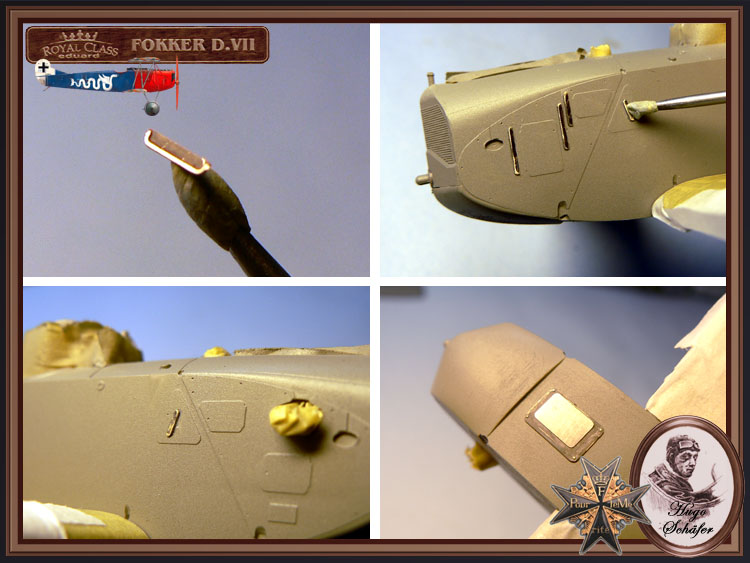
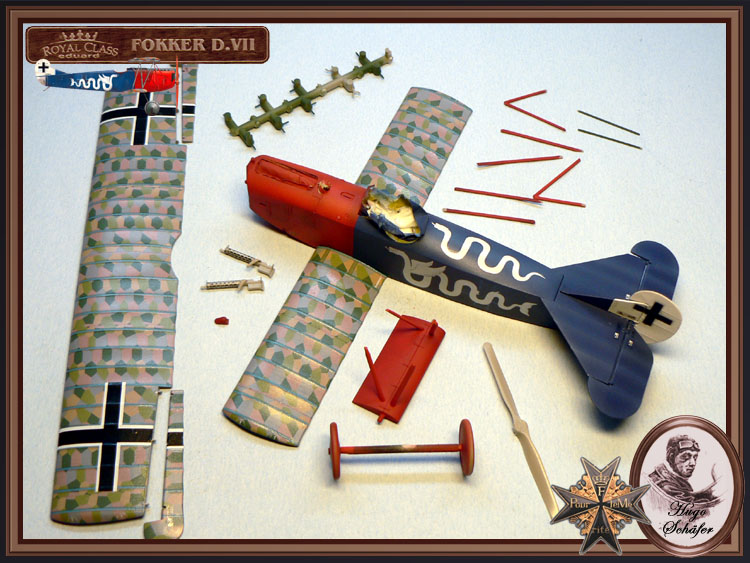
For the exhausts (PP F 8 - 10), Mr. Pete Grosz tells me that there were at least six manufacturers putting out these exhausts. The instructions take this time to discuss the application of its lozenge. For me it seems that this should have taken place a page back before assembling the major components. See the rear cover of the instructions for more. Next comes the rudder (PP A 12) and stabilizer fin (PP A 15) and control horns (PP C 3 X 2). On the original aircraft these items were covered in normal fabric (either plain or lozenge depending on the batch) and the white areas were then painted in place. Next, werke numbers, factory serials and rudder cross were applied. I would now add the control horns (PP C 11 X 4) and let dry. As this begins to dry set the attitude of the elevators (PP A 17) that you wish to reflect. The four plates are hinged panels (PE 4 X 4) to access the lower wing spar attachment for the fuselage. Note these should have the triangular plates (PE 26) on the fuselage, located immediately above the hinged access plates (PE 4 X4).
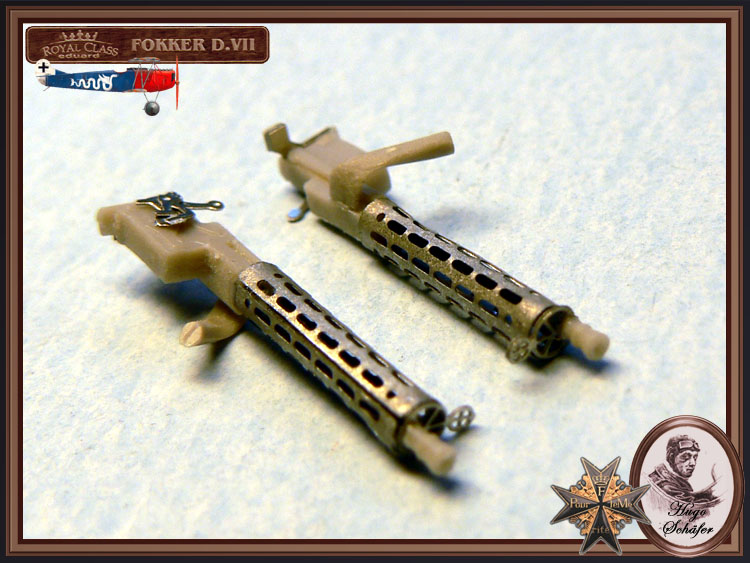
Page 11. The kit provided Spandau machine guns (PP A 5 X 2) are entirely plastic. But Eduard gives you etched metal parts for the fretted jackets and other details (PE 6, 20, 21, 23 X 2). The empty belt chutes (PP C 2 & 7) attach next. The completed Spandau machine guns should be painted in semi gloss black. All German issue Spandau and Parabellum machine guns came from the factory with the outer surfaces covered in a baked on black enamel. Some highlighting in gun metal colouring maybe appropriate. You have the option to install smaller round counters (PE 6 X 2) directly to the gun breeches. On the previous page larger versions were discussed.
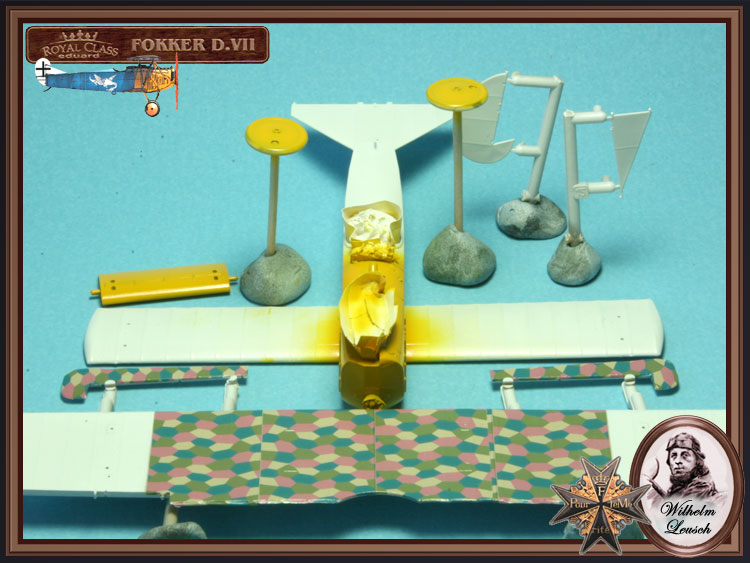
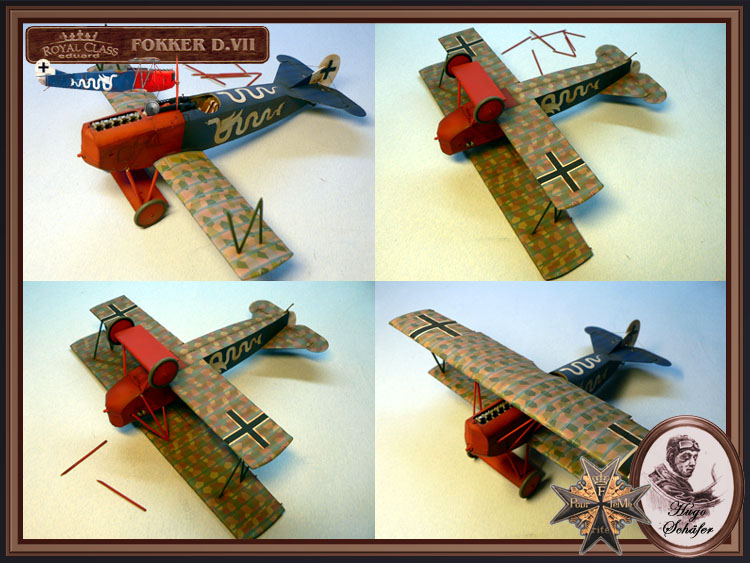
The Eduard top wing assembly (PP A 1, 4, 9 B 2) does not have the mold casting problem found in most of the DML / Dragon kits. By this time I have painted and added decals to all completed wing surfaces and they are thoroughly dry. As mentioned earlier this type of wing assembly is great for the modeler who wants to simulate damage. By thinning down the inner surfaces, portions of internal structure is easy to replicate. For those of you with AMS - a strip of 20 thou strip could be added between the cabane attachment points out to the leading edge mating surfaces of the top wing. It helps the Eduard wing match the wing thickness shown in Anthology 3. Otherwise the wing will be too thin seen from the front. Even with this easy modification, it's still not as deep as the Roden wing, but that item may be on the too thick side. Add the control horns (PP C 11 X 2) next. More is discussed here about the lozenge placement. See the rear cover of the instructions for more.
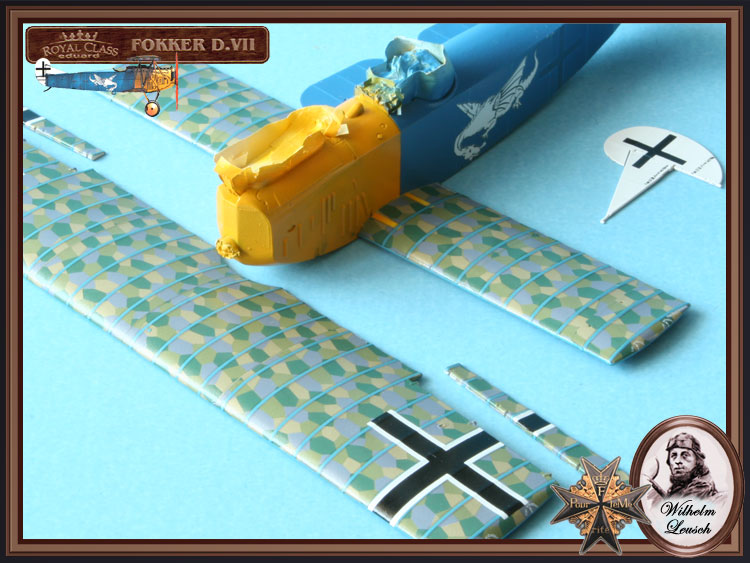
upper wing assembly
Page 12. To bring the fuselage and top wing assemblies together I use childrens Lego blocks. To form a jig to keep everything level and square. Then add the interplane (PP C 5 X 2) struts first, then the cabane (PP C 9, 15 30 & 31) struts. The anemometer (PP C 29, PE 9) is an air speed indicator. The plastic struts are commendably thin and clean up quite nicely. My own opinion is that metal etched or white metal load-bearing struts or supports gives a build a much greater longevity. The kit provided photoetch under the chin-pan access door on my example is off set and should be centered. The hinge was at the forward edge on the original machines. These are easy to replicate with a couple of .005 thou plastic sheet / card scraps cut to shape.Page 13. Continues the cabane strut (PP C 9, 15 30 & 31) attachment details. Next the horizontal tail unit stabilizer struts (PP C 20 X 2 ) and the tail skid (PP C 12). I did replace this item with a modified brass rod for strength. It looks like Eduard originally forgot to add two control horns (PP C 11 X 2) to this image. On the Schwerin built machines the grab handles (PP C 8) do splay out about 30 degrees from the fuselage.
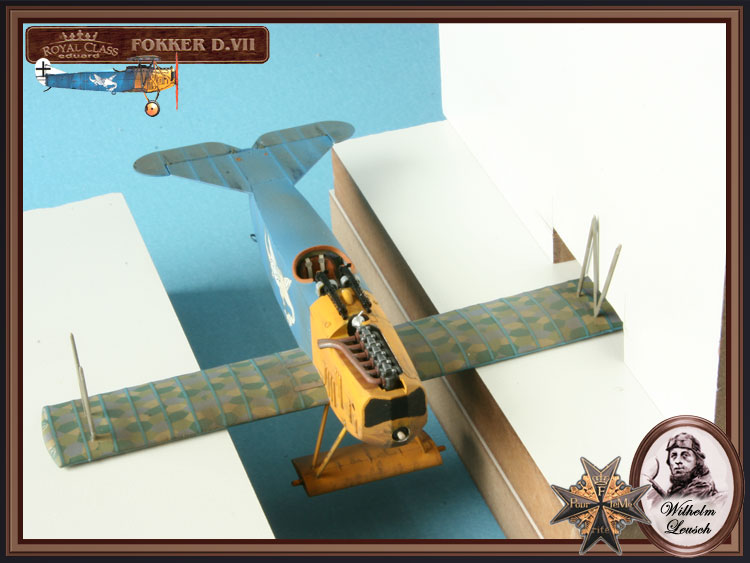
Page 14. Is the axle wing (PP B 7, F 5 & 6 ) and wheel (PP F 4 X 2) assemblies. With the wing axle mid section (PP B 7) I routed out the plastic axle and replaced it with a brass rod of appropriate diameter. Next add the landing gear legs (PP C 23-26 ) to the wing axle (PP B 7, F 5 & 6). There are four propellers of two types offered by the kit. Axial (PP B 16 ) and Heine (PP B 17) and note that Eduard has not referenced the right application to the profile provide in the kit decals. The problem is that the Heine propellers (PP B 17) are far too short for inline six cylinder engines and should be closer in length to the Axial (PP B 16) types provided. Two of the four kit propellers with the cones on the bosses are quick release items seen on some BMW engine variants only. It is the pitch and length of a propeller that determines the engine application. The paddle profile was the company hallmark.
Page 15. The half moon strut attachment points(PE 26 X 8) that Eduard include as photoetch are for the underside of the top wing assembly are a nice touch to add as well. Rigging paths are shown in thin red lines. There should be four aileron actuation cables (two on each side for the fuselage) running up into the area behind the rear cabane struts (PP C 9 & 15.) Check your references.


About the Author


FROM: COLORADO, UNITED STATES
I was building Off topic jet age kits at the age of 7. I remember building my first WWI kit way back in 1964-5 at the age of 8-9. Hundreds of 1/72 scale Revell and Airfix kits later my eyes started to change and I wanted to do more detail. With the advent of DML / Dragon and Eduard I sold off my ...
Comments

No worries mate! Actually it would not take much to finish your build ... with the fuselage closed up and all... Ok, ok I'll quit ...for now. Your entirely welcome. Labor of love and all. So many kits so little time... Say where is that Camel build as well? Hah!
OCT 02, 2006 - 09:29 PM
You and the Aeroscale membership are welcome Rick;
I try to do the same kind of work on all my kit reviews. At least those that have visited my website (see the banner at the bottom of my post )seem to like what I do as well. But I am very fortunate to be tied into WWI aviation research as deeply as I am. For most people its a passing fancy for me it replaces more expensive hobbies and I get to stay close to the family.
Here is the non-profit org that I volunteer for;
http://www.lafayettefoundation.org/
OCT 02, 2006 - 09:38 PM
Greetings Steffen,
I totally understand about money. (I and my wife have 5 children and money is always tight.) BUT! Thats why I started my website. It helps me pay for my hobby and I get to help people like you.
When it comes to great information and solid research on WWI aviation you cannot go wrong with anything written by Greg VanWyngarden. With the kits you have mentioned I have given you the bare bones of my experience to have a good build in this and the other review / features here at Aeroscale. But I got what I know from reading.
I am one of the fortunate few that has an entire archive at my disposal. It has the life's gatherings of 6 major WWI aviation research giants at its core. Even Greg comes to me for photographs at times.
Do yourself a favor. You have already spent quite a lot for the kits. You have these reviews and features to acomplish the builds. But if you do not invest in solid research monographs like the Albatros publications Fokker D.VII Anthology, you do yourself a tremendous dis-service. I admit its is a chunk of money to buy all three. It took me three years to put enough money aside, one year for each volume.
Anthology 1 is about the Fokker Schwerin product and the first 20 Jastas.
Anthology 2 is about the OAW builds and the next 28 Jastas.
Anthology 3 is about the Albatros production series and the remaining Jastas.
The first has some typos in it but the last two have few faults. The great thing is they will always be there on your shelf waiting for you to spend some time and flights of fancy.
OCT 05, 2006 - 04:09 PM
Greetings all; For some of the forum feedback during the build see;
banter bout the builds
OCT 10, 2006 - 08:04 PM
Ay laddie e went into it and took ou the unnecs bits and twiggs. Shes a workin in fine form ne.
OCT 11, 2006 - 12:28 AM

Aye wee man....it wasnae working earlier mate....the whole website was acting up today error 404 etc etc, must have been wee beasties....ok noo though....
geeza a beer and I'll read it from the start....
OCT 11, 2006 - 12:35 AM
ay matie ta bruwnies nd ae fairies do the dark mischef ae times. But you'll be doing ae jig if n I pour you a single malt of abou 30 years in age.
 http://www.ladyofthecake.com/mel/frank/sounds/alive.wav
http://www.ladyofthecake.com/mel/frank/sounds/alive.wav OCT 11, 2006 - 12:54 AM
Nae chance wee man....it'll take mere than a 30 year auld whisky to get ma to act like an Eejit blootered ootae ma coupon
gee over here and I'll take ye on a pubcrawl.....son
OCT 11, 2006 - 01:25 AM
ay laddie if your going to do a pubcrawl, I'll stroll of you don't mind. I get stiff in the joints...my doctor told me to stay outta the joints but what does e know.
OCT 11, 2006 - 01:50 PM
Copyright ©2021 by Stephen T. Lawson. Images also by copyright holder unless otherwise noted. The views and opinions expressed herein are solely the views and opinions of the authors and/or contributors to this Web site and do not necessarily represent the views and/or opinions of AeroScale, KitMaker Network, or Silver Star Enterrpises. Images also by copyright holder unless otherwise noted. Opinions expressed are those of the author(s) and not necessarily those of AeroScale. All rights reserved. Originally published on: 2006-09-30 00:00:00. Unique Reads: 19825

WEB HOSTING BY


Copyright ©2021 AeroScale and Kitmaker Network, a subsidiary of Silver Star Enterprises
All Rights Reserved. Please read our Conditions of Use and Privacy Policy.
All Rights Reserved. Please read our Conditions of Use and Privacy Policy.