

1⁄35The Fall of a Prototype
5
Comments
Painting
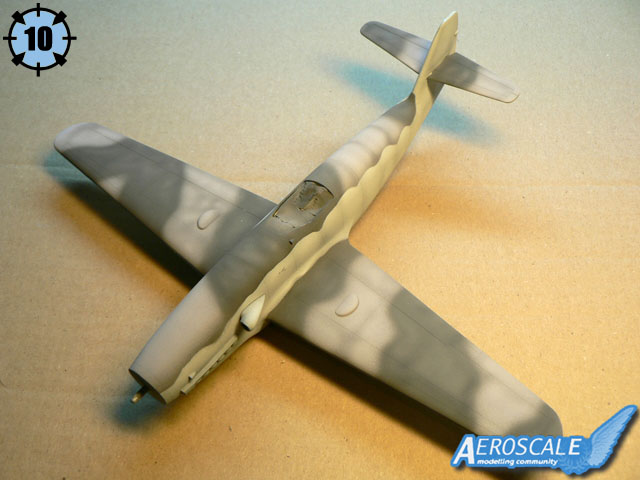
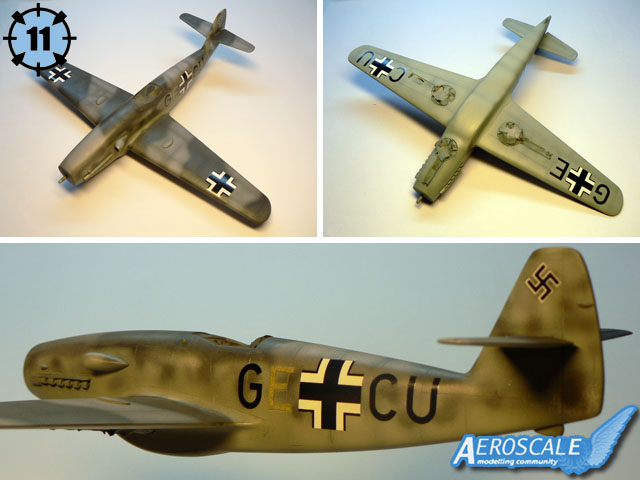
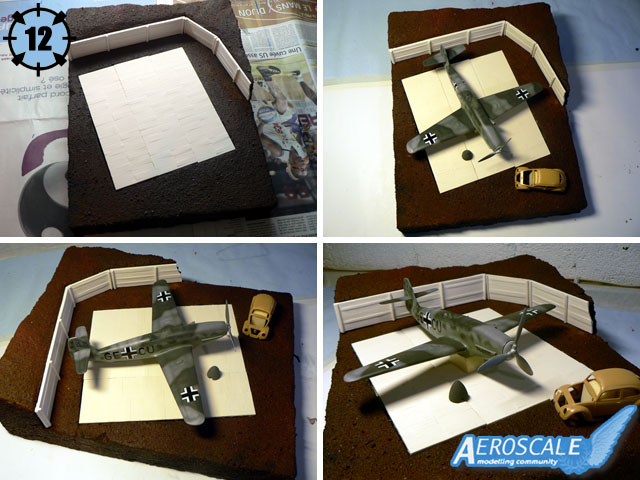
Before I began to paint the model, I first sanded it smooth and rescribed the panel lines that got lost during the building process. I then sprayed a coat of Humbrol Metal Cote both to reveal imperfections and for later weathering (picture 9). A typical RLM 76-74-75 camouflage was applied freehand, except for the fuselage sides where I used some Blu-Tac to have a better delimitation (picture 10). A coat of Klir (the French Future) was sprayed and I applied the decals. At last the model started to look like the Me 309 prototype (picture 11). I finally masked the "E" code letter with Tamiya tape because it seemed to have literally peeled away on the real aircraft and I wanted to reproduce that effect during the weathering stage.After a 24 yours drying period, the base was also ready to be painted. I used a mix of brown acrylics and I applied a wash of Klir mixed with black to simulate the color of North European sand (picture 12). It seems very dark but this is how it looks like in my garden when it's rainy! This task achieved, it was finally time to paint those new Mark58 products (picture 13). Since this was a test build, I decided to use the easiest method I could, to see if it was possible to achieve a good result without too much work. I simply brush painted the parts randomly with Tamiya Deck Tan (XF55) and Dark Yellow (XF60) acrylics and then applied a dark brown wash of tinted Klir... that's all! The painting was very easy since the products manufactured by Mark58 are made of a composite material resulting from the mixture of an acrylic resin with mineral powder. Once hardened, the surface of it is porous, and no primer is needed to achieve a nice finish. But more elaborate effects can be achieved with oils. I saw some display bases painted by M. Toillié using this method and I can tell you they look fantastic!
More building...
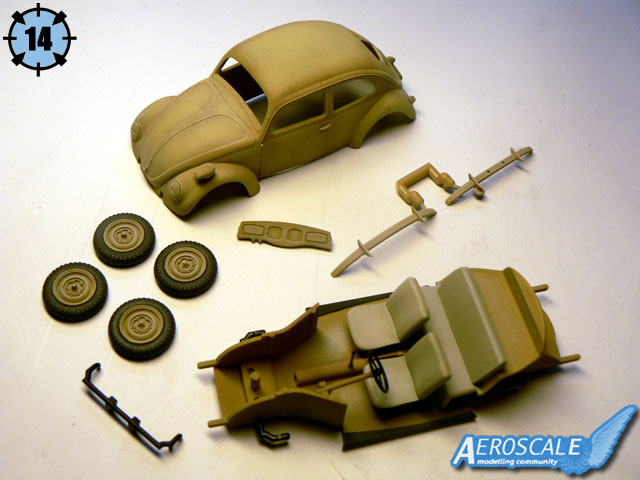
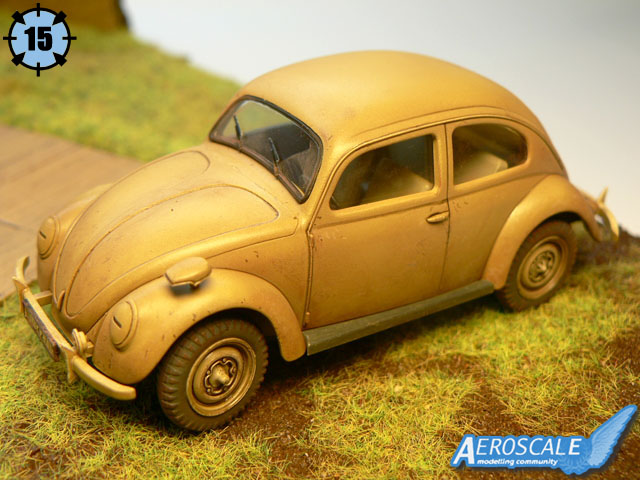
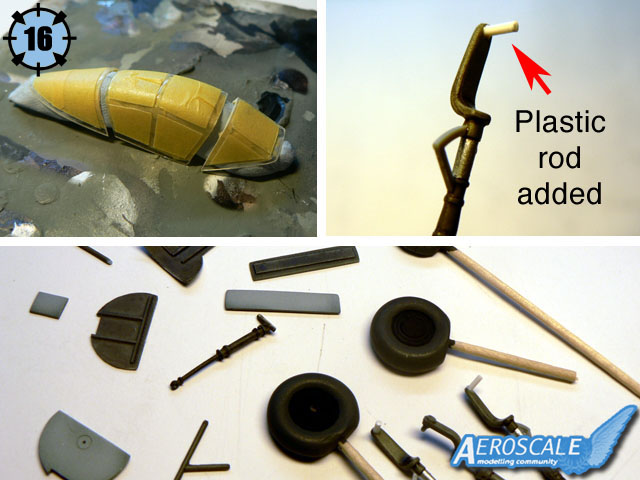
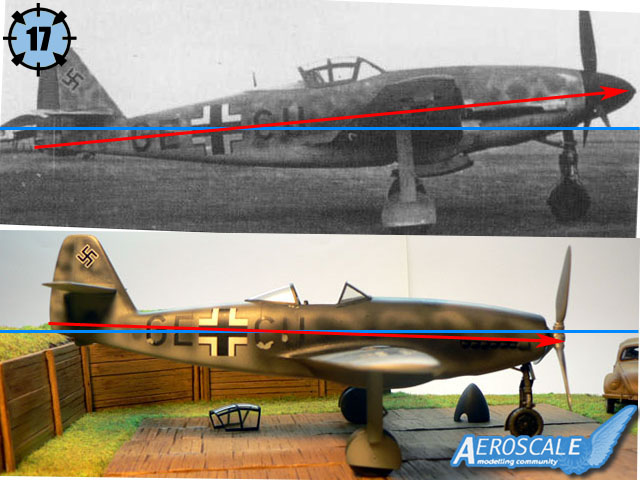
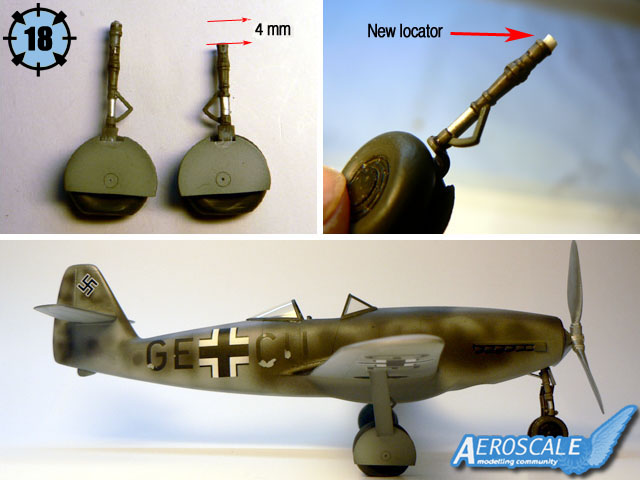
To add some color to the dio, I decided (again, with the help of Aeroscale members), to incorporate a Dark Yellow (XF60) camouflaged Volkswagen type 82E "Käfer". This is the new Tamiya kit and I must say it is lovely (picture 14). I think it can be build in one day if you use acrylics and the level of detail is good out of the box. Once painted and weathered it looks very convincing (picture 15). I hope Tamiya will make a lot of these 1/48 vehicles!The next step was to get the Me 309 on it's feets to get it finished. I masked the vacuformed canopy with Tamiya masking tape and painted the landing gear components (picture 16). It was necessary to add a small plastic rod to the landing gear... because there was none on the original plastic part! Adapting the resin wheels would have been very difficult without this little extra work. Then I glued the undecarriage in place and I proudly laid out the plane on the diorama base. Shock! Horror! The model just looked ridiculous! I compared it to a picture of the real aircraft and found out that the Czech Model kit was pointing it's nose down rather than up like on the real thing (picture 17). I had no other choice than to detach the main landing gear and reduce it's length to approximately 4mm (picture 18). Even with this modification, the model wasn't sitting like the real prototype. But I decided to left it as it was, because getting it right would have required much more work, including changing the wings dihedral and the landing gear's position. Sometimes I just wonder if the manufacturers test build their own kits?


About the Author


FROM: MOSELLE, FRANCE
I'm mainly interested in WW2 aircraft and I build them in 1/48 scale.
Comments

Jean - Luc! Very interesting I like the historical details of your build.
NOV 10, 2006 - 05:53 PM

I agree with Stephen, Jean-Luc. Very interesting and informative read. Great looking diorama....
NOV 10, 2006 - 06:07 PM

Great read and very realistic dio. I could look at it for hours at a time.
Thanks for writing and posting a feature of it.
Andy
NOV 10, 2006 - 09:03 PM
Jean-Luc,
Great build and an excellent article. i really look forward to seeing your completed projects. This one is very original and well executed.
Cheers,
Justen
NOV 14, 2006 - 01:43 AM
Copyright ©2021 by Jean-Luc Formery. Images also by copyright holder unless otherwise noted. The views and opinions expressed herein are solely the views and opinions of the authors and/or contributors to this Web site and do not necessarily represent the views and/or opinions of AeroScale, KitMaker Network, or Silver Star Enterrpises. Images also by copyright holder unless otherwise noted. Opinions expressed are those of the author(s) and not necessarily those of AeroScale. All rights reserved. Originally published on: 2006-11-11 00:00:00. Unique Reads: 12394

WEB HOSTING BY


Copyright ©2021 AeroScale and Kitmaker Network, a subsidiary of Silver Star Enterprises
All Rights Reserved. Please read our Conditions of Use and Privacy Policy.
All Rights Reserved. Please read our Conditions of Use and Privacy Policy.