

1⁄35The Fall of a Prototype
5
Comments
Heavy weathering
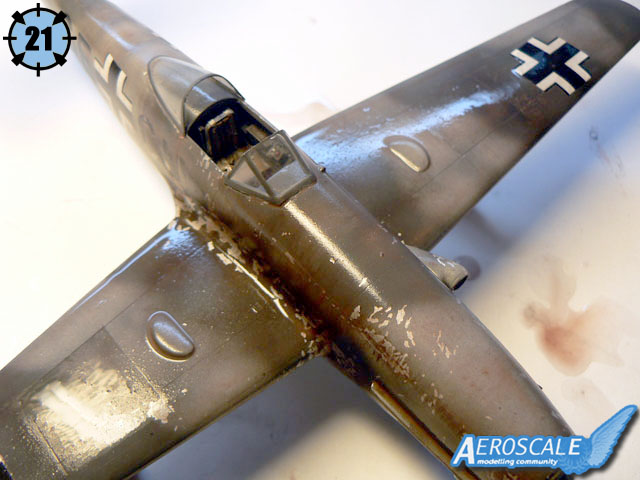
Often modelers have arguments about the weathering of their aircraft replicas. Sometimes it's not enough, sometimes it's to much, it's always difficult to find the right balance. I admit to have sometimes overdone the paint chipping on some of my models for "aesthetic" reasons, but this time I really could go very far, having a picture reference wich showed the real plane in an "advanced state of decomposition" (picture 3).I started to "peel away" some paint using tape (picture 19). Having previously sprayed the model in aluminium, this method was perfect to simulate the paint chipping. The undercoat appears under the acrylic layer, like natural metal appears under the heavy worn out camouflage of real planes. Then I added some rust streaks, mainly on the panel lines, rivets and exhaust areas. To achieve this effect I used the following method: I first mixed brown pastel powder with water and then applied some of this "paint" on the model with a small brush (picture 20). I let it dry for a few minutes and spread it out with a small hard brush. The advantage of this method is that you can wash away the pastel powder with water if you applied to much of it. In fact if you made a mistake or if the result isn't convincing, you can simply start all over again!
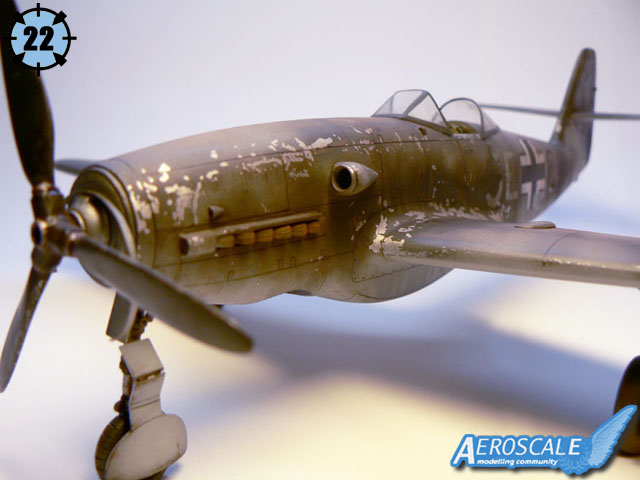
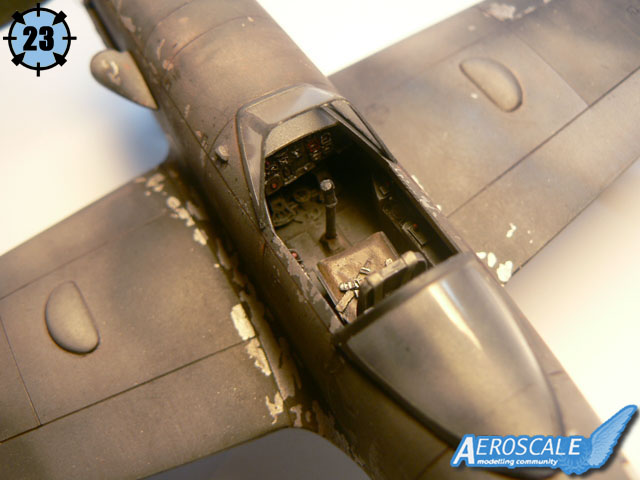
I finally applied a very diluted wash (water with pastels) over the upper part of the model and let it dry (picture 21). The pastels powder settled down randomly and this was the final weathering touch on the Me 309 (picture 22 and 23).
Finishing work
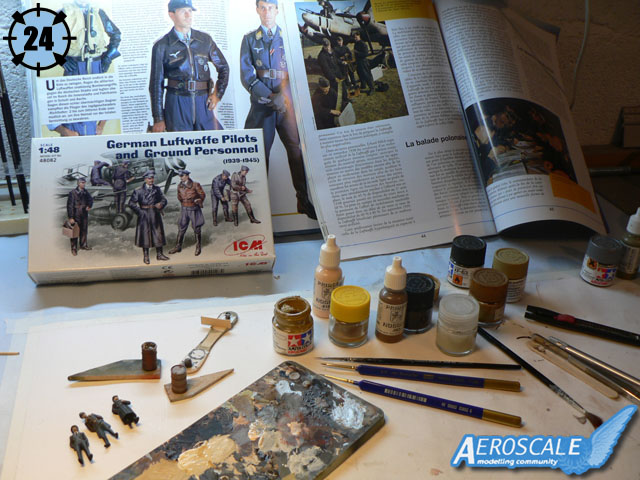
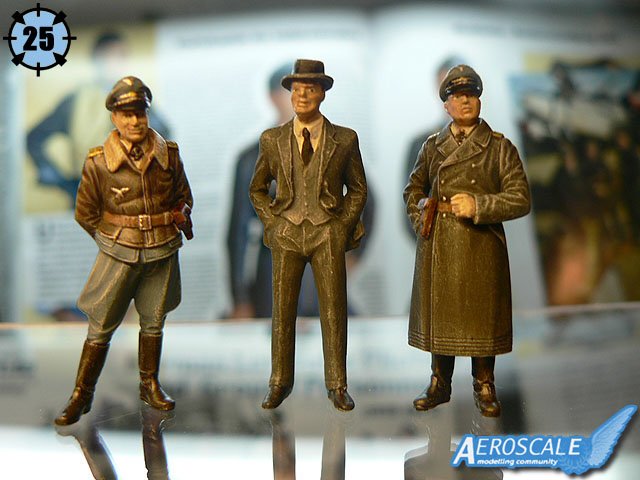
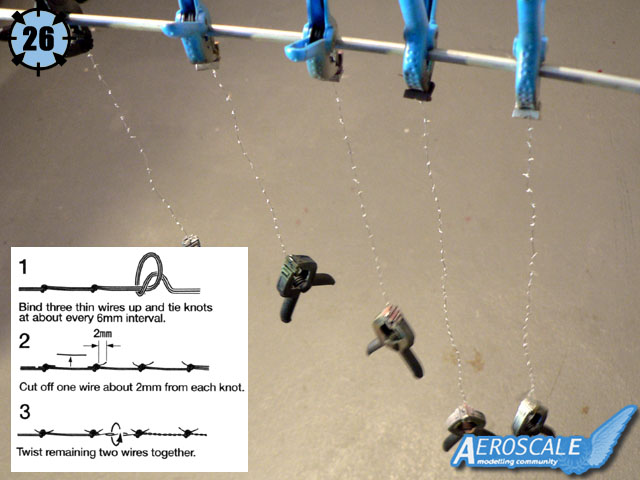
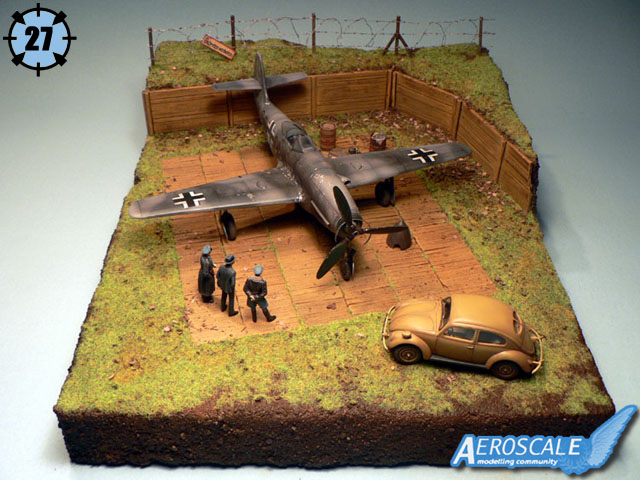
I still had to paint the figures and I must confess this is not what I like to do most. Anyway, a diorama without figures isn't really a diorama so I had no other choice than to go through this "punishment" (picture 24). I used Prince August and Tamiya acrylics to paint the two Luftwaffe officers and the civilian. Not being a "purist", I drybrushed my figures to reveal the relief details. I know it would have been better to blend the colors with a brush but I didn't wanted to spend more time than necessary on something I don't enjoy, so I decided to go for the faster method. The two officers came from the (excellent by the way) ICM set and the civilian is a Preiser 1/50 figure and received a scratchbuilt hat to give him a more vintage look (picture 25).The barbed wire was made using the method depicted in the Tamiya "Brick Wall, Sand Bag and Barricade" set (picture 26). It's a little bit long and boring to do but much more realistic (and cheaper) than using photo etched items which are looking too flat. It took me a few yours to do the ones I needed and sometimes I felt like an old lady making knitting! My advice if you want to make your own barbed wire out of thin wire: work in sessions and listen to relaxing music. However, once finished, the result is worth the efforts (picture 27).
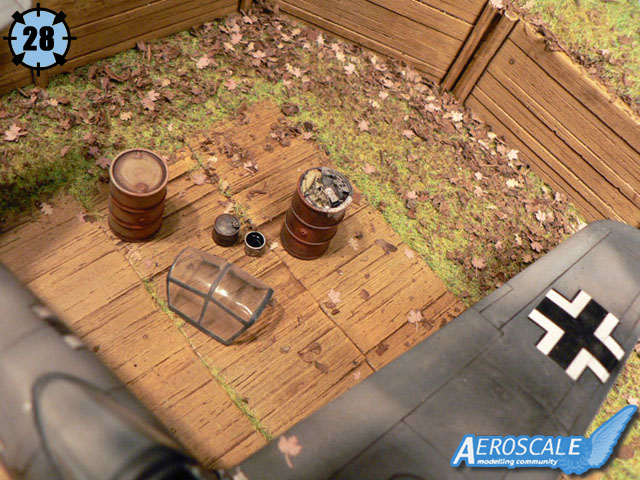
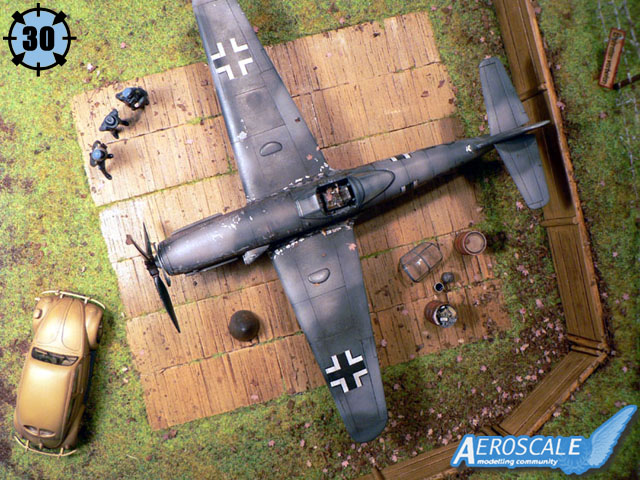
I finally added some barrels and buckets as well as leaves on the ground (picture 28). The latter are a mix of Plus Model 1/48 scale miniatures and real leaves I shredded to pieces to obtain more volume. A "Nicht Betreten" sign was placed on the barbed wire (picture 29) and I could consider the diorama finished (picture 30).
The Fall of a Prototype... the theory
Some people (even on other forums) suggested I should apply a netting on the wing's crosses because the real prototype would have been camouflaged to avoid destruction by Allied ground attack planes. This seems of course logical, however, based on the reference photo (picture 3), I think this wasn't the case in this particular occasion. To the contrary, I think that the airframe was precisely used as lure (decoy).A lot of things are strange in the reference picture. The first thing I noticed are the very dark exhaust stains and weathering on the sides. In fact it looks as if the engine caught fire (on the ground or in the air) and heated the paint so much that it peeled off pretty heavily. The whole Me 309 project being about to be cancelled (or was already), it wasn't necessary to repair the plane. So I guess it was simply stripped of of it's engine, instruments, radio etc... Now there were two possibilities for the Germans: scrapping the plane to use the metal, or left it as it was, in a corner of an airfield... maybe to be a nice target for Allied pilots? I think the second option is probable/possible. When you look at the second picture again, you will notice another strange thing: the fuselage cross is nice and clean. Why? It should have the same weathering as the letters. I believe that the crosses have been repainted to be even more visible from the air.
Conclusion
I pretty much enjoyed this project which a consider to be my first "real" diorama. It's the first time I built a model for the purpose of being displayed in a small scene. Mark Toillié is right when he says designing a diorama is like working on a movie scene. In fact it is very similar because you have to find the actors, the appropriate location and of course a good story!I would like to thank all the people who helped me during the build of this diorama, especially Steffen Arndt (alpha_tango) for his constructive comments and of course Mark Toillié for his wonderfull diorama products.


About the Author


FROM: MOSELLE, FRANCE
I'm mainly interested in WW2 aircraft and I build them in 1/48 scale.
Comments

Jean - Luc! Very interesting I like the historical details of your build.
NOV 10, 2006 - 05:53 PM

I agree with Stephen, Jean-Luc. Very interesting and informative read. Great looking diorama....
NOV 10, 2006 - 06:07 PM

Great read and very realistic dio. I could look at it for hours at a time.
Thanks for writing and posting a feature of it.
Andy
NOV 10, 2006 - 09:03 PM
Jean-Luc,
Great build and an excellent article. i really look forward to seeing your completed projects. This one is very original and well executed.
Cheers,
Justen
NOV 14, 2006 - 01:43 AM
Copyright ©2021 by Jean-Luc Formery. Images also by copyright holder unless otherwise noted. The views and opinions expressed herein are solely the views and opinions of the authors and/or contributors to this Web site and do not necessarily represent the views and/or opinions of AeroScale, KitMaker Network, or Silver Star Enterrpises. Images also by copyright holder unless otherwise noted. Opinions expressed are those of the author(s) and not necessarily those of AeroScale. All rights reserved. Originally published on: 2006-11-11 00:00:00. Unique Reads: 12394

WEB HOSTING BY


Copyright ©2021 AeroScale and Kitmaker Network, a subsidiary of Silver Star Enterprises
All Rights Reserved. Please read our Conditions of Use and Privacy Policy.
All Rights Reserved. Please read our Conditions of Use and Privacy Policy.