Salt Weathering
14
Comments
APPETIZER
Decades ago when I first started painting my aeroplane models, factory-fresh was the look modelers sought. Then some wise guy noticed that paint on real aircraft suffered nicks, dents, scrapes, scratches, peels and abrasions exposing the metal underneath. Factory-fresh no longer satisfied many modelers and the quest became to model not only the vehicle, but the distressing of the finish as well.
The first technique to show flaked paint that I recall was simply to simulate the chips exposing paint by painting silver spots and lines upon the surface of the exterior color. Metallic colored pencils and other artist tools were tried (images 1 and 2).
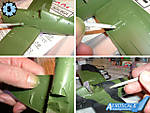
Next modelers thought to simulate the wear by actual removing paint from the model. An aluminum finish was applied, the wear-areas masked, then came the exterior color over the masks. Eventually someone found that one could actually scratch, chip and pull off (with tape, though hard to control [image 3]) the exterior color from the metallic undercoat (images 5 and 6).
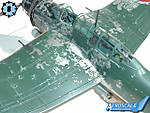
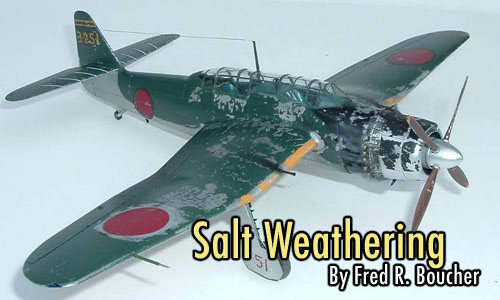
Whether learned or personally ‘discovered’, all mentioned techniques I have employed individually and in combination. My 1/48 Aichi B7A Ryusei “Grace“ torpedo plane demonstrates all of the above (images 7 and 8). Photographs of an operational "Grace" show huge areas of metal exposed by severe weathering and I always wanted to model this effect. Generally pleased with the results, I used them on other models. The one problem was that tape and fingernails and X-acto blades really could not simulate very small chips. Paint and fine brushes were still required.
NEW MENU ITEM
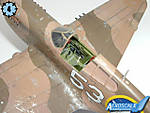
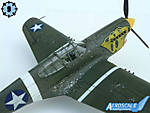
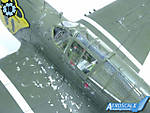
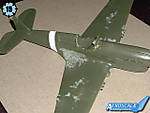
Then I found an article by some innovator about putting salt on the metallic finish prior to the exterior coat. The fine grains of table salt create fine chips. Perfect for small losses of paint. Intrigued, I fought off the concern about whether the salt would mar the paint and gave it a try. The first attempt was on my 1/48 Hasegawa P-40E. The results are completely satisfying (images 9 and 10)!
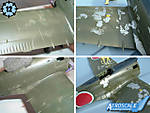
Ready to attempt the technique on a grander scale, I chose the 1/32 Hasegawa Ki-84 Hayate “Frank”. On went the salt. Yet it appeared the salt would not cover enough area on the big model for the results I envisioned. So I used liquid masking for the large areas and ‘fine tuned’ them with salt. Alas, the salt is too fine to look good. The masked areas are too uniform. Oh well, that is what silver paint and Prismcolor pencils are for (images 11-12)…
BUFFALO CHIPS
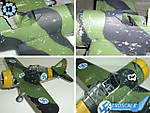
Finally I bought sea salt. The granuals are larger and irregular. My next victim would be my Fighters Under the Midnight Sun Campaign 1/48 Brewster B.239 Buffalo. I used a random mix of table salt and the sea salt. Judge the results for yourself but I have found my magic bullet (image 13)!
APPLICATION
This technique seems simple: put salt on the model where you want the paint to not be, then paint. Nothing is so simple, but close. The salt must adhere to the surface or it will blow off. Wet the surface and the salt will stick. Do not use too much water or the salt will dissolve. Also, water tends to pool on smooth metallic finishes. My method is to wet the area with saliva: the salt does not dissolve and the drool does not pool. Tobacco chewers, I suggest you not spit your chaw…
Sprinkle on the salt. I simply fold a piece of paper and shake the salt from the sharply creased end until I get enough of the salt where I want it. You can actually be fairly precise with where you put it (image 14).
Let the liquid you adhere the salt to dry. Gently shake the model to dislodge any loose salt, then spray the paint.
DESSERT
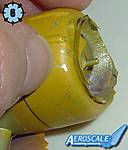
After the paint has cured, remove the salt. It just brushes off, but there is a step 2: wash it thoroughly! On my first attempt, the P-40, I just brushed the salt away and then went over it with a moist cloth. Then I sprayed a clear coat of Future for the decals, and the residual salt reacted with the Future and fogged! (image 15) No problem, Future dissolves on contact with ammonia, and the whole mess was cleaned and re-Future’d within minutes.
CHECK PLEASE!
Salt-chip weathering. I am a believer and will use it on any scale, aircraft, armor, naval or railroad. Like a chef says to encourage you with a new spice, ‘Try it, you’ll like it!’
Comments
Hi Fred.
Nice feature!
Ive been wanting to try the salt technique for a while now as the old silver pencil just doesnt seem to cut it anymore.
One question your article brings up.You say its important to wash the surface before applying Klear for decalling. I use mainly acrylic paint nowdays.Do you run the risk of washing the paint off by doing this, and if so,how do you get around this?
Nige
JAN 12, 2007 - 06:36 PM
Hello Everyone,
Thank you for your encouragement! I am sure you will all find this a good thing to try.
Scott, spit-shining!?! I love it!
Nige, you bring up something I did not think to mention. The first P-40 and the Ki-44 Tojo are painted with enamels. The Grace is primed with acrylic aluminum of my beloved Polly Scale, but the rest were primed with enamel silvers of various brands. Their exterior paints are all acrylic, Polly Scale, Aero Master and old Pactra.
The Polly Scale dries rock hard, quickly (in fact, the Buffalo was painted green, chipped, tape-masked and painted black, re-chipped and rinsed within 3 hours; the Ki-84 Frank was painted and allowed to cure a day, and I was not able to scratch any of the Polly Scale off!) I have soaked my models painted with Polly Scale in water to soften liquid masks for removal--no problem.
However, Pactra reacts differently. Soaking, even heavy rinsing, my models painted with Pactra in water causes the paint to blister--scores of little blisters. I first found this on a RAF F-4K I am building. Thinking it was ruined, I left in disgust. Returning the next day, the water had evaporated and the paint was smooth again! The green on the Buffalo is Pactra, the yellow is Polly Scale. Just washing the salt off caused the Pactra to blister. By the next morning it was fine.
So, I have had no problem with washing or soaking off my acrylic paints in water. Bio-degradable Simple Green removes these acrylics quickly. So do some window cleaners. In fact, I am considering reworking the Frank's chipping by removing the Future with ammonia (which does not hurt the paint) and attacking the Polly Scale with Simple Green. Stay tuned!
JAN 13, 2007 - 12:00 AM
Great feature Fred.
I always wondered how to keep the salt on the plane while spraying.
Will definitely try this technique out.
Andy
JAN 13, 2007 - 05:21 AM
Brilliant!! I'm at this stage now with my 1/72 B-52 so I will be trying it this weekend. Roll on Saturday. What do you do about weathering decals?
JAN 16, 2007 - 12:21 AM
I know this is about using salt for weathering aircraft but this is what I did on a 76th JB Land Rover Ambulance ... Hope you all don't mind me showing this in this thread?


JAN 16, 2007 - 04:36 AM
Hi Qwacker,
The decals are a challenge. I tend mask the NMF where the decal will be (if I can accurrately figure out where the decal will lay) and then tear the decal to expose the NMF. Or, I watch for where the decal settles in the slight depression caused by the chip, and spot-tear the decal there. Mainly, traditional silver pencil / paint goes on the decal.
Hi Future, feel free to post! The article is about salt weathering, not merely aircraft--I just haven't build many AFVs lately.
JAN 17, 2007 - 10:34 AM
Thanks Fred, I'll give it a bash, oops wrong joice of words, I'll give it a go when I get there. Cheers.
JAN 18, 2007 - 12:29 AM
I use rock salt. I break up the rocks to the desired size I need. Then wet the area that is to be weathered. Of course the base coat of paint is already dry. Then apply the rock salt to the wet area. Let it dry. Paint your top coat. Let that dry. The knock off the rock salt. And you have lovely paint chips waiting to be weathered.
Then use a wash and this really helps to highlight the difference between the top coat and base coat where the salt weathering has been used. I prefer this than painting chipped paint.
JAN 19, 2007 - 02:54 AM
Uh-oh! Who's article do you like the best?
Another Site's Salt Weathering Article
JAN 23, 2007 - 02:56 AM
Copyright ©2021 by Fred Rick Boucher. Images also by copyright holder unless otherwise noted. The views and opinions expressed herein are solely the views and opinions of the authors and/or contributors to this Web site and do not necessarily represent the views and/or opinions of AeroScale, KitMaker Network, or Silver Star Enterrpises. Images also by copyright holder unless otherwise noted. Opinions expressed are those of the author(s) and not necessarily those of AeroScale. All rights reserved. Originally published on: 2007-01-13 00:00:00. Unique Reads: 31630


