

1⁄48Fieseler Fi 156
8
Comments
About the Author


Comments

We both know that the the goodies for the kit just came out and ... what the heck, modellers of our kind are just slow and maintaining a website is just eating up very much time ......
Michael: That is a very nice Model!!! Great job!!!
all the best
Steffen
DEC 12, 2008 - 04:32 AM

Michael,this is VERY nice work..I like your subtle colour contol and weathering. Can you tell us if you have added anything to the kit or is it straight out-of-box?
DEC 12, 2008 - 06:03 AM

Thnaxs a lot Rowan, Stehpen and Jim ...
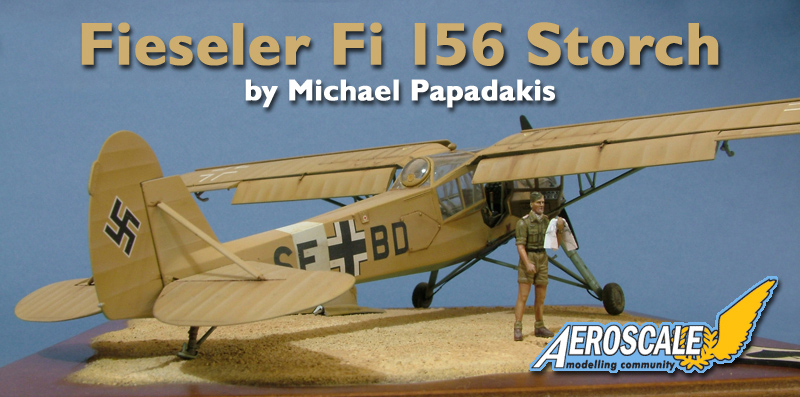
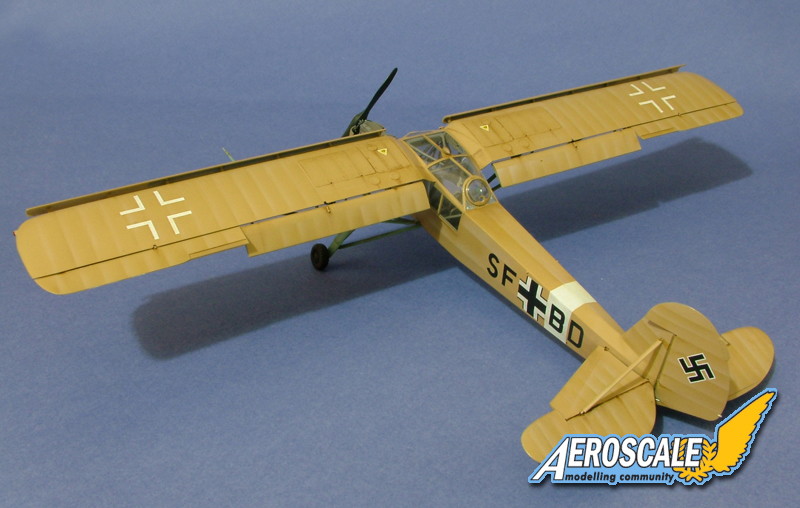
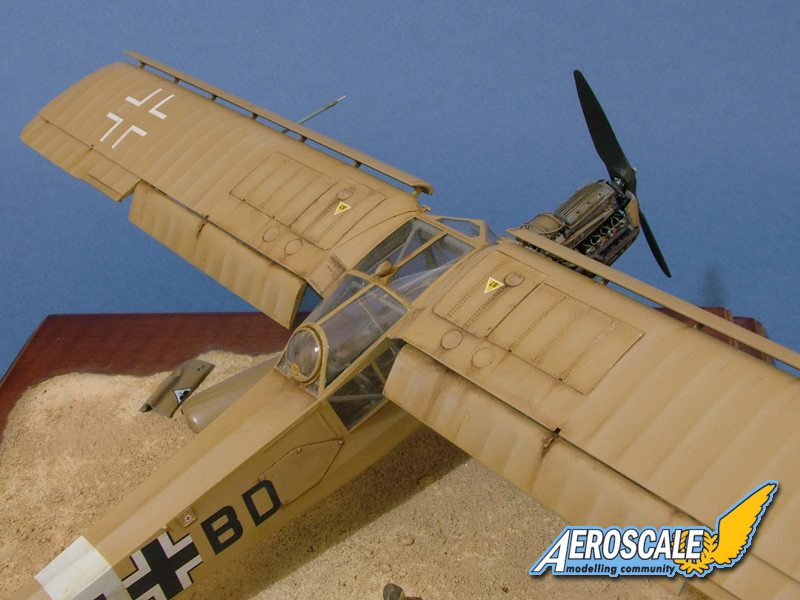
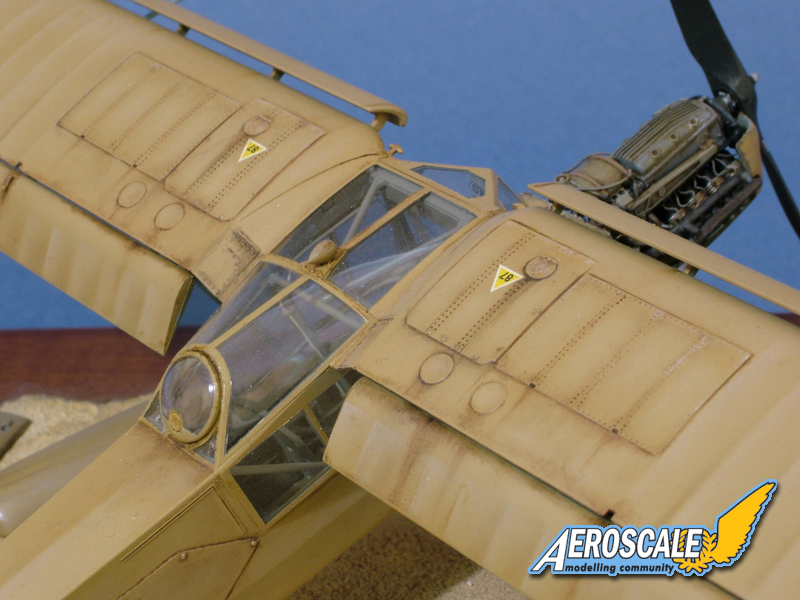
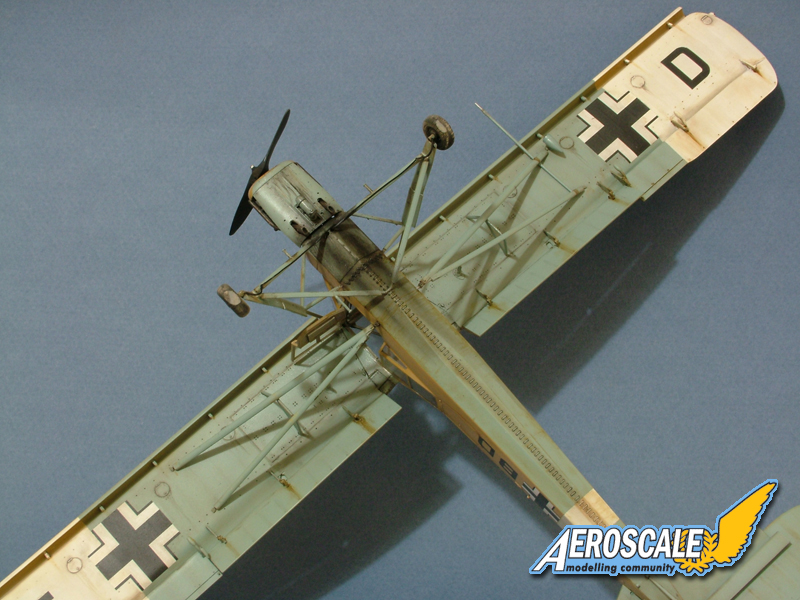
The Tamiya Storch is probably one of the best engineered models ever... Without too much effort it is possible to produce a very fine result.
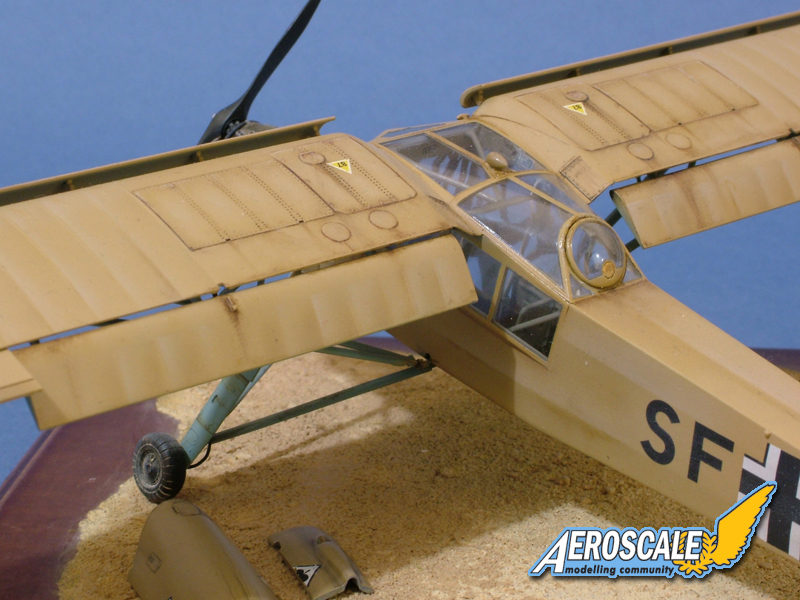
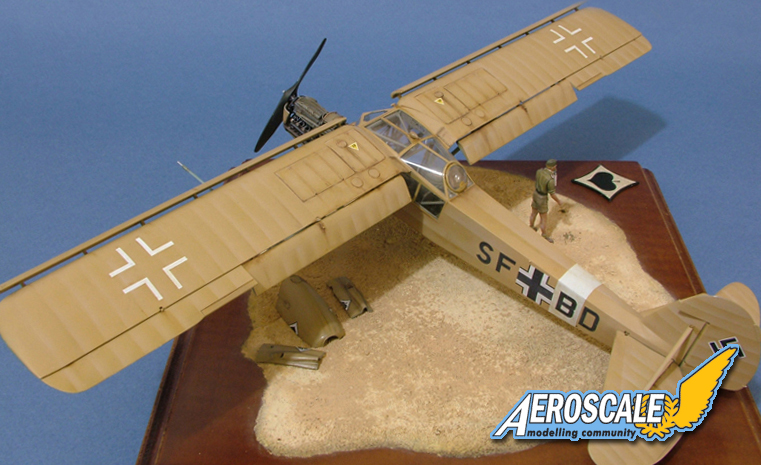
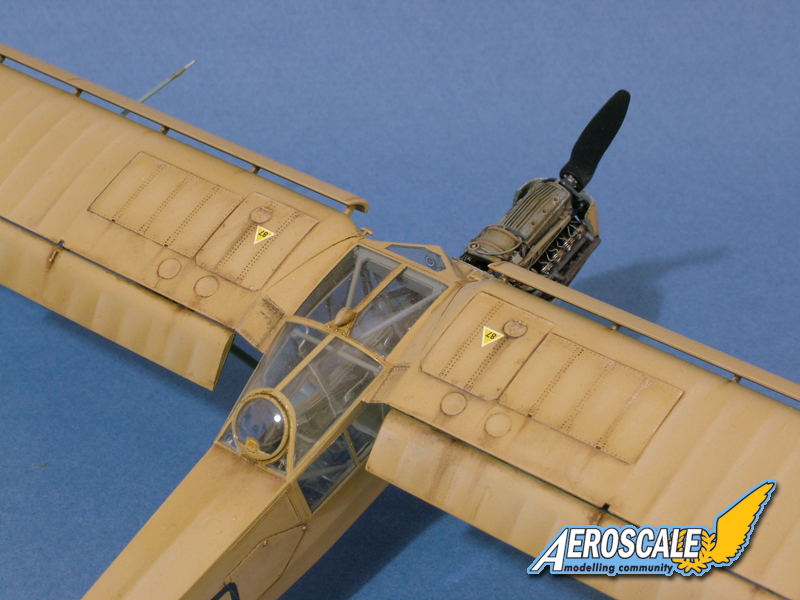
Strating from the cockpit, I made a new middle seat from scratch and added the canopy internal framework. I also used the canopy masks (provided by the kit) as a template to make a second set in order to mask the canopy interior. Then I airbrushed the lot with RLM 02. The only two faults I found in this kit was the relatively big gap underneath the wings whre the two halves meet as well as the gap between the horizontal stabilizer and the fuselage. The first was rectified with filling and sanding whereas in the second case I had to cut a few bits from the kit parts.
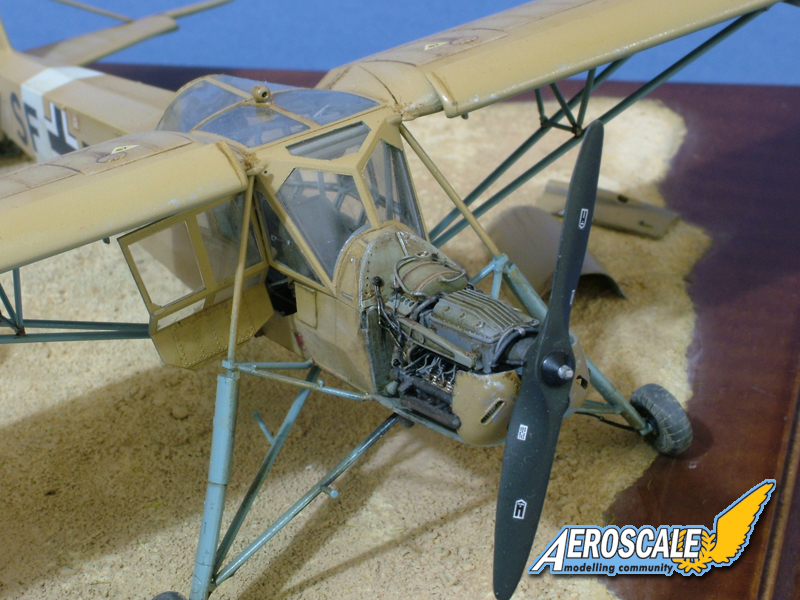
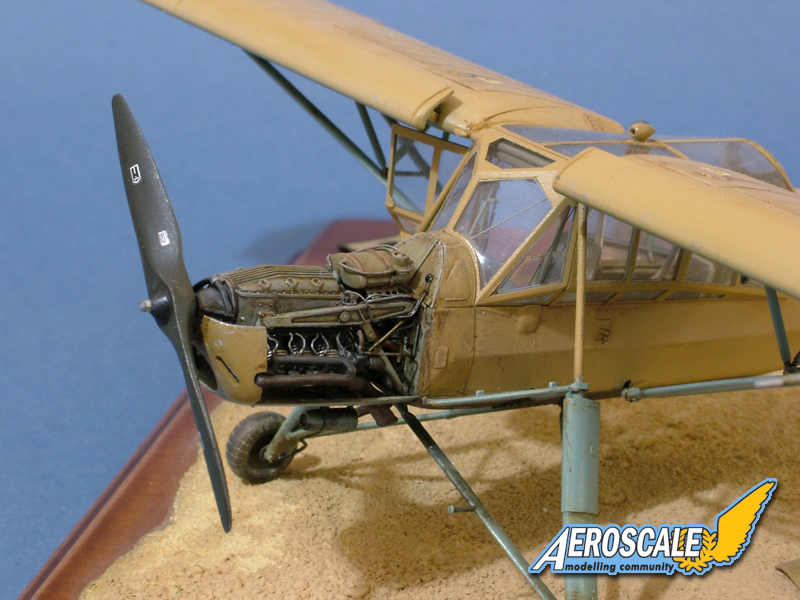
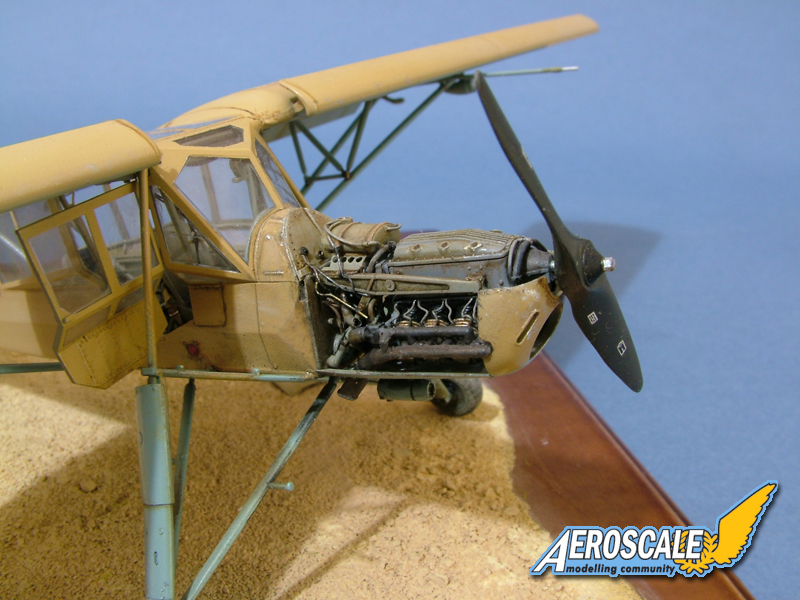
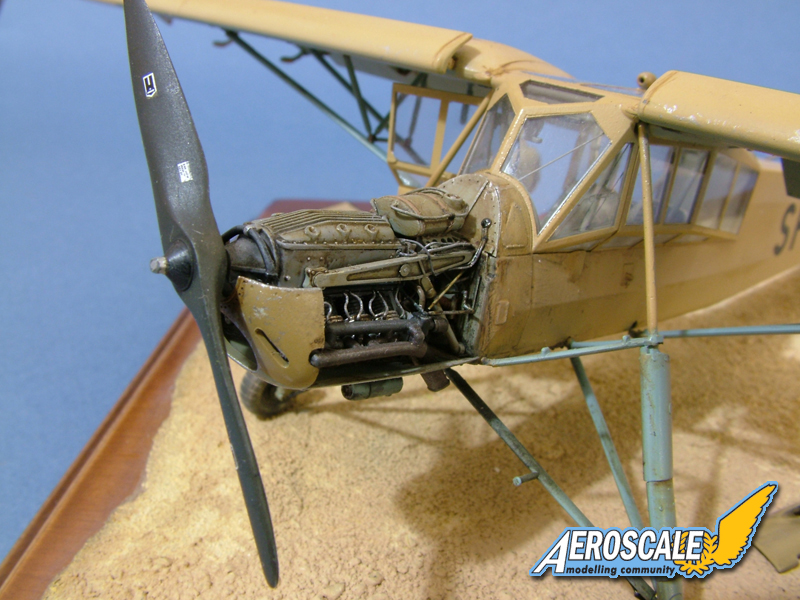
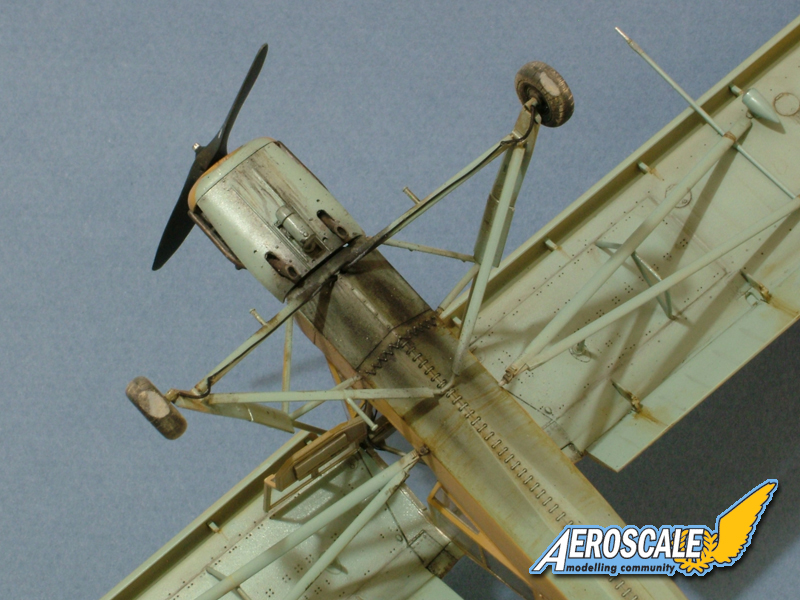
The most interesting aspects in this built were indeed the weathering and the engine. The whole of the model was airbrushed with a lighter shade of Xtracolor RLM 79 which was highlighted on the right side of each wing frame and darkened on each left side. Similarly on the fuselage the higher bits were highlighted and the lower ones darkened. Then I made extensive use of oil colours and experimented with different techniques... The idea was to add to the initial airbrushed highlighting and shading. Oil streaks, faded and used materials, slight chipping and smoke from the exhausts were amongst the intended weathering techniques.
Finally the engine was based on the Storch Manual so I tried to make it as accurate as I could. Once again the weathering was done with oil colours such as black, burnt and raw umber, white etc.
Thanks again, I hope i did't overdo it with my description.
DEC 12, 2008 - 07:18 AM

Hi Michael,
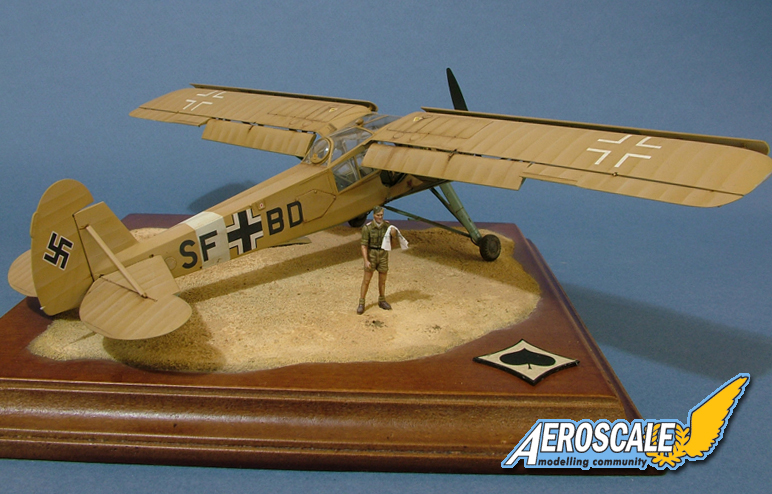
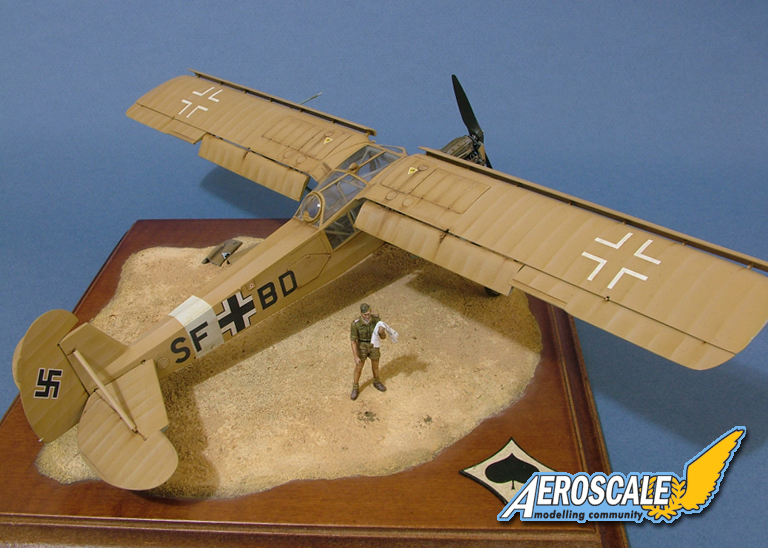
Fantastic job on the Storch! I like the model but also the very fine presentation base.
Jean-Luc
DEC 12, 2008 - 07:21 AM
Thank you very much Jean Luc..
With rerards to the base, it was constructed by af riend of mine who is into dioramas. I don't think I am really good with this sort of thing so I had to "outsource" it.. Also the figure was done by another friend who is into figures and dioramas.. I guess I am a bit well connected..
DEC 13, 2008 - 09:03 AM

Mike-- absolutely stunning workmanship. The weathering is superb and your subtle fuel spills and engine exhaust are outstanding.
Well done!
DJ
DEC 17, 2008 - 07:57 AM

Thank you very much DJ!!
Also, many thanx to you Dave. If there is anyhting I can do to help please let me know.
DEC 30, 2008 - 06:50 AM
Copyright ©2021 by Michael Papadakis. Images also by copyright holder unless otherwise noted. The views and opinions expressed herein are solely the views and opinions of the authors and/or contributors to this Web site and do not necessarily represent the views and/or opinions of AeroScale, KitMaker Network, or Silver Star Enterrpises. Images also by copyright holder unless otherwise noted. Opinions expressed are those of the author(s) and not necessarily those of AeroScale. All rights reserved. Originally published on: 2008-12-12 00:00:00. Unique Reads: 5537

WEB HOSTING BY


Copyright ©2021 AeroScale and Kitmaker Network, a subsidiary of Silver Star Enterprises
All Rights Reserved. Please read our Conditions of Use and Privacy Policy.
All Rights Reserved. Please read our Conditions of Use and Privacy Policy.