1⁄48Kawasaki Ki-45 Toryu
7
Comments
Introduction
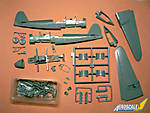
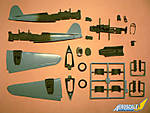
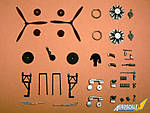
When Hasegawa released their Kawasaki Ki-45 Kai Koh Toryu (Nick) w/ Isuzu TX40 combo kit in late 2007 (see review here) it landed on my workbench immediately. A couple of month later, what was supposed to be a simple "out of the box" build ended into a diorama with many accessories from different manufacturers (Eduard, Fine Molds, Mark58, Tamiya etc...). Here's a full build report about it.construction of the aircraft
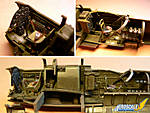
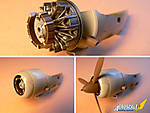
First I built up the various sub-assemblies prior to painting: cockpit, sidewalls, wings, gear bays, nose cone, tyres, intakes, and exhausts. I must say everything fell together without any problem. The cockpit, gear bays, gear bays covers, inside of engine cowlings, etc... were painted in the basic color Tamiya XF-51 Khaki Drab. the propellers and their hubs were painted in XF-10 Flat Brown, Tyres in Dark Grey, landing gear struts in Satin Black and Silver, oil cooler ring in Dark Copper, engine in Silver and armament in Steel.I drybrushed and washed the interior and added some colors here and there but not too much. On the few photos I could find on the web, I couldn't see more than some black, red and silver details. The seatbelts are from Eduard. I don't know if they are accurate for this aircraft but I used the ones labelled "Kawasaki" in the set.
The representations of the radial powerplants are pretty basic but once the cowlings are over the sub-assemblies, not much can be seen of them, and even less when the propellers are fitted! So it was not necessary to loose too much time to detail the engines as it would really have been a waste of time. I applied a wash on them though.
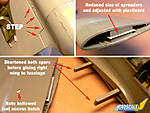
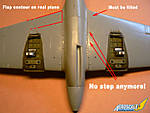
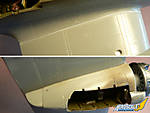
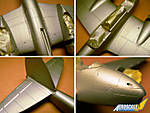
Then it was time to glue the fuselage halves together. The fit was so good that I didn't had to use any cement to keep the cockpit assembly inside. At this stage I also positioned the belly of the aircraft as well as the nose cone. While gluing the wings to the fuselage I noticed a small problem. The left wing fitted perfectly but not the right one. No matter what I tried, the result was always a 1/2 mm step where the wing was supposed to meet the Karman. I decided to use my dremel to cut away some plastic from the two locators of the wing and adjusted the thickness of it with thin stripes of plasticard. I also reduced the lenght of the fuselage spars because somehow I felt they where in the way. The fit was much better after this surgery. It is to note that two seams will have to be filled because they don't follow the natural contours of the flaps. I applied some Mr Surfacer 1000 with a brush on the wing root and the fuselage although it was only a preventive measure in this case, since the overall fit of the kit is very good. The fit of the engine nacelles for example was perfect and trouble free.
Despite the fact that Hasegawa made the kit with optional parts (to do other variants), I found no real problems with the assembly so far. If you work carefully, you won't loose any surface detail of the kit. Under a coat of aluminium paint, everything is clean and smooth. While the model was left aside 24 hours to dry, I masked the transparent canopy parts with Tamiya tape cut to shape with an X-Acto knife. Of course I've used a new blade.
Painting
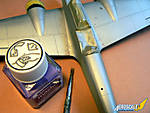
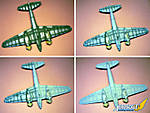
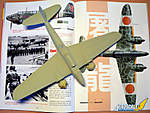
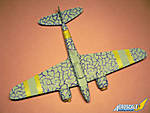
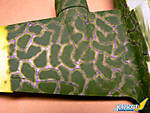
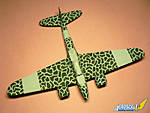
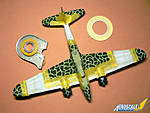
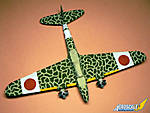
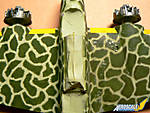
On the underside, I've applied the basic IJA Grey (XF 14) color over the pre shaded panel lines. This was my method: I first applied dark grey/green (in fact Tamiya's German Field Grey XF 65 ), then I filled the panels with XF 14 and finally sprayed another coat of heavily diluted paint to blend everything together. I didn't pre-shaded the upperside of the model since I believed that the heavy mottling of the camouflage would make it almost invisible. I applied some maskol with an old brush on the wing roots though to simulate paint chipping.I first wanted to do the paintscheme of the box art but I found another one in a French magazine (Avions n°124), that of Isamu Kashiide of the 4th Hiko Sentai, which I found more appealing. The most difficult part of the build was to reproduce the disruptive green patches of the upper surfaces. Since I wasn't confident about my freehand airbrushing abilities, I cheated and used maskol to spray the patches. I wasn't very satisfied about the result but I chose to go on and sprayed the white areas of the aircraft using Tamiya and Cammet masking tape.
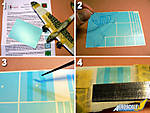
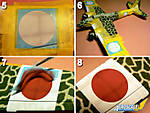
Meanwhile I received Mal's Miracle Masks roundels and the painting of the Hinomarus could begin. Here's what you have to do to use the masks:
1 - carefully read the instructions
2 - weed the decal sheet (remove what's not needed)
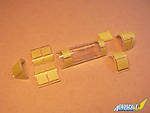
3 - to transfer the mask, join the separate pieces with the rectangular pieces provided
4 - locate the masks on model (I used a ruler and the panel lines as guides)
5 - take away the centre roundel and mask the outside
6 - the model is ready for painting
7 - when the paint is dry, carefully remove the mask with tweezers
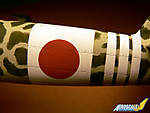
8 - the result, a clean and sharp Hinomaru!
Well, "miracle" is a word one must use with precaution, but if you want to paint your markings rather than use decals, then yes, this product is miraculous indeed.
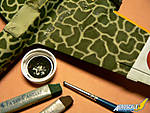
I still wasn't happy with the green patches though, so I had to find a method to "blur" them a little. I first tried with a Q-tip but it didn't worked. Then I tried the same technique but moistened the cotton end with Tamiya Thinner. It wasn't better because it was too aggresive and washed away the green patches... hmmm. I was about to give up but tried one last thing and... (drum roll)... it worked! In fact I used a very old brush which had almost no hairs anymore and applied some pastel powder on the patches. The result was a nice blur effect. Not quite the exact replica of the original sheme but much more realistic in my opinion. It took me about two hours to do the whole model but I think it was worth it.
To do the tail markings, I first masked the white and then applied the red with a fine brush using the picture of the original aircraft as a guide. The result was not perfect but with some weathering I looked alright. Of course, just after the model was finished, AviPrint did a decal sheet with exactly the same tail markings... doh!
Comments
WOW! Very nice, from the opening banner,which is very cool by the way to the last photo. The build is excellent,the dio looks busy and the photography is right on. I think good photos really add to the presentation and really shows the build well. Good lighting is KEY. Thank you for showing your lighting set up. Where did you get your backround photo? Again, great job, Wingman out.
FEB 20, 2009 - 02:55 AM
I was wondering when you would finally post that feature .... the TMM France must be loong sold out ...
looking forward to your Lanc ... though I will never build such a beast it has something ...
as written in the original thread: fantastic build
all the best
Steffen
FEB 20, 2009 - 03:43 AM
I grabbed the next boxing of this kit as a result of your build thread, Jean Luc. Hasegawa OWES you! Wonderful work, my friend!
FEB 20, 2009 - 05:43 AM
Hi all,
Thanks for your kind words.
I never really found the time to publish it but I had to do it for you at least since you wanted to do the same aircraft. The paper article was in Replic, not in TMM.
Jean-Luc
FEB 22, 2009 - 06:42 AM
Hi Jean-Luc
could be a Chinese mag ... unreadable for me .... still the Toryu is one of your best OOB projects!
For those who want to know more; here is the link to the original thread:
https://aeroscale.kitmaker.net/forums/111745&page=1
Hope to see the next with flaps and slats!!!
all the best
Steffen
FEB 22, 2009 - 07:07 AM
An absolutely beautiful build, Jean-Luc! Excellent in every way and very inspiring!
FEB 27, 2009 - 06:52 PM
Copyright ©2021 by Jean-Luc Formery. Images also by copyright holder unless otherwise noted. The views and opinions expressed herein are solely the views and opinions of the authors and/or contributors to this Web site and do not necessarily represent the views and/or opinions of AeroScale, KitMaker Network, or Silver Star Enterrpises. Images also by copyright holder unless otherwise noted. Opinions expressed are those of the author(s) and not necessarily those of AeroScale. All rights reserved. Originally published on: 2009-02-20 00:00:00. Unique Reads: 22939


