

1⁄35MH-60J Jayhawk Conversion
4
Comments
Once the interior was complete, I closed it up and finished the fuselage. I built the External Stores Support System (ESSS) mounts out of scrap resin pour blocks, sanded and shaped to the correct profiles. On the starboard side is a small ESSS and extended hoist mount. I made the extended hoist mount by cutting and combining two mounts, one from another Academy H-60 kit. The port side ESSS was made out of larger pieces of scrap resin, also sanded into shaped. Small ½ round bars were used to detail the upper portion and a clear position light out of the kit was added to its outer edge.
I also added the Cobra Company open exhaust engine pieces at this time. They fell into place pretty much without any issues. Some filling and sanding was needed to blend them into the fuselage, but not any more than expected. They are very nice pieces.
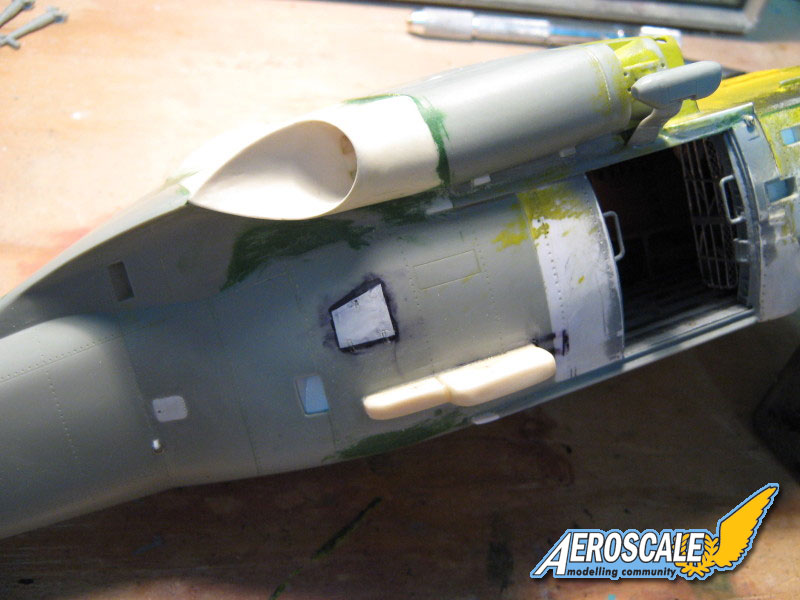
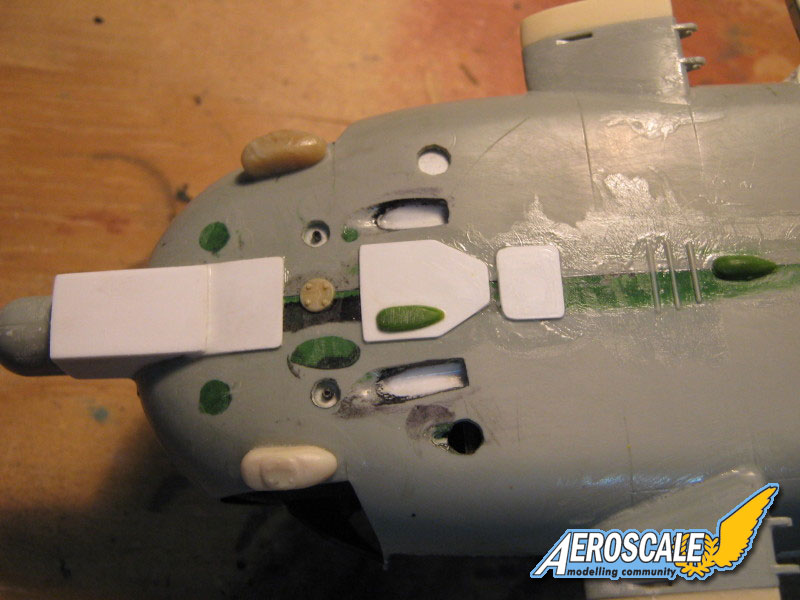
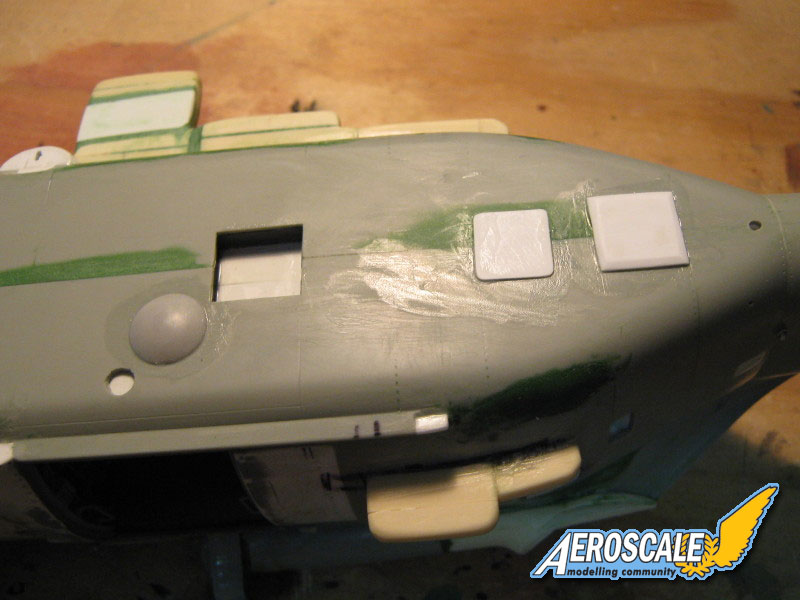
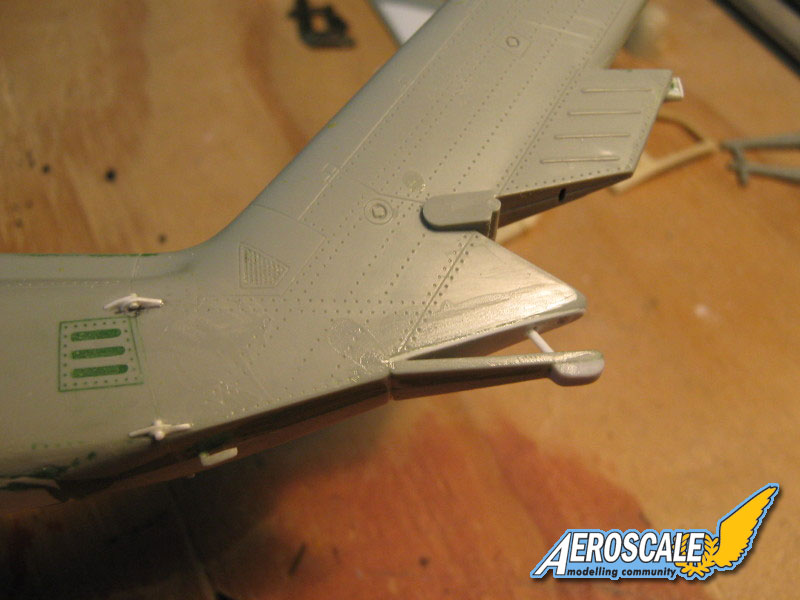
The USCG uses a distinctive nose radar set-up. To replicate it, I used the Academy kit part for the radar dome and scratched the rest. I cut the bottom and side pieces out of 0.020 sheet styrene and then bent 0.015 styrene around the frame I created to make the curved upper portion. I next moved on to the underside and added antennas, access panels, and cut out the search and landing light openings found there. I also moved to the tail and cut out the tail landing skid and added a shock absorber and other details there.
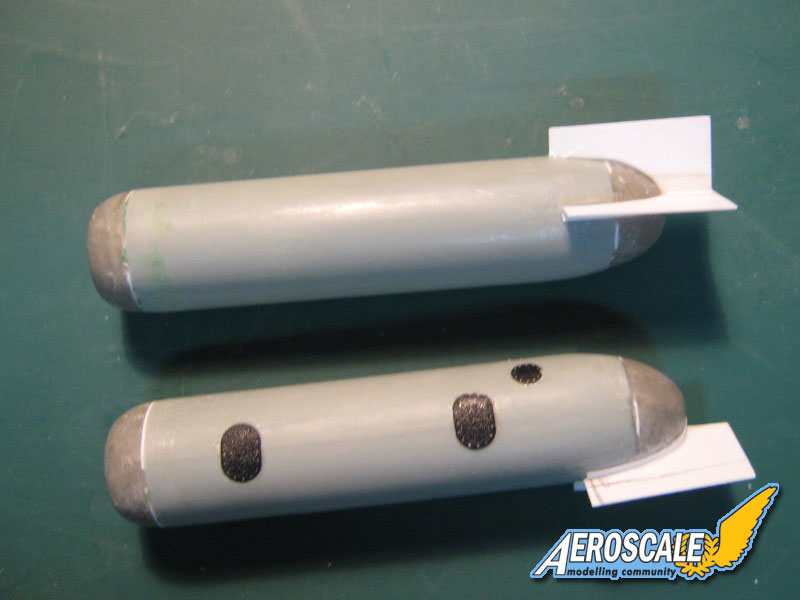
Next, I worked on the external fuel tanks. I used the tanks out of the Academy UH-60A/L kit, cut down to size. Apoxie Sculpt A & B putty was used for the end caps, and sheet styrene for the fins. The black access cover shapes are the new Archer texture decals. They look great, but didn't stick at all. They are thick and stiff. They wouldn't bend around the curve of the tank. I had to superglue them on.
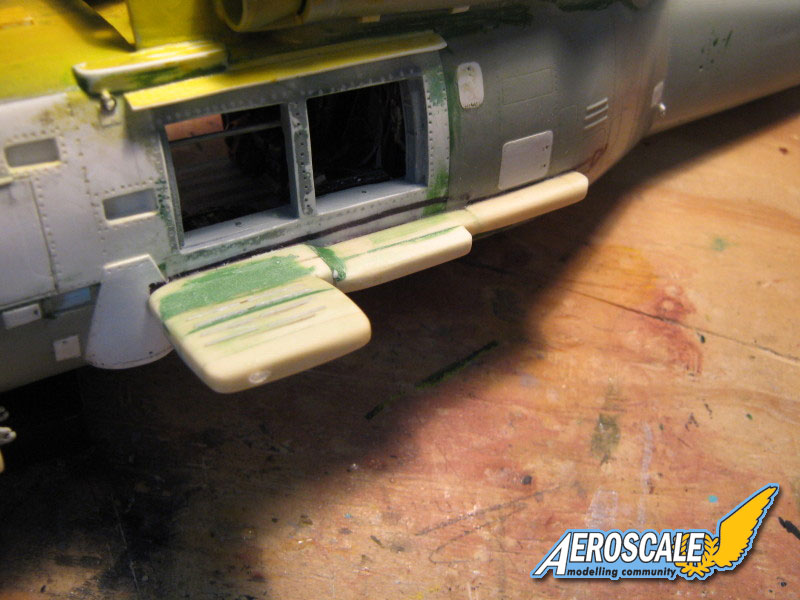
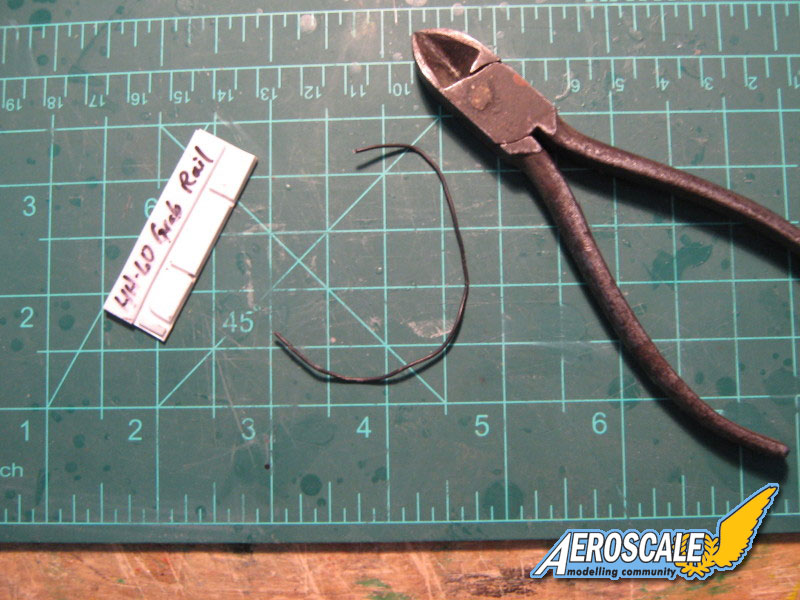
Next up was to modify the main gear struts. I used a left over covered spring piece from a resin howitzer and the kit strut. These were cut down to only about 1/2 inch so they would attach to the bottom of the now closed in landing strut covers. The struts themselves are the ones without the wire cutter blades and listed as not used in the kit. I built the rear strut out of 1/8 inch plastic tubing and some scrap rings, along with the connection end of the kit's tail wheel and some scrap angle pieces. I also completed the intakes for the engines with the air flow center tubes extended back to the face of the turbine at this stage. I extended the air flow center tubes with A & B putty as well. I also made the grab handles behind the pilots doors at this time. I made a jig out of 0.040 sheet styrene so I would get the same shape for each. I bent thin muffler wire to shape and installed it into holes I drilled into the fuselage.
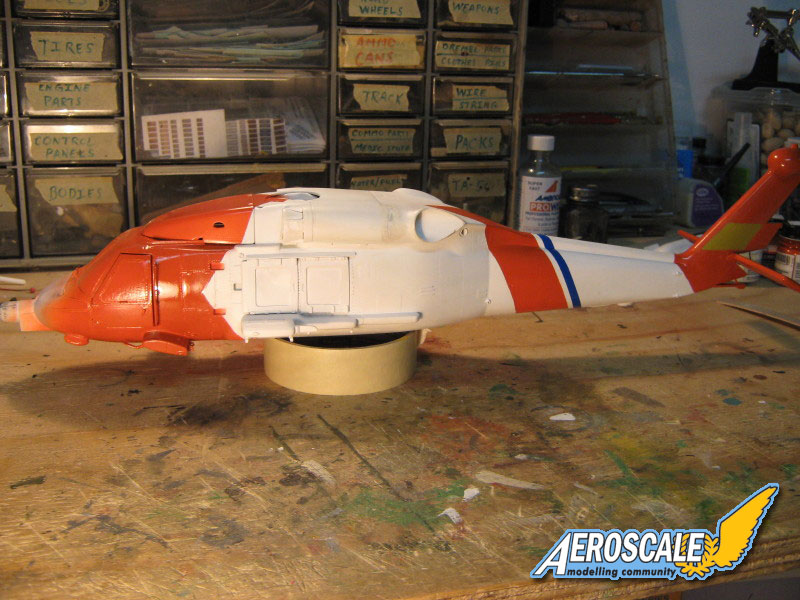
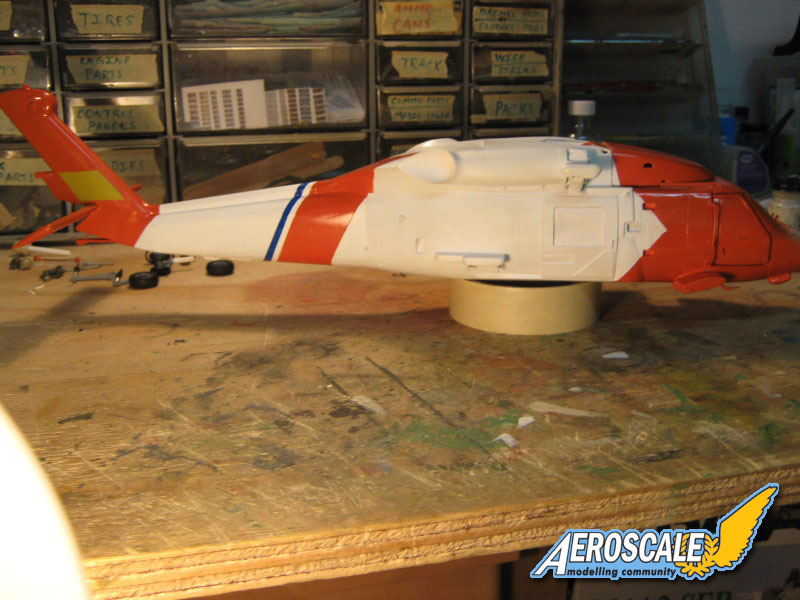
The next step was to paint the interior canopy frames black and install it on the fuselage. I also used the Cobra Company doors with windows from the AH-60L DAP kit, since they have the newer pop-out, circular vent. The window, canopy, and door openings were all taped off with masking tape and I began painting the fuselage. I first painted it overall white, and then stated taping it off for the USCG International Orange to be added. Once this was dry, I taped off the area for the blue line on the tail and used French Blue for the stripe. Lastly, I taped off the nose and anti-slip areas on the roof and starboard ESSS mount and painted them, along with half of the tanks, flat black.
I also added the Cobra Company open exhaust engine pieces at this time. They fell into place pretty much without any issues. Some filling and sanding was needed to blend them into the fuselage, but not any more than expected. They are very nice pieces.
The USCG uses a distinctive nose radar set-up. To replicate it, I used the Academy kit part for the radar dome and scratched the rest. I cut the bottom and side pieces out of 0.020 sheet styrene and then bent 0.015 styrene around the frame I created to make the curved upper portion. I next moved on to the underside and added antennas, access panels, and cut out the search and landing light openings found there. I also moved to the tail and cut out the tail landing skid and added a shock absorber and other details there.
Next, I worked on the external fuel tanks. I used the tanks out of the Academy UH-60A/L kit, cut down to size. Apoxie Sculpt A & B putty was used for the end caps, and sheet styrene for the fins. The black access cover shapes are the new Archer texture decals. They look great, but didn't stick at all. They are thick and stiff. They wouldn't bend around the curve of the tank. I had to superglue them on.
Next up was to modify the main gear struts. I used a left over covered spring piece from a resin howitzer and the kit strut. These were cut down to only about 1/2 inch so they would attach to the bottom of the now closed in landing strut covers. The struts themselves are the ones without the wire cutter blades and listed as not used in the kit. I built the rear strut out of 1/8 inch plastic tubing and some scrap rings, along with the connection end of the kit's tail wheel and some scrap angle pieces. I also completed the intakes for the engines with the air flow center tubes extended back to the face of the turbine at this stage. I extended the air flow center tubes with A & B putty as well. I also made the grab handles behind the pilots doors at this time. I made a jig out of 0.040 sheet styrene so I would get the same shape for each. I bent thin muffler wire to shape and installed it into holes I drilled into the fuselage.
The next step was to paint the interior canopy frames black and install it on the fuselage. I also used the Cobra Company doors with windows from the AH-60L DAP kit, since they have the newer pop-out, circular vent. The window, canopy, and door openings were all taped off with masking tape and I began painting the fuselage. I first painted it overall white, and then stated taping it off for the USCG International Orange to be added. Once this was dry, I taped off the area for the blue line on the tail and used French Blue for the stripe. Lastly, I taped off the nose and anti-slip areas on the roof and starboard ESSS mount and painted them, along with half of the tanks, flat black.


About the Author


FROM: FLORIDA, UNITED STATES
Retired US Army Artillery Officer, currently a contractor at MacDill AFB in the Tampa, FL area. I have been modelling for the past 40+ years, really seriously on armor and large scale helos (1/32, 1/35) for the last 35 or so.
Comments
Well done Gino! Love the hi-viz scheme these machines wear. Excellent build!
"Q"
MAY 17, 2009 - 03:42 AM

Thanks for posting it Rowan. It turned out to be a great-looking article.
MAY 17, 2009 - 11:38 AM

Copyright ©2021 by Gino P. Quintiliani. Images also by copyright holder unless otherwise noted. The views and opinions expressed herein are solely the views and opinions of the authors and/or contributors to this Web site and do not necessarily represent the views and/or opinions of AeroScale, KitMaker Network, or Silver Star Enterrpises. Images also by copyright holder unless otherwise noted. Opinions expressed are those of the author(s) and not necessarily those of AeroScale. All rights reserved. Originally published on: 2009-05-16 00:00:00. Unique Reads: 24300

WEB HOSTING BY


Copyright ©2021 AeroScale and Kitmaker Network, a subsidiary of Silver Star Enterprises
All Rights Reserved. Please read our Conditions of Use and Privacy Policy.
All Rights Reserved. Please read our Conditions of Use and Privacy Policy.