

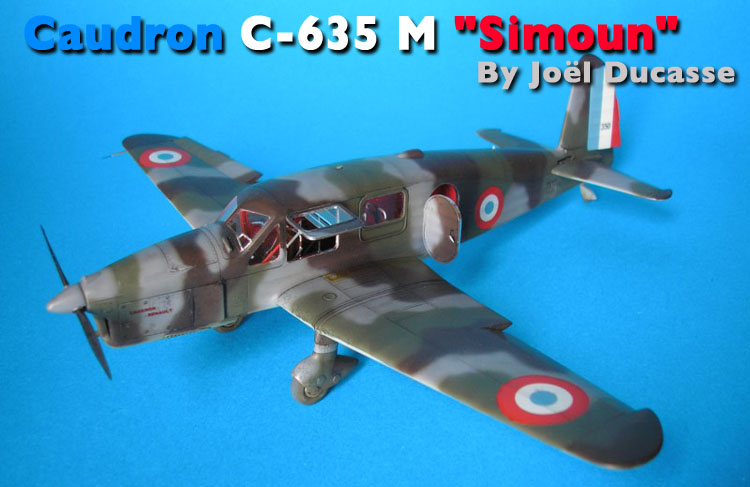
1⁄48Caudron C-635 M Simoun
6
Comments
Introduction
The Caudron "Simoun" in its various versions (C-620 to C-635), was a famous tourism and raid aircraft in the Thirties. Mounting of the most famous pilots of the time, from Bastié to Saint Exupéry, the "Simoun" made it possible to beat many records. Because of its notoriety and its performances, the military showed interest in it before the outbreak of war, so more than 500 specimens of the military version C-635 M were produced until May 10, 1940.In spite of its celebrity, this elegant single-engined aircraft has never been a first choice for plastic model manufacturers. Only, Heller made a kit in 1:72 scale a long time ago and, more recently, JMGT produced one in 1:48 scale in vacuform.
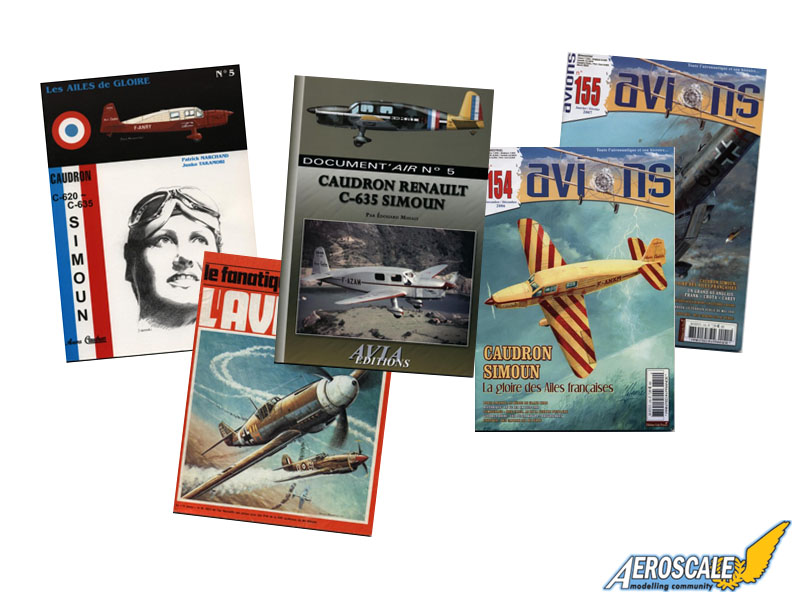
Reference material
- Les ailes de gloire n° 5.- Documentair n° 5 Avia éditions.
- Lalbum du fanatique de laviation n°112.
- Avions n° 154 et n° 155.
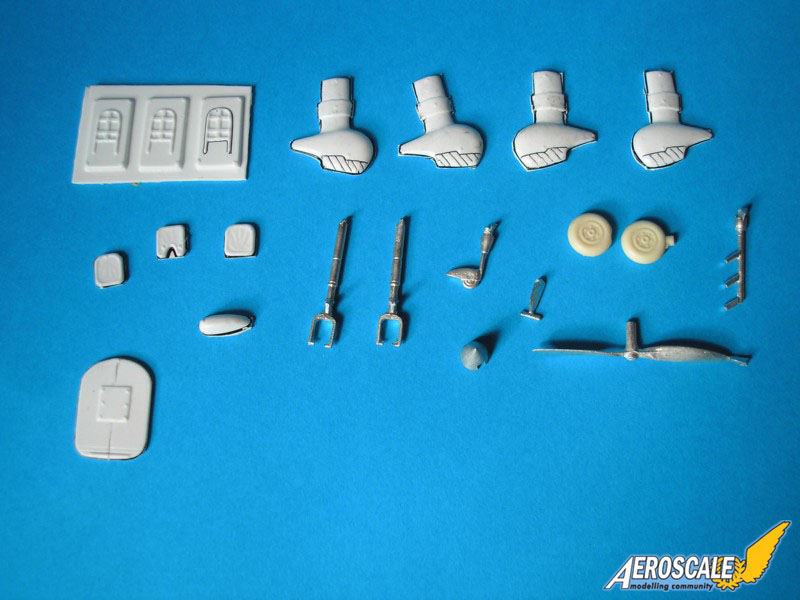
My first vacuform kit
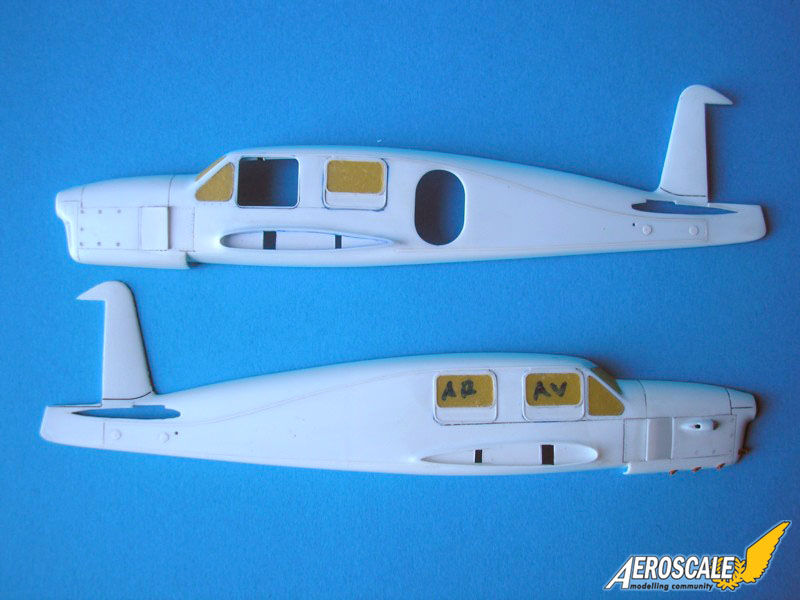
This build was a first for me because I've never tackled a vacuform kit before. Two questions arose by examining the parts. The first: how to represent the glazings in a realistic way? The second: how to assemble the various elements (fuselages halves, wings with fuselage, etc..?). Not having a solution very ready for these problems at this time, I have decided to impose to myself basic principles before starting the project and find the solutions for the technical problems that would undoubtly arise during the assembly.Two pairs of half fuselages are provided in the JMGT kit. One pair formed from a white plastic sheet and a second from a transparent plastic sheet. What a good idea! This seemed to be the perfect solution to do the glazings! No clear parts to cut out, adjust and glue with all the risks of messing up. Simply mask the windows and paint. Unfortunately the transparent plastic was granulous, very breakable and difficult to sand and polish to a transparent finish. In the end, the solution which seemed to be ideal in the first place, appeared to be only wishful thinking.
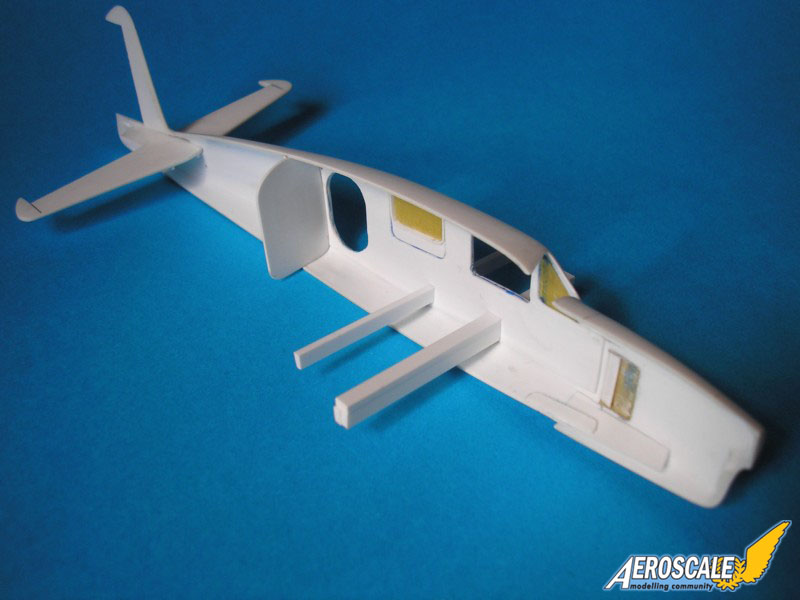
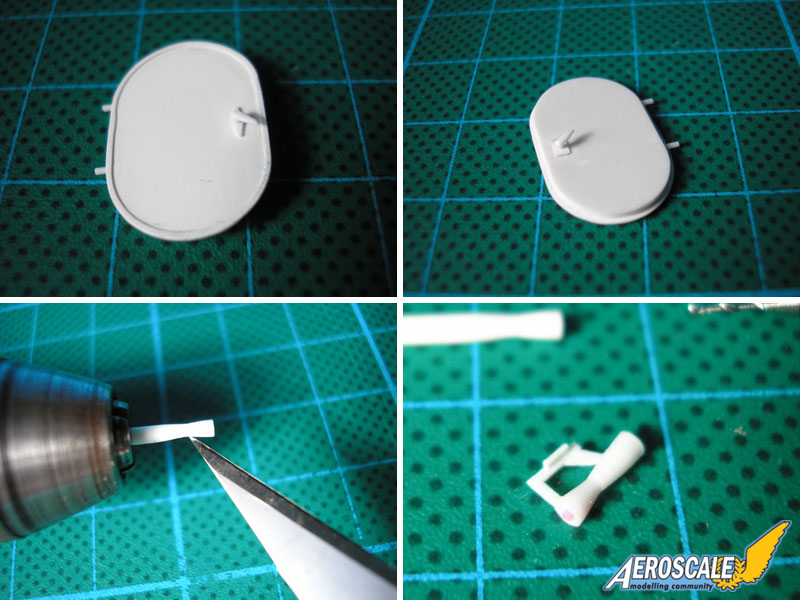
On the other hand the white plastic seemed to be very pleasant to work with so I chose to work with this material. The windows would be cut out from the fuselage halves, and the glazings would be made out of 0,5 mm thick plexiglass (thanks you Eric Fauré for giving me this material which was so easy to sand and to polish to an ideal transparency). I've decided to represent the access door as well as the pilot's side window in the opened position (as it was often the case on the ground). Thus a complete detailing of the cockpit, which would be very visible, was mandatory. This is not something which frightens me, to the contrary, I like to scratchbuild detail parts for interiors and in this case one will see the job.
For a stronger assembly, some self made locators were added inside the fuselage halves. They were made out of two pieces of plastic tube. Inside one of them, I placed, slightly exceeding, a piece of round section, which was meant to be the male part. For the wings I have added two strong spars which are visible inside the cockpit on the real aircraft. The one piece horizontal tailplane found it's place in two openings made into the rear of the fuselage.
With regard to decoration, although the possibility is offered in the kit to make some attractive and colorful civil versions, I have decided to make a three tone camouflaged version, having a weak spot for French planes of the battle of France. I chose to do the Caudron numbered 350 serialed T-507. The machine left the assembly lines in May 1939 and was apparently used as a liaison aircraft during the "Phoney War" ("Drôle de Guerre" in French or "Sitzkrieg" in German) and the battle of France. After the Armistice, it was stored in Oran in 1941 and finished its career with the GB II/52 in Algiers where it was damaged on the ground in 1943.
Now that the preliminaries are over, let's go through the building process in detail...
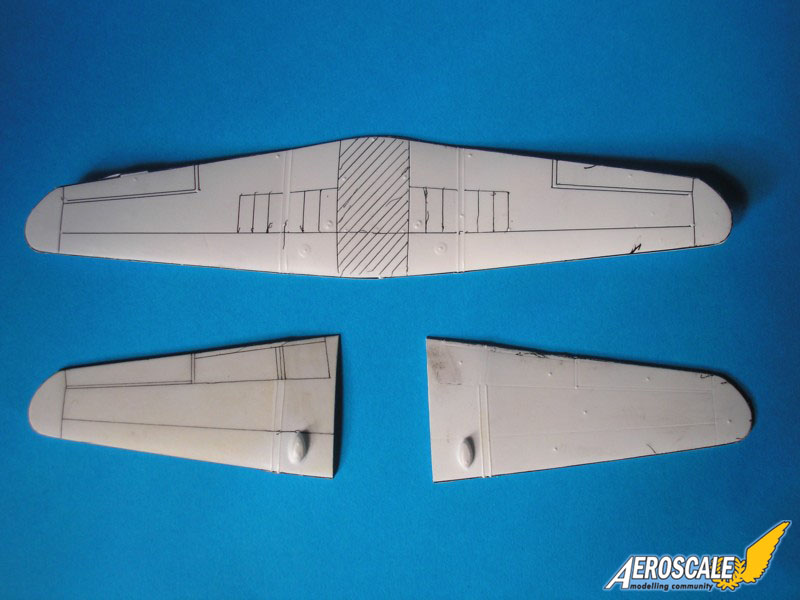
Preparing the parts
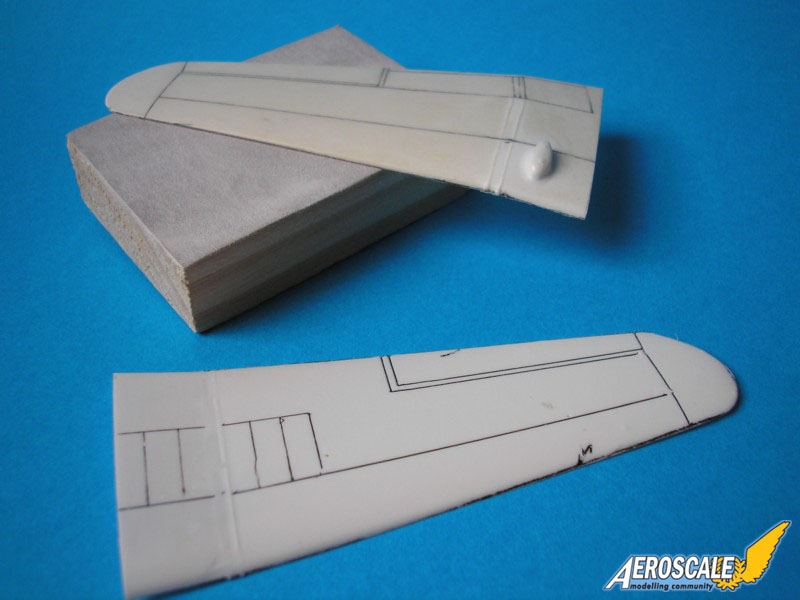
At a very early stage of this project, I have discovered that the most important work when doing a vacuform kit lies in the preparation of the parts. The rest is pretty much comparable to the build of an injected plastic model (except for the scratchbuilt interior of course). With this in mind, if you follow the instructions provided by JMGT (which are very explicit by the way), the construction shouldn't be too difficult.First of all, you have to trace the contour of the parts with a black marker. Then, using a cutter fitted with a new blade, you can cut out the parts perpendicularly to the surface of the plastic sheet. Once the parts are separated, a surplus of material, corresponding to the thickness of the sheet, is visible thanks to the residue of marker. The parts must be sanded until this surplus disappears. It is important to work on a flat surface for the best possible result. Do not rush and check the amount of surplus regularly. Indeed, on the precision of this operation, will depend the quality of the assemblies to come. As we will see, the parts of the kits have been very well designed and very little putty will be needed in the end.
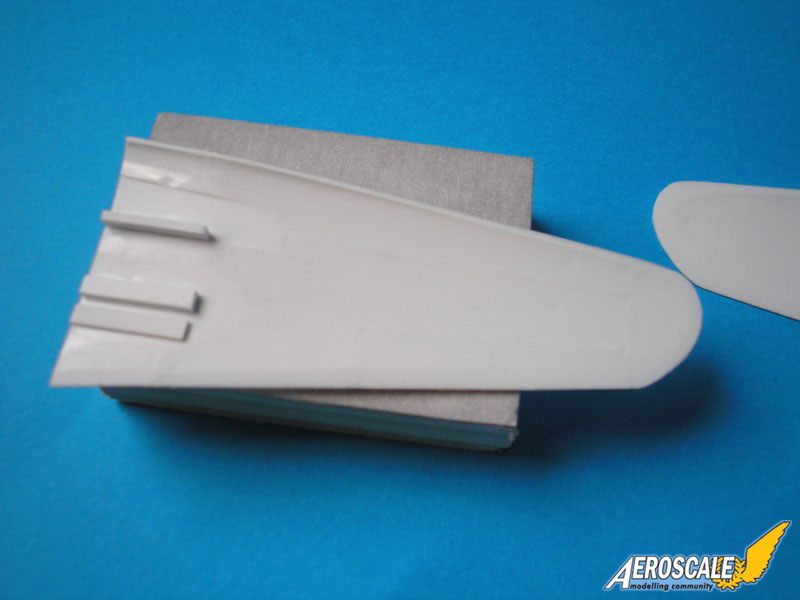
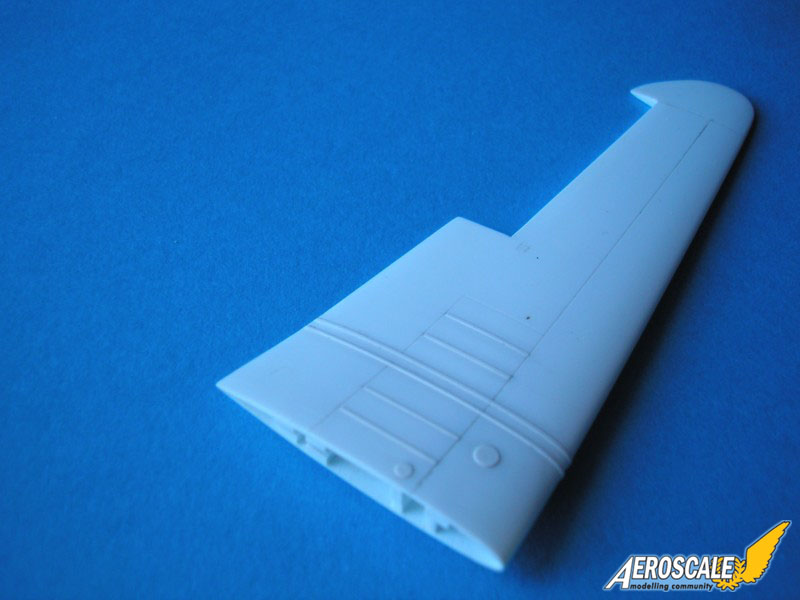
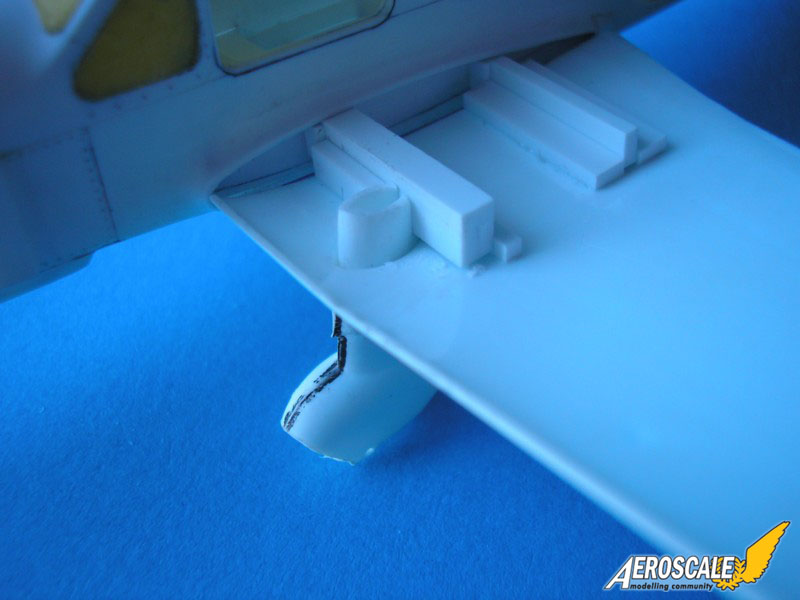
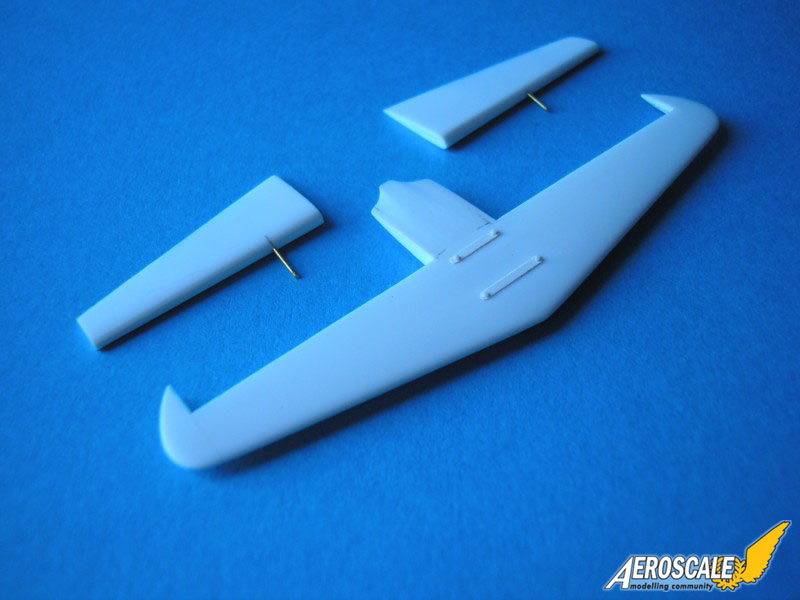
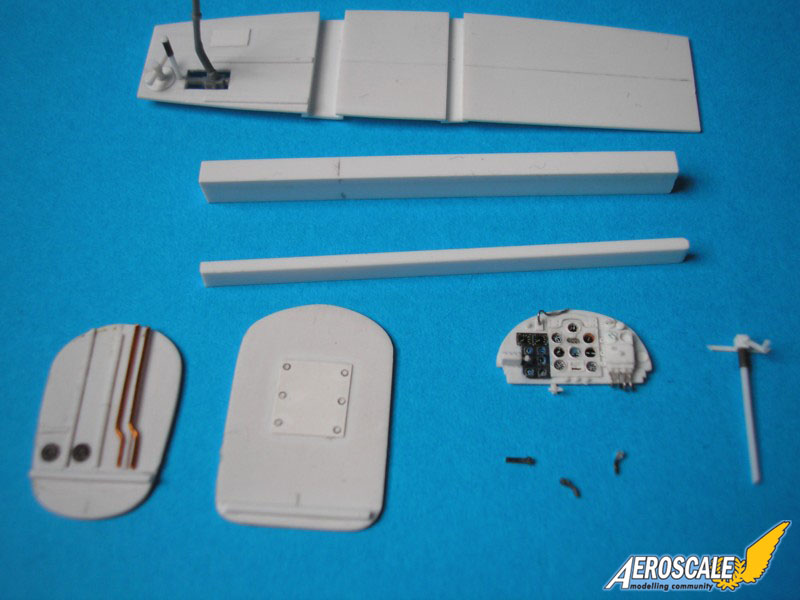
For this JMGT kit, I have used the following building sequence: first, I have sanded both half fuselages. After this was done, I have cut out the openings allowing the passage of the one piece horizontal tailplane. The latter was sanded until it was just small enough to go through. It is necessary to test fit the parts regularly to achieve the best possible result. The fuselage's Karmans were hollowed in order to create a passage for the scratchbuilt wing spars. Here as well it is necessary to have a light hand when sanding. Then it is the turn of the wings to be sanded to the appropriate shape. Be sure to check their thickness regularly when compared to the Karmans. It is also necessary to open the holes to accomodate the fixed landing gears later. Also, the control surfaces are separated in order to represent them in a more dynamic way.
Of course, the quality of the kit can't be compared to the production of mainstream manufacturers. For example, the surface of the vacuform plastic had an orange skin aspect. Also, the engraved panel lines were too deep and too broad. The representation of the details in relief was overall very soft. The reinforcements ribs of the wings did not correspond on the upper and lower parts. Finally, there were several dots on the surface of the vacuformed parts (due to the aspiration holes necessary for the moulding), which were badly placed and difficult to remove without damaging the relief details. For all these reasons, the surface of the parts were sanded smooth, new panel lines were engraved and the various reinforcements ribs replaced with fine strips of plastic card.
Glazings
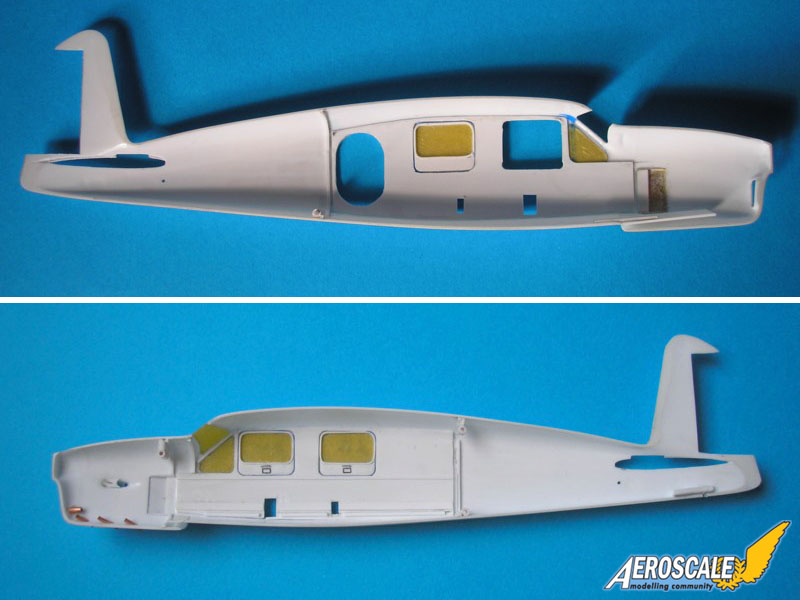
The window openings in the fuselage halves were cut out according to the plans published in the issue n°154 of the French magazine "Avions". The clear parts, as I've said before, are made from 0,5 mm thick plexiglass. The transparent parts are carefully glued in place with cyanoacrylate and then sanded and smooth using various grades of sandepapers (600 until 12 000 micromesh). The polishing was done with Tamiya Compound and finally all the clear areas were protected with Tamiya Masking Tape (interior and exterior).Once protected, the windows are surrounded by a thin strip of evergreen in order to leave an extra thickness of 0,25 mm towards the outside. The lower part of the window is made with 0,5 mm plastic card of 0,5 mm and again surrounded by an evergreen strip. For the left window which would remain in the opened position, the plexiglass was replaced by two pieces of very fine rhodoïd to represent the sliding panel.
Scratchbuilding the interior
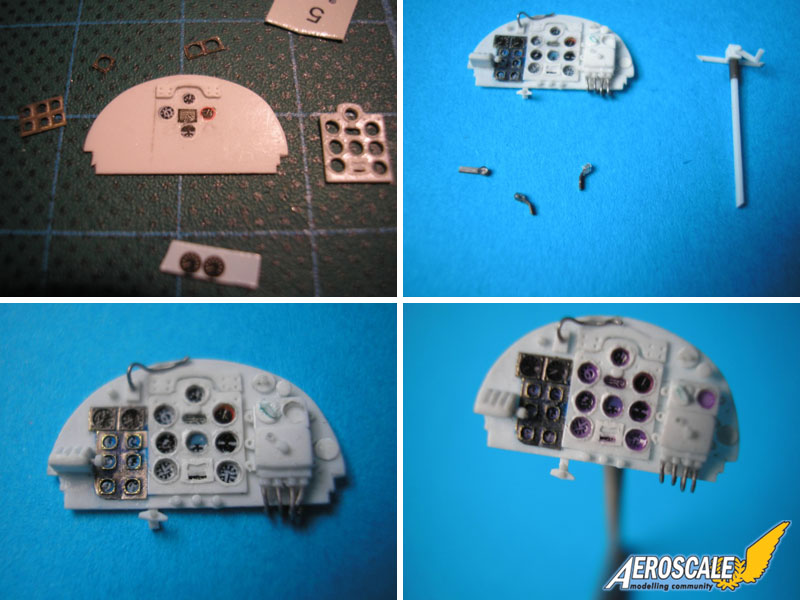
For the interior, everything has to be build from scratch. For this, one can use the instruction drawings but some good reference photographs and documentation are also necessary. The only original parts left from the kit are the bases of the three seats. Everything else is scratchbuilt. I have started by adding 0,4 mm of plastic inside both half fuselages to increase their thickness. The bulkheads, as you can imagine, were made from plastic card as well and details were added using plastic and copper wire. Then I did the wing spars (front = 4,6 X 3 X 56 mm, rear = 3,2 X 1,5 X 56 mm) and the floor. It goes without saying that many trials are necessary to achieve a good fit. The self made locators are quite useful to maintain the half fuselages together.The instrument panel is made from plastic card, photo etched parts from the spare box and transfers for the instruments. The side walls are detailed according to photographs and the seats made from evergreen rods, plastic card and Tamiya Masking Tape. The seatbelts are made from lead and photo etched parts. The access door is 0,5 mm thick and some details are added to the inner side.


About the Author

Comments

Hi Joël
Absolutely stunning - a real masterpiece!
I've never spotted this kit on the shelves over here, but I did build JMGT's Caudron-Renault CR-714 back in the '90s - another good qualty vacuform with nice resin and white-metal details. I just wish I could have built it half as well as you...
All the best
Rowan
OCT 03, 2009 - 08:06 PM

Wow, your build is absolutly stunning! I like this plane very much with its extensive interior...
It looks very difficult to get these vacuform kits together, I have never tried to build one, perhaps in 100years I'm going to try this
And I always wanted to try your post-shading technique. Very nice weathering you achieved there!
Looking forward to see your next build!
OCT 03, 2009 - 11:12 PM

Top notch workmanship. It is a pleasure to see such a spectacular build.
Mark
OCT 04, 2009 - 01:50 AM
The level of craftsmanship is stunning. Way to go on such a difficult build... and what a cool looking plane!
OCT 04, 2009 - 02:49 AM

Copyright ©2021 by Joël Ducasse. Images also by copyright holder unless otherwise noted. The views and opinions expressed herein are solely the views and opinions of the authors and/or contributors to this Web site and do not necessarily represent the views and/or opinions of AeroScale, KitMaker Network, or Silver Star Enterrpises. Images also by copyright holder unless otherwise noted. Opinions expressed are those of the author(s) and not necessarily those of AeroScale. All rights reserved. Originally published on: 2009-10-03 00:00:00. Unique Reads: 12732

WEB HOSTING BY


Copyright ©2021 AeroScale and Kitmaker Network, a subsidiary of Silver Star Enterprises
All Rights Reserved. Please read our Conditions of Use and Privacy Policy.
All Rights Reserved. Please read our Conditions of Use and Privacy Policy.