Post Shading
3
Comments
Lets start with a quick, down and dirty step by step and then I will break that down.
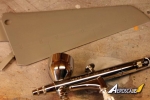
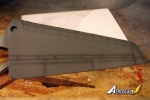
Step 1 - Apply basic paint scheme. Iím going to use some Aeromaster Gray-Violet on my test subject, a Revell F-14 wing section.
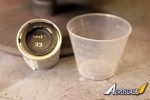
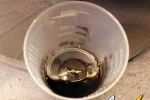
Step 2 - Mix the shading color. Using my trusted Humbrol #33 Flat Black, I mix one drop of paint and 1 milliliter of lacquer thinner based on the pipette I used. I counted the drops and it comes out to about 30 drops of thinner from the pipette. Sorry that I canít get more precise.
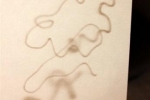
Step 3 - Adjust the nozzle on your airbrush and psi- I crank the nozzle down on mine and do a couple of test shots on a white 3x5 card to fine tune it. I set the psi at 15 lbs. Once the nozzle down as fine as I can get it, and still shoot my shading mixture through it, Iím ready.
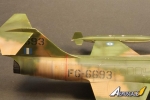
Step 4 - Lets do some shading! I intentionally made the panel lines along the bottom of the wing darker to show them better. I did this with just 3 or 4 passes of the airbrush. The ones along the leading edge were done with a single pass. These lines came out more subtle than the first ones and one can easily see the difference between the two. These could be accentuated even more by fading the surrounding panels, but that is for another time.
Okay, that does it for the quick step by step. Letís break it down from thereÖ
Before any of the post shading is done, the basic paint scheme needs to be applied. The better the base layer of paint, the easier it will be to shade later. If you have overspray to clean up, it makes no sense to shade anything, as you are going to obliterate the shaded area when you do your touch ups. Hence the importance of a good base coat. For obvious reasons, a lighter color will be easier to do than one that is darker. However, one can post shade a darker color by lightening the base color slightly. Black or dark blue can be shaded using this technique. The base color simply needs to be lightened slightly to pull it off. You can trick the eye to believe it is seeing something it isnít. Once the base color is laid on, let the model dry/cure completely. 24 hours is a good rule to follow. Do I follow this rule? Not always, but I know when I can get started with my post shading and donít want to pass along my bad habits to youÖbetter to err on the safe side...so 24 hours of drying/curing after the base colors are applied. You can work on something else in the mean time. :o)
When it is time to post shade your panel lines, you have some choices to make. One is what type of thinner to use. I have used everything from standard paint thinner, bought by the gallon at home improvement stores, to lacquer thinnerÖalso bought by the gallon at home improvement stores, and everything in between; diosol, xylene, airbrush thinner, etc. Ultimately I came back to lacquer thinner as I found it easiest for me to use and work with. Your options are many and you do not have to use what I do, Iím just letting you know what I prefer. ** I use solvent based paints, but the same technique can be used with acrylics, although I have not tried it.
The next choice is the shading colors. I use flat black from Humbrol for almost everything. Why black and why Humbrol? It thins well and consistently every time. I have used Model Master Paints in the past and had trouble getting it to thin down properly. I constantly had to adjust my nozzle on the airbrush to work through thick areas of paint that didnít mix fully in the paint cup. I tried Humbrol and have not looked back. The flat black also imparts a shadow look once laid in. Your mixture should be roughly 30 drops thinner to 1 drop paint. You will probably have to play around with different ratios to see what is going to work best for you, but the one I mentioned above (30:1) is what works for me. You want something closer to tinted thinner as opposed to thinned paint. The next choice is air pressure. I shoot at 15 psi. I have tried to go lower but always ran into splattering when I did so. Because there is a high amount of thinner the mixture isnít going to dry before it hits the model (Unless you are too far away) and thus give you the anti-skid texture that occurs when paint is shot at too high of a pressure. Your last choice is the nozzle opening on your airbrush. I try to keep mine necked down as tight as it will go and still allow the shading mixture to flow.
When itís time to shade, keep the nozzle of the airbrush close to the surface and continue to move down the panel line. This will help provide a visual for the shading as it hits the surface and it will help keep the spray pattern small, which is what we want. If you stop, puddles will form and we donít want that.
Trust meÖ
Comments
Great article Matt. I must admit this is my favoured method of weathering an aircraft, I prefer it as you have a better measure of control over the weathering without worrying whether the pre-shading is going to disappear under the colour scheme. Thanks for posting.
tim
JUN 05, 2010 - 04:03 AM
Thanks Tim. Hopefully I answered what folks wanted to know. I know not everybody is comfortable with doing this mehtod, but like you said, I feel it is the preferable method for shading do the control I have over the amount of the shading I put down. Thanks again, "Q"
JUN 05, 2010 - 01:24 PM
Very cool, not even posted for a full week and over 1000 views thus far. Thanks folks... "Q"
JUN 08, 2010 - 09:59 AM
Copyright ©2021 by Matthew Quiroz. Images also by copyright holder unless otherwise noted. The views and opinions expressed herein are solely the views and opinions of the authors and/or contributors to this Web site and do not necessarily represent the views and/or opinions of AeroScale, KitMaker Network, or Silver Star Enterrpises. Images also by copyright holder unless otherwise noted. Opinions expressed are those of the author(s) and not necessarily those of AeroScale. All rights reserved. Originally published on: 2010-06-04 00:00:00. Unique Reads: 16407


