Post Shading
3
Comments
Moving on…
This technique, like most techniques of our hobby, requires some practice to see what is going to work and what is not. Hopefully I will be able to help with identifying what has worked for me and what has not. I suggest you grab on old model with some panel lines on it to use as a test piece or as I call it, a “Mule” because it gets worked hard…really hard. Use your mule to figure out what is going to work for you and what is not.
Let’s look at a couple of pieces I have used this technique on. The first one is the Greek F-104G Starfighter. It is the Revell of Germany boxing, essentially a re-boxed Hasegawa kit. I decided early on that I wanted to show a heavily worn appearance on the plane once I got to painting. The plane is painted in the three tone South East Asia camouflage over a light gray bottom. I used a combination of post shading and washes to bring out the details. Panel fading was also used to accentuate the panel lines. I used flat black for the post shading and artist oils for the washes.
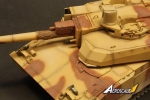
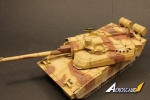
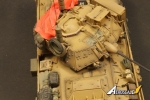
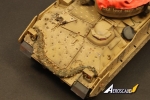
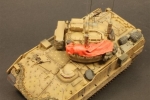
The next piece is Monograms venerable P-39 kit painted as one we sent to Russia as part of the lend lease act. The OD over gray paint was post shaded using Humbrol Flat Black along with some fading of various panels to impart a more weathered look to it. For an older kit, it really builds well. As I said in my initial sentences, this technique can be used on armor as well. I used it to bring out the shadowed and dirty areas on my Tamiya Bradley and the Leclerc MBT such as around bolt heads, weld beads and along the seams where panels come together.
Because the shading mixture is so thin, it has to be built up to get to the right amount of saturation/color. If by chance you get a little too heavy handed and make it too dark, like I did on the F-14 trailing edges, a quick spray of the base color will easily cover the goof and one can re-shoot the shading. I tried the pre-shading method and more times than not ended up covering up the shading in my attempts. How do you go back and fix that? Shoot more black, let it dry, and then shoot more base color. In short…add more paint to your model. With post shading the amount being laid down is extremely thin and lends itself well to what it is, shading. Mistakes are easier to fix in my opinion, and it dries quickly. Seems like there is a lot to this huh? It’s not that involved once you get this hang of it. You will know what to do and how to do it; just got to get there first.
So, there you have it in a nutshell. As I stated above, this is how I do it. Give it a try…you might find you like this method or you might cuss me at length.... If you have any questions, feel free to contact me and I will do my best to answer them.
Comments
Great article Matt. I must admit this is my favoured method of weathering an aircraft, I prefer it as you have a better measure of control over the weathering without worrying whether the pre-shading is going to disappear under the colour scheme. Thanks for posting.
tim
JUN 05, 2010 - 04:03 AM
Thanks Tim. Hopefully I answered what folks wanted to know. I know not everybody is comfortable with doing this mehtod, but like you said, I feel it is the preferable method for shading do the control I have over the amount of the shading I put down. Thanks again, "Q"
JUN 05, 2010 - 01:24 PM
Very cool, not even posted for a full week and over 1000 views thus far. Thanks folks... "Q"
JUN 08, 2010 - 09:59 AM
Copyright ©2021 by Matthew Quiroz. Images also by copyright holder unless otherwise noted. The views and opinions expressed herein are solely the views and opinions of the authors and/or contributors to this Web site and do not necessarily represent the views and/or opinions of AeroScale, KitMaker Network, or Silver Star Enterrpises. Images also by copyright holder unless otherwise noted. Opinions expressed are those of the author(s) and not necessarily those of AeroScale. All rights reserved. Originally published on: 2010-06-04 00:00:00. Unique Reads: 16407


