

1⁄32Albatros D.III OEFFAG
12
Comments

HISTORY
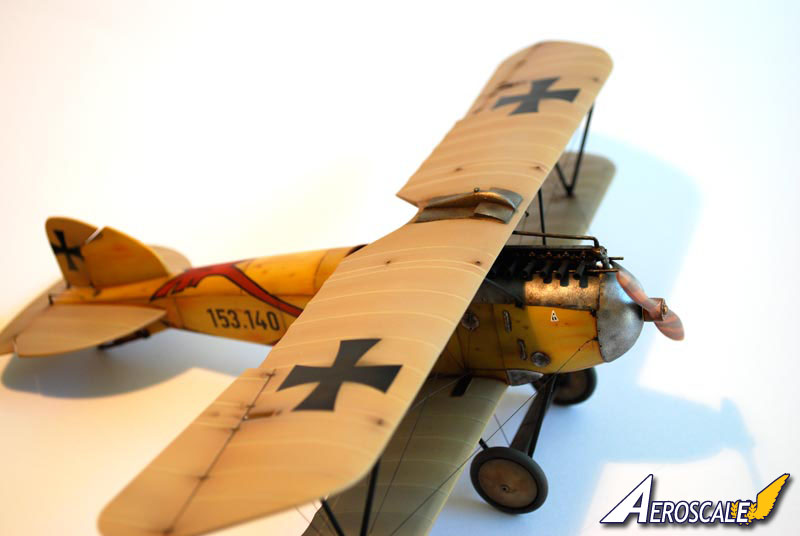
The OEFFAG Albatros DIIs and DIIIs were built under licence from Albatros werke GmbH, Johannistahl. At first glance the Austrian version look very similar to the original but differed in several aspects such as armament, power plant, and cockpit layout. The later 153, and 253 versions also had a round shaped nose, which set them apart from the rest of the Albatros family. It could be argued that the Austrian versions were superior copies; Later versions had more power with the 200/225 hp Austro Daimler and the wings never suffered structural problems. In any matter, it was perhaps Austria-Hungary's best fighter, and was flown by several aces, such as Godwin Brumowski, Frank Linke-Crawford and Josef Kiss.THE KITS
Ever since I first saw the Austrian Albatros I knew I wanted to model one preferably the round nosed 153/253 version but as an 1:32 modeler, there were no options. That was until Battle Axe released their short run kit. But having built two of their offerings before I knew probably it was more truoble than it was worth.But when Hannants had a clearout, curiosity got the best of me... In the back of my mind I thought I might be able to use most of the kit, and throw some spare Roden bits in, like I had done on a previous build. However, apart from being badly made, the kit proved very incorrect, and in bits overly simplified.
Then I got a Roden DIII kit at a sale, now this is a very good boxing. A plan formed to convert this one into the coveted late Austrian DIII using what bits I could from the Battle Axe kit.
ASSEMBLY
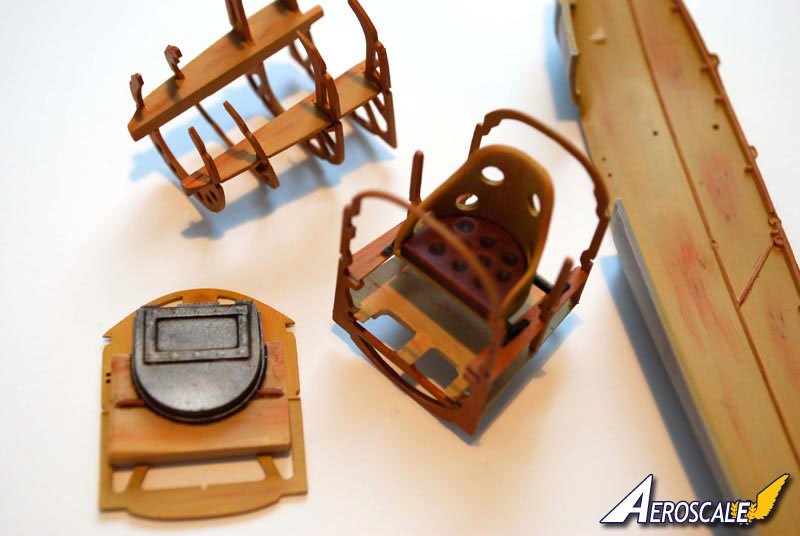
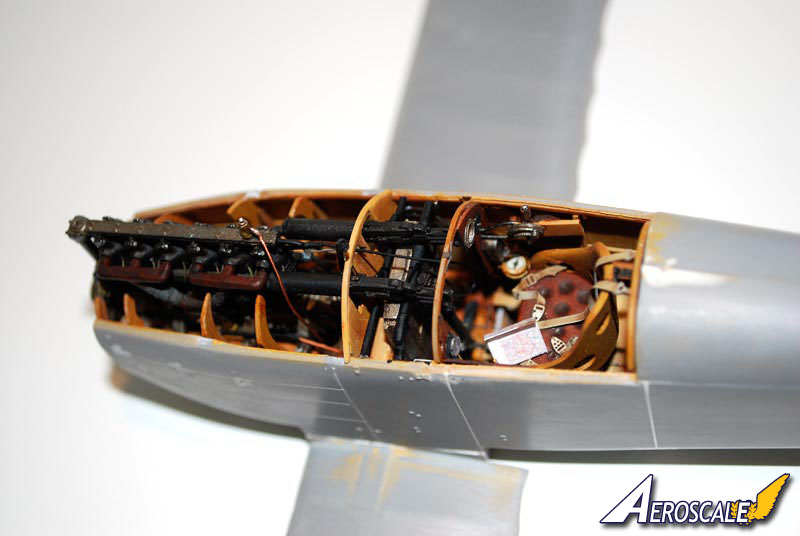
After trial fittings I identified witch bits to use from the B.A. Box. I wanted to use the complete fuselage and put a modified Roden interior inside then using the Roden wings.However, the fuselage was cast far too thick, and made it impossible to use the Roden bulkheads, so instead I decided to saw of the nose, and graft it onto the Roden fuselage. In the end I only used a handful of bits from the Battle Axe box.
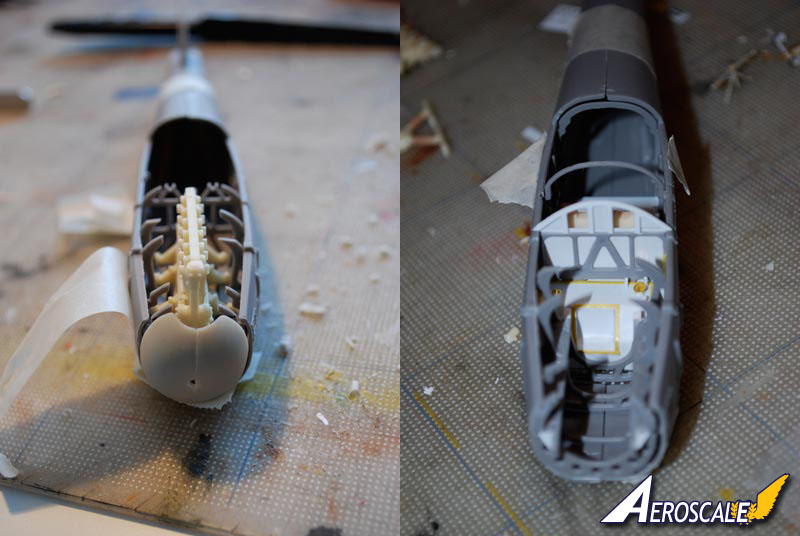
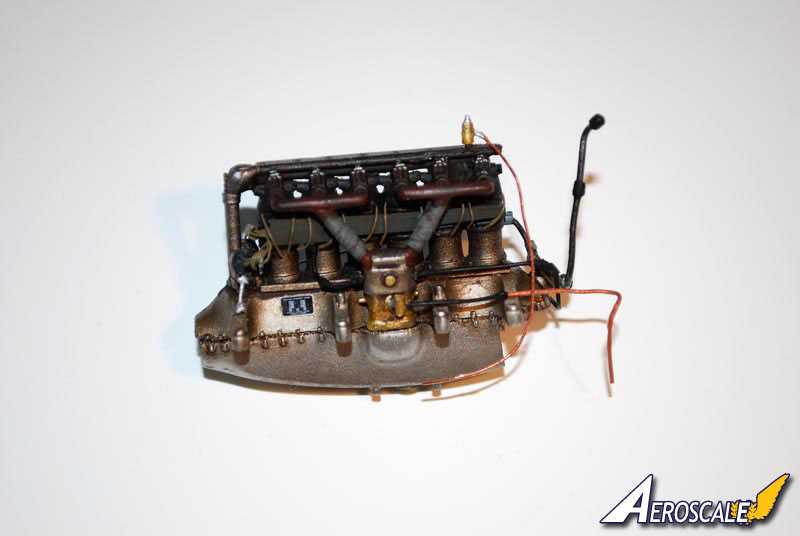
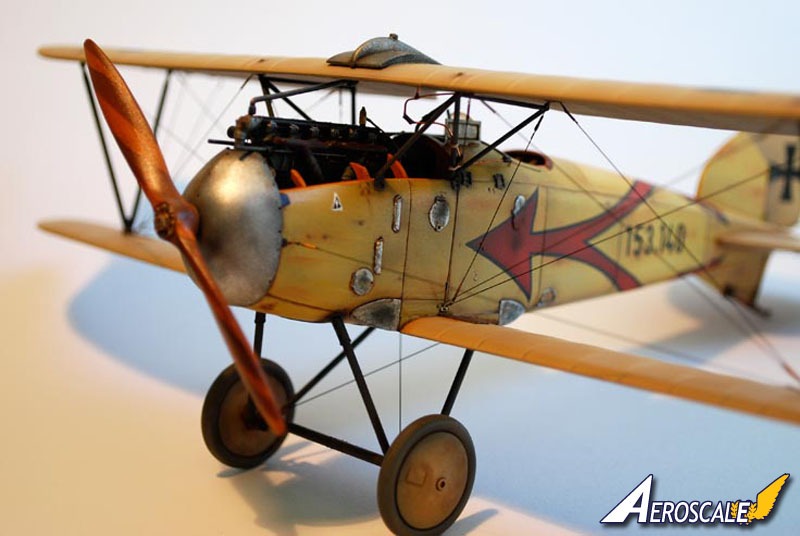
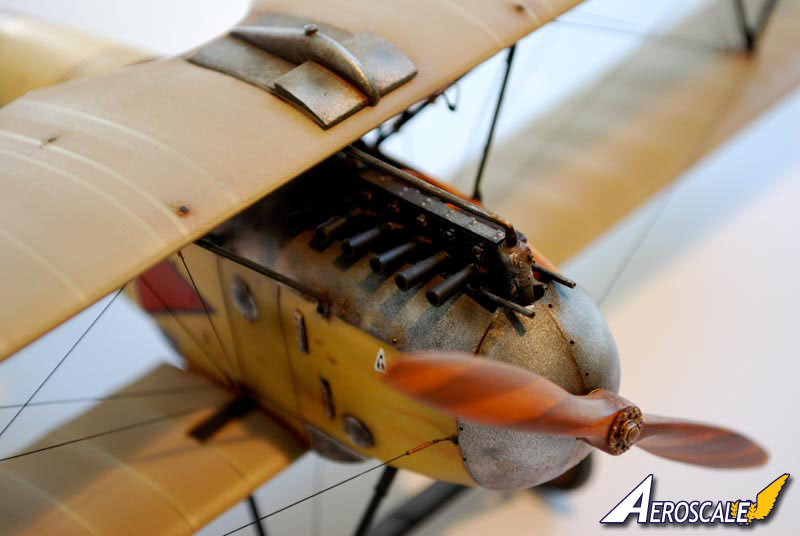
The engine (resin). By far the best part of the B.A. kit, although it has some issues that I ignored. I added wires, tubes and some other ancillaries to dress it up a bit.
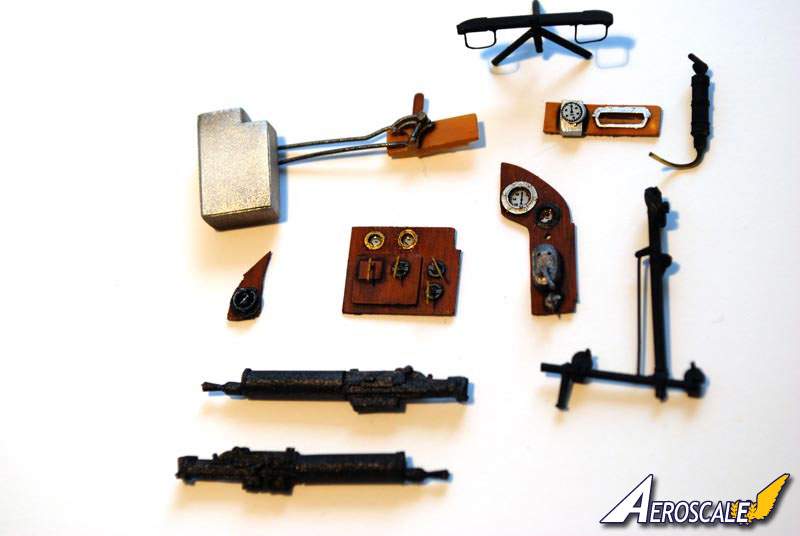
The guns. B. A. only supply you with the gunstocks and leave the rest to your imagination. I choose to scratch build the barrels from plastic tubes.
The ammobox. Was nicely cast, but I had to saw it off the thick and rough firewall, and then build a new firewall using a Roden Bulkhead.
The gas tank. Had to be scratch built, using folded plastic sheet.
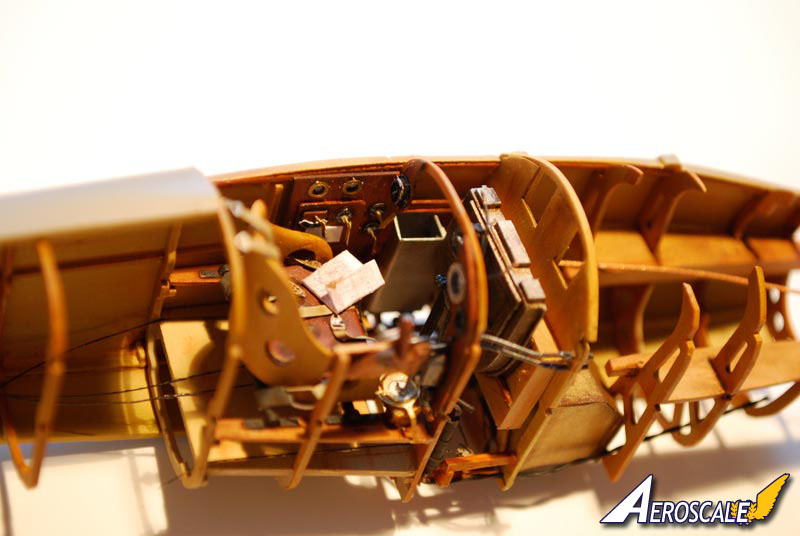
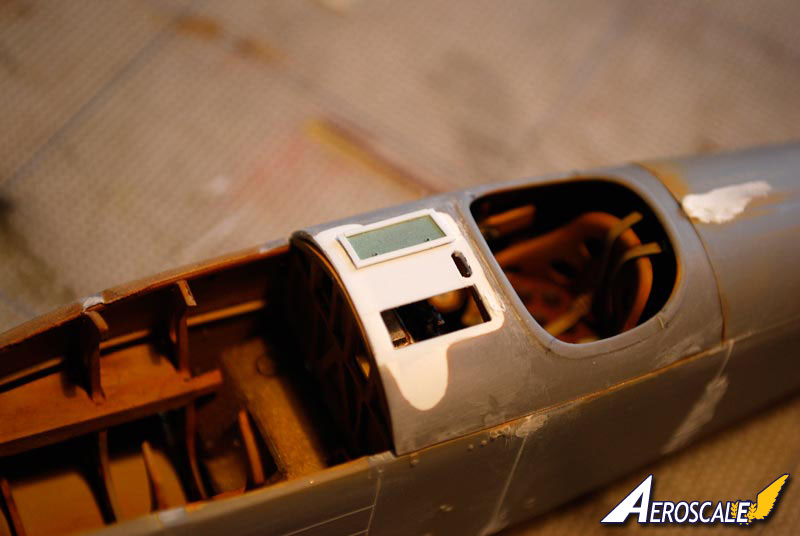
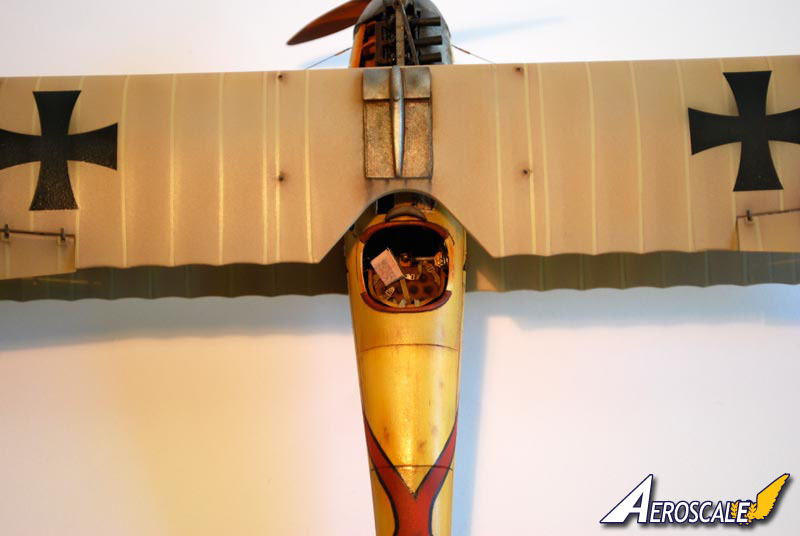
The cockpit. Here I used the stick and pressure pump from the B.A. kit. The rest was either adapted from the Roden kit or scratch built, such as the instrument panels.
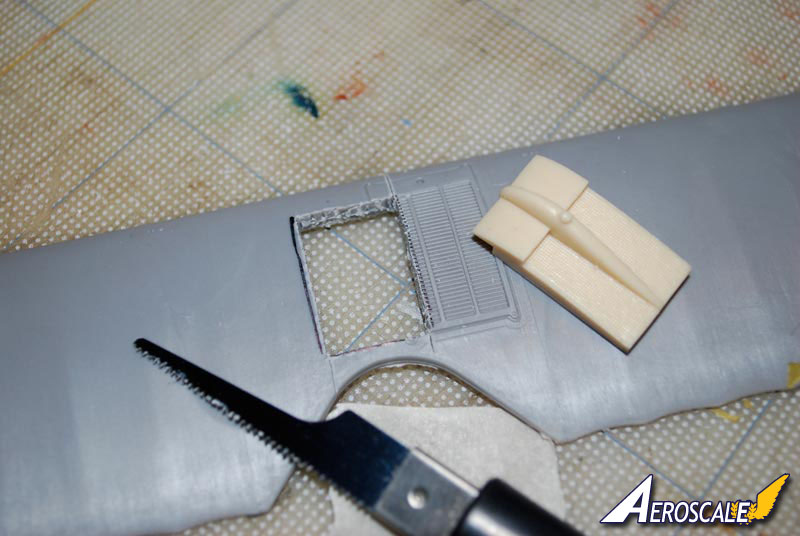
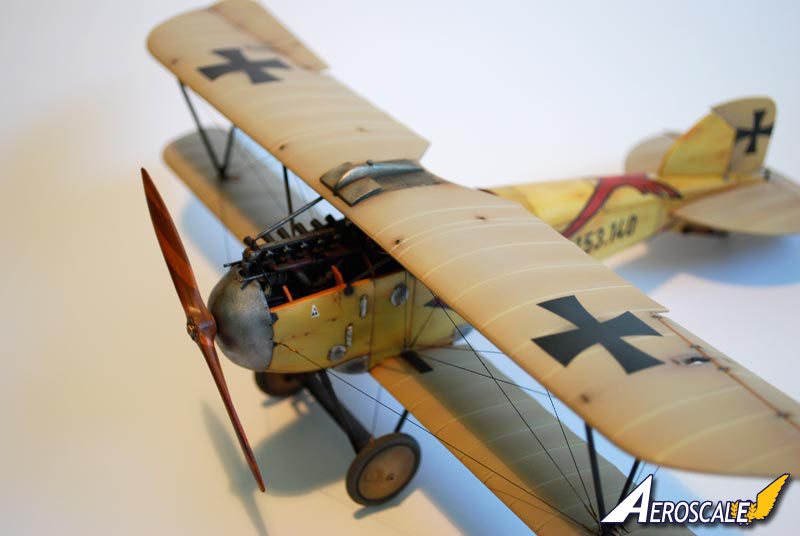
The Radiator. This was cut into the upper wing. After measuring out the location, I taped the borders of what was to be cut out. Then drilled as many holes as I could, being careful to stay inside the taped area. The hole was cut using a scalpel and a small saw.
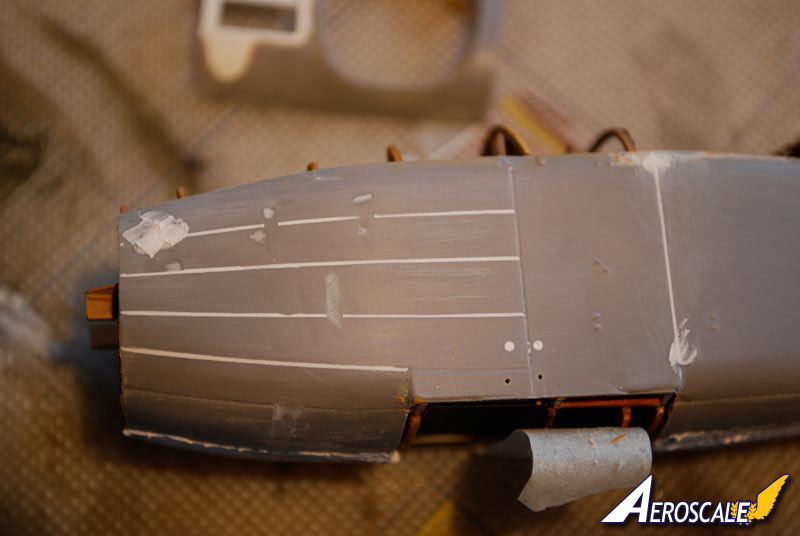
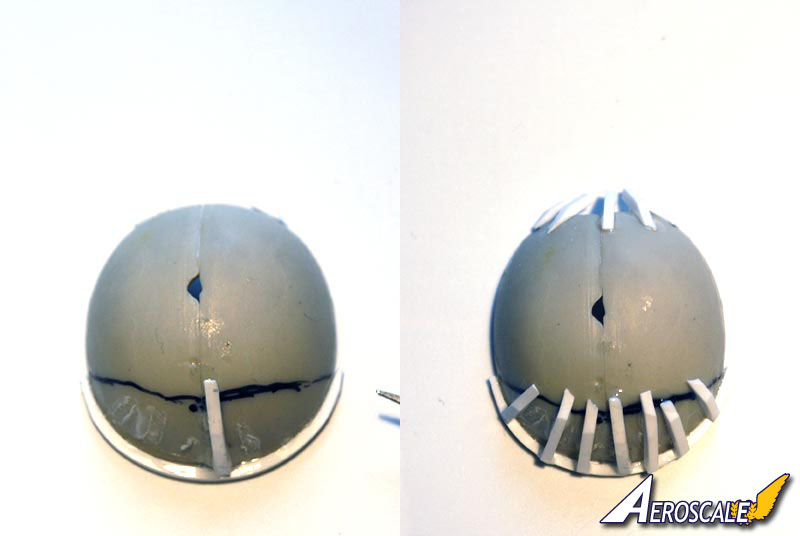
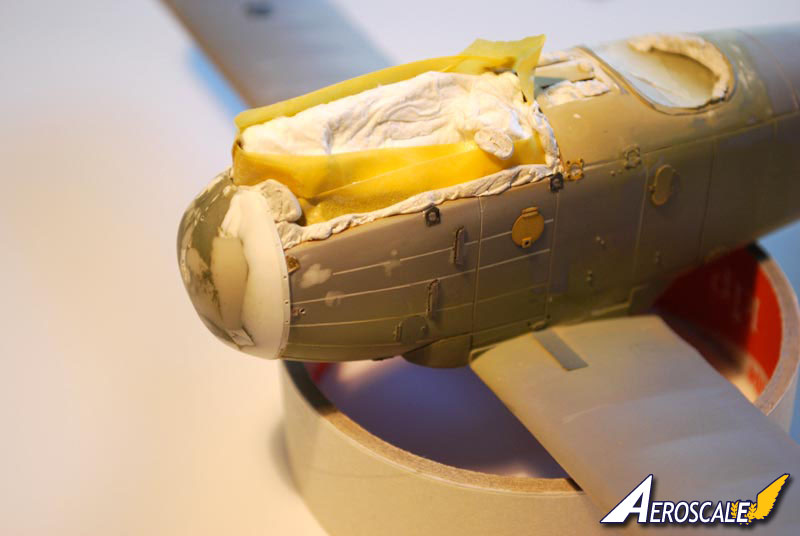
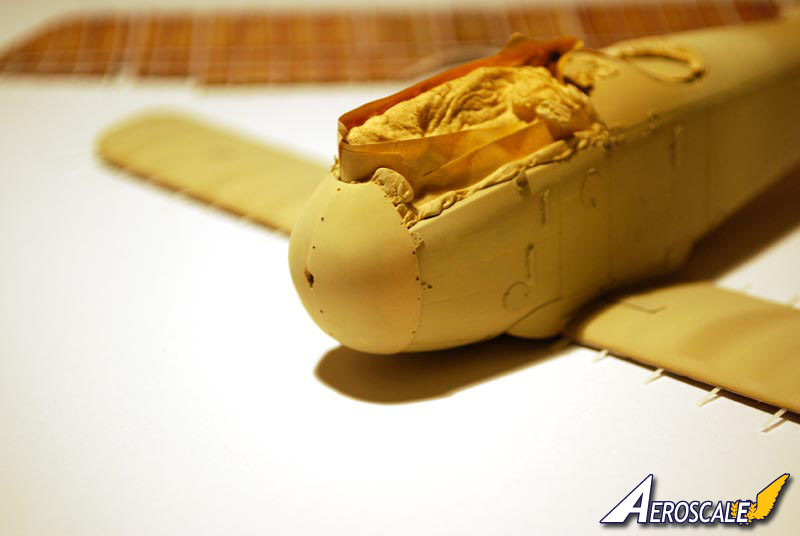
Nosejob: The B.A. nose was not quite the right shape height wise so apart from adapting it for the new airframe I had to make the whole thing a bit taller using plastic strips and putty. Once glued into place, I added a thin plastic strip - slightly banana shaped, to fit around the nose. This gave me a step and wrap around feeling of the noseshield to the fuselage rather than just an engraved line. After this, several layers of putty and a lot of sanding, and the nosejob was done.
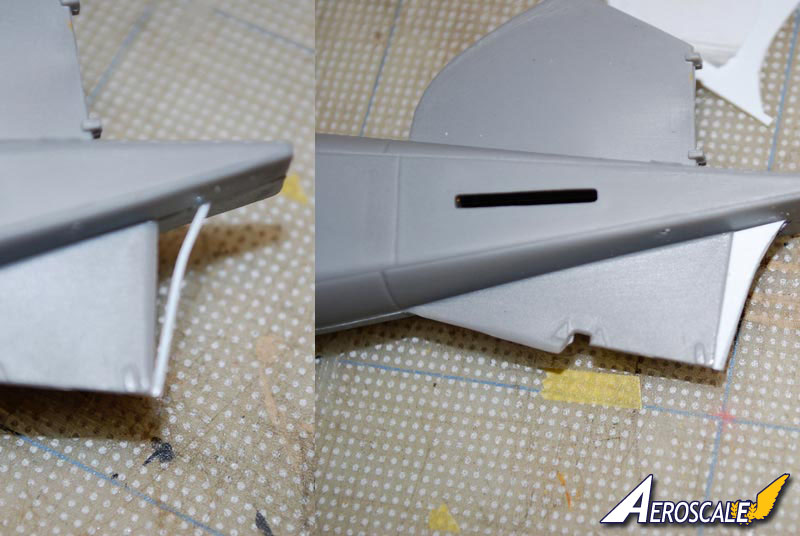
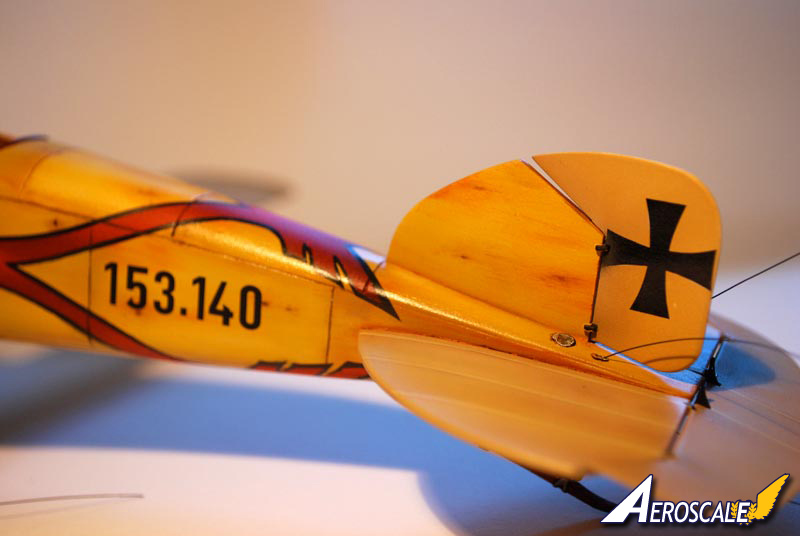
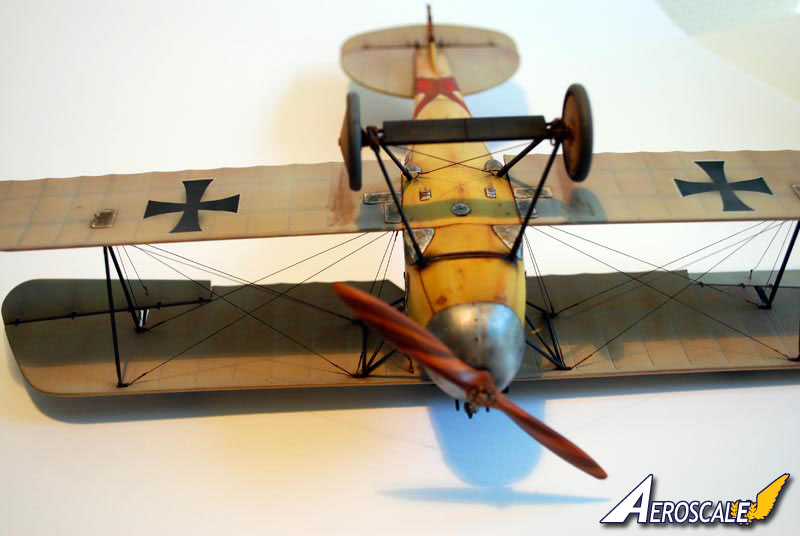
Tail: The OEFFAG tail is a bit different in shape, looking more like the later DV. A plastic rod was bent into shape, creating an outline. This was then filled in with plastic sheet cut to shape.
Fuselage: Nice as the Roden detail on the fuselage is, its not appropriate for this DIII type, a lot of filling and sanding had to be done, first removing the details later replaced later with PE bits. There was also the need for some rescribing of panel lines. Although the shape of the Austrian DIII is very similar to the German counterpart, most panels are different.
Decking: Here I used as much of the upper decking as I could from the Roden kit, shaping the access ports with thin plasticard. The doors were made from PE bits and plastic strips.
Engine Panel: I got some very helpful tips from the forum on how to make an engine panel out of a beer can, which worked really well.
PAINTING AND DECALS
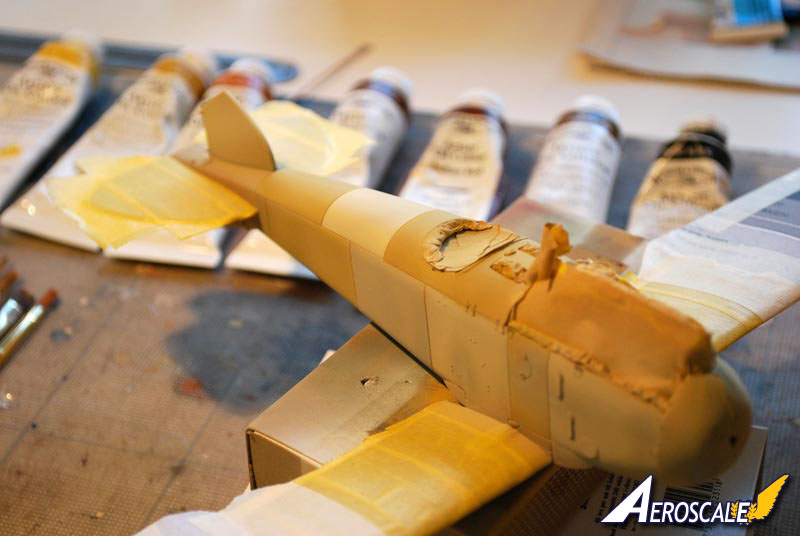
I mainly use Tamiya acrylics as a base but to get texture and feel to my liking, I use artist oils for wood and leather. Most other bits in the cockpit and the engine get an oil wash to ad texture or dirt/oil.Once the fuselage was finished I primed the whole thing using Tamiya sand yellow out of a rattle can, which is my preferred way to do it. This is a good base for both the wood, and the Clear Doped Linen that I was going for.
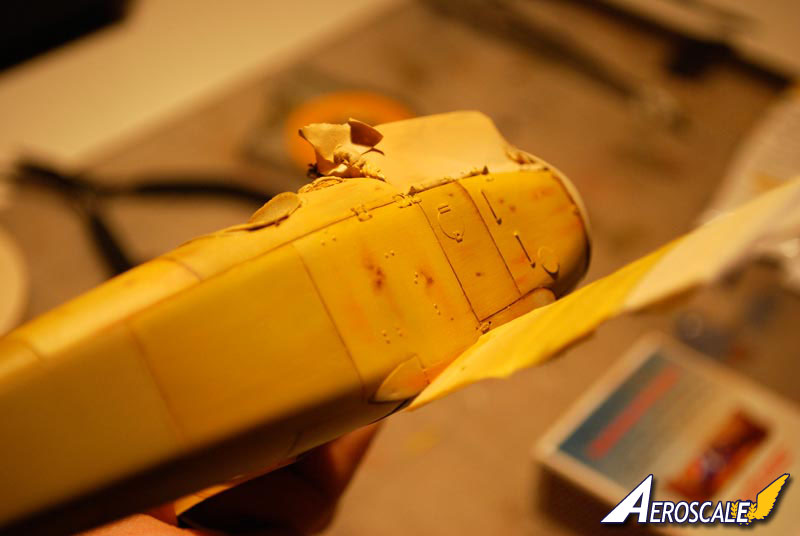
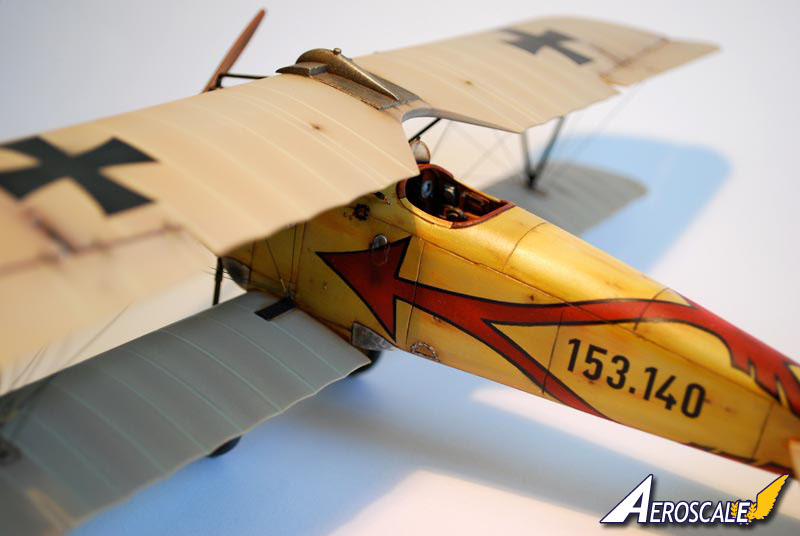
In preparation of the wooden fuselage, I painted the panels in various shades of beige. This was then painted with W&N oils, panel by panel, mainly in light yellow ochre, using a flat brush to give a woodgrain pattern. Then some burnt sienna to pick out some darker strains and knots. After about a weeks drying it was coated in clear gloss varnish.
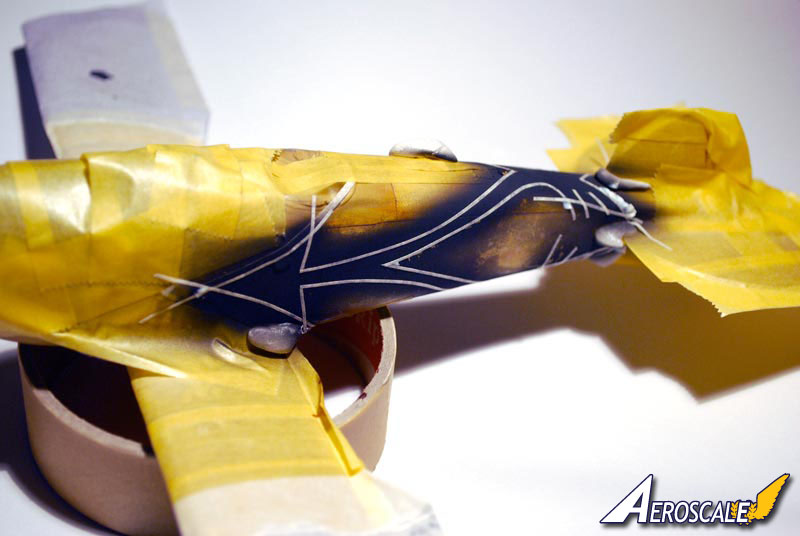
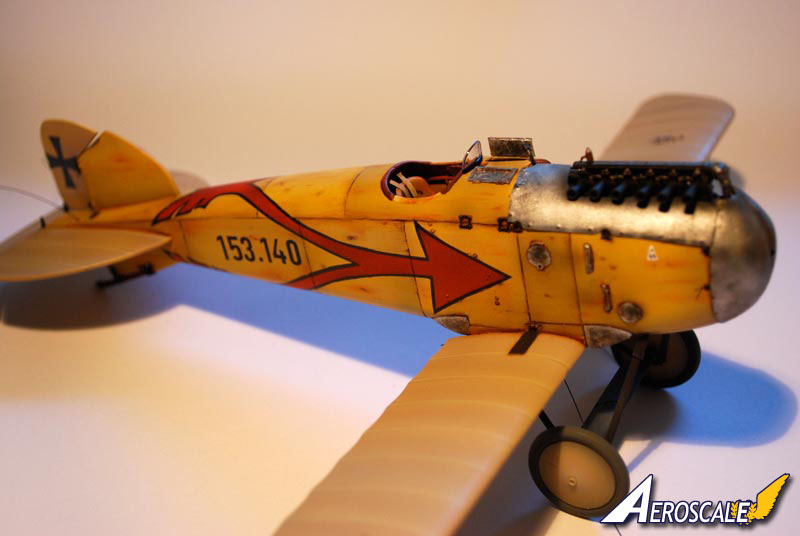
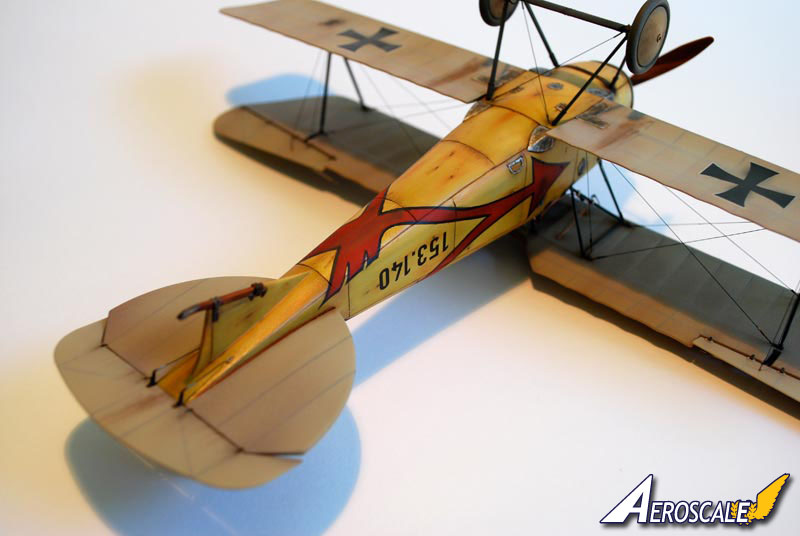
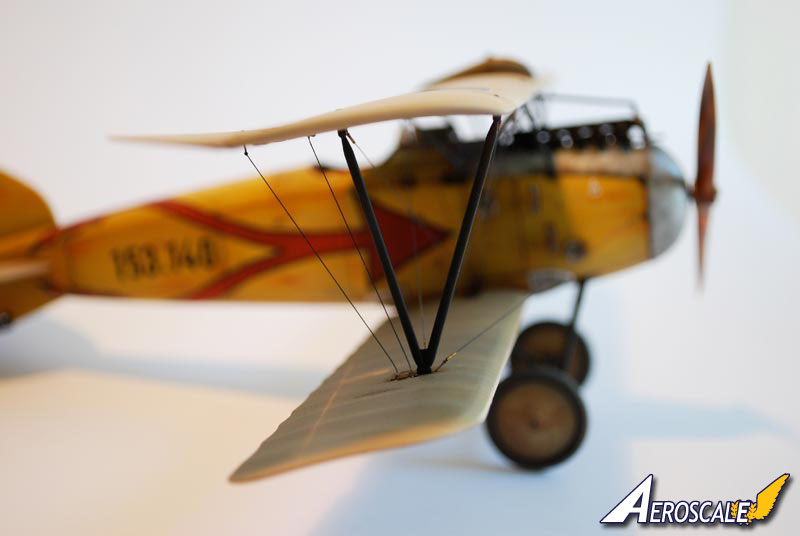
I had pondered on Albatros 153.140 as my marking option. The profile has some great looking arrows but they seemed very difficult to acheive. After a bit of debating on the forum I took the plunge; Using sticky airbrush film, I airbrushed them directly onto the fuselage a bit risky I didn't really fancy stripping the wood and start it all again... It was a success though and with some finishing touches I now had a nice arrow marking going.
With the arrows sprayed, decals mainly consisted of crosses from my spares box, Serial numbers came from Archer transfers, actually for German WWII armor, but can look accurate with some adjustments.
FINISHING TOUCHES
Rigging was done using fine fishing line, and for the first time I used buckles from Bobs Buckles. Together with micro brass tubes, they made rigging a simpler and more pleasant experience. As a final touch I did some light weathering with dry pastels underneath then the prop was put in place, and the nose job was finally done.SUMMARY
It proved a longer and more challenging project than I had first thought, but I did learn some new skills, thanks to the forum here. To me it was well worth the effort in the end. When I look over at the shelf where it now sits in between my other Albatroses, I feel very pleased to finally have an Austrian round nose in my 1:32 collection.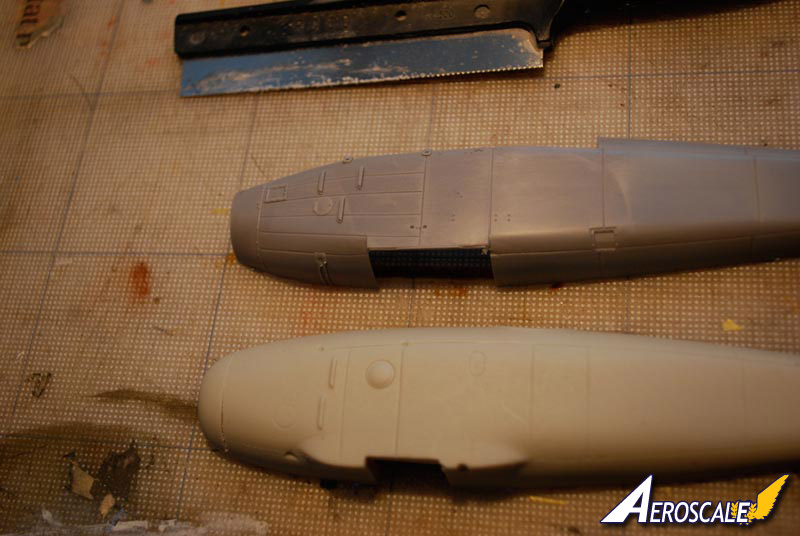


About the Author


FROM: VäSTRA GöTALAND, SWEDEN
Learning how to build kits in the 70s, when the weekly allowance went to either an Airfix or Matchbox kit. Me and my brother doing one or two each every week, then blowing them up Graduating to 1:48 Monogram in the 80s, and also turning towards some serious figurepainting. The late 90s was not a ver...
Comments
Wonderfull Albatros Mikael and amazing step by step presentation. Congratulations.
JUN 26, 2010 - 04:38 AM

An awesome build, and Mikael was so helpful and open with information...
Truly deserves this feature and more
Keith
JUN 26, 2010 - 05:28 AM

I second Keith thoughts.Excellent project and many great ideas and tips.Mikael you've set a very high bench mark for yourself with Oeffag D.III.I personaly can't to see what's next from your bench.No doubts you'll set even higher bench marks with your next project.
Highest Regards,
Gregory Jouette
JUN 26, 2010 - 08:43 AM

Hi Everyone
Thank You so much for all your kind words Me and the Albatros are quite overwhelmed with the attention this build has attracted. Also feeling very flattered with the feature!
Gregory my friend Thank You Yes this feature makes it a bit hard to "just" do an out of the box build here in future
Warmest Regards to you all
Mikael
JUN 26, 2010 - 11:44 PM

Great build! I really like the artistic paint work, and loved your step by step conversion notes!
RAGIII
JUN 27, 2010 - 02:43 PM

Hi Mikael:
I have to echo the sentiment of everyone on here. You really have done a great job turning a sows ear into a silk purse. If a B.A. Oefag ever turns up at a 'reasonable' price, I will definately turn to your feature for how to. You have definately raised the bar.
Thanks for sharing.
Best
Mark
JUN 28, 2010 - 01:00 AM
Jesper, RAGII and Mark Thank You so much your kind comments on the build they really mean a lot to me.
Glad you like the the step by step, hope it'll be helpful for anyone doing a similar conversion.
Warmest Regards
Mikael
JUN 28, 2010 - 04:14 AM

Thank You very much Péter Your OEFFAG Albatros is very beautiful too and in 1:72! I could not do that.
Warm Regards
Mikael
JUL 03, 2010 - 01:48 AM
Copyright ©2021 by Mikael Terfors. Images also by copyright holder unless otherwise noted. The views and opinions expressed herein are solely the views and opinions of the authors and/or contributors to this Web site and do not necessarily represent the views and/or opinions of AeroScale, KitMaker Network, or Silver Star Enterrpises. Images also by copyright holder unless otherwise noted. Opinions expressed are those of the author(s) and not necessarily those of AeroScale. All rights reserved. Originally published on: 2010-06-26 00:00:00. Unique Reads: 18369

WEB HOSTING BY


Copyright ©2021 AeroScale and Kitmaker Network, a subsidiary of Silver Star Enterprises
All Rights Reserved. Please read our Conditions of Use and Privacy Policy.
All Rights Reserved. Please read our Conditions of Use and Privacy Policy.