

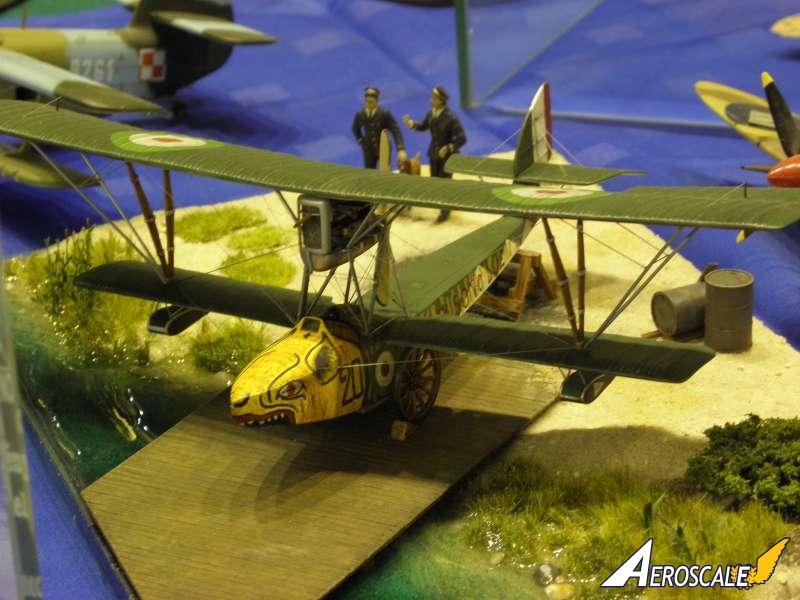
1⁄48Macchi M5
4
Comments
Macchi M.5 - Historical
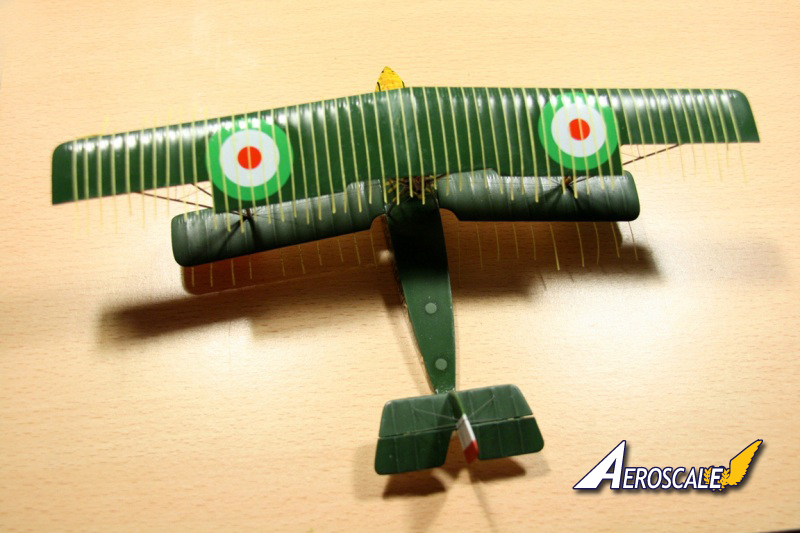
The Macchi M5 was designed early 1917 as a single seater fighter-flying boat, being a continued development of the Macchi Lohner L.3 model. The machine was introduced to the front units already in the fall of 1917 where they proved to be quite successful, and due to their speed they could even keep up with German or Austrian land-based fighter planes.The aircraft was armed with one, later two 7,7mm Vickers machine guns, and features the 160 HP (118 kW) Isotta-Fraschini- V.4B in-line engine.
The Varese-based manufacturer produced about 350 machines overall, some more units were built at the IAM plant in Napoli. The type stayed in operation till 1923.
The M5 earned a particular reputation for serving with the US expeditionary corps in Italy, where C Hamann received the first Congressional Medal of Honor ever granted to a Naval aviator.
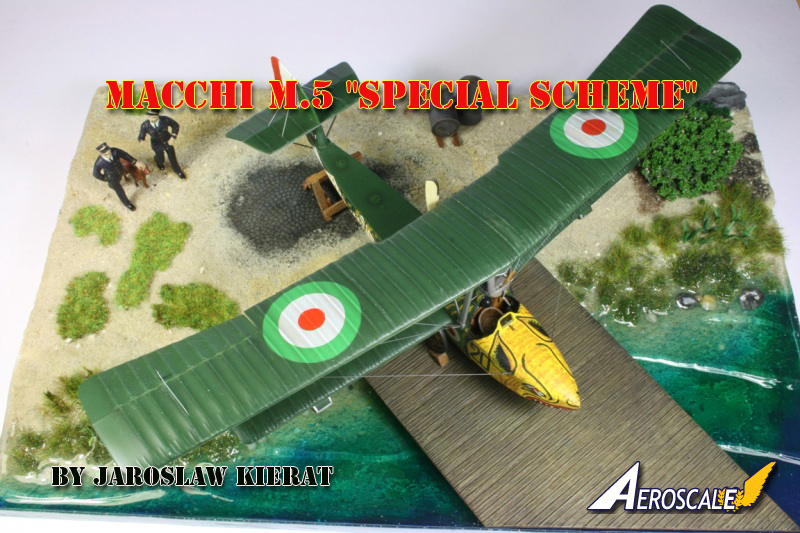
The built model features the aircraft with the serial number 13041,which served till July 1918 in the 261. Squadron of the Regia Marina (Royal Italian Navy) at was stationed close to Venice. It was flown by the leader of the unit, Domenico "Pepuzzo" Arcidiacono (military rank Sottotenente di Vascello).
Introduction
Sometime in 2008, at the Euro Scale Modelling of IPMS Holland in Utrecht I got seduced by the Devils Advocate in person, my friend Aleks to buy this for me so far unknown kit. As it proved later, its sometimes better to resist the temptationThe kit
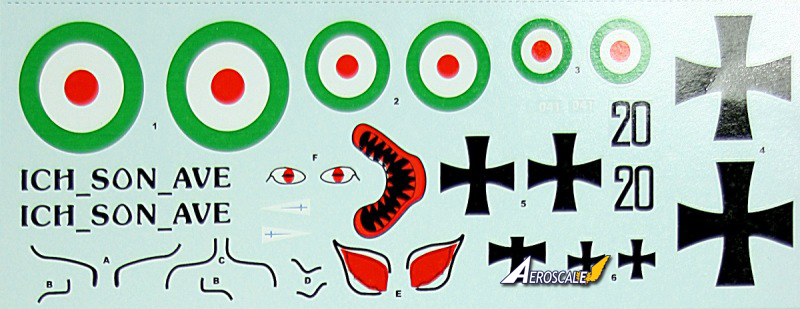
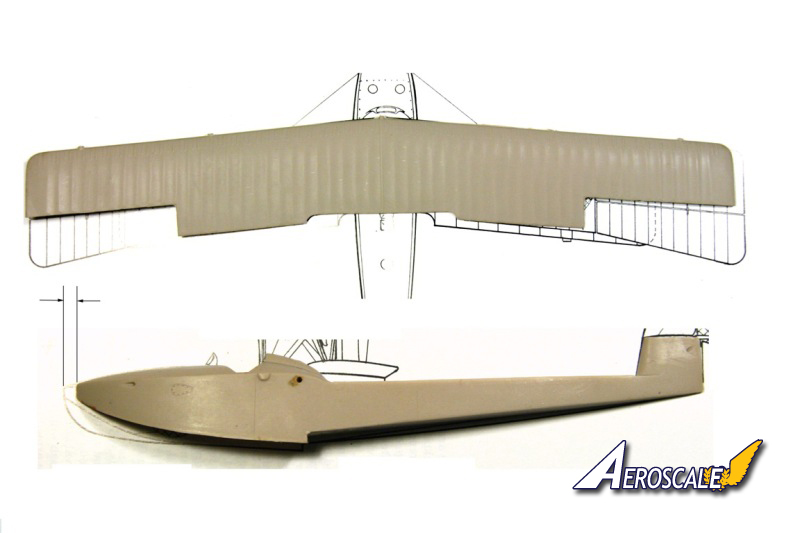
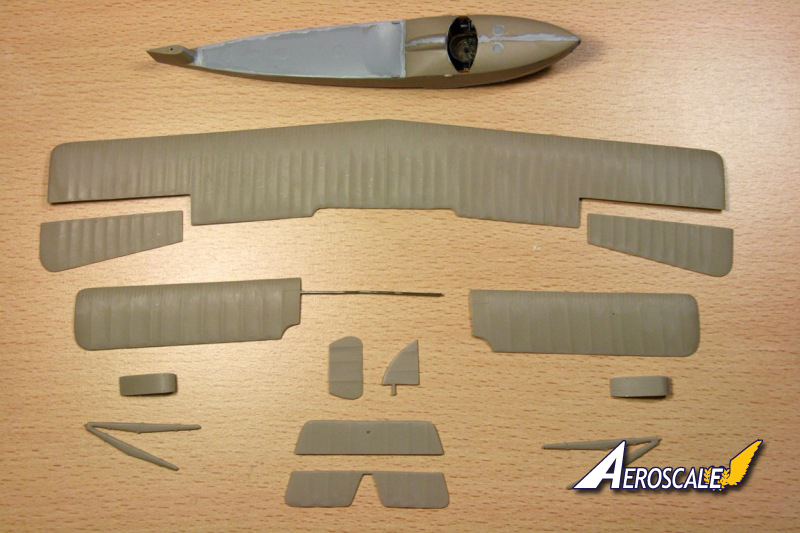
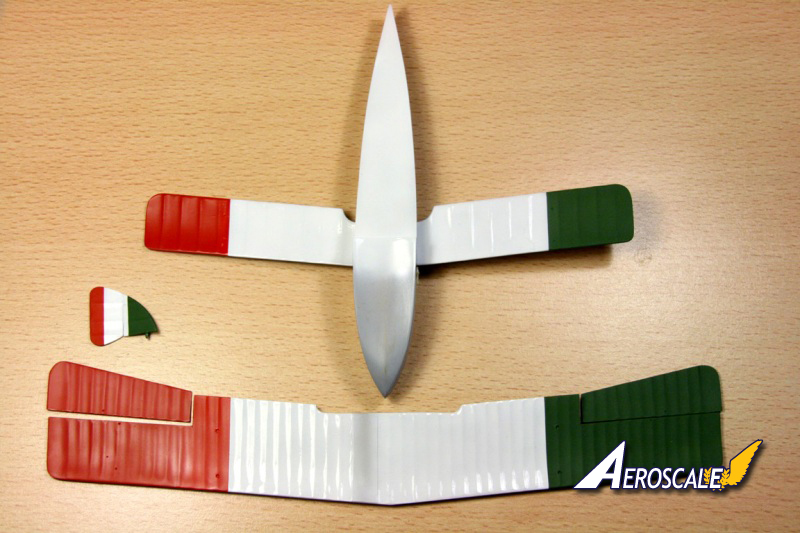
At the first glance, the contents of this rather expensive kit (I paid 36 Euro) looks rather promising. For a short run kit acceptable surface roughness, no visible casting defects or flash. Attached was a bag or resin components. There were no PE parts, though, which is generally common with models of the type and price. Additionally, theres a decal set, with a rather strange writing on it.
The instruction is rather general, so theres no way without the Windsock DataFile Nr.86 by Gregory Alegi.
With the data file on hand, I checked the accuracy of the parts across the board they appear to be on the small side. Assuming, the Windsock files are correct, the Fly model seems to be more in the 1:50 scale.
Due to the nature of the kit, it is only recommendable to experienced and highly frustration tolerant modelers.
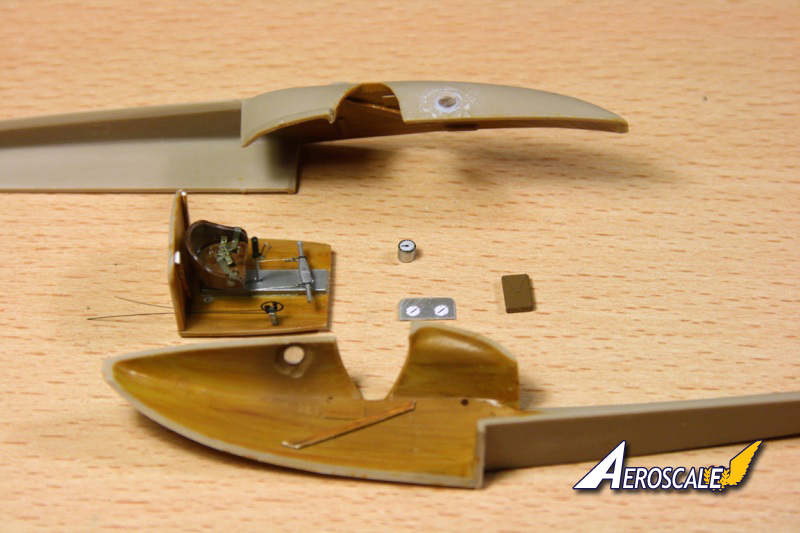
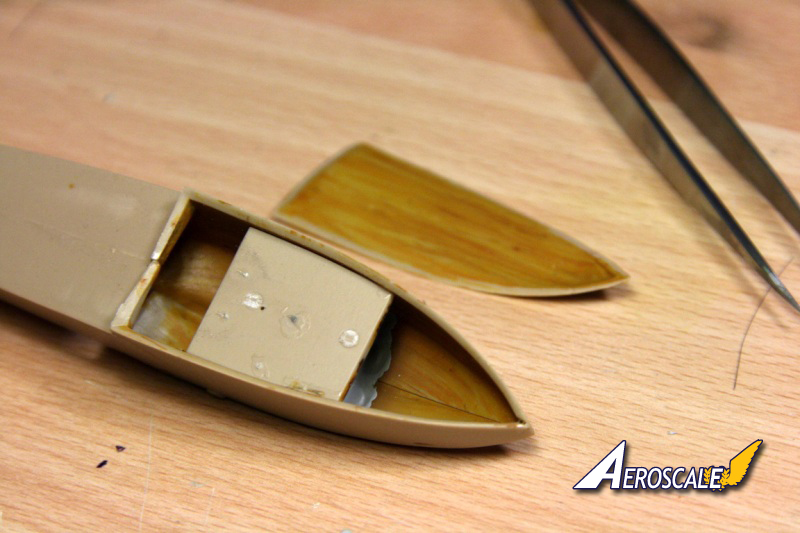
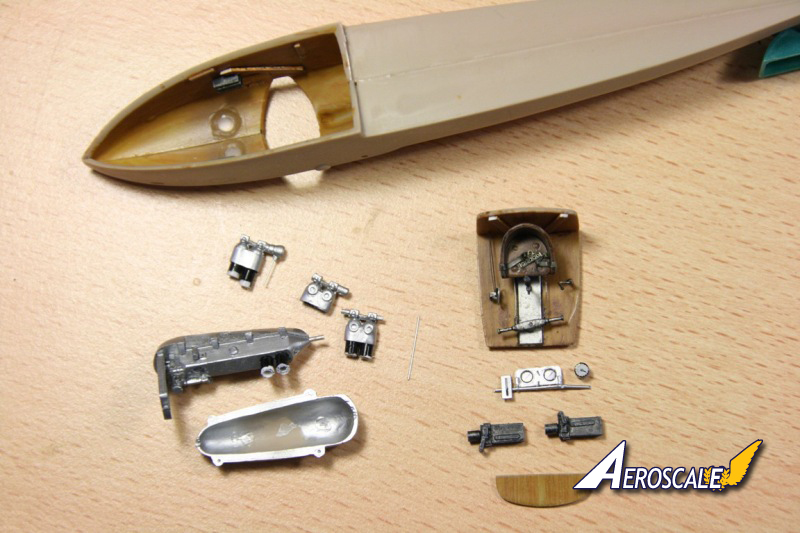
Cockpit
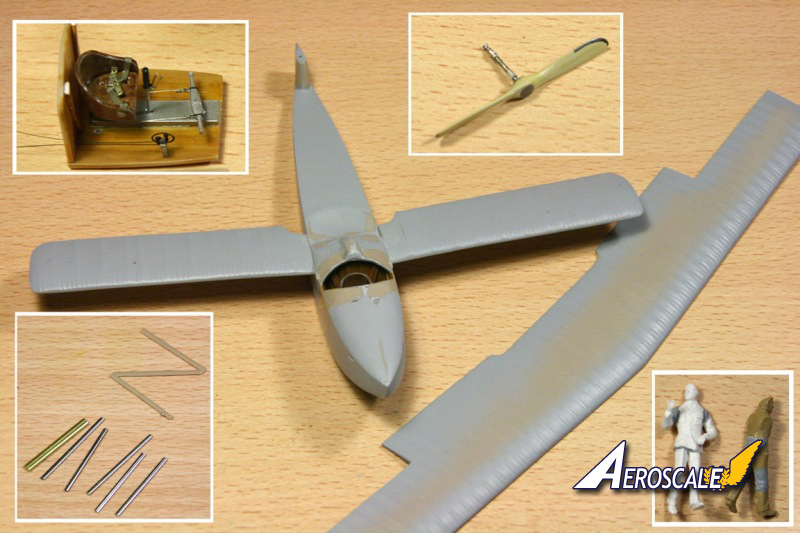
A dry fitting showed, that the attached components were hardly useful, so I decided to build them from scratch. The instrument boards were made from P.E leftovers, the gauges sketched on a PC and printed. The guns, stick and the control cables were made from bits and pieces from the leftover box.
The instruction (nor the Windsock) mention any cockpit internal painting specification whatsoever, so I stayed with the vague hint, that it was varnished natural wood.
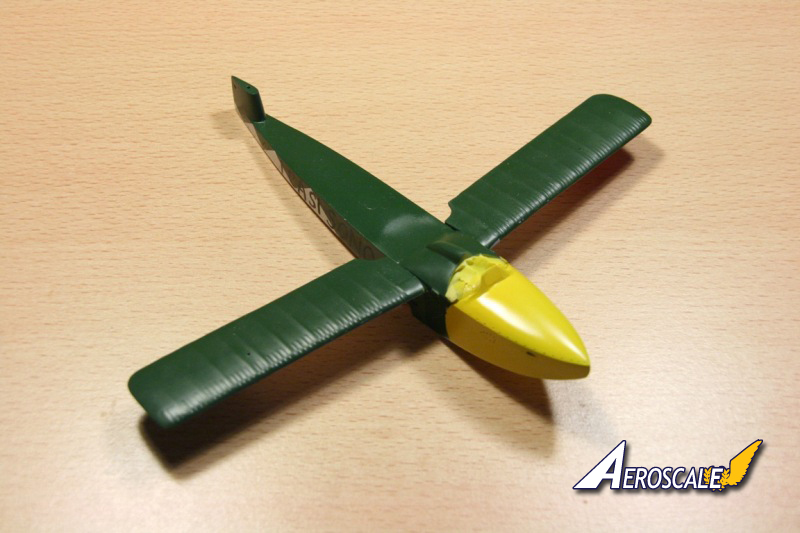
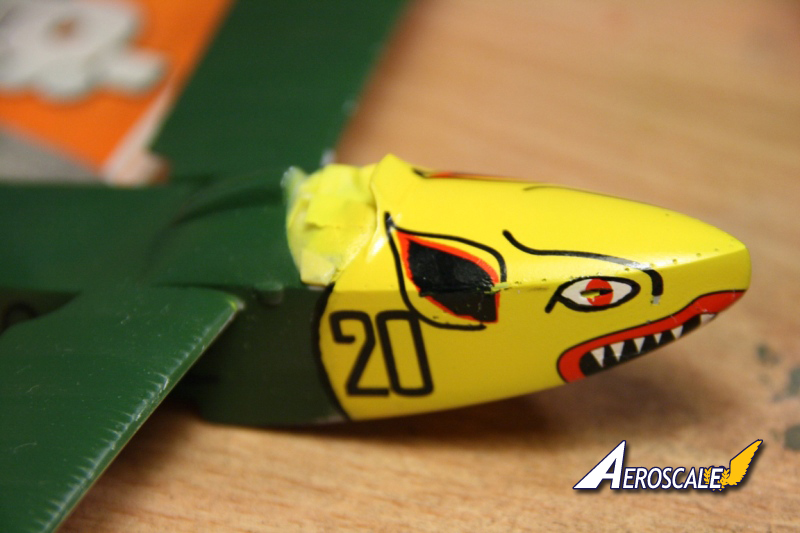
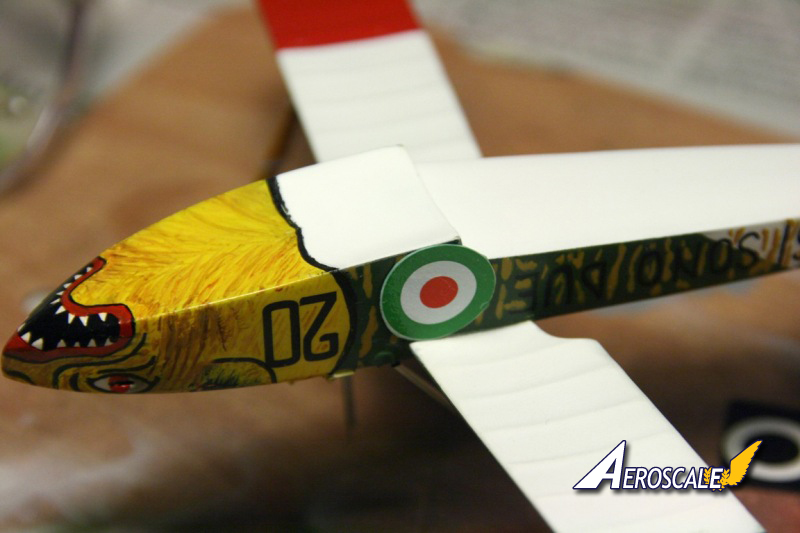
Dragon head
The most striking feature of the special scheme is the artistically painted dragon head. Since after fixing the wings, there would be little space to paint this artwork, I decided to address this at an early construction stage.
The kit foresees for this purpose several curvy lines on the decal sheet. Therefore I first painted the bow of the hull yellow, and then tried to apply the decals. Notwithstanding the facts, that they didn't want to comply to the shape of the part, in the end they looked far different from what could be seen on the well preserved original photographs. Since the original was apparently painted by some maestro, there was no other way, than to unroll the palette of the artists oils, and try to realize the head using a fine brush and hues from ochre to burnt umbra.
The writing
After a thorough study of the pictures in the data file, the writing "i casi sono due" (there are two possibilities) can be discerned. Thats a quote by an Italian Variete artist, Ettore Petrolini, who was rather famous at that time.
The kits decal sheet offers the writing: "ICH_SON_AVE". Upon my email request Mr. Valek of Fly just stated dryly that hes aware of this, but there wont be a correction sheet.
As on the real plane the letters were drawn by hand, I used a thin black marker to create this writing on the fuselage sides.
Re-building the engine
The attached engine is cast in one piece from resin. Since this part decisively influences the appearance of the kit, extra care was needed in that matter.
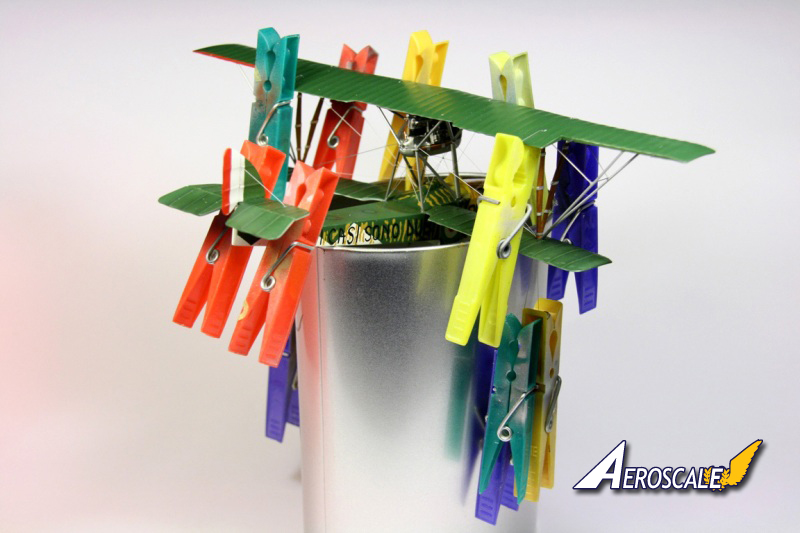
The engine in my kit had a parting line defect, which led to a skin between the cylinders, which could not be removed. For that reason, I cut the engine apart with a micro saw, and re-arranged the cylinders, exhaust s and other bits and pieces with parts from the PE leftovers.
Painting was done with Alclad, weathering with artists oils and MiG pigments, which substituted for rust.
The pusher propeller was too large, and would not permit rotation. I shortened it significantly, and re-shaped according to the Windsock images.


About the Author


Comments

Very nice build. It was in the recent contest in Poland?
VIII contest, Bytom Feature
MAR 19, 2011 - 12:47 PM

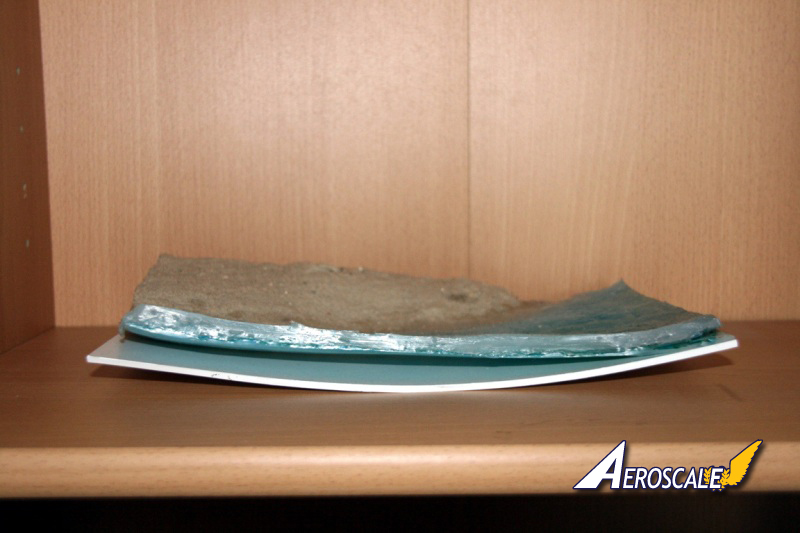
Very nicely done ! I really like how the water turned out , looks so real !
MAR 19, 2011 - 04:27 PM

Well observed
It was on display, on the IPMS Silesia club table, but not in the competition.
MAR 19, 2011 - 10:44 PM
Could you tell us some details about the build? Highs and lows. . .
MAR 20, 2011 - 06:40 AM
Copyright ©2021 by Jaroslaw Kierat . Images also by copyright holder unless otherwise noted. The views and opinions expressed herein are solely the views and opinions of the authors and/or contributors to this Web site and do not necessarily represent the views and/or opinions of AeroScale, KitMaker Network, or Silver Star Enterrpises. Images also by copyright holder unless otherwise noted. Opinions expressed are those of the author(s) and not necessarily those of AeroScale. All rights reserved. Originally published on: 2011-03-18 00:00:00. Unique Reads: 9211

WEB HOSTING BY


Copyright ©2021 AeroScale and Kitmaker Network, a subsidiary of Silver Star Enterprises
All Rights Reserved. Please read our Conditions of Use and Privacy Policy.
All Rights Reserved. Please read our Conditions of Use and Privacy Policy.