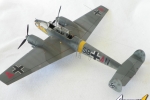
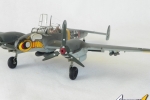
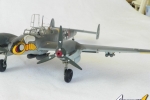
1⁄32Messerschmitt Bf 110
9
Comments
intorduction
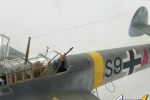
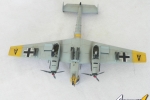
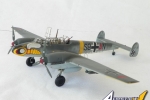
Briefly, in narrative, the kits is Dragon's very good but terribly explained (the instructions are HORRIBLE) 1/32 scale Bf 110C-7 serving with 5./ZG 1 on the eastern front. As I mentioned, the kit instructions are a disaster and I'd like to express many thanks to Brett Green who published an errata giving me the guidance I needed to navigate construction.building the kit
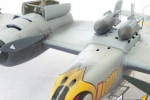
As far as the kit itself, many have provided their feedback and I won't go into that here. Let it be sufficient to say that all the positive comments published regarding the quality of the kit are true. It is overall an excellent kit. I do take exception to the very difficult and moderately poor fitting fitting multi-part engine cowlings.My kit was built out of the box with the exception of an exterior Eduard PE fret that added very little to the original kit. I didn't care for the kit decals as the color was way off and they are thick and brittle. Considering the Wasp markings rely on decals flexibility to conform to the natural curve of the nose cone, the kit decals are unacceptable for this alternative. Accordingly, I purchased EagleCals' quite excellent set #117. The decals were thin, in-register and settled down into the kit's recessed panel lines very well. They are not for the novice modeler however. It will take an extraordinary level of patience and poise to get them to to set down right. In my case, I had to make several small slits on the decal where the rate of curvature was too great for the decal to set down without a bulge. The slits allowed the decal to sit flat conforming to the shape of the nose cone. The antenna was made from fine fishing tippet and insulators scratchbuilt from 0.015 plastic rod.
Comments
Beautiful Zerstorer, Jim. I like the camouflage and markings. Now you just have to find a place to put it.
Thanks for sharing
MAY 22, 2012 - 08:27 AM
Thanks Jesper, I appreciate the kind words. You ain't a kidding about the place to put it part, it takes up a lot of space on the shelf!! Take care.
Jim
MAY 23, 2012 - 10:31 AM
Hi Jim,
Good looking '110! That Wespe insignia, how can one not love it? I remember when Fujimi issued a 1/48 110 in the 70s with this marking.
Well done!
MAY 30, 2012 - 02:57 PM
Thank you Frederick, it too is one of my very favorites! To top it off the Eaglecals set is outstanding. Shortly I will undertake a 190G with the Wesspen markings, very cool stuff!! Take care and thanks again for the kind words :-)
Jim
MAY 30, 2012 - 05:00 PM
OOPS, meant to type 109G, not 190G!! I woulda sounded pretty stupid!!
Jim
MAY 30, 2012 - 05:03 PM
very nice Jim...
here's a page on ZG 1 109s that you might find of interest..
LINK
JUN 02, 2012 - 09:26 AM
Outstanding! Thank you very much! This is a great reference, I really appreciate it! And, thank you for the kind words :-)
Jim
JUN 02, 2012 - 03:06 PM
Very nice work all around. The camo scheme with the mixed splinter/mottle pattern is impressive and not easy to do.
The wasp nose art -- which must have been really delicate work -- is great. When I built my first Bf 110 I gained a lot of respect for the machine as an underestimated and often overlooked plane. Put a scary wasp on the nose, and you get a sense that there is more to the Bf 110 than its inferiority to the Spitfire.
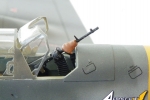
Is the leather mounting on the machine gun added to the kit? It's a nice touch.
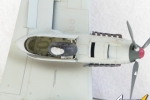
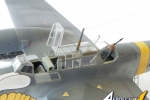
Could we please see some close-up photos of the cockpit? I'm not sure how detailed the kit is in that regard but the Bf 110 has a really interesting cockpit -- not one you want to build with poor instructions.
Last thing -- it's 1:32 -- and I thought my 1:48 Bf 110 was difficult to find a place for...
JUN 06, 2012 - 08:03 PM
Hey Jason, thank you for the kind words, I really appreciate that. You're right, the mottled camo and wasp nose decal were challenging. I think it tool me about 15 minutes to get the wasp to conform to the fuselage contours properly and be symmetrical about the planes centerline. It was woth it though, I have always loved these markings. I also share your facination with this machine, it was really something. The leather mounting was included in the kit, the trick was mixing the paint to match leather. I will sweet talk my photographer and if I can convince my wife to take some interior close-ups I'll try and figure out how to post them. It is fairly well detailed and I should have done a better job including them, sorry. Take care and thank you again for the kind words.
Jim
JUN 07, 2012 - 01:43 PM
Copyright ©2021 by Jim Whitbread. Images also by copyright holder unless otherwise noted. The views and opinions expressed herein are solely the views and opinions of the authors and/or contributors to this Web site and do not necessarily represent the views and/or opinions of AeroScale, KitMaker Network, or Silver Star Enterrpises. Images also by copyright holder unless otherwise noted. Opinions expressed are those of the author(s) and not necessarily those of AeroScale. All rights reserved. Originally published on: 2012-05-12 00:00:00. Unique Reads: 9172


