

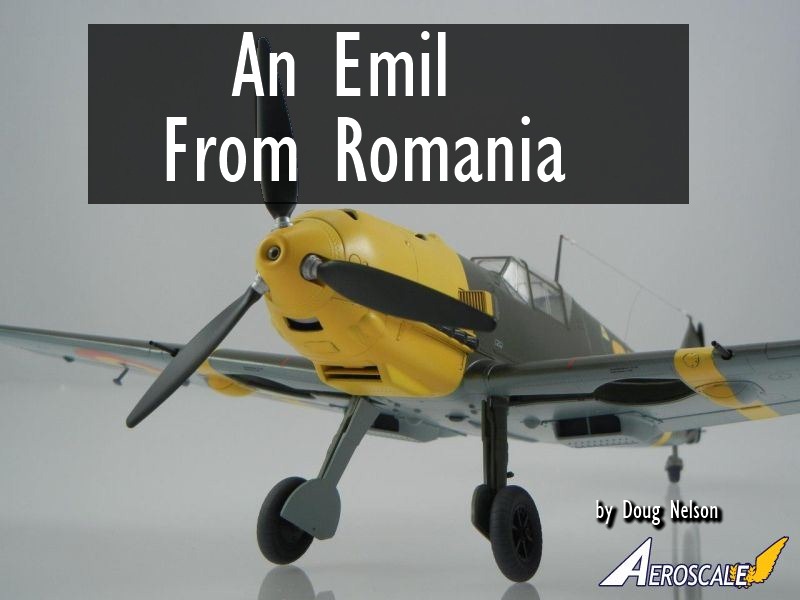
1⁄32An Emil from Romania
5
Comments
history
The Royal Romanian Air Force used mostly German and Italian aircraft during the Second World War. 50 Bf 109 E3/4 equipped Romanian fighter Grups.the model
I've always liked the angular looks of the Messerschmitt Bf-109E series. While the later F/G/K versions look good, to me the E series are the best looking. I was very pleased when a new-tool Bf-109E kit was released, but now feel really spoiled with two new-tool 1/32 109E kits available.While it is not my intent to compare the two current kits, the CyberHobby and Eduard, with this build, having built both I can say that from my perspective at least, both kits have their advantages and disadvantages, and I would compare them to the differences between a Hasegawa (Eduard) and Tamiya (CyberHobby) kit in 1/48. In the end it really comes down to which kit you prefer, and which you like the final looks of better.
Having built two CyberHobby 109E kits now, I feel qualified to make some observations regarding the kit. They are as follows:
Pros:
- Excellent shape
- Excellent and accurate detailing
- Beautiful main aerial mast with hook
- Full brake lines
- Nice wheels
- Positionable control surfaces with convincing scale hinges
- Wing tie-down hooks
- Nicely rendered flexible plastic wheel well dust covers
- Easy to assemble with well fitting parts (exception noted below)
- A few errors and vague placement details in the instructions
- Nose can be difficult to assemble and fit to the fuselage following instructions
- Missing fuselage MG "blast tubes" that are clearly visible on the finished model
- Some mold lines that can be hard to spot until painting begins
building
Overall, as seen in my build log, the build was pretty effortless and drama-free. Having previous experience building a CyberHobby 109E, I was prepared for any areas that needed extra attention. The PE control surface hinges are not difficult to assemble if you take your time and just focus on one section at a time. Knowing that the fuselage gun tray detail would not be visible and would cause fit issues with the cover, I was able to simply leave it out this time, rather than install it and remove it. The same with the rudder attachment holes in the fuselage. And finally, knowing that the engine "pod" was not going to fit (for me anyway) the way the instructions would have you assemble it, I was prepared to attach it the way I did with some added styrene tabs to help hold it in place. And hopefully my build blog highlighted these areas and my solutions to them for future builders of this kit. Even with those areas, the kit overall was a real pleasure to build, with nice, positive parts locators and no filler being needed anywhere, with the minor exception of the wing cannon access covers. Few kits can be built as easily!paint and markings
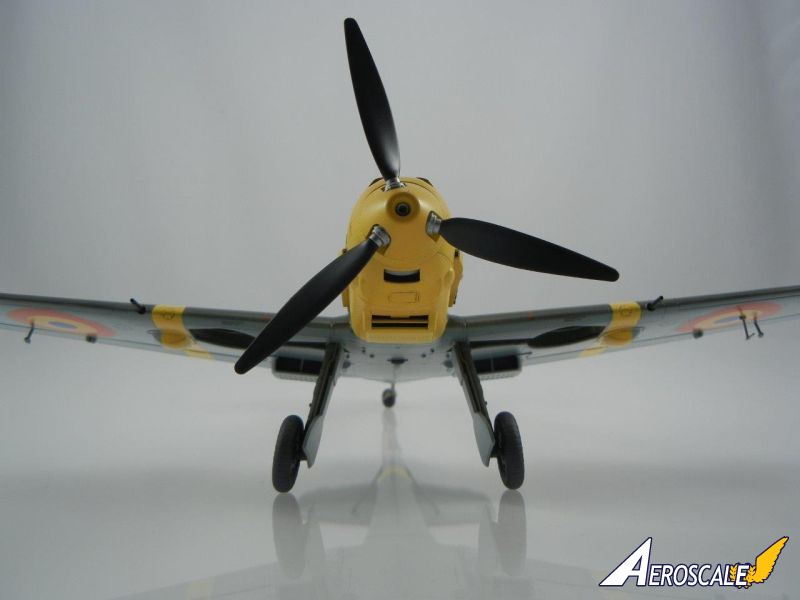
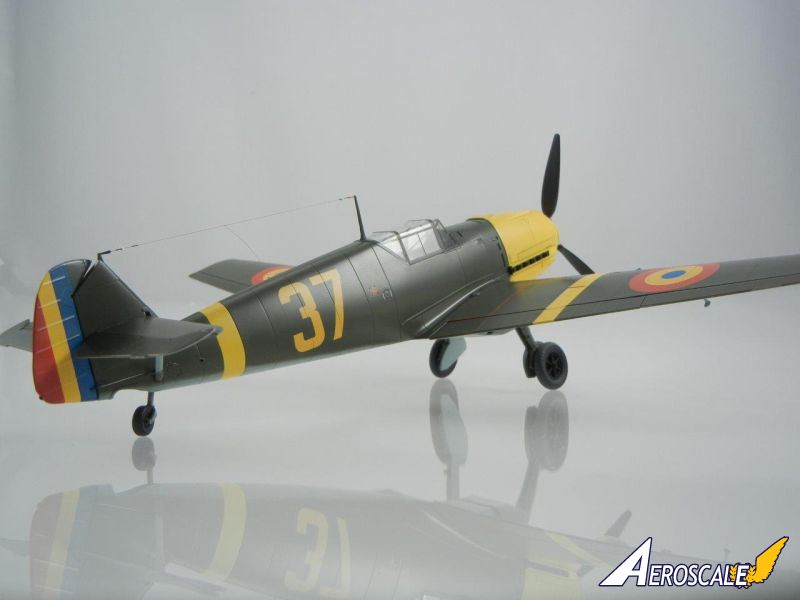
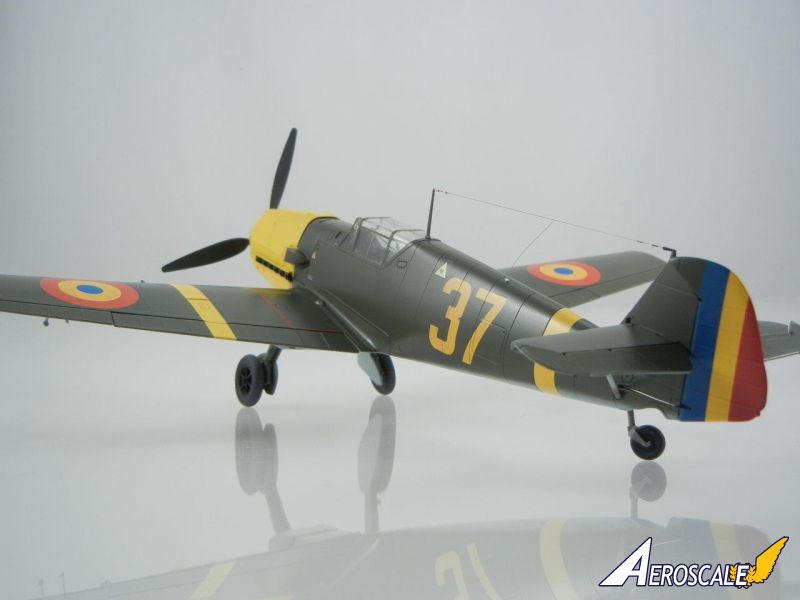
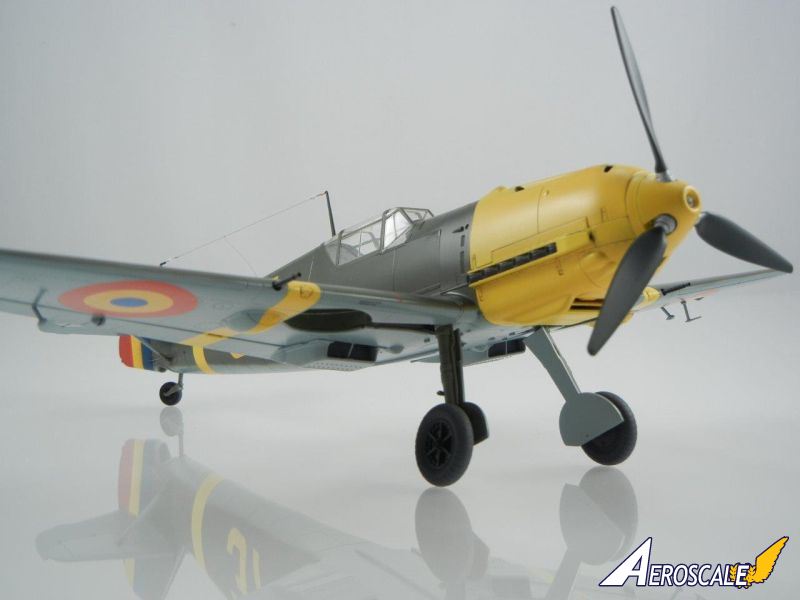
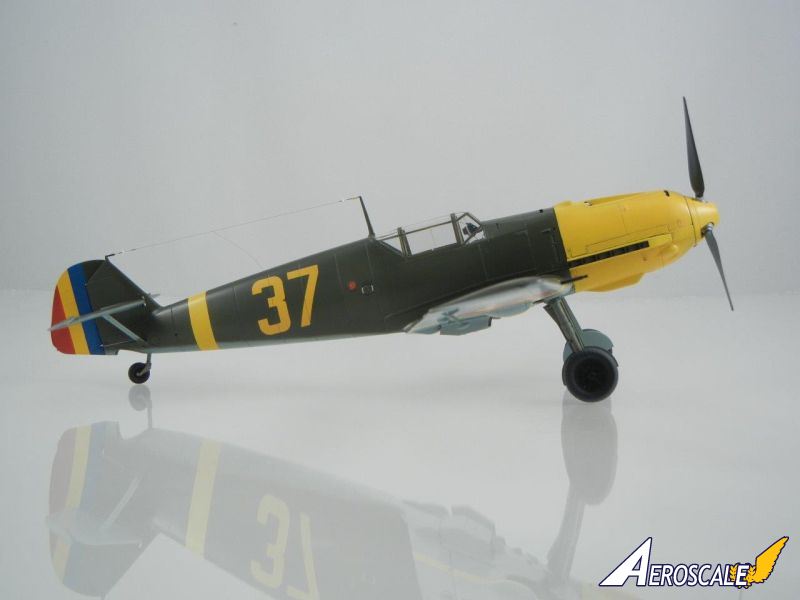
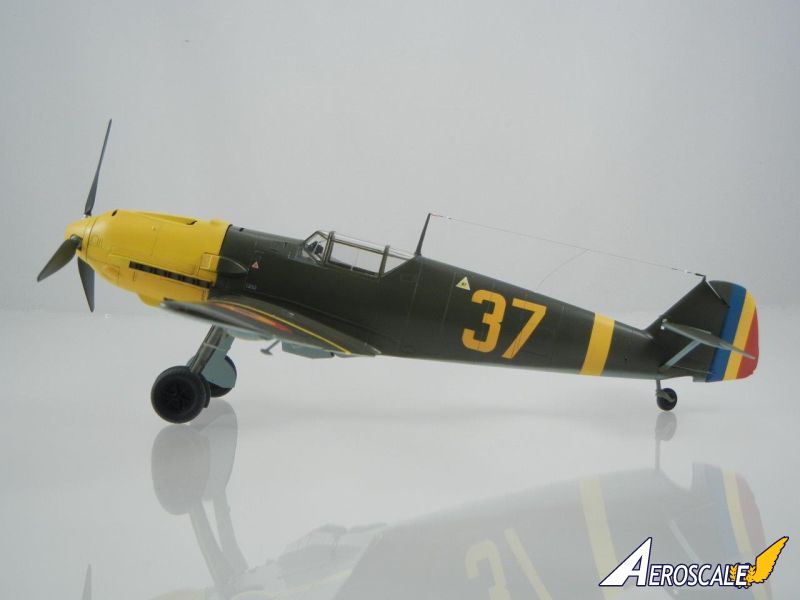
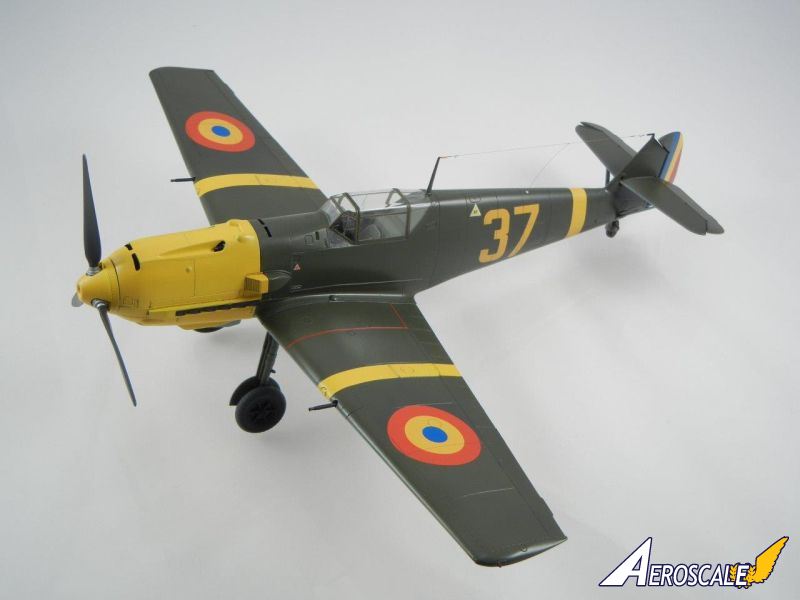
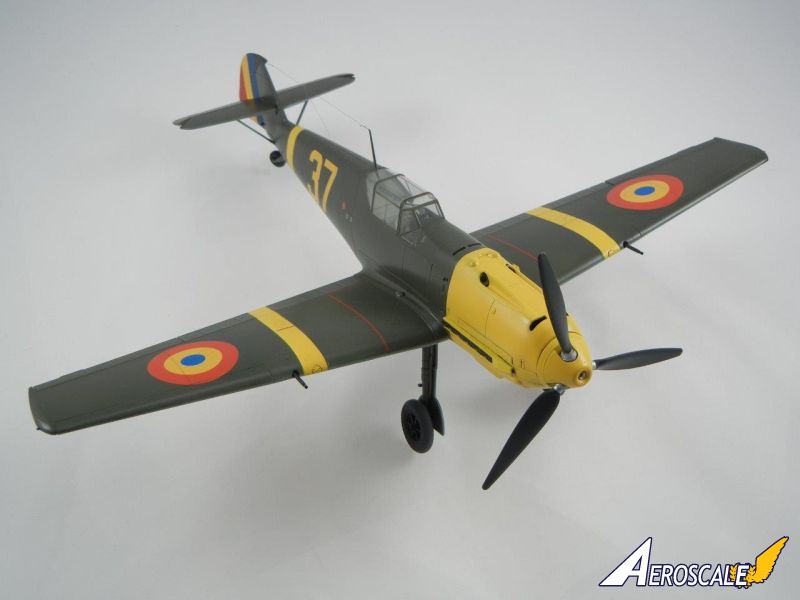
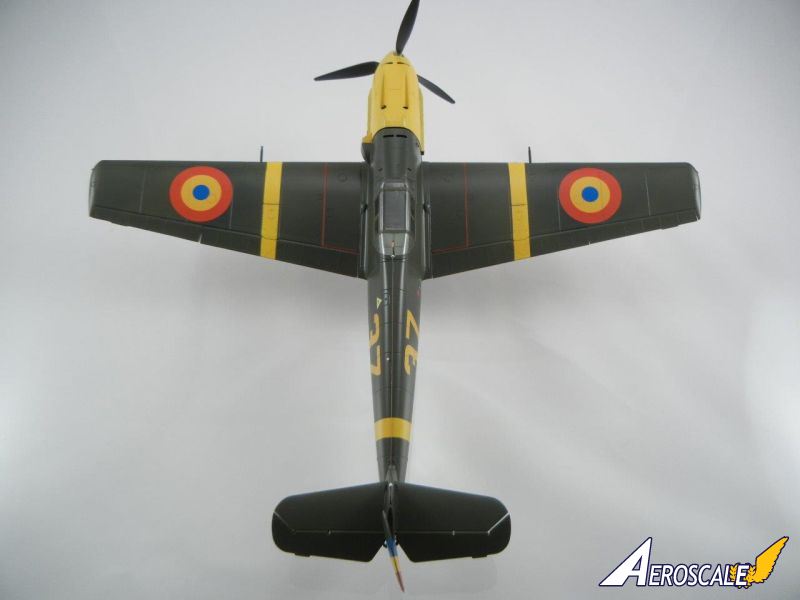
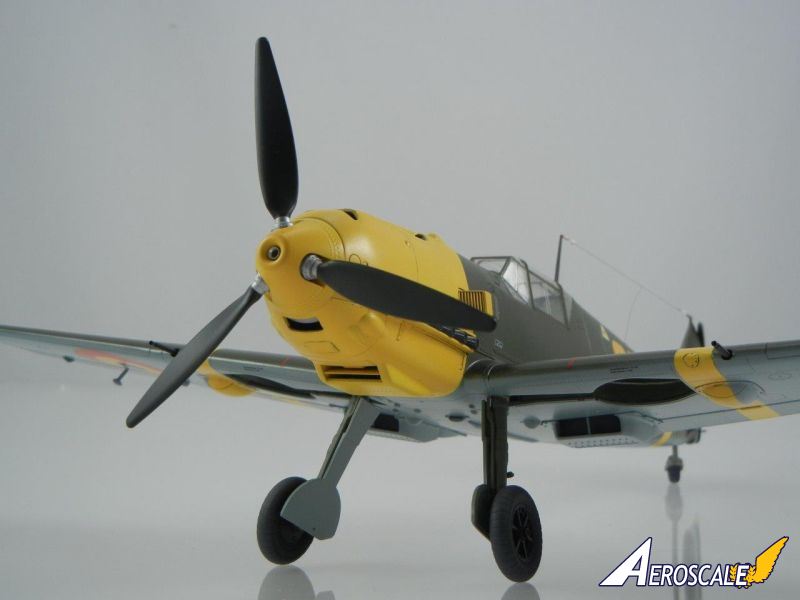
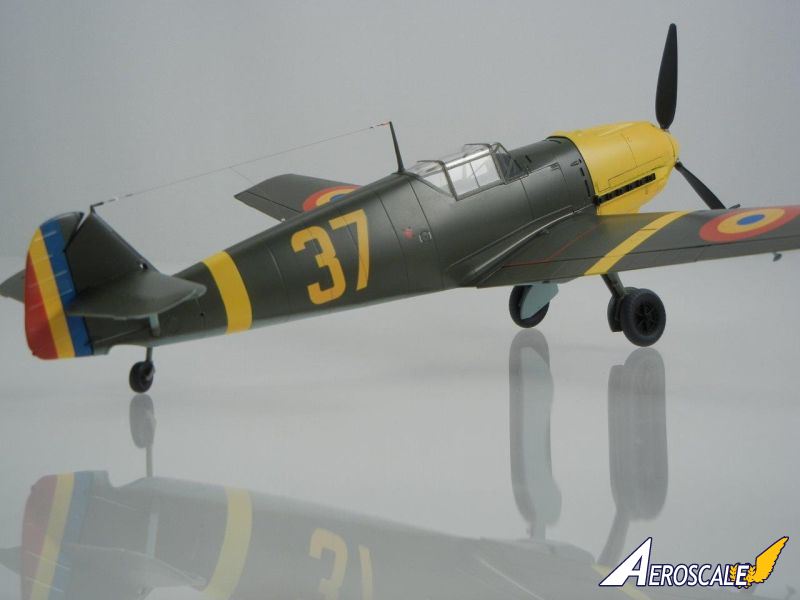
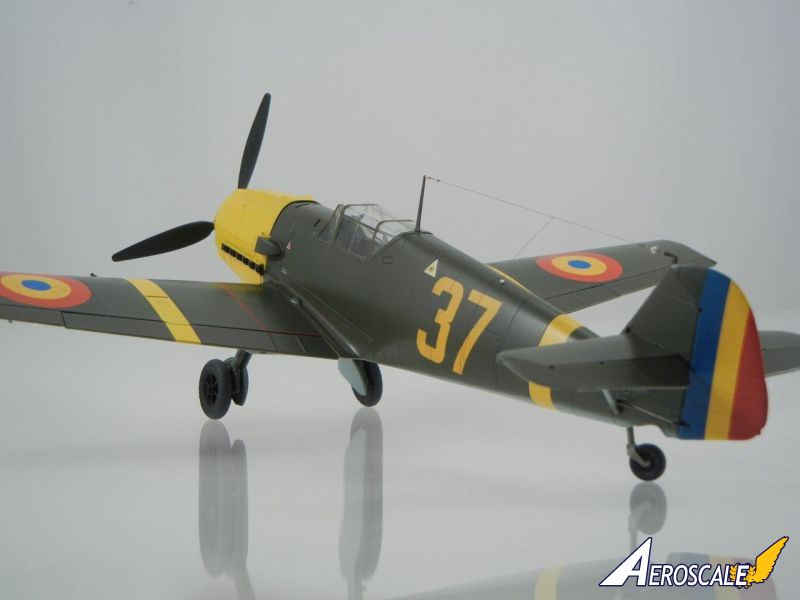
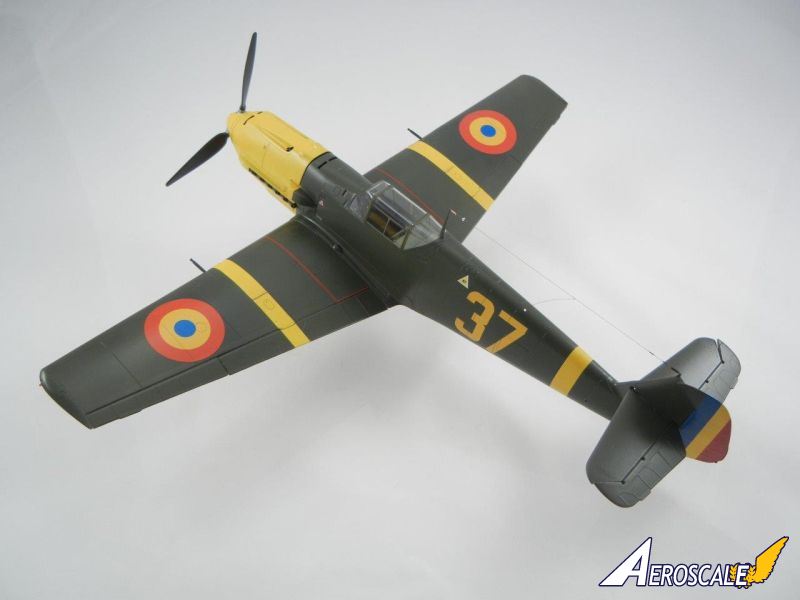
As I have several 109E-3 schemes I want to build, I had to decide which to do first. As I see my display case as a kind of "mini-museum" I thought it would be nice to add a 109E in somewhat different markings. Although I usually prefer to build aircraft solely in schemes of the country of origin, I had to make an exception for this attractive Romanian Air Force scheme. First, because it looked good and was different, and two, because my wife is Romanian. This model represents No.37, Grupul 7 Vanatoare, based at Pipera-Bucharesti, as delivered in March 1941. There are many photos of these aircraft at the time of delivery and shortly thereafter, which show them in RLM 70/65 . Note that Luftwaffe paint was semi-gloss when applied, so I represented this on my model as well. Not really visible in the accompanying photos, but barely perceptible on the model, are the original German markings and camo scheme on the upper wings showing through the new RLM70 overcoat, based on photos of this airframe.I used the excellent RB Productions Romanian Bf109E Part 3 decal sheet. Other than an initial self-inflicted problem, the decals went on beautifully and I would highly recommend them (or Part 1, Part 2) to anyone looking for a colorful and out-of-the-ordinary scheme for their own 109E. Other aftermarket used were the excellent Airscale instrument decals, Master 109E barrel set, and an MV lens for the gunsight. "Scratch-built" details include the 11 part aerial wire and assorted parts, some stainless steel wire for the rudder control cables, plastic tube for the fuselage MG "blast tubes", some aluminum tube for the spinner cannon tube and some stretched clear sprue (painted) for the wingtip lights.
conclusion
As I have a few more CyberHobby Bf109E kits, as well as RP Production's Romanian Bf109E part 1 and part 2 decals, you can be sure I'll be building at least one more 1/32 Romanian 109E for my collection as well!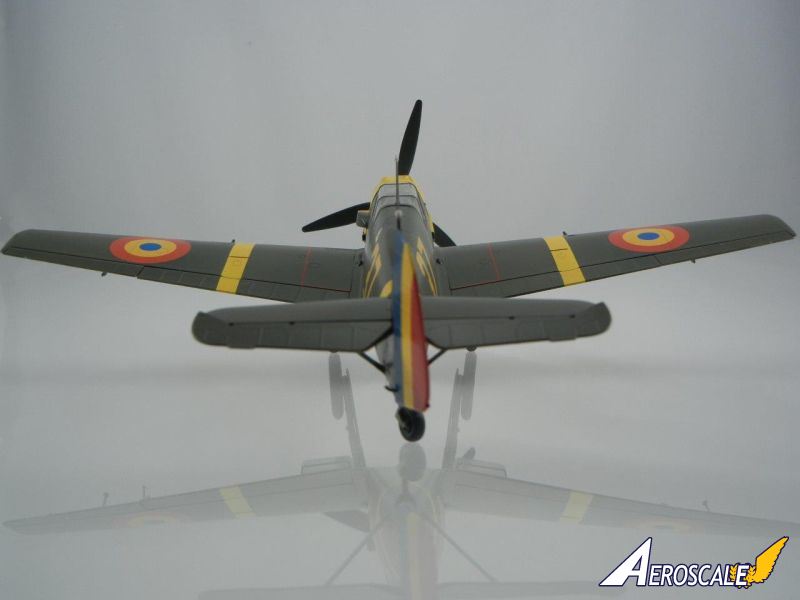

About the Author


FROM: GEORGIA, UNITED STATES
I've been modeling on and off for over 40 years. My primary interests are WW1, Interwar and WW2 aircraft, although I do build an occasional WW2 armour kit. I used to build 1/32 kits back in the 80's, but switched to 1/48 in the early 90's when all the nice new kits started showing up. I've sinc...
Comments
Doug, I followed your entire build blog from start to finish, so you know how enthusiastic I was about how your Emil came out. Just a stellar build from start to finish.
Joel
FEB 22, 2014 - 12:31 PM

Hi Doug
I think Joel just about said it all. As ever, a really beautiful piece of work from you - and I always learn some fresh tricks and tips to try from your builds.
All the best
Rowan
FEB 22, 2014 - 08:17 PM

Hi Alan, Your Somme diorama looks GREAT!! I really like the way you used our interlocking sandbag sections, timber and wicker trench supports to create an entire trench system. VERY NICE!! keep up the good work. Paul
FEB 23, 2014 - 01:10 AM

Hi Paul,
The sandbag sections really gave me the idea and your two British Troops are really well sculpted. We just need a few more. Thanks for you comments, appreciated
There is some sort of cross over mix up in the link at the bottom of my dio and you comments have ended up here in Doug's thread. I've asked Jim to look at the connection but perhaps Jessica might do the same as they have highjacked my link lol.
Cheers
Al
FEB 25, 2014 - 12:56 AM
Copyright ©2021 by Doug Nelson. Images also by copyright holder unless otherwise noted. The views and opinions expressed herein are solely the views and opinions of the authors and/or contributors to this Web site and do not necessarily represent the views and/or opinions of AeroScale, KitMaker Network, or Silver Star Enterrpises. Images also by copyright holder unless otherwise noted. Opinions expressed are those of the author(s) and not necessarily those of AeroScale. All rights reserved. Originally published on: 2014-02-22 00:00:00. Unique Reads: 7328

WEB HOSTING BY


Copyright ©2021 AeroScale and Kitmaker Network, a subsidiary of Silver Star Enterprises
All Rights Reserved. Please read our Conditions of Use and Privacy Policy.
All Rights Reserved. Please read our Conditions of Use and Privacy Policy.