_GOTOBOTTOM
World War II
Discuss WWII and the era directly before and after the war from 1935-1949.
Hosted by Rowan Baylis
CyberHobby 1/32 Bf109E3 Review Build
DougN1
_VISITCOMMUNITY
Georgia, United States
Joined: August 08, 2011
KitMaker: 410 posts
AeroScale: 409 posts
Posted: Tuesday, November 19, 2013 - 07:15 AM UTC
Well, now that the new job extremely steep learning curve has finally started to settle down, I've got a little time to get some model building done.

So, what better than to pull out this very nice 1/32 CH 109 E3 kit!
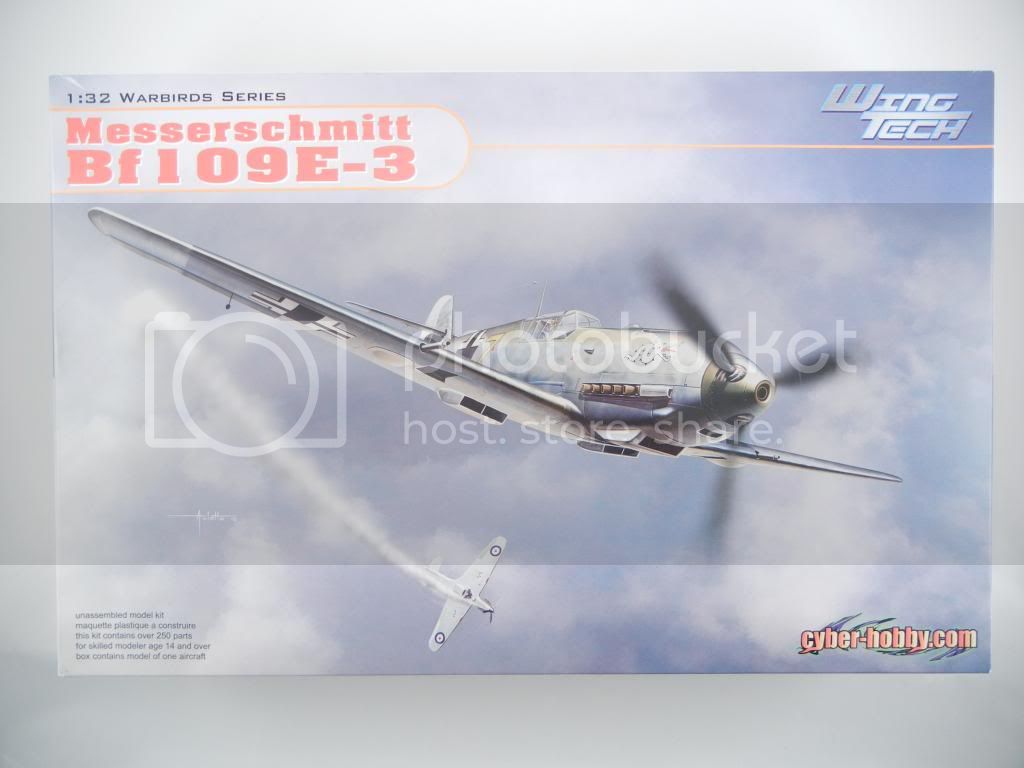


While the Eduard kit is very nice, and has excellent surface detail, I must admit that I prefer the CH kit. I think the CH kit has better engineering and fit which make it an easier build.

Having built the E4 version of this kit, I will try to use lessons learned from that experience.

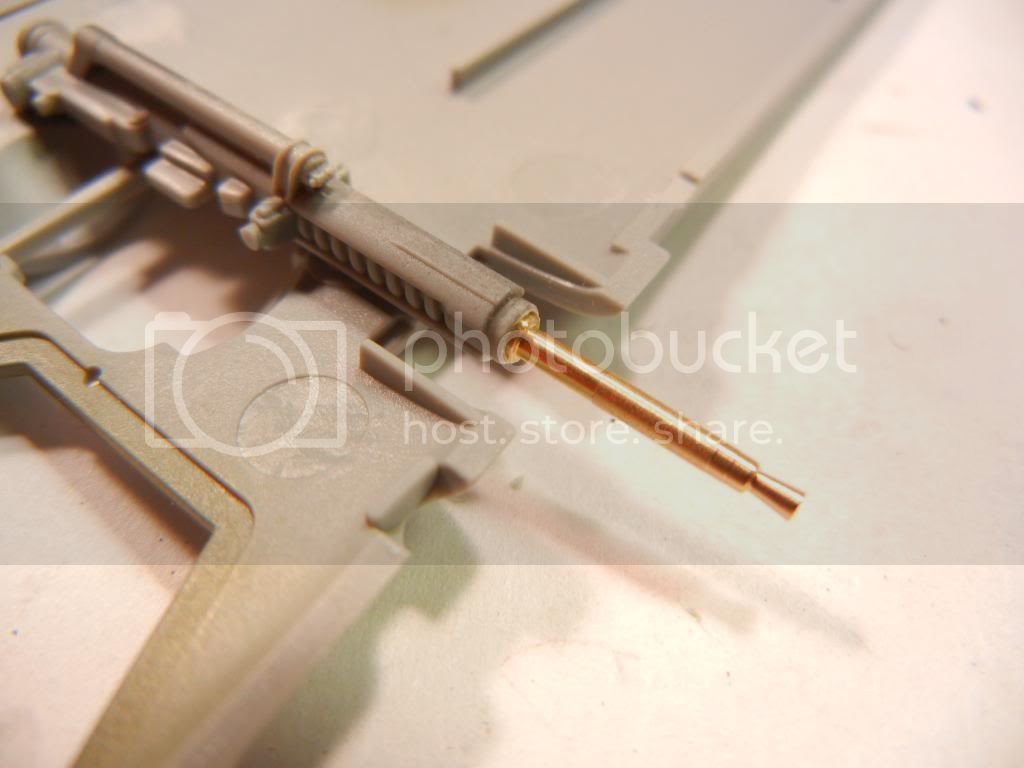
I plan to build the kit oob with the exception of some Master brass barrels. While the kit ones look very good painted, I wanted to try a set of these, so we'll see how that goes.

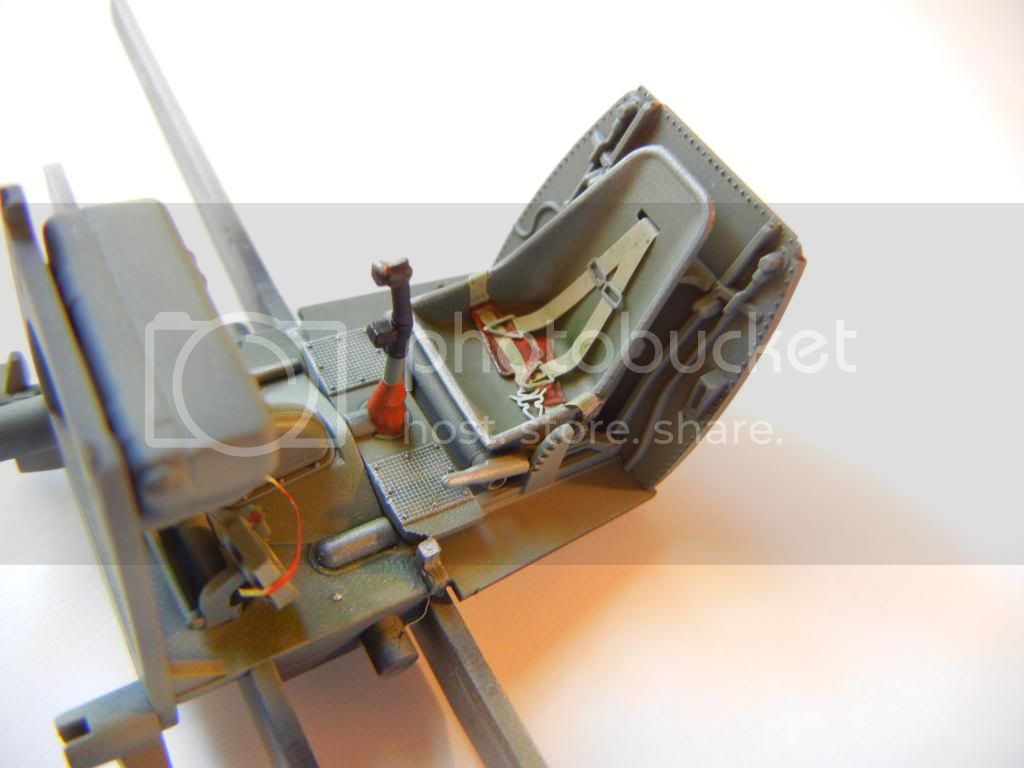
As usual, the build begins with the cockpit. I modified the single molded throttle quadrant by cutting a slot in it to improve the look:


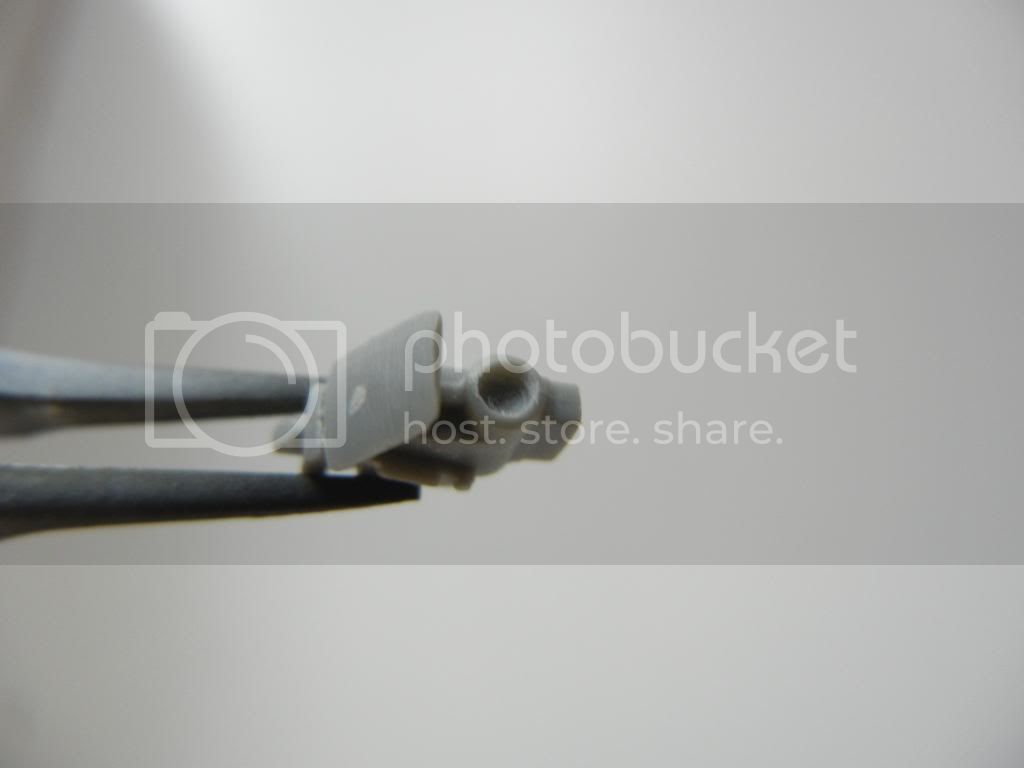
I also modified the gunsight by drilling a hole where the sight glass goes and will add a MV lens there after painting:


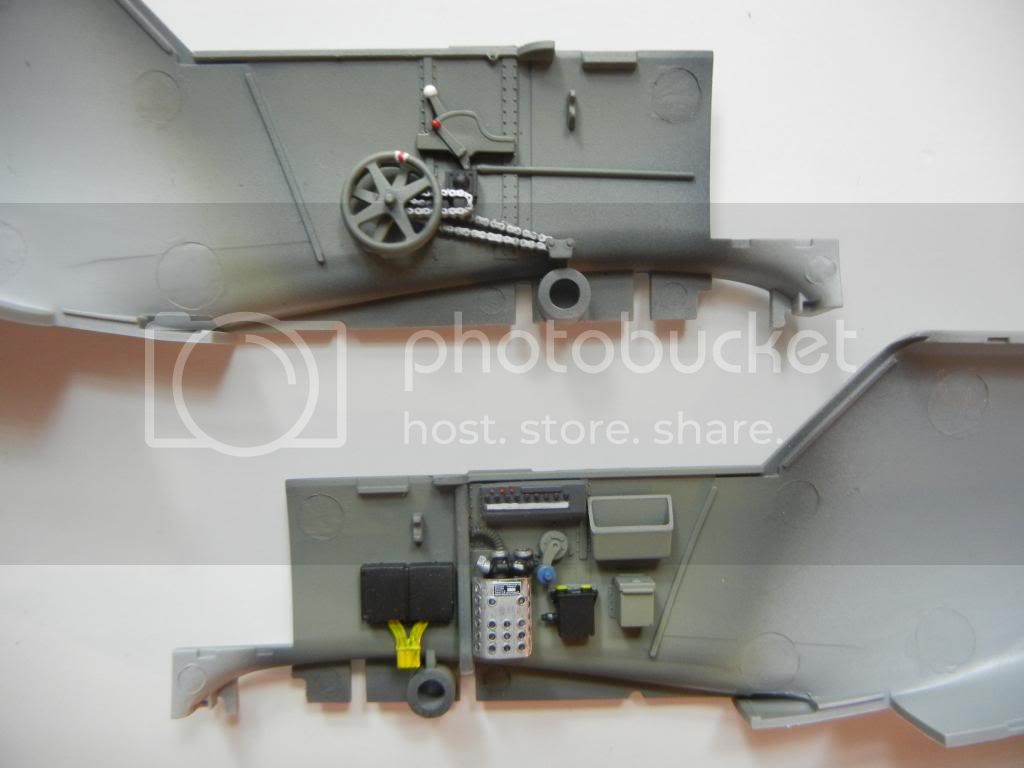
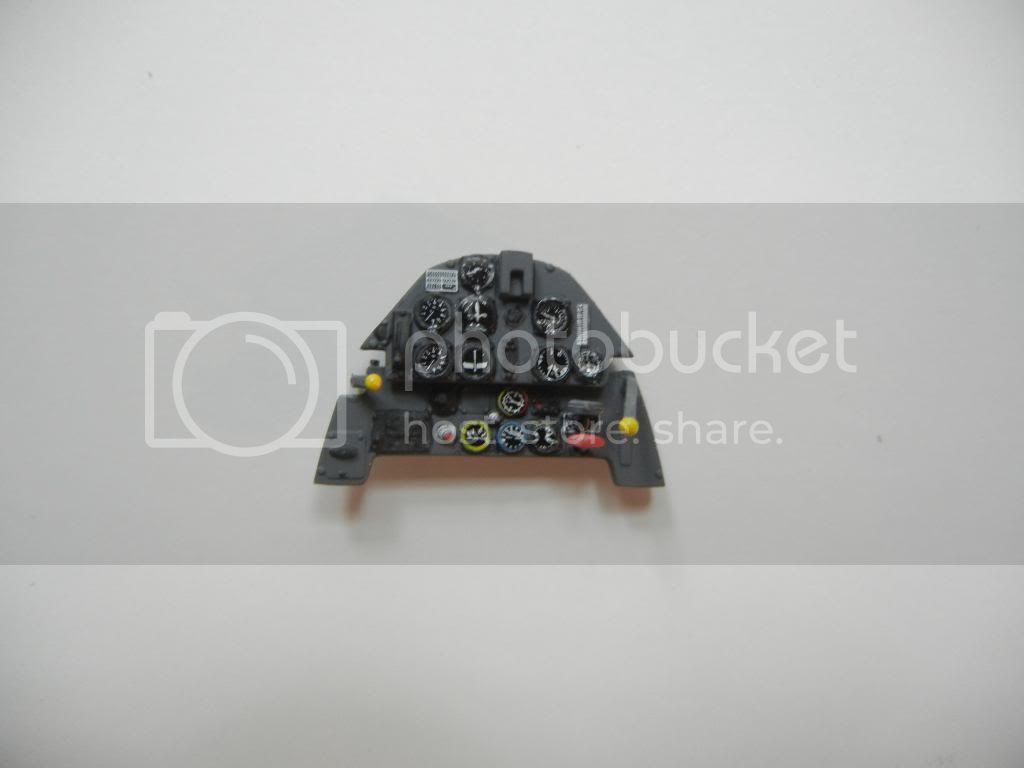
I debated on using an Eduard IP on this build, after not having a good time trying to paint the IP on my E4 build. However, after using some instrument decals on my Dragon 1/32 build (seen here), I decided to use some airscale instrument decals on this one as I prefer the 3D look. I am pleased with the way it came out:


Next, I'll be getting the cockpit together.

Thanks for looking, comments/critique welcomed!

Doug
Antoon3103
_VISITCOMMUNITY
Antwerpen, Belgium
Joined: March 31, 2012
KitMaker: 224 posts
AeroScale: 146 posts
Posted: Tuesday, November 19, 2013 - 08:56 AM UTC
Doug,

Off to a nice start, the ip looks very good.
I will follow this build.

Tony
Joel_W
Staff MemberAssociate Editor
AUTOMODELER
_VISITCOMMUNITY
New York, United States
Joined: December 04, 2010
KitMaker: 11,666 posts
AeroScale: 7,410 posts
Posted: Wednesday, November 20, 2013 - 02:56 PM UTC
Doug, You're off to a nice start. Will be subscribing and following along.
Joel
DougN1
_VISITCOMMUNITY
Georgia, United States
Joined: August 08, 2011
KitMaker: 410 posts
AeroScale: 409 posts
Posted: Friday, November 22, 2013 - 01:43 AM UTC
Thanks guys!

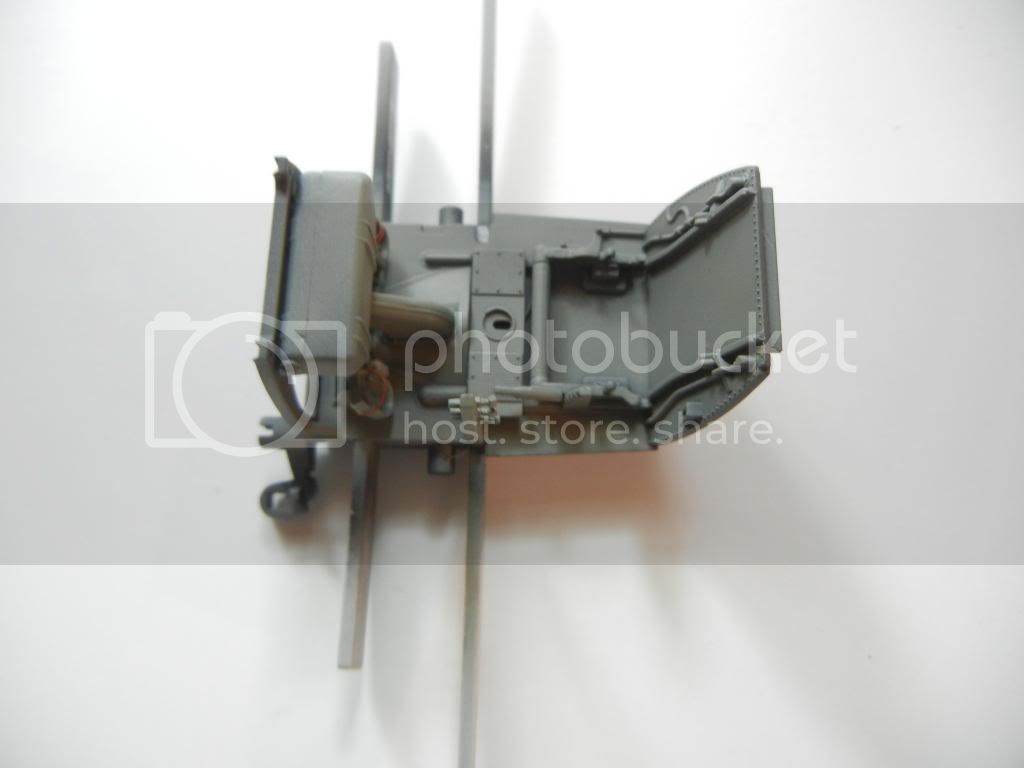
Time for an update, managed to get the cockpit bits together and painted in preparation for assembly:


Also painted up the gunsight and added the MV lens:


If you are building this kit, I would suggest attaching the two frame parts (F9/F10) to the slots in the sides of the cockpit rather than to the floor (I have one on the side of the cockpit and one on the floor above) as they might get broken off when handling if you attach them to the floor.

Need to see if I can get the kit provided PE seatbelts to look acceptable, otherwise I might need to try a set of RB production seatbelts for this one.

Thanks for looking, comments/critique welcomed!

Doug
Merlin
Staff MemberSenior Editor
AEROSCALE
#017
_VISITCOMMUNITY
United Kingdom
Joined: June 11, 2003
KitMaker: 17,582 posts
AeroScale: 12,795 posts
Posted: Friday, November 22, 2013 - 08:38 PM UTC
Hi Doug

Nice one! Great start - and great to see you back and building! The instrument panel looks excellent with the Airscale decals.

All the best

Rowan
warreni
_VISITCOMMUNITY
South Australia, Australia
Joined: August 14, 2007
KitMaker: 5,926 posts
AeroScale: 2,201 posts
Posted: Sunday, November 24, 2013 - 07:10 AM UTC
Hello DOug.

The CH 109 is probably the only one I haven't built yet and I will say that the Eduard kit was a pain with the engine being a bit too big and the covers not fitting properly. I learned from that and don't worry with the engine except for the bare basics needed to support the prop.

Everything is looking great and I will be following closely as I have the E-7 in the stash and will get this one one day soon as well.. although the Trumpeter ones are about half the price where I buy from..

Cheers
Warren
DougN1
_VISITCOMMUNITY
Georgia, United States
Joined: August 08, 2011
KitMaker: 410 posts
AeroScale: 409 posts
Posted: Tuesday, November 26, 2013 - 02:02 AM UTC
Thanks guys!

Rowan it is good to get back to the bench again I am really liking using these decals for IP's.

Warren - I've built both the Eduard and CH kits already, and neither one will let you fit the engine/MG covers over the full interior detail. Having put it all in, and then cut most of it away in my first CH build, I'm just putting the minimum in on this build.

Ok - got the harness worked to an acceptable standard and installed on the seat:


Now I just need to double check that I haven't forgotten anything and it will be time to close up the fuselage!

Thanks for looking, comments/critique welcomed!
DougN1
_VISITCOMMUNITY
Georgia, United States
Joined: August 08, 2011
KitMaker: 410 posts
AeroScale: 409 posts
Posted: Wednesday, November 27, 2013 - 09:22 AM UTC
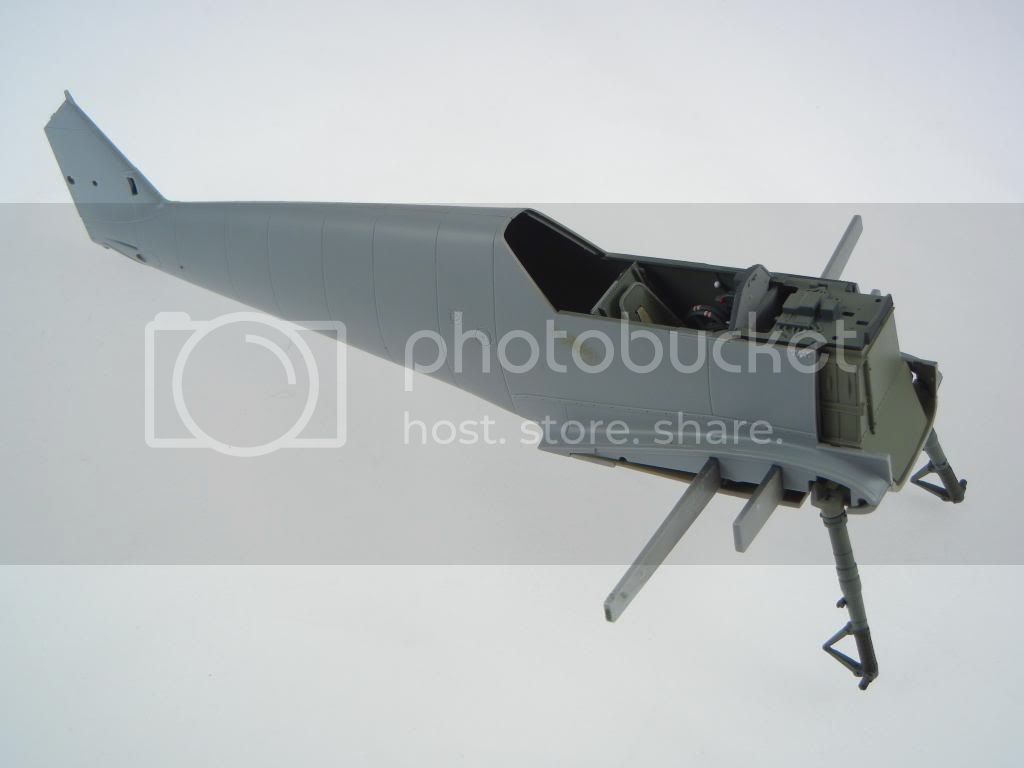
Ok, got the fuselage together, and making good progress. A couple pics:


Cockpit Impressions:

Overall, the cockpit went together very well. I left off parts F43 and F43 as their location is a bit ambiguous, and they can't be seen on the finished model anyway. Also, as noted above, I recommend attaching F9 and F10 to the sidewalls rather than the floorboard so you don't break them off during handling.

Finally, knowing I had a small bit of difficulty on my first kit getting the MG cover (part A1) to fit properly, I did not glue the IP, the MG tray, or framing it sits on to the fuselage side walls (it is plenty strong attached to the floorboard and frame) so I could squeeze the fuselage sides a little if needed.

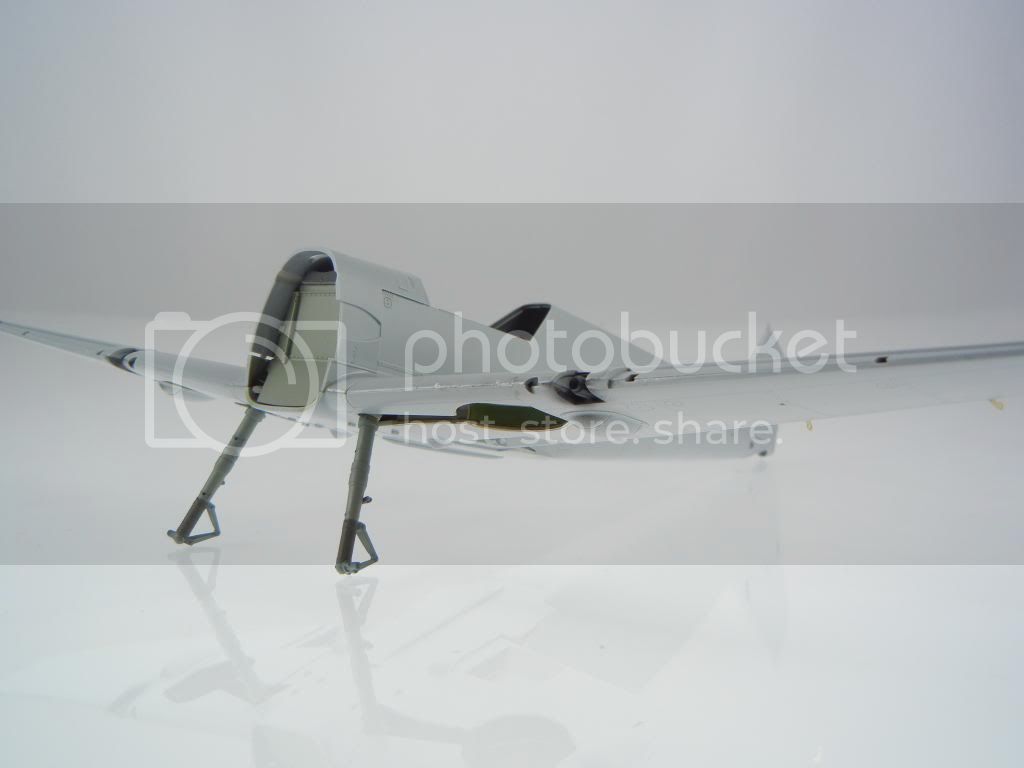
I could not resist putting the fuselage up on it's gear legs to see how it looked:


Next I'll start working on the wings and other bits. I'll also get the minimum items in the MG tray (basically the guns and their holders) and get the MG cover (A1) in place.

Thanks for looking, comments/critique welcome and appreciated!

Doug
Holdfast
Staff MemberPresident
IPMS-UK KITMAKER BRANCH
#056
_VISITCOMMUNITY
England - South West, United Kingdom
Joined: September 30, 2002
KitMaker: 8,581 posts
AeroScale: 4,913 posts
Posted: Wednesday, November 27, 2013 - 07:43 PM UTC
Looking good Doug, I particularly like the instrument panel; did the instruments have raised detail and did you apply the decals directly over them if they did? I have a similar issue with the instrument panel of my Bf110 and I am contemplating using decals.
Joel_W
Staff MemberAssociate Editor
AUTOMODELER
_VISITCOMMUNITY
New York, United States
Joined: December 04, 2010
KitMaker: 11,666 posts
AeroScale: 7,410 posts
Posted: Thursday, November 28, 2013 - 02:27 AM UTC
Doug, Your cockpit is outstanding. Nice job on the weathering, as it looks very convincing.

Joel
DougN1
_VISITCOMMUNITY
Georgia, United States
Joined: August 08, 2011
KitMaker: 410 posts
AeroScale: 409 posts
Posted: Friday, November 29, 2013 - 02:16 AM UTC
Thanks guys! This aircraft is being modeled when it was just delivered to it's new owners, so I tried to keep things fairly clean with just some minor wear.

@ Mal - the decals went right over the raised detail, and they stay flat. No worries about silvering as there is very, very little carrier film on the Airscale decals, and I cover them in Future/Kleer anyway. If you check my 110 build (link in your 110 build thread), I built up the Eduard IP and used decals (not airscale, but still worked the same) on the kit part and compared the two. I ended up using the kit part with decals for my build in the end.

Thanks again!

Doug
DougN1
_VISITCOMMUNITY
Georgia, United States
Joined: August 08, 2011
KitMaker: 410 posts
AeroScale: 409 posts
Posted: Saturday, November 30, 2013 - 02:20 PM UTC
Update time!

Started working on the wings. I decided to try out the excellent Master brass barrels for this build, so I cut the end off the 20mm cannon and drilled out a hole to accept the brass barrel (which will be installed at the end):


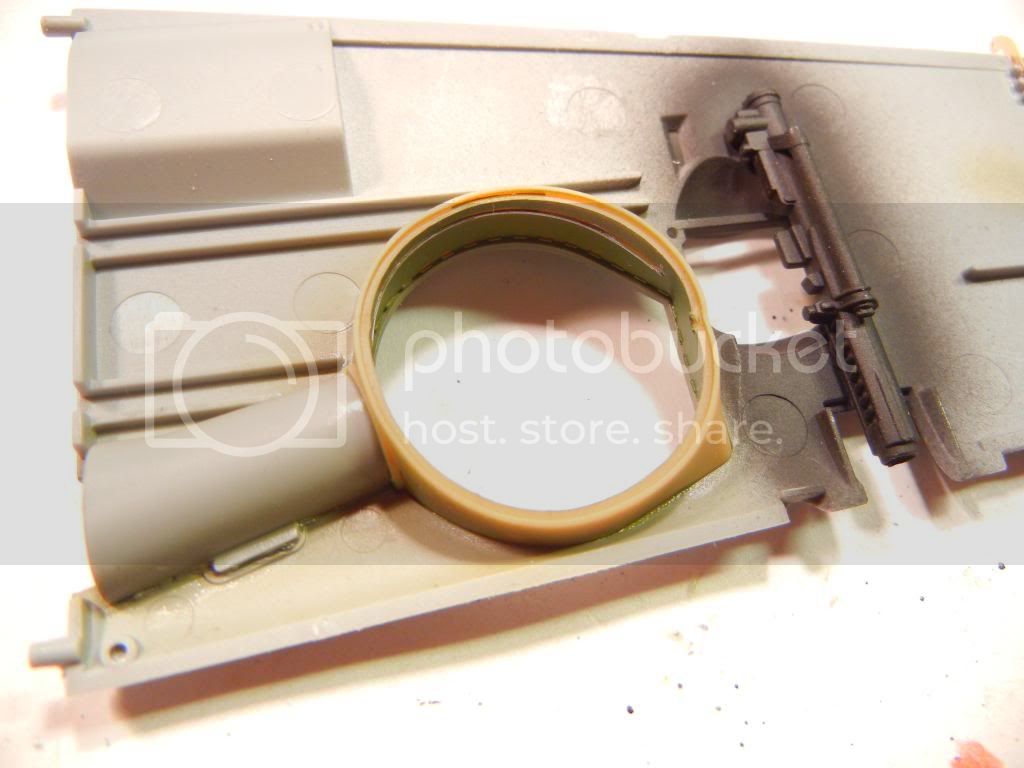
I also painted and fitted the flexible plastic wheel well insert, attaching it to the lower portion of the wing to get the best fit:


Next I'll get the wing upper and lower halves together and start fitting the inserts.

Thanks for looking, comments/critique welcomed!

Doug
Joel_W
Staff MemberAssociate Editor
AUTOMODELER
_VISITCOMMUNITY
New York, United States
Joined: December 04, 2010
KitMaker: 11,666 posts
AeroScale: 7,410 posts
Posted: Sunday, December 01, 2013 - 01:44 AM UTC
Doug, I have to admit that the brass gun barrel is truly an outstanding AM part. Even in 1/48 scale they make a difference. I'm really leaning towards adding them to my builds.

Joel
DougN1
_VISITCOMMUNITY
Georgia, United States
Joined: August 08, 2011
KitMaker: 410 posts
AeroScale: 409 posts
Posted: Tuesday, December 03, 2013 - 03:10 AM UTC
Another update! I've gotten the wings together. As I did in my previous build, I added the PE hinges (MA1 and MA6) to the wings, but did not attach the aileron/flaps yet as that can be done later.

Fit of the wings was good, I did have to use a toothpick to poke/prod the wheel well insert (H1/H2) into place on the upper wing half, and there is a gap on the leading edge cannon access covers (C45/C46) which I also experienced on my previous build:


Also note that the instructions are incorrect when it comes to the parts numbers of the leading edge MG plug (C41/C42) as these are shown being attached to the wrong wings and should be switched from what the instructions show.

I like to have my slats closed on my 109 models (must be some sort of OCD) so I fitted them closed here as well. Unfortunately, fitting them closed took a bit of effort, but it all worked out in the end

A final "beauty shot" before we move on to getting other bits fitted:


Next I'll get the MG's in place (and fitted for their master barrel ends) and the cover in place.

Thanks for looking!

Doug

Joel_W
Staff MemberAssociate Editor
AUTOMODELER
_VISITCOMMUNITY
New York, United States
Joined: December 04, 2010
KitMaker: 11,666 posts
AeroScale: 7,410 posts
Posted: Tuesday, December 03, 2013 - 06:05 AM UTC
Doug, really nice progress. Looking forward to your next update.
Joel
Holdfast
Staff MemberPresident
IPMS-UK KITMAKER BRANCH
#056
_VISITCOMMUNITY
England - South West, United Kingdom
Joined: September 30, 2002
KitMaker: 8,581 posts
AeroScale: 4,913 posts
Posted: Tuesday, December 03, 2013 - 10:19 PM UTC

Quoted Text

@ Mal - the decals went right over the raised detail, and they stay flat. No worries about silvering as there is very, very little carrier film on the Airscale decals, and I cover them in Future/Kleer anyway. If you check my 110 build (link in your 110 build thread), I built up the Eduard IP and used decals (not airscale, but still worked the same) on the kit part and compared the two. I ended up using the kit part with decals for my build in the end.

Thanks again!

Doug


Thanks for the conformation and I did see your 110 build, so that confirms the way forward for me. I have ordered the Airscale decals
DougN1
_VISITCOMMUNITY
Georgia, United States
Joined: August 08, 2011
KitMaker: 410 posts
AeroScale: 409 posts
Posted: Friday, December 06, 2013 - 01:48 AM UTC
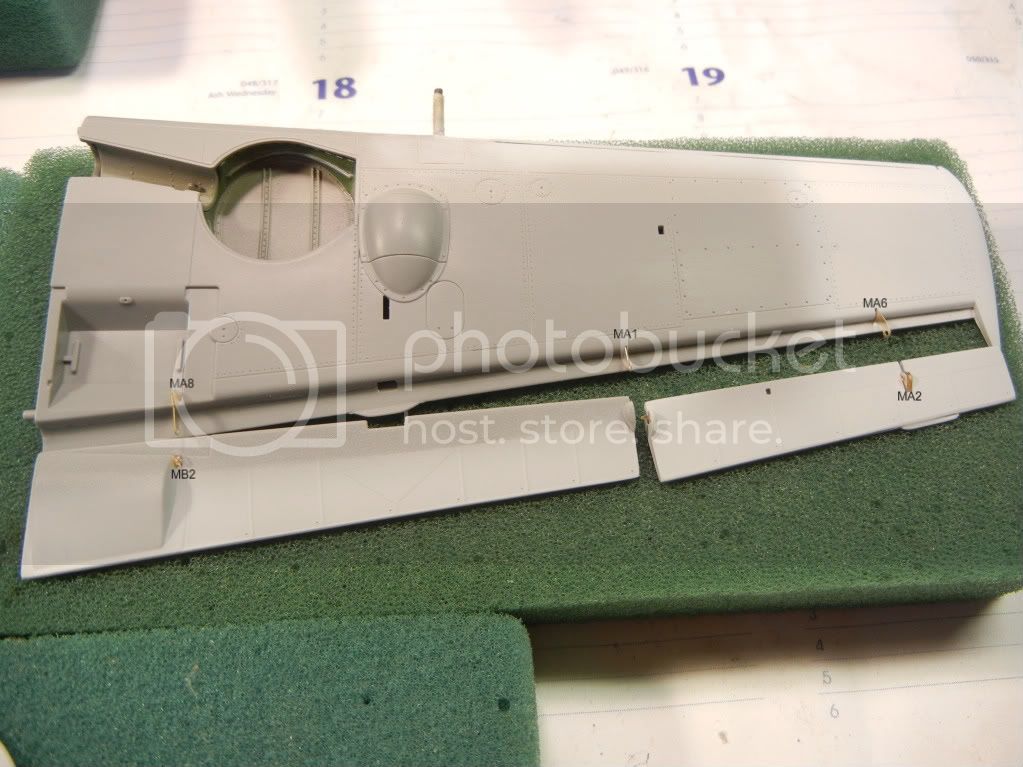
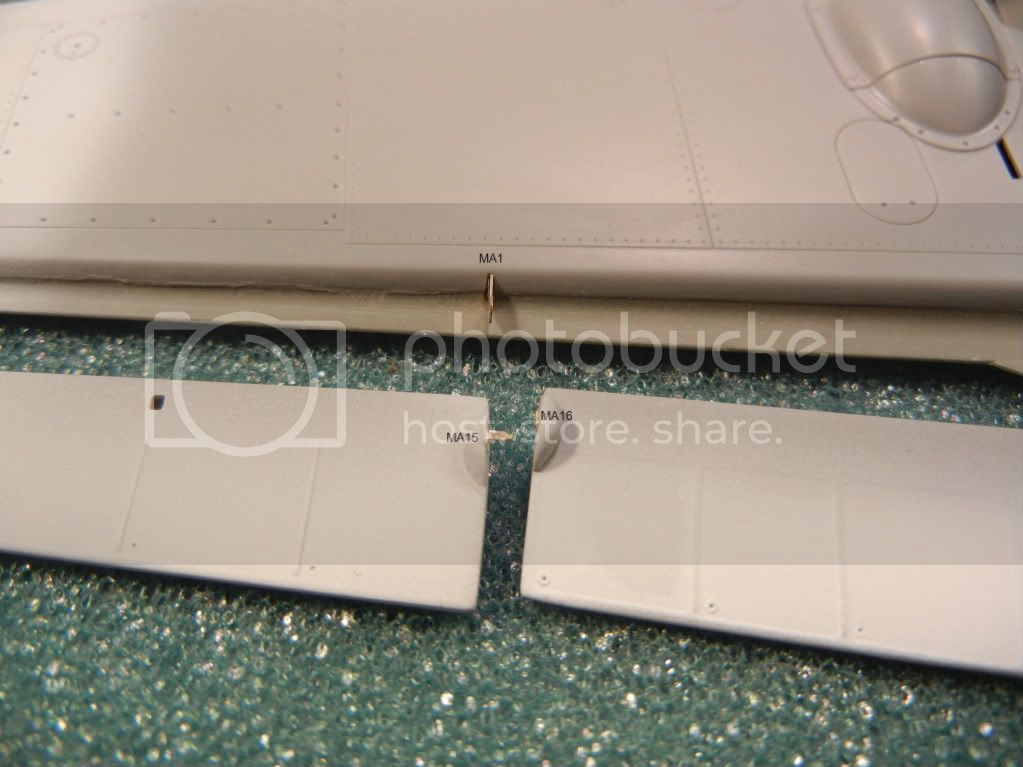
Time to assemble the wings. The kit instructions are a little vague when it comes to what PE part goes where, so once I sorted it out, I labeled them to make it easier for anyone else wondering:


I would recommend just using a small bit of styrene rod for the pins to hold the parts in place, rather than the tiny little plastic pins provided in the kit. If you are careful, the flaps and ailerons will be movable when assembled(if you want them to be).

I was going to leave the flaps down, but after looking at all the photos I have of the aircraft I am modelling, and it's sister aircraft, they all had their flaps up in every photo.

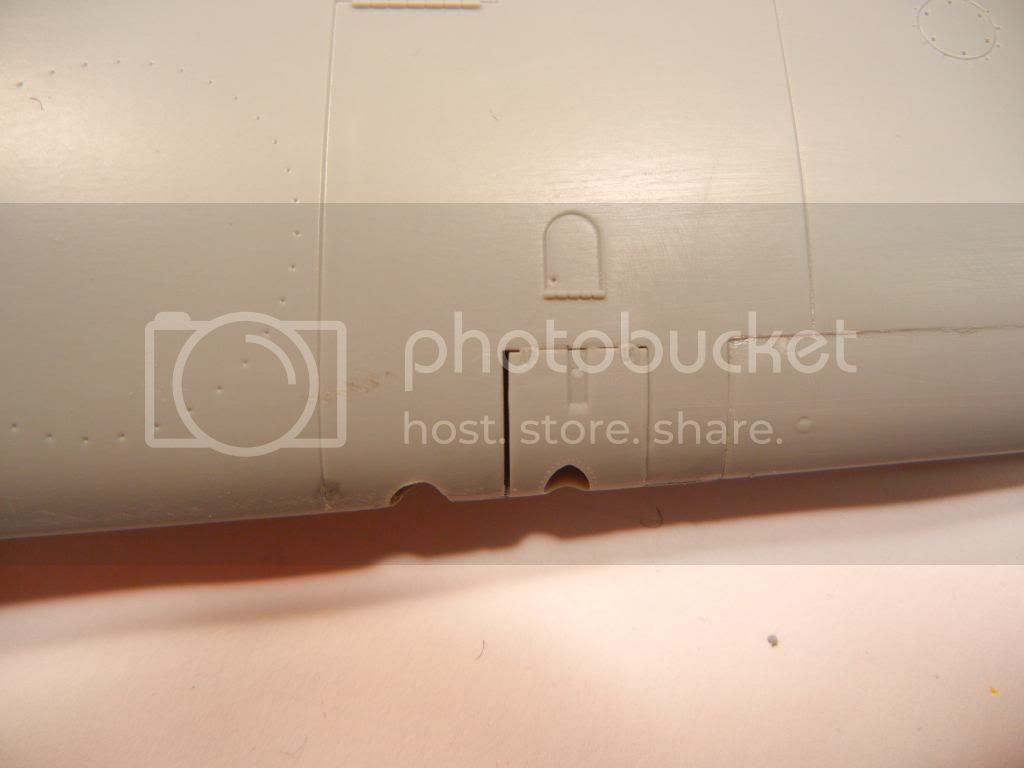
When I build the CH 109E4 kit, I noticed a problem with the attachment holes for the rudder. Interestingly, I was told that CH were going to fix this on future releases, but that is not the case. Accordingly, you'll need to address this as well. The following photo illustrates the issue:


More later! Thanks for looking, comments/critique welcomed!

Doug
Joel_W
Staff MemberAssociate Editor
AUTOMODELER
_VISITCOMMUNITY
New York, United States
Joined: December 04, 2010
KitMaker: 11,666 posts
AeroScale: 7,410 posts
Posted: Friday, December 06, 2013 - 03:17 AM UTC
Doug, Those hinges are amazing. I'm all thumbs with smallish PE parts.

Joel
warreni
_VISITCOMMUNITY
South Australia, Australia
Joined: August 14, 2007
KitMaker: 5,926 posts
AeroScale: 2,201 posts
Posted: Friday, December 06, 2013 - 07:09 AM UTC
Watching with interest Doug. 1/32 is the perfect scale for these aircraft.
DougN1
_VISITCOMMUNITY
Georgia, United States
Joined: August 08, 2011
KitMaker: 410 posts
AeroScale: 409 posts
Posted: Saturday, December 07, 2013 - 04:24 AM UTC
Quick update today. While the kit does provide a number of nice details, one surprising omission are the two tubes that go on the end of the MG's (which are highly visible from the two cowl MG openings). So, the builder will need to make these themselves.

I cut a piece of styrene tube at the appropriate angle, and then made the two pieces. As the tube has pretty thick walls, I used my "pine cone" bit to thin them out a bit:


Here you can see how the brass barrels look in the finished part:


I'll paint them RLM 02 and they will be ready to attach to the inside of the upper cowling. Of course, if you are building with your cowls off, you'll need to attach them to the ends of the MG's instead.

Thanks for looking, comments/critique appreciated!

Doug
Holdfast
Staff MemberPresident
IPMS-UK KITMAKER BRANCH
#056
_VISITCOMMUNITY
England - South West, United Kingdom
Joined: September 30, 2002
KitMaker: 8,581 posts
AeroScale: 4,913 posts
Posted: Saturday, December 07, 2013 - 07:24 PM UTC
Nice info on the hinges and a nice bit of detail on the cowling MGs, watching with interest
DougN1
_VISITCOMMUNITY
Georgia, United States
Joined: August 08, 2011
KitMaker: 410 posts
AeroScale: 409 posts
Posted: Monday, December 09, 2013 - 08:40 AM UTC
Another quick update. Been taking care of a few of the small things.

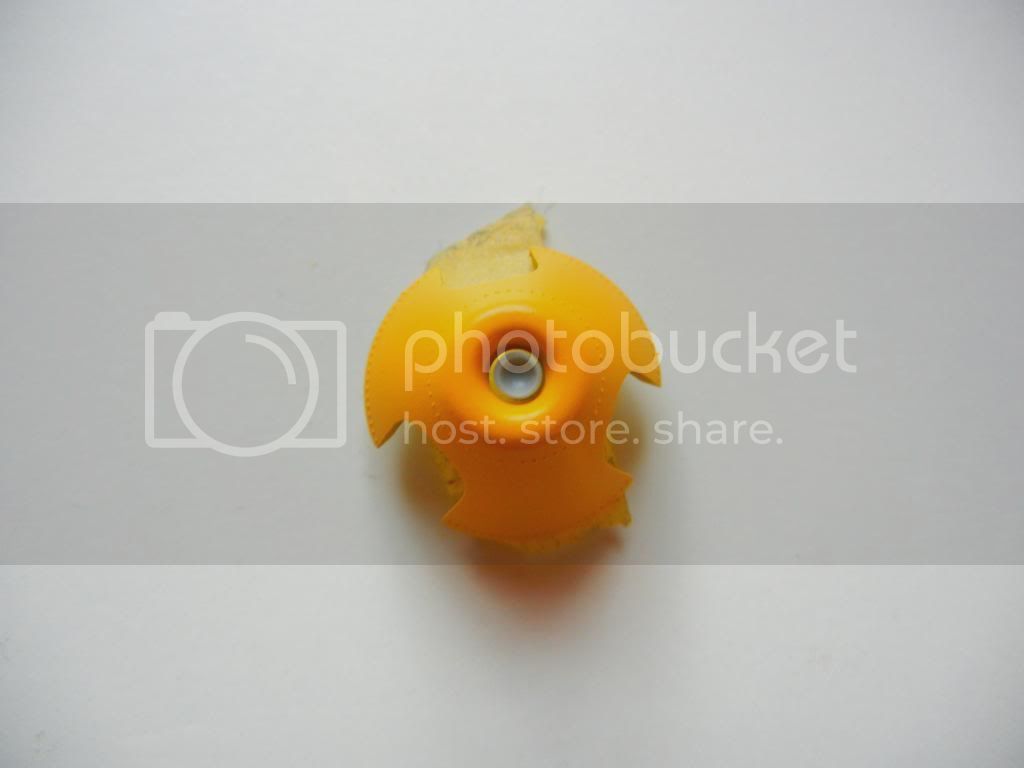
The kit spinner has the open hole at the end of the tube for the engine mounted cannon (which if IIRC were not used), and provide a nice plastic part that goes through the prop hub and attaches to the engine on the other side. It's not bad and would probably look good painted up:


But, as I did on my 110 build, I cut off the forward end of the kit part, and added a bit of aluminium tube (also thinned out at the end with my "pine cone" bit. I like it much better and I don't have to a paint it:


Speaking of the prop, the kit parts all include a "collar" of some sort at the ends where they go into the hub. This is not really correct, as the prop blades are smooth all the way into the hub, but the last bit before the hub is unpainted. I think CH mistook the unpainted bit for a collar and molded it that way. The Eduard kit does not have this issue, but the good news is that unless you get really, really close, you can't really see the difference.

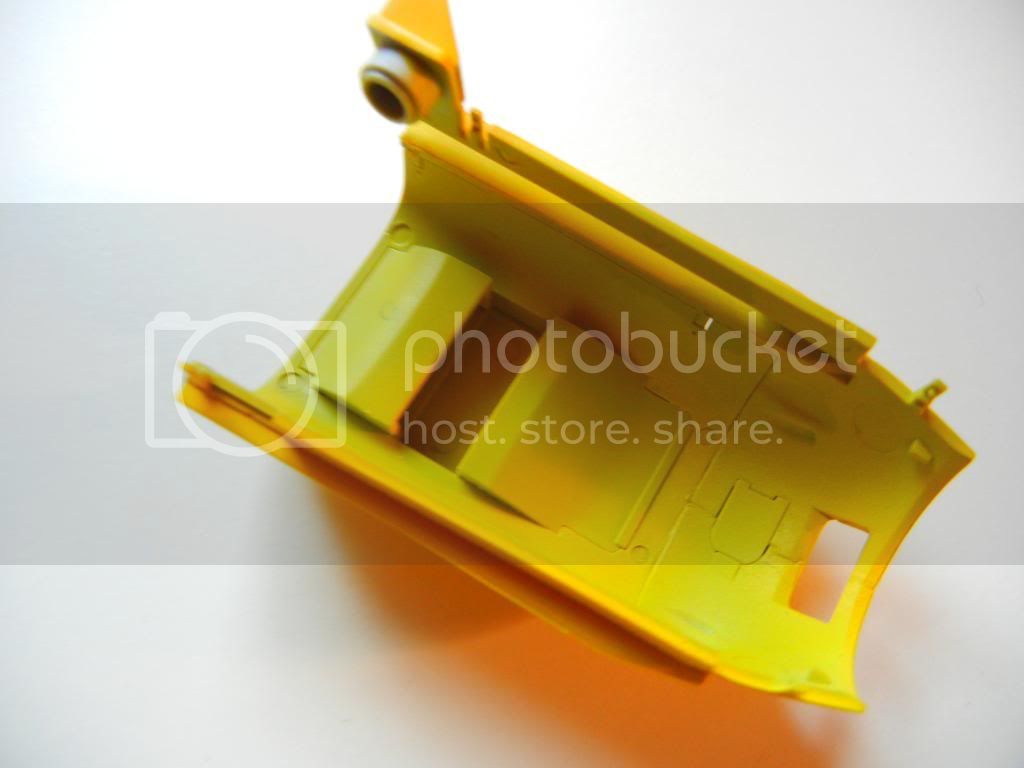
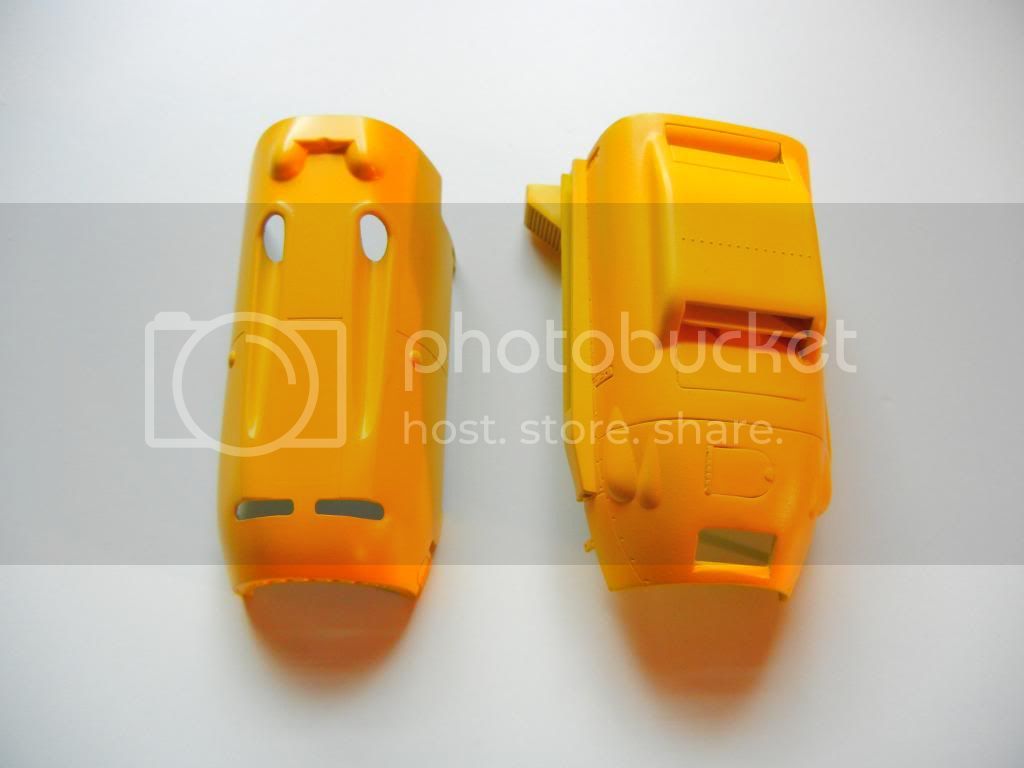
I deviated from the instructions, in that I did not want to build the cowl around the engine, so I assembled the lower cowl parts and painted it in RLM04. I first painted the insert parts RLM04, and then when dry, added them to the rest of the lower cowl and painted the whole thing (as appropriate for the scheme I am doing). I left out the oil cooler and painted it black with some silver drybrushing, but you can barely see it when looking from the front and cannot see it at all from the rear.


Also be aware there are some mold lines on the sides of both the upper and lower cowls that should be sanded off. I am guessing these are due to the slide mold technology that CH uses.

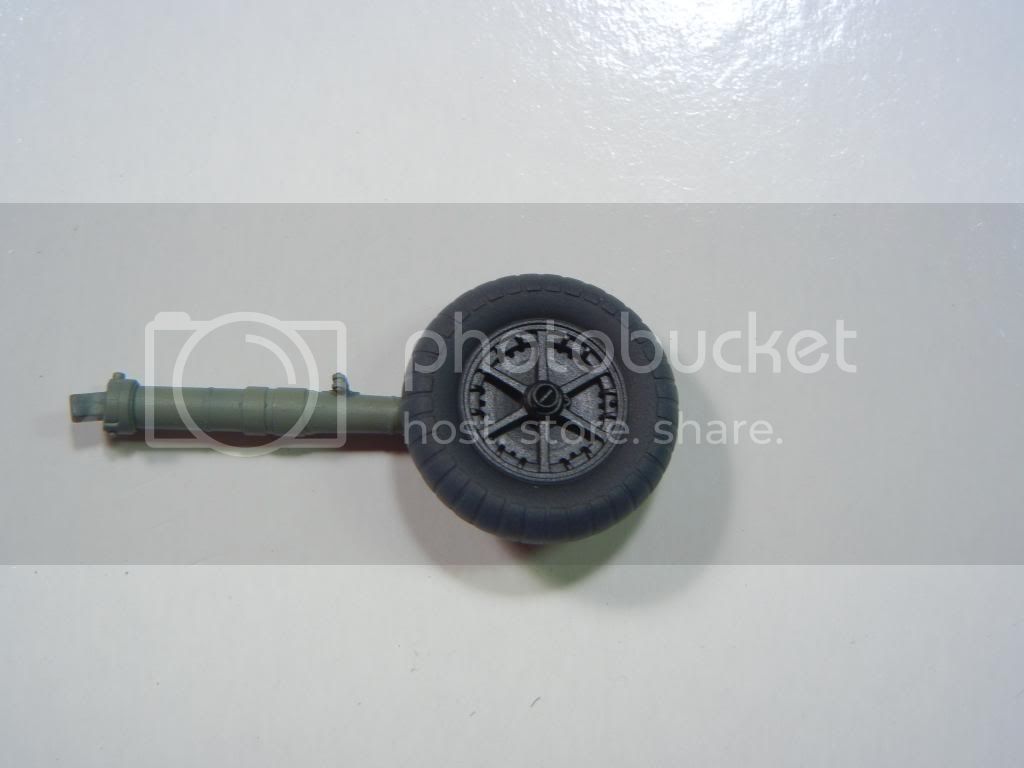
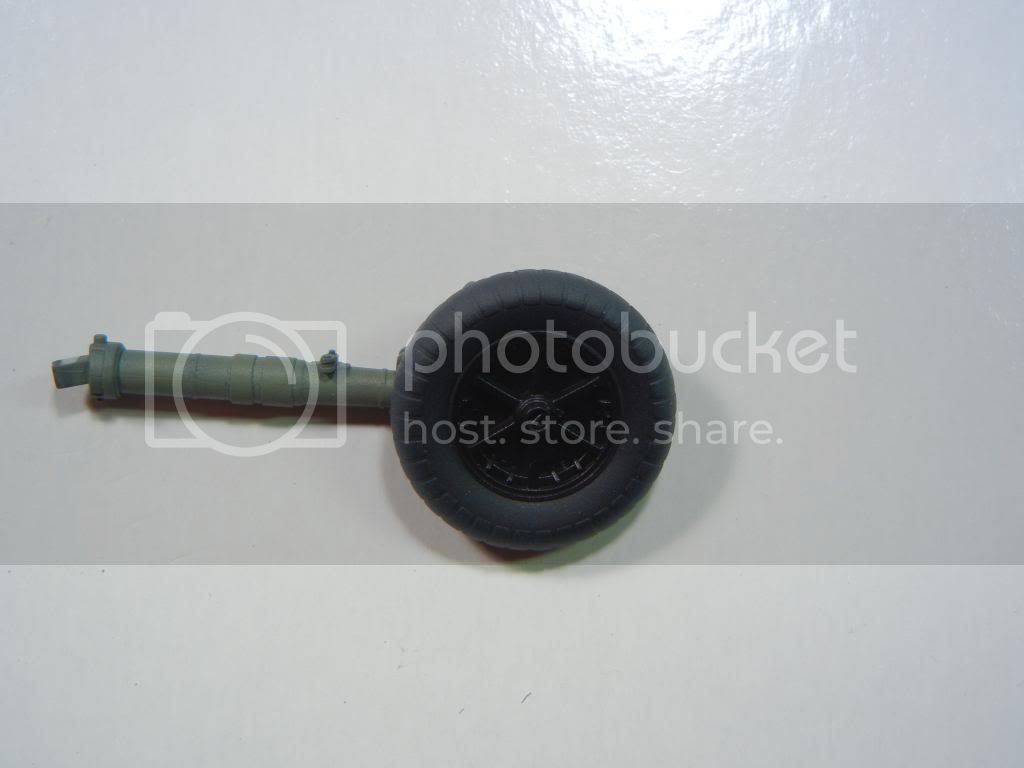
I also got the wheels together, and painted them. I used 3 different colors for this. First, I paint the hubs with semi-gloss black, and then when dry, mask this and paint the tires with Model Master Aircraft Interior Black (which is a slightly lightened flat black). I let that dry, and then I go over the tread areas with RLM66 to lighten that area up, as the part in contact with the surface is typically lighter than the sidewalls. Here are a couple shots of the finished wheel:


In the next update, I'll get the wings mated to the fuselage!

Doug

DougN1
_VISITCOMMUNITY
Georgia, United States
Joined: August 08, 2011
KitMaker: 410 posts
AeroScale: 409 posts
Posted: Tuesday, December 10, 2013 - 05:12 AM UTC
Yet another update!

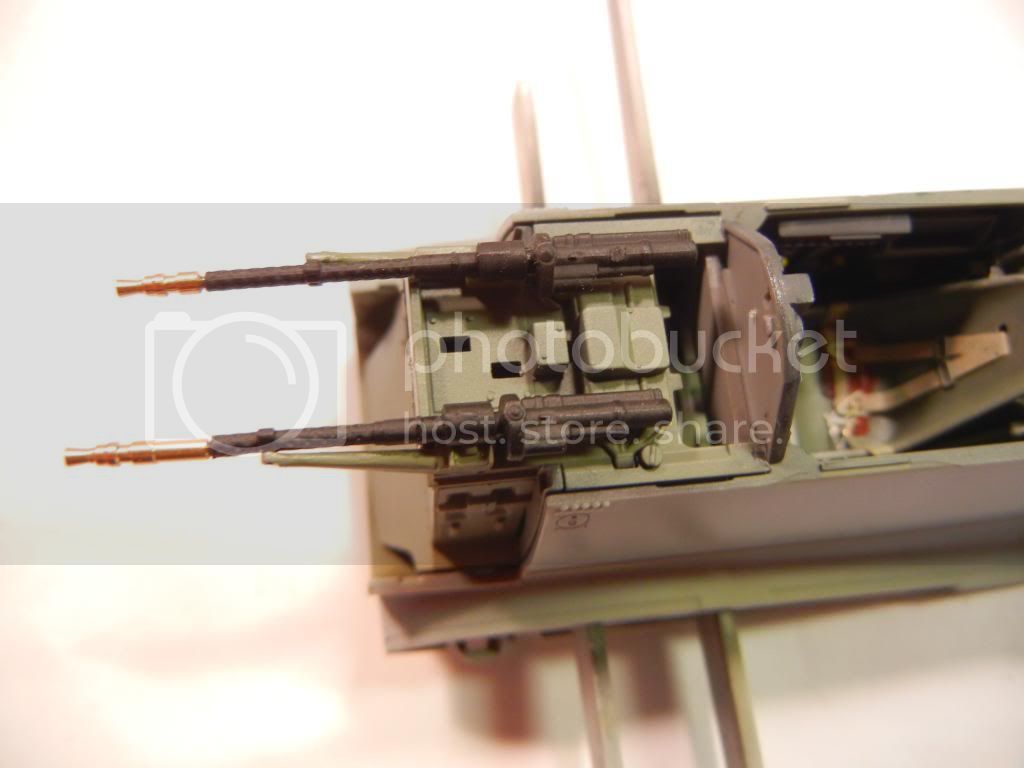
I decided it would be easier to finish up work on the fuselage before I mated it to the wing. With that in mind, the first thing I did was add the few necessary parts to the MG tray in front of the windscreen. As the cover will be permanently attached, I just added the MG's themselves, and the two support parts (C13/C14). Nothing else was added as they just get in the way of the cowl cover closing properly (and they are not visible when closed):


I also added the engine bearers to the fuselage, as it is harder to see their attachment points with the cowl cover in place:


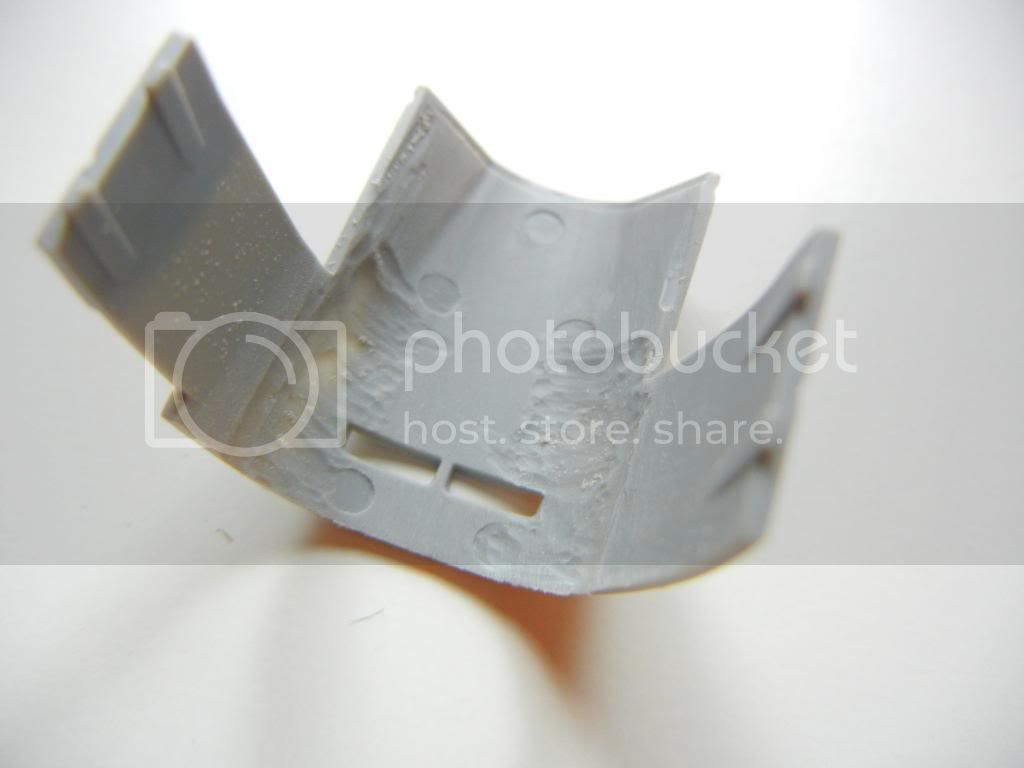
Even with this minimalist approach, I still ended up grinding out the cowl cover a bit to get a better fit (that did not require applying some pressure). I also removed the two tabs as I found they interfered with the fit as well:


After one last check, everything was glued in place. I'll let this dry, then attach the gun sight and canopies.

Thanks for looking, comments/critique/questions welcomed!

Doug
Joel_W
Staff MemberAssociate Editor
AUTOMODELER
_VISITCOMMUNITY
New York, United States
Joined: December 04, 2010
KitMaker: 11,666 posts
AeroScale: 7,410 posts
Posted: Tuesday, December 10, 2013 - 06:40 AM UTC
Doug, nice progress. I really like the use of the Aluminum tubing through the spinner rather then the kit supplied plastic part. Huge difference in appearance.

Joel
Holdfast
Staff MemberPresident
IPMS-UK KITMAKER BRANCH
#056
_VISITCOMMUNITY
England - South West, United Kingdom
Joined: September 30, 2002
KitMaker: 8,581 posts
AeroScale: 4,913 posts
Posted: Tuesday, December 10, 2013 - 07:19 PM UTC
Looking good Doug, I like the addition of the aluminium tube to the spinner I won't be able to do this on my 110 as it is an OOB build but I am going to try and thin the walls a little. Nicely painted cowlings too
 _GOTOTOP