

1⁄35Storm Bringers - Painting & Detailing RAF 60lb RPs
3
Comments
Painting
(See chart at the end for what the coloured bands mean.) The kit instructions would have you paint the whole of the rockets black. In one of my references it suggests black warheads and silver rocket bodies, but neither of these is correct. Another reference states that the warheads are dark green? I dont know this in fact but it is an educated assumption based on what I have seen during my Army service and particularly at the bomb disposal museum. In my opinion the warheads would have been deep bronze green, a colour that British AFVs were painted. It is possible that the bodies were this colour too, as black and white pictures in my references, seem, to show them as similar colours. As it is more then likely different companies manufactured the warheads and bodies; it is also quite likely that they were a different dark green.There is a light green fill band around the warhead body and I would normally paint this first then mask it. I decided however to paint clear decal film and apply this later. It would also have been ideal to paint the other 2 fill bands before the main colour, but for reasons that will be explained later, I didnt. So the warheads were painted Humbrol deep bronze green, and the rocket bodies Humbrol dark green.
Painting the nose fill bands.
On the real thing there are two ½ bands, one white the other red, on the nose of the rockets (see chart), this is 0.26, say 0.3mm in 1/48 scale. Because the nose of the rocket is a double compound curve and masking tape cut to 0.3mm wide has no effective adhesion left, another method of creating these bands had to be found.I pondered this problem from the moment I opened the box and knew I wanted to paint the bands. I hit on the solution, quite early on in the build, it was simple - as with all the best ideas. The idea is not entirely new but I had to adapt it for use on the warheads. I initially tried out this idea to get some indication if it would work or not. Using my Historex punch and die set I punched different sized holes in 3 pieces of Tamiya masking tape. The first was large enough to mask the warhead at the position of the lower edge of the first band. The second, smaller hole gives the width of the first and the lower edge of the second band and the third the top edge of the second band and the nose tip. On this trial these three pieces of tape were positioned and I concluded that this method would work. The rockets were now left alone until the model was completed, safe in the knowledge that painting them would be easy. How wrong I was...
When the time came, I sat down to punch out the first masks. To do this it is necessary to lay the Tamiya tape onto thin plasticard, this produces a nice neat hole in the tape. I punched the eight pieces required and proceeded to apply them to the warheads (peel the tape off the card carefully so as not to tear it). To my dismay I couldnt get the tape positioned correctly. When I had one close to being right I punched the next size and tried it... this was not going to work.
I dont know why it appeared to work when I tried it earlier but it wasnt going to work now. Studying the situation I reasoned that the square of tape needed a flat surface to adhere to. Sounds good, but how do you fix a flat surface around the warhead so that it is level in all planes. I came up with the solution quite quickly, it was the execution that took the time. I needed a jig that would hold the rockets vertical and also support a piece of plasticard with holes punched in it, allowing the tip of the warhead to poke through. There was something else to take into account - the delicate resin fins.
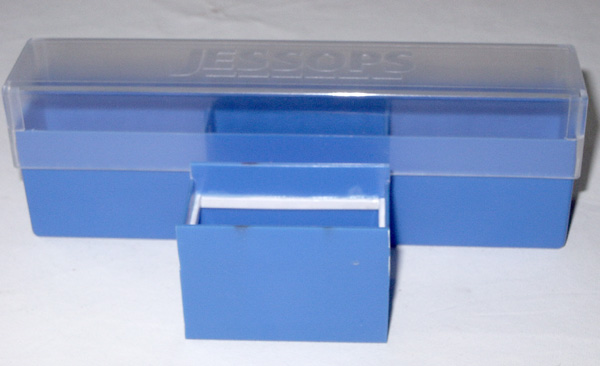
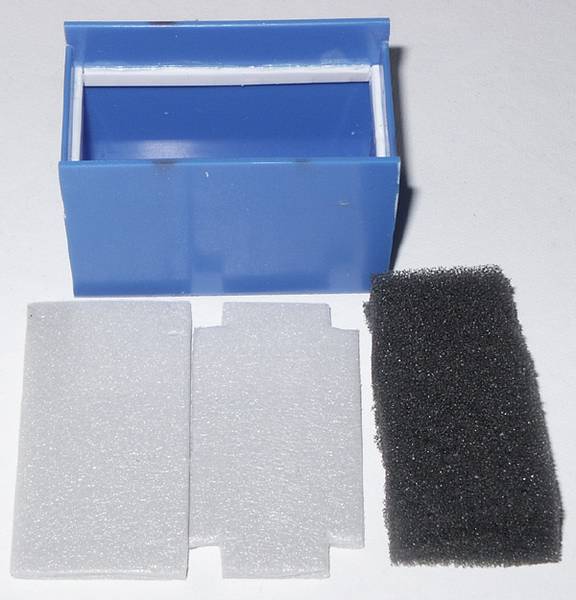
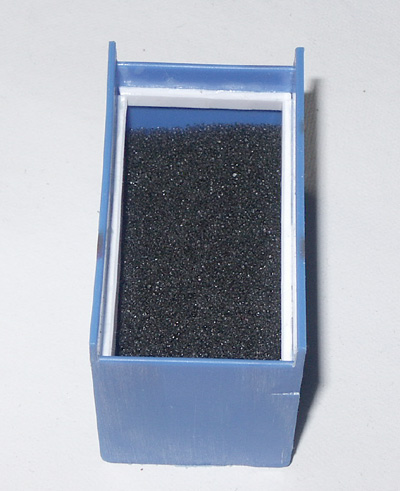
I had several attempts at building jigs, but for one reason or another they were no good. Through these attempts I realised that slid film holders might be the correct depth. There are plenty around the house because my daughter is into photography. I cut the centre section out of 2 of the wider ones, (I could have left them intact but it would have made them a little unwieldy). They are actually a tad too deep, which is a good thing, because the solution to this sorted out the protection of the fins, and gave sufficient spring to the rockets to hold them tight. I used the dense foam insulation for laminate flooring. A piece was cut to fit in the bottom of the slide holder box, a second, similar sized piece had the corners cut out to size of the fins.
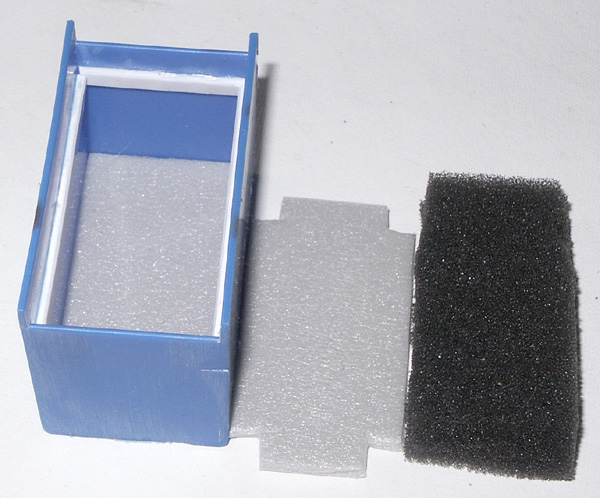
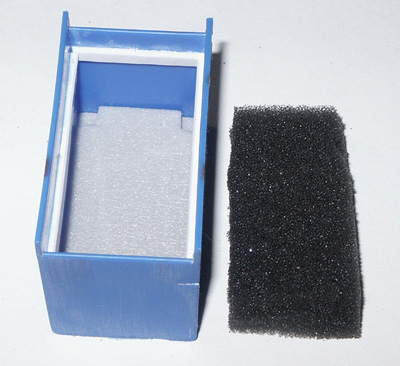
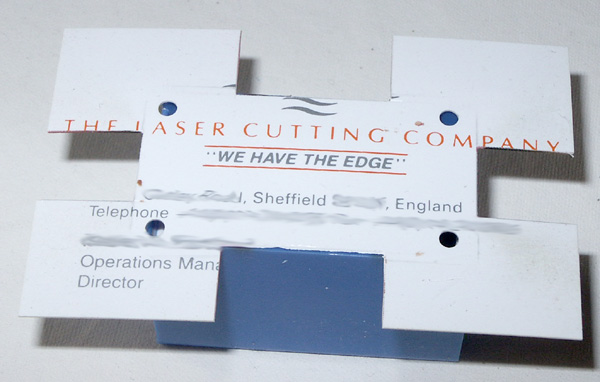
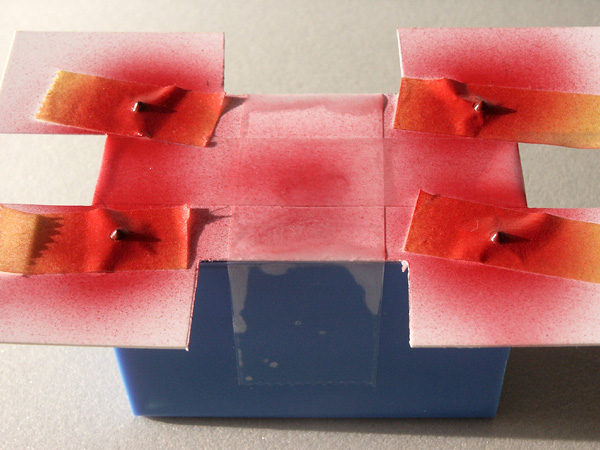
Now I just had to keep the rockets vertical. The clips on the rocket bodies were in the way so I simply fixed plastic strip around the inside of the box. To keep the rockets in position I cut a piece of foam, which when in position pushes the rockets into the corners, against the plastic strip. The rockets are held secure and vertical, with just enough height that when the top card is positioned it will press them down, making for a tight fit. This top card was made out of a plastic business card, of which I have loads and use for decanting paint onto. Positions were measured, carefully, and holes punched, using the next biggest size punch, to the 3 used for the masking. The card was also cut so that its edges were flush to the slide holder, but with areas left to give the tape something to adhere to (see pictures). This card, when positioned over the warheads and taped down secured the rockets, leaving just enough of the warhead showing to apply the masking. The tape was punched and applied the same as described earlier, but this time, with something to adhere to the masking worked. More about that later... suffice to say, at this point, I was well chuffed. When I next paint rocket warheads I will modify the box slightly, by adding 40 thou plastic strip around the outside of the box. This will support the card with holes better.


About the Author


FROM: ENGLAND - SOUTH WEST, UNITED KINGDOM
Hi, my name is Mal Mayfield and I have been modelling seriously for about 25 years. My main interest is 1/48 scale second world war. I build all types and all combatants. I have built 1/35 scale "targets" and 1/72 scale modern aircraft, plus a couple of cars. I have also dabbled with figure painting...
Comments


Thanks guys, I started this as part of the original Storm Warning article but as you can see it is a bit long to be part of that
Mal
MAR 07, 2005 - 07:42 AM
Copyright ©2021 by Mal Mayfield. Images also by copyright holder unless otherwise noted. The views and opinions expressed herein are solely the views and opinions of the authors and/or contributors to this Web site and do not necessarily represent the views and/or opinions of AeroScale, KitMaker Network, or Silver Star Enterrpises. Images also by copyright holder unless otherwise noted. Opinions expressed are those of the author(s) and not necessarily those of AeroScale. All rights reserved. Originally published on: 2005-03-06 00:00:00. Unique Reads: 16465

WEB HOSTING BY


Copyright ©2021 AeroScale and Kitmaker Network, a subsidiary of Silver Star Enterprises
All Rights Reserved. Please read our Conditions of Use and Privacy Policy.
All Rights Reserved. Please read our Conditions of Use and Privacy Policy.