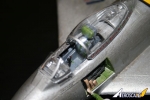
1⁄48Junior Modellers' Showcase: F-86F
20
Comments
History
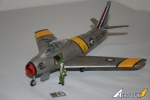
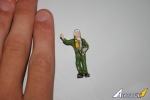
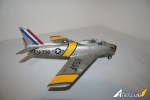
The F-86 Sabre was the dominant fighter of the Korean War. It fought tooth and nail against the premier Russian design, the Mig 15, achieving a kill ratio of around 11 to 1. Itís offensive armament consists of six .50 cal machine guns, and it is powered by the General Electric J47 jet engine, one of the most widely produced jet engines of all time. It propelled the Sabre to 688 miles per hour.This particular Sabre belonged to the 67th Fighter Squadron, theďFighting Cocks.Ē It is piloted by Lt. Harvey Brown, who hails from Delray Beach, Florida.
Construction
This was a very easy kit to build. There arenít very many tin pieces to worry about, most pieces were rather large. I do all of my assembly with the standard modelling glue, which was sufficient to hold all of the pieces together.The instructions were very straight-forward, I always knew exactly where every piece needed to go. No confusion, even with my beginner-level skills.
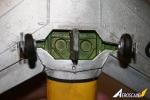
My only complaint was with the rear landing gear, which was somewhat flimsy at the joint. Other than that, it was a very nice model.
Painting and decals
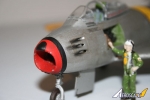
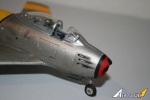
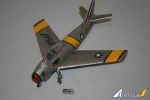
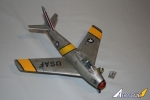
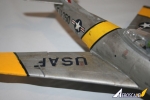
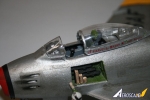
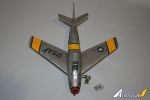
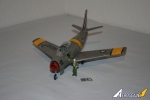
So, painting can sometimes be difficult for me, as I donít own an airbrush and rely on rattle cans and paintbrushes. At first, I tried a chrome coloured rattle can, which proved to be a horrible idea. For some reason, no clue why, this paint was very globby & runny. Even when sprayed very lightly, it would run off and glob at the bottom. I actually ended up wiping off this paint before it could dry, and resprayed it with some silver paint I found in my dads garage. I then painted the nose red, and sealed it all off with some flat topcoat. The decals were all pretty easy to put on, except for the yellow stripe along the fuselage, which was curved, and hard to get all of the bubbles and wrinkles out of. Also, for the yellow stripe on the wing, it just has black border decals that you have to paint yellow inside. I donít know why they wouldnít just make solid yellow decals, like they did for the fuselage, but oh well. I then attempted some weathering, using black oil. I also took silver paint, and flecked the red paint on the nose to simulate paint chipping.Conclusion
This was such a fun build. It is my fifth build, and my first build with a bare metal finish. I am proud of the way that it turned out. If you have any tips as to how I can make my next build better, please let me know!Also, a question for the Aeroscale community: Do you think that I should build a diorama/base to display this aircraft on? Thanks!
Comments
Logan,
Well done, especially your NMF done with a rattle can. Looking forward to your B-47 build.
Just one word of advice for a build of such an old kit. The decals could have dried out and become brittle with the clear film turning yellow. Test one decal that you won't be using, as it may be wiser to buy a after market sheet.
Looking forward to your next build feature.
Joel
JUL 19, 2014 - 02:11 PM
Thanks for the tip, Joel. I can tell that they've gotten pretty brittle, I tried to put one on the stand, and got about three cracks in it. Where do you suggest I look for one of these aftermarket sticker sheets?
JUL 19, 2014 - 02:20 PM
That may very well be difficult, especially if the model is not standard scale. Perhaps you can scan the decal, digitally remove the yellow and print it on clear decal film.
Alternatively, you can probably piece together the insignia, major markings and serial numbers from generic decals.
Yellowed decals can sometimes be salvaged by bleaching them in sunlight for a couple of weeks. Seal them in a plastic bag and tape them to a south or west facing window. You can prevent cracking by coating them with Microscale Liquid Decal Film.
JUL 19, 2014 - 04:44 PM
So fill a plastic bag with bleach, put in the decals, and then leave it in the sun?
JUL 20, 2014 - 02:52 AM
Oh no! No bleach, that will ruin them! The UV in the sunlight will "bleach" them over the period of a couple of weeks. Put the decals in a bag to protect them from any moisture that may be in the air and just tape them into the inside of the glass.
JUL 20, 2014 - 05:23 AM
Okay, I thought that sounded like a weird method haha! Decals might not be the best route, either- For all of the locatirons for decals, there are raised ridges. It might be easier to just paint inside the ridges, as putting decals over them could prove difficult anyways.
JUL 20, 2014 - 06:48 AM
Oh wow, that's an oldie Most of us carefully sand and polish those decal locations off but if you're going to use them, I'd recommend that you paint them white first. That will help to make the colours look brighter.
JUL 20, 2014 - 07:49 AM
Copyright ©2021 by Logan Fetzer. Images also by copyright holder unless otherwise noted. The views and opinions expressed herein are solely the views and opinions of the authors and/or contributors to this Web site and do not necessarily represent the views and/or opinions of AeroScale, KitMaker Network, or Silver Star Enterrpises. Images also by copyright holder unless otherwise noted. Opinions expressed are those of the author(s) and not necessarily those of AeroScale. All rights reserved. Originally published on: 2014-07-19 00:33:45. Unique Reads: 5502


