

1⁄48F-15C
8
Comments
History
The F-15 Eagle is a twin-engine, all-weather tactical fighter, which was designed by McDonnell Douglas, to gain and maintain air superiority. The United States Air Force selected McDonnell Douglas' design in 1967 to meet the service's need for a dedicated air superiority fighter. The Eagle first flew in July 1972, and entered service in 1976, and is expected to remain in active serve till 2025.The A and C-models are single-seat variants, which are the main air superiority versions. The B and D-models added a second seat behind the pilot as a training aircraft. Strike Eagles are E-models which uses the second seat for a weapon systems officer.
The kit depicts The F-15C as a MSIP 11 Eagle, which stands for the Multi-stage Improvement Program, which would provide maximum air superiority in a dense hostile environment in the late 1990s and beyond. 427 Eagles received the new avionics upgrades. Along with later model production aircraft, these retrofitted aircraft would provide the Combat Air Forces (CAF) with a total MSIP fleet of 526 aircraft. *
The Kit
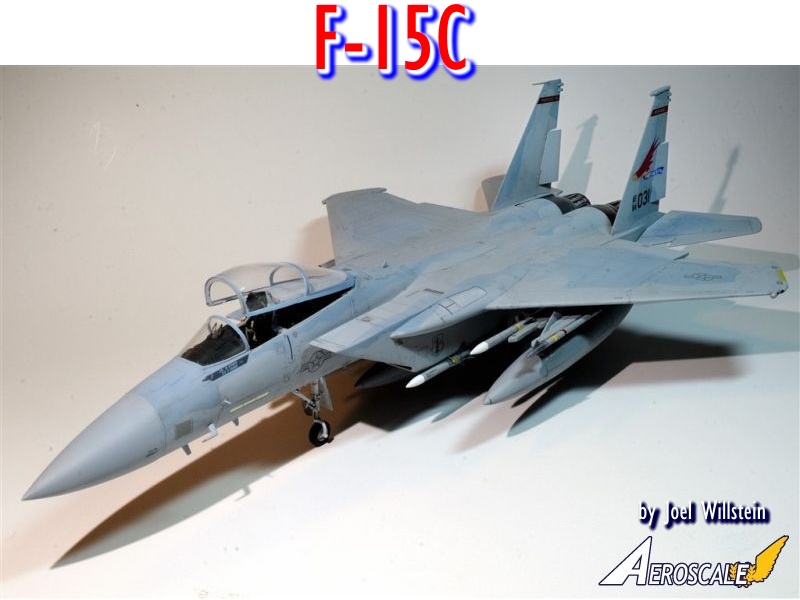
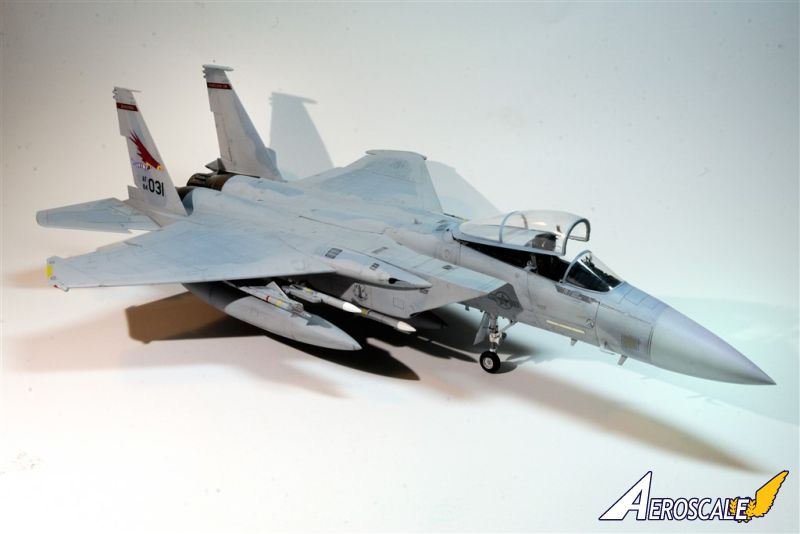
This is Great Wall Hobby's brand new, and much improved 1/48 scale F-15C MSIP 11 Eagle, which is molded with all the latest avionics. Their original F-15 release of the B/D variants has serveral shape issues that have all be addressed and corrected.The boxing contains 28 sprue trees plus 2 sprue trees of clear parts, and two sheets of decals, one being all the necessary stencils. I opted to use the Caracal Decals for the Oregon ANG REDHAWKS instead.
Kit Construction
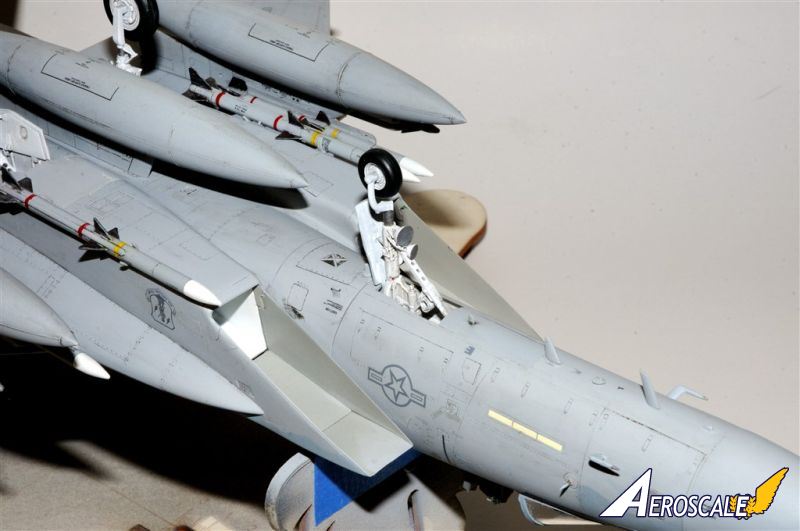
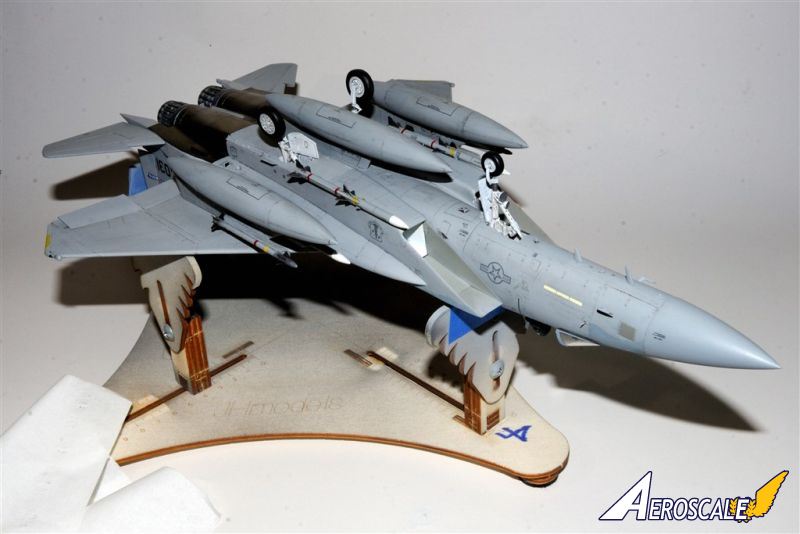
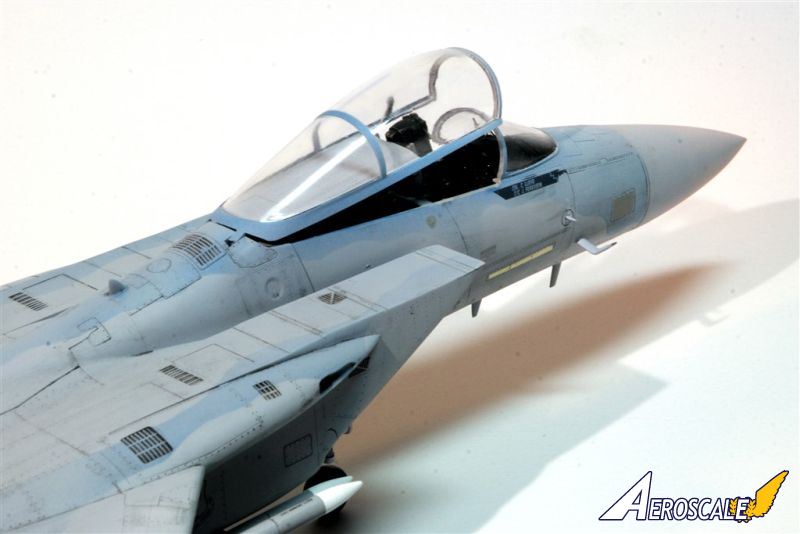
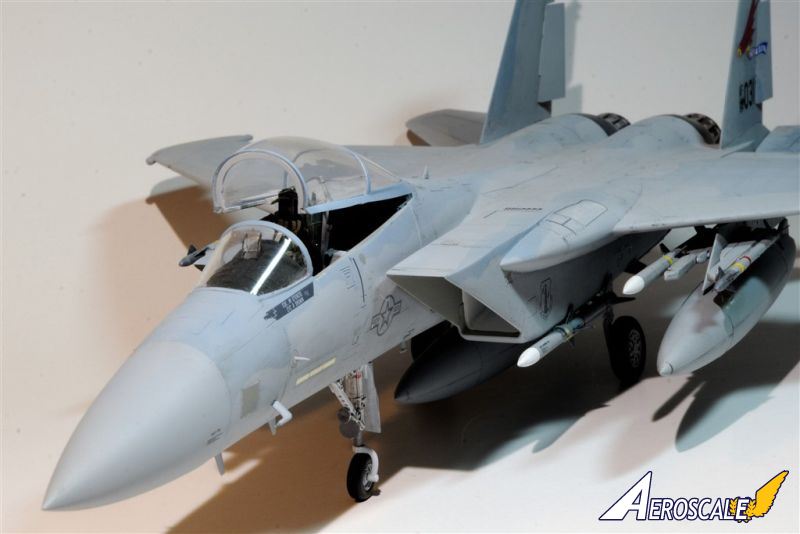
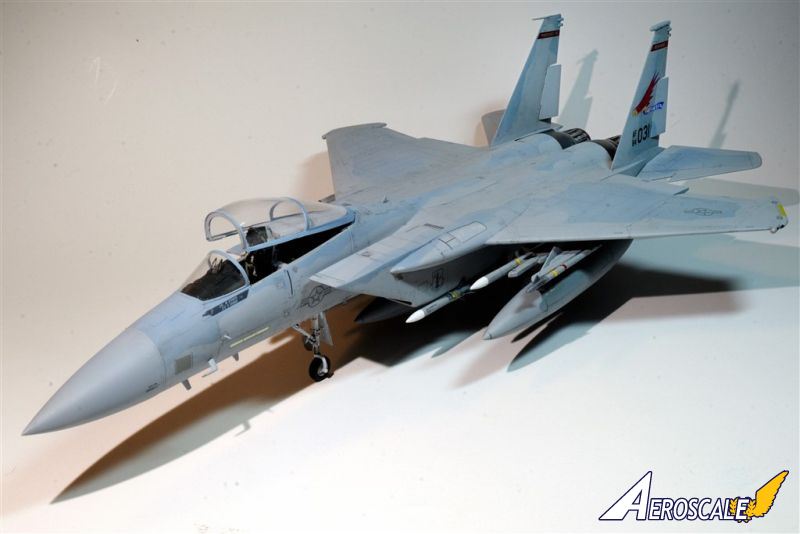
Without a doubt, the GWH F-15C kit is the finest kit I've ever built to date. Every part is beautifully detailed, and the fit is nearly perfect. I hardly needed any filler except for the fit of the nose cone, and the lower wing fuselage joint. The kit has both foward fuselage electronic bays designed to be opened with excellent detail, as well as the nose radar. My personal preference is to model a aircraft with as few compartments opened as possible, so that they wouldn't alter the overall look and feel of the aircraft. I also opted to close the large airbrake on the spine of the aircraft, as well as lowering the position of the raised canopy for a more streamline effect. To my surprise, closing the side electronic bays, the panels fit almost perfectly, requiring no putty.The cockpit is very well detailed, as is the Aces II ejection seat. There wasn't really any need for a AM resin replacement.
The only negative to the whole kit is the two landing/taxiing lights on the front gear strut. There are no clear lenses, and even after using Metalizers they still aren't convincing looking lights, so I'm adding home made lenses.
Load Out
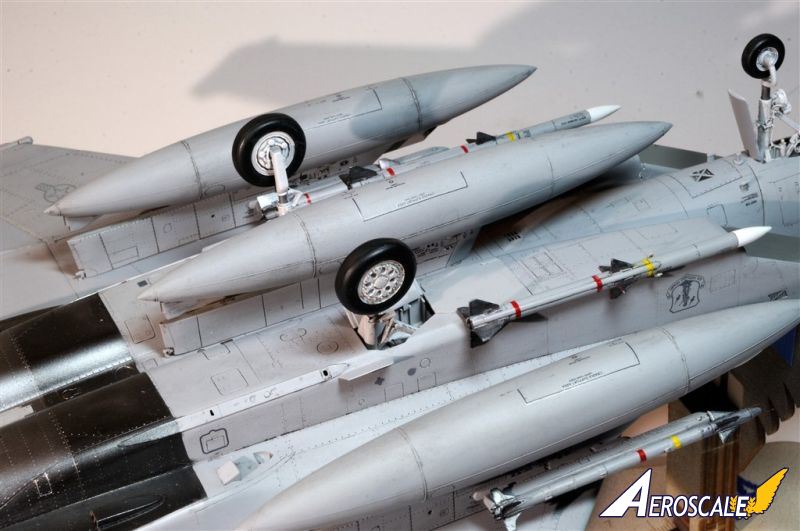
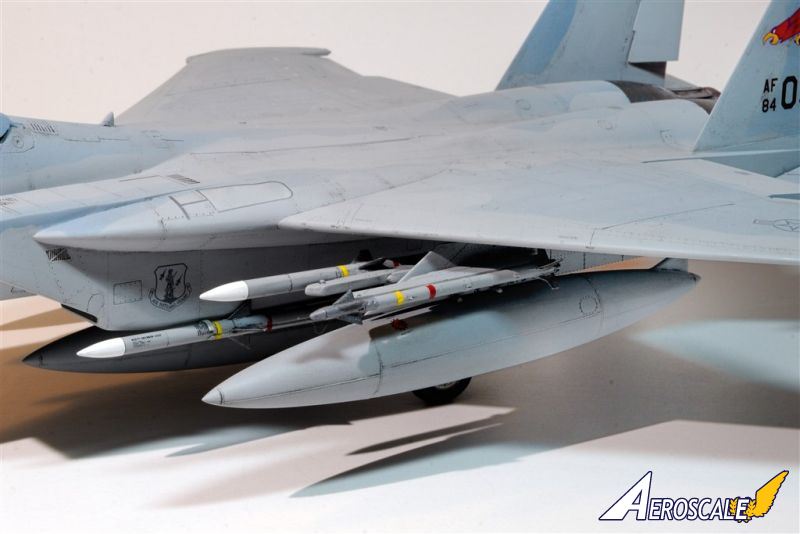
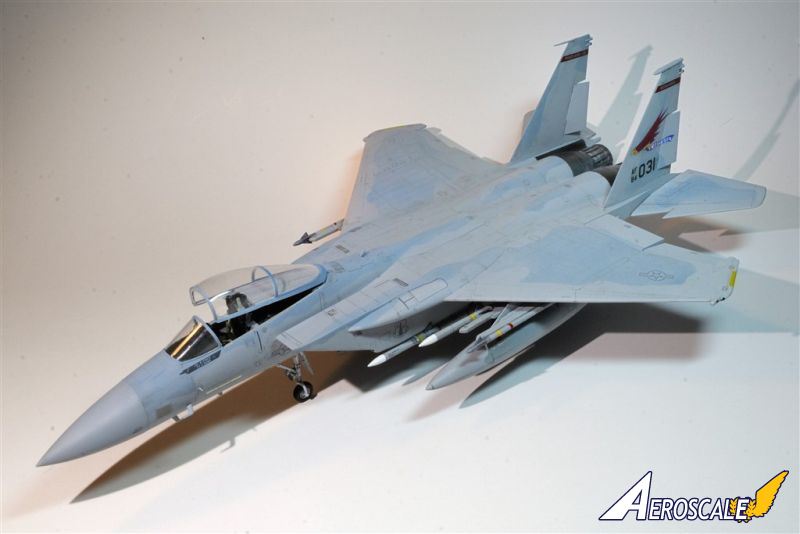
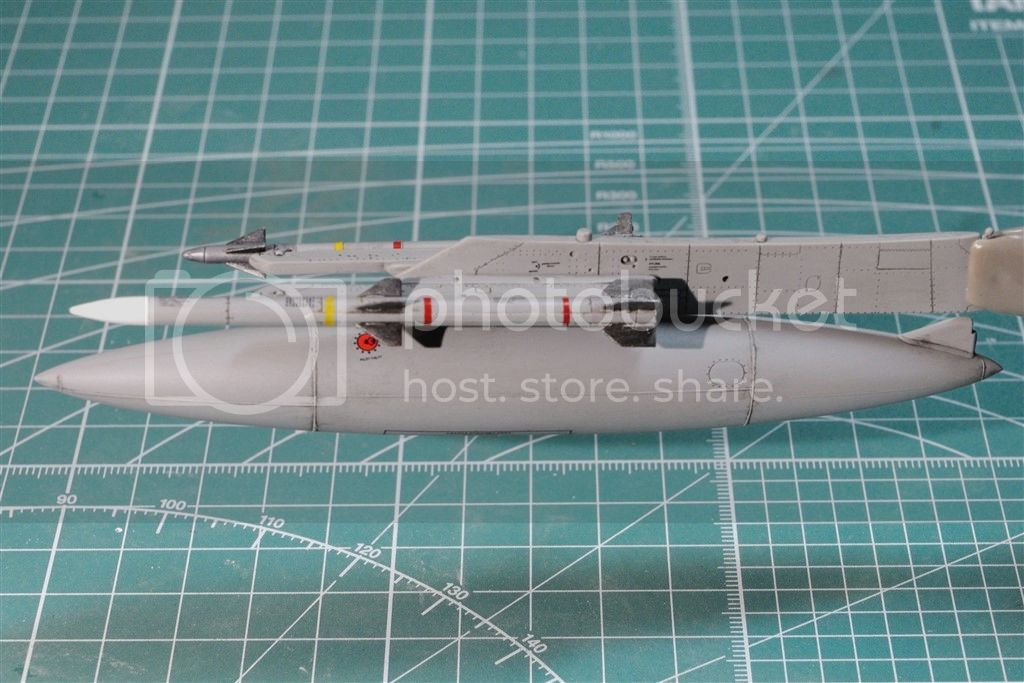
The kit contains three 300 gallon drop tanks, two AIM-9X Sidewinders, two AIM-120A AMRAAMs,and two AIM-120C AMRAAMs. All 6 missiles are extremely well detailed, as are the 3 drop tanks. All the stations are nicely detailed with two racks each to attach the appropriate missile to. Two curved racks are provided for each of the four fuselage housings to mount the AIM-120A AMRAAMs.Painting
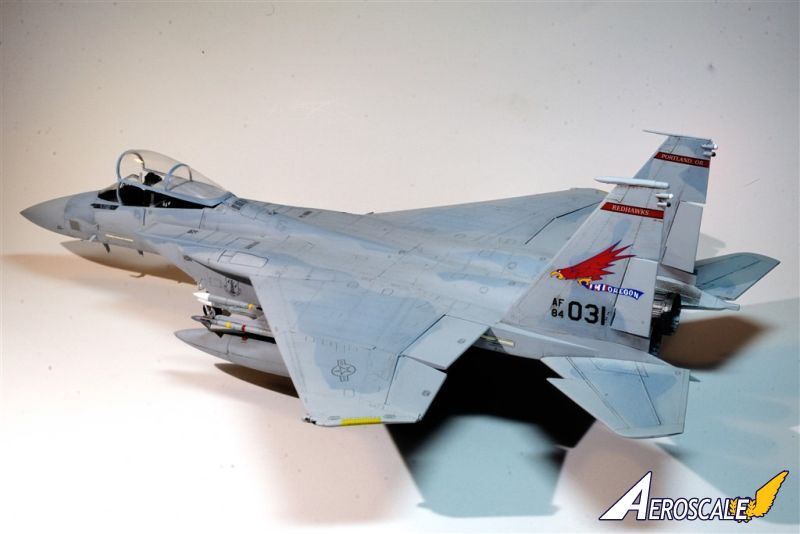
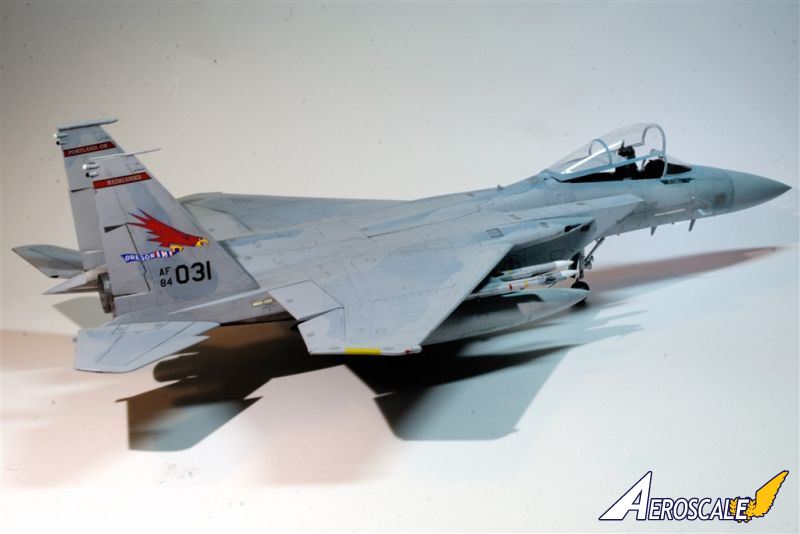
As my usual practice the model was primed with Tamiya Gray Surface primer, and any touch ups and or repairs were done, then reprimed once again.Since I was going to be doing the Light And Dark Ghost Grey scheme, I decided to use Model Master's enamel paints as they have both shades. The Light Ghost Grey went down smooth as silk. After a day or so I used Blue Tac worms and proceded to airbrush the Dark Ghost Grey on. One wing later I stopped. I just couldn't tell the difference in colors. I let the paint dry a full day, and still under good lighting the colors looked almost identical. Talking with some of my more astute modeling friends, they had experienced the same issue. So I decided to "switch gears", and go with one of the MOD paint schemes of the Oregeon ANG. Now came the challenge of actually mixing the Blue Grey as the color and combinations changed almost on every aircraft. It took a lot of extra work, but finally I got the colours close enough.
Decalling
I had decided at the start of the build to use the Caracal Oregon ANG REDHAWKS decal sheet. The decals laid down perfectly without any issues. I also changed my decal procedure after seeing Paul Budzik's decalling tutorial Video, as well as a few emails back and forth. Basically it's the Micro system of Set and Sol, followed by Solvaset as the final application. I'm certainly more than glad I made the adjustment, which just goes to prove that old dogs can learn a few new tricks.Weathering
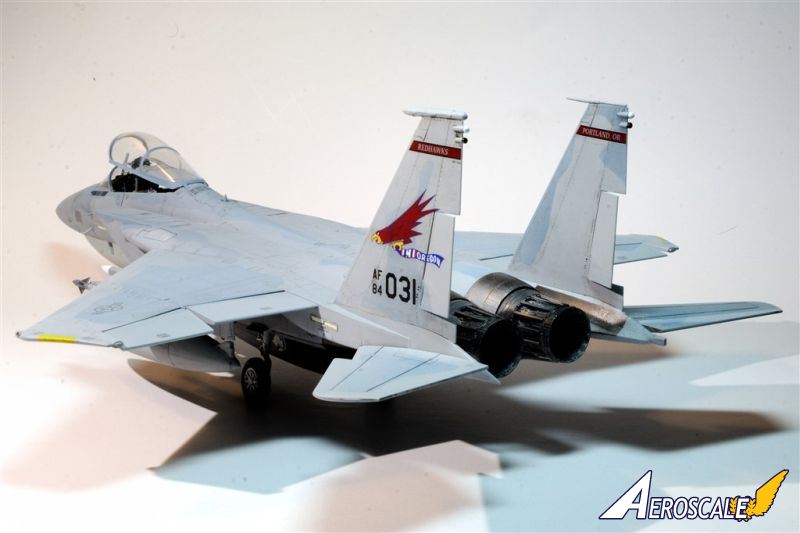
As most of you know, I'm not a big fan of pre-shading, I prefer post shading with thinned colors for fading, dust and dirt, as well as washes, filters, and pigments. On the F-15C I concentrated on just slightly darkening the panel lines, and streaking along the rivet lines. Then a few overall washes to blend everything together.Final Thoughts
As I said right at the start, GWH 1/48 scale F-15C is the finest and most detailed kit I've ever built. It certainly should be for a kit with a MSRP of $116.00. Sprue Brothers has it for a mere $92.99. I suspect that a lot of modellers will still opt for the Hawegawa kit at a third of that price.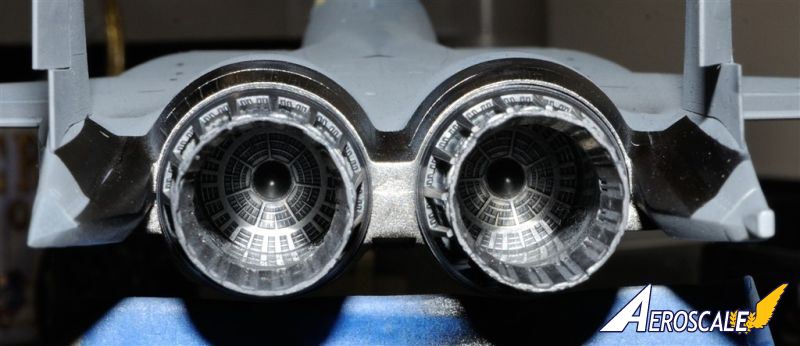


About the Author


FROM: NEW YORK, UNITED STATES
I've been a plastic scale modeler on and off for most of my life since I 1st found them on a shelf at a local toy store way back in the very early 1960s. Once in High School modeling stopped until the mid 1970s when I got married, and needed a hobby that would keep me at home. After 10 years I to...
Comments

A super looking F-15C, a beautiful paint job and great photos. I am also aware of the problem with MM Dark and Light Ghost Gray, they are almost the same color. You did a nice job with the camouflage pattern. Again, very nicely done.
FEB 20, 2015 - 03:21 PM

Hi Joel
It's great to see your Eagle on the front-page. Fantastic build!
All the best
Rowan
FEB 20, 2015 - 03:30 PM

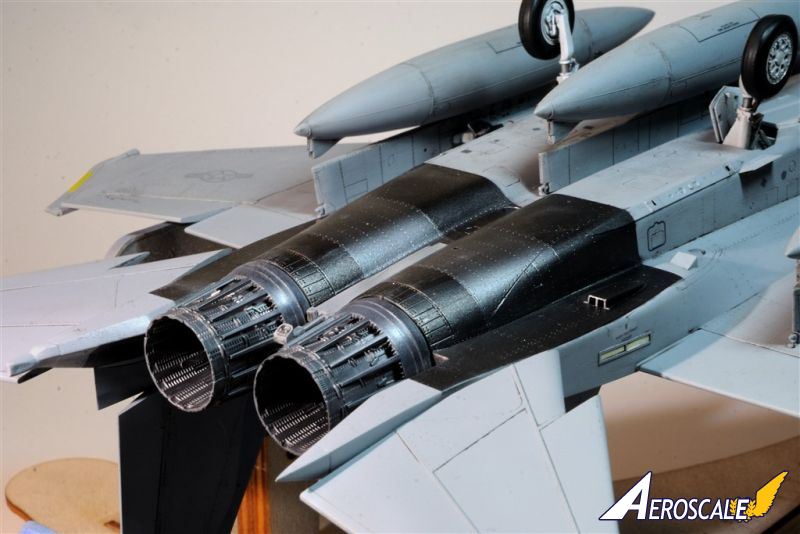
Great build Joel, very professional! I think you did a great job and I especially like your engines. I fly into Portland often and you did their ANG proud. Take care. Jim
FEB 20, 2015 - 08:13 PM

Congrats on the build Joel! My D build has become something of a nightmare. Since I'm supposed to be doing as a feature review, I used ALL the stencil decals from the kit, which I see you wisely skipped. Nice work!
FEB 21, 2015 - 08:27 PM
Michael,
Thank you.
Actually, I used all the stencils on the 2nd sheet. Most of the stencils are either Dark or light Ghost Gray, and the areas where they go are naturally light Ghost Gray, so it's very hard to see them unless you're almost on top of the model. But if you look closely, you'll see them. I did have a lot of silvering issues, and ended up using several applications of Solvaset with varying results. There is a technique using Pledge that is supposed to eliminate the silvering issue, but I've yet to try it. Better yet, a absolutely smooth and glossy surface is still the best solution. And that's something I never really achieve.
Joel


FEB 21, 2015 - 10:09 PM
Thanks to all my Aeroscale friends for your most positive comments on my F-15C build. Sharing with all of you is more then half the fun of modeling for me these days.
Joel
FEB 21, 2015 - 10:11 PM

The F-15 is a very beautiful aircraft and this model does it all the justice it deserves. Congratulations with an excellent build
FEB 22, 2015 - 01:55 AM
Copyright ©2021 by Joel Willstein. Images also by copyright holder unless otherwise noted. The views and opinions expressed herein are solely the views and opinions of the authors and/or contributors to this Web site and do not necessarily represent the views and/or opinions of AeroScale, KitMaker Network, or Silver Star Enterrpises. Images also by copyright holder unless otherwise noted. Opinions expressed are those of the author(s) and not necessarily those of AeroScale. All rights reserved. Originally published on: 2015-02-21 00:34:26. Unique Reads: 10598

WEB HOSTING BY


Copyright ©2021 AeroScale and Kitmaker Network, a subsidiary of Silver Star Enterprises
All Rights Reserved. Please read our Conditions of Use and Privacy Policy.
All Rights Reserved. Please read our Conditions of Use and Privacy Policy.