

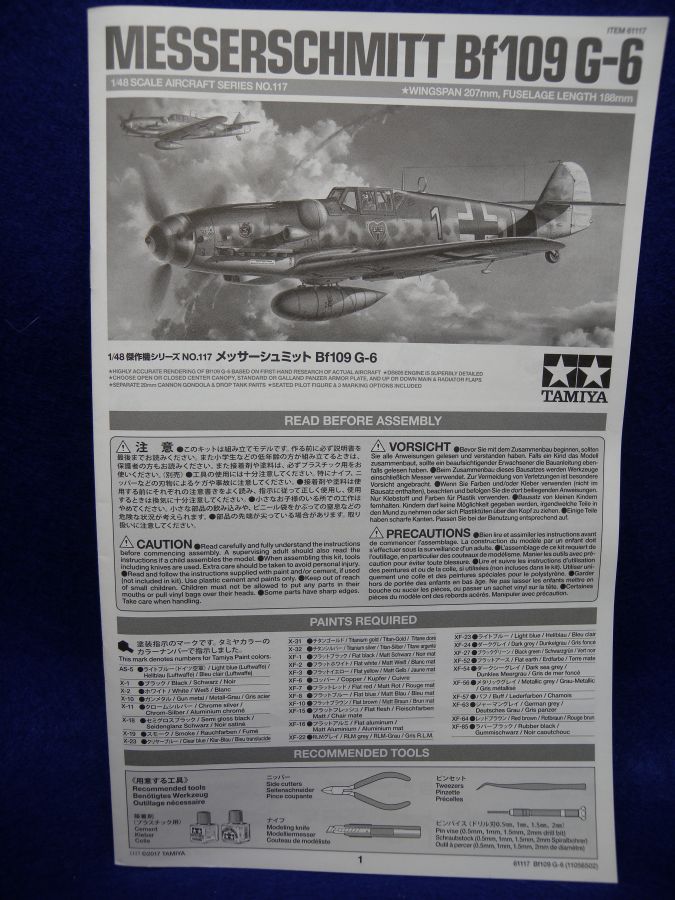
1⁄48Messerschmitt Bf109 G-6
20
Comments

Introduction
The Messerschmitt Bf109 is probably one of the more iconic World War 2 German fighter aircraft. First operationally used during the Spanish Civil War in 1937, the aircraft went on to be the main fighter of the Luftwaffe. The Bf109 was flown the by the three top aces of the Luftwaffe during World War 2, claiming more then 900 victories between them. Throughout the war, the Bf109 went through improvements, with the G-series introduced in mid-1942. The major improvement of the G's was the more powerful DB605 engine.A new molding from Tamiya features the Bf109G-6, a mid example of this "G" series.
Contents
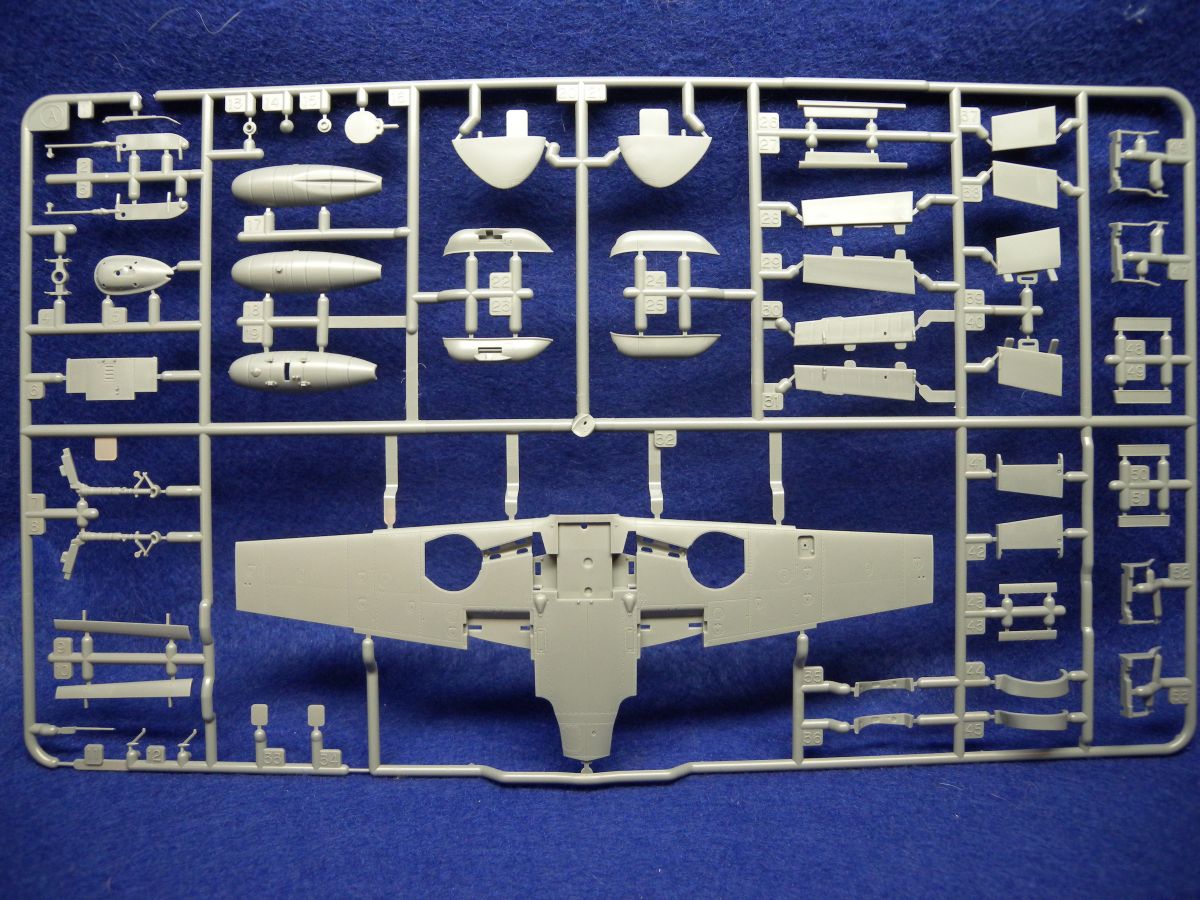
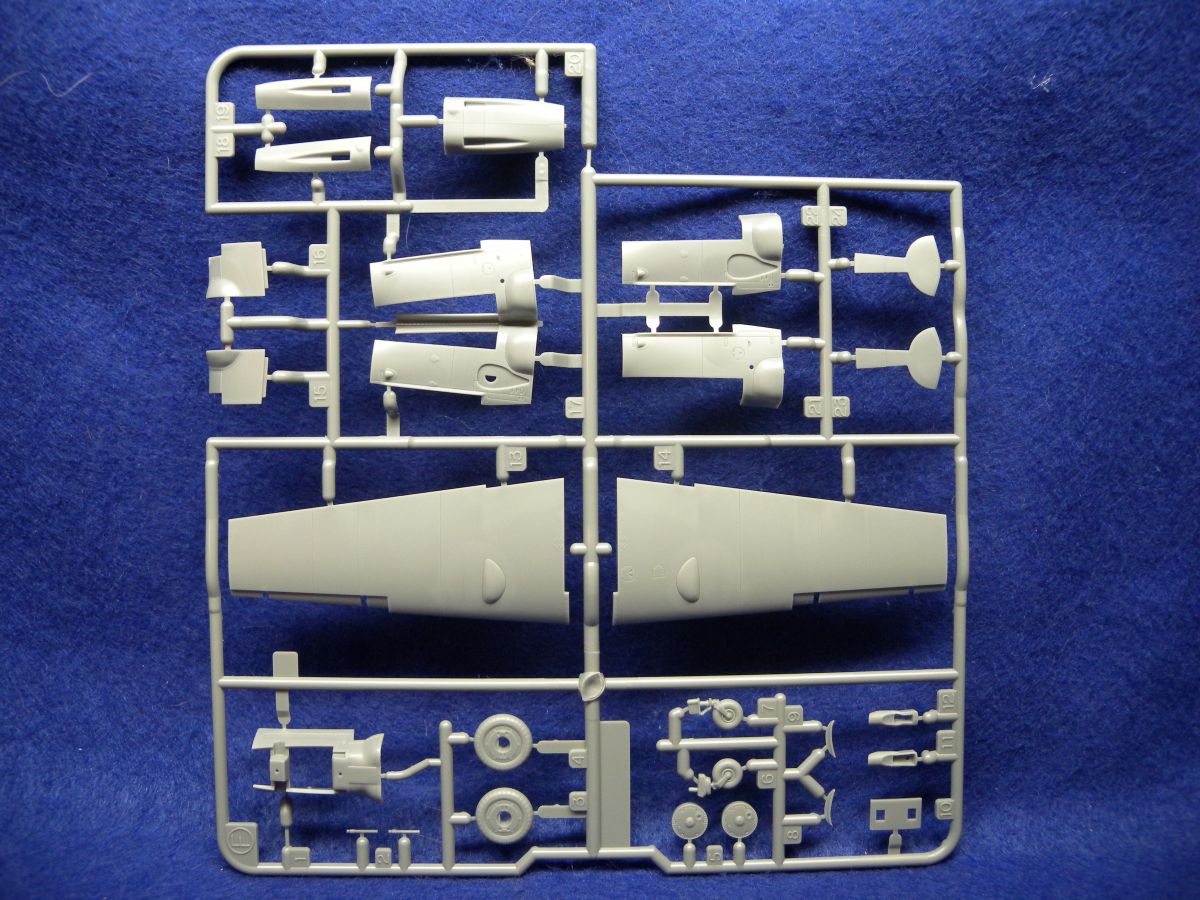
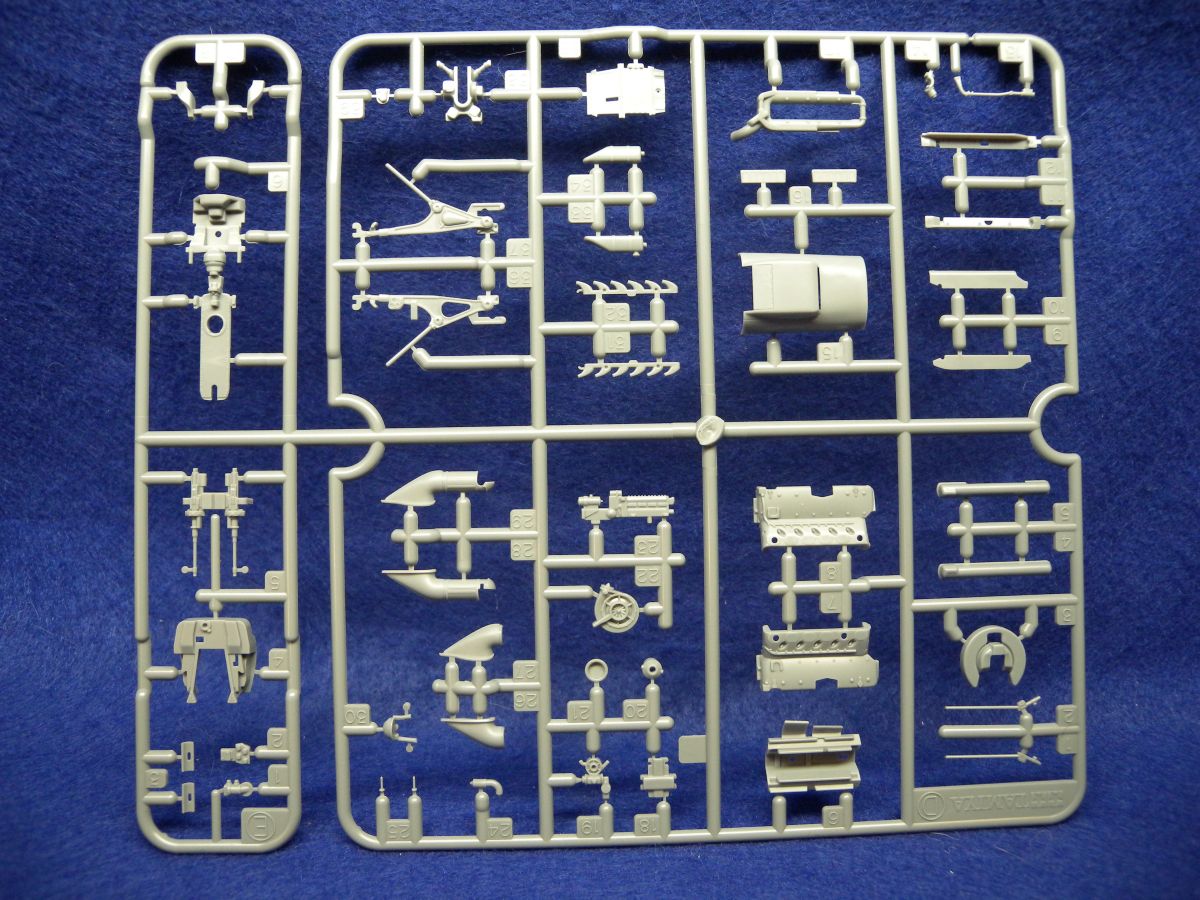
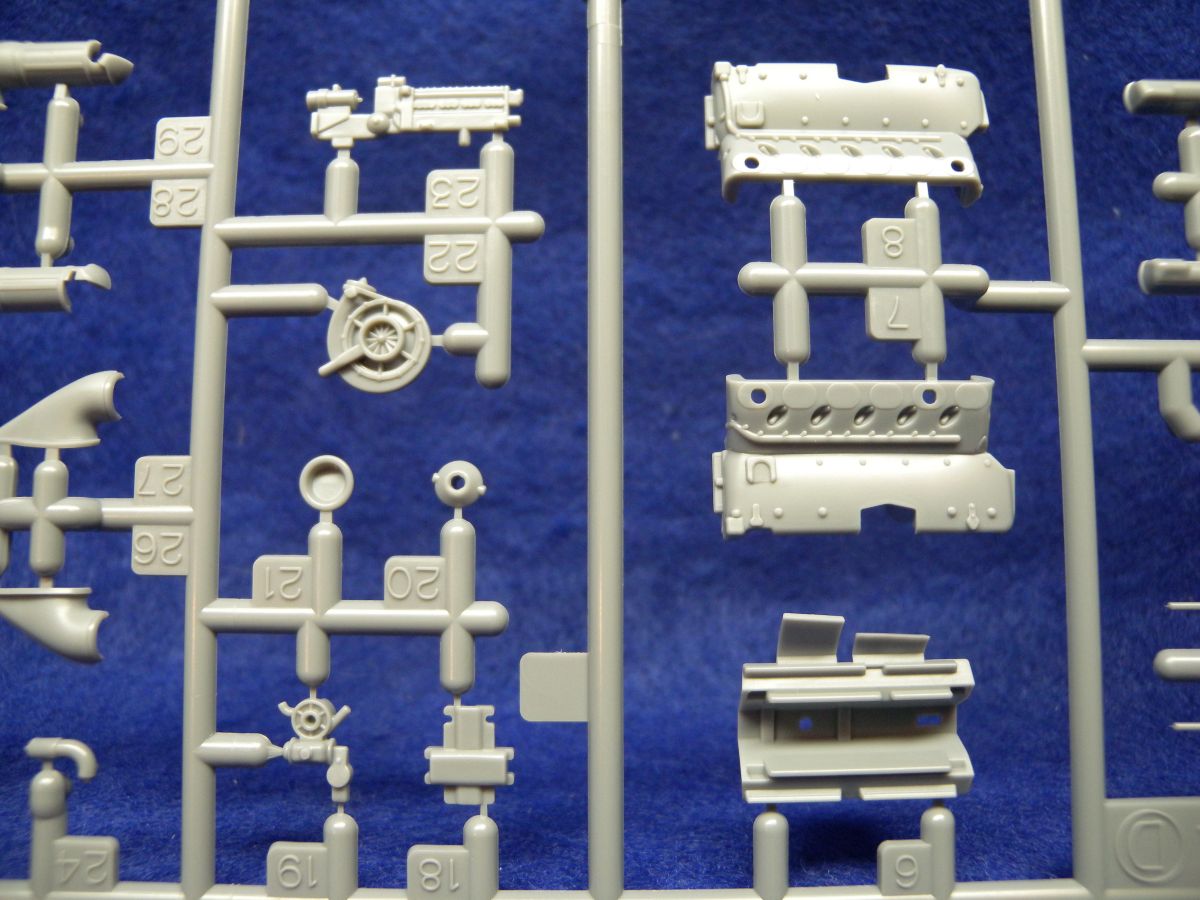
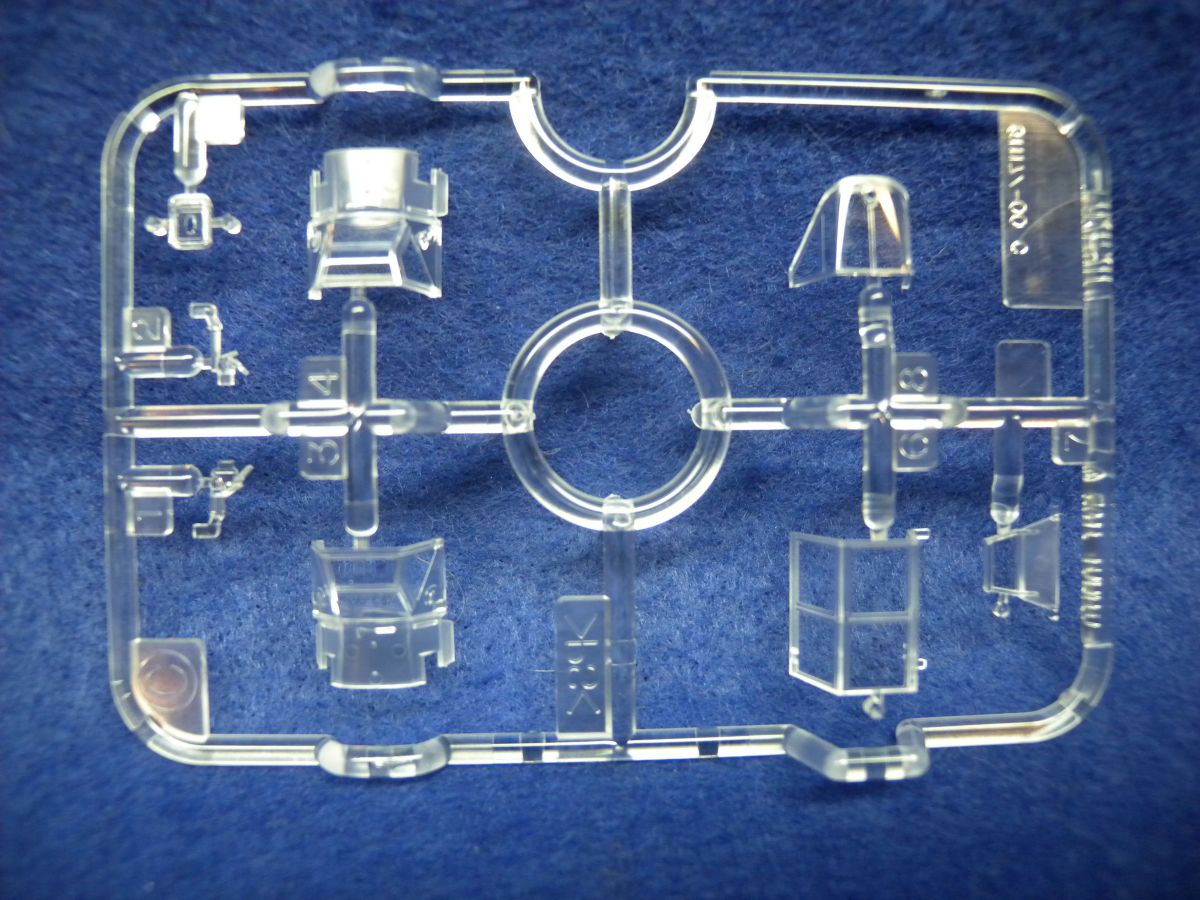
6 Plastic Sprues 1 Clear Plastic Sprue 1 Vinyl Rubber Sprue 2 Small Magnets 2 Metal Washers 2 Decal sheets 1 Masking Sheet 2 Instruction Sheets (store options separate) 1 Large Colored Painting and Marking GuideReview
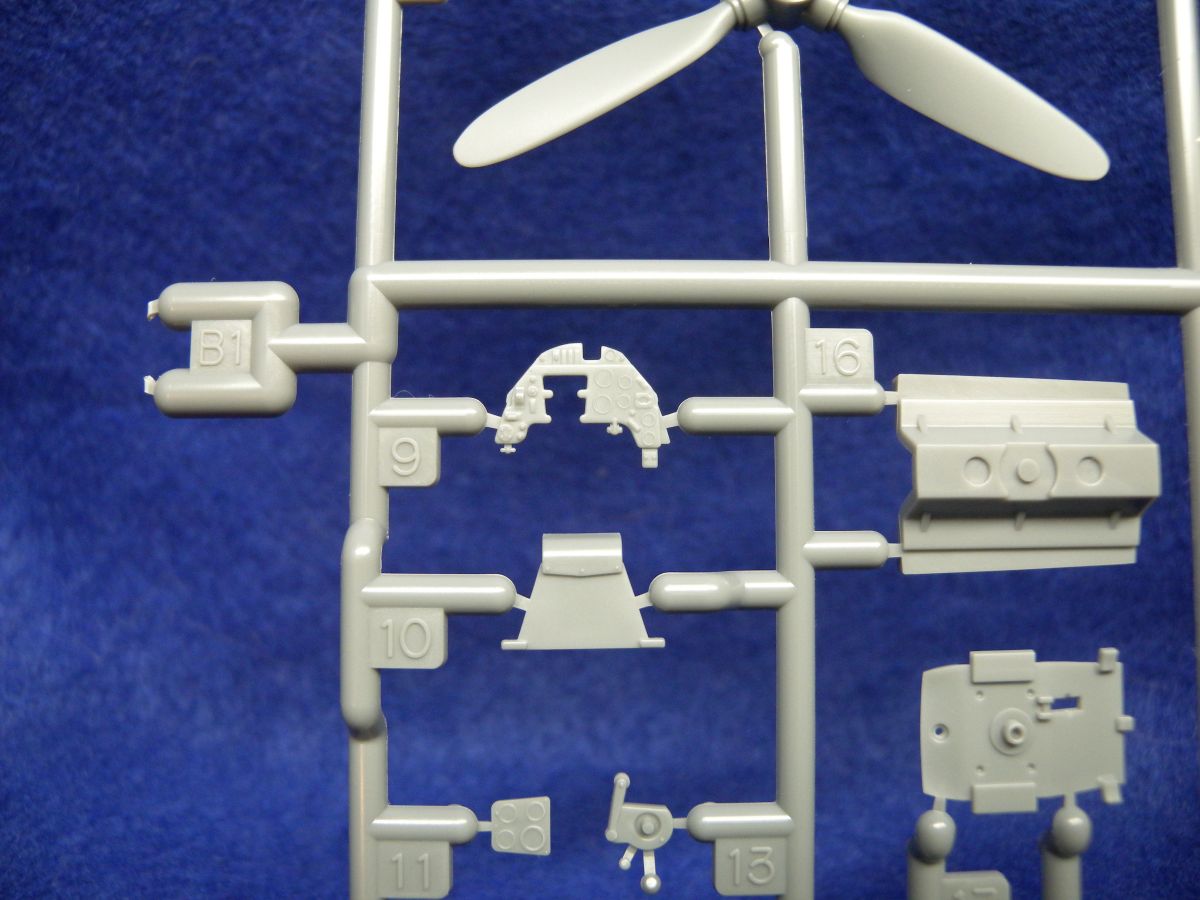
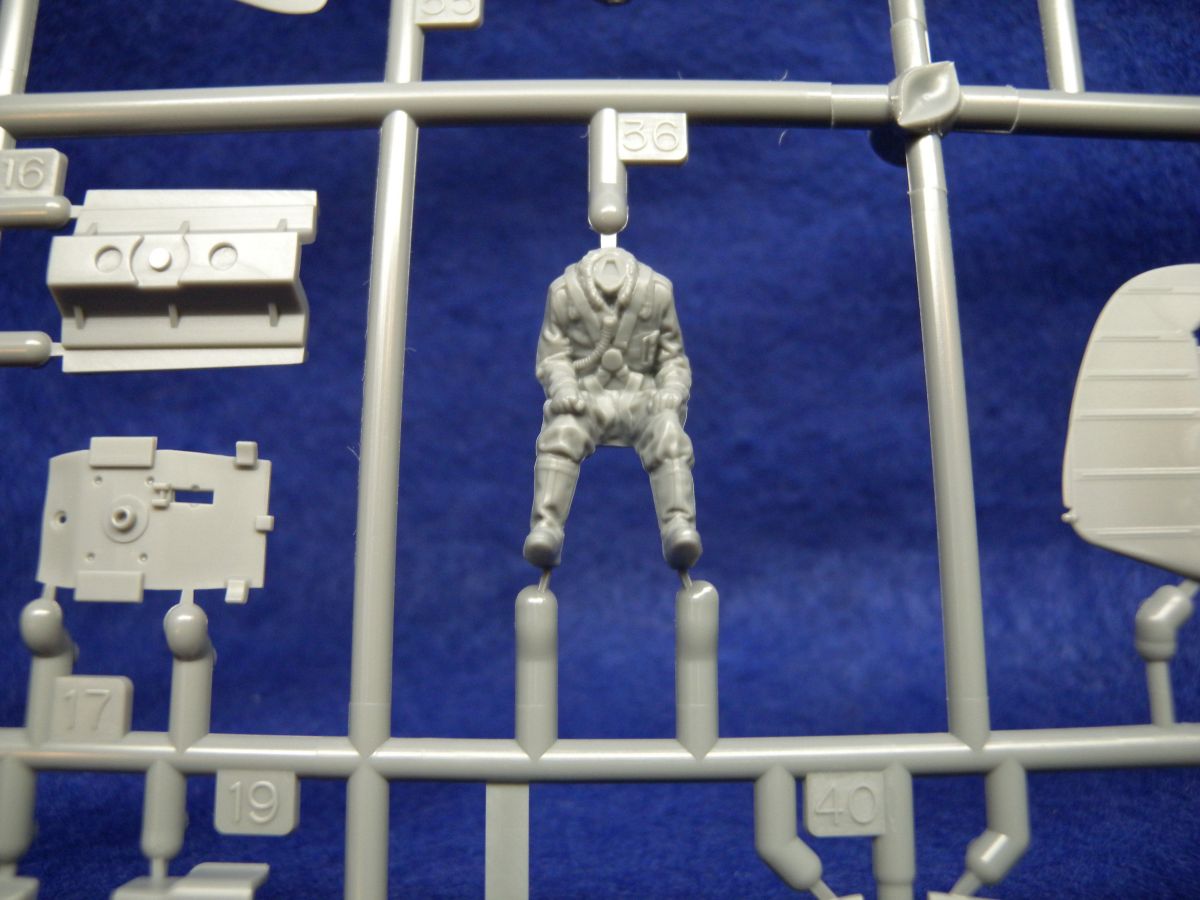
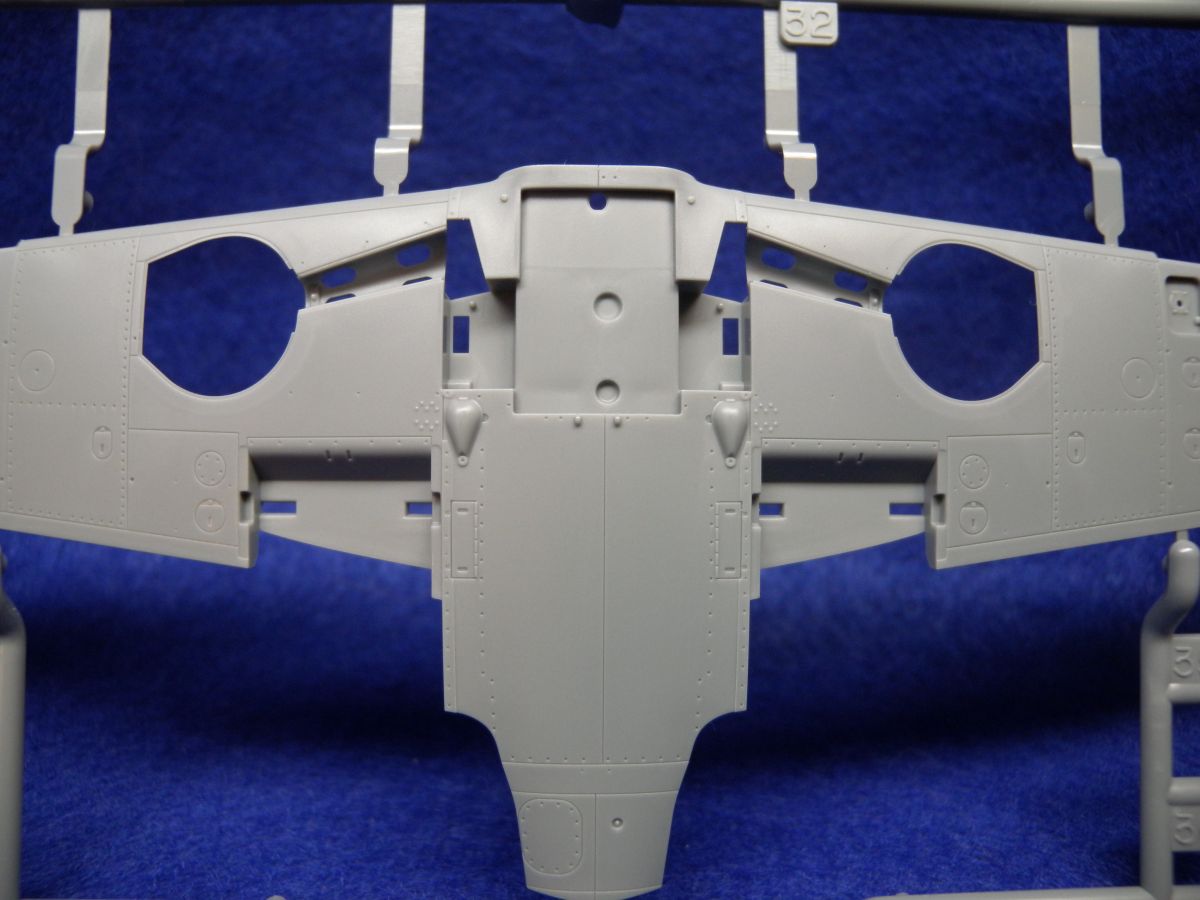
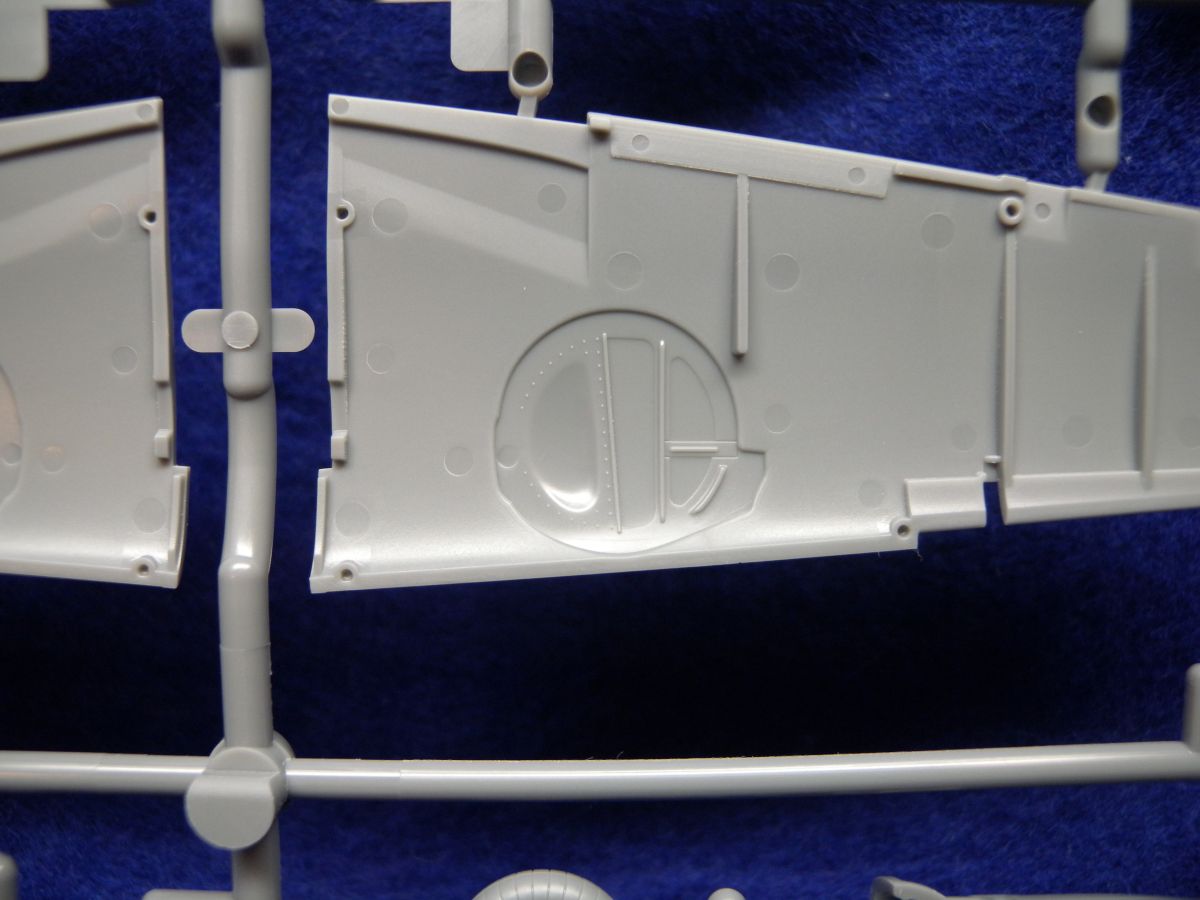
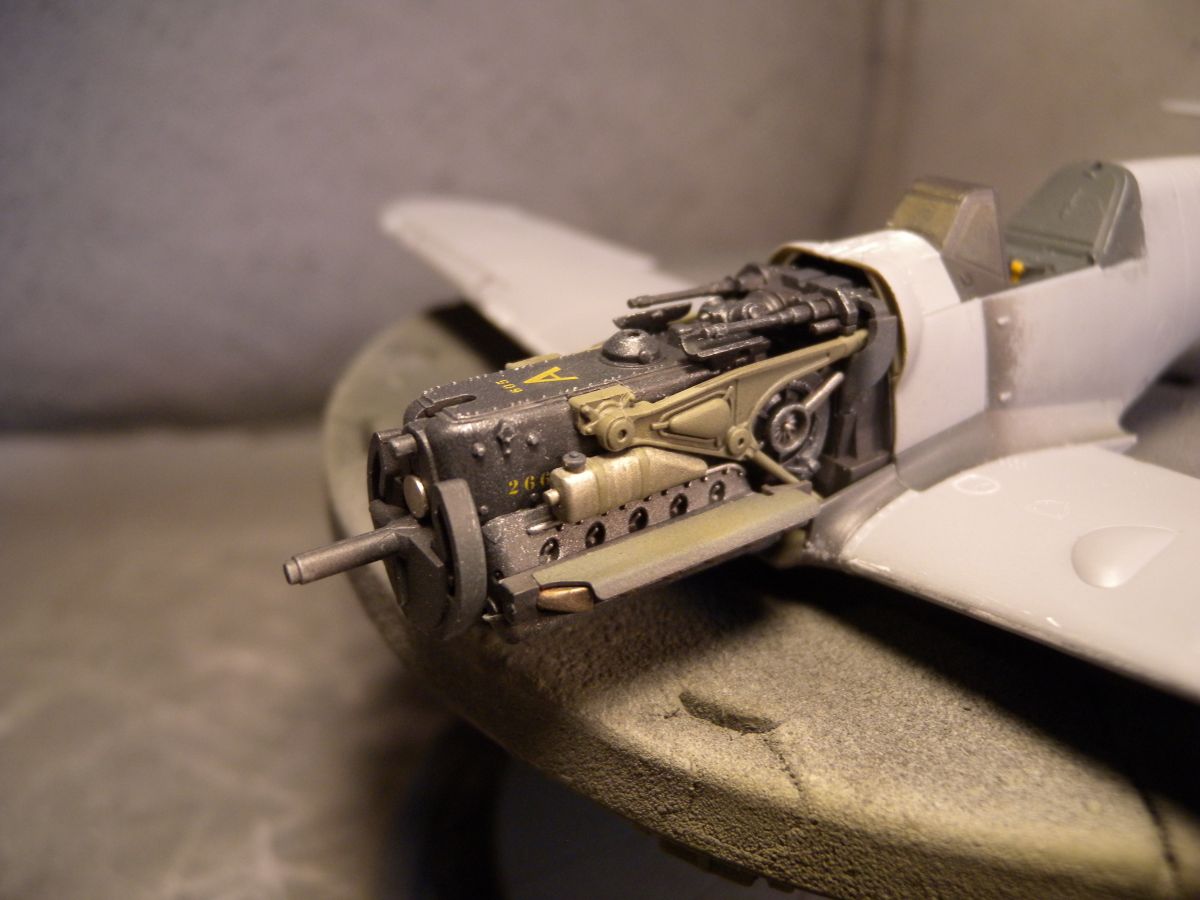
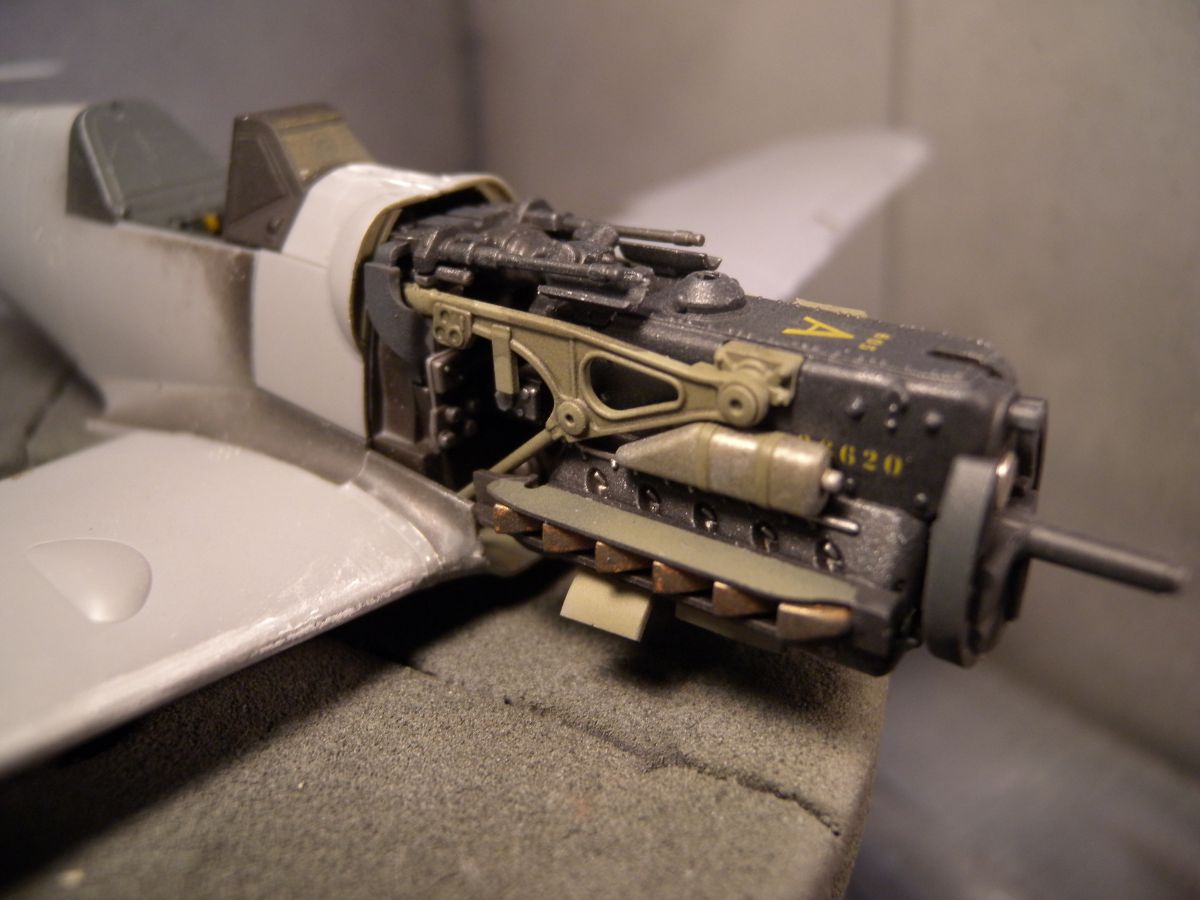
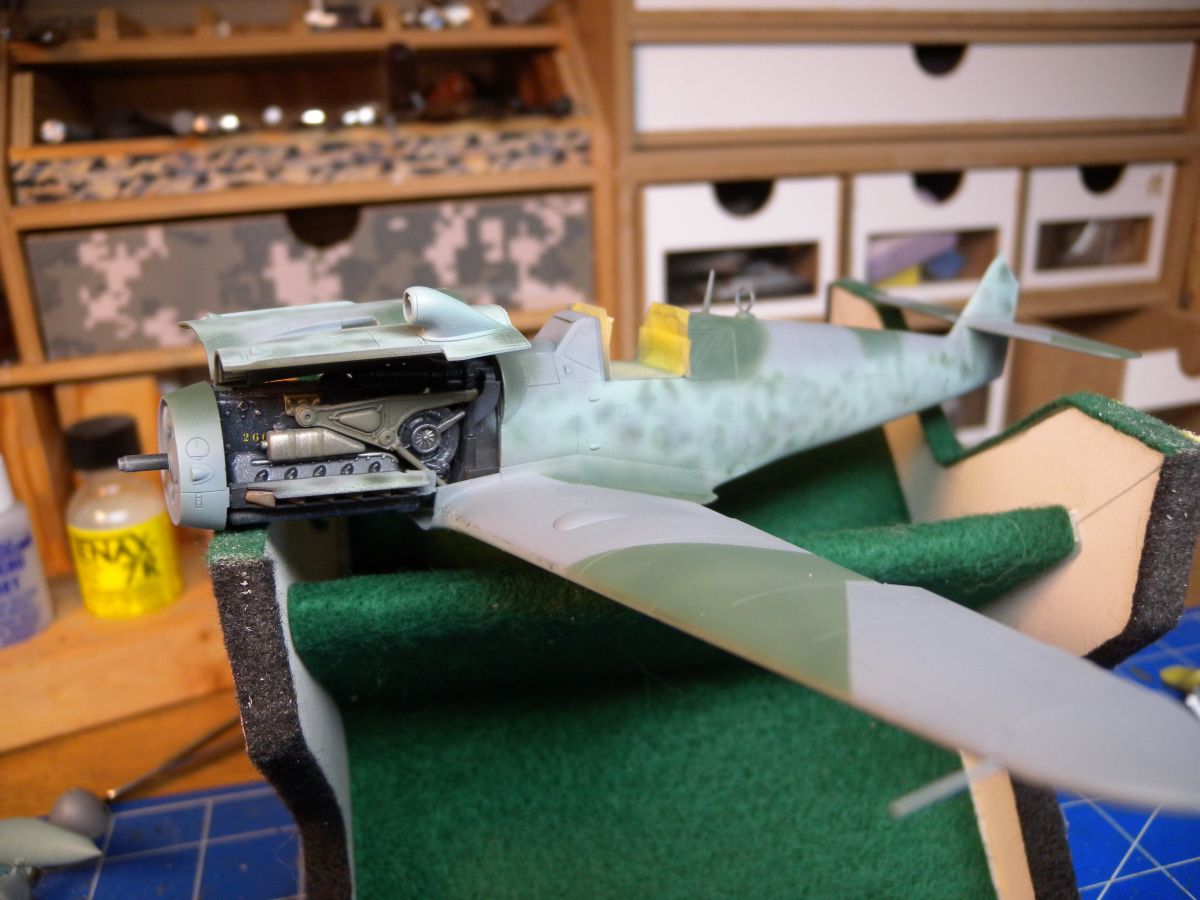
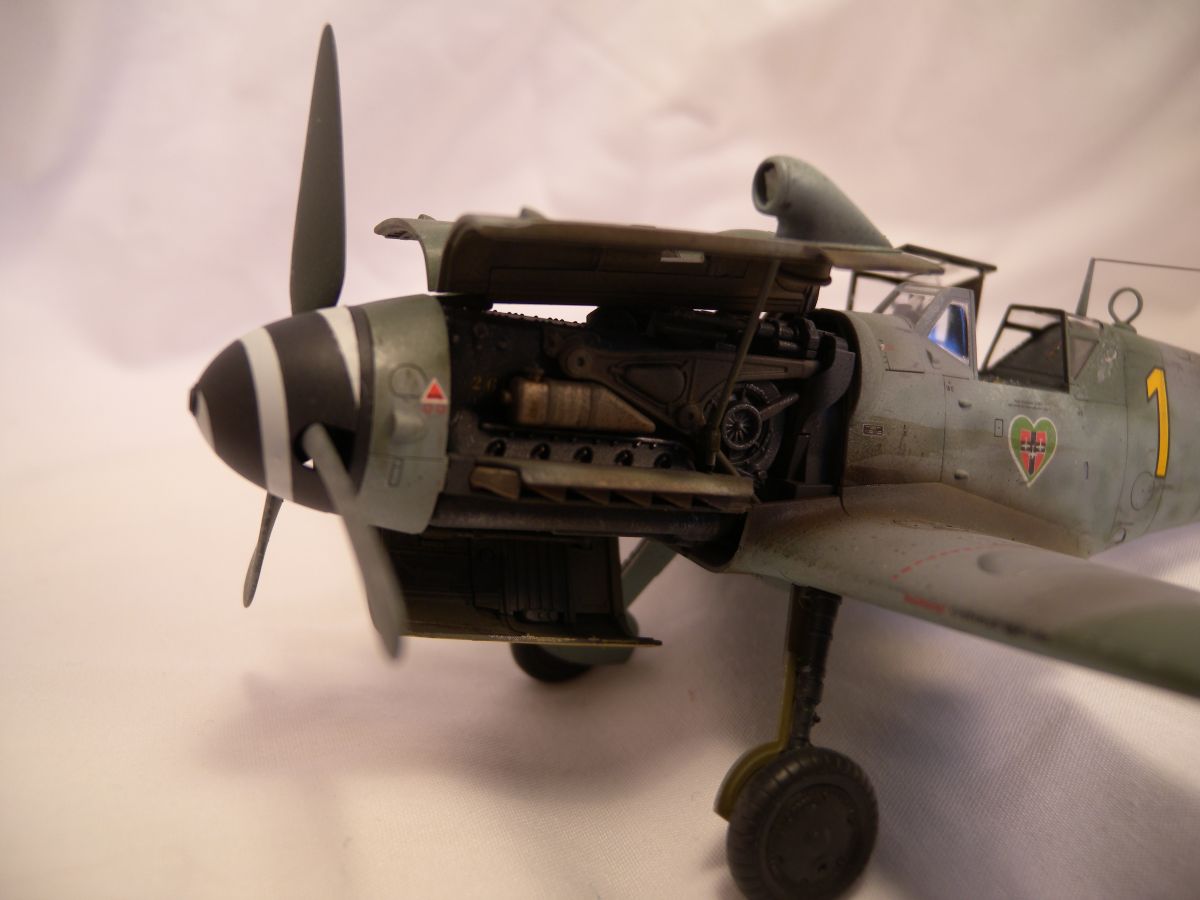
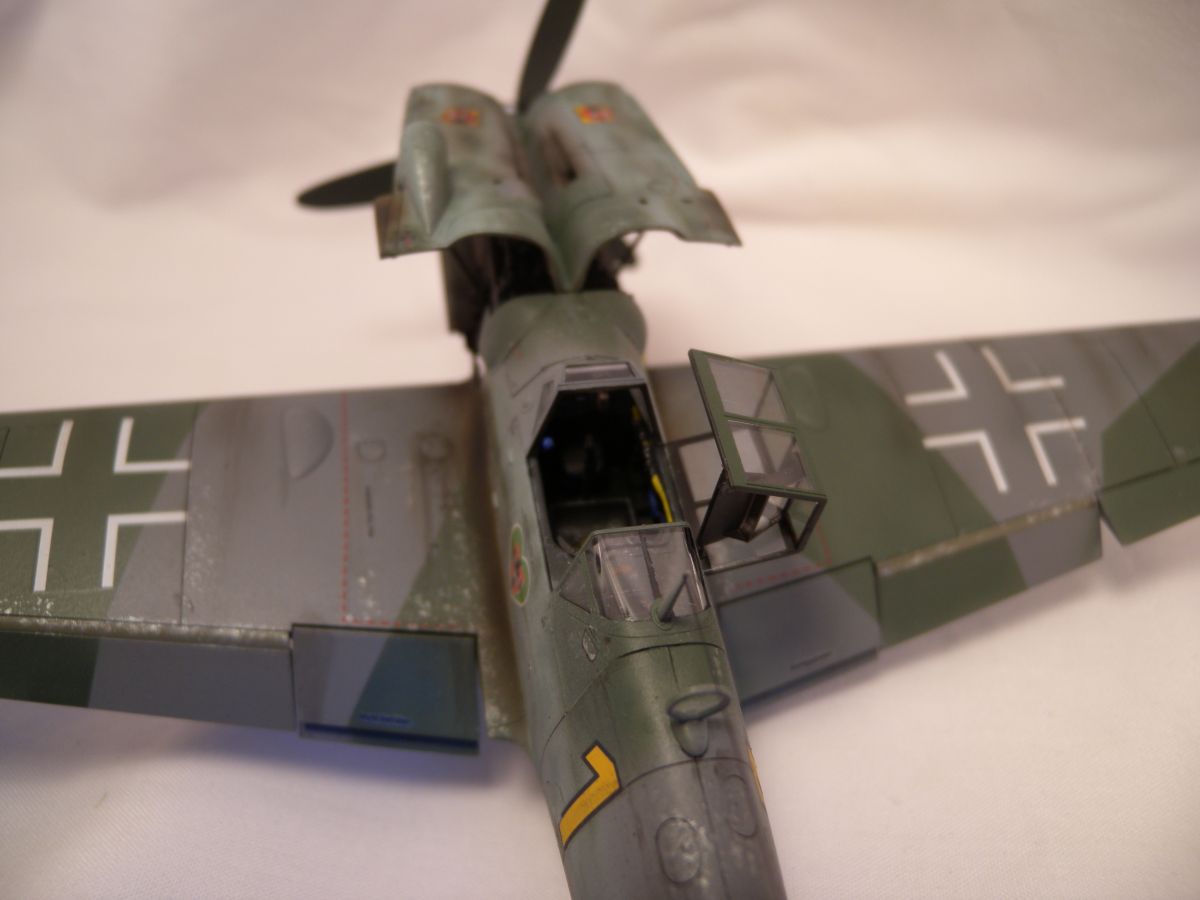
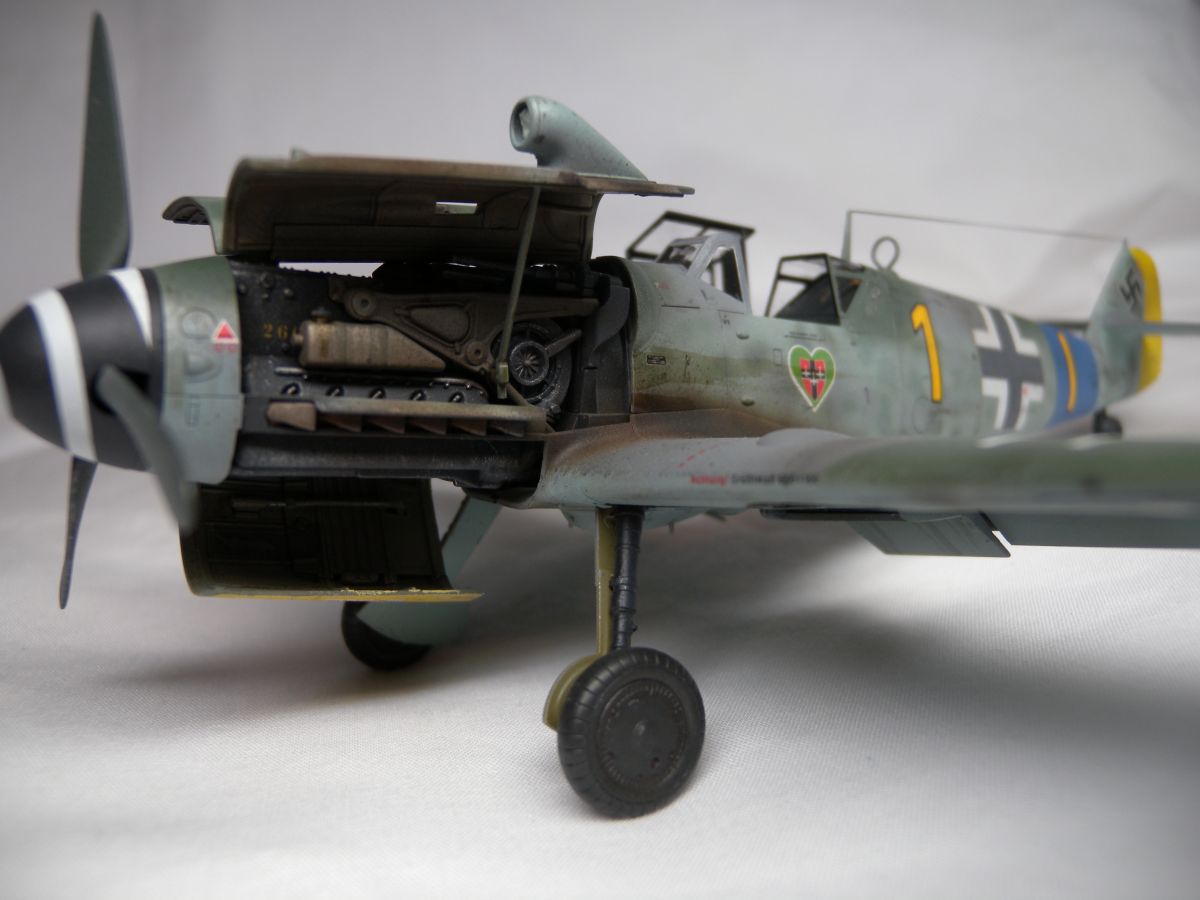
It has been a while since I have been able to lift the box top on a newly tooled kit from Tamiya, and my initial inspection showed my why so many people like Tamiya's quality. The moldings are superb, no flash, no sink marks, and only a couple of ejector marks. The overall detail is great, fine engraved panel lines and rivets, and very well molded detailed parts.The kit includes a nicely detailed cockpit, as well as a detailed engine. All the parts for these are very nice looking, with good surface details and some fine parts. Options are provided for building both of these in the open and closed position. As well Tamiya has included two small magnets that can be used to hold the engine compartment closed, and allowing to be removed for display. The kit also includes a molded "open" set of engine hatches, if you wish to display the plane with the engine permantely showing. This includes tab to hold the bottom hatch open as well. A pilot figure is also included, and looks very nice.
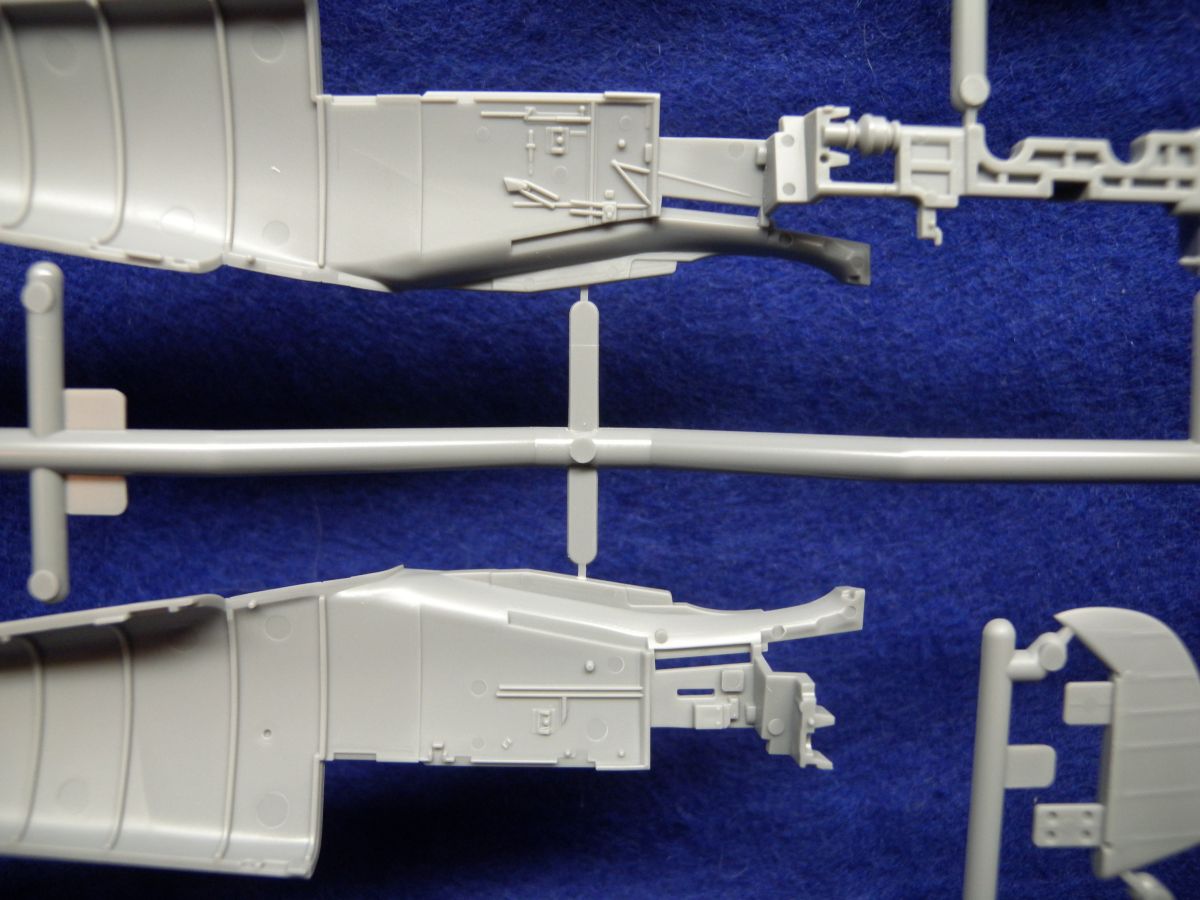
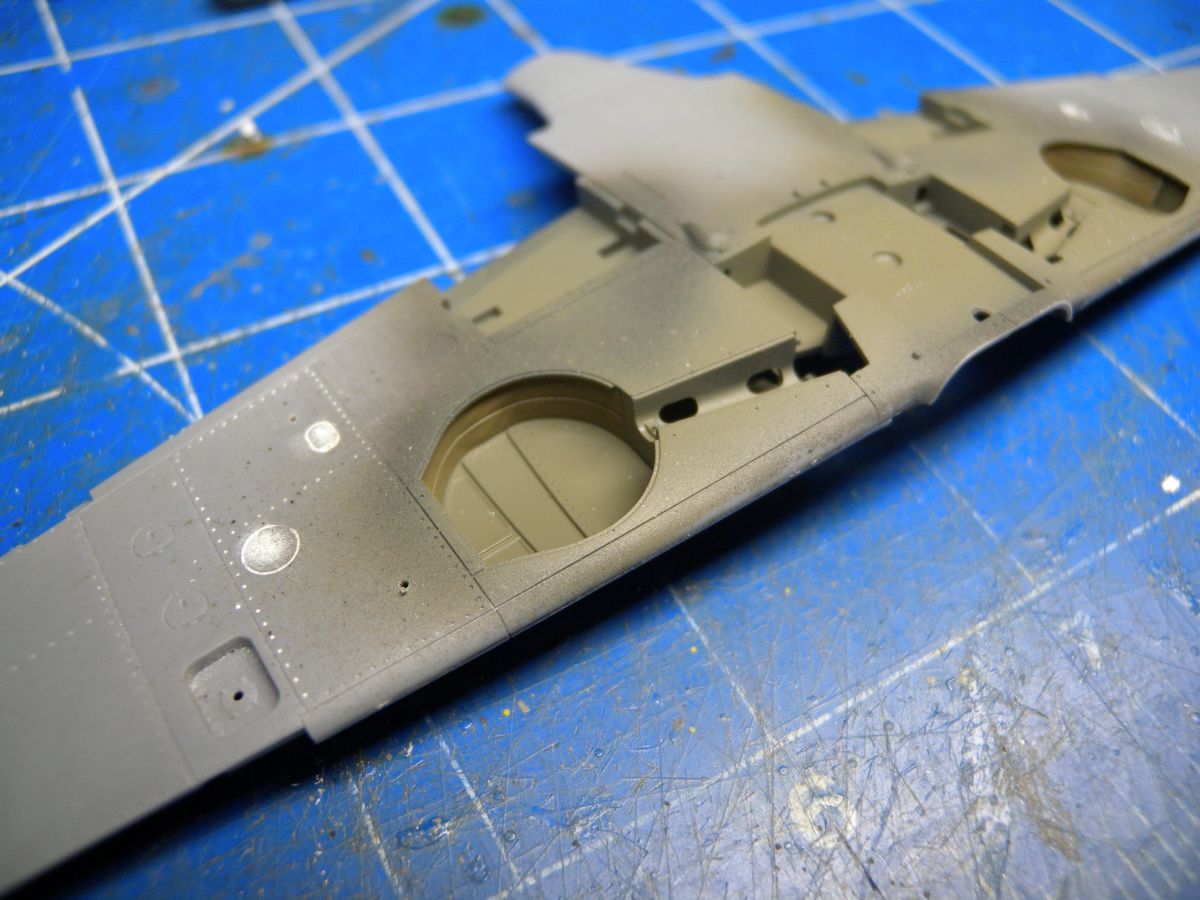
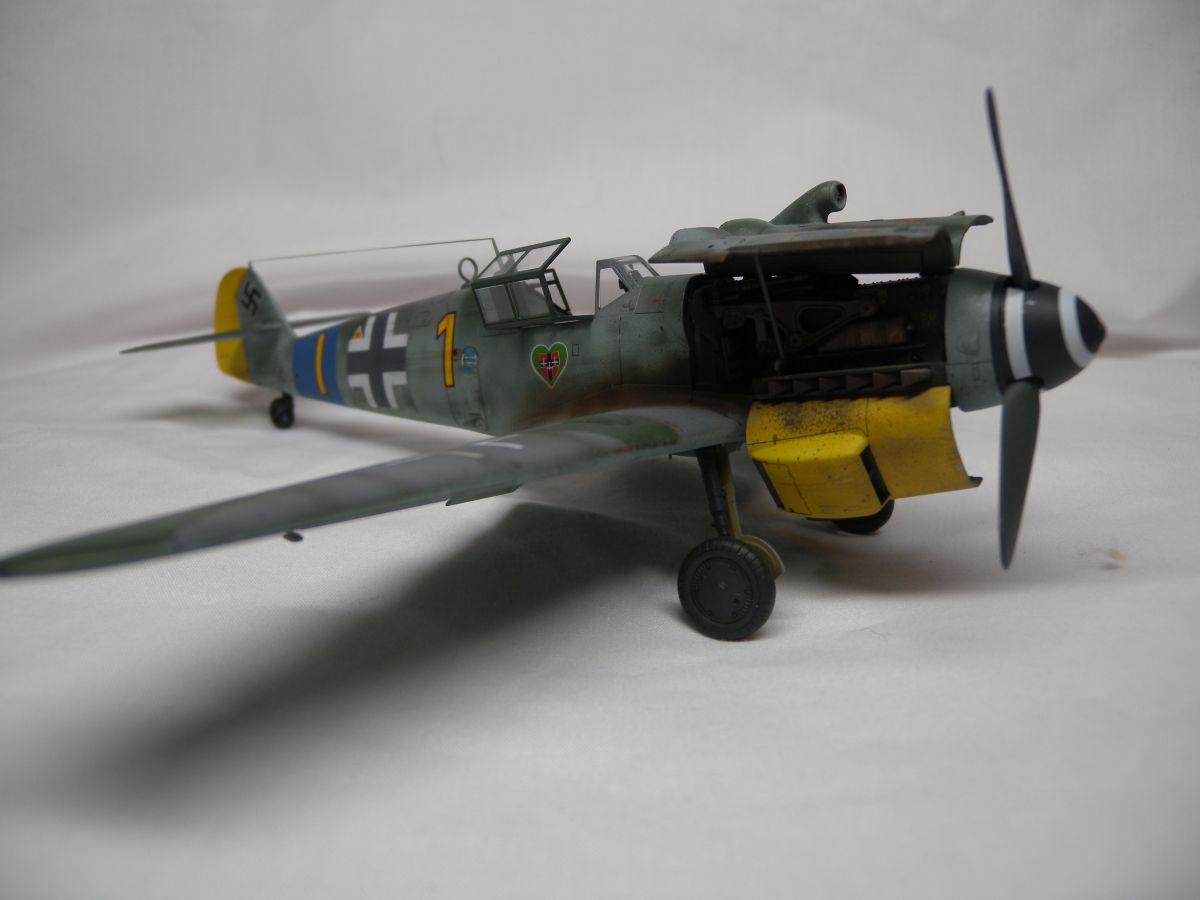
On the bottom of the aircraft, the wheels well look to be very well done, including the molded simulated cloth partition as the back of the wheel well. The landing gear struts also look very well molded, with nice tread and hub details on the main wheels.
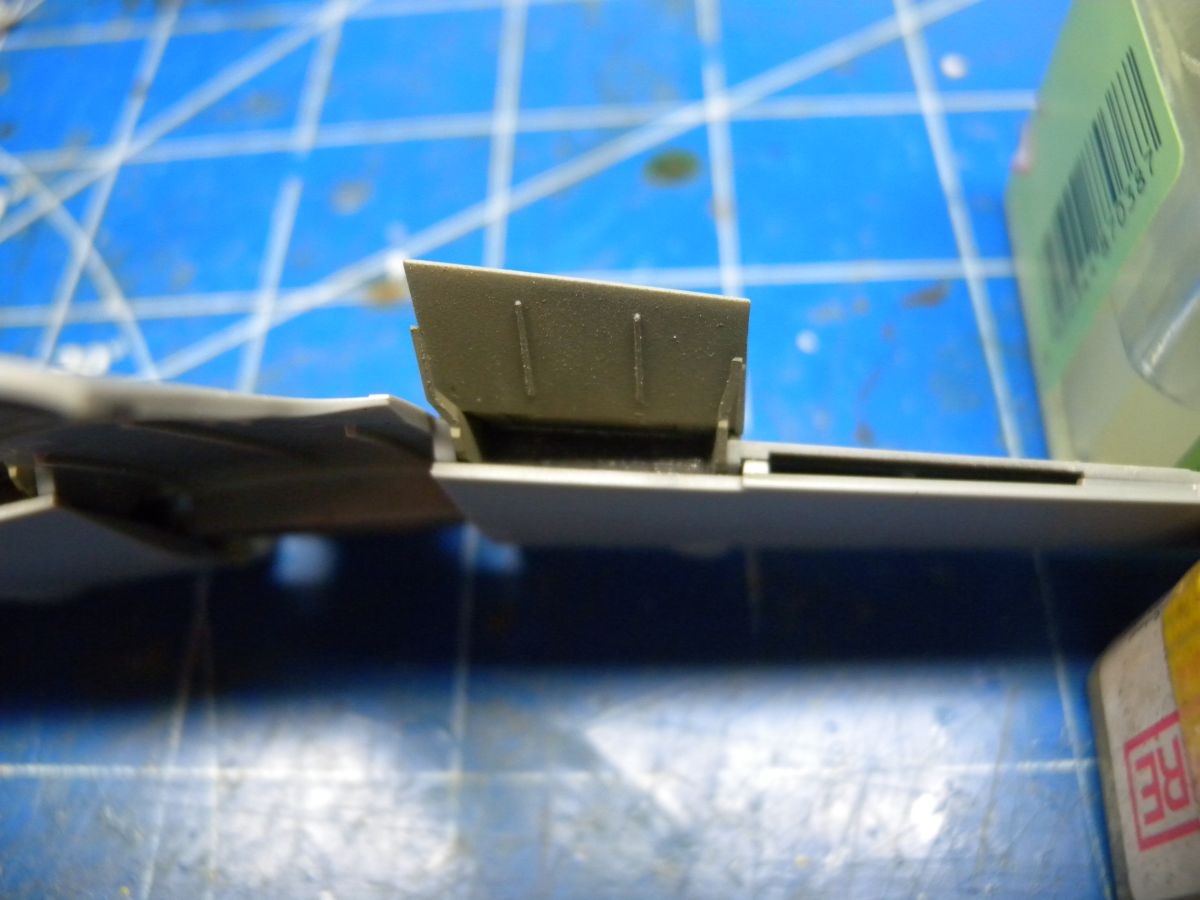
One weakness I find with Tamiya kits is the lack of open ends on appropriate parts. This includes the machine guns and exhaust, both of which are molded with blunt ends. This are reasonably easy to rectify either with a small drill or replacing with aftermarket parts.
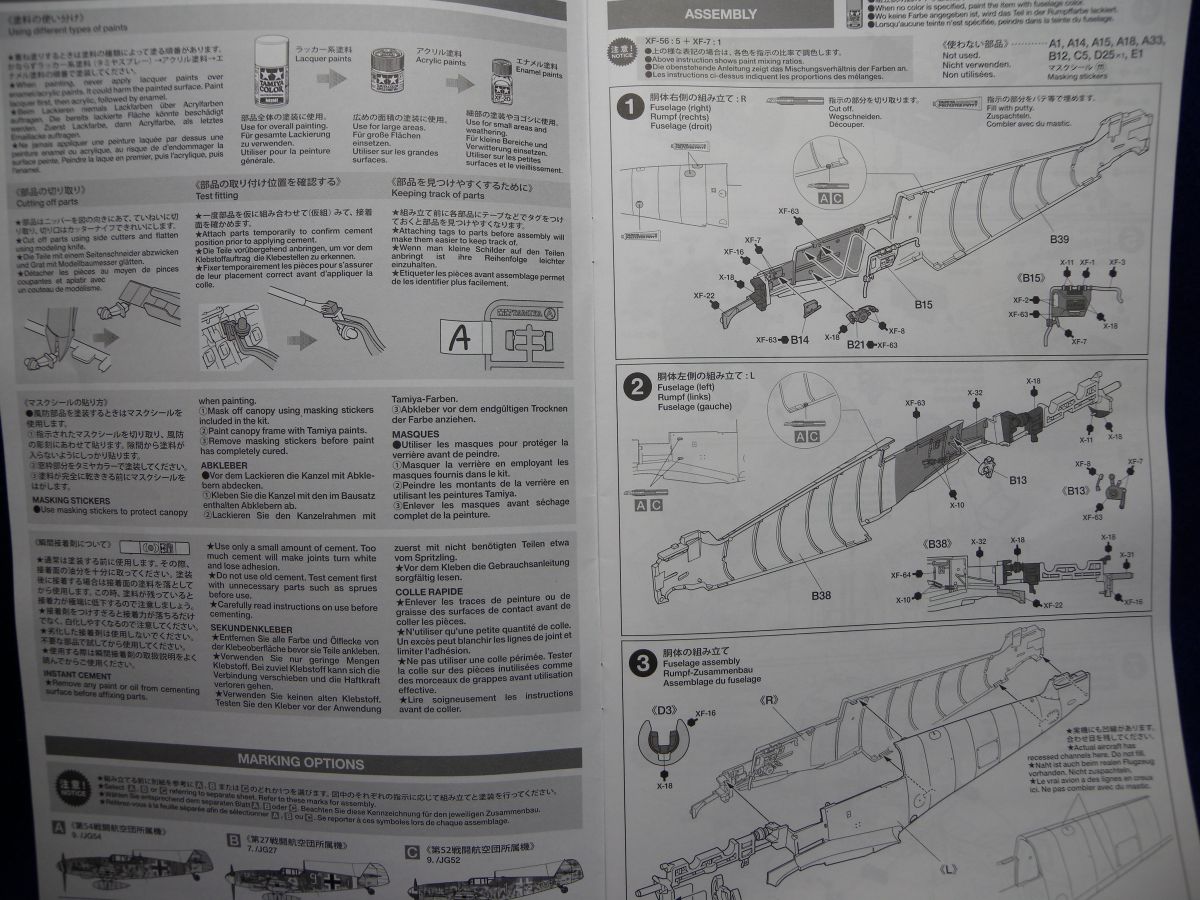
The instructions are a typical Tamiya, well laid out, with clear steps to follow. The instructions include 35 steps for building this kit, but you will need to watch for some optional steps, based on the variant you want to build. The instructions include paint callouts along the way, referencing Tamiya paints. There are also some decals to be applied along the way to watch out for as well.
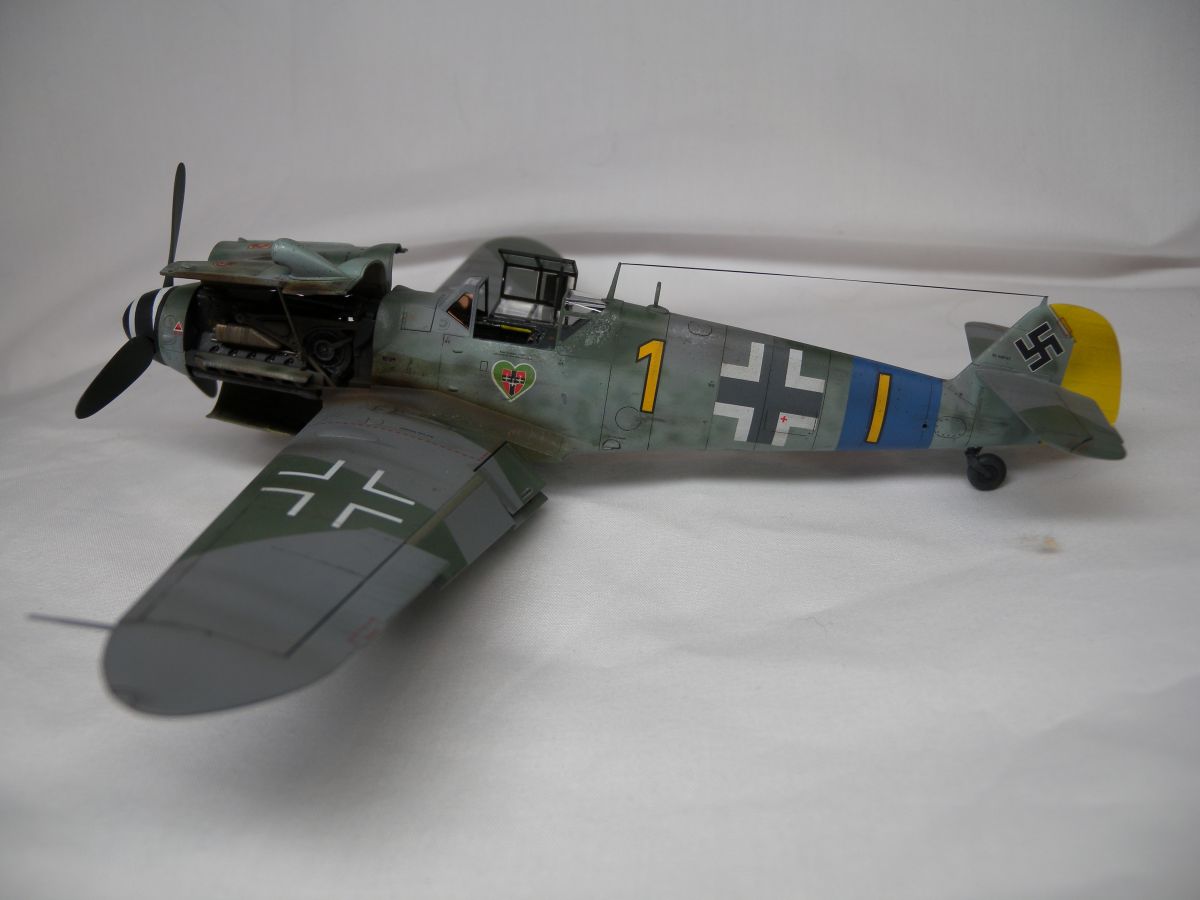
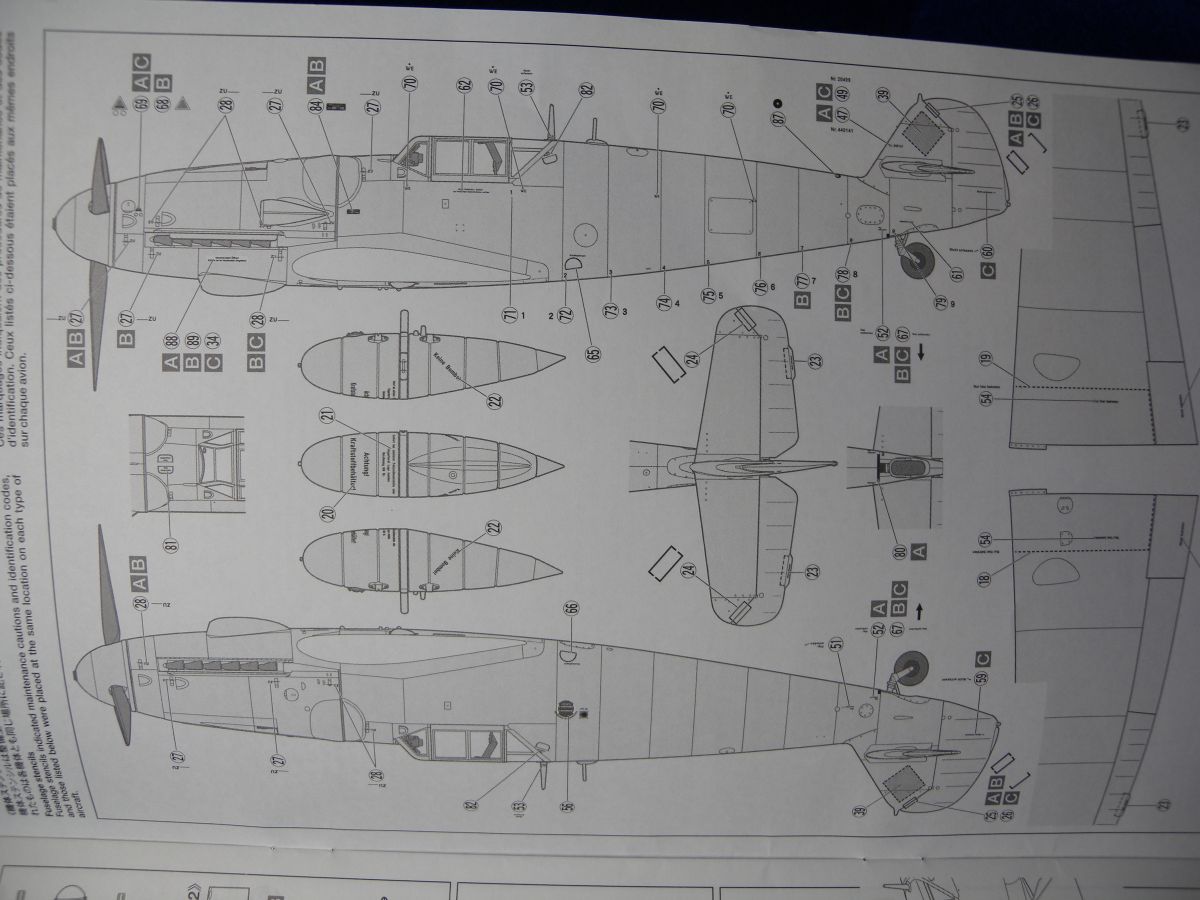
The main instructions included the marking placement for the general stencils, but Tamiya included a large colored sheet to show the painting and marking for three different aircraft.
- 9./JG54, February 1944 - 7./JG27, Maleme, Crete, December 1943 - 9./JG52, Novo-Zaporozhye, October 1943
Also included is a folder out with background information on the Bf109.
A review of the decals, included on two sheets, looks to show well printed decals with sharp color and all in register. One sheet looks to include the common markings, while the other sheet includes the specific aircraft markings.
Build
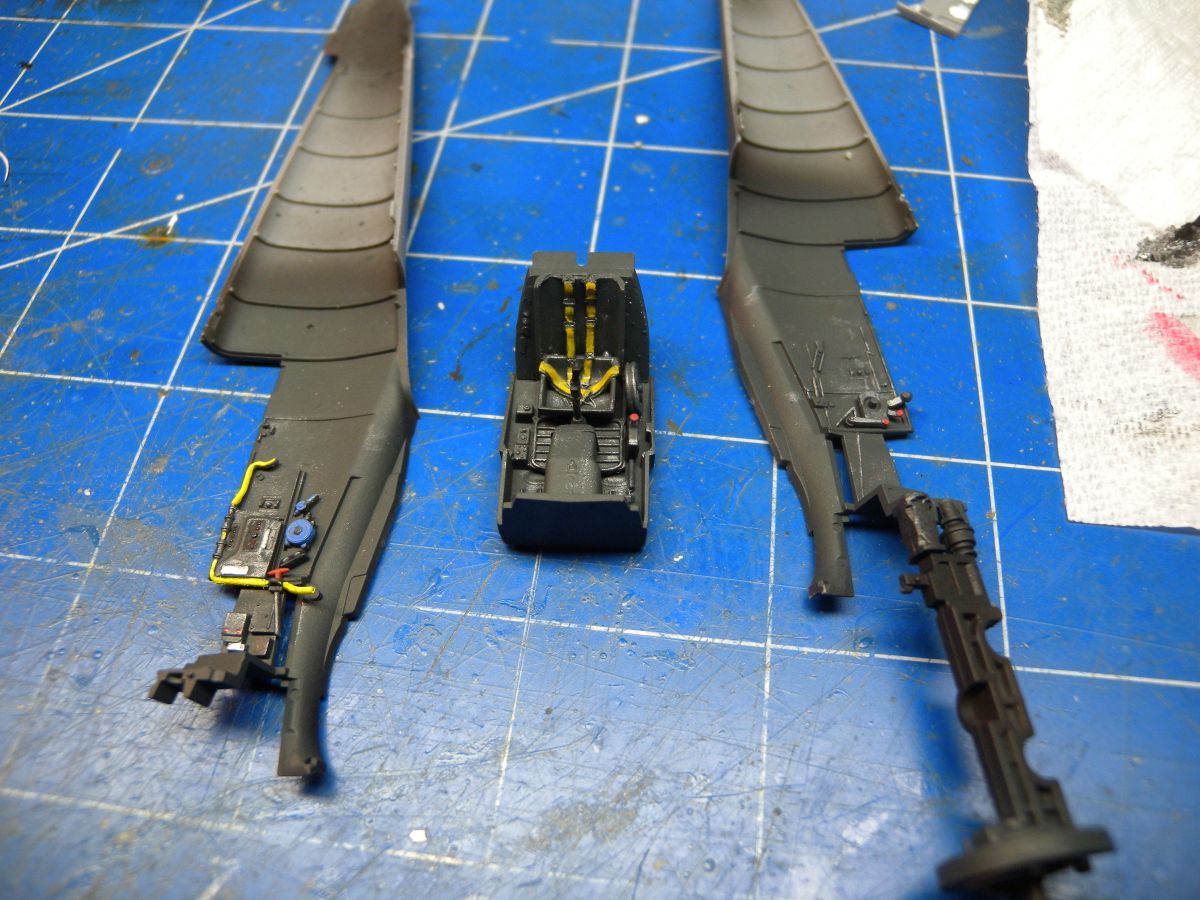
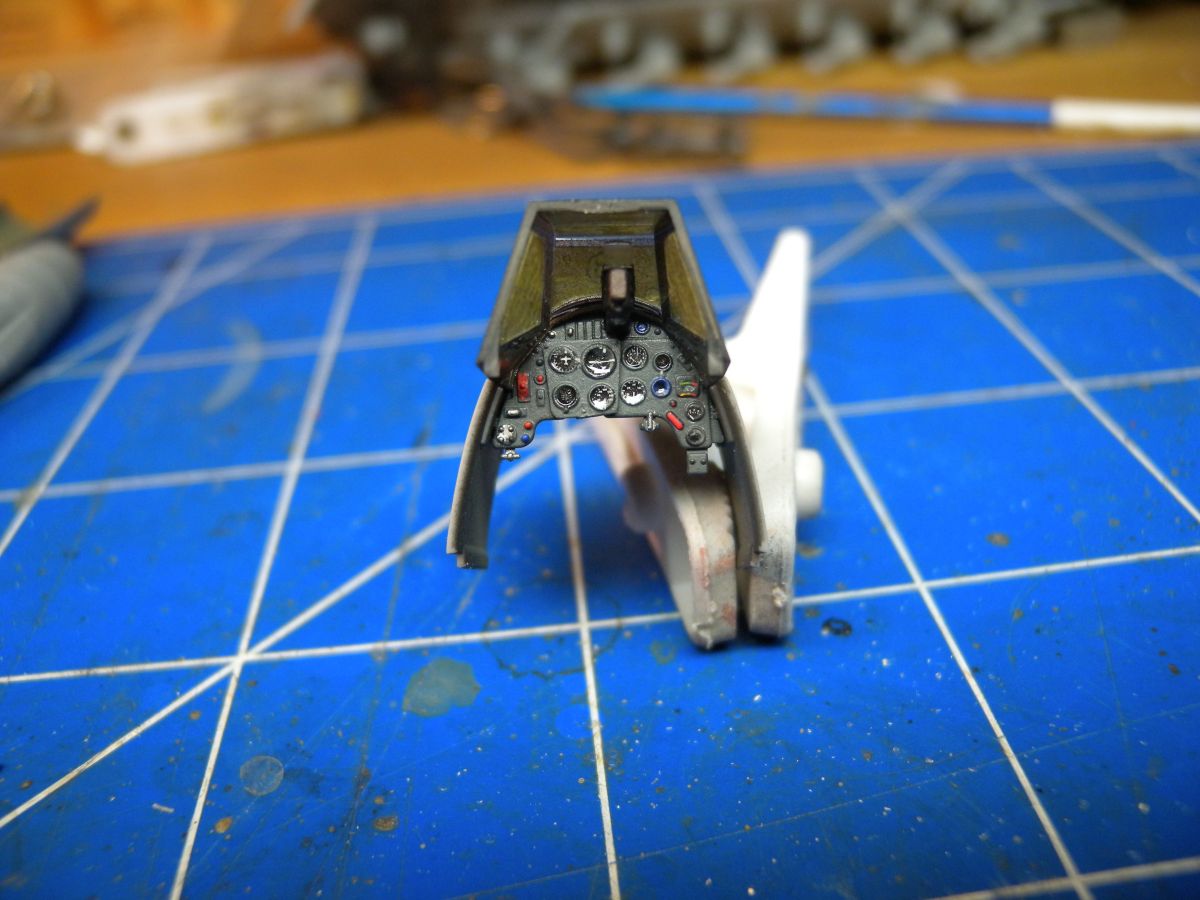
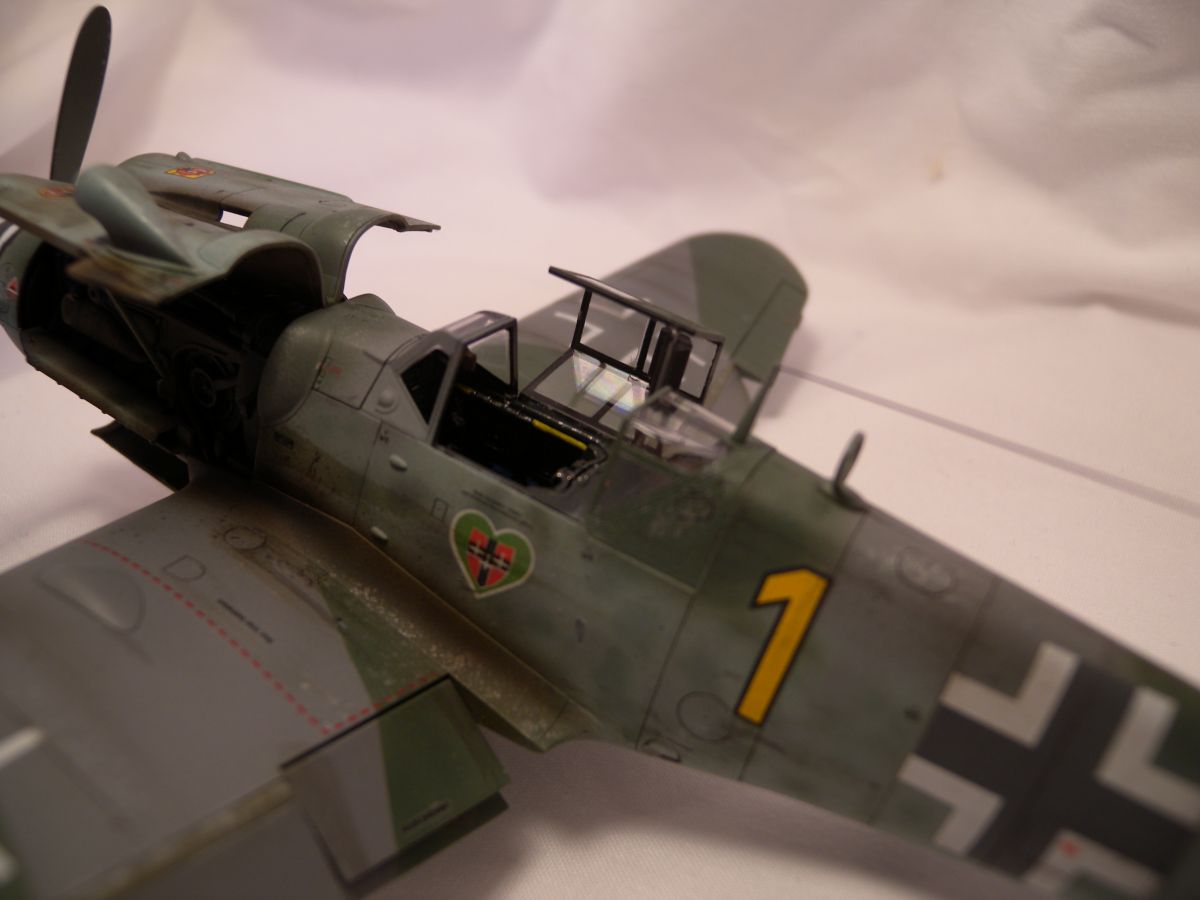
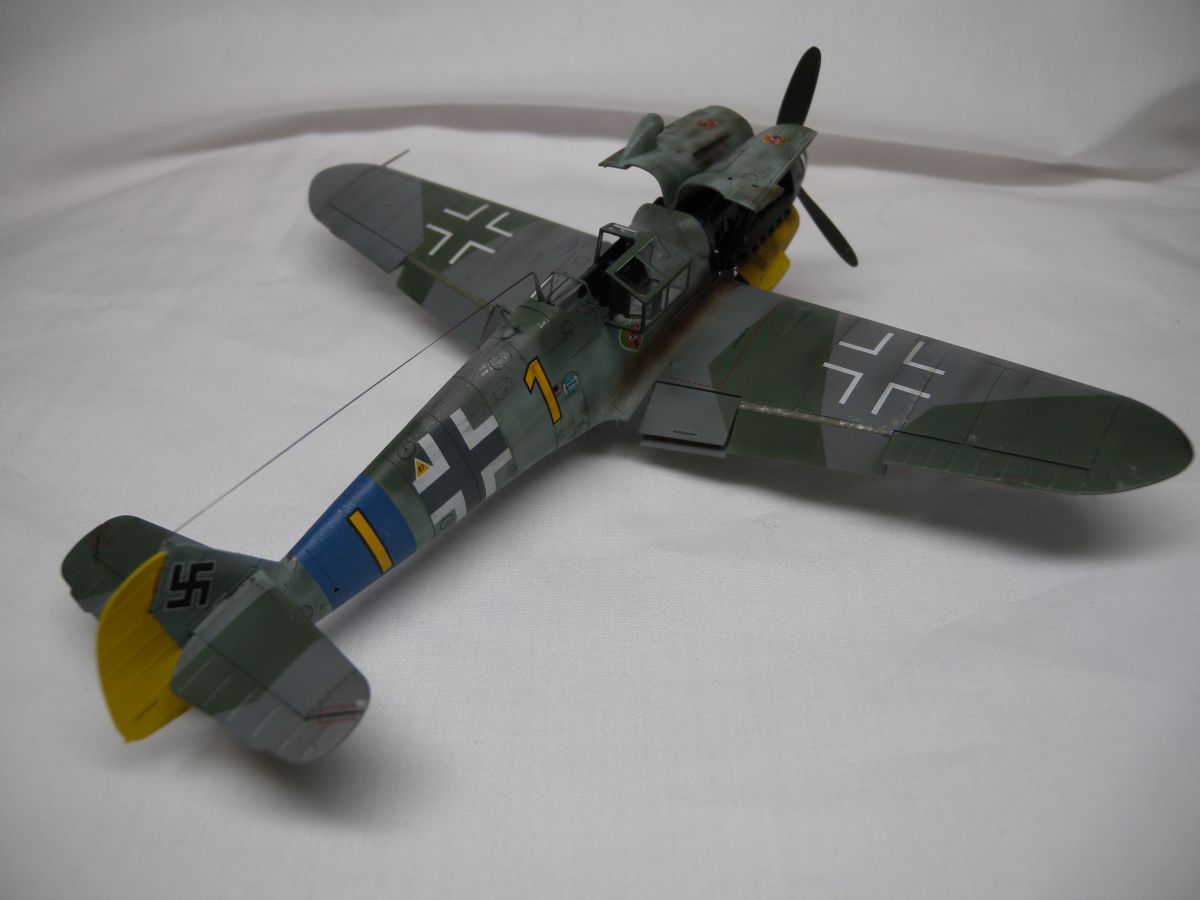
Building this Bf109 from Tamiya starts with the cockpit, like many aircraft kits. Out of the box, the parts build a nice cockpit. Tamiya does include a decal for the seat belt, but I decided to replace the entire seat for an aftermarket part from Ultracast, with the seatbelt cast in place. As for the rest, it went together very well with no fit issues, this includes fitting the assembly between the fuselage halves. A decal is included for the instrument panel, that does look very good when applied.Onto the wings, there are a couple of parts for the landing gear bay, then sandwiching the wings together. Again no fit issues at all. A nice touch is that Tamiya provides separate control surface, allowing the flaps to be put in either the up or deployed position. The tabs for the connection points are solid and provide great fit and sturdy connection.
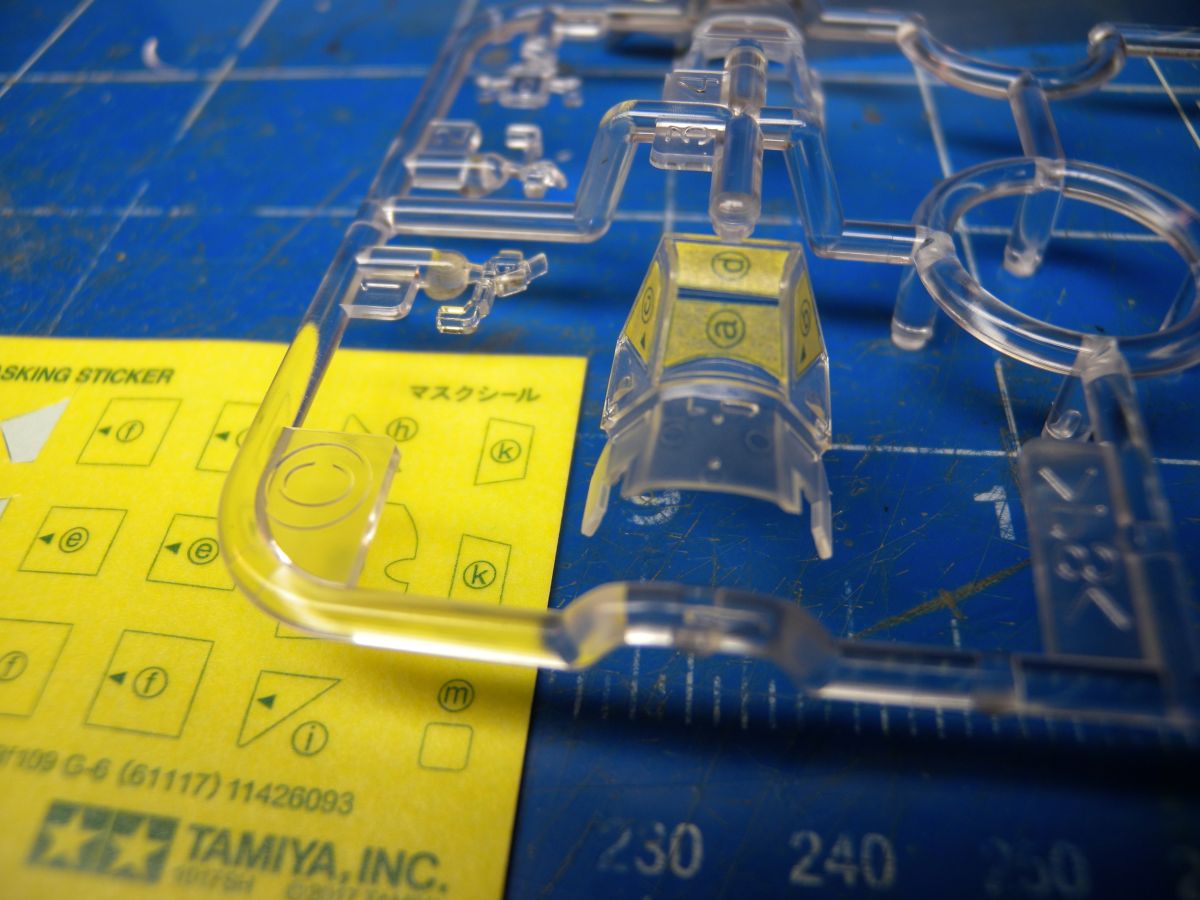
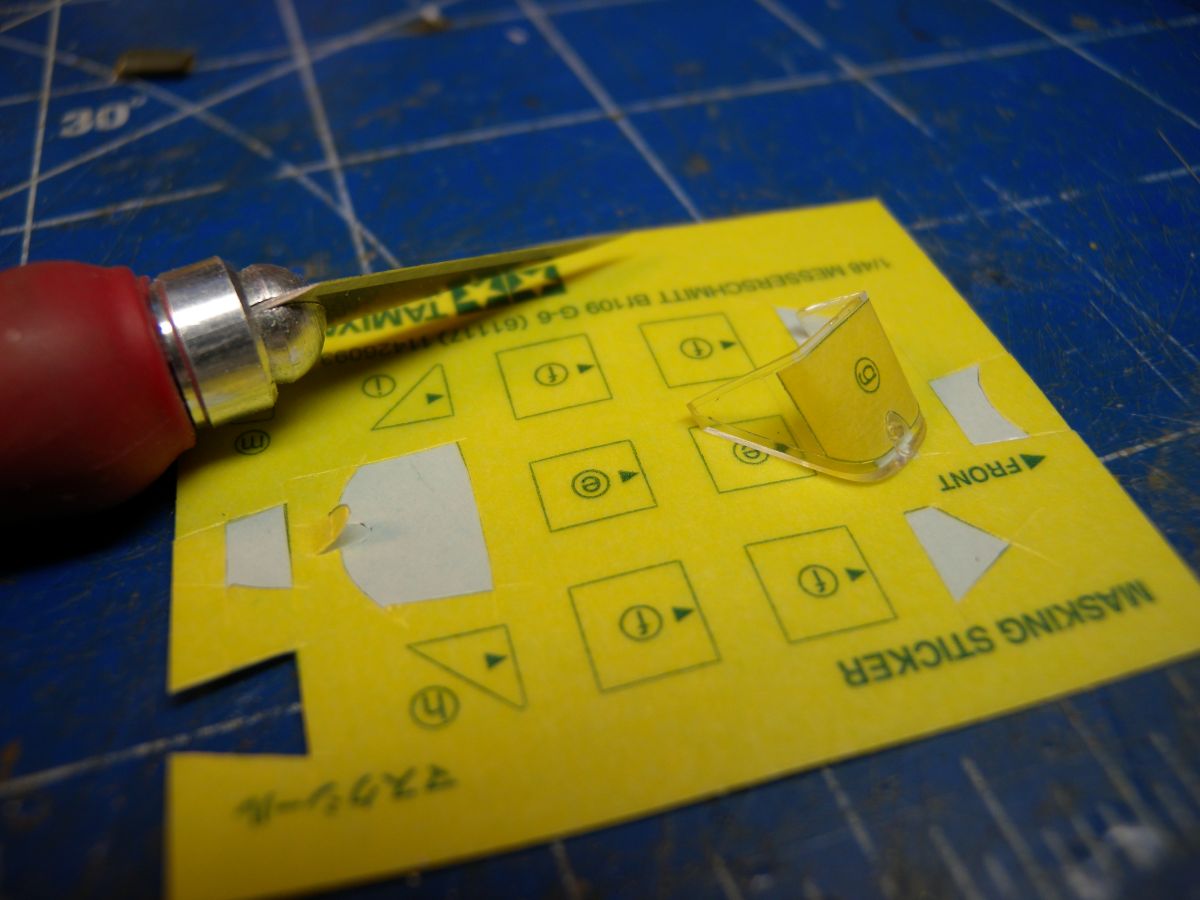
A great addition to the kit is a masking sheet for the canopy parts. It should be noted that while the sheet is marked, it is not pre-cut. I just followed the markings provided on the sheet, and the masks fit right into place.
The engine built up very nice, and the kit provides a solid connection to the fuselage molded right onto the fuselage. This makes for a very sturdy placement of the engine. I painted the engine black, and dry brushed with a little steel for effect then added the decals for it.
That attachment of the wings to the fuselage was no issue, and I was very happy with the fit, no gaps. I did find that I needs just a little putty on the front of the wing, but nothing bad.
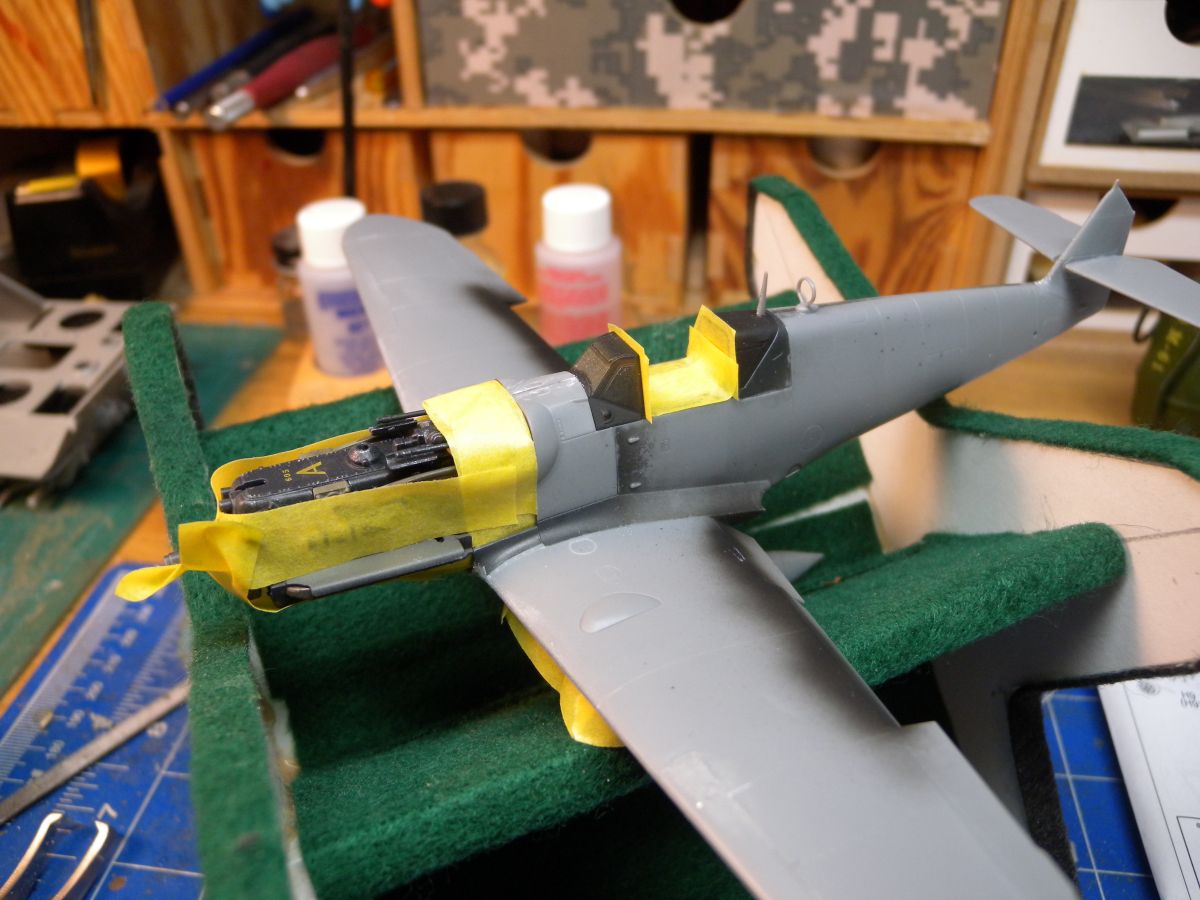
As I planned for open engine compartment and cockpit, the planning for painting needs to be considered. With the the major parts assembled, it was time for priming. I masked of the cockpit, engine and wheel wheels to start. I primed with Ammo by Mig Black Primer prior to painting with Vallejo Air paints. I painted the engine compartment hatches separately, including the the rudder.
The landing gear and propeller were primed and painted separately prior to attaching.
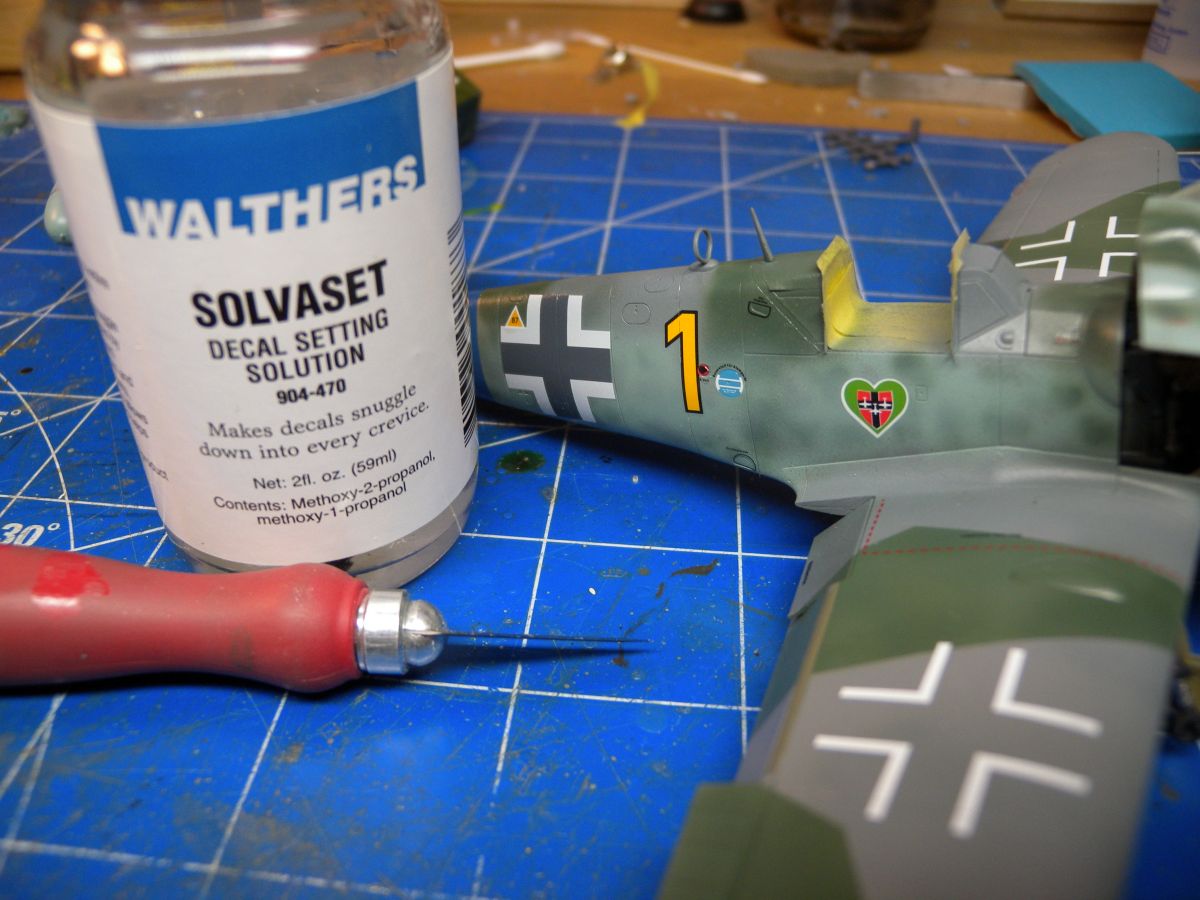
The biggest let down I found in the kit were the decal. While they looked very good on the sheet, I found the bigger decals, the rear blue stripe and belakruz did not sit down in the panel lines and details, even with a lot of SolvaSet applied. For the larger decals, I did run a sharp knife over the panel line details and reapply SolvaSet a few more times. While working with the decals, I did notice they thicker then a lot of other on the market today.
With all the parts assembled, final weathering was applied, and I was very happy with the result. This is an amazing new tooled release from Tamiya of the Bf109, with great fit, ease of assembly, the kit almost falls together.
Overview
I am very impressed with the Bf109G-6 from Tamiya, the kits is molded superbly and the fit is just outstanding. There are great looking detail from nose to tail, with good surface details and great looking interior details. The build is just as awesome with great fit and ease of build. There are many options for open hatches and position-able surface controls. The only issue I found was during finalising the build, the decals. They decals in the kit while looking good on sheet, but when applying I found them rather thick and difficult to lay into the surface details. I would definitely recommend this kit.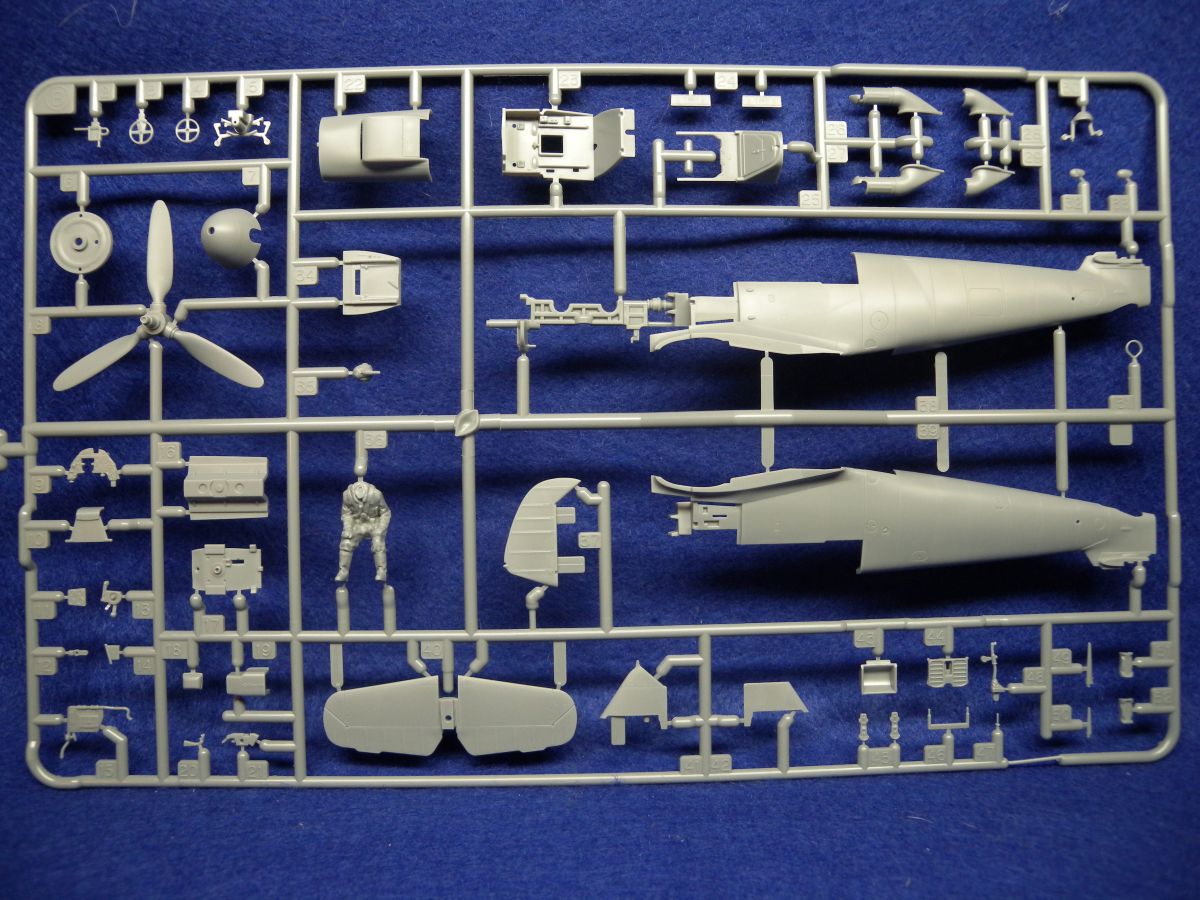


About the Author

FROM: ONTARIO, CANADA
I am an IT Consultant and father, with a passion for plastic models. I mostly prefer 1/35 Armor and 1/48 Aircraft. My main interests are anything Canadian, as well as WW2 German and British Armor and Aircraft. I have been building models since I was a young kid, got away from it for awhile, but r...
Comments

Steam ahead Gaston, be a hero and make such feature, I am looking forward to seeing it
[/quote]
We all know that won't happen. A quick search via Google shows that even Tamiya itself shoqws the kit built up with the cowl closed. Maybe a more extensive Google search next time Gaston?
MAR 05, 2018 - 06:07 AM

I know a guy doing a comparison build...
...he's relatively inexperienced after 35 years of building no models...
He's not very quick, because he is has a few builds going at once...
He's me.
BigT-vs.-Eduard Bf109G6 Build
MAR 05, 2018 - 07:46 AM

Gary, I'll follow your comparison build with interest. Your Eduard kit is the same as I have here on my bench. Which version will you build? I'll go for Gerd Barkhorn but a different machine he flew
MAR 06, 2018 - 01:01 AM
Torsten,
I have a few different options I can choose. Probably Barkhorn, but you never know.
Gaz
MAR 06, 2018 - 05:12 AM

Well I have started to build this kit for a customer. I had the Eduard resin set for the cockpit as my patron wanted it that way. let say I'm not a rookie in modeling, but when after much struggle the resin tub was glued in to the fuselage, the plastic parts for the ammunition cases, could not fit properly! I did then glue the nose panels in the close position to check the fit, and once again the resin tube is keeping from any tight fit! Now guess! An order to HLJ for a new kit which will be from the box and with the close option! Te rest is in the graveyard now! Those resin sets are a pain in the A..and when you look at the level of detail in the kit, they do not bring that much plus value, considering what will be left to see! My two cents!
AUG 27, 2018 - 07:00 AM
I'll be building my Tamiya kit with all the cowlings open and in the box top marking scheme - now that I know it will trigger some of you.
SEP 10, 2018 - 06:18 AM
They compare well...
 But there are size differences:
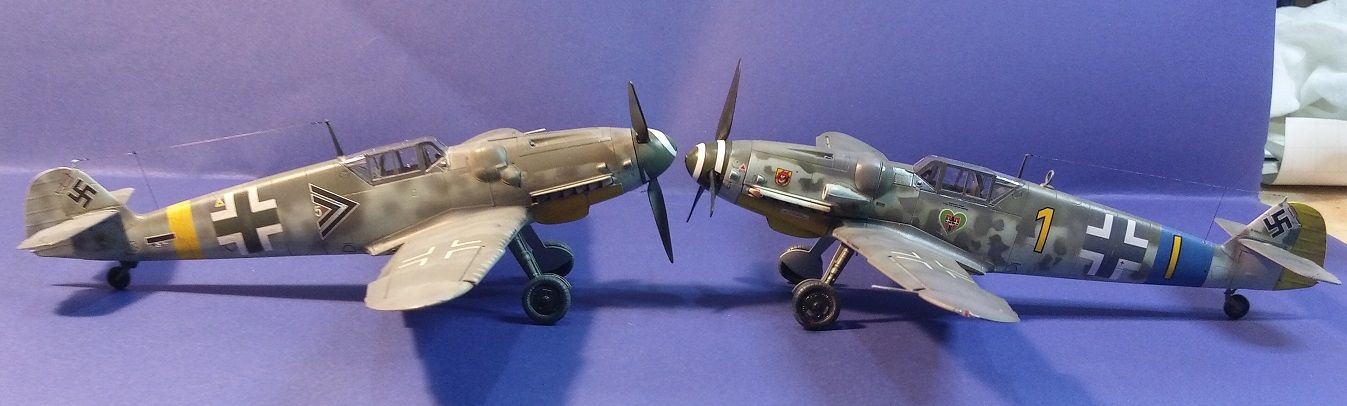 As far as comparing them to Zvezda...
The Zvezda is set up with the radiators fully closed(you'll need to create tabs to model them open). Decals not so good (so extra money for more!). Sink marks in the wings... ...and four-part fuselage halves.
Pick your poison, I guess. Here is the order where I'll put my preference for 1/48 109 G6's:
1. Tamiya (Most fun, most accurate LG angles w/out using a protractor, nice engine.)
2. Eduard (Gets second because pf those little scoops on the side of the cowls being molded open.)
3. Hasegawa
4. Zvezda (Did not enjoy the build!)
5. UM (didn't enjoy this build!)
6. KA Models (don't like the shape of the spinner)
Gaz
As far as comparing them to Zvezda...
The Zvezda is set up with the radiators fully closed(you'll need to create tabs to model them open). Decals not so good (so extra money for more!). Sink marks in the wings... ...and four-part fuselage halves.
Pick your poison, I guess. Here is the order where I'll put my preference for 1/48 109 G6's:
1. Tamiya (Most fun, most accurate LG angles w/out using a protractor, nice engine.)
2. Eduard (Gets second because pf those little scoops on the side of the cowls being molded open.)
3. Hasegawa
4. Zvezda (Did not enjoy the build!)
5. UM (didn't enjoy this build!)
6. KA Models (don't like the shape of the spinner)
Gaz
But there are size differences:
As far as comparing them to Zvezda...
The Zvezda is set up with the radiators fully closed(you'll need to create tabs to model them open). Decals not so good (so extra money for more!). Sink marks in the wings... ...and four-part fuselage halves.
Pick your poison, I guess. Here is the order where I'll put my preference for 1/48 109 G6's:
1. Tamiya (Most fun, most accurate LG angles w/out using a protractor, nice engine.)
2. Eduard (Gets second because pf those little scoops on the side of the cowls being molded open.)
3. Hasegawa
4. Zvezda (Did not enjoy the build!)
5. UM (didn't enjoy this build!)
6. KA Models (don't like the shape of the spinner)
Gaz
SEP 10, 2018 - 06:33 PM
Gary, you forgot the old 1990's Academy kit in your list. I've built it a few times and although it cannot keep up with recently published kits, it's not that bad to build. My fav 109 kit in the meantime comes from our czech neighbours, though I guess that Zvezda kit must also be fine. I'm judging it from their great Pe-2.
Torsten
SEP 11, 2018 - 06:27 AM
Torsten,
I've never built that kit. In the 1990's I wasnt building any models. I didn't return to models until 2015.
And there's nothing really wrong with the Zevzda G6. I just didn't enjoy building it, and I wouldn't recommend it to a novice.
The Zevzda kit is made to be built with the engine covers open. If you're wanting them closed-up, it's more a pain in the backside.
Gaz
SEP 11, 2018 - 10:57 AM

Torsten,
I've never built that kit. In the 1990's I wasnt building any models. I didn't return to models until 2015.
And there's nothing really wrong with the Zevzda G6. I just didn't enjoy building it, and I wouldn't recommend it to a novice.
The Zevzda kit is made to be built with the engine covers open. If you're wanting them closed-up, it's more a pain in the backside.
Gaz[/quote]
Gary- Great builds! Thank you for sharing
SEP 11, 2018 - 12:06 PM
Copyright ©2021 by Kevin Brant. Images also by copyright holder unless otherwise noted. The views and opinions expressed herein are solely the views and opinions of the authors and/or contributors to this Web site and do not necessarily represent the views and/or opinions of AeroScale, KitMaker Network, or Silver Star Enterrpises. Images also by copyright holder unless otherwise noted. Opinions expressed are those of the author(s) and not necessarily those of AeroScale. All rights reserved. Originally published on: 2018-02-27 00:00:00. Unique Reads: 14435

WEB HOSTING BY


Copyright ©2021 AeroScale and Kitmaker Network, a subsidiary of Silver Star Enterprises
All Rights Reserved. Please read our Conditions of Use and Privacy Policy.
All Rights Reserved. Please read our Conditions of Use and Privacy Policy.