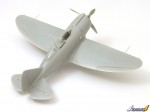
1⁄32Re. 2000 Heja/J20 Build Guide
The canopy
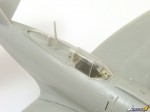
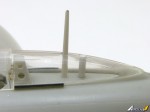
The canopy is cast in three sections. Take note that the sliding section of the canopy has the thickest frame on its rear edge.If you’re building a Hungarian aircraft, there’s a mirror to fit on the windscreen, while all three versions have a lock/grab handle to install at the front of the sliding section. Unfortunately, the etched part is much larger than shown in the instructions and won't fit where indicated.
The rails for the sliding centre section are supplied as etched parts which much be folded into U-channels. If you pose the canopy open, fix the rails on the cockpit sills. I the canopy is closed, they fit either side of the fixed rear section.
I have to admit the canopy rails defeated me. Despite my best efforts, I couldn't bend them to a true U-section. Even heating them in a gas flame to soften the metal didn't help - there simply wasn't enough material to get the leverage needed to bend them neatly. So, I did the obvious thing... and cheated! I used them as templates to cut lengths of U-section styrene channel and thinned it down a bit. While it looks a bit heavy compared with the metal parts, it’s a passable solution if you struggle as I did.
Final Details
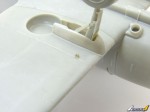
The instructions show small photo-etched hooks and rings fitting to the top surface of each wing. I couldn't see any sign of these in the walkaround of the Swedish aircraft and I suspect they are lifting points that were used to hoist the naval version of the Re 2000 onto its catapult for launching, so I omitted them. On the underside are what are may be tie-down rings, so I did fit those.Somewhat unusually, the Re. 2000 sports two pitot tubes, one on each wing. The longer one attaches to the starboard wing as per the main diagram in the instructions (the position is shown reversed in the two smaller views), and a small etched vane fits on its kinked front section. The venturi attaches to the starboard fuselage side and its longer end should face to the rear (not as shown in the instructions).
The last task was to glue the external bead sight in front of the windscreen before fitting the propeller and declaring the model finished.
Conclusion
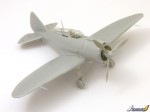
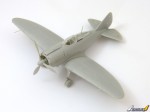
Overall, I found Silver Wing's Re 2000 a very satisfying build. It offered a few challenges in places, but that's half the fun of modelling, and the result is very impressive, capturing the look of this attractive aircraft nicely.Copyright ©2021 by Rowan Baylis. Images also by copyright holder unless otherwise noted. The views and opinions expressed herein are solely the views and opinions of the authors and/or contributors to this Web site and do not necessarily represent the views and/or opinions of AeroScale, KitMaker Network, or Silver Star Enterrpises. Images also by copyright holder unless otherwise noted. Opinions expressed are those of the author(s) and not necessarily those of AeroScale. All rights reserved. Originally published on: 2018-10-10 00:00:00. Unique Reads: 14684


