_GOTOBOTTOM
Cold War (1950-1974)
Discuss the aircraft modeling subjects during the Cold War period.
Hosted by Tim Hatton
RDAF Meteor F.8
magnusf
_VISITCOMMUNITY
Stockholm, Sweden
Joined: May 02, 2006
KitMaker: 1,953 posts
AeroScale: 1,902 posts
Posted: Sunday, September 23, 2007 - 06:19 AM UTC
A Danish Gloster Meteor F.8. A very rude person would probably call this ”an ugly aircraft in a boring paint scheme” and possibly insult both our English friends (which there seem to be a lot of around here…) and our Danish friends (of which I have seen at least one in the same Tomcat campaign as me lately…). Since I am a very polite and well behaved person, I would of course never dream of writing anything like that…

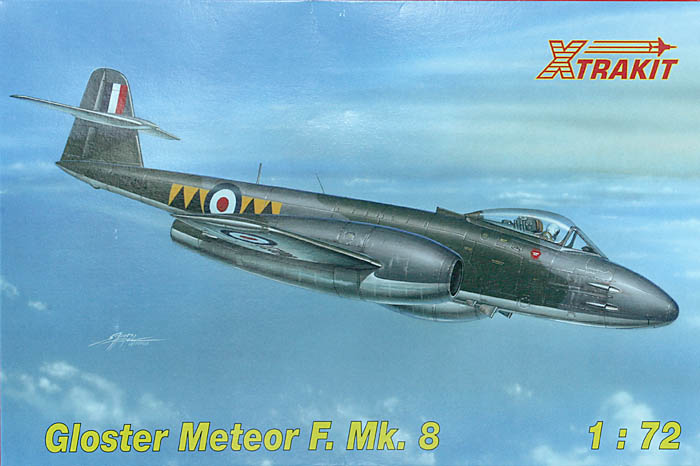
I will use the excellent (at least it looks like that and it has got raving reviews elsewhere on the Internet) Xtrakit 1/72 Meteor F.8. As for decals, I haven’t decided yet. I have very few (and conflicting) references to which the Xtradecal sheet I bought just adds to the confusion.

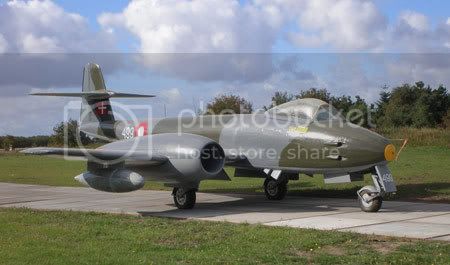
I visited Stauning in Denmark two weeks ago and they have a nice looking Meteor on display. Theirs is a late model F.8 with full-blown canopy and large engine intakes. Lower surfaces are grey but that doesn’t need to mean anything since this is a restoration. It also has a rounded typeface for the numerals.

Looking at the very few photos I have of Danish Meteors these show aircraft with the earlier kind of canopy (smaller Perspex area with sheet metal at the rear), small air intakes and a more square kind of numerals. Could this possibly be some kind of delivery scheme? And if so, were the aircraft rebuilt during their relatively short service time with new canopies (very possible) and larger intakes (less likely I think). Xtradecal suggests lower surfaces in high speed silver in the profile view and PRU blue in the plan view...

Anyone around who can bring some order to the above confusion? Jesper, you’re from Denmark? (Remember, I would never dream of saying that the paint scheme is boring)?

I will blog this build and I aim for a finishing date not later than mid October in order to meet the C-4 Open date. I will try to make at least one update a week but this depends a bit on my family, my work schedule and my travelling schedule!

On to the model.

Nice box art!

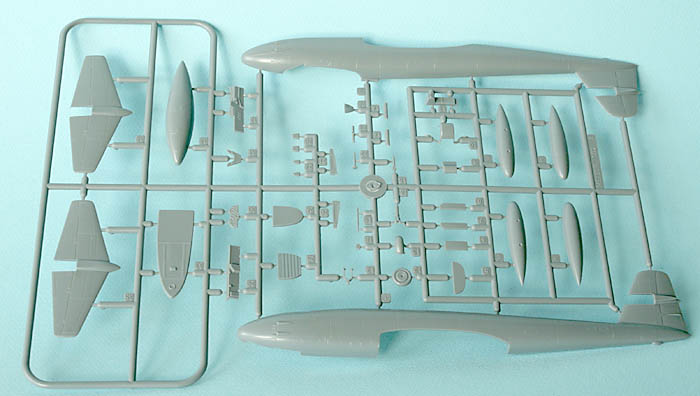
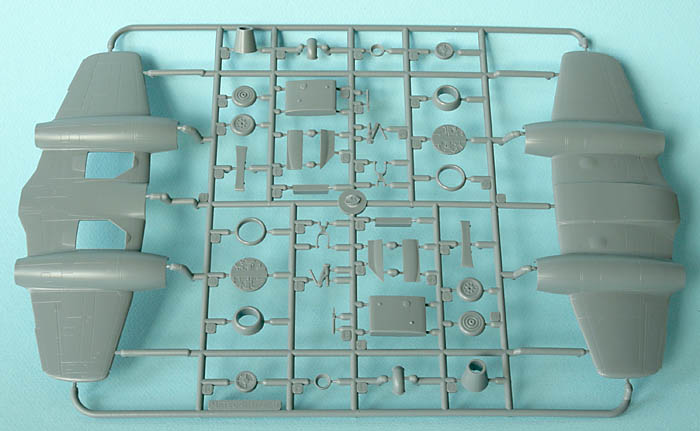
And what's in the box then?

Two well moulded grey sprues.


One clear sprue with early and late canopies.


A well printed decal sheet
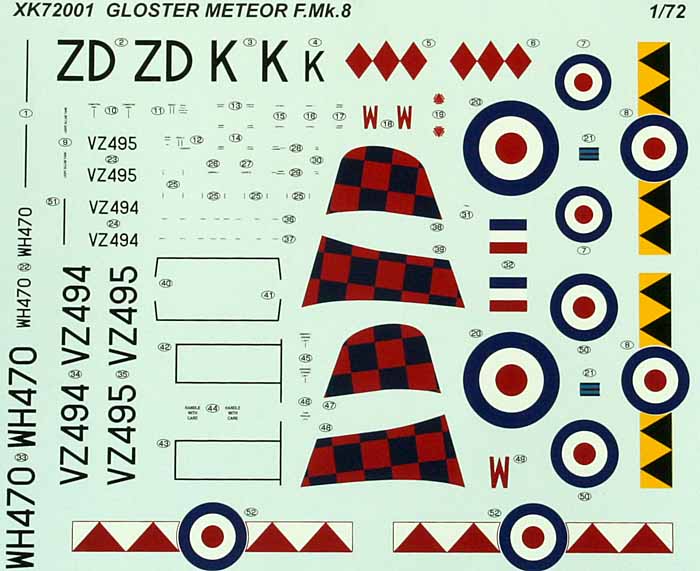

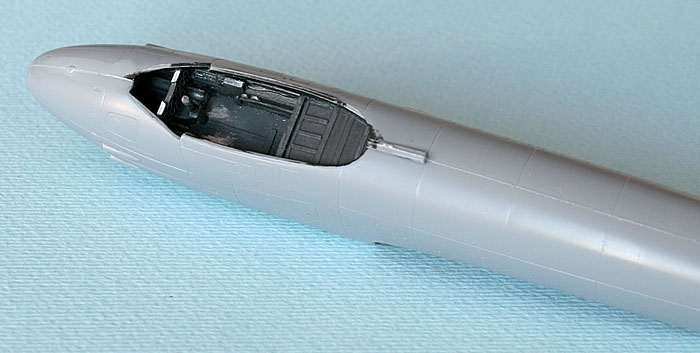
The build has already started with a few subassemblies. There is no resin or photo etch in this kit and I don’t really think there is an immediate need for it. The styrene parts are sharp and well defined and the cockpit will surely look the part when painted.
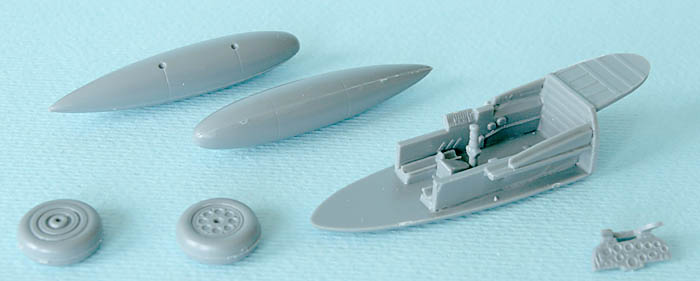

See you soon!

Magnus
SGTJKJ
#041
_VISITCOMMUNITY
Kobenhavn, Denmark
Joined: July 20, 2006
KitMaker: 10,069 posts
AeroScale: 3,788 posts
Posted: Sunday, September 23, 2007 - 11:29 PM UTC

Quoted Text

I visited Stauning in Denmark two weeks ago and they have a nice looking Meteor on display. Theirs is a late model F.8 with full-blown canopy and large engine intakes. Lower surfaces are grey but that doesn’t need to mean anything since this is a restoration. It also has a rounded typeface for the numerals.

Looking at the very few photos I have of Danish Meteors these show aircraft with the earlier kind of canopy (smaller Perspex area with sheet metal at the rear), small air intakes and a more square kind of numerals. Could this possibly be some kind of delivery scheme? And if so, were the aircraft rebuilt during their relatively short service time with new canopies (very possible) and larger intakes (less likely I think). Xtradecal suggests lower surfaces in high speed silver in the profile view and PRU blue in the plan view...

Anyone around who can bring some order to the above confusion? Jesper, you’re from Denmark? (Remember, I would never dream of saying that the paint scheme is boring)?

See you soon!

Magnus


Hi Magnus

So you went for this bird Well, compared to the Swedish 4 colour splinter camouflage the Danish camouflage is definently boring. You should try making one of the Danish Sabres. All around dark green - now that is a challenging paint job.

I am no expert on the RDAF, but I will see what I can dig up.

Talk again soon
SGTJKJ
#041
_VISITCOMMUNITY
Kobenhavn, Denmark
Joined: July 20, 2006
KitMaker: 10,069 posts
AeroScale: 3,788 posts
Posted: Monday, September 24, 2007 - 12:06 AM UTC
In 1950 the Danish Air Force bought 20 Meteor mk. 8 with pressurised cabin, ejector seat and a 70 cm longer body compared to the mk. 4. The first aircraft were delivered in 1951 and started service in squadron 724 at air station Karup. Later they were transfered to Air station Aalborg were they served in 6 years.
When Squadron 724 started using Hawker Hunter in 1956 some Meteor Mk. 8s were used a target tugs, but most were scrapped in 1957-58.

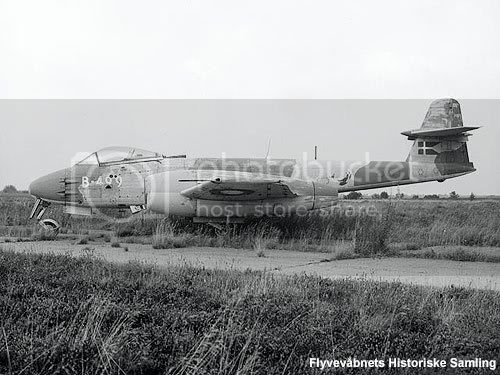
Hope this helps. Here are a few pictures I have found. They should help. It seems like you already know one of them as this is the one you saw at the museum.


magnusf
_VISITCOMMUNITY
Stockholm, Sweden
Joined: May 02, 2006
KitMaker: 1,953 posts
AeroScale: 1,902 posts
Posted: Monday, September 24, 2007 - 04:29 AM UTC
Thanks for the photos Jesper. It looks well past its sell-by date in the upper photo...

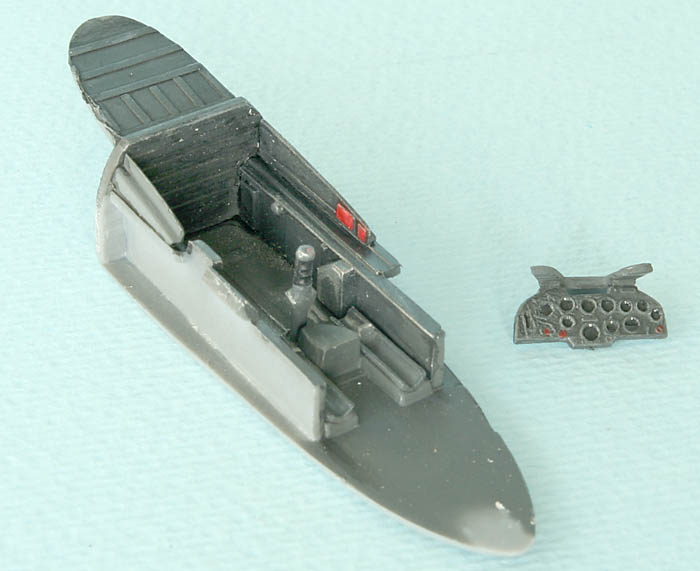
Quick update tonight. Cockpit has been painted! Since the colour of choice after WWII was black, I mixed a "light black" from Tamiya black and grey and sprayed the whole subassembly in it. Detail painting was then done using "real black" Vallejo, a dark oil wash (that I really still don't get along very well with) and drybrushing using light grey and silver. Not much will be seen anyway considering the rather cramped hole that a Meteor cockpit is!


Regards

Magnus
SGTJKJ
#041
_VISITCOMMUNITY
Kobenhavn, Denmark
Joined: July 20, 2006
KitMaker: 10,069 posts
AeroScale: 3,788 posts
Posted: Monday, September 24, 2007 - 05:21 AM UTC
Hi Magnus

Looks good with the cockpit. It seems like the colour scheme on the restored Meteor is correct. I just found this colour profile on a Meteor Mk. 8 from Karup Air station in 1954.

magnusf
_VISITCOMMUNITY
Stockholm, Sweden
Joined: May 02, 2006
KitMaker: 1,953 posts
AeroScale: 1,902 posts
Posted: Monday, September 24, 2007 - 06:24 AM UTC
Jesper, that's excellent! I think I'll go for the following:

Early canopy (makes it look more interesting)
Large intakes (because the one at Stauning has them)
Square numerals (if I can find them, you don't happen to know of a good source for these in 1/72?)

Regards

Magnus
SGTJKJ
#041
_VISITCOMMUNITY
Kobenhavn, Denmark
Joined: July 20, 2006
KitMaker: 10,069 posts
AeroScale: 3,788 posts
Posted: Monday, September 24, 2007 - 07:36 PM UTC

Quoted Text

Square numerals (if I can find them, you don't happen to know of a good source for these in 1/72?)

Regards
Magnus


Not really, but you could try to call stoppel Hobby. You can see his homepage here, but I am sure his has more stuff that what is on the homepage. Call him and I am sure you will solve your problems with decals.

Some decals from Stoppel hobby

Just for the record, I am not affiliated with Stoppel Hobby. I only buy my stuff there
magnusf
_VISITCOMMUNITY
Stockholm, Sweden
Joined: May 02, 2006
KitMaker: 1,953 posts
AeroScale: 1,902 posts
Posted: Wednesday, September 26, 2007 - 06:01 AM UTC
I say as Jesper says:

Quoted Text


Some decals from Stoppel hobby

Just for the record, I am not affiliated with Stoppel Hobby. I only buy my stuff there


I've ordered two Meteor sheets from them (they are Danes, they really should know their stuff!) and added a Cayuse sheet (they had one at Stauning, that chopper is so small you could almost call i cute) and an F-86D sheet as well. You never know when these might come in handy...

Otherwise not much of an interesting update tonight, more to show that the projects is rolling smoothly forward on lightly oiled wheels (I do feel a bit poetic tonight).

Fuselage assembled:


Regards

Magnus
magnusf
_VISITCOMMUNITY
Stockholm, Sweden
Joined: May 02, 2006
KitMaker: 1,953 posts
AeroScale: 1,902 posts
Posted: Friday, September 28, 2007 - 06:25 AM UTC
Some more bits and pieces cleaned up and painted.

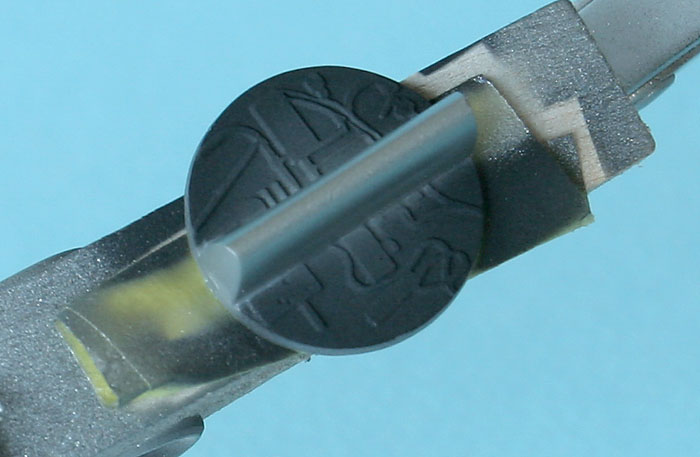
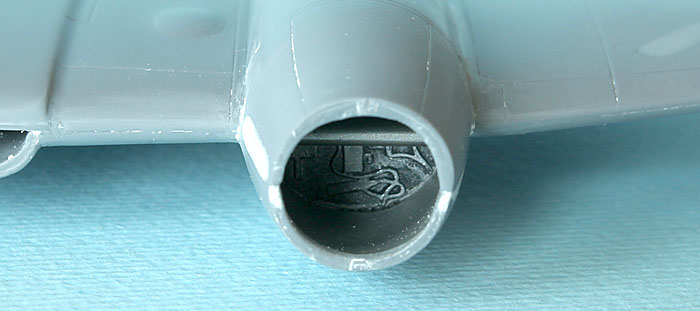
Since later Meteors had long engine nacelles not much of the engine will be seen. On the first ones (Mk 1 and early Mk 3) with short nacelles the airfoil section is almost level with the intake lip. Xtrakit has included the airfoil section and also "engine fronts" in the shape of two flat plates with some raised detailing. Buried inside the nacelles they will probably look perfectly acceptable after a bit of drybrushing.


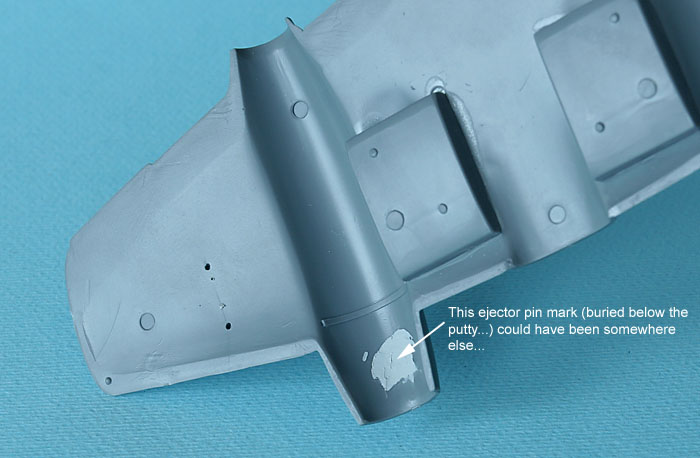
There are two strategically placed ejector pin marks in each air intake. I am not sure that they will be seen after assembly but I won't take any chances with that since that area will be VERY hard to reach after assembly...


I promise you a more interesting update tomorrow!

Regards

Magnus
Phantom2
_VISITCOMMUNITY
Östergötland, Sweden
Joined: April 18, 2006
KitMaker: 708 posts
AeroScale: 678 posts
Posted: Friday, September 28, 2007 - 08:03 AM UTC
Oh, no!

Not another ugly aircraft in a boring paintscheme!

But the Meteor is nevertheless one of the early jets I like the most!

Ugly?
No, not really, but It´s not pretty either.
I´d say a typical british design, built to do the job with no extra frills, and It did do the job very well indeed!

That´s why I like the Hurricane too, overshadowed by beautiful designs as the Spitfire, but were they really so much better?

The British paintscheme Is the same, designed to do the job, and a lot more interesting then today´s all-grey "dip-jobs"!

I have the Tamiya F.1 (completed) and F.3, Classic Airframes F.4 (will be a Danish version!) and the N.F.11/13 (will be a Swedish target-tow If I can find some decals), all in 1/48, no F.8 yet but that will be added.


I´m following your build with great interest, and look forward to see it completed!

Cheers!

Stefan E
magnusf
_VISITCOMMUNITY
Stockholm, Sweden
Joined: May 02, 2006
KitMaker: 1,953 posts
AeroScale: 1,902 posts
Posted: Friday, September 28, 2007 - 08:22 PM UTC
Aaaaah! Nice one Stefan! That is the one kit I really would like Tamiya to shrink to 1/72 scale (well, the Swordfish would be welcome as well but if I was allowed only one wish I'd go for the Meteor...). I would like to build a collection of "Jets of WWII" in 1/72 and I think the early Meteor is the one that is the least catered for of them in that scale.


Quoted Text

Oh, no!

Not another ugly aircraft in a boring paintscheme!

But the Meteor is nevertheless one of the early jets I like the most!

Ugly?
No, not really, but It´s not pretty either.
I´d say a typical british design, built to do the job with no extra frills, and It did do the job very well indeed!

That´s why I like the Hurricane too, overshadowed by beautiful designs as the Spitfire, but were they really so much better?


The early marks were a lot better proportioned than the later ones. Things went badly wrong when they chopped off the wing tips on the Mk 4 (and that was already a rather chubby wing with small span/chord ratio) and it only got worse from there.

I have dry fitted my Mk 8 and that is one long fuselage compared to that wing!

I have a PJ resin T.7 in 1/72 with a set of ALPS decals for Swedish target tugs. I'll better finish that one soon before there is an injection T.7 from MPM on the market...

Regards

Magnus
magnusf
_VISITCOMMUNITY
Stockholm, Sweden
Joined: May 02, 2006
KitMaker: 1,953 posts
AeroScale: 1,902 posts
Posted: Saturday, September 29, 2007 - 05:50 AM UTC
I promised a more interesting update but I am sorry, this is what there is to offer tonight...

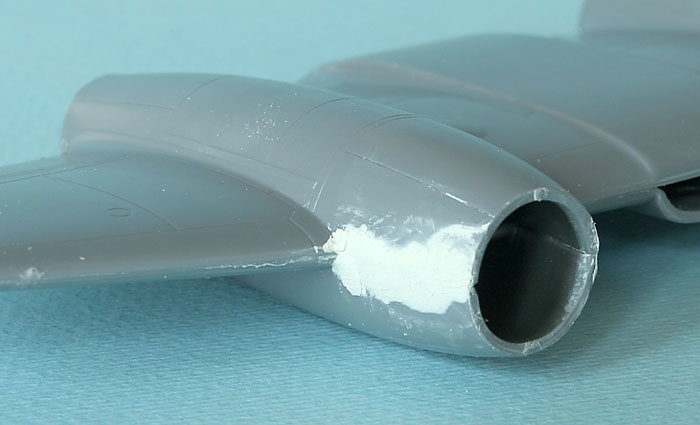
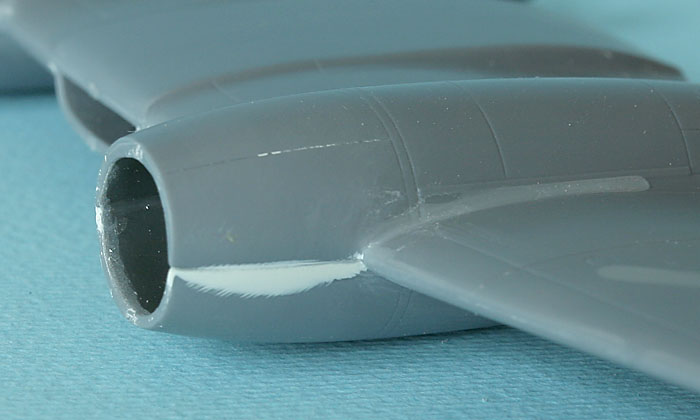
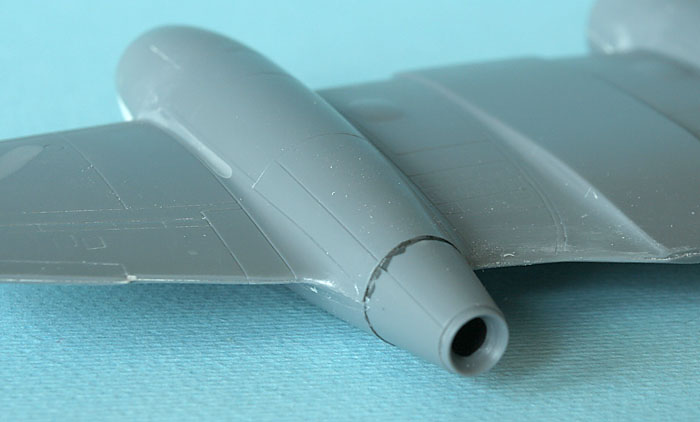
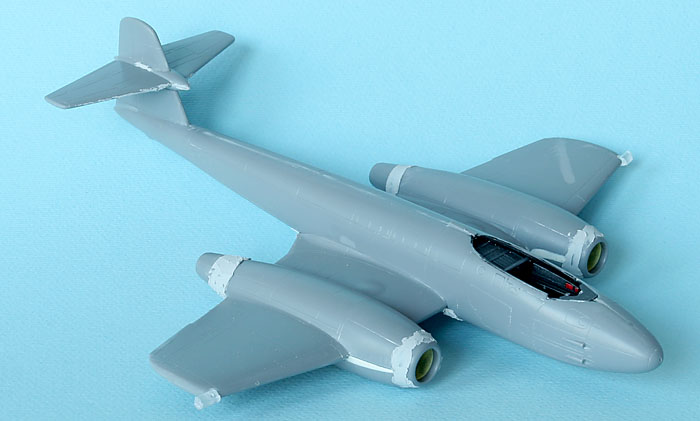
I glued the wings, sandwiching the engine fronts between the halves. There is something odd with the nacelles, they don't fit very well with one half being noticeably wider than the other. A generous amount of Milliput takes care of this.


After sanding, it looks a bit tidier!


The outlets have been added. Some careful aligning to the nacelles will pay off later!


I wonder how round the nacelles are? Well, time will tell... Catch a glimpse of the engine fronts as well, after the inlet rings (and I will use the small ones, late change of mind) have been fitted not much will be seen!


See you!

Magnus
magnusf
_VISITCOMMUNITY
Stockholm, Sweden
Joined: May 02, 2006
KitMaker: 1,953 posts
AeroScale: 1,902 posts
Posted: Saturday, September 29, 2007 - 09:12 PM UTC
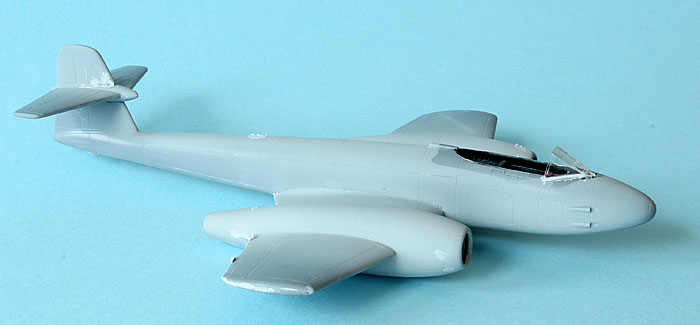
It looks like an airplane! This is what I wanted to show yesterday but there were a few more things to do before I could stick all the parts together.

As you all can see, I didn't achieve the desired "magic fit" of intakes and exhausts. A good reason to try another Meteor in the near future...


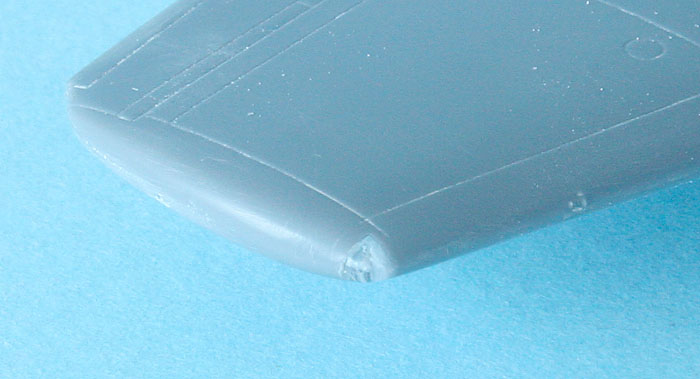
Wing tip position lights have been prepared with clear sprue, to be filed to contour and polished.


One thing that I didn't notice before: The canopies are cast as one piece integral with the windscreen. I tried to separate them using the windscreen from one of the parts and the canopy fron the other but I ended up with one windscreen and two cracked canopies...

I'm off to Warzaw in a few days and I will probably try to pick up an FR. 9 there so that I can source one of the canopies from that one.

Regards

Magnus
magnusf
_VISITCOMMUNITY
Stockholm, Sweden
Joined: May 02, 2006
KitMaker: 1,953 posts
AeroScale: 1,902 posts
Posted: Monday, October 01, 2007 - 05:52 AM UTC
Good evening friends!

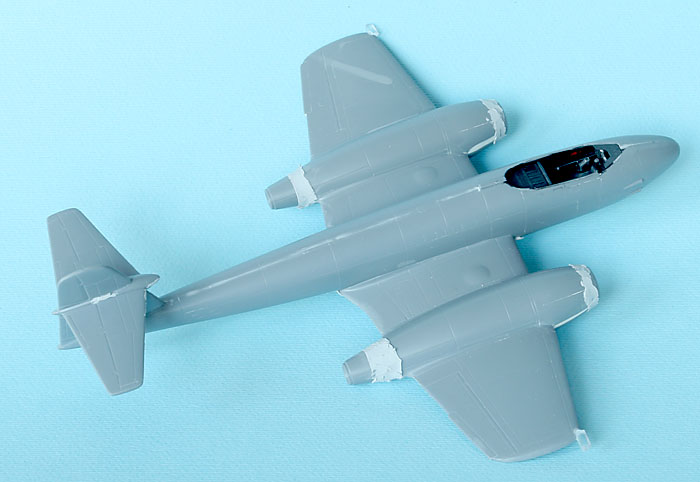
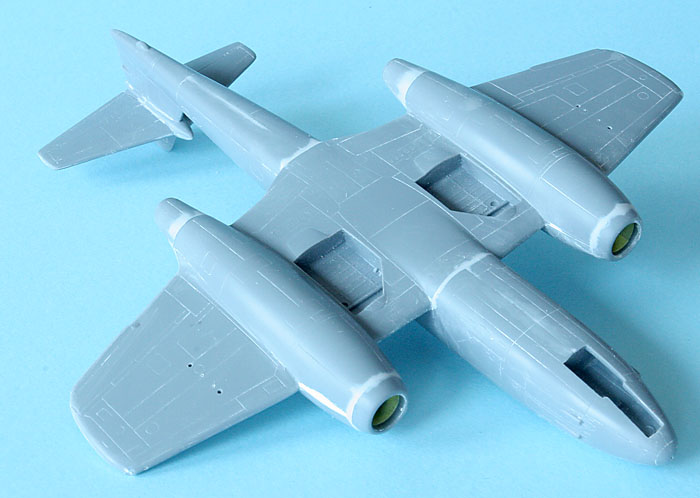
Some serious sanding later, this is what I ended up with:


And this is the lower surfaces. No real fit problems but it isn't Tamiya!


And a close-up of the wingtip light. I drilled a small hole before mounting it to simulate a light bulb. It is clearly seen on colour photos that the whole glass was coloured, not just the light bulb.


My friend Sten volounteered his spare canopy. Thanks!

Regards

Magnus
SGTJKJ
#041
_VISITCOMMUNITY
Kobenhavn, Denmark
Joined: July 20, 2006
KitMaker: 10,069 posts
AeroScale: 3,788 posts
Posted: Tuesday, October 02, 2007 - 01:00 AM UTC
Very interesting, Magnus. However, for some reason all your pictures have turned into the small dreaded red "x". I can see all other pictures...

Looking forward to see more.
magnusf
_VISITCOMMUNITY
Stockholm, Sweden
Joined: May 02, 2006
KitMaker: 1,953 posts
AeroScale: 1,902 posts
Posted: Tuesday, October 02, 2007 - 04:07 AM UTC

Quoted Text

Very interesting, Magnus. However, for some reason all your pictures have turned into the small dreaded red "x". I can see all other pictures...

Sorry about that Jesper! It shouldn't be fatal since I host the photos with my ISP so that I can post them elsewhere on the Internet if I so desire. Twice this week the server has been down or very slow and this have never happened before (at least not so that I have noticed it).

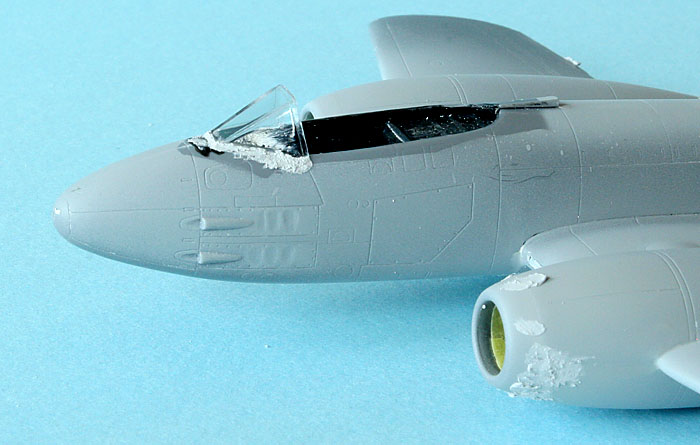
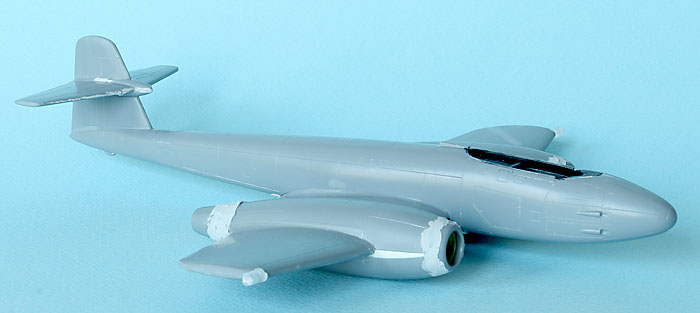
On to the modelling!

Windscreen attached, a quick primer coat and some touch-up with filler.


On the cover of the Warpaint Meteor book there is a nice colour photo of three Meteors at Cyprus. On the F.8 closest to the camera there is a very prominent wrinkle effect on the ammo bay covers. I decided to duplicate it both because it looks cool and because I have been planning to try some kind of stressed skin effect for a long time. And this seemed a bit easier than doing it on a Liberator wing


This might be the last post for a few days since I am off to Poland (carrying a LOOONG shopping list in my wallet) for a few days tomorrow night.

Regards

Magnus
SGTJKJ
#041
_VISITCOMMUNITY
Kobenhavn, Denmark
Joined: July 20, 2006
KitMaker: 10,069 posts
AeroScale: 3,788 posts
Posted: Tuesday, October 02, 2007 - 06:08 PM UTC
Looks good, Magnus. All the pictures are visible now

You are really making good progress on this one. The wrinkles in the gun covers are a nice touch.

Looking forward to see more when you get back from your shopping spree in Poland

BTW: if you are going to Warsaw there is a very nice book/arts store very close to Hotel SAS Radisson on a corner. I cannot remember the street name, but SAS Radisson should be on most tourist maps. This store has a very good and cheap selection of Kagero and Militaria books. Highly recommended. They also have some kits, but the selection is quite limited.

Have a nice trip
magnusf
_VISITCOMMUNITY
Stockholm, Sweden
Joined: May 02, 2006
KitMaker: 1,953 posts
AeroScale: 1,902 posts
Posted: Tuesday, October 02, 2007 - 10:22 PM UTC

Quoted Text


You are really making good progress on this one. The wrinkles in the gun covers are a nice touch.


Thanks Jesper! I am curious myself over how it will look when it is finished!


Quoted Text


BTW: if you are going to Warsaw there is a very nice book/arts store very close to Hotel SAS Radisson on a corner. I cannot remember the street name, but SAS Radisson should be on most tourist maps. This store has a very good and cheap selection of Kagero and Militaria books. Highly recommended. They also have some kits, but the selection is quite limited.

Have a nice trip


Excellent! We are four modellers travelling together, one of whom is born in Warzaw so I am sure he will be able to bring us there!

See you in a few days!

Magnus
magnusf
_VISITCOMMUNITY
Stockholm, Sweden
Joined: May 02, 2006
KitMaker: 1,953 posts
AeroScale: 1,902 posts
Posted: Monday, October 08, 2007 - 06:18 PM UTC
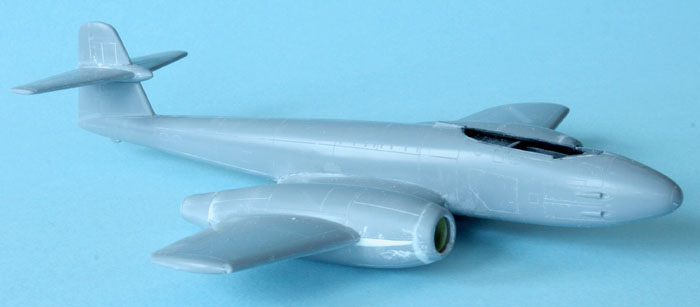
Back again after a VERY good holiday in Warzaw. Four days of good early autumn weather, plastic models, history, good food and beer What more is there to ask for?

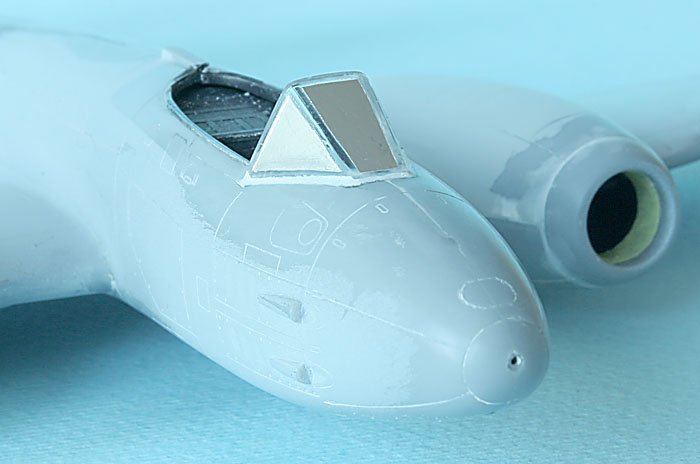
A bit of progress on the Meteor the last two nights: Wind screen is installed and faired in with putty. I cover the perspex areas with Bare Metal Chrome and this works as both a mask and a protection when sanding (if done with fine grit paper and a careful hand...).

The small hole in the nose was misaligned between the fuselage halves so I drilled it clean, filled it with super glue and then drilled a new hole in the middle.


Maybe a bit of painting tonight...

Regards

Magnus
SGTJKJ
#041
_VISITCOMMUNITY
Kobenhavn, Denmark
Joined: July 20, 2006
KitMaker: 10,069 posts
AeroScale: 3,788 posts
Posted: Monday, October 08, 2007 - 09:34 PM UTC
Looks good, Magnus.

Glad that you had a nice trip to Warsaw. Did you find the store with the books etc.?
magnusf
_VISITCOMMUNITY
Stockholm, Sweden
Joined: May 02, 2006
KitMaker: 1,953 posts
AeroScale: 1,902 posts
Posted: Monday, October 08, 2007 - 10:16 PM UTC

Quoted Text

Looks good, Magnus.

Glad that you had a nice trip to Warsaw. Did you find the store with the books etc.?


Sorry Jesper, I should have told you: Yes we found the book store, I think it was Pelta that you meant. This is located close to the city center, five minutes walk from Jadar. And yes, we did spend a few hours there as well

Regards

Magnus
magnusf
_VISITCOMMUNITY
Stockholm, Sweden
Joined: May 02, 2006
KitMaker: 1,953 posts
AeroScale: 1,902 posts
Posted: Wednesday, October 10, 2007 - 05:45 AM UTC
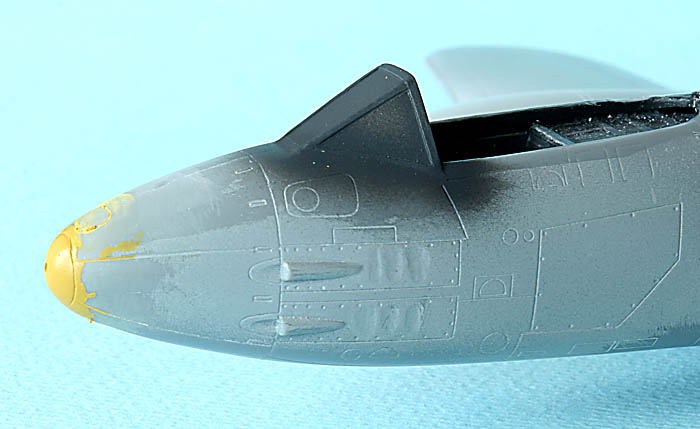
A yellow nose tip won't hurt... The one in the museum has it at least so I suppose it isn't that much off...

I will sand the edges of the yellow paint a bit before applying the camo, I tried yesterday but the paint wasn't hardened enough then.


Regards

Magnus
magnusf
_VISITCOMMUNITY
Stockholm, Sweden
Joined: May 02, 2006
KitMaker: 1,953 posts
AeroScale: 1,902 posts
Posted: Thursday, October 11, 2007 - 06:34 AM UTC
Good evening!

Suddenly we are in the middle of the autumn in the northern hemisphere and here in Stockholm it is getting dark in the late afternoon. That time of the day when I take my model photos, using daylight througt a couple of large windows...

I have been experimenting with the flash tonight since I can't trust the daylight anymore. Results are acceptable but I don't like the harsh shadows that I get despite using a diffusor and bouncing the light of the white walls and roof...

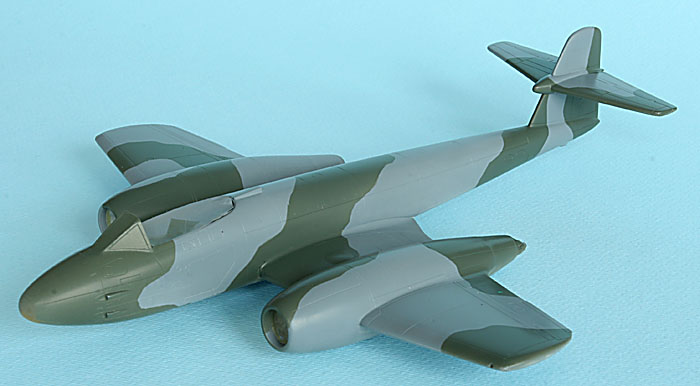
Anyway, this is the result of yesterdays airbrush work: A Meteor in Dark Sea Grey. I used Xtracrylix paint for this, lightening it a bit using white to get a bit more contrast to the Dark Green.


Regards

Magnus
magnusf
_VISITCOMMUNITY
Stockholm, Sweden
Joined: May 02, 2006
KitMaker: 1,953 posts
AeroScale: 1,902 posts
Posted: Thursday, October 11, 2007 - 08:05 PM UTC
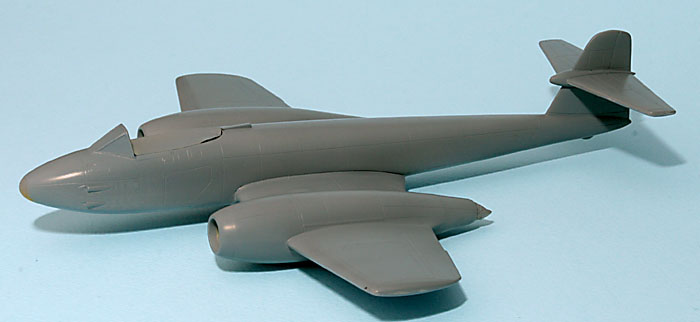
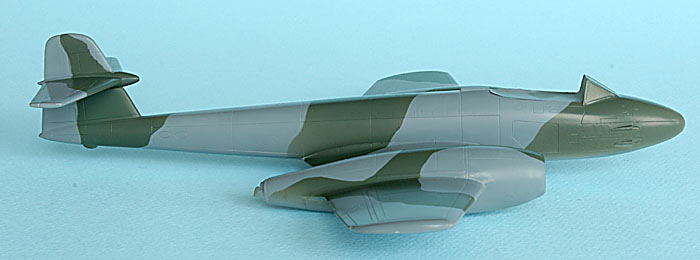
Top camo done!

I spent last evening masking and painting the green. Two hours for masking, ten minutes for painting... Maybe I lightened the grey a bit too much but that will change during weathering!


Regards

Magnus
magnusf
_VISITCOMMUNITY
Stockholm, Sweden
Joined: May 02, 2006
KitMaker: 1,953 posts
AeroScale: 1,902 posts
Posted: Friday, October 12, 2007 - 06:14 AM UTC
The second update of today, please bear with me

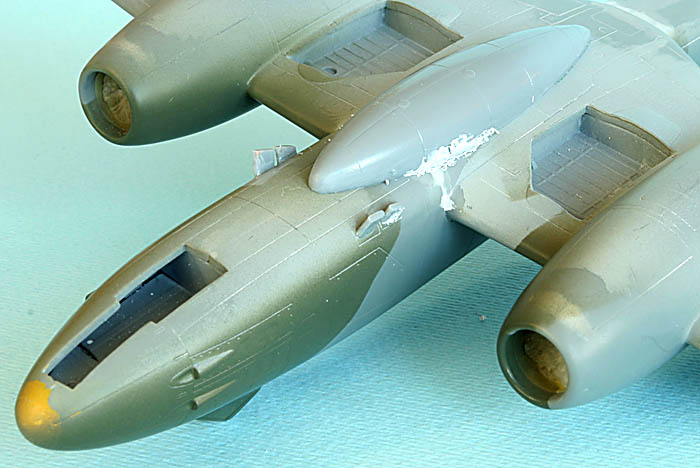
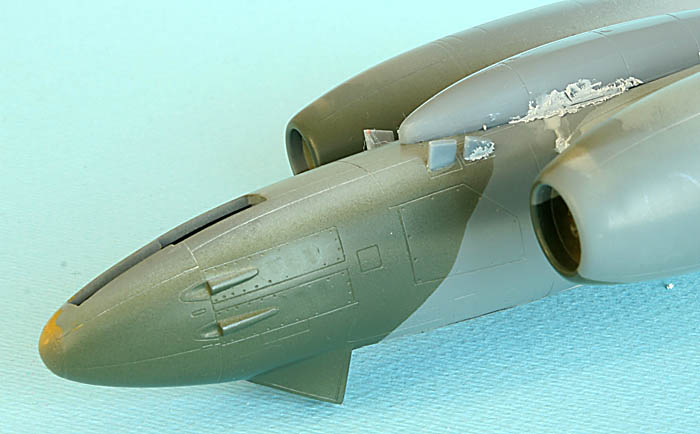
I stole a few minutes after lunch to install the belly tank (I forgot it during the main building phase, embarrasing...) and the spent ammo chutes. I tried to sand the tank to fit using a piece of sand paper wrapped around the fuselage but I was still left with some small cracks.


With a bit of luck, I will be able to quickly sand the puttied areas and commence painting the lower surfaces tonight.

Finally: I now have a canopy thanks to friend Sten!

Regards

Magnus
 _GOTOTOP