

Cold War (1950-1974)
Discuss the aircraft modeling subjects during the Cold War period.
Discuss the aircraft modeling subjects during the Cold War period.
Hosted by Tim Hatton
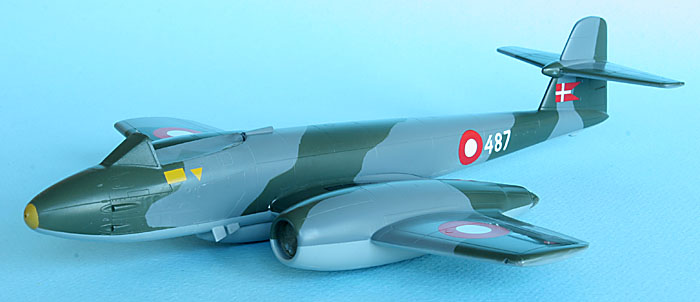
RDAF Meteor F.8

f1matt

Joined: August 13, 2006
KitMaker: 1,021 posts
AeroScale: 184 posts

Posted: Friday, October 12, 2007 - 07:21 PM UTC
I like the stressed skin detail. I am around 1:1 scale aircraft everyday. It is a detail common to probably almost every aircraft ever built (of metal anyway). I wonder if model kits will ever come with this detail?

magnusf

Joined: May 02, 2006
KitMaker: 1,953 posts
AeroScale: 1,902 posts
Posted: Saturday, October 13, 2007 - 02:22 AM UTC
Matthew wrote:
I remember that Mauve made a try with their 1/48 P-40 many years ago. It was not exactly stressed skin but they tried to depict the overlapping skins on the wings. It came out rather nicely. What worries me is what it would look like if the Matchbox trench digger went to work on stressed skin
This was mostly an experiment for me since it was confined to a small area, I doubt I have the patience to do it on a whole aircraft! :-(
After another marathon masking session yesterday, the lower surfaces are now painted as well. I will start decaling tonight and after that it is weathering time!
Regards
Magnus
Quoted Text
I like the stressed skin detail. I am around 1:1 scale aircraft everyday. It is a detail common to probably almost every aircraft ever built (of metal anyway). I wonder if model kits will ever come with this detail?
I remember that Mauve made a try with their 1/48 P-40 many years ago. It was not exactly stressed skin but they tried to depict the overlapping skins on the wings. It came out rather nicely. What worries me is what it would look like if the Matchbox trench digger went to work on stressed skin
This was mostly an experiment for me since it was confined to a small area, I doubt I have the patience to do it on a whole aircraft! :-(
After another marathon masking session yesterday, the lower surfaces are now painted as well. I will start decaling tonight and after that it is weathering time!
Regards
Magnus
magnusf
Joined: May 02, 2006
KitMaker: 1,953 posts
AeroScale: 1,902 posts
Posted: Wednesday, October 17, 2007 - 06:31 AM UTC
Hi there!
It has been kind of quiet around here lately. This is due to work requirements and decal disappointment!
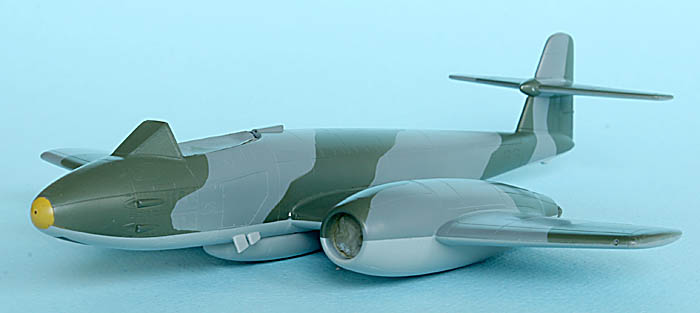
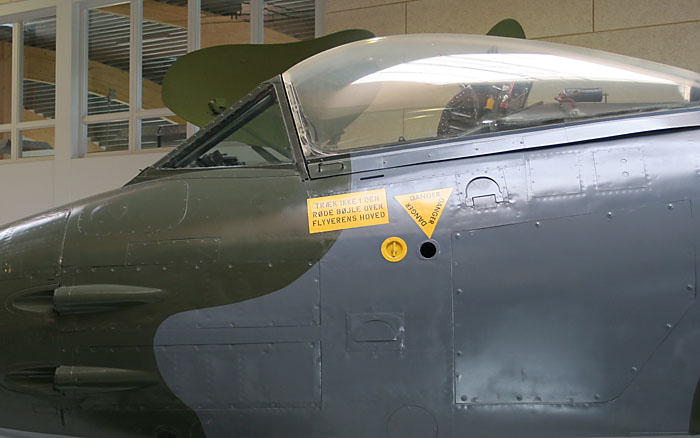
To start with, the Xtradecal sheet is pretty useless for Danish Meteor builders. The danish national markings are printed much too dark (in fact, all markings with red in on the sheet uses the same red which is correct for RAF roundels I presume!). The numerals look thin. Another very prominent marking that is lacking is the huge yellow decal below the canopy warning the unwary from pulling the red handle above the pilot's head. Also, ejection seat markings on Danish Meteors are yellow.
Since I had already followed Jesper's advice and ordered two Meteor sheets from Stoppel, I had high hopes for these. OK, the roundels were of a lighter shade of red but still no yellow signs...
This meant some computer graphics work instead of plastic modelling:
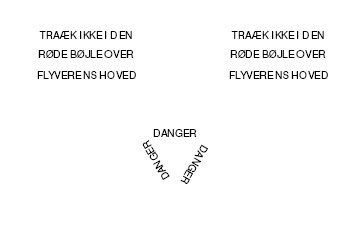
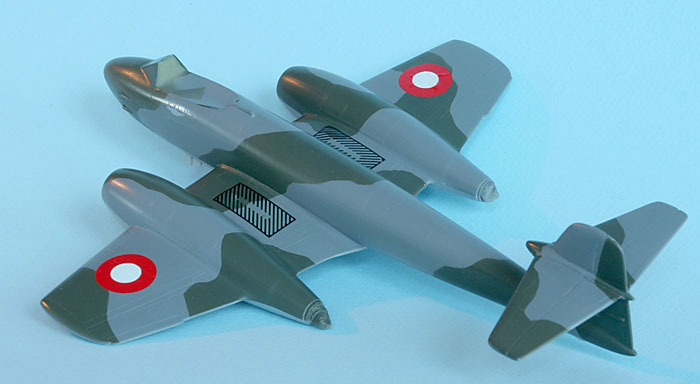
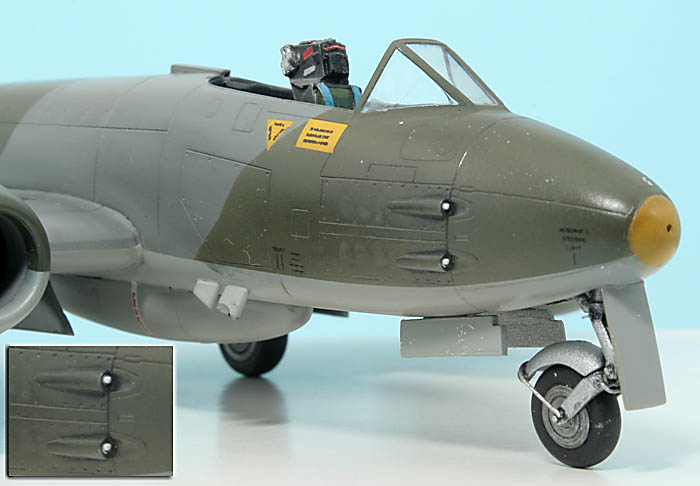
These signs are made in PowerPoint, using Arial typeface size 1 point, the smallest possible. The triangles do look a bit uneven but remember that they are rather tiny in reality!
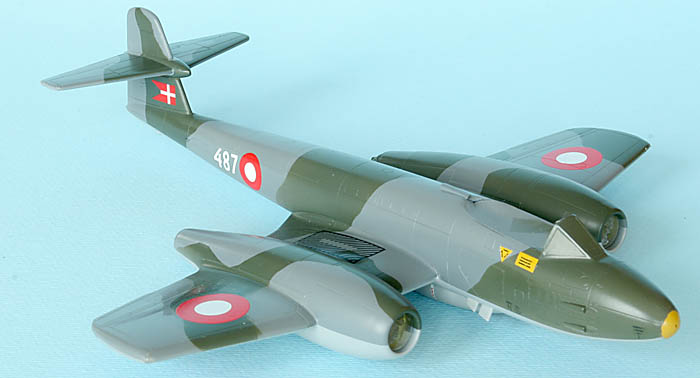
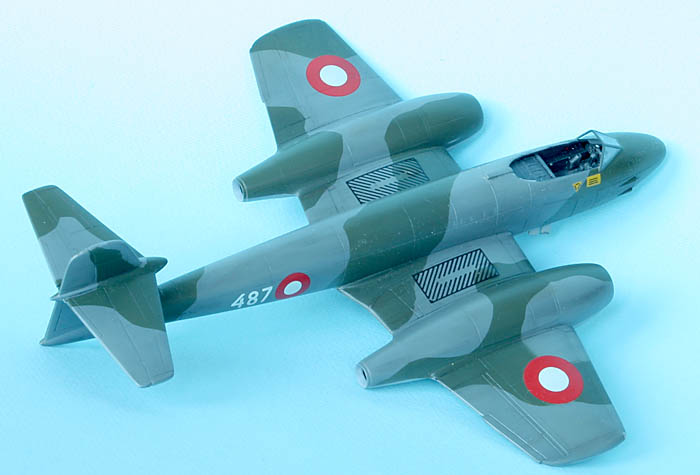
Another thing missing was some kind of "No Walking" marking inside the engines.
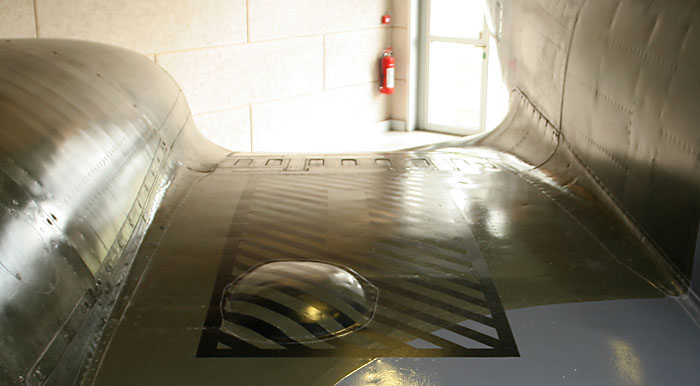
These were drawn as solid 3D-models in Pro/Engineer (my main working tool), put on a drawing, sectioned and hatched densely to produce the black lines. All the markings (including quite a few spares, for donation if anybody needs them, drop me a line!) were then laser printed onto Xtradecal clear decal film.
The walkways can be seen here, they look a bit more prominent in the photos (thanks to sharpening in Photoshop) than in reality. I might however overspray them thinly with grey to tone them down a bit.
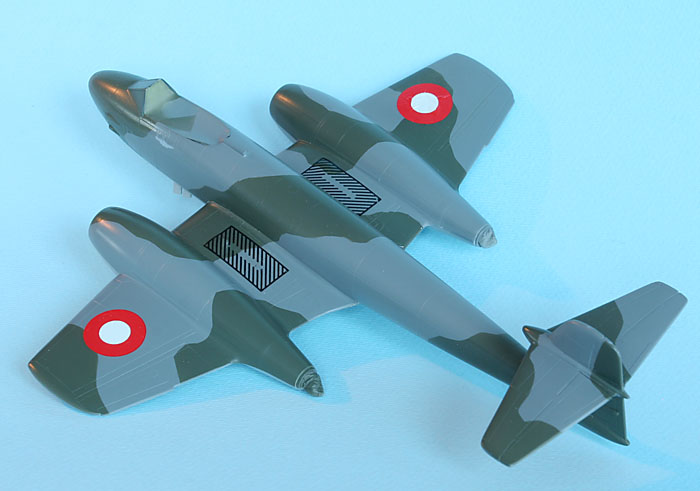
Yesterday I started decalling. The Stoppel decals are nothing short of excellent and the clear decal film is even better. This combined with Gunze Mr Mark Setter (my new favourite party drug ) resulted in snugly fitting decals! I did of course have to try the Mr Mark Softener as well which has been described to me as "the Dynamite of the setting solutions". It surely is... This resulted in an impressive amount of wrinkles that 24 hours later are still there. I do have some spare roundels as well since I bought two sets (after 25 years of modelling I know myself well...).
One final disaster: While polishing the paint to prepare it for decals (I don't like clear coats and avoid them if at all possible) I managed to remove the paint below the cockpit. I'll have to sand and touch up that area tonight!
You can see both the wrinkles (on the right wing) and the missing paint (below cockpit) if you look closely...
Best regards
Magnus
It has been kind of quiet around here lately. This is due to work requirements and decal disappointment!
To start with, the Xtradecal sheet is pretty useless for Danish Meteor builders. The danish national markings are printed much too dark (in fact, all markings with red in on the sheet uses the same red which is correct for RAF roundels I presume!). The numerals look thin. Another very prominent marking that is lacking is the huge yellow decal below the canopy warning the unwary from pulling the red handle above the pilot's head. Also, ejection seat markings on Danish Meteors are yellow.
Since I had already followed Jesper's advice and ordered two Meteor sheets from Stoppel, I had high hopes for these. OK, the roundels were of a lighter shade of red but still no yellow signs...
This meant some computer graphics work instead of plastic modelling:
These signs are made in PowerPoint, using Arial typeface size 1 point, the smallest possible. The triangles do look a bit uneven but remember that they are rather tiny in reality!
Another thing missing was some kind of "No Walking" marking inside the engines.
These were drawn as solid 3D-models in Pro/Engineer (my main working tool), put on a drawing, sectioned and hatched densely to produce the black lines. All the markings (including quite a few spares, for donation if anybody needs them, drop me a line!) were then laser printed onto Xtradecal clear decal film.
The walkways can be seen here, they look a bit more prominent in the photos (thanks to sharpening in Photoshop) than in reality. I might however overspray them thinly with grey to tone them down a bit.
Yesterday I started decalling. The Stoppel decals are nothing short of excellent and the clear decal film is even better. This combined with Gunze Mr Mark Setter (my new favourite party drug
) resulted in snugly fitting decals! I did of course have to try the Mr Mark Softener as well which has been described to me as "the Dynamite of the setting solutions". It surely is... This resulted in an impressive amount of wrinkles that 24 hours later are still there. I do have some spare roundels as well since I bought two sets (after 25 years of modelling I know myself well...).One final disaster: While polishing the paint to prepare it for decals (I don't like clear coats and avoid them if at all possible) I managed to remove the paint below the cockpit. I'll have to sand and touch up that area tonight!
You can see both the wrinkles (on the right wing) and the missing paint (below cockpit) if you look closely...
Best regards
Magnus
magnusf
Joined: May 02, 2006
KitMaker: 1,953 posts
AeroScale: 1,902 posts
Posted: Thursday, October 18, 2007 - 08:59 PM UTC
This is what you get for being stupid:
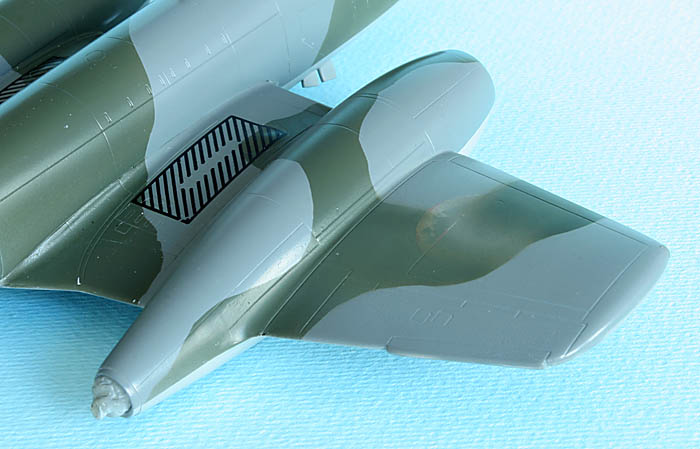
Danish roundel sanded down (there were no other way to removing it, the decal was extremely reluctant to let loose of the wing, thanks to "the Dynamite of setting solutions...) and wingtip carefully repainted. I will polish it and add a new roundel today.
Regards
Magnus
Danish roundel sanded down (there were no other way to removing it, the decal was extremely reluctant to let loose of the wing, thanks to "the Dynamite of setting solutions...) and wingtip carefully repainted. I will polish it and add a new roundel today.
Regards
Magnus
SGTJKJ

#041

Joined: July 20, 2006
KitMaker: 10,069 posts
AeroScale: 3,788 posts

Posted: Friday, October 19, 2007 - 12:24 AM UTC
This build is moving along very well despite your polishing and decal problems.
I feel your pain about the wrinkles in the decals. I had the same problem with my previous Henschell 129 build - and I did not have an extra set of decals.
It is a joy to follow your build - especally since it feels like closer to home with the Danish markings

Looking forward to see more
I feel your pain about the wrinkles in the decals. I had the same problem with my previous Henschell 129 build - and I did not have an extra set of decals.
It is a joy to follow your build - especally since it feels like closer to home with the Danish markings
Looking forward to see more

magnusf
Joined: May 02, 2006
KitMaker: 1,953 posts
AeroScale: 1,902 posts
Posted: Friday, October 19, 2007 - 08:23 PM UTC
Quoted Text
This build is moving along very well despite your polishing and decal problems.
Have you ever thougt about how easy this all would be if you just stuck to what you know works and avoided risky experiments on your latest masterpiece? It is not so that there is a lack of derelict hulks in the " did not finish"-pile to experiment on either...
Quoted Text
I feel your pain about the wrinkles in the decals. I had the same problem with my previous Henschell 129 build - and I did not have an extra set of decals.
It simply isn't fair!
Quoted Text
It is a joy to follow your build - especally since it feels like closer to home with the Danish markings
Looking forward to see more
I have stocked up on a few more Danish subjects so you might expect more. If that is in the near future I don't know however...
I get more and more annoyed over the decals. If I had to chose one marking to do on a decal sheet I would chose the sling marks on the drop tanks. I have still to see one photo of a Meteor with droptanks that don't have them. French, Israeli, Swedish (the civilian yellow ones!!!), and of course from the RAF, all had them. If Uzbekistan had flown Meteors they would probably have had the slingmarks as well!
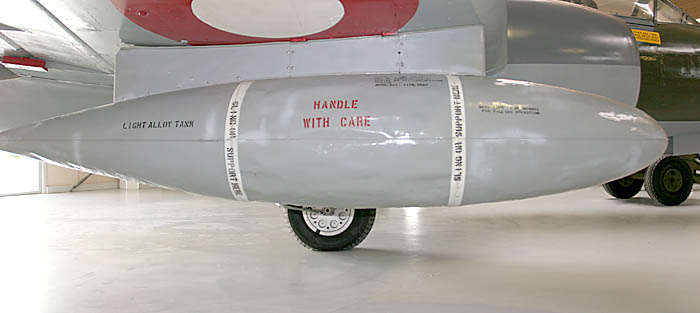
Guess what? No sling marks on the decal sheet. And the text "Light Alloy Tank" is written "Light Alumnw Tank" or something like that... I'll have to go through the decal box once more, with a bit of luck there are these markings on some of the Modeldecal sheets I have hoarded over the years....
Anyway, decalling almost over now! I won't miss it...

Regards
Magnus
magnusf
Joined: May 02, 2006
KitMaker: 1,953 posts
AeroScale: 1,902 posts
Posted: Saturday, October 20, 2007 - 07:34 PM UTC
You can always trust Modeldecal! OK, they might look a bit outdated when you look at both the black-and-white instruction sheets and the decal sheet itself but they are well researched and even if the decals sometimes look a bit murky they work well and look good in place! And who else makes decal sheets where you can choose between 38 different planes?
Drop tank markings come from Modeldecal set 88, which includes a complete set of Meteor stencilling.

Regards
Magnus
Drop tank markings come from Modeldecal set 88, which includes a complete set of Meteor stencilling.
Regards
Magnus
magnusf
Joined: May 02, 2006
KitMaker: 1,953 posts
AeroScale: 1,902 posts
Posted: Saturday, October 27, 2007 - 02:49 AM UTC
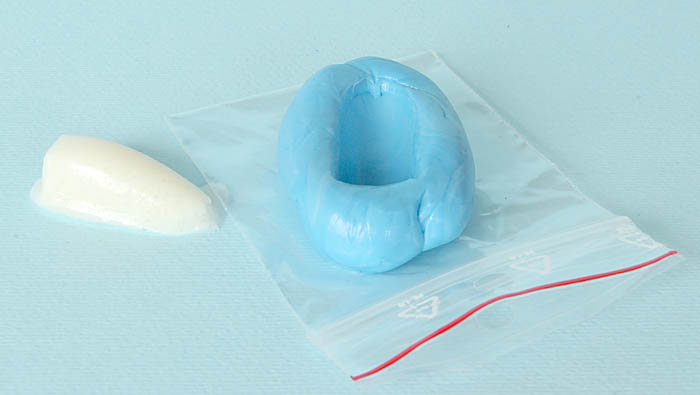
A weekend update. Modelling time has been sparse this week but I have at least managed to ruin my third canopy (sorry Sten....). I have never come across such a brittle canopy, in order to be extra careful this time I even supported it from the inside with moulding silicone but that didn't help either!
Next step will be making my own canopy, I have already cast a base plug that will be sanded down a bit to make room for the plastic and then duplicated again to give me the "real" plug. The most inspiring part of modelling really
On to the lighter side of the project. Decalling is finally finished, next is a quick clear coat to seal in the decals and then on to the weathering.
I have started to assemble the rather fiddly landing gear. I will add some extra details from scratch.
See you soon!
Magnus

StenEk
Joined: October 02, 2007
KitMaker: 31 posts
AeroScale: 29 posts
Posted: Saturday, October 27, 2007 - 10:35 AM UTC
I have a few more canopies, just in case... 
magnusf
Joined: May 02, 2006
KitMaker: 1,953 posts
AeroScale: 1,902 posts
Posted: Sunday, October 28, 2007 - 03:27 AM UTC
Sten wrote:
That's very kind of you Sten but that would be a waste only meaning that I would be ruining canopy number four!
By the way, I thougt over my options and decided that life is too short for vacforming except in an emergency so I ordered a set of canopies from Aeroclub yesterday. As for "emergencies": The definition is that an emergency vacforming is called for when there is absolutely no other way of getting a replacement canopy. My HUP-2 and Firebrand qualifies...
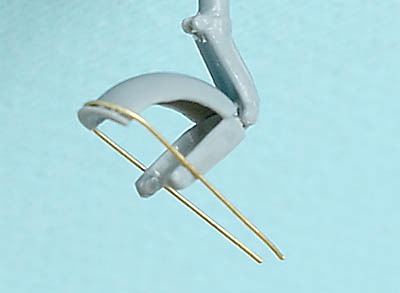
Yesterday was landing gear detailing day:
Finally, as some of you might have noted: I have missed my target finishing date ("no later than mid october") by a broad margin. And I doubt I will be able to enter it in MoM october either...
Regards
Magnus
Quoted Text
I have a few more canopies, just in case...
That's very kind of you Sten but that would be a waste only meaning that I would be ruining canopy number four!
By the way, I thougt over my options and decided that life is too short for vacforming except in an emergency so I ordered a set of canopies from Aeroclub yesterday. As for "emergencies": The definition is that an emergency vacforming is called for when there is absolutely no other way of getting a replacement canopy. My HUP-2 and Firebrand qualifies...
Yesterday was landing gear detailing day:
Finally, as some of you might have noted: I have missed my target finishing date ("no later than mid october") by a broad margin. And I doubt I will be able to enter it in MoM october either...
Regards
Magnus
SGTJKJ
#041
Joined: July 20, 2006
KitMaker: 10,069 posts
AeroScale: 3,788 posts
Posted: Tuesday, October 30, 2007 - 01:59 AM UTC
Looks good, Magnus. It is progressing nicely. The decals look very good also on the drop tanks. I will have to check out modeldecal on the internet if I can find them.
Nice details on the landing gear.
Looking forward to see more.
Nice details on the landing gear.
Looking forward to see more.
magnusf
Joined: May 02, 2006
KitMaker: 1,953 posts
AeroScale: 1,902 posts
Posted: Thursday, November 01, 2007 - 08:48 PM UTC
Jesper wrote:
Modeldecal is very much "pre-web" stuff and they ("they" means Richard Ward who has done lots of Airfix sheets) don't produce any new ones. On the other hand, the sheets were apparently printed in rather large numbers since more than 50 different sheets still are available from Hannants I also think that Hannants have actually re-printed some of the more popular ones.
Meteor build, or rather painting, is making progress:
I sealed the decals with Gunze clear thinned with Isopropanol and then gave the model a light oil wash to break up the uniform appearance. I will also go over it with some pastels later.
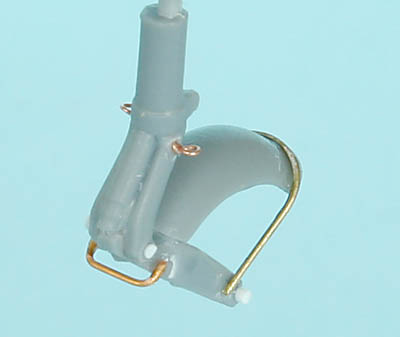
Nose gear painted and washed. I'll pick out a few more details with a brush and then it is ready for installation:

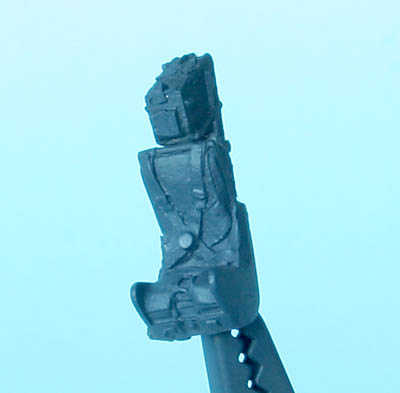
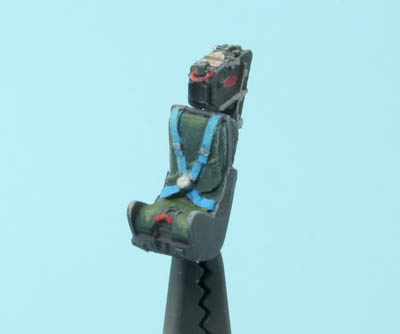
I planned on sticking to OOTB from the beginning but I found an old Aeroclub seat in my stash. They are really good even if they look a bit primitive in the bag. What you see on the photo is just the cleaned-up white metal seat painted black, no extra detailing! And they don't cost a fortune either...
There will be no more progress this weekend since we will have visitors staying overnight this weekend. Or maybe I can steal some modelling time this afternoon...
Regards
Magnus
Quoted Text
Looks good, Magnus. It is progressing nicely. The decals look very good also on the drop tanks. I will have to check out modeldecal on the internet if I can find them.
Modeldecal is very much "pre-web" stuff and they ("they" means Richard Ward who has done lots of Airfix sheets) don't produce any new ones. On the other hand, the sheets were apparently printed in rather large numbers since more than 50 different sheets still are available from Hannants I also think that Hannants have actually re-printed some of the more popular ones.
Meteor build, or rather painting, is making progress:
I sealed the decals with Gunze clear thinned with Isopropanol and then gave the model a light oil wash to break up the uniform appearance. I will also go over it with some pastels later.
Nose gear painted and washed. I'll pick out a few more details with a brush and then it is ready for installation:
I planned on sticking to OOTB from the beginning but I found an old Aeroclub seat in my stash. They are really good even if they look a bit primitive in the bag. What you see on the photo is just the cleaned-up white metal seat painted black, no extra detailing! And they don't cost a fortune either...
There will be no more progress this weekend since we will have visitors staying overnight this weekend. Or maybe I can steal some modelling time this afternoon...
Regards
Magnus
magnusf
Joined: May 02, 2006
KitMaker: 1,953 posts
AeroScale: 1,902 posts
Posted: Sunday, November 11, 2007 - 07:07 AM UTC
Good evening mates!
The Meteor is slowly nearing completion.
I spent this afternoon painting the ejection seat, an Aeroclub white metal seat with the only addition being the ejection handle.
I have also prepared an Aeroclub canopy as a substitute for the wrecked originals. It was a bit of a disappointment since quality is not at all on par with Falcon but it will have to do since I haven't found another source for one.
Regards
Magnus
magnusf
Joined: May 02, 2006
KitMaker: 1,953 posts
AeroScale: 1,902 posts
Posted: Monday, November 12, 2007 - 03:56 AM UTC
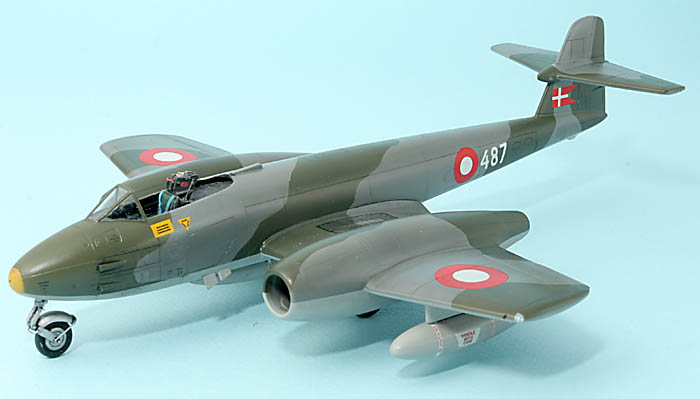
It's standing on it's landing gear now!
Two things to note for any future Meteor builds:
1) The nose weight stipulated in the instructions isn't even close to enough. And it is a lot harder to add nose weight when the fuselage halves are glued together... With a bit more lead in the nose and a white metal seat it is still almost a tail sitter.
2) Landing gear are a pain to attach. Better planning with the landing gear adjusted for fit before the gear bays are installed would have been a great idea...
A few more finishing touches and then we're finished...
Regards
Magnus
magnusf
Joined: May 02, 2006
KitMaker: 1,953 posts
AeroScale: 1,902 posts
Posted: Monday, November 12, 2007 - 09:47 AM UTC
Another update tonight. I've got company in the workshop tonight, my wife is preparing this year's Christmas cards and that makes the modelling more fun as well!
20 mm cannon in 1/72 are small and fiddly...
Magnus
20 mm cannon in 1/72 are small and fiddly...
Magnus
magnusf
Joined: May 02, 2006
KitMaker: 1,953 posts
AeroScale: 1,902 posts
Posted: Friday, November 16, 2007 - 09:56 AM UTC
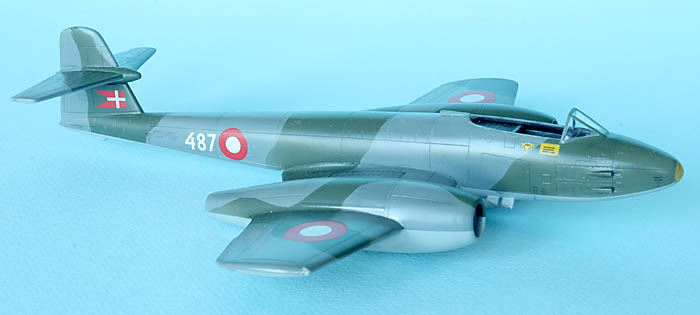
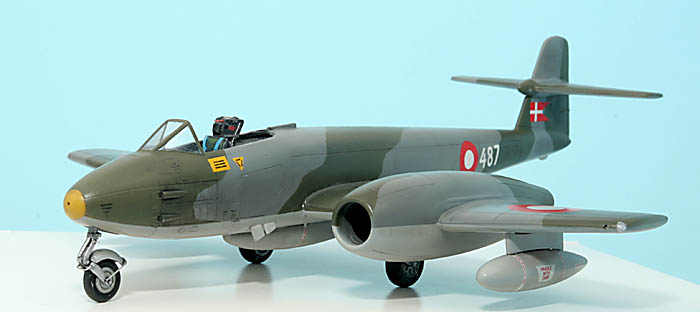
I'm calling this one a day now!
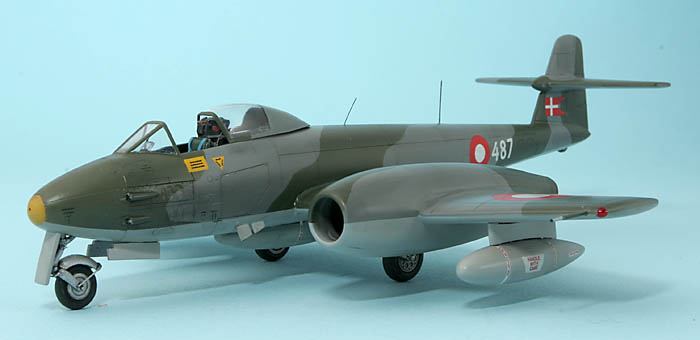
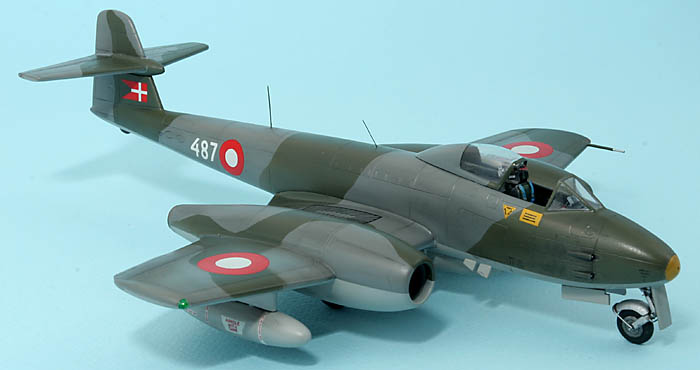
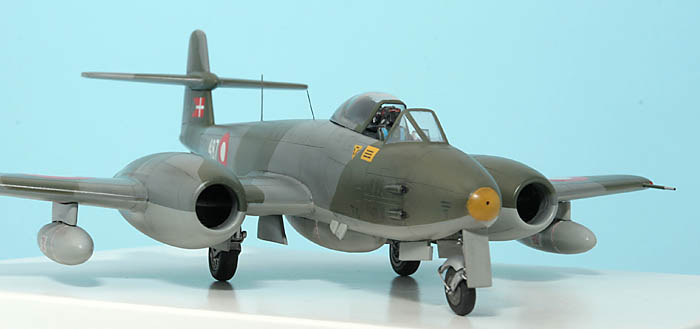
Regards
Magnus
Regards
Magnus

Phantom2
Joined: April 18, 2006
KitMaker: 708 posts
AeroScale: 678 posts
Posted: Saturday, November 17, 2007 - 04:37 AM UTC
Hi Magnus!
Finally, you crossed the finishing line with this stubborn build!
What can I say but;
A really good build, and It was fun reading about it (and your woes) too.
Cheers!
Stefan E
Finally, you crossed the finishing line with this stubborn build!
What can I say but;
A really good build, and It was fun reading about it (and your woes) too.
Cheers!
Stefan E
magnusf
Joined: May 02, 2006
KitMaker: 1,953 posts
AeroScale: 1,902 posts
Posted: Saturday, November 17, 2007 - 09:41 PM UTC
Quoted Text
Hi Magnus!
Finally, you crossed the finishing line with this stubborn build!
Stefan E
Hi Stefan!
I've actually built a few ones that were a lot worse, the Valom Blackburn Firebrand springs to my mind and Ventura Spitfires aren't that easy either
Anyway, I'm glad that you liked both the build and the blog, the blog helps keeping speed up in the building process (nothing like my thread dropping down the thread listing to force me into "the sty" for a quick building session
)!I will probably get an FR.9 since that one has a few interesting paint schemes out of the box and also to get that extra canopy... When to build it? That is another question...
Regards
Magnus
 |

WEB HOSTING BY


Copyright ©2021 AeroScale and Kitmaker Network, a subsidiary of Silver Star Enterprises
All Rights Reserved. Please read our Conditions of Use and Privacy Policy.
All Rights Reserved. Please read our Conditions of Use and Privacy Policy.